Help or comments?
- If you can not find an answer to your question or something is not working as expected Contact support.
- If you would like to comment on a feature or suggest something new send us feedback
Overview of POS Settings
The POS has many diverse settings that can be changed locally at the store or remotely via corporate. These are of
course behind employee permissions. These settings can also vary from store to store if needed but generally are
kept in sync across all stores. Refer to the “Managing POS Settings From Corporate” document for more details on
this.
Receipt Settings
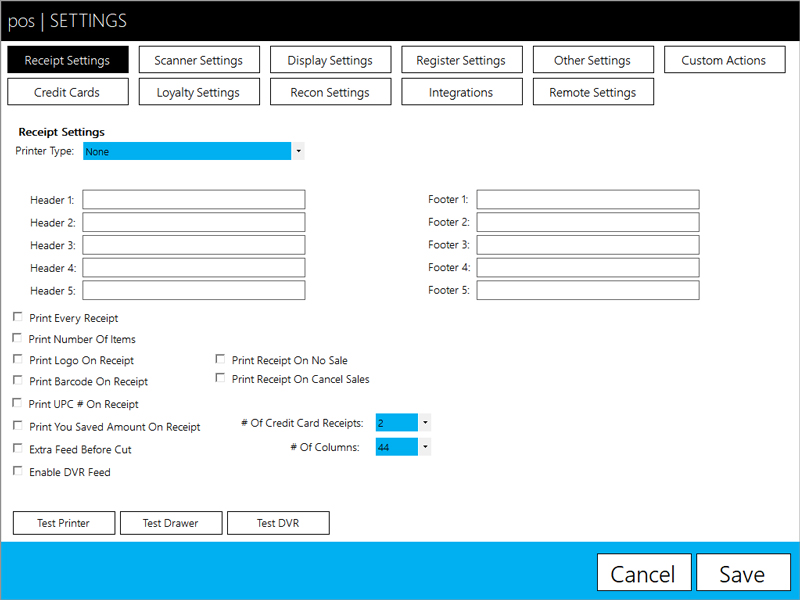
Receipt Settings
- Printer Type – Allows user to select printer
- If OPOS, user chooses OPOS printer and OPOS cash drawer
- If Serial, user chooses COM port and pop command for drawer
- Header 1-5 – Information that prints on the top of receipts
- Footer 1-5 – Information that prints on the bottom of receipts
- Print Every Receipt – Prints a receipt at the end of every sale
- Print Number Of Items – Prints the summed quantity of items on the receipt
- Print Logo On Receipt – If supported by printer, allows user to print a logo at the top of the receipt; monochrome 256×256 .bmp image
- Print Barcode On Receipt – Prints scannable receipt identifier at bottom of receipt for returns
- Print UPC # On Receipt – Prints the UPC below the item description
- Print You Saved Amount On Receipt – Prints summed total of transaction discounts
- Extra Feed Before Cut – Feeds more paper through printer before receipt is cut
- Enable DVR Feed – Allows POS integration on DVR systems that allow a COM input interface
- Print Receipt On No Sale – Prints a receipt on no sale transaction types
- Print Receipt On Cancel Sales – Prints a receipt on cancel sale transaction types
- # Of Credit Card Receipts – The number of receipts printed on a credit card transaction
- # Of Columns – Select the width of the printers columns for specific printers
- Test Printer – Allows user to test selected printer
- Test Drawer – Allows user to test pop the cash drawer
- Test DVR – Allows user to test the DVR
Scanner Settings
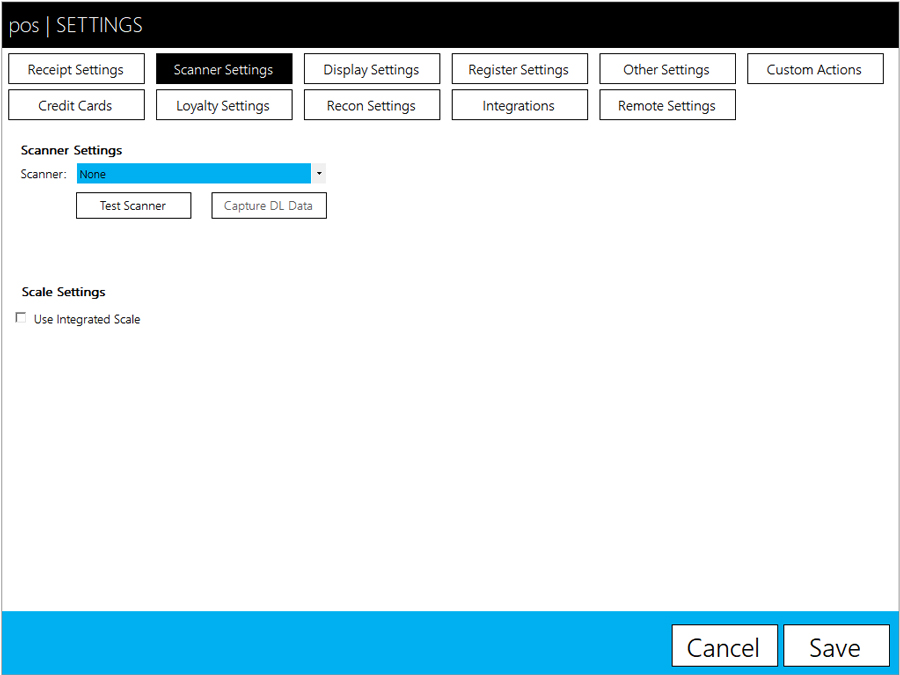
Scanner Settings
- Scanner – Allows user to select OPOS scanner
- Test Scanner – Allows user to test selected scanner
- Capture DL Data – Allows user to test scan a driver’s license to capture data into text file to give to FasTrax for troubleshooting
- Scale Settings – Allows user to specify a COM port for integrated scale use
Display Settings
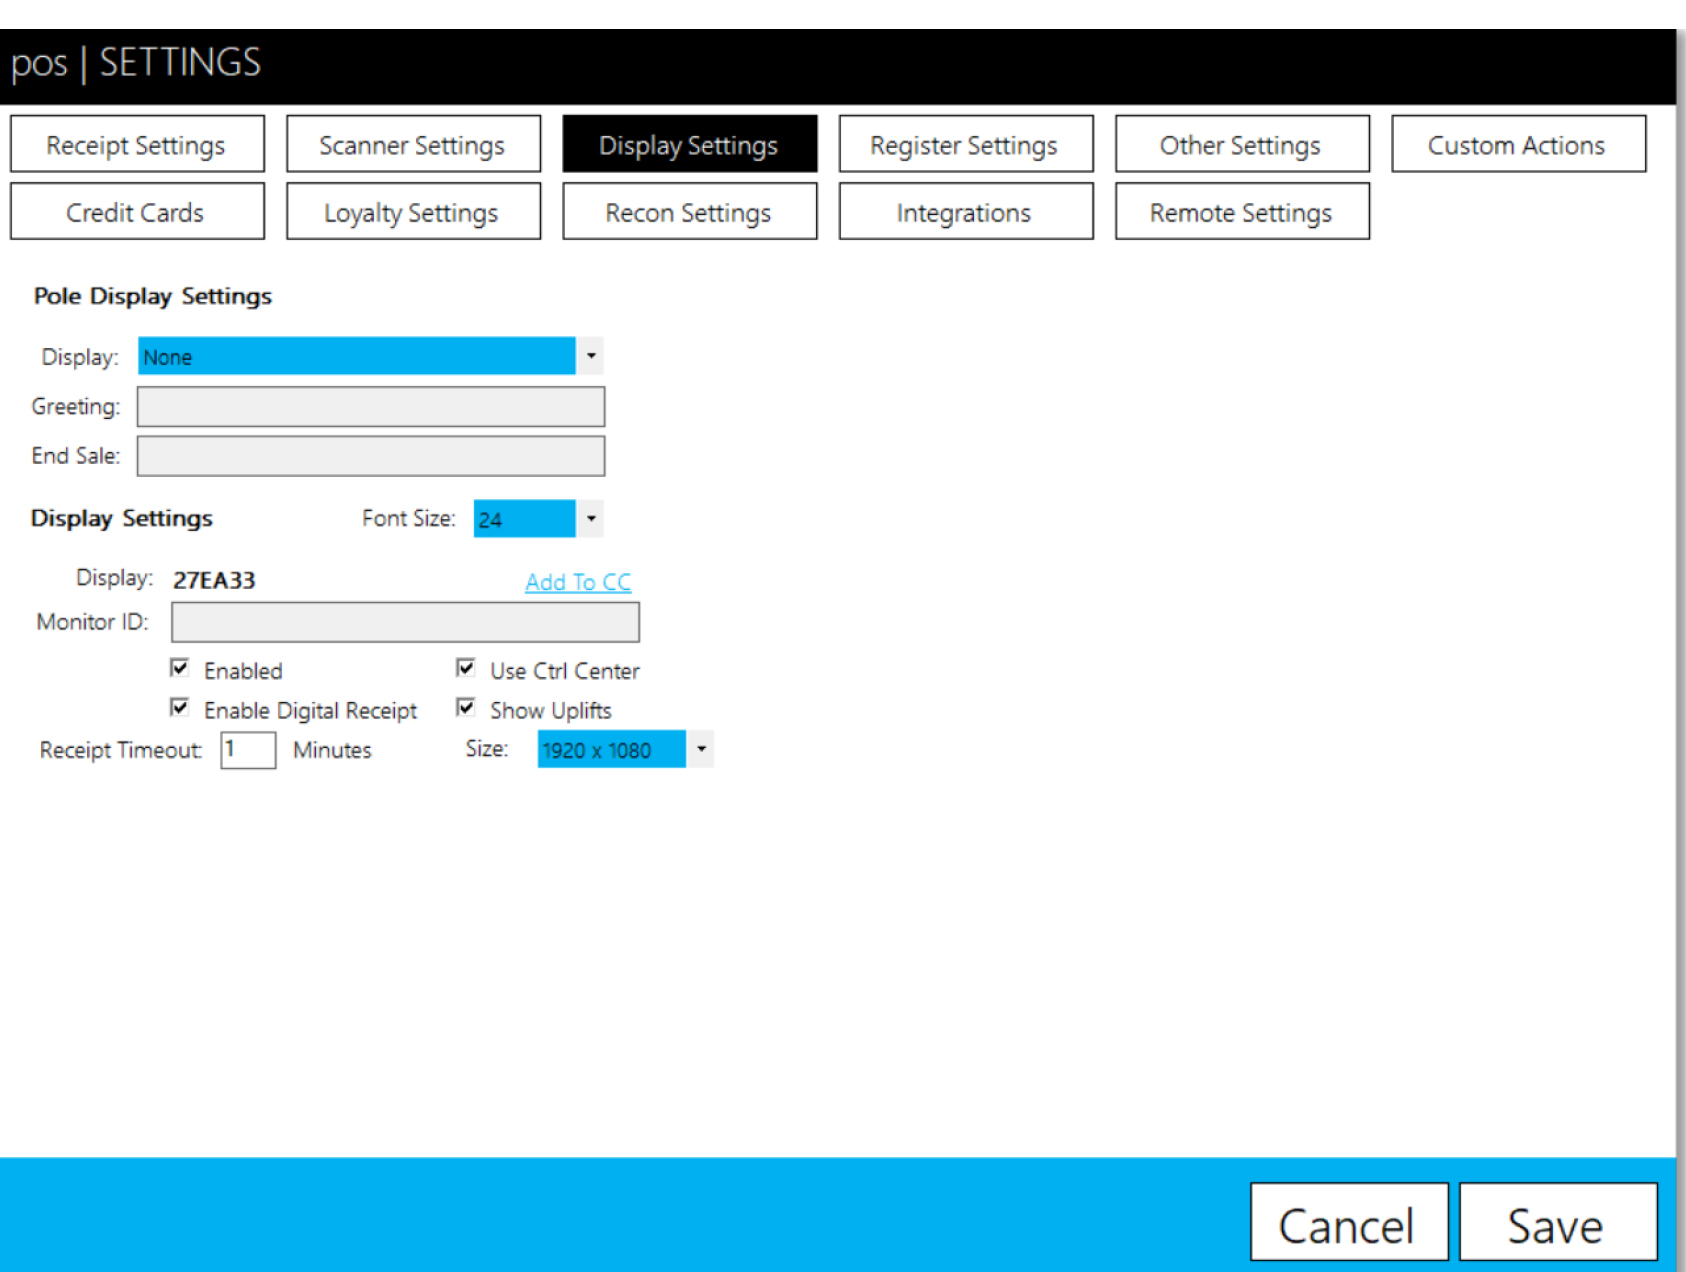
Pole Display Settings
- Display – Allows user to select an OPOS pole display
- Greeting – Allows user to type in greeting message
- End Sale – Allows user to type a end sale message
Display Settings
- Font Size – Allows user to change display font size
- Image Path – Allows user to choose folder with .jpg images
- Enabled – Enables the display
- Enabled Digital Receipt – Splits display to show a digital receipt
- Use Ctrl Center – Enables the display to pull signage from the FasTrax Control Center
- Show Uplifts – Enables uplifts on the display
Register Settings
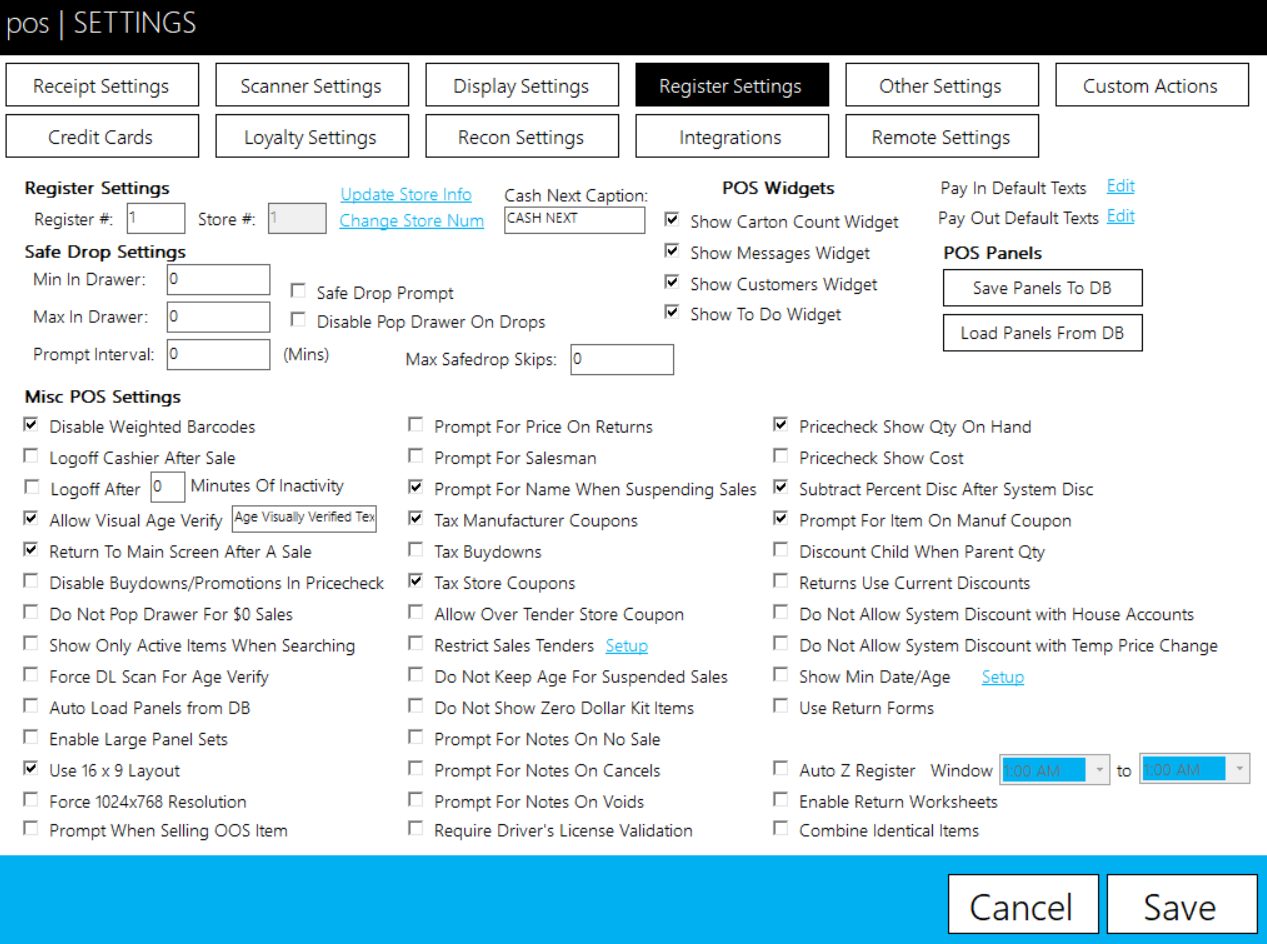
Register Settings
- Register # – Sets the register number
- Store # – Shows the store number
- Update Store Info – Allows you to set the store details, such as address and phone number
- Change Store Num – Allows the store number to be changed
- Cash Next Caption – Allows the cash next caption to be changed for the cash next button type
Safe Drop Settings
- Min In Drawer – The value the safe drop will drop to
- Max In Drawer – The value where the safe drops will start prompting
- Prompt Interval – How often the prompt occurs in minutes
- Safe Drop Prompt – Enables the safe drop prompts
- Disable Pop Drawer On Drops – Disables the pop drawer button on the safe drop prompt
- Max Safe Drop Skips – The max number of skips that can be done for safe drops
Misc POS Settings
- Disable Weighted Barcodes – Disables barcodes with a leading 2 meaning the barcode contains the retail price
- Logoff Cashier After Sale – Logs the cashier off after each completed sale
- Logoff After _ Minutes Of Inactivity – Logs cashier off after a specified idle time period
- Allow Visual Age Verify – On transactions with age restrictions, places a bypass button
- Return to Main Screen After A Sale – After completing a sale, returns cashier to main panel
- Disable Buydowns/Promotions in Pricecheck – Removes visibility of buydowns and promotions on pricechecks
- Do Not Pop Drawer For $0 Sales – On completed sales where the balance is $0, the cash drawer will not be opened
- Show Only Active Items When Searching – Only shows active items when doing an item search
- Force DL Scan For Age Verify – On age restricted items, forces a drivers license to be scanned; it cannot manually be entered
- Auto Load Panels From DB – Upon first opening the POS, panels are loaded from the database
- Enable Large Panel Sets – Allows use of 20+ individual panels
- Use 16 x 9 Layout – The POS is formatted for wide screen monitors
- Force 1024×768 Resolution – Forces the display to the 1024×768 resolution
- Prompt When Selling OOS Item – Prompts the cashier are they certain when an item with 0 QOH is being sold
- Prompt For Price On Returns – Prompts for the items price on returns, allowing the cashier to alter the value
- Prompt For Salesman – On items sold that are in a commission campaign, the POS prompts for the salesman based on who is clocked in
- Prompt For Name When Suspending Sales – Prompts the cashier for an identifier name when suspending sales
- Tax Manufacturer Coupons – Taxes the item before the coupon is applied
- Tax Buydowns – Taxes the item before the buydown is applied
- Tax Store Coupons – Taxes the item before the coupon is applied
- Allow Over Tender Store Coupon – Allows a transaction to be paid for in total by store coupon(s)
- Restrict Sales Tenders – Restricts departments to specific tenders, such as lottery to cash
- Do Not Keep Age For Suspended Sales – When checked, age verification prompts will come up for resumed sales. When unchecked, suspended sales will remember age verification.
- Do Not Show Zero Dollar Kit Items – Items that are $0 will not be shown on the receipt and transaction
- Prompt For Notes On No Sale – When using the no sale button, prompts the cashier to enter notes for a reason why it was used
- Prompt For Notes On Cancels – When using the cancel sale button, prompts the cashier to use notes for a reason why it was used
- Prompt For Notes On No Voids – When using the void item button, prompts the cashier to use notes for a reason why it was used
- Require Driver’s License Validation – After scanning a driver’s license, shows the ID information such as name and age and how many days until expiration for the cashier to verify and either accept or reject
- Pricecheck Show Qty On Hand – Shows the quantity on hand for items on the price check screen
- Pricecheck Show Cost – Shows the cost and margin for items scanned on price check screen
- Subtract Percent Disc After System Disc – Forces the system to subtract a manually cashier entered discount after a system discount is applied (order of operations)
- Prompt For Item On Manuf Coupon – When scanning a manufacturer coupon, prompts for the item that the coupon is applied to
- Discount Child When Parent Qty – Allows subunit items to receive a discount if the quantity purchased equals the purchase unit quantity when the price would be different (packs cost more than cartons)
- Returns Use Current Discounts – All returns use current system discounts, even when returning against a receipt
- Do Not Allow System Discount with House Accounts – Transactions with house accounts are not eligible for system discounts
- Do Not Allow System Discount with Temp Price Change – Items with a temporary price change is not eligible for a system discount
- Show Min Date/Age – Once enabled and entered, shows minimum age and dates for age restrictions on the POS
- Use Return Forms – Requires entry of a customer and reasons for return, keeping track of all returns
- Auto Z Register – Allows a scheduled time for register Z’s to be scheduled
- Combine Identical Items – Combines multiple scans of the same item into a single line item with a quantity equal to the number of times scanned, shortening the receipt
- Pay In Default Texts – Allows user to define preset pay in texts
- Pay Out Default Texts – Allows user to define preset pay out texts
POS Widgets
- Show Carton Count Widget – Enables the carton count widget
- Show Messages Widget – Enables the messages widget
- Show Customers Widget – Enables customers widget
- Show To Do Widget – Enables to do widget
POS Panels
- Save Panels To DB – Saves the loaded panels to the store database
- Load Panels From DB – Loads the saved panels from the store database
Other Settings
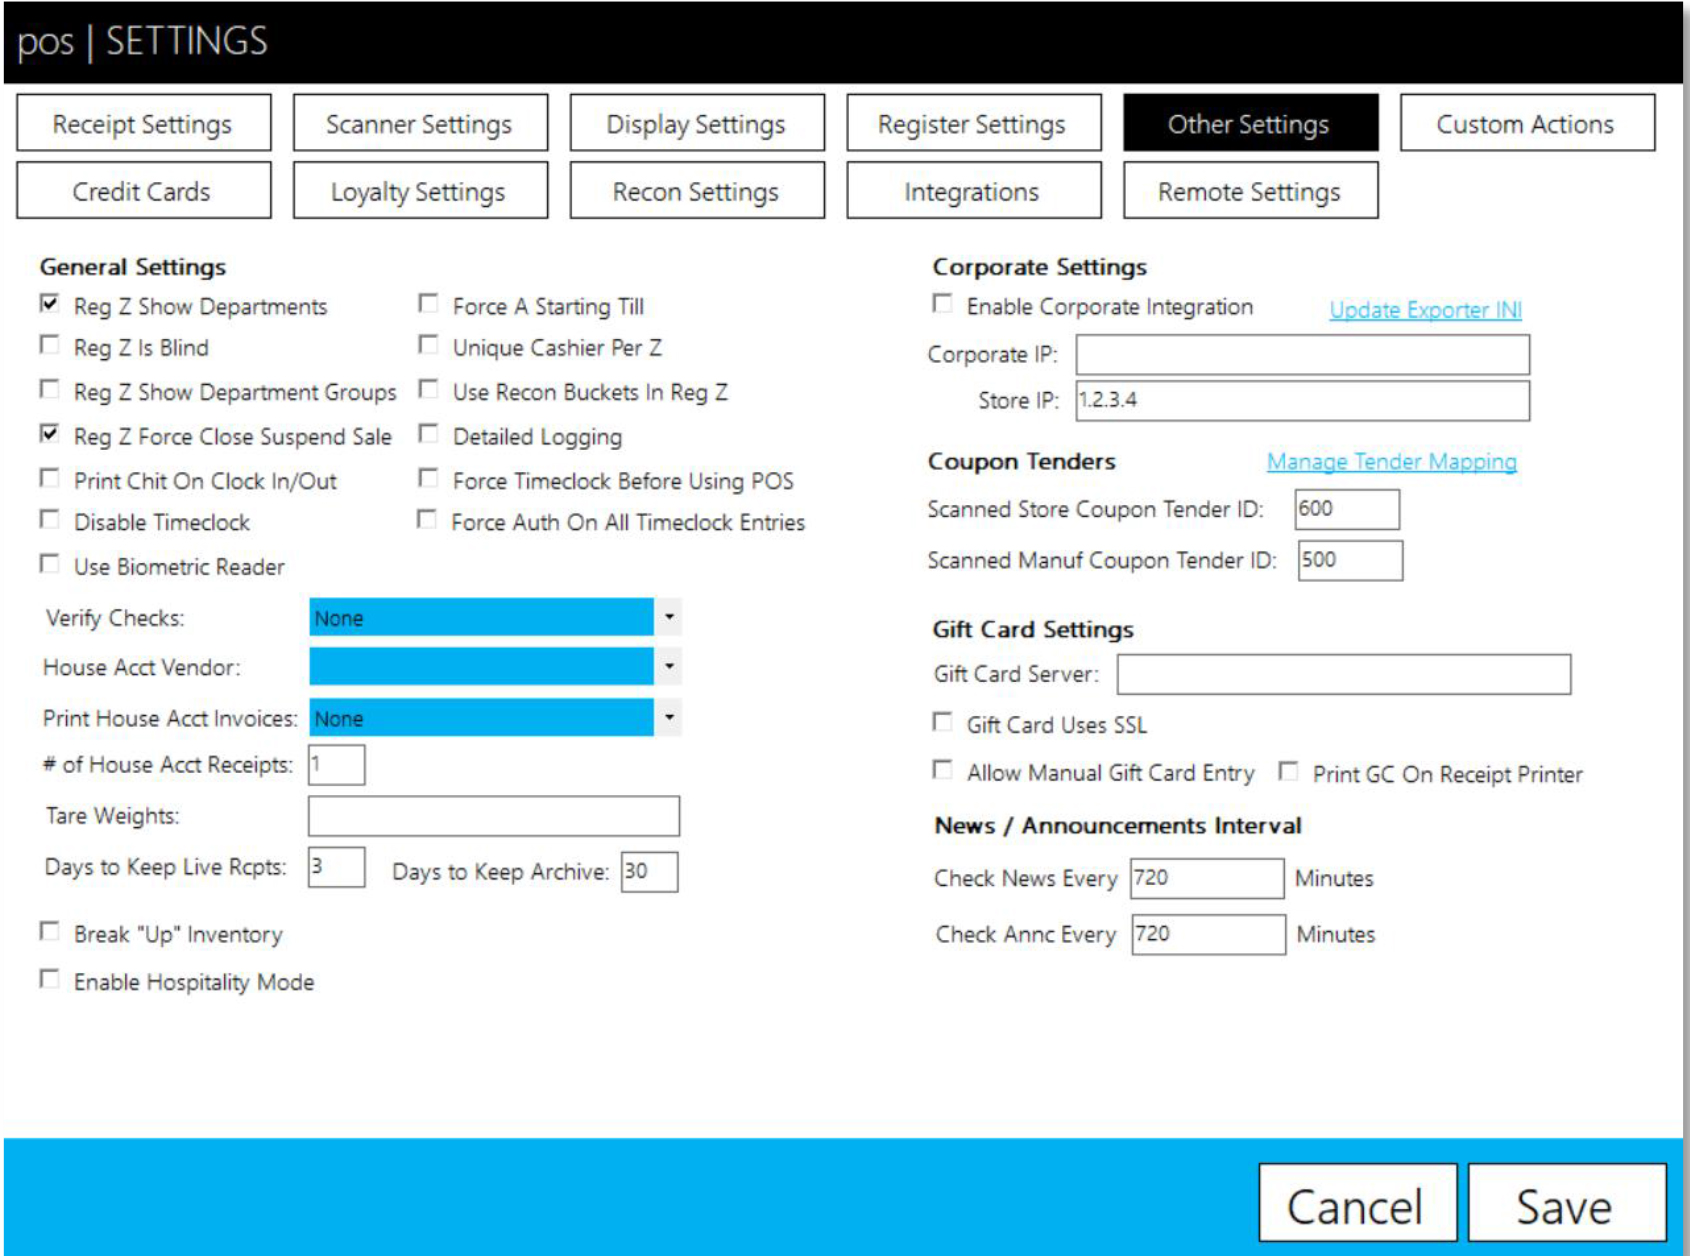
General Settings
- Reg Z Show Departments – The Z tape that prints out shows department sales
- Reg Z Is Blind – The Z tape that prints out shows no sales or tender information
- Reg Z Show Department Groups – The Z tape that prints out shows department group sales
- Reg Z Force Close Suspend Sales – Forces the cashier to cancel out of suspended sales before the shift is Z’d out
- Print Chit On Clock In/Out – Prints a clock in/out slip out of the receipt printer each time an employee clocks in or out
- Disable Timeclock – Disables the FasTrax timeclock within the POS
- Use Biometric Reader – Enables biometric reader usage on the POS
- Choose Digital Persona or Touchpoint based on hardware
- Force A Starting Till – Forces the cashier to key in a starting till
- Unique Cashier Per Z – When enabled, only allows a single cashier per shift
- Use Recon Buckets In Reg Z – On the Z tape, shows the bucket values instead of individual tender values
- Detailed Logging – Logs POS actions in details for FasTrax support usage
- Force Timeclock Before Using POS – Forces cashier to be clocked in before ringing sales
- Force Auth On All Timeclock Entries – Forces authorization on all timeclock entries, with no grace period
- Verify Checks – Allows user to utilize a positive or negative check verification
- House Acct Vendor – Allows user to define house account vendor for house account invoices
- Print House Acct Invoices – Allows user to automatically or manually print house account invoices
- # of House Acct Receipts – Defines the number of receipts that are printed on house account invoices
- Tare Weights – Defines the tare weights used on the POS, separating values by commas
- # Days to Keep Live Rcpts – The number of days receipts are kept alive in the “Reprint Receipts” button
- Days to Keep Archive – The number of days receipt files are kept on the PC before being purged automatically (note – this does not affect ability to run reports on Director)
- Break “Up” Inventory – When checked, a sale that would make a purchase unit go negative QOH will break “up” the subunit to keep it from going negative (only occurs if subunit QOH allows for this)
- Enable Online Pending Transfers – Enables the ability to create and received online pending transfers
Corporate Settings
- Enable Corporate Integration – Enables corporate integration
- Update Exporter INI – Updates the Exporter INI to use the set corporate and store IP addresses
- Corporate IP – The corporate server’s IP with port if applicable
- Store IP – The local store’s IP with port if applicable
Coupon Tenders
- Manage Coupon Tender Mappings – Allows manufacturer coupons to be mapped to specific tender IDs
- Scanned Store Coupon Tender ID – Allows mapping for a scanned store coupon
- Scanned Manuf Coupon Tender ID – Allows mapping for a scanned manufacturer coupon
Gift Card Settings
- Gift Card Server – IP address of gift card server, with port if applicable
- Gift Card Uses SSL – This forces gift card authentication to use SSL rather than normal http
- Allow Manual Gift Card Entry – Allows cashier to manually enter a gift card number, in addition to scanning the
gift card barcode - Print GC On Receipt Printer – Prints gift card barcode on receipt from receipt printer
New / Announcements Interval
- Check News Every __ Minutes – Designates the interval for the POS to call to FasTrax and pull news
- Check Annc Every __ Minutes – Designates the interval for the POS to call to corporate and pull announcements
Custom Actions
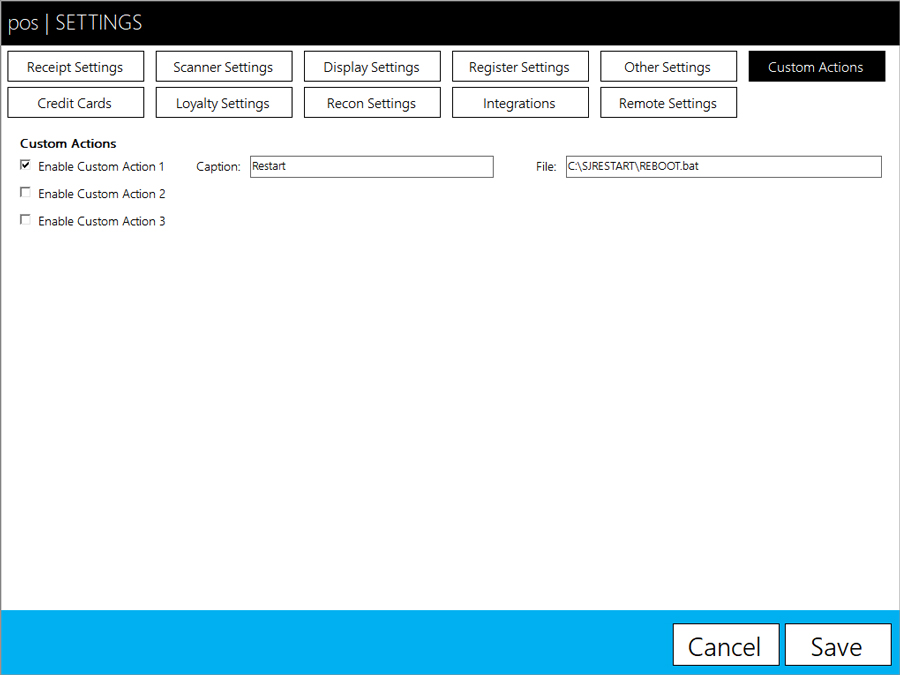
Custom Actions
- Enable Custom Action 1 – Allows user to create a custom action to start a different program under actions
- Enable Custom Action 2 – Allows user to create a custom action to start a different program under actions
- Enable Custom Action 3 – Allows user to create a custom action to start a different program under actions
Credit Cards
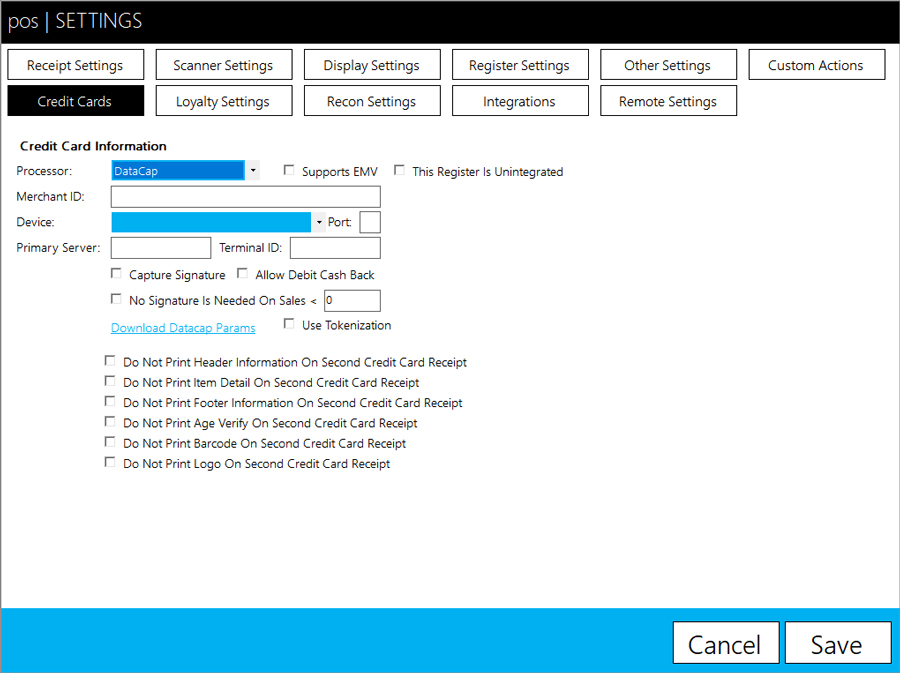
Credit Card Information
- Processor – User chooses Datacap for widest pinpad selection
- Supports EMV – User chooses if the processor has EMV enabled
- Merchant ID – The processor assigned merchant ID
- Device – User chooses the device / processor assigned to the POS
- Port – Specify the COM port the pinpad is assigned to
- Primary Server – The IP address that the machine has that runs the Datacap Host software
- Terminal ID – The processor assigned terminal ID for the pinpad
- Capture Signature – Enables signature capture if pinpad supports it
- Allow Debit Cash Back – Allows debit cash back if processor allows it
- No Signature Is Needed On Sales < _ – Allows the user to choose if signatures are not required, if the processor
allows it - Download Datacap Params – Sends programming from this page to the pinpad
- Use Tokenization – Choose if processor uses tokenization (only Vantiv currently)
- This Register Is Unintegrated – Bypasses integrated processing for a secondary register
- Do Not Print Header Information On Second Credit Card Receipt – Bypasses printing receipt header on second
copy - Do Not Print Item Detail On Second Credit Card Receipt – Bypasses printing items on receipt on second copy
- Do Not Print Footer Information On Second Credit Card Receipt – Bypasses printing receipt footer on second
copy - Do Not Print Age Verify On Second Credit Card Receipt – Bypasses printing age verification on second copy
- Do Not Print Barcode On Second Credit card Receipt – Bypasses printing the receipt barcode on the second copy
- Do Not Print Logo On Second Credit Card Receipt – Bypasses printing the company logo on the second copy
- Require Minimum Sale Amount of __ – Will not allow the credit card transaction to go through if the subtotal is
below this amount
Loyalty Settings
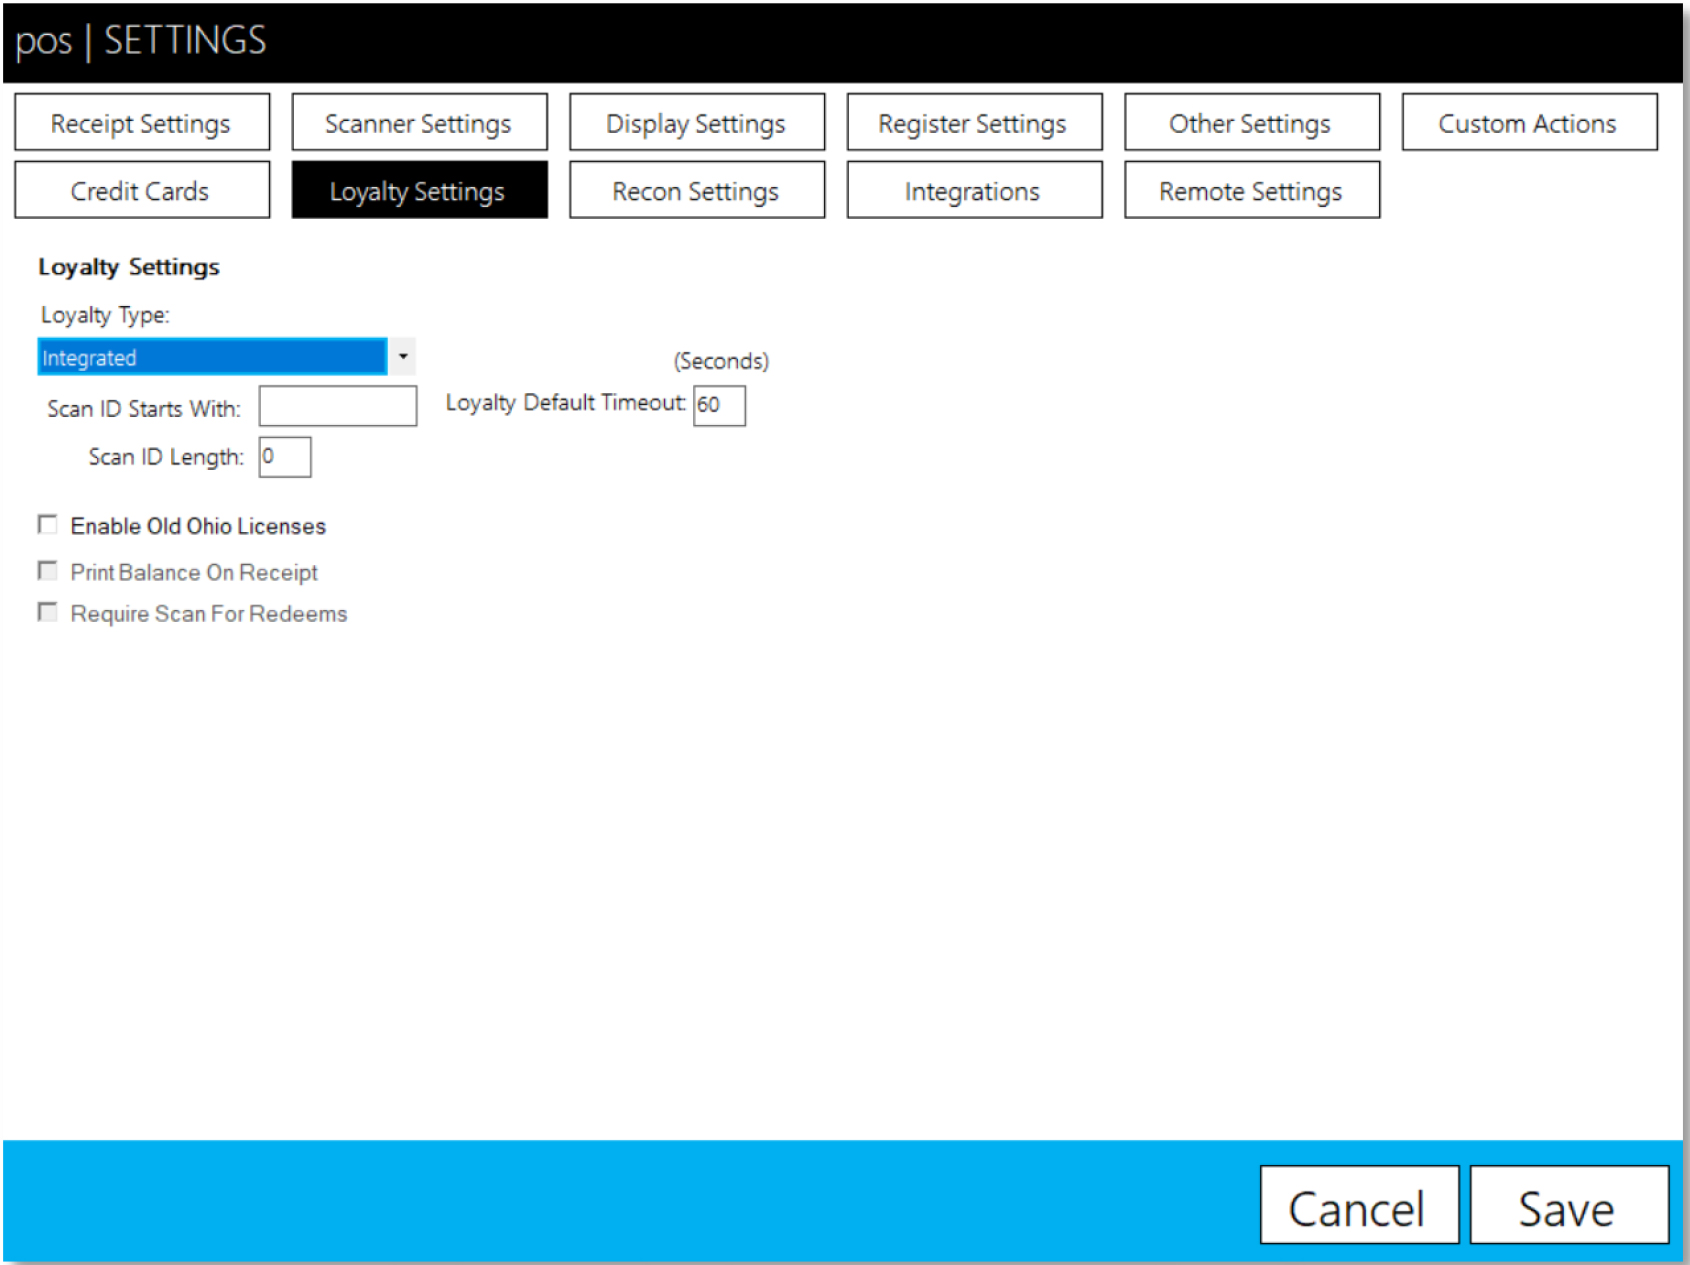
Loyalty Settings
- Loyalty Type – User chooses no loyalty, integrated loyalty, or enhanced if they pay for enhanced
- Scan ID Starts With – If user is utilizing special, scannable loyalty card, specify the leading digit
- Scan ID Length – If user is utilizing special, scannable loyalty card, specify the card number length
- Loyalty Default Timeout – How many seconds until a timeout error happens when trying to search a loyalty
customer without internet connectivity - Enable Old Ohio Licenses – Enables older Ohio licenses to scan
- Print Balance On Receipt – Prints loyalty balance on receipt for enhanced loyalty
Recon Settings
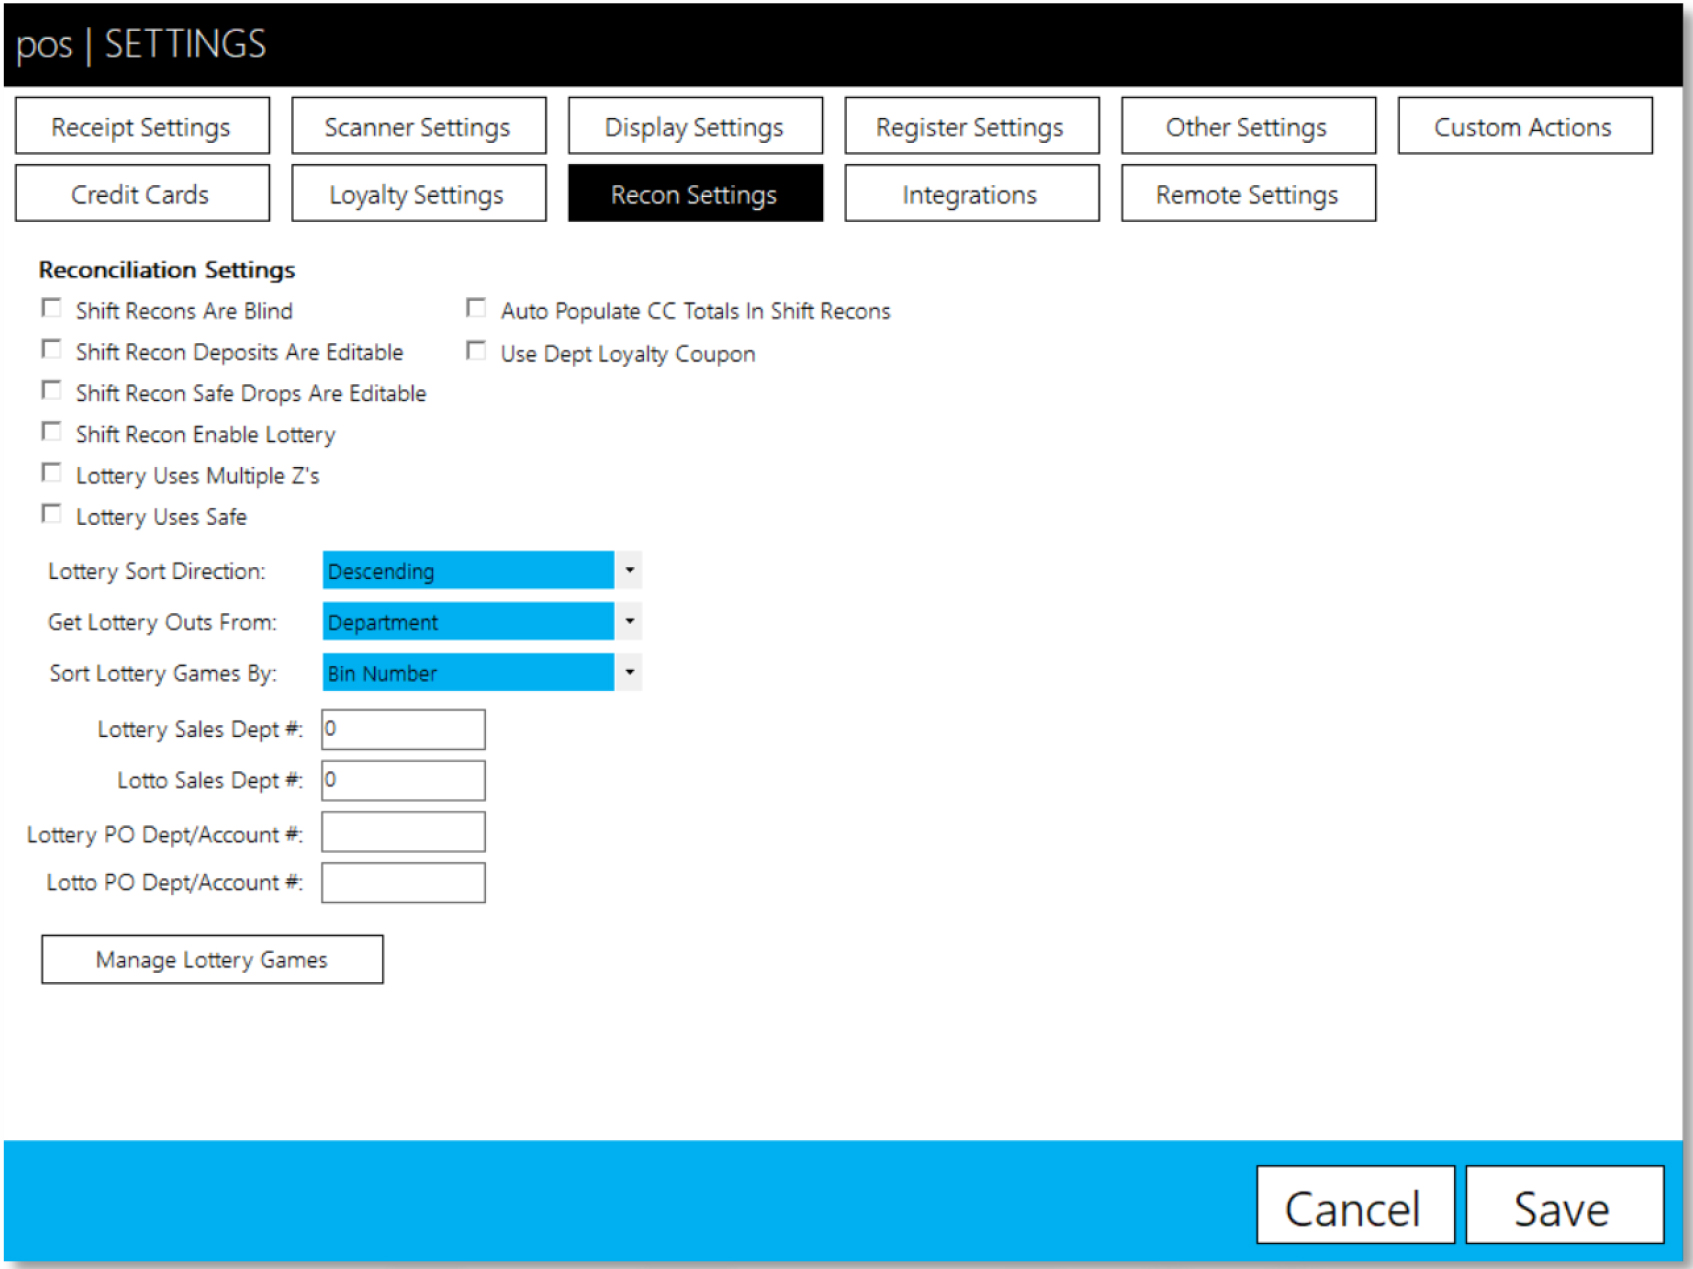
Reconciliation Settings
- Shift Recons Are Blind – Cashier doesn’t see system details or variances when reconciling shift
- Shift Recon Deposits Are Editable – Allows the cash deposit to be editable
- Shift Recon Safe Drops Are Editable – Allows safe drops to be editable
- Shift Recon Enable Lottery – Enables ability to do lottery reconciliation
- Lottery Uses Multiple Z’s – Enables lottery recon to combine multiple shifts
- Lottery Uses Safe – Lottery books are kept in the safe
- Auto Populate CC Totals In Shift Recons – If using integrated credit cards and blind reconciliation, automatically
totals the credit card line up on reconciliations - Use Dept Loyalty Coupon – Allows coupons to reconciled that are tied to a specific department
- Lottery Sort Direction – Choose whether lottery tickets are sorted via ascending or descending ticket numbers
- Get Lottery Outs From – Choose whether lottery payouts are from departments or pay out accounts
- Sort Lottery Games By – Choose if games are sorted via bin number or game number
- Lottery Sales Dept # – Input lottery sales department number
- Lotto Sales Dept # – Input the online lottery sales department number
- Lottery PO Dept/Account # – Lottery pay out department number or account number
- Lotto PO Dept/Account # – Online lottery pay out department number or account number
- Manage Lottery Games – Allows user to map lottery games to bin numbers
Integrations
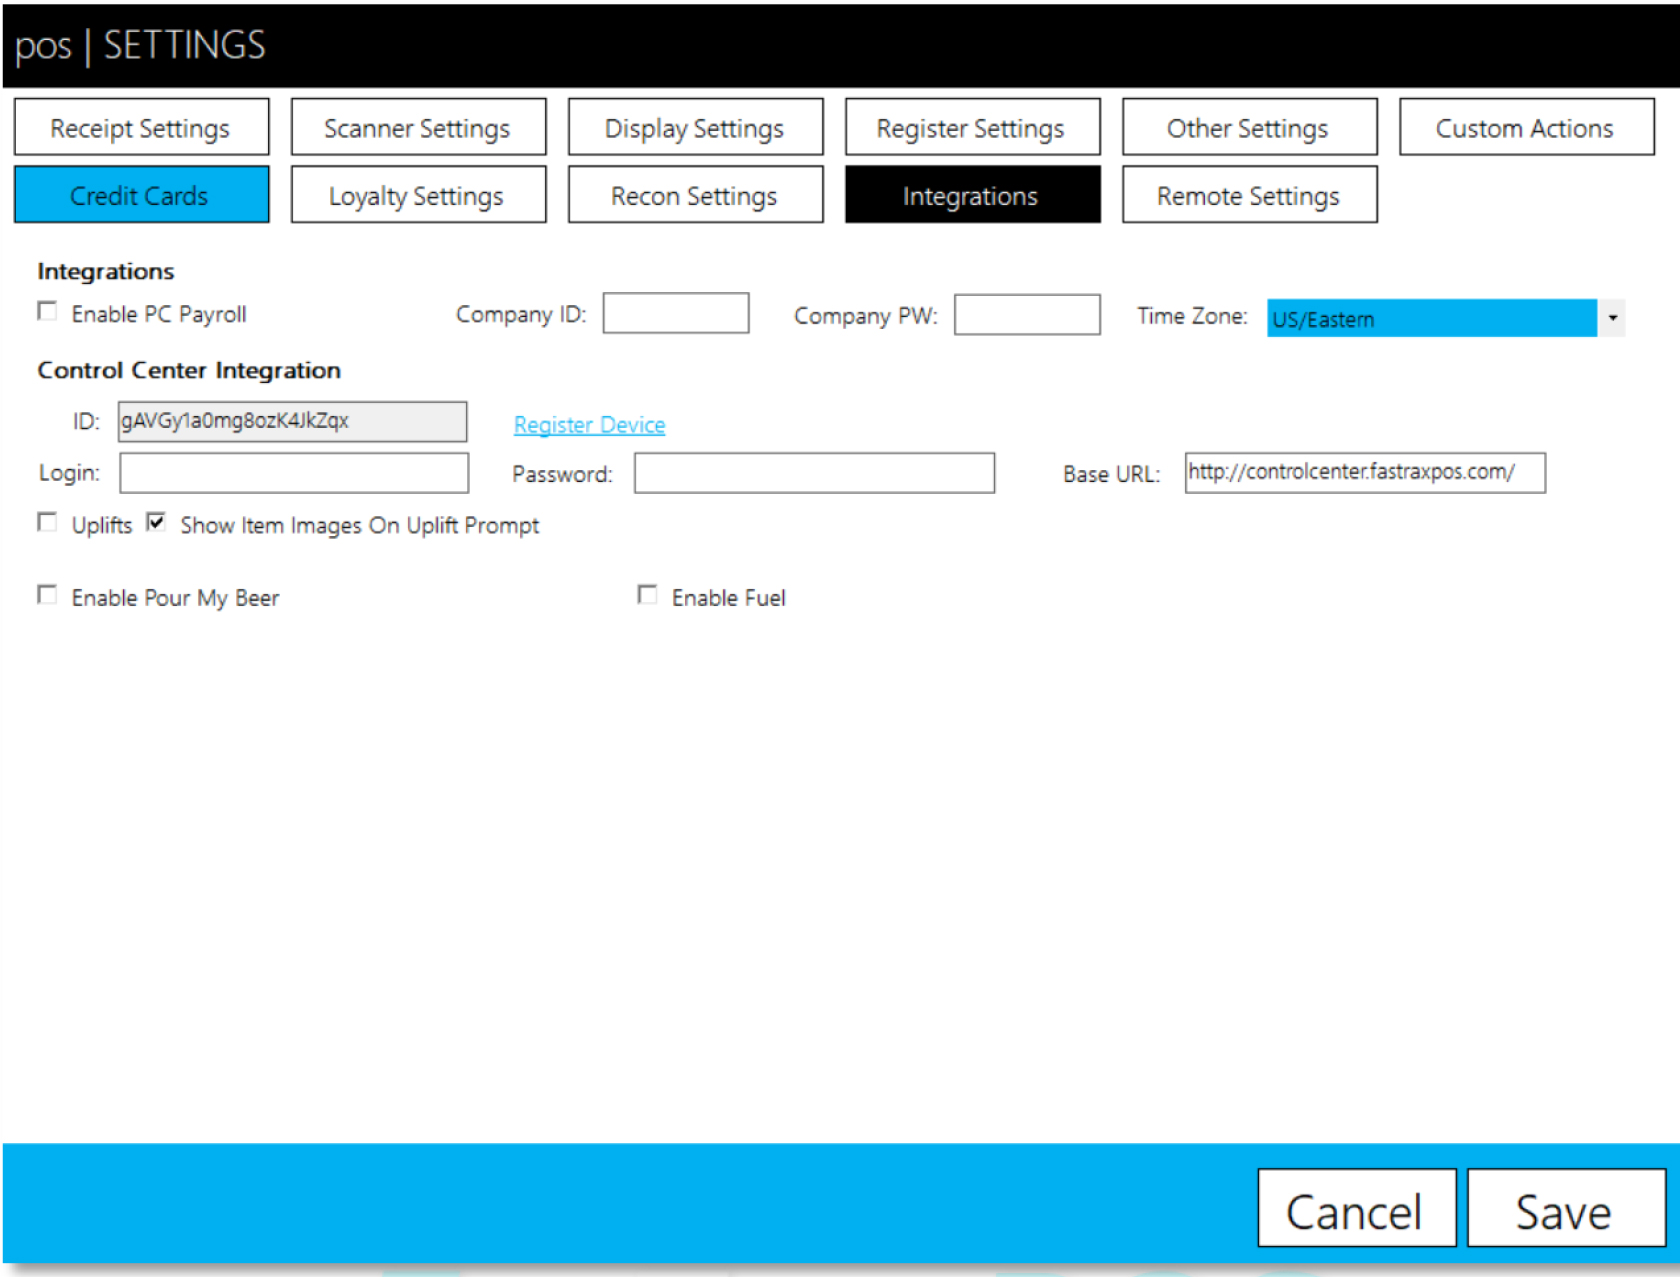
Integrations
- Enable PC Payroll – Enables PC Payroll integration within the POS
- Company ID – The PC Payroll unique company ID
- Company PW – The PC Payroll company password
- Time Zone – The time zone the store is in
Control Center Integration
- ID – The unique identifier of the machine on the FasTrax Control Center
- Login – The login for the company on the FasTrax Control Center
- Password – The password for the company on the FasTrax Control Center
- Base URL – The URL of the FasTrax Control Center
- Uplifts – Are uplifts to be enabled
- Show Item Images On Uplift Prompt – Are item images to be associated with uplift campaign
- Enable Pour My Beer – Enables Pour My Beer integration
- Enable Fuel – Enables fuel integration (not currently functional)
Remote Settings
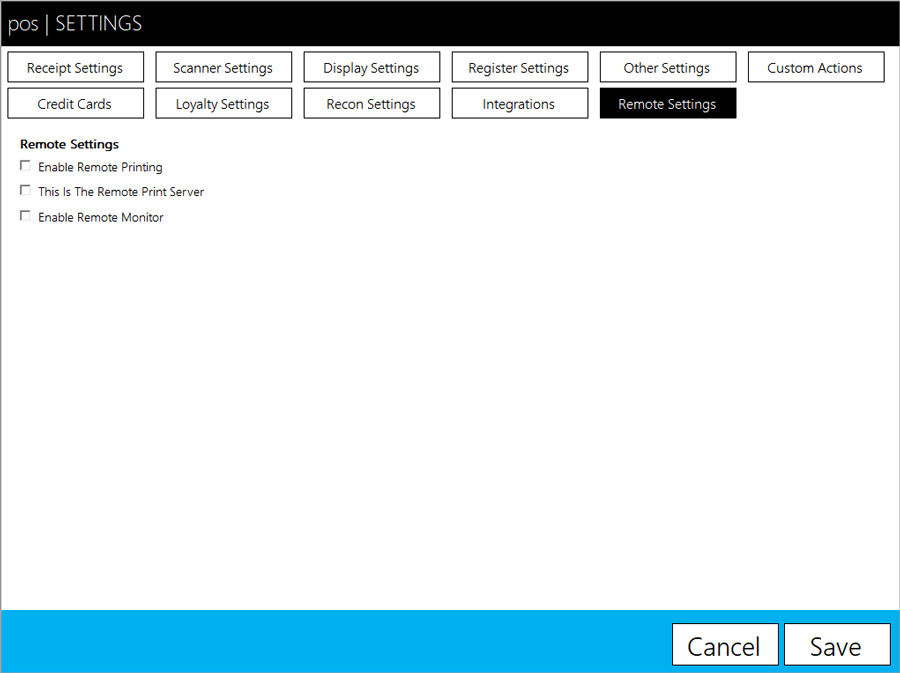
Remote Settings
- Enable Remote Printing – Enables the remote kitchen printer function
- This Is The Remote Print Server – Designates a remote print server
- Enable Remote Monitor – Enables a remote monitor for restaurant environments
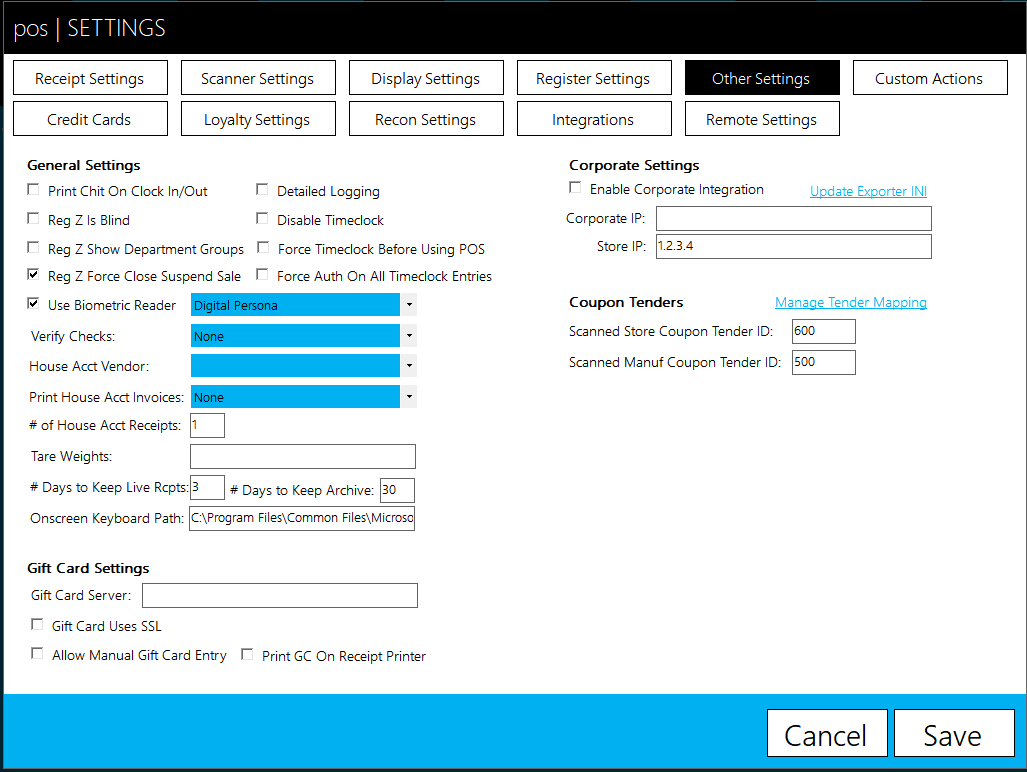
Enable Biometric Scanner
- From within the POS, choose Actions – Settings – Settings – Other Settings
- Make sure the logged in user has adequate permission levels for adjusting settings.
- Check the checkbox for “Use Biometric Reader”.
- From the dropdown, choose the type of biometric reader that is to be utilized.
- “Touchpoint” is for the HP RP9. “Digital Persona” is for other machines.
- Choose the “Save” button
- The POS will now be closed and ready to be used with the biometric scanner
Print Registration
After enabling the biometric scanner, when opening the POS for the first time and logging in using an employee number, you will be prompted to register your fingerprints.
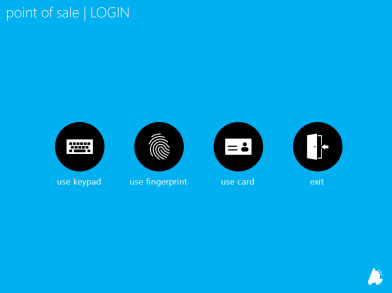
- Open the POS and choose “use keypad”.
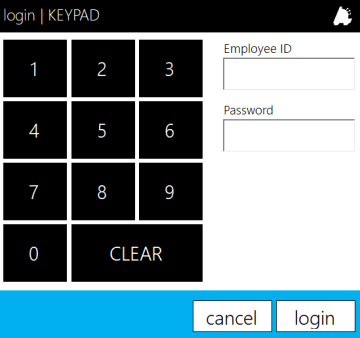
- Choose “Login”
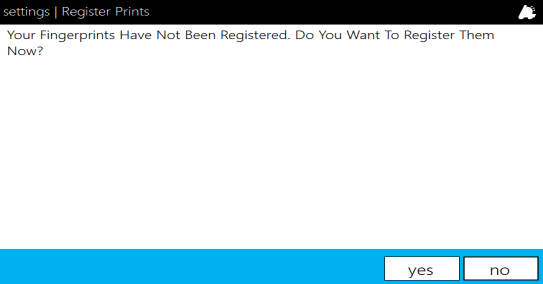
- You will then be prompted to register your print.
- Choose “Yes”
- Choose the applicable digit this employee will use.
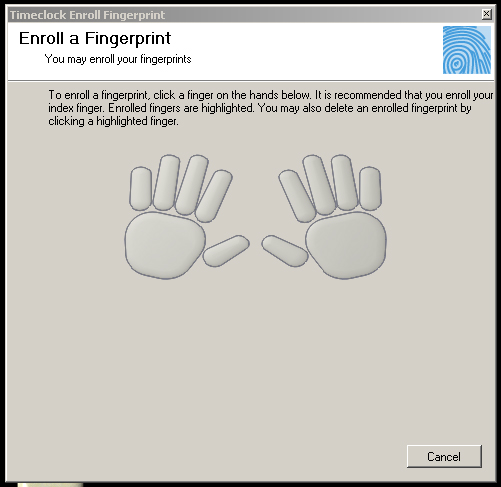
- After choosing the applicable digit, you will be prompted to scan the digit 4 times.
- This requires the employee to place, lift and place the same digit 4 times.
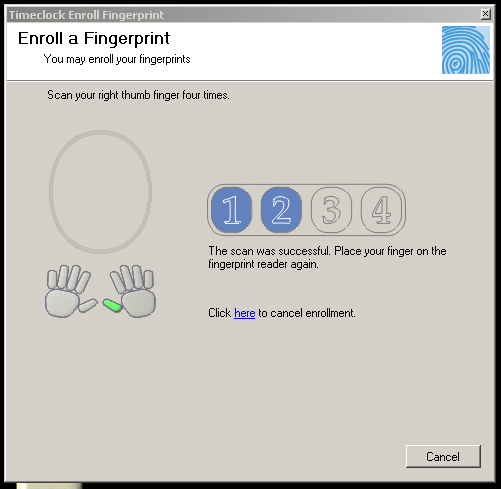
- After successfully scanning 4 times, you will be notified that the
fingerprint has been added to the database. - Choose “OK”
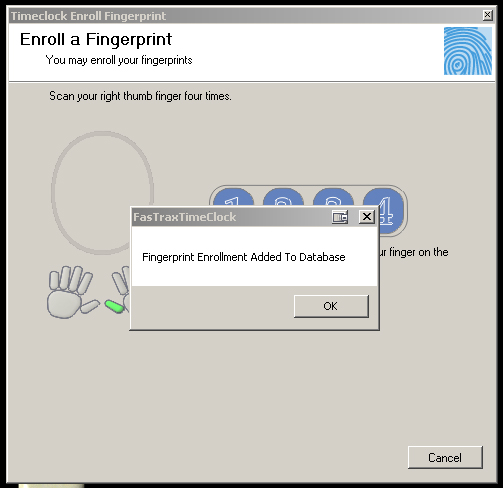
If employees choose to “Cancel” the fingerprint scan utility and instead manually enter their cashier number and password for clock in/out, the Timeclock Report available via FasTrax Director will show as a “Manual” entry.
Biometric POS Login
After prints have been registered via the Timeclock configuration, the biometric readers can also be used to log into the POS.
- From the log in screen of the POS, choose the applicable “use fingerprint” button
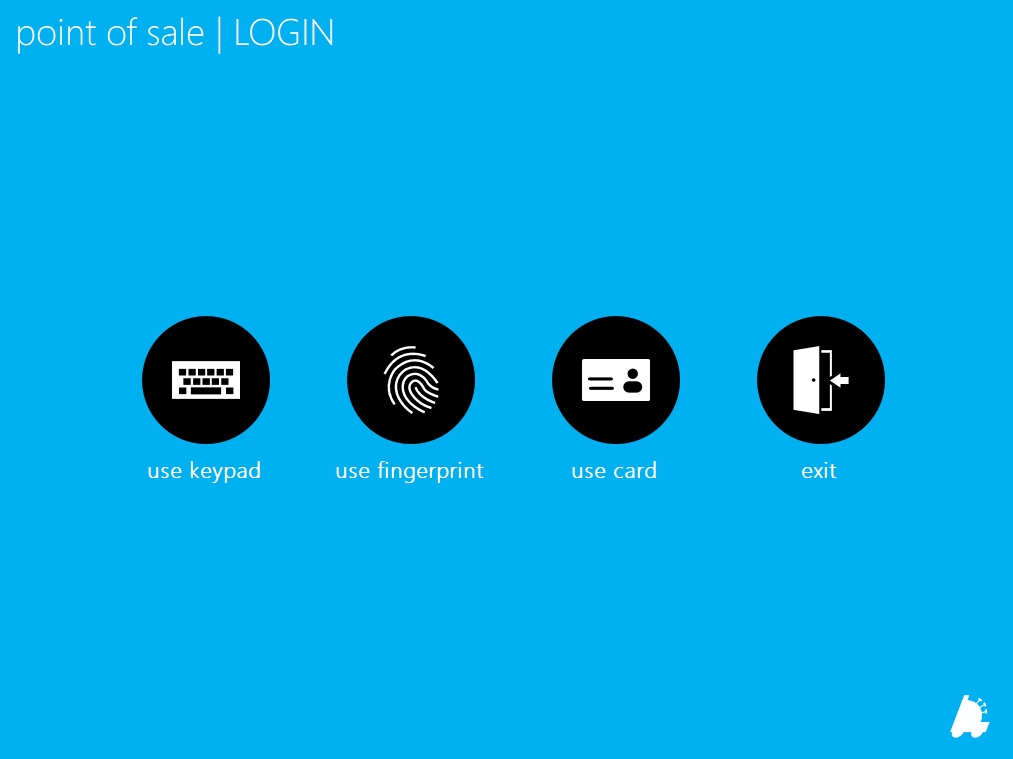
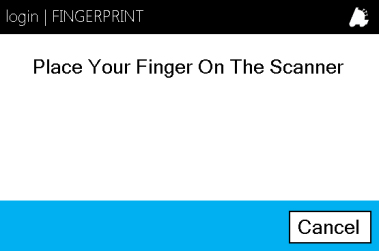
- This will open the Fastrax FingerPrint Reader entry window.
- Scan the same registered digit.
- POS will successfully log in.
Resetting Employee Biometric Data
Employee Biometric data can be reset via the FasTrax Director.
If a Corporate setup is being utilized, the employee reset should be performed here, saved and sent to stores via the FasTrax Queue.
- Open and log into Fastrax Director.

- Choose the Maintenance module.

- Choose the “Employee” tab.
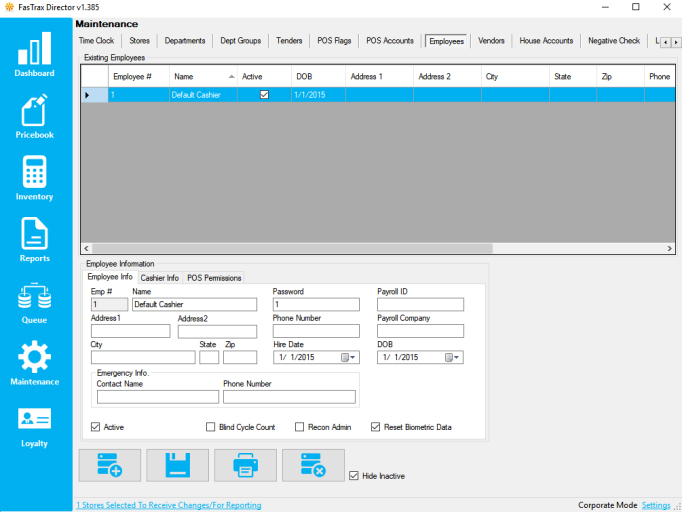
- Highlight the applicable employee from the employee list.
- Check to “Reset Biometric Data”.
- Choose “Save”.
Buydowns
Buydowns – This enables you to schedule either a Buydown or Promotional discount on items. Both types function the same.
A Buydown is a reduction of an item’s retail price derived from a reduction of the item’s cost from the supplier, vendor or manufacturer. These cost reductions are dependent on either a set quantity and/or date range.
A Promotion is a reduction of an item’s retail price for the purpose of eliminating stock or driving product interest.
Examples of this would be:
- The next 50 sold of a certain item are $1.00 off
- An item, or group of items, is $1.00 off for a period of a specific 2 weeks.
- An item, or group of items, is $1.00 for the next 50 sold or next 2 weeks, whichever is completed first
- In the Pricebook module, click on the “Buydowns” Tab.
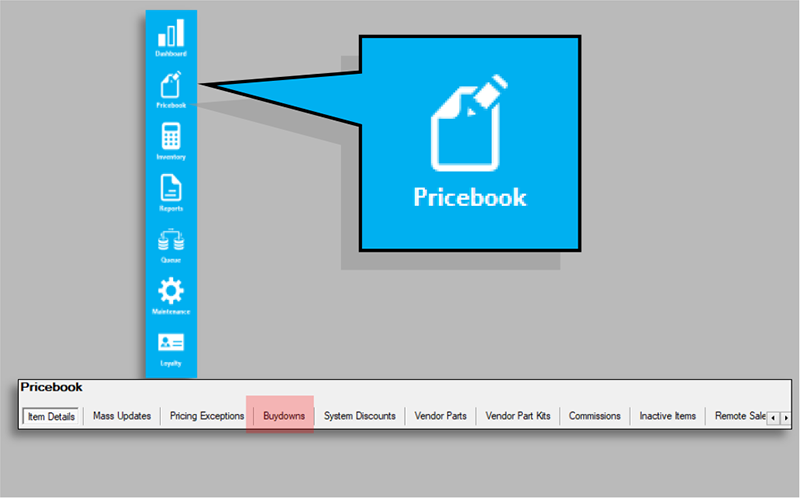
- This will bring up the “Buydowns” utility.
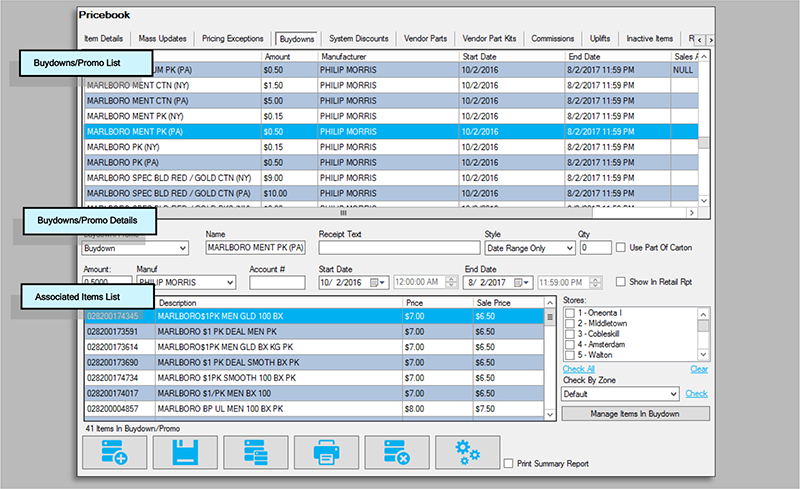
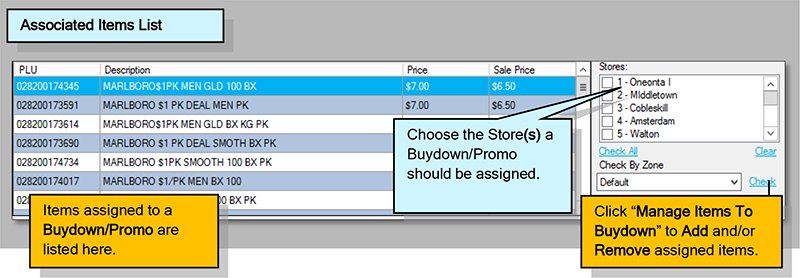
This utility is separated into three sections; Buydowns/Promo List, Buydowns/Promo Details and Associated Items List.
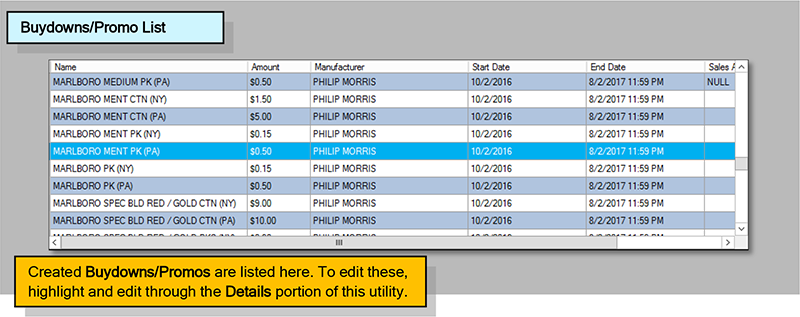

- To create a new Buydown/Promo, click the “Add/Plus” button.
- In the Detail section, first decide if this is to be a Buydown or a Promotion.
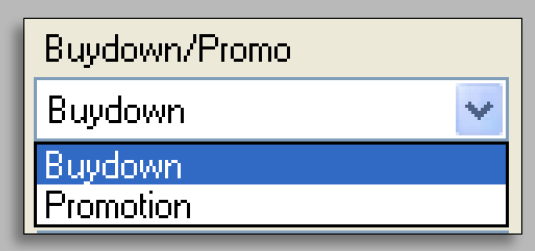 When choosing if this is to be a Buydown or Promo remember, both types operate the same. However, the ability to label a type will assist in record and book keeping.
 - Now, begin entering any pertinent information for this Buydown/Promo.
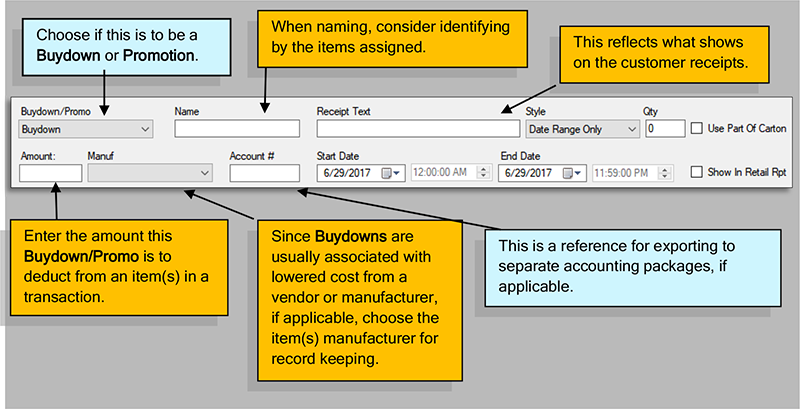
- Choose the applicable Buydown/Promo Style.
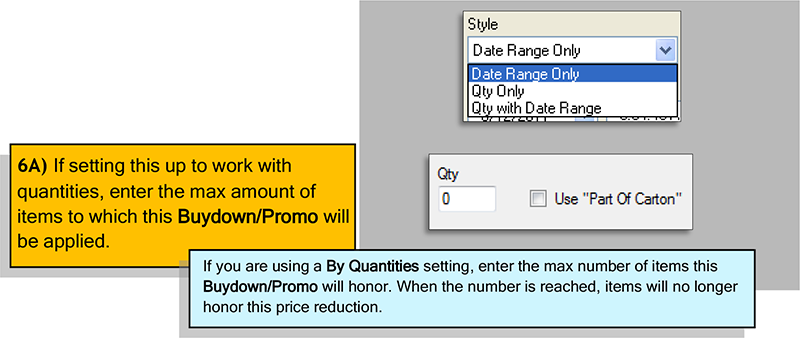
- If you are utilizing a Date Range, enter the Start/End dates and times this Buydown/Promo will function.
 These dates can be edited at any time allowing you to reuse Buydowns/Promos!
 - Once all descriptive details for this Buydown/Promo have been entered, press the “Save” button.
 If you are using a By Range setting, enter the Start/End date this Buydown/Promo will honor. When the End Date is reached, no more items will honor this price reduction.If a Quantity with Date Range is being utilized, the Buydown/Promo will run until either the Quantity or Date is reached, whichever comes first.
Items will now have to be set to this Buydown/Promo
Items can also be added to Buydowns/Promos via Mass Updates!
- Press the “Add Items To Buydown” button.

- This will bring up the “Buydowns” utility.
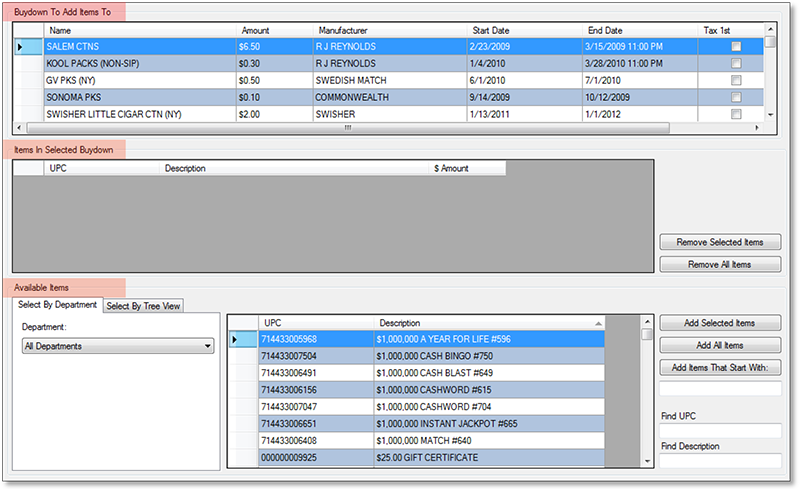
This utility is separated into three sections; Buydowns/Promo List, Buydowns/Promo Details and Associated Items List.
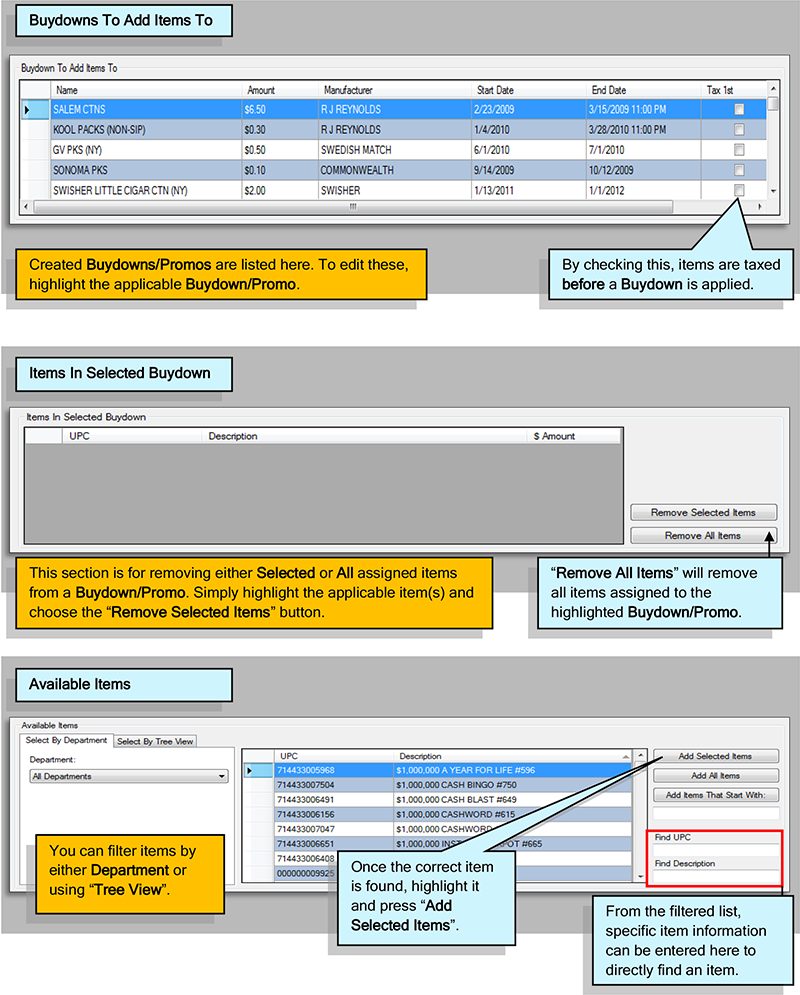
- To add items to a Buydown/Promo, first filter to the item(s) you wish to add. This can be accomplished by either Department or Tree View.
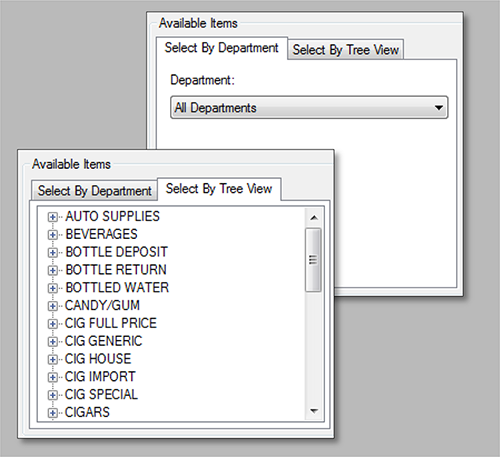 All items must be designated to a Department, however, using the Tree View with categorized descriptions makes filtering especially simple. This process is similar to assigning Buydowns/Promos via Mass Updates.
 - Filtered items will appear in the “Available Items” List screen.
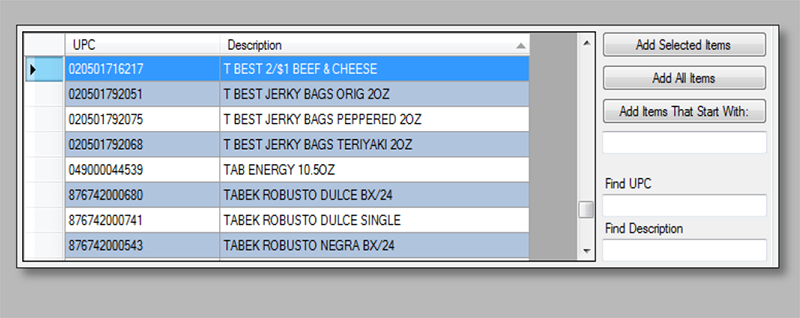 From this list, highlight applicable items you wish to add to this Buydown/Promo.Remember, holding the Ctrl Button while performing Mouse Clicks will allow you to highlight multiple items!
 - Once items have been highlighted, press the “Add Selected Items” button.
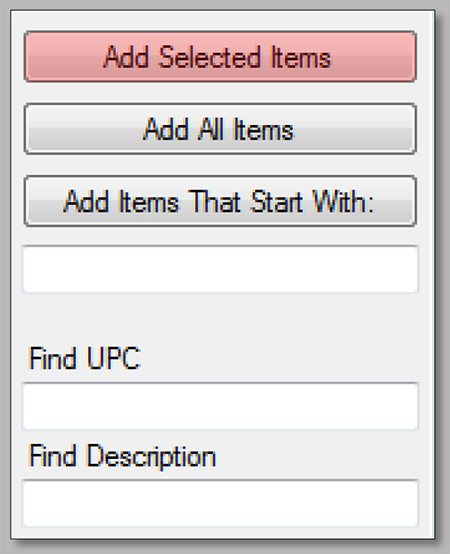 Add All Items – This will add all items contained in the filter list.Add Items That Start With – Type in a UPC or Description and items from the filter list fitting this will be added.Find UPC – Enter a UPC and the item will be located in the filter list.Find Description – Enter a description and items meeting this will be located in the filter list.
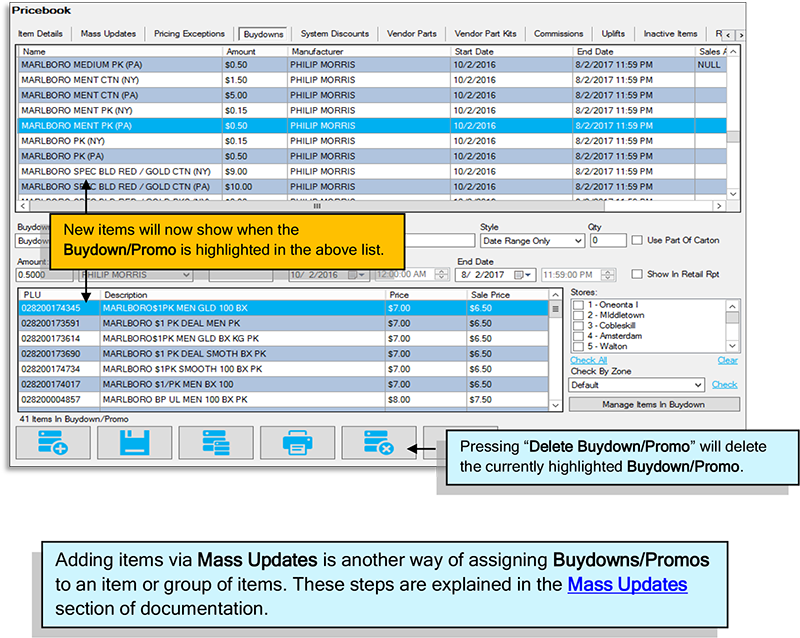
 - Added items will appear in the “Items In Selected Buydown” section.

- When all applicable items have been added, press the Close/X button located in the top right corner of the Add Items screen.
Overview of Carton Counts (Limiter)
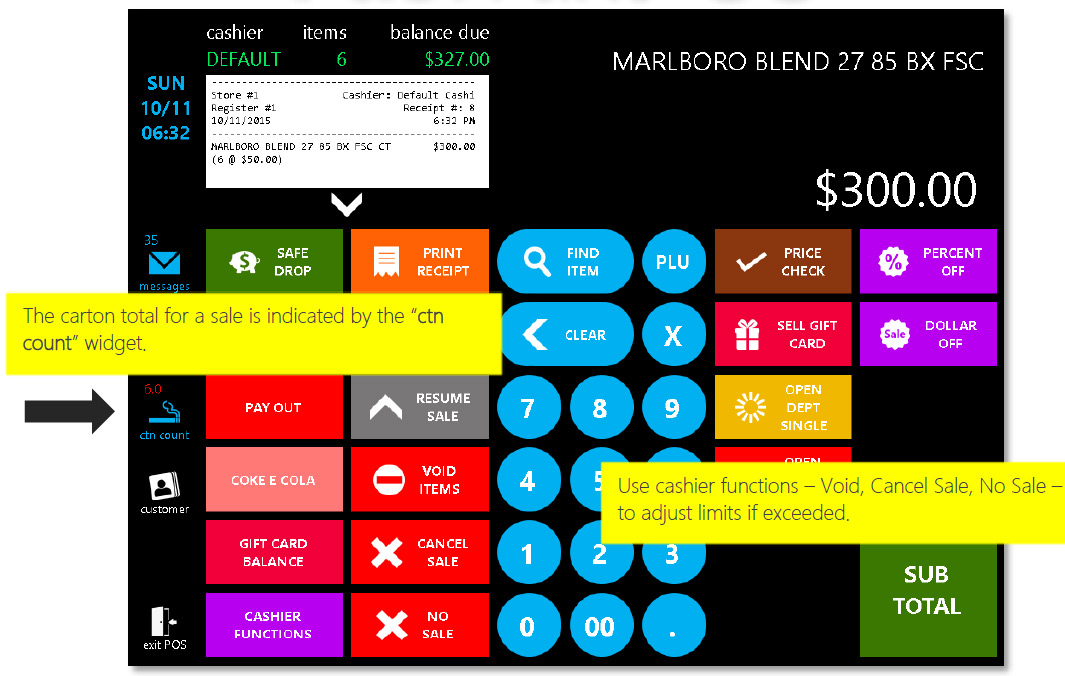
Depending on your location or contract agreement with manufacturers or vendors, you may be limited in the amount of cartons able to be sold on a single transaction.
Exceeding these limits may result in fines or loss of benefits per your purchase agreements.
For this, FasTraxPOS has built tools to assist you in alerting and controlling excessive sales.
Using the Carton Counts function can proactively alert your cashiers to possible contract violations.
Q: What does Carton Counts do?
A: Carton Counts is a way for you to control the amount of cartons sold on a single transaction per manufacturer/vendor contract agreements.
Q: What does this do to the database?
A: This creates a count limit based on a family of UPC prefixes. UPC prefixes are the leading 5-7 digits on a family of products’ UPC.
Q: Do I have to do this?
A: Limits are based on contract agreements you may have with manufacturers or vendors.
Q: On which machine(s) should this be performed?
A: Carton Counts (Limits) are entered via Director (corp or store) depending on enterprise setup, then sent to stores via the “Queue” module to take effect.
If you have questions about applicable machines, please contact FasTrax support.
Q: How do you access Carton Counts through the POS?
A: Carton Counts is edited through the Director. The POS will prompt you when limits are met or exceeded.
Q: Is this something FasTraxPOS Technical Support can assist me with?
A: Absolutely!
Q: In what order should this be performed?
A: Follow the steps below for the best results.
Carton Counts (Limiter) Setup
- After logging into Director, choose the“Maintenance” module, then the“Departments” option located along the top.

- This will open the “Departments” optionswindow.
Grouping items you wish to honor Carton Counts (Limiter) into specific departments will assist in future creation and maintenance of Carton Counts definitions.
- Highlight an existing department you wish tocheck for Carton Counts as shown below.
- Check the “Add To CTN Count” option.
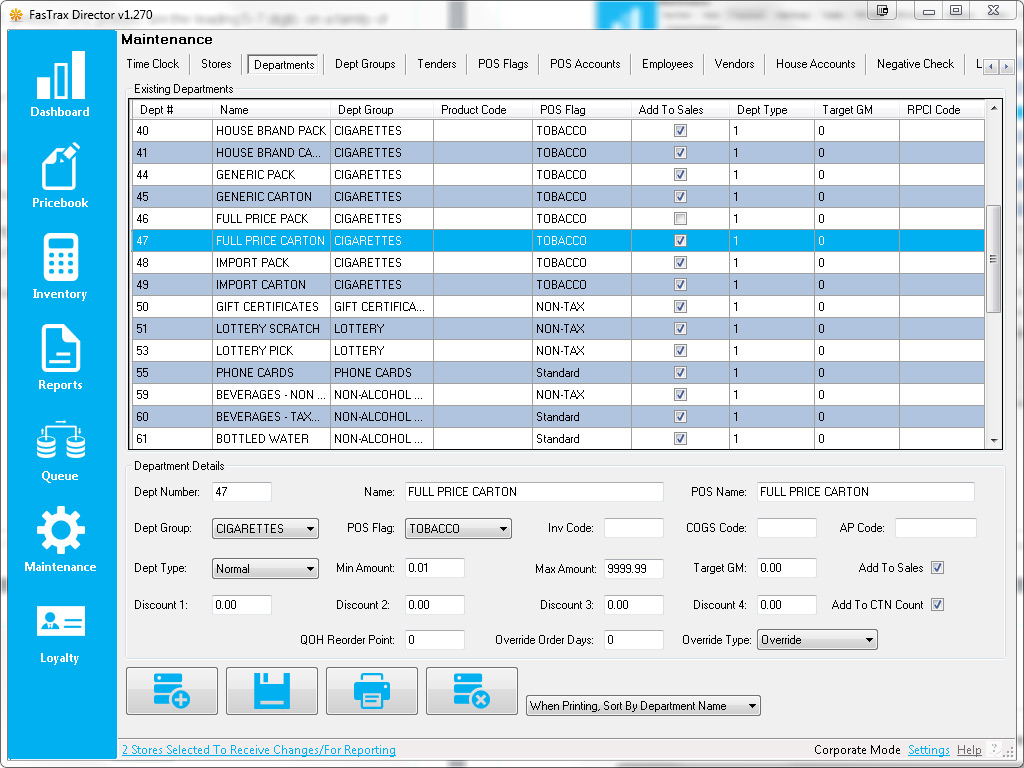 After choosing “Save” to apply changes, department changes will need to be sent to stores via the “Queue” module to take effect.
 - After checking and saving applicabledepartments, while in the “Maintenance”module, choose the “Carton Counts” optionlocated along the top.

- This will open the “Carton Counts” optionswindow.
Choose the “Add” button at the bottom tocreate a new definition, or highlight an existingdefinition to edit.
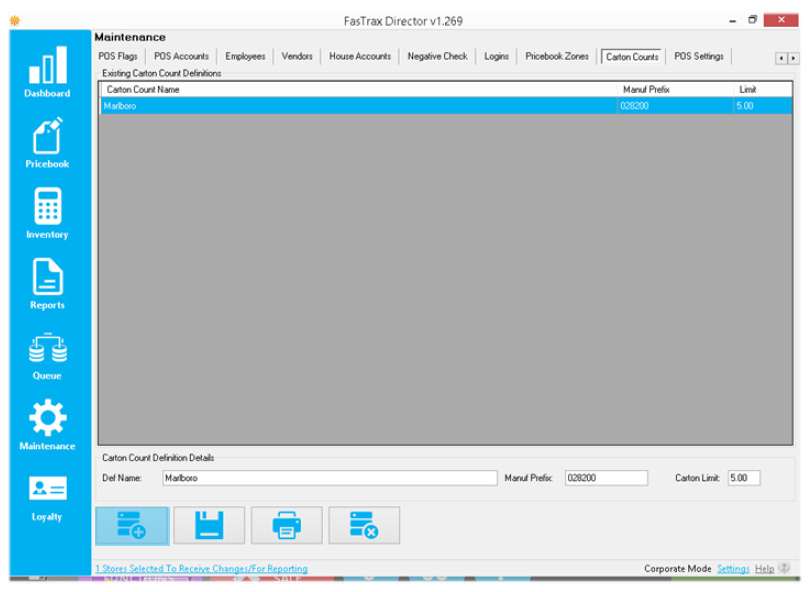
- Using the “Carton Count Definition Details”section, enter the data required for theapplicable manufacturer carton limit.
Marlboro product shown as example below
Def Name – This would usually reflect themanufacturer.

Manuf Prefix – The beginning portion of amanufacturer’s barcode, usually referred to asa family code. These are typically the first 5-7digits common to a manufacturer’s product.
Carton Limit – The numeric carton limit value.If carton to pack relationships are linked inyour Pricebook, packs entered will counttoward this limit.
- Choose the “Save” button when finished.
 Changes (both to Departments and Carton Counts) will need to be sent to stores via the “Queue” module to take effect.
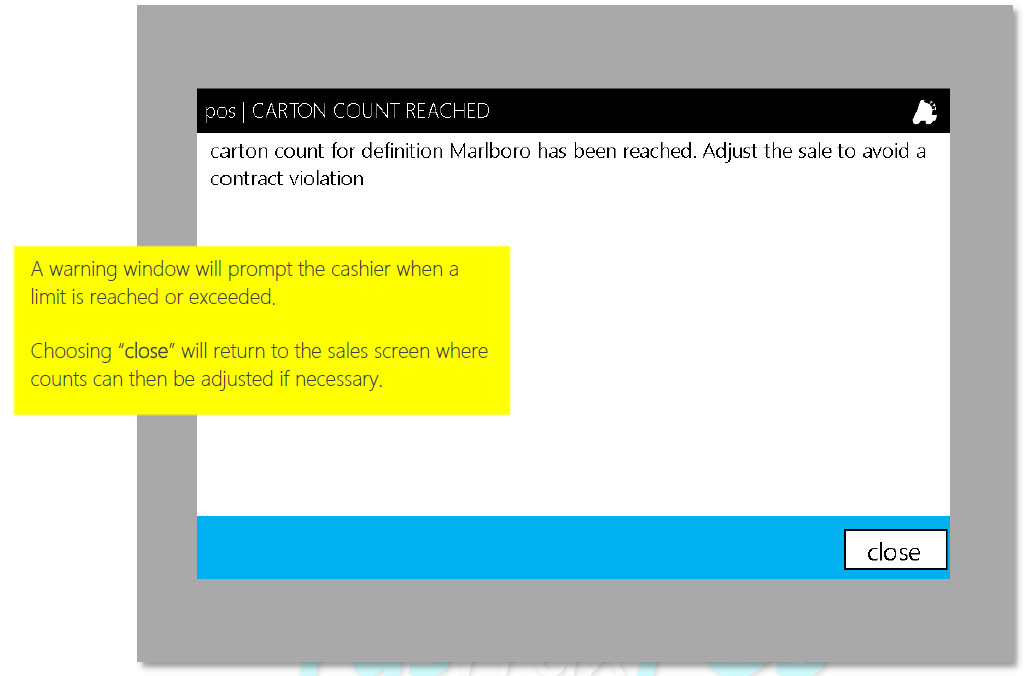
POS Interface | Carton Counts (Limiter)
Once sent to stores, Carton Counts (Limiter) will prompt cashiers when limits are met or exceeded.
Overview of Commissions
Commission Campaigns are a simple, fast, and intuitive way of adding a spiff to specific item(s) and keeping track of the payouts to employees that made the sale. Campaigns are reportable for payouts via the Sales section of the Director Reports module.
Campaigns have the option to be tracked at store level directly within the POS. Employees can see how much they have made during a specific time period on each campaign, as well as compare their rank to others both in the store and across the company via the Campaign Leaderboard.
This will surely ignite the competitive spirit of employees and lead to increased sales!
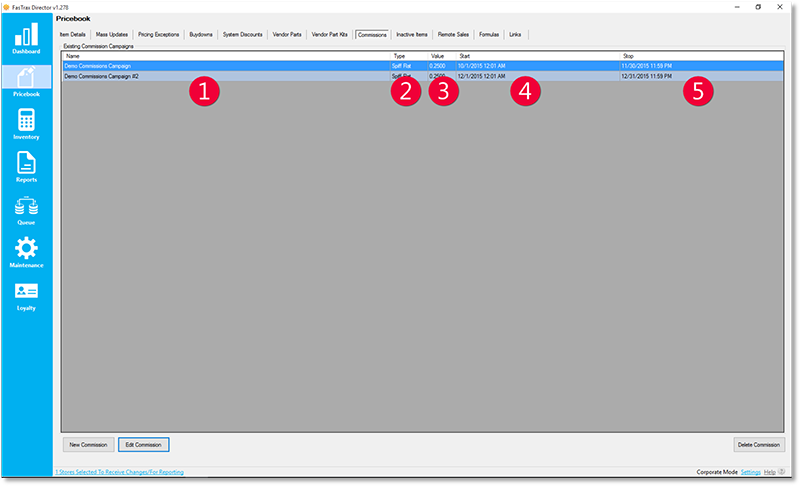
- Start – the start date of the commission campaign
- Type – the type of spiff
- Name – the name of the commission campaign
- Value – the value of the spiff per item sold
- Stop – the stop date of the commission campaign
Creating a Commission Campaign
- In Director, choose the Pricebook module.

- Then, choose the Commissions option from the menu ribbon.
This guide will illustrate the “Spiff Flat” method of Commissions. The value of commission per item will be $.50.
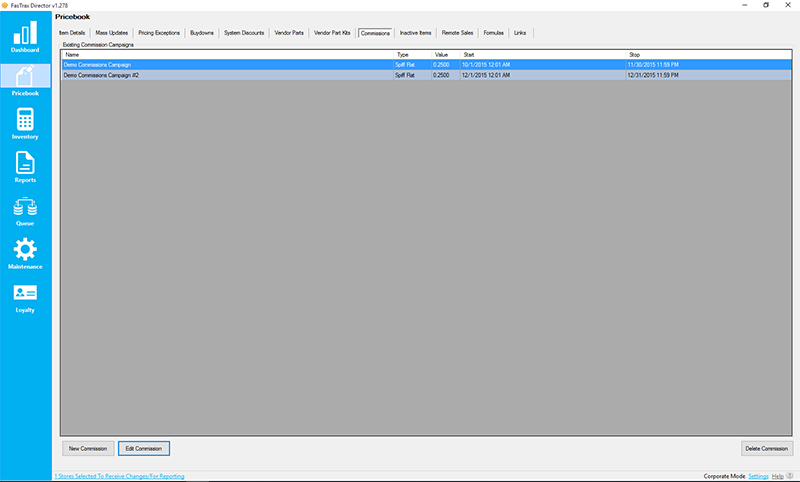
- Choose the Add button.
If you are editing an existing Commission Campaign,simply highlight the applicable line and edit in the details section.

- In the Discount Details section, enter the parameters you wish for this discount to follow.

- Campaign Name – name of the Commission Campaign that is currently being edited
- Start/Stop Date – signifies the starting date of the Commission Campaign
- Campaign Type – the type of campaign to be run
- Value – the spiff dollar amount to be paid to employee during the campaign
- Add/Remove Item – click add item to bring up the window to search and adds items; highlight an item in
- Cancel/Save – save or cancel the changes made in the current session5.
- Choose Save when complete

Apply Commission Campaign to Items via Item Details
- After logging into Director, choose the Pricebook module.

- Within Item Details, navigate to the applicable item.
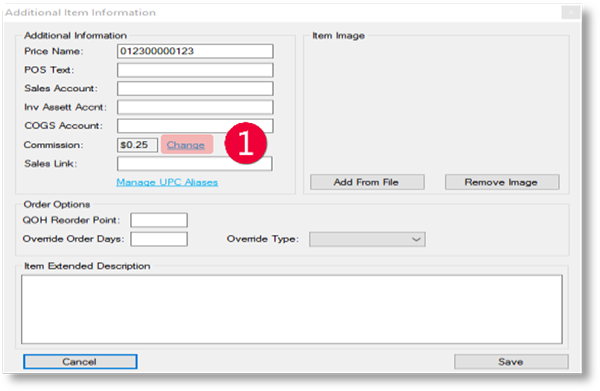
Choose the Additional Info link.
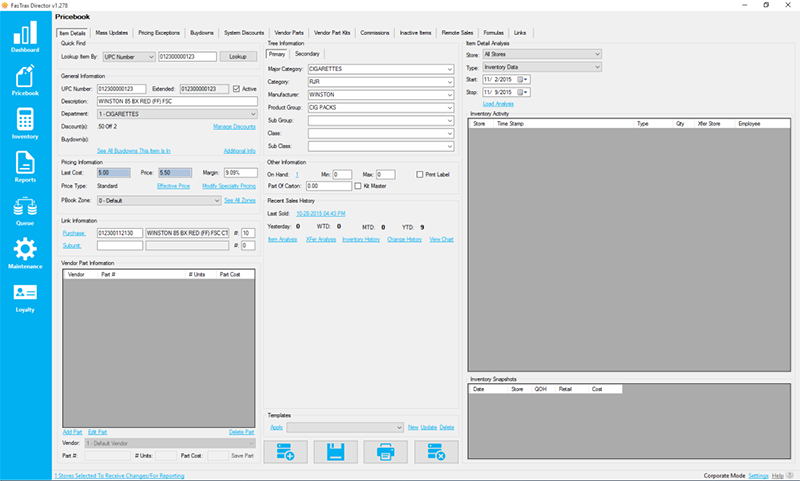
- This will open the Additional Info window.
- From this Additional Info window
- choose the Change hyperlink beside “Commission”
- select the applicable Commission Campaign from the
dropdown - choose “Assign to Campaign”
Items can also be removed from campaigns from this same window.
Choose the Remove From Campaign option when in the Item Commission window then Close.
Choose Save to apply changes to items.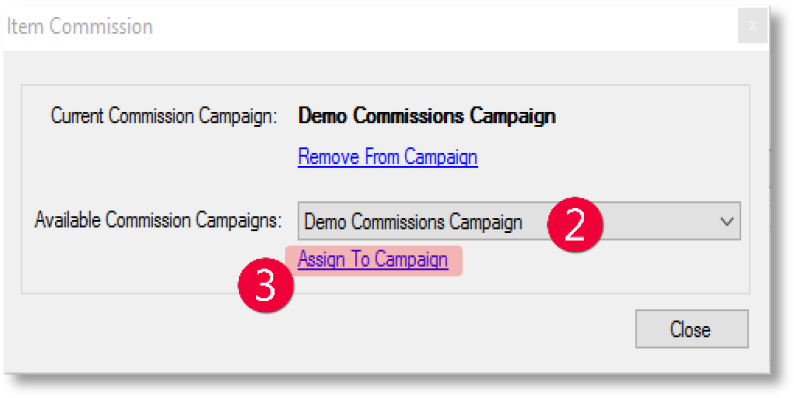
- choose the Change hyperlink beside “Commission”
- Choose Close and Save to save all changes

Apply Commission Campaign to Items via Mass Updates
- After logging into Director, choose the Pricebook module then Mass Updates from the menu ribbon.
- Within Mass Updates, filter to the applicable item(s) and choose the Utilities tab from the bottom ribbon.
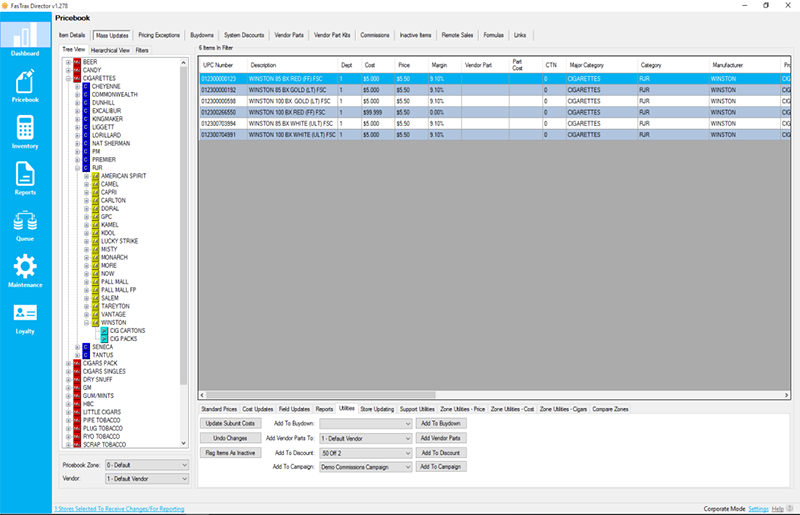
- From the Utilities tab
- choose the applicable campaign from the dropdown menu

- choose Add To Campaign.
When using Mass Updates, take care to ensure you have filtered to intended items.If you do accidently apply to unintended items, items can be managed by returning to the Commissions section, choose the Edit Commission link, and remove applicable items.
- choose the applicable campaign from the dropdown menu
Required Settings for the POS
- After logging into the POS:
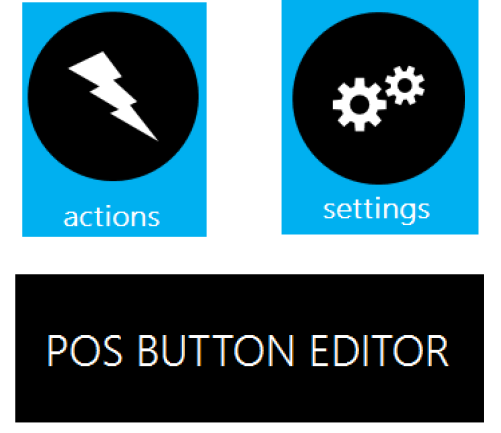
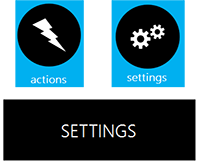
- choose the actions icon
- choose the settings icon
- choose the POS BUTTON EDITOR button
- Choose the applicable panel where the buttons will be placed and
choose EDIT, then choose a blank button on where you’d like the
button to be and choose Edit Button.
- Use the highlighted button types and parameters; non highlighted parameters are by preference
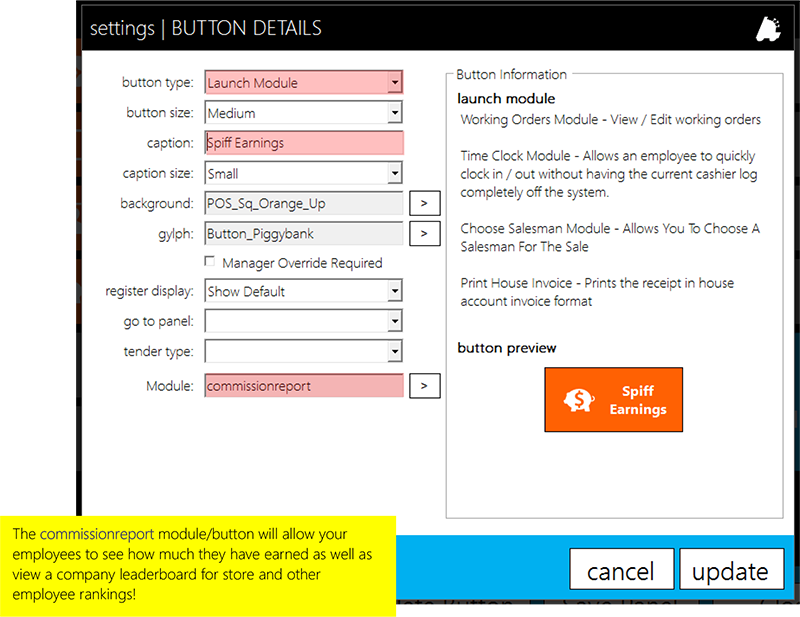
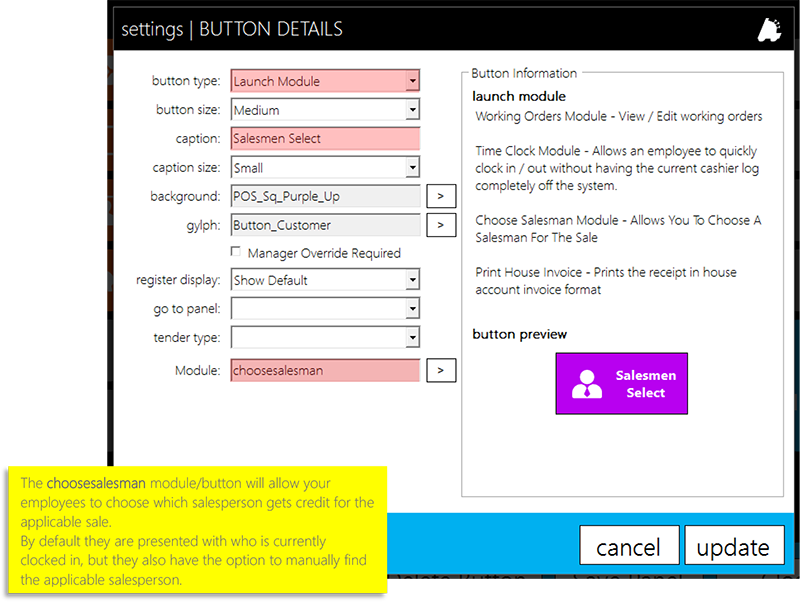
- Choose Update to save the button parameters then Save Panel to save the changes made to the panel.
- Next, open POS Settings by choosing actions, then settings, and finally the SETTINGS button.
- Finally, navigate to the Misc Register Settings tab and choose the checkbox Prompt For Salesman.
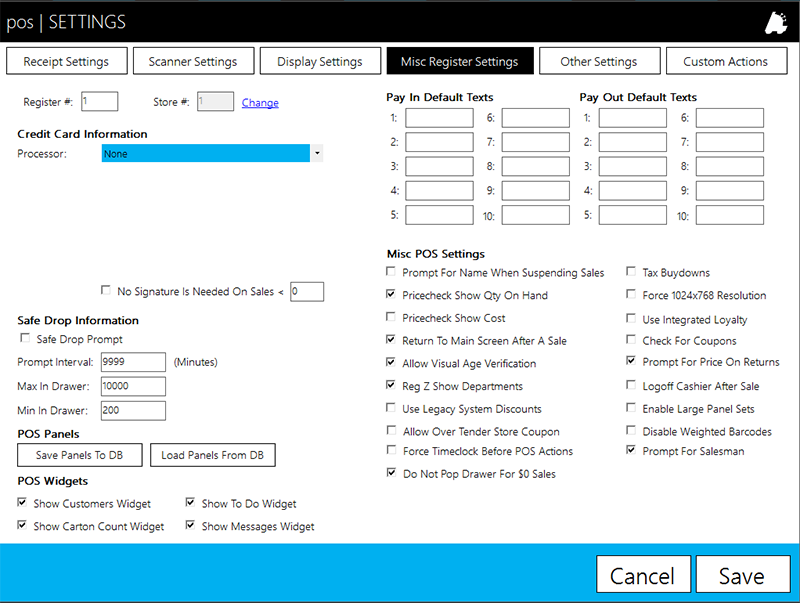
- Choose Save and the POS will close to save the changes made.

Overview of House Accounts
House Accounts are a simple and intuitive way of tracking customer sales, with options of giving them department level discounts, cost plus pricing discounts, an in-store charge tab, or pre-programmed tax exemption options.
House accounts have the option of charging sales to a tab and then paying towards their owed balance over time. All of this data is easily reported on from within Director.
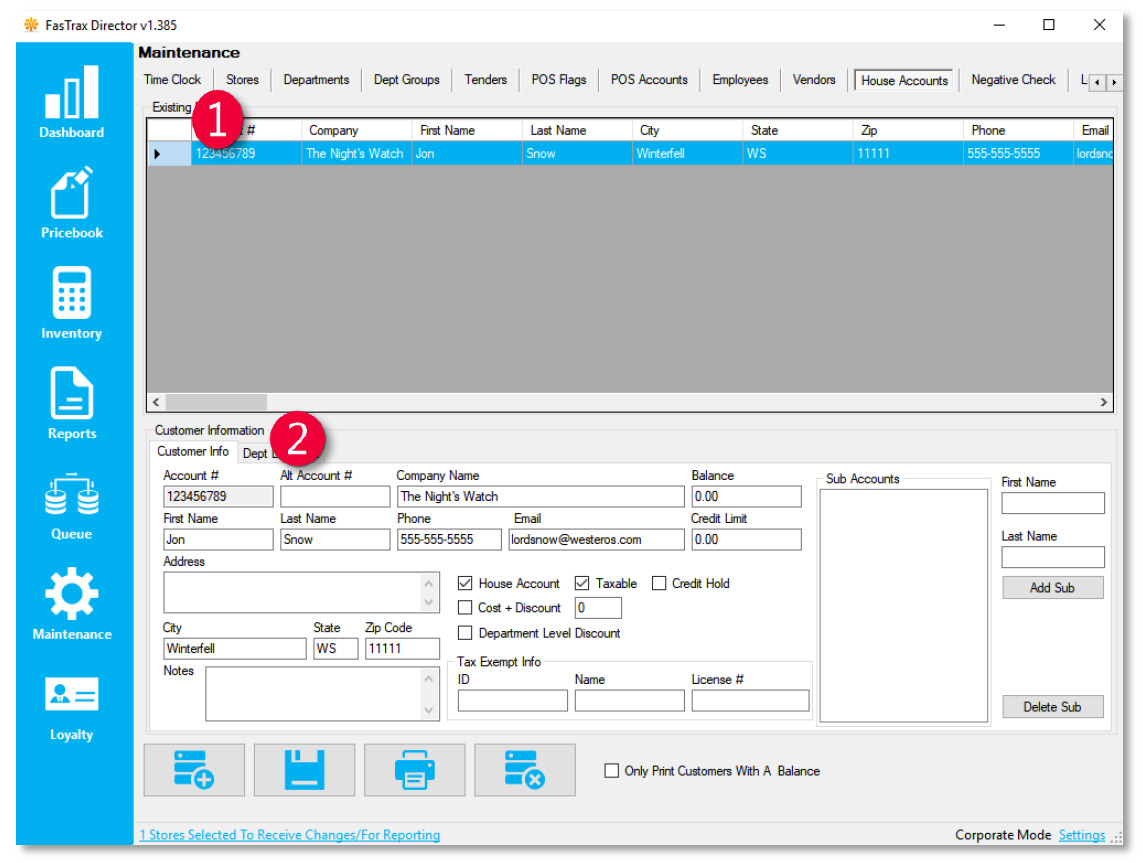
- Existing Customers – A listing of all customers that have been previously entered
- Customer Information – Fields that are editable when entering or editing customers
Creating a House Account
- After logging into Director, choose the Maintenance module.

- Within Maintenance, choose the House Accounts tab
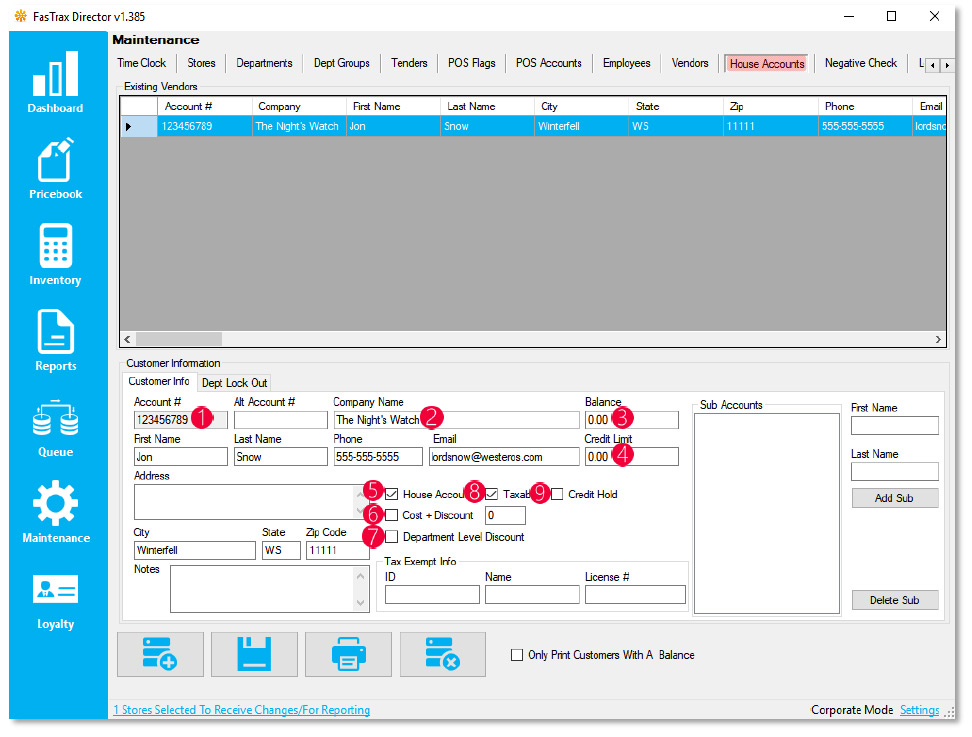
- Account Number – The numerical house account number
- Company Name – The house account / company name
- Balance – The current balance owed by the selected house account
- Credit Limit – The max credit limit allowed for the selected house account
- Designates the house account
- Cost + Discount pricing
- Department level discount designation
- Taxable or non-taxable designation
- Designates house account charge hold
POS Button Creation
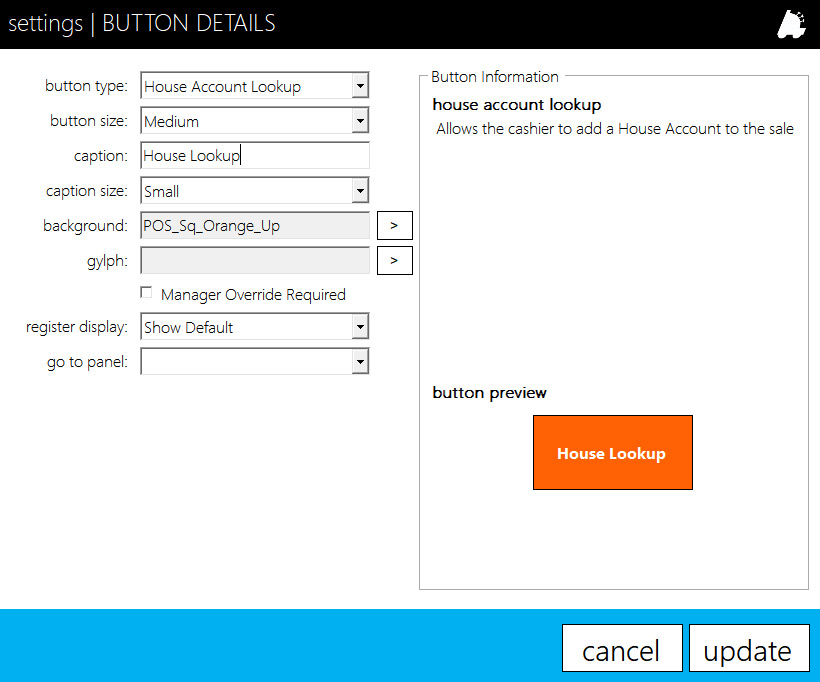
- After logging into the POS and going to the panel editor, create a button with the following parameters for the house lookup, which is used to add a house account to the sale
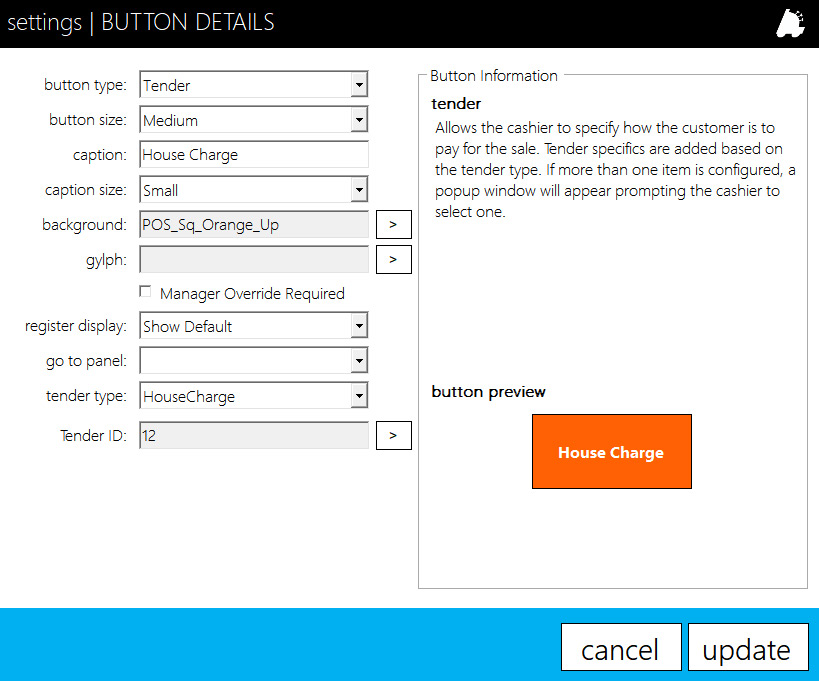
- If utilizing house charges, create a button with the following parameters on the subtotal panel
- If utilized house charges, house payments allows the account to pay towards their charged balance. Create a button with the following parameters.
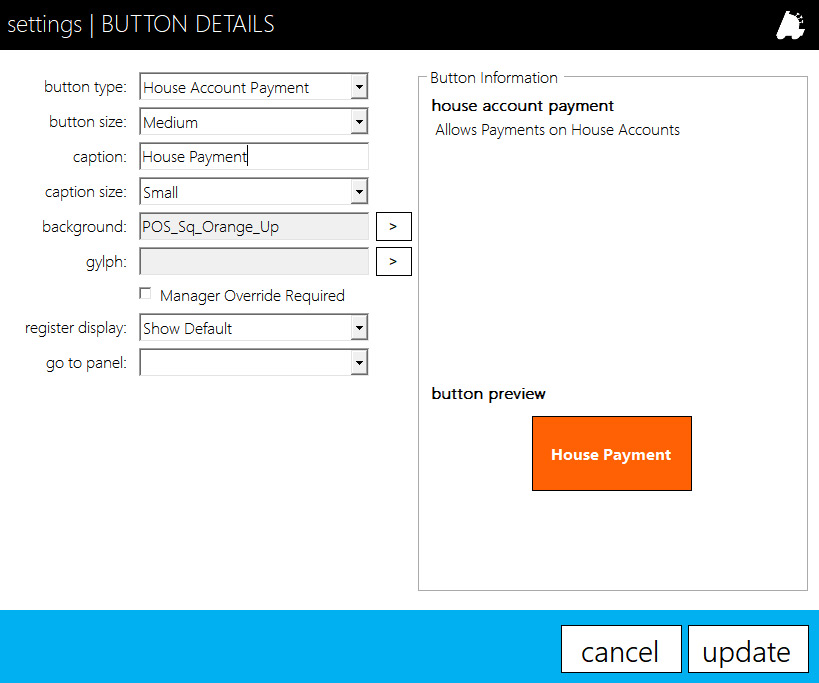 Remember that a house charge is effectively a tab that allows house accounts to charge to and pay back at a later date.
Reporting On House Accounts
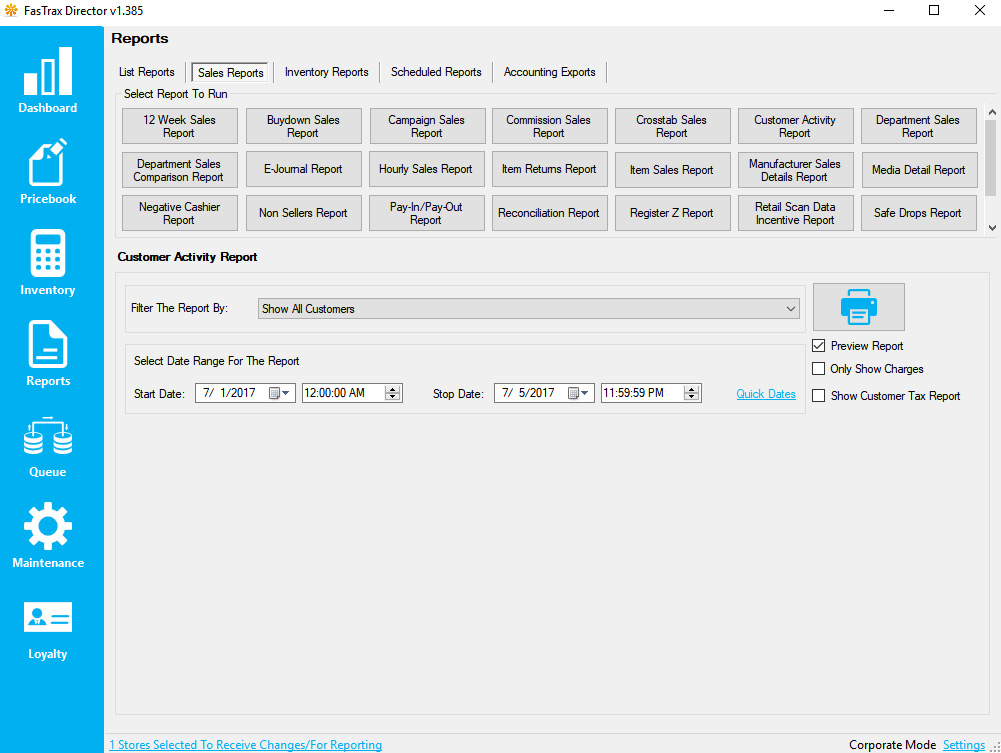
- All activity from house accounts, sales, charges, and payments, can be seen via reporting from within Director reports
POS Reconciliation Guide
Overview of Reconciliation
Reconciliation is the process of closing out a shift and recording the physical amount of tenders on hand against the tender amounts recorded by the system. This allows for tracking of any discrepancies between system totals and on hand tenders.
Reconciliation takes place in two phases. First is the Shift Reconciliation, performed by each cashier at the close of their shift. Second is the Daily Reconciliation, performed by the Manager at the end of the day (or beginning of the next day). This guide will cover both Shift and Daily Reconciliation.
Shift Reconciliation
- Before performing a shift reconciliation, the Register Z button must be pressed in POS.

- This will result in a register Z tape printing from the receipt printer, and will put you back on the POS Home Screen. Tap Actions to continue.
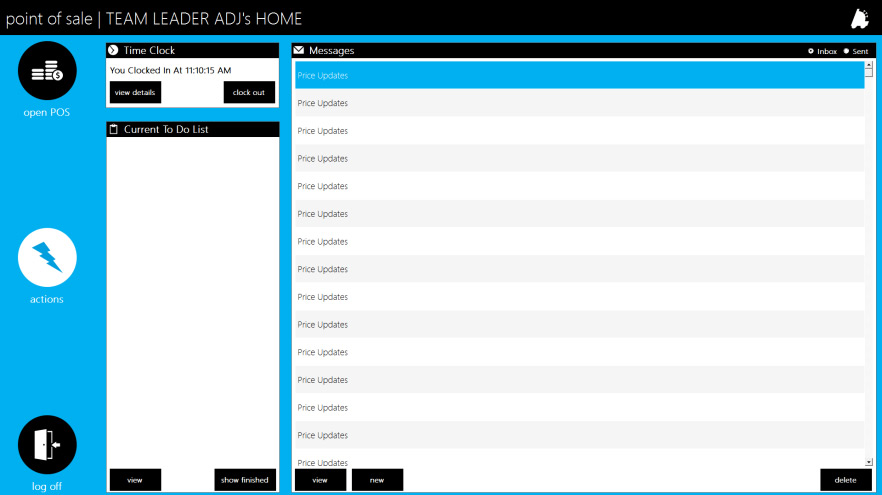
- Tap Reconciliation

- Tap Shift Reconciliation

- From the recon | SHIFT RECONCILIATION screen, tap the Z # you wish to reconcile, and then tap the Select button at the bottom right.
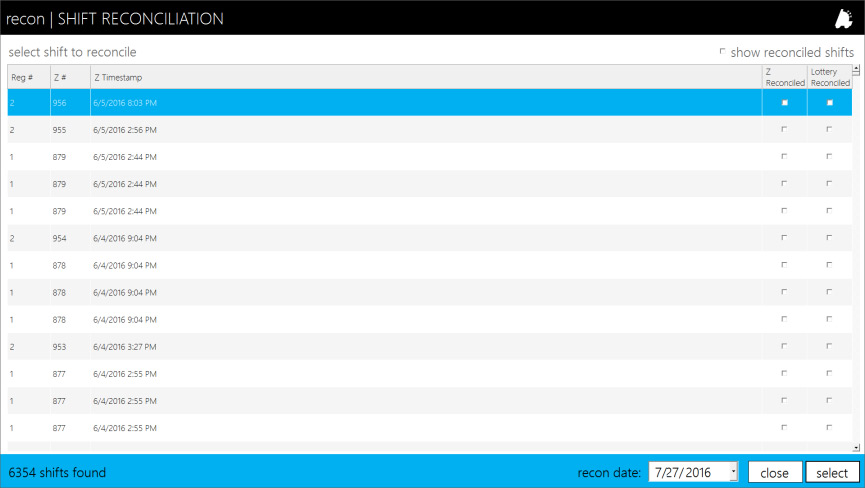
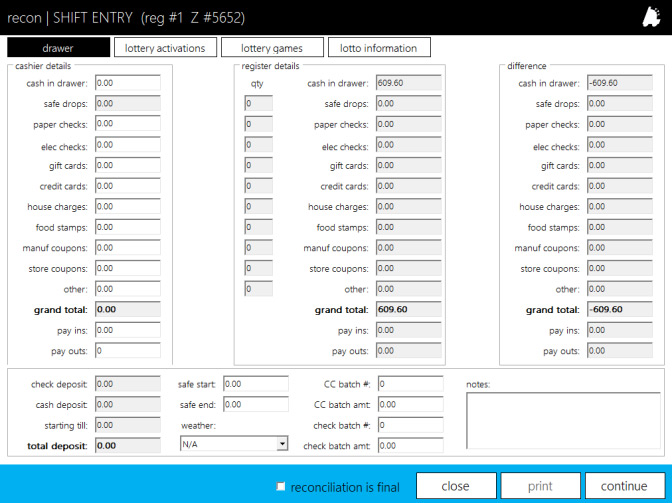
- Next, on the recon | SHIFT ENTRY screen, enter the amount of each tender found in the cash drawer.
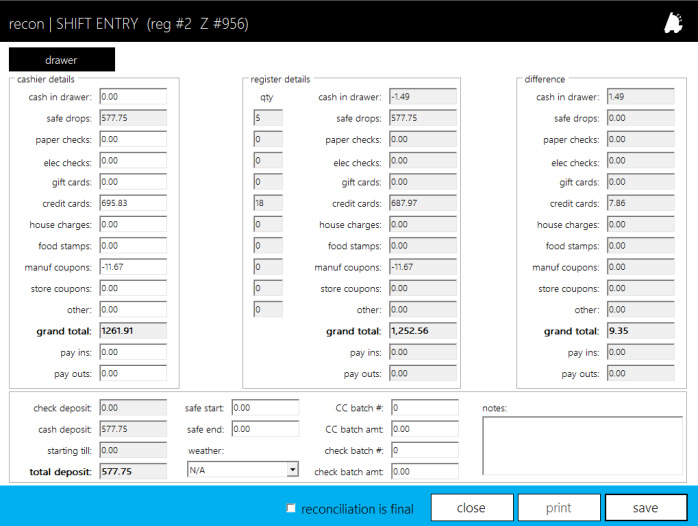 If your POS has the Shift Recons Are Blind option set, both the Register Details and Difference sections will be blank.
 - Fill out any remaining applicable information for Safe Start and Safe End totals as well as CC and Check Batch information at the bottom of the window (if applicable).
- Once finished, check the box for reconciliation is final.
 If you are doing Lottery Recon next, then you will not need to check this box, or tap Save. Instead, you will tap Continue to start the lottery portion of the reconciliation
 - Tap Save, and you will be asked to confirm.
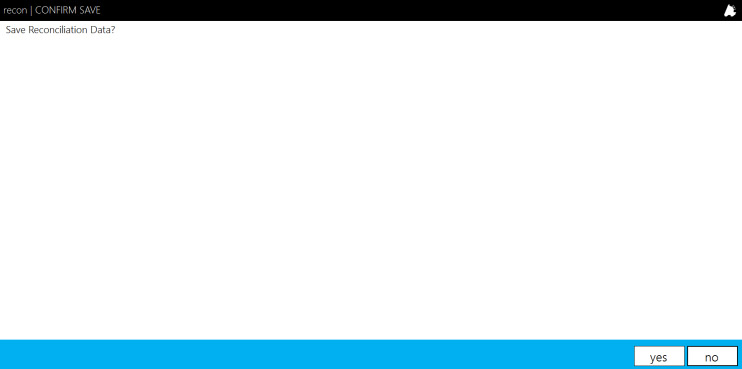
- Tap Yes, then OK, and your Shift Reconciliation is completed.
Lottery Reconciliation
- If your POS has the Shift Recon Force Lottery option set, then your Shift Entry page in POS will have three more tabs for lottery reconciliation; tapping Continue will start your Lottery reconciliation on the Lottery Activations Tab.
To enable lottery recon, from your POS Home Screen, go to Actions > Settings > Settings > Recon Settings, and check the Shift Recon Force Lottery Box.If more than one register Z is performed daily, you will also need to check Lottery Uses Multiple Z’s
- On the Lottery Activations tab, select a book from the dropdown menu to activate, and enter the serial number from the back of the book, then click Activate Book. Repeat for all books that have been activated today
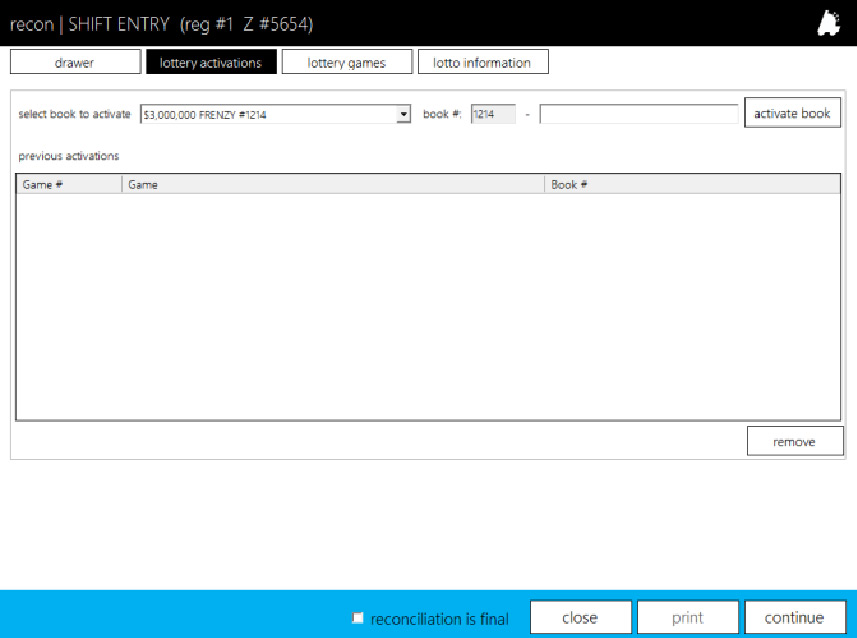 Note that this does not remove the need to scan the book to activate it on the lottery machine. It is only a way to keep track of what has been activated on that machine.
 - Once finished with lottery activations, click Continue to move on to the Lottery Games section.

- On the Lottery Games tab, enter the starting and ending numbers of all your scratch-off games for the day. Note that the starting numbers are filled automatically from the previous day’s reconciliation (if one exists).
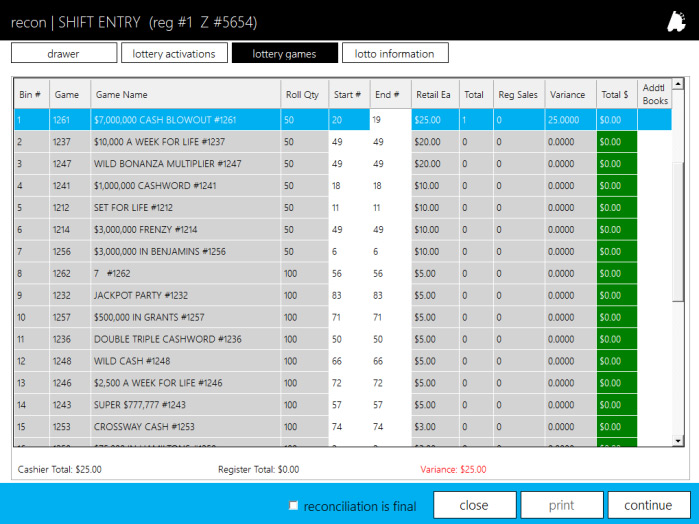 If necessary, verify that your Sort Direction for the scratch-off tickets is set correctly. To do so, from your POS Home screen, go to Actions > Settings > Settings > Recon Settings. From here you can set your sort direction to count up (Ascending) or down (Descending).
 - Once all games have their start/end numbers entered correctly, click Continue to proceed to the Lotto Information tab.

- On the Lotto Information tab, enter dollar amounts and quantities in their appropriate fields. This information can all be found on the report printed from your lotto machine at the end of the day.
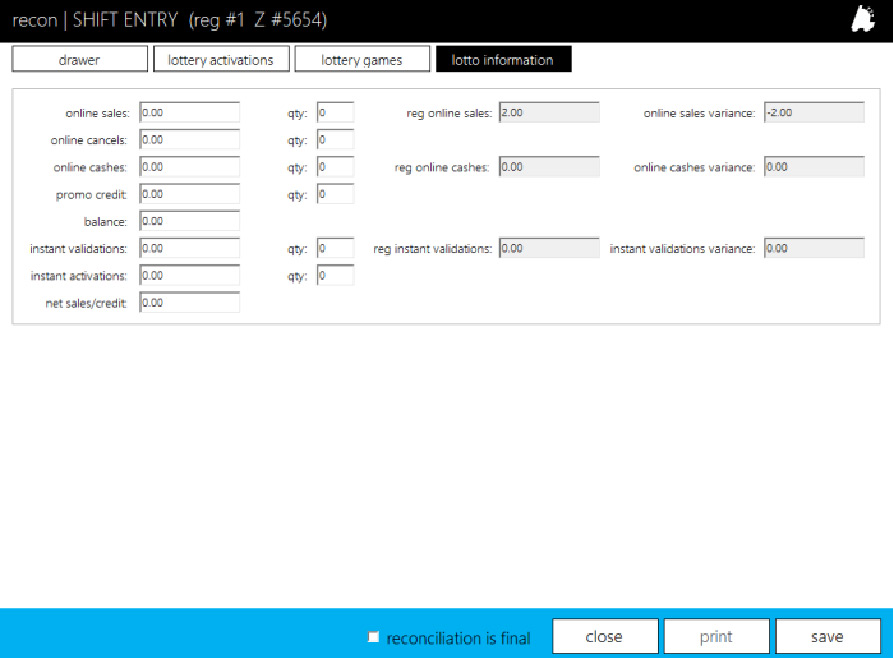
- Verify all information is correct, then check the Reconciliation is Final box, and tap Save to finish your reconciliation.

Daily Reconciliation
- From the Home screen, tap Actions.
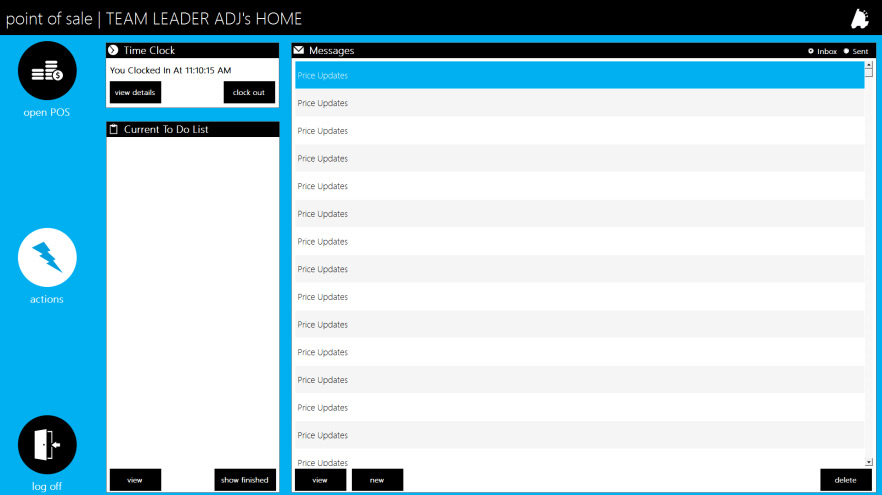
- Tap Reconciliation.

- Tap Add Daily Reconciliation.

- Verify that the correct register Z’s are selected and tap Continue.
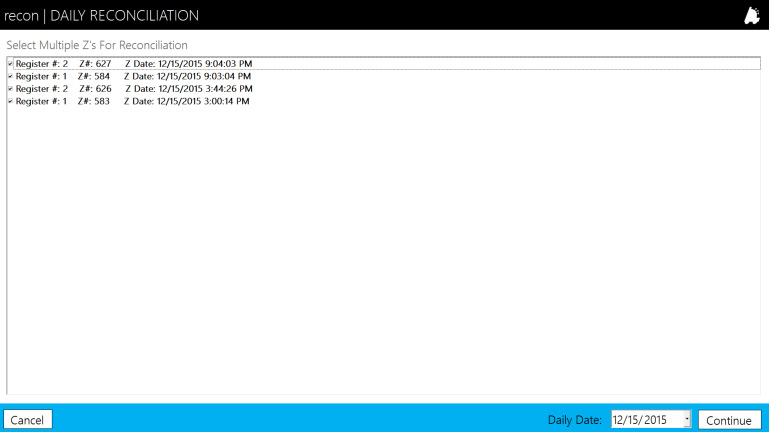
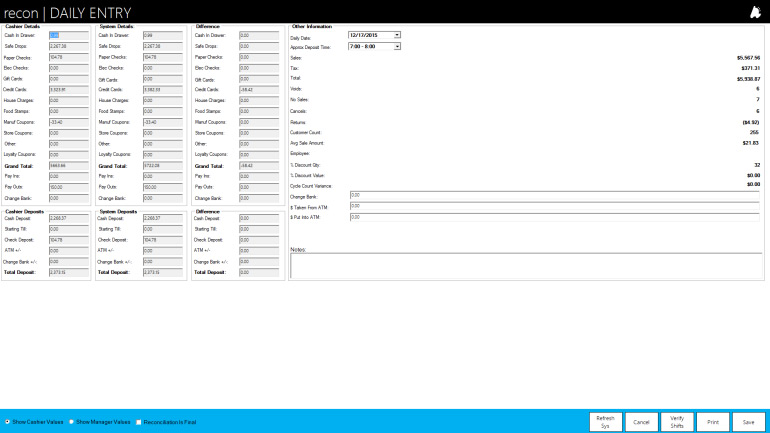
- The recon | Daily Entry screen shows the totals entered by the cashier on their Shift Reconciliations. Tap Verify Shifts to add manager totals for each shift.
- On the recon | Shift Reconciliation screen, tap one of the shifts to verify; then tap Verify Shift. This will populate the Shift Amounts with the cashier totals
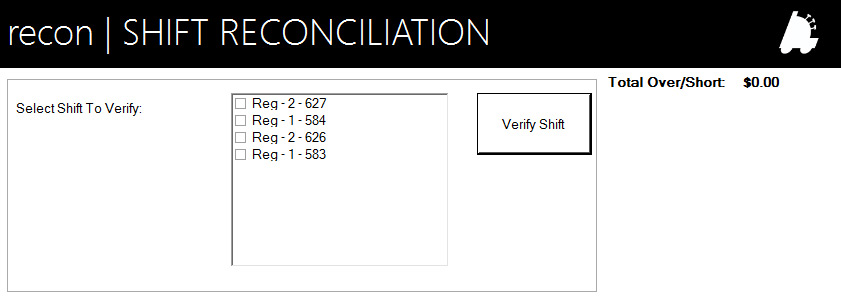
- Fill in the Verified Amounts column with the total tenders from the shift you have selected. Once finished, tap Save.
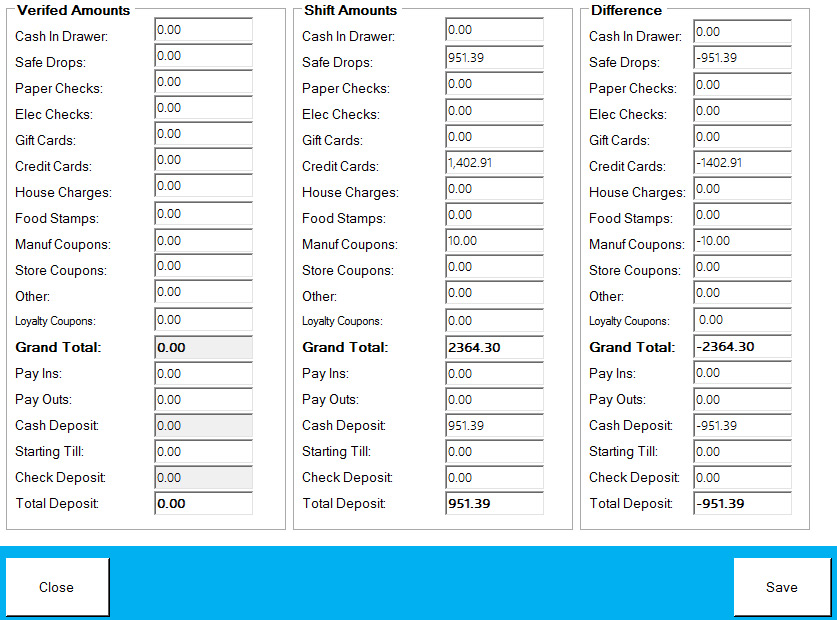
- Repeat steps 6 and 7 until all shifts are verified.
- Once all shifts are verified, tap Close to return to the recon | Daily Entry screen. Add values for Change Bank, as well as money Taken from ATM and money Put into ATM if applicable.
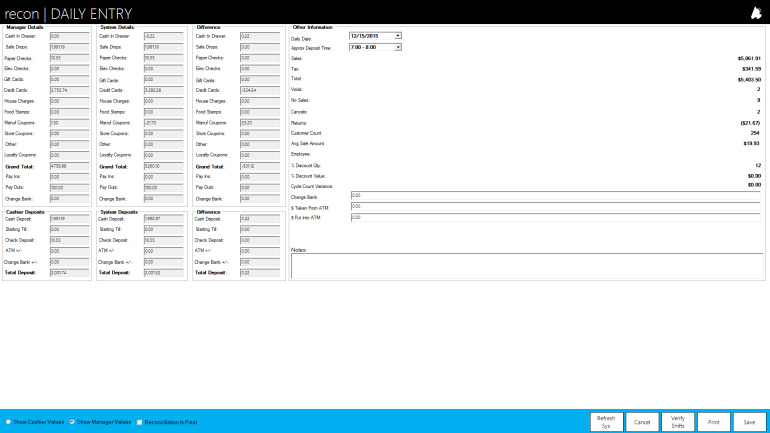
- Once all values are entered and verified, tap the Reconciliation is Final box, then tap Save.

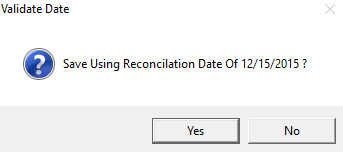
- You will be asked to validate the Reconciliation Date, and then asked if you want to save the Reconciliation Data. Tap Yes for both questions, and your daily reconciliation is completed.
Gift Card Setup and Configuration
Requires
POS w567 (and newer)
GiftCardLoader.exe
TenderProcessor webservice folder
TenderProcessorDatabaseCreation.SQL script
- Create “Gift Card” department and tender via FasTrax Director->Maintenance
- Gift Card department number is not specific; any number is acceptable
- Confirm if department is taxable
- Gift Card tender ID should be 710
- Gift Card department number is not specific; any number is acceptable
- Create “TenderProcessor” Database
- Open SQL Management Studio
- Log in as “SA”
- Password “Password0&”
- Right-click “Databases” under the “Object Explorer” and choose “New Database”
- Enter “TenderProcessor” as the Database name; choose “OK”
- Under “Object Explorer”, open “Security” then “Logins”
- Double-click “Fastrax” and choose “User Mapping” from the Login Properties – Fastrax window
- Check “TenderProcessor”, then check “db_owner” from the Database role membership window
- Choose “OK”
- Choose “New Query”; located above Object Explorer
- From the available databases dropdown, choose “TenderProcessor”
- Choose “File”, then “Open”, then “File”
- Navigate to the location you have placed the “TenderProcessorDatabaseCreation.sql” script
- Choose “Open”
- Once the query screen is populated with the script, choose “Execute”
- Set up and configure the TendorProcessor webservice
-If this is a multi-store/Corporate setup, TenderProcessor webservice only needs to be added on thecorporate server.-If this is a single store setup, TenderProcessor webservice will need to be setup on the main SQLmachine.TenderProcessor contains:App_Data folder (empty)bin folderTenderProcessor.asmxWeb.config- Copy the TendorProcessor folder to inetpub ->wwwroot
- Configure the “TenderProcessorConnectionString” information in the Web.config
- Match the Data Source, ID & Password with the Web.config in FTCorpWebservice directory
- Open IIS Manager and “Right Click” on the TenderProcessor folder and choose convert to application
- Confirm the assigned Application Pool is set to enable 32 bit applications.
- If necessary, create a new pool for the TenderProcessor; choose to enable 32 bit applications
- Via the Command Window, reset IIS
- Choose the Windows “Start” button
- Type “cmd” in the “Run” box (could be “Search programs and files”); press “Enter”
- In the black command box, type “iisreset”;press “Enter”
- IIS will reset
- Once IIS is reset
- Move the “GiftCardLoader.exe” to C:/FasTrax/POS, if not already present
- Setting up TenderProcessor on POS
- Add/Edit the following settings in POS.ini
[GiftCardProcessor]
Host=localhost – IP of machine running TenderProcessor
HostPort=80 -port of machine running TenderProcessor
HostUsesSSL=false -use of SSL on the of machine running TenderProcessor
ForceGCSwipe=false – used by POS forces cashier to swipe the gift cards-If this is a multi-store/Corporate setup, “Host” is the Public IP of the corporate server.-If this is a single store setup, “Host” should be either “localhost” or the Local IP of the main DB machine - Add the following buttons to the POS
- Ensure POS is version 567 or higher
- GiftCard Balance button from the Misc Tab; used to get Gift Card Balance
- Prog Dept Button and set the Department Number to the newly created Gift Carddepartment. Set the “ISGIFTCARD” value to “True”
- GiftCard Tender button from the Tenders Tab and set the GiftCardTendID to 710 – New tender is created in step 1 of this doc; 710 is suggested ID
- Add/Edit the following settings in POS.ini
Director Settings
Even though Gift Cards can be sold, redeemed and checked via the POS, to fully utilize Gift Cards, customers will
want the ability to track and view their Gift Cards in a more efficient manner.
FasTrax Director offers an interface that enables customers to fully view and track transactions sold on Gift Cards via
a couple of simple settings.
Even though these settings are not necessary for Gift Cards to be sold and function, this feature is required to
complete the module.
- Set Director Settings to Enable Gift Cards
- Once logged into FasTrax Director, click the “settings” hyper link at the bottom right of the window.
- From this new window, click “Show Gift Cards Tab”.
- This will enable the Gift Cards Director interface where cards, balances and transactions can
be checked. - This section is found under the “Maintenance” module.
- This will enable the Gift Cards Director interface where cards, balances and transactions can
- This can also be enabled by adding “ShowGiftCards=1” to the FasTraxDirectorSettings.ini under
[Settings]
- Create/Set FasTraxGiftCards.UDL
- This should already be located in the “Installer Files” folder.
- Move from the “Installer Files” folder to C:/FasTrax
- Configure to point to the “TenderProcessor” database.
If the FasTraxGiftCards.UDL is not located in the “Installer Files” folder, or on the machine – -
COPY an existing .UDL (e.g. FasTraxSQL.UDL)located in C:/FasTrax/
-
Rename to “FasTraxGiftCards.UDL”
-
Place new FasTraxGiftCards.UDL in C:/FasTrax/
-
Configure to point to “TenderProcessor” database
- This should already be located in the “Installer Files” folder.
Cashier Gift Card Functions
Sale of a Gift Card
- Enter the intended dollar amount of Gift Card and choose the Gift Card Sale button
- This is the newly created Prog Dept Button
- Choose SubTotal and tender with the correct payment type.
- Now the POS will prompt the cashier to swipe or enter the Gift Card Number.
- Cashier can manually input Gift Card Number via on screen keypad.
- A local MSR/Card Scanner is necessary to load gift cards via swipe.
Mercury pin pads and external card swipes are not compatible.
- Once the Gift Card information has been filled out correctly, press the “Submit” button.
- Sale will complete and print the Gift Card Number with the Card Balance on the receipt.
Redeem Gift Card
- Cashier enters items for sale.
- Cashier chooses SubTotal when ready to tender sale.
- Choose the Gift Card Redeem/Tender button.
- This is the newly created GiftCard Tenders button.
- POS will prompt for the Gift Card Number at which point the cashier will swipe or enter the Gift Card Number
- Cashier can manually input Gift Card Number via on screen keypad.
- A local MSR/Card Scanner is necessary to load gift cards via swipe.
Mercury pin pads and external card swipes are not compatible.
- Once the Gift Card information is entered, press the “Submit” button
- This will cash out the sale and deduct the balance from the card via the database.
Partial Tenders
Gift Cards can be partially tendered.
However, if you “Cancel Sale” the POS will prompt you to refund the already tendered amount to the card.
This is handled like a normal refund, only when the “Gift Card Sale” button is chosen, you will have to enter the card
number or swipe the card when tendering to credit the refund.
Overview of Managing POS Settings from Corporate
Managing POS Settings via corporate is a quick and simple way to make on the fly setting changes that directly affect the store’s POS operations.
Settings are first pulled back from the store so you can view what is currently set.
If specific changes are required, changes can be made and sent instantaneously to the store!
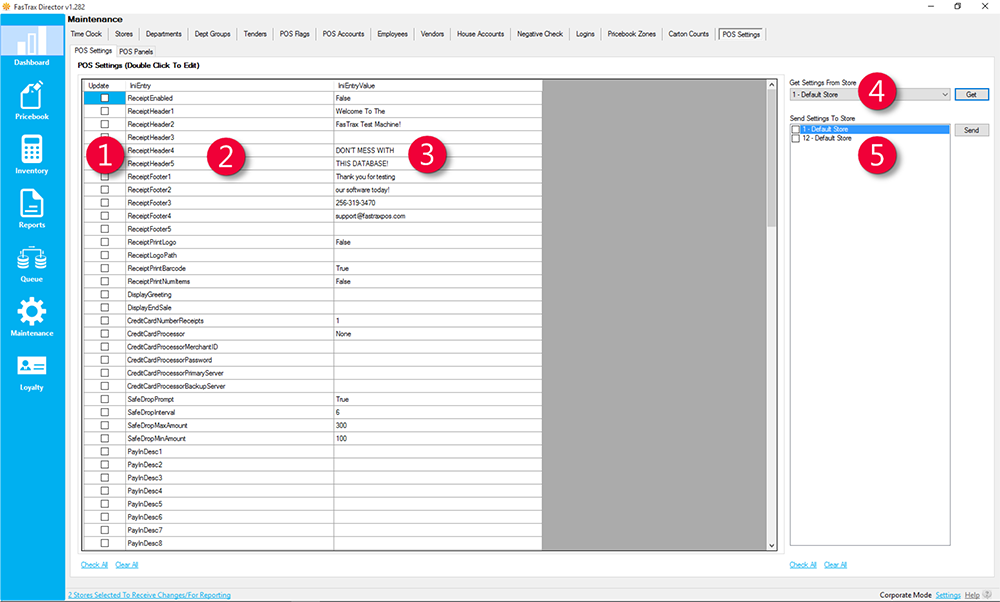
- Update – checkbox that signifies if a setting value has changed
- IniEntry – the setting name
- IniEntryValue – the setting value
- Get Settings From Store – choose which store to pull settings from
- Send Settings To Store – choose which store(s) to send settings
Changing POS Settings from Corporate
- After logging into Director, choose the Maintenance module.

- Within Maintenance choose the POS Settings tab
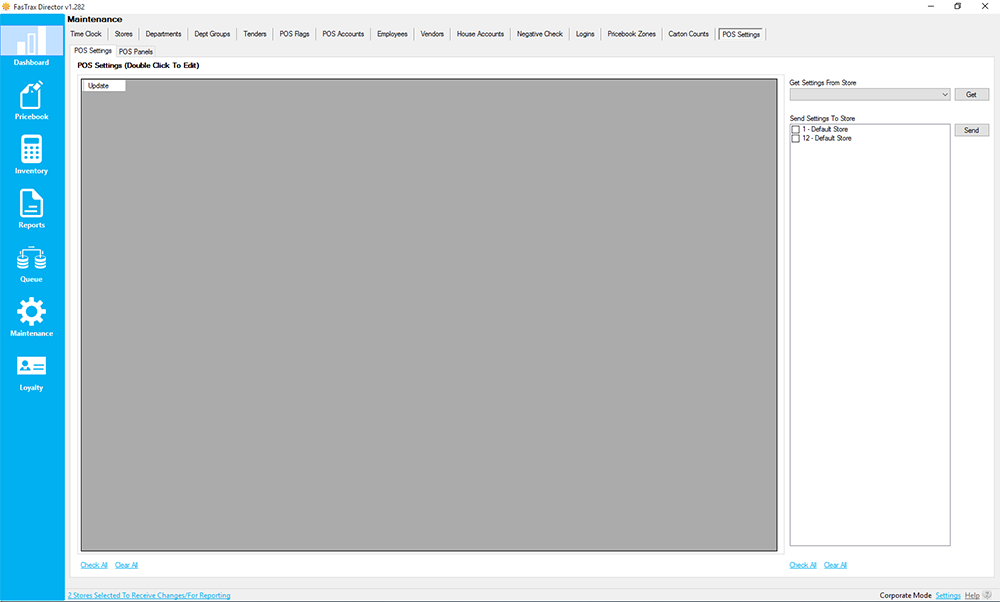
- Choose the applicable store settings you wish to pull from the Get Settings From Store dropdown and choose Get

This pulls the POS Settings that are currently running at the selected store.If a communications error is received, it could be related to a firewall or IP address change. Contact support for assistance. - After retrieving the applicable store’s settings, the POS Settings grid is now populated with editable fields.
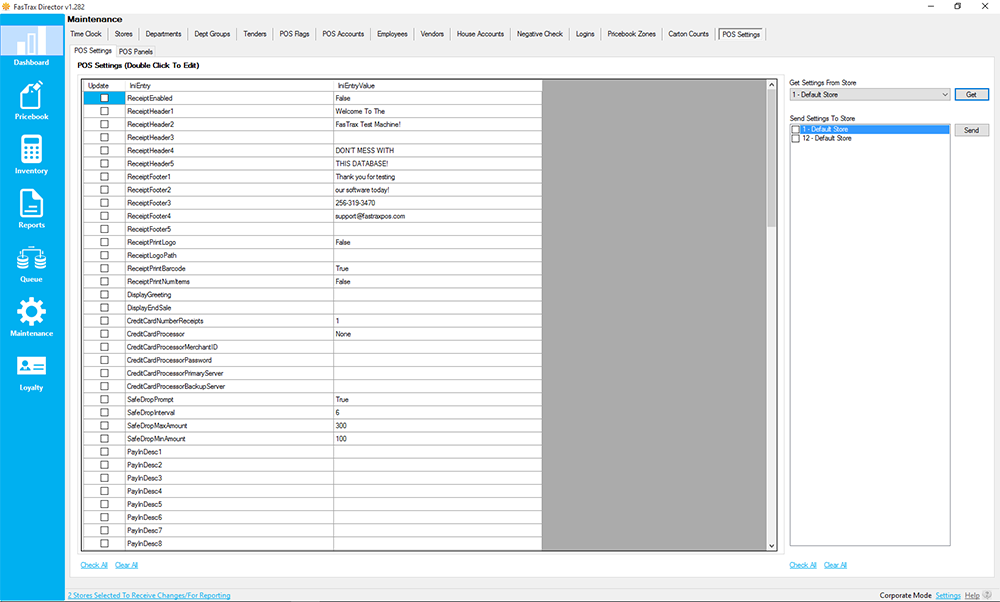
- Double click in the appropriate IniEntryValue field you wish to make changes.

- Enter new Value: in the POS Settings Details window.
- Choose Save when complete.

Sending POS Settings
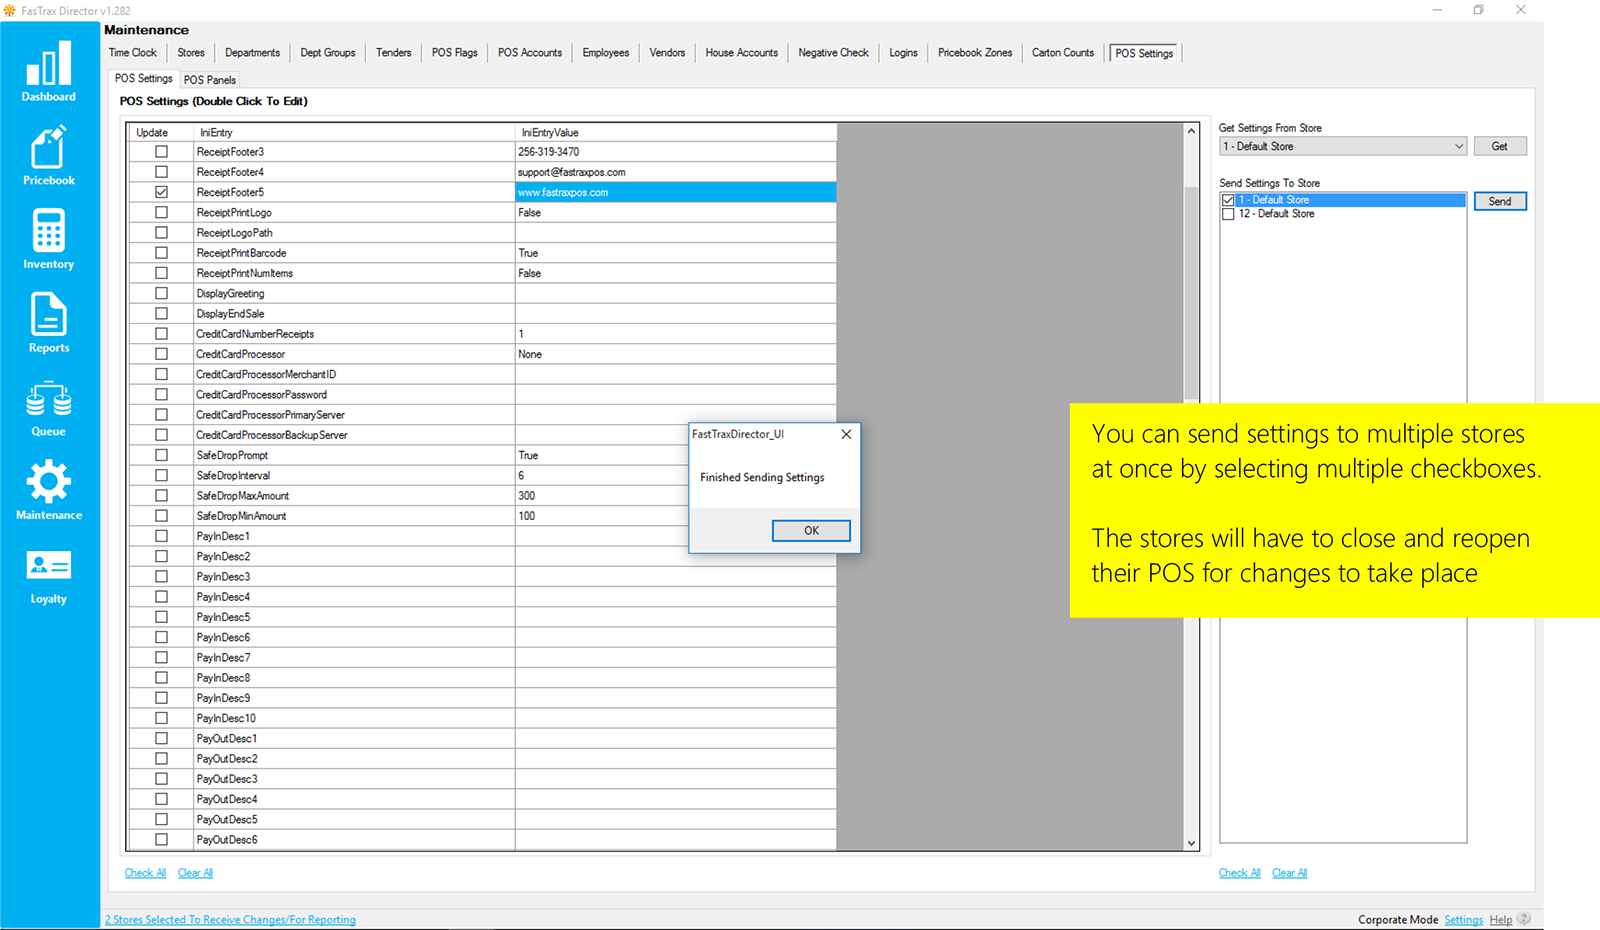
- Send changes by selecting the applicable store checkbox under Send Settings To Store, then choose Send
Overview of POS & Home Utility
The POS utility is the central interface hub for your employees and store operations.
Far beyond a simple point of sale interface, this utility also serves as the center of communications and responsibilities for your employees and managers.
Access to pricebook, inventory, label printing, receiving, reorders, reconciliations, and reports are permission based actions available to employees or managers. This centralized desktop eliminates the need for multiple programs while offering a myriad of clean and intuitive work spaces.
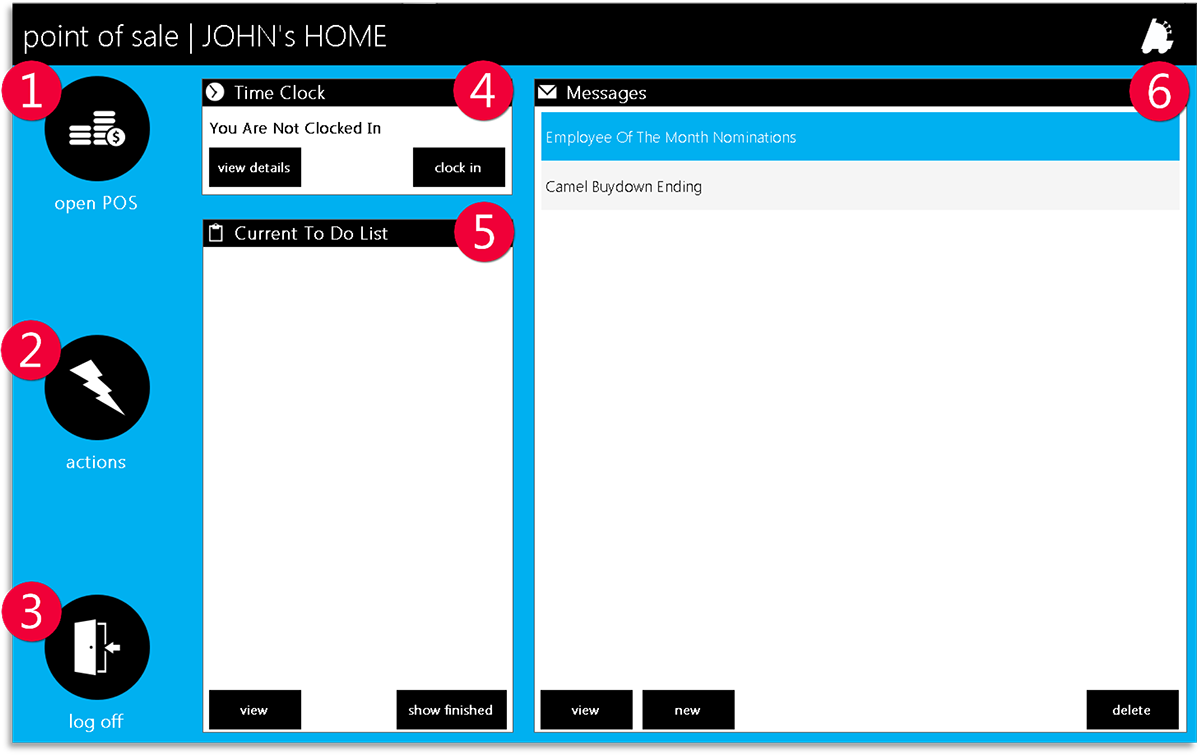
- open POS – choose to open point of sale interface
- actions – access point for pricebook, inventory, print labels, receiving, reorder, reconciliation, reports,management, and settings
- log off – exit home workspace and return to log in options
- Time Clock – employee interface to clock in/out and review time clock details
- Current To Do List – access point for employee “To Do List”
- Messages – access point for intercompany messaging
Logging On
- Choose the POS desktop icon.

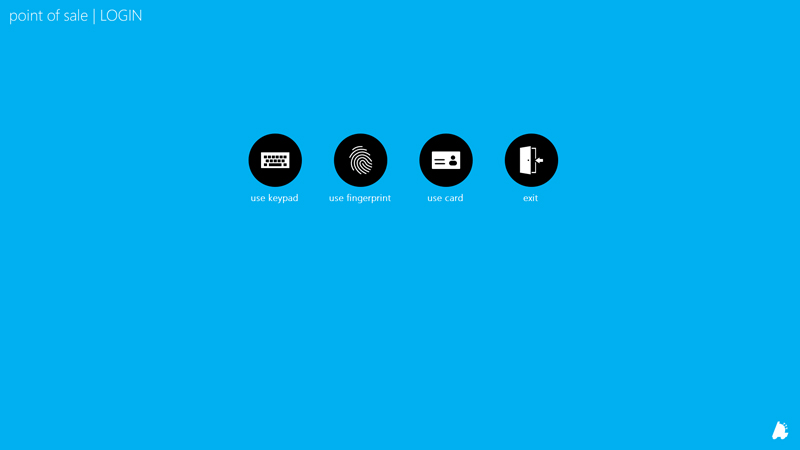
- This will open the “point of sale | LOGIN”interface window.
Choose the “use keypad” icon.
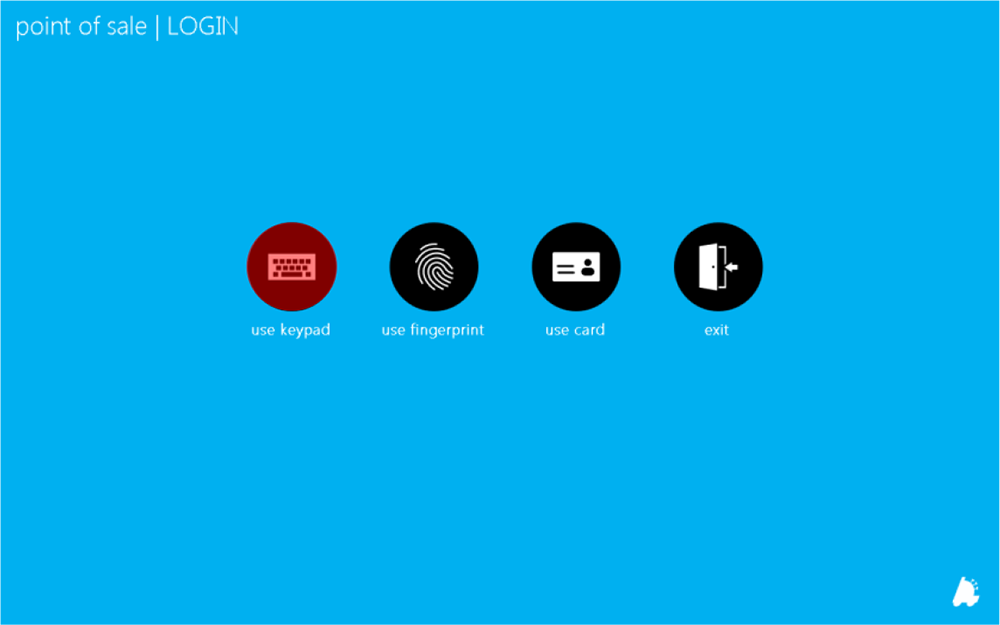 This guide will illustrate the “use keypad” method of logging in.use fingerprint – can be used with appropriately outfitted biometric hardware
use card – cards programmed with the employee number as a mag stripe or barcode can be used when chosen
- This will open the “login | KEYPAD” window.
Enter the appropriate Employee ID andPassword then choose the “login” button.
“cancel” will return to the login options.
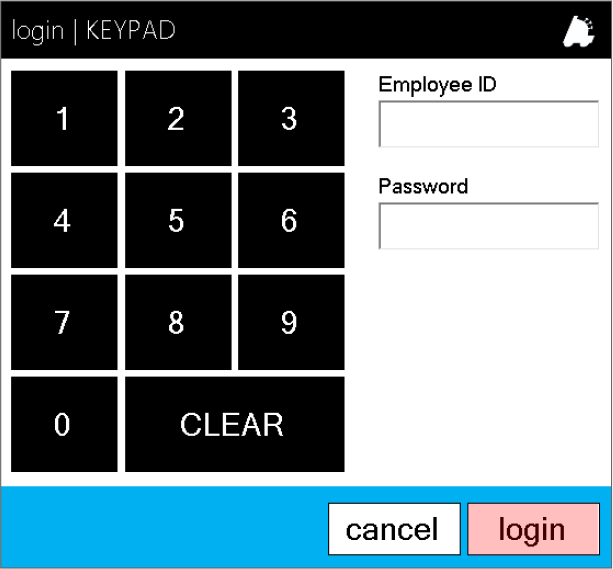 Your hardware keyboard can be used as well as the on screen buttons for data entry.
 - This will open the employee home screen.
To manage time clock entry, choose the clockin/out button from the “Time Clock” section.Button text will display the applicable action.
“view details” will display time entries for thelast 7, 14, or 30 days.
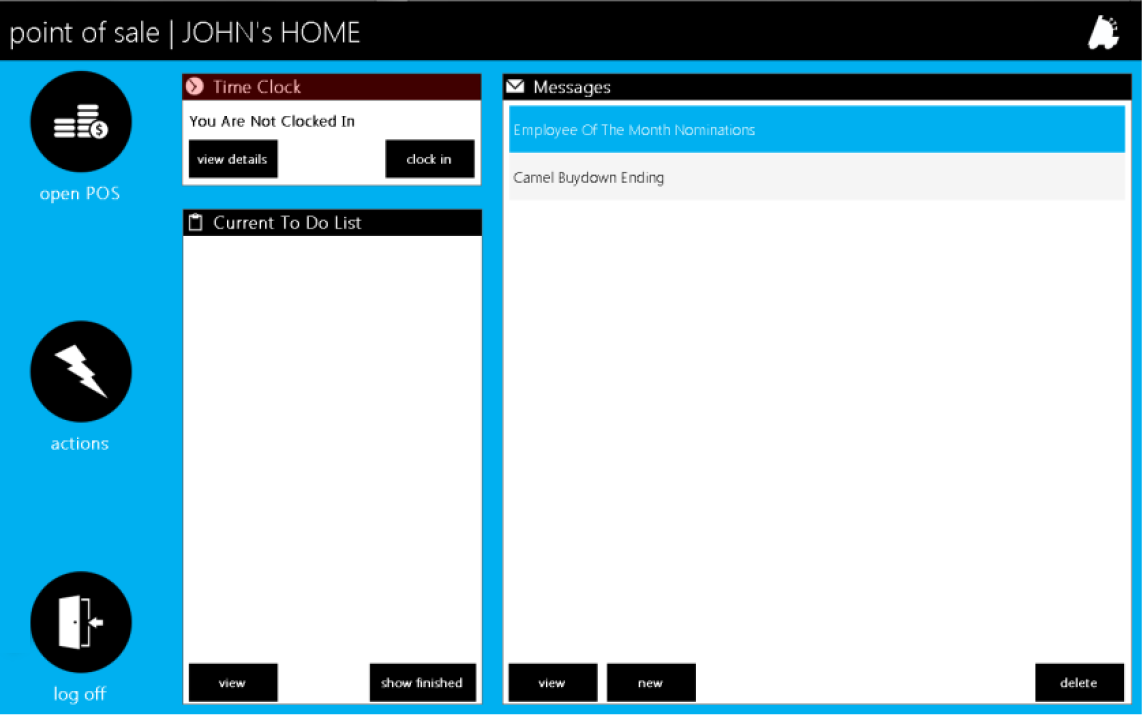 To log off, simply choose the “log off” icon.This will exit and return to the LOGIN screen.
Accessing the POS (point of sale) Interface
- After logging in, choose the “open POS” icon from the employee home interface.
- This will open the POS.
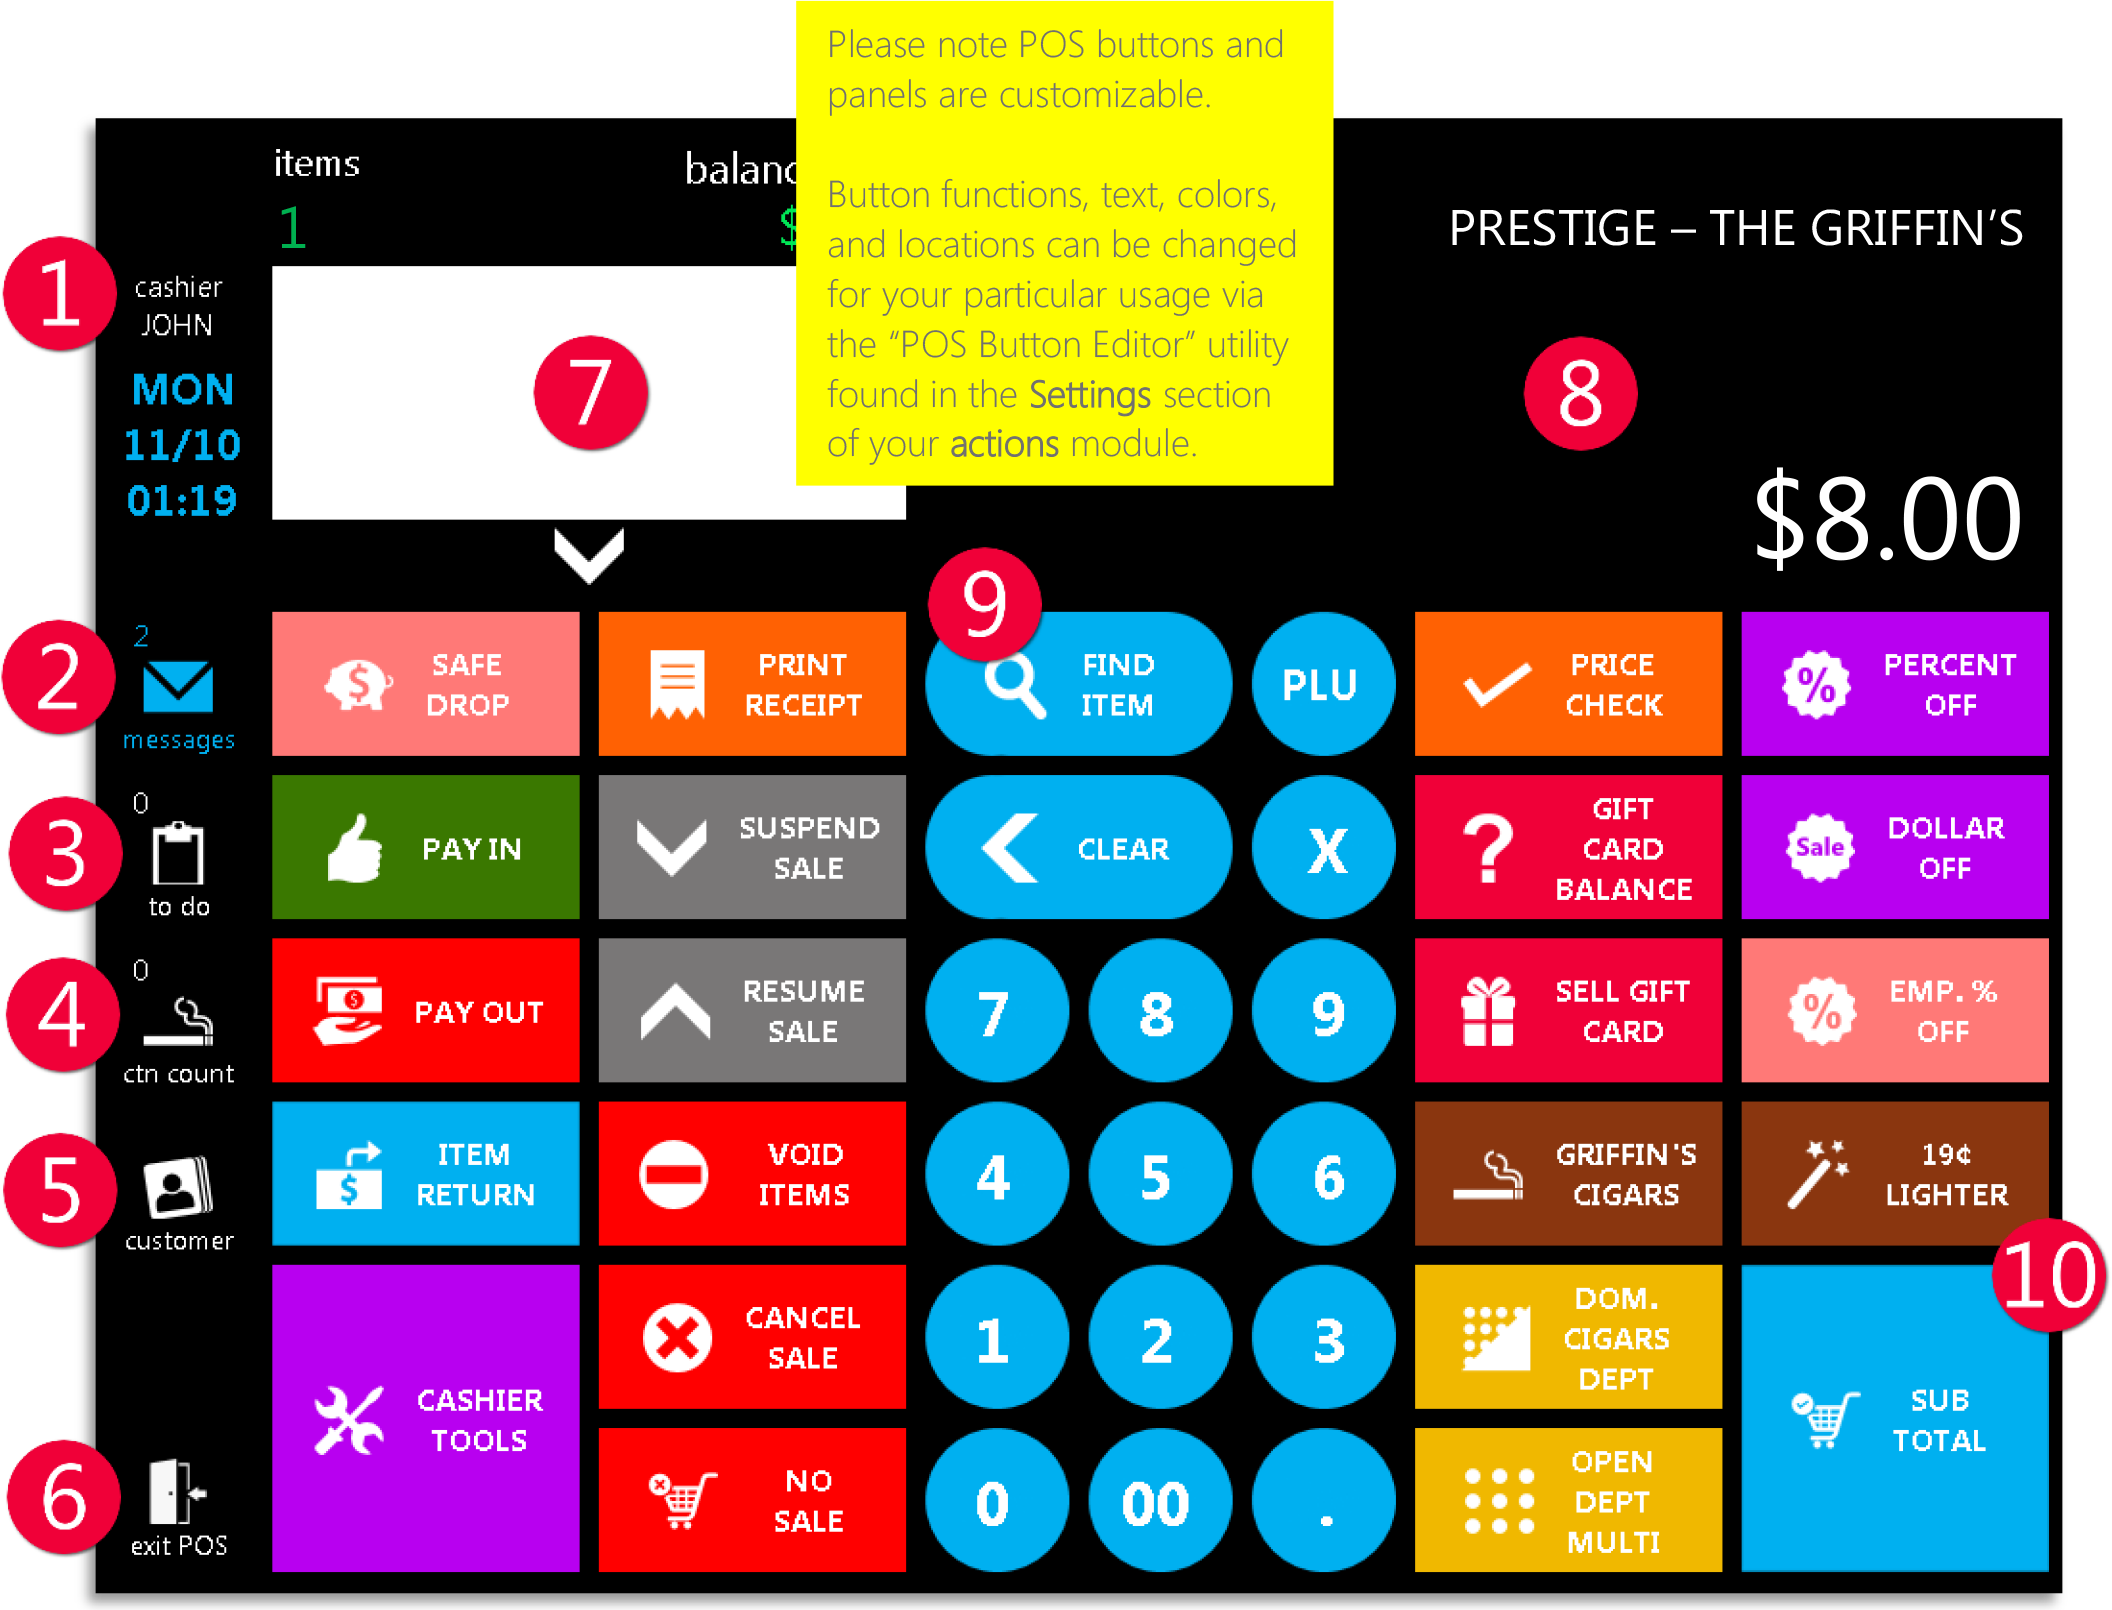
- current logged on cashier
- quick access and alert for current messages
- quick access and alert for “to do” list
- carton equivalent in current transaction fromitems scanned
- choose loyalty customers for transaction
- exit POS – exits the POS utility
- virtual receipt window – click arrow to expand
- item and transaction information window
- keypad – hardware keyboard can be used aswell as on screen keypad
- subtotal button – link to transaction subtotalscreen
Cashier Tools
Within the POS there are buttons that perform functions other than item and department links.
These cashier functions and tools aid your cashier in proper handling of transactions and items as well as offer quick links to expanded operational views. Click here for walkthroughs.
|
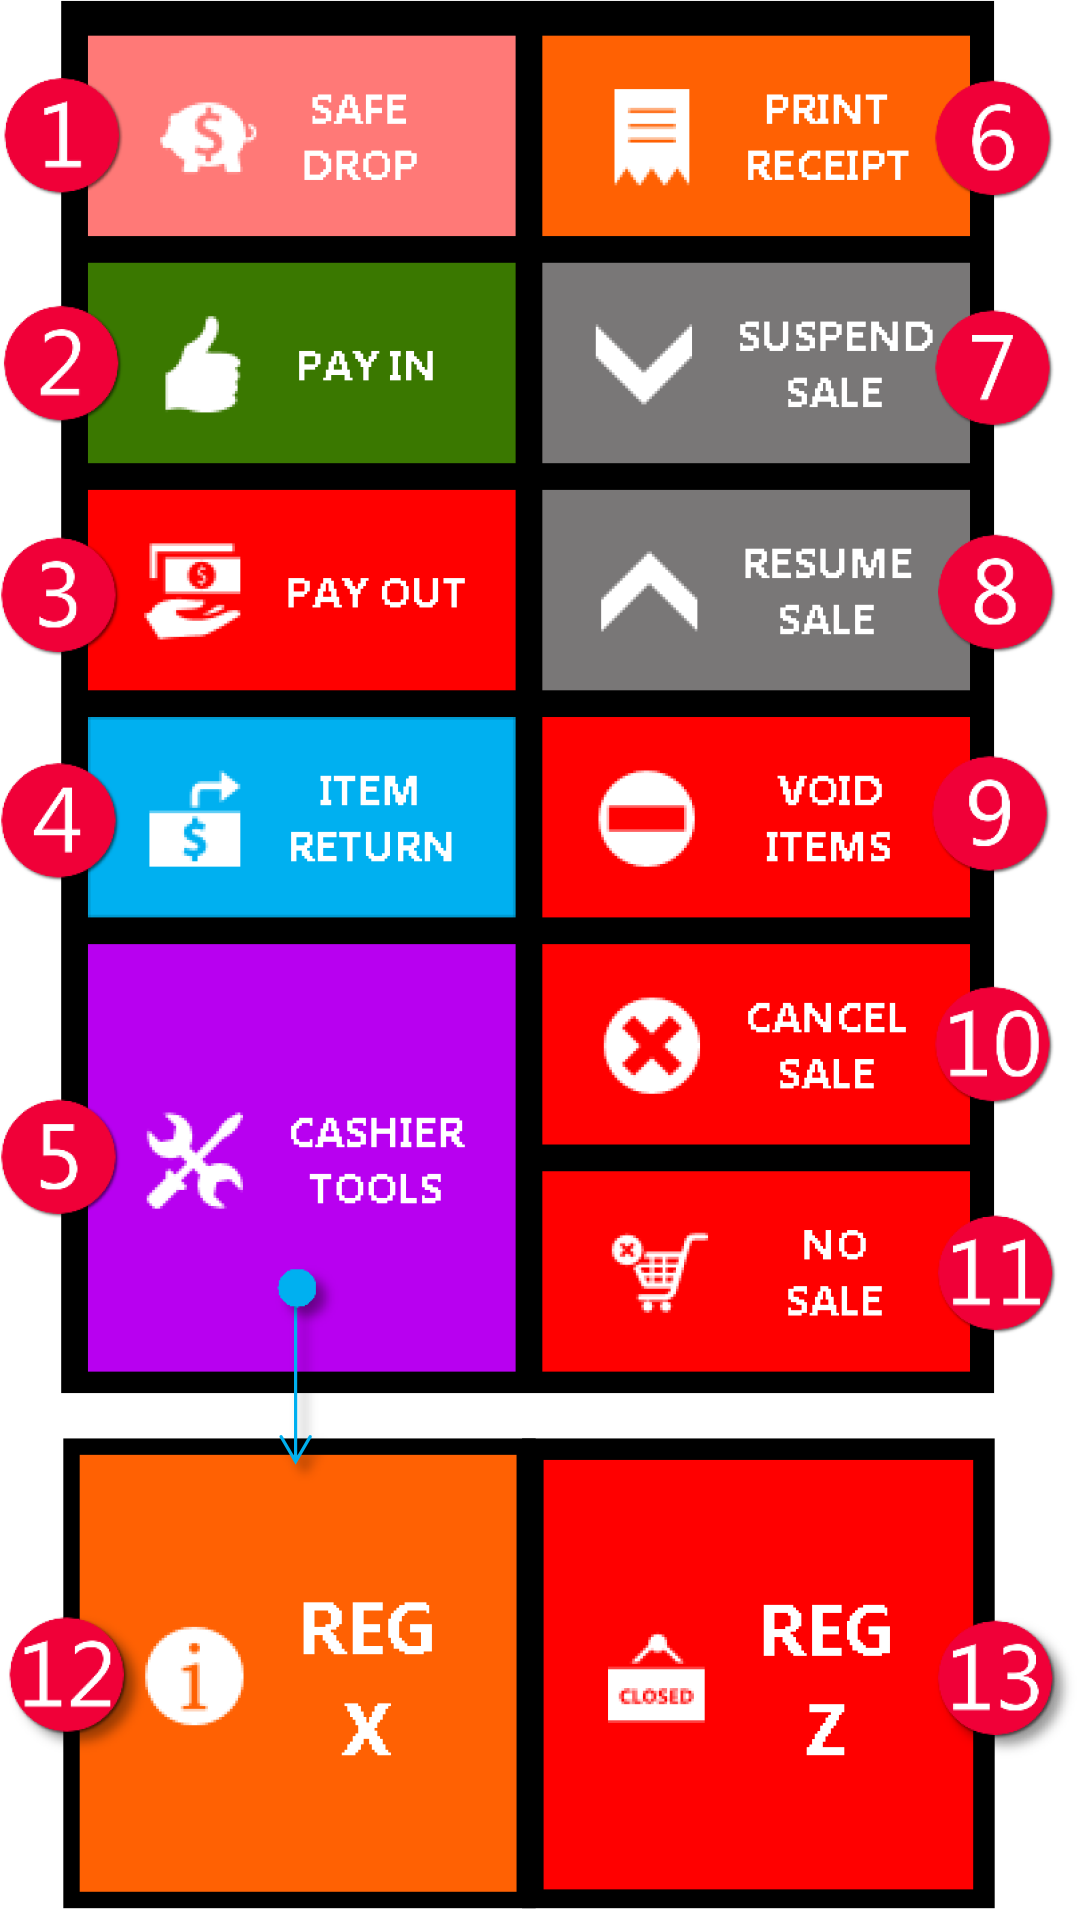 Please note POS buttons and panels are customizable by button function, location, text, and color via the “POS BUTTON EDITOR” utility in the Settings module of actions. Function button availability is permission based. |
Performing a Transaction
Performing a transaction via FasTraxPOS is a very quick and intuitive process.
Items can be entered a number of ways; scanning a barcode, manually keying in a UPC, assigning an item UPC to POS button, searching via the “FIND ITEM” function, or selling a dollar amount via an open department.
These transactions can then be tendered via the “SUB TOTAL” button or set aside for later action via “SUSPEND SALE”.
Items on transactions can be individually removed via the “VOID ITEMS” button or the sale completely removed by using the “CANCEL SALE” button.
Once the correct item and quantities are entered, choosing the “SUB TOTAL” button will access the subtotal screen for choosing available tender options.
The subtotal screen applies tax to the sale; however, sales can be edited after choosing “SUB TOTAL” by simply pressing “RETURN TO MAIN”.
Entering an Item
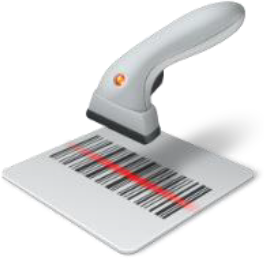
- Barcode scanner
Via your configured barcode scanner, scan the barcode label of the applicable item(s).
- Manual Entry
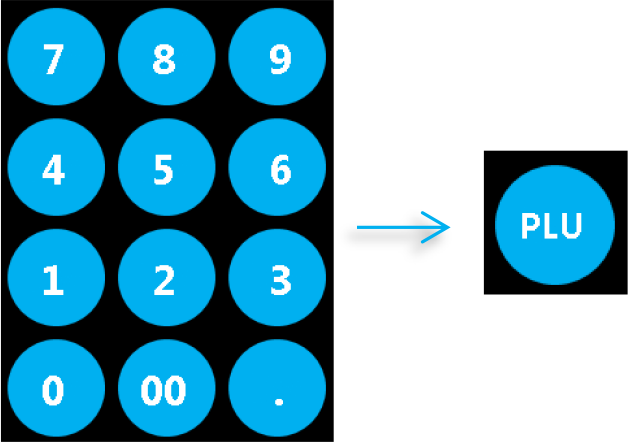
Enter the UPC of the applicable item(s) via the onscreen number pad or hardware keyboard, then press the “PLU” button.
Unless recognized as a “UPC Alias”, the POS will auto expand entries if necessary.
- Programmed Button – Option 1
Buttons can be assigned to a specific item(s) via the “POS BUTTON EDITOR”.
Simply pressing an item programmed button will add the applicable item to a sale.
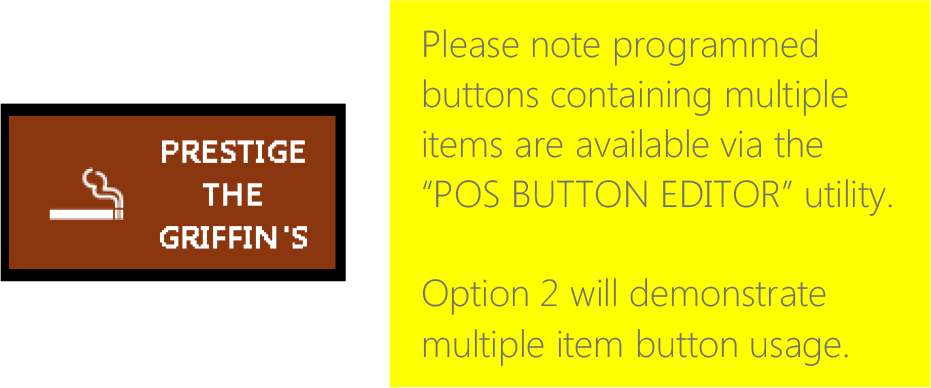
Programmed Button – Option 2
Buttons can be assigned for multiple item(s) via the “POS BUTTON EDITOR”.
Simply pressing an item button programmed with multiple items will open a “CHOOSE ITEM” window listing the assigned items.
From this list, choose the applicable item.
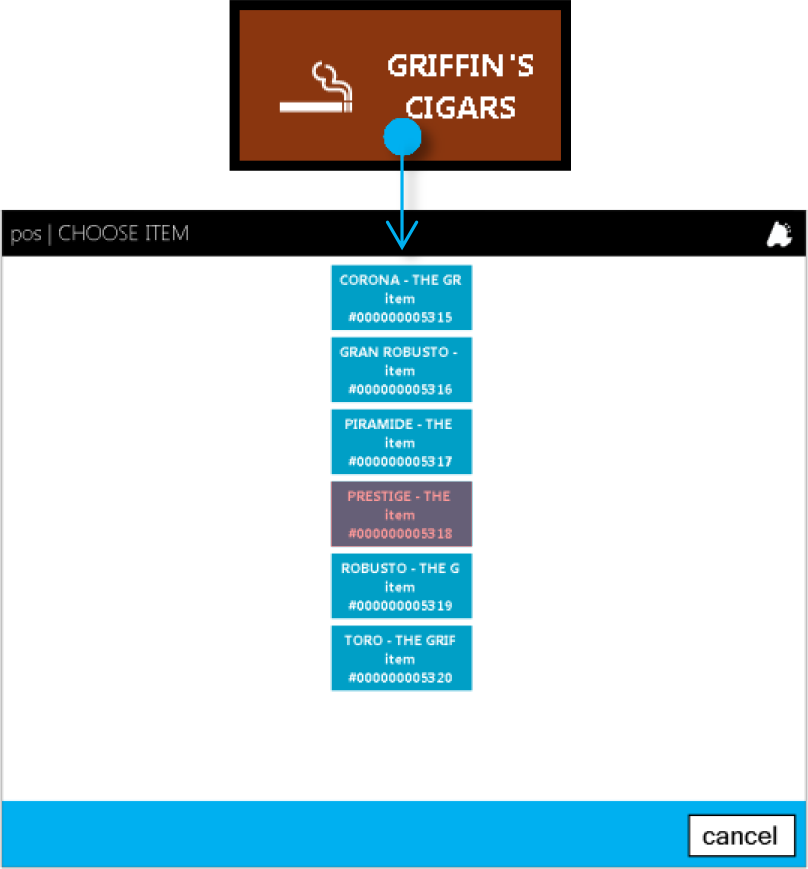
This method is preferable to designated panels of multiple buttons due to its space saving nature while offering a clean, centralized spot for items. - Find Item
- Press “FIND ITEM” located within the onscreennumber pad.
This will open the “FIND ITEM” window.

- From the “search by” drop down, choose how youintend to look up your item; Description, UPC, orVendor Part number.
This example will use “Description”.
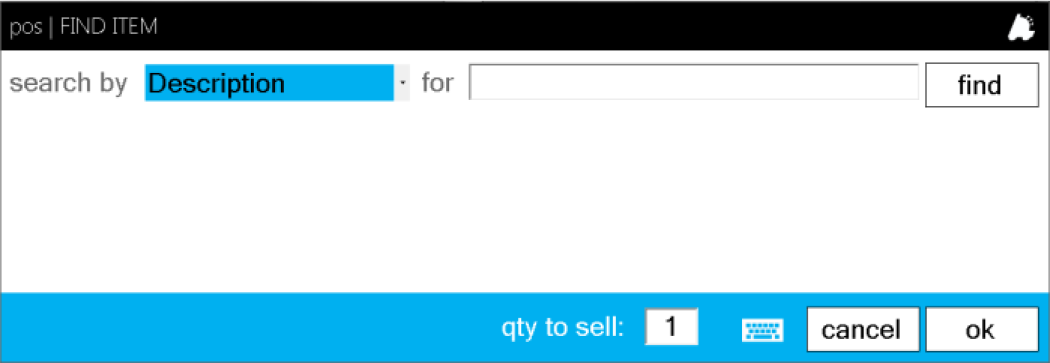
- In the “for” field, enter the applicable search datathen press the “find” button.
This will list all items matching your search criteria.From the listed items, click or press the applicableitem(s) then enter the quantity you wish to add tothis transaction.Press the “ok” button when you are ready toproceed.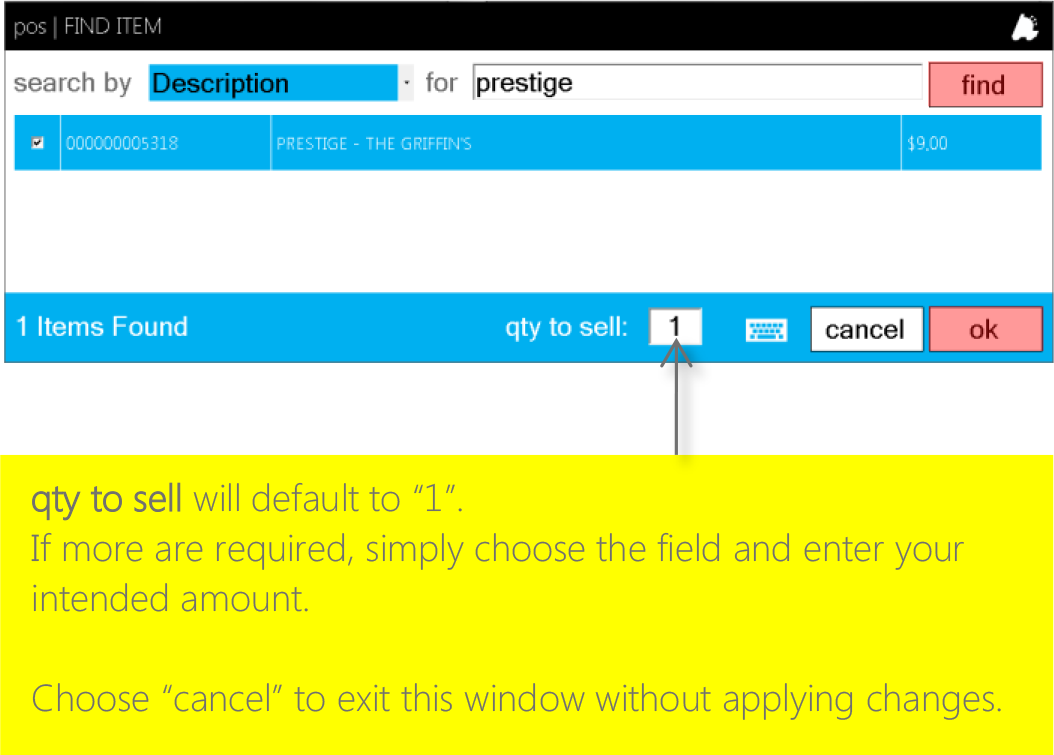
- Press “FIND ITEM” located within the onscreennumber pad.

Once an item has been entered, data about the current product can be viewed in the information window.
- items count – accruing quantity of items currently on transaction
- balance due – accruing balance, with tax, of current transaction
- virtual receipt – virtual representation of transaction receipt
- virtual receipt expansion – will open a window displaying a complete list of items on current transaction
- current item detail – last item entered name and price
Tendering a Sale
After item entry is complete, proceed to the SubTotal screen for transaction tendering.
- Press the “SUB TOTAL” button
- This will open the SUBTOTAL screen.
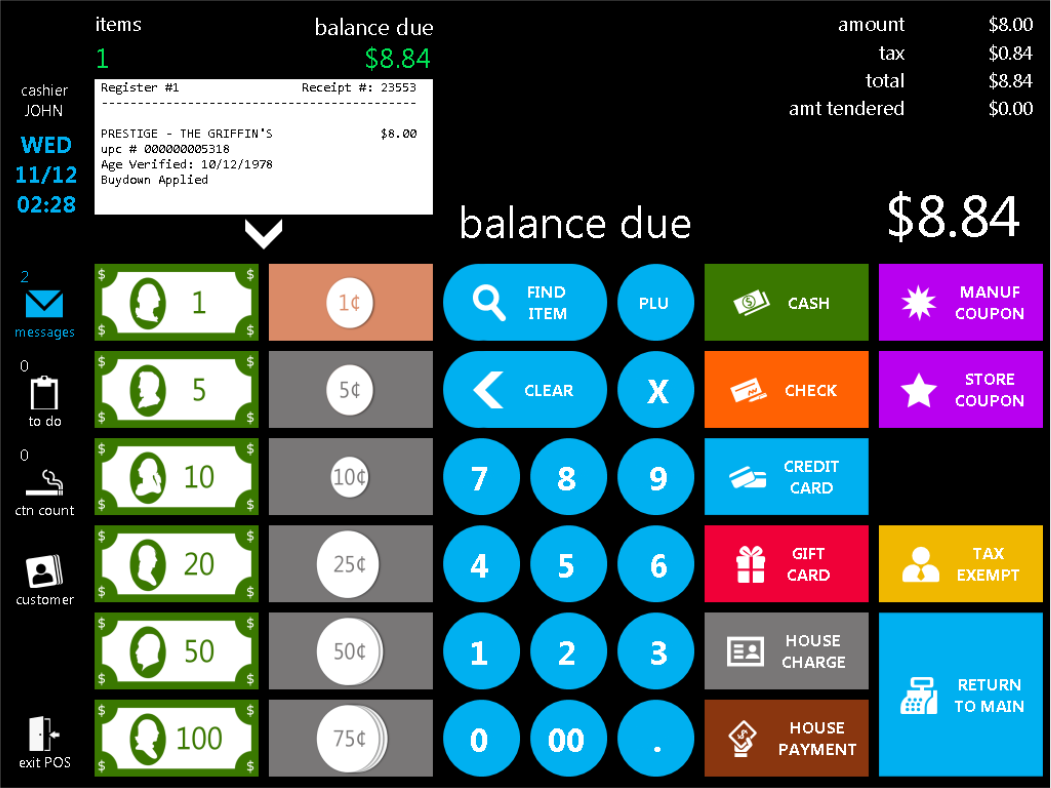 To return to the item entry screen, simply press “RETURN TO MAIN”.

From the SUBTOTAL screen, you have a number of tender choices depending on your particular tender configurations.
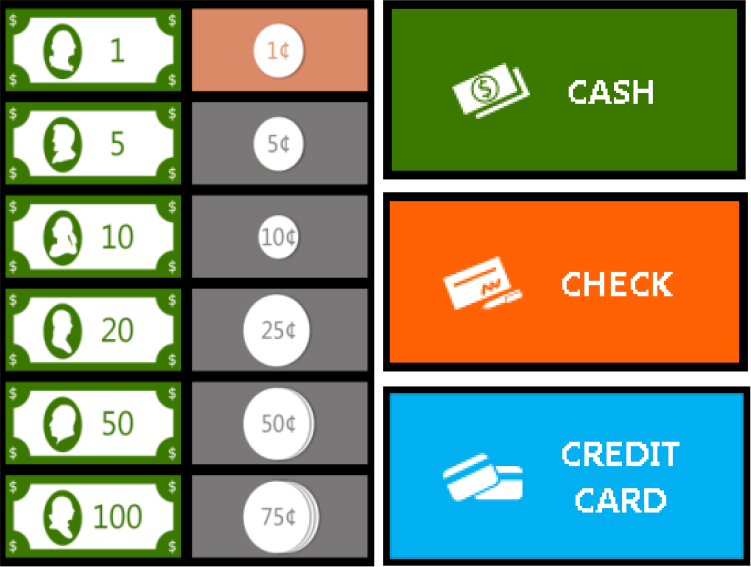
- Quick Cash – These buttons are preprogrammed for exact cash amounts; $1, 5$, 10$, etc. When pressed, they will reduce the “balance due” by their indicated amount.
- Onscreen Keypad – Use this (and/or hardware keyboard) to enter tender amounts in lieu of Quick Cash buttons.
- CASH – If no amount is entered via the onscreen keypad, pressing this option will tender the sale for the exact amount.
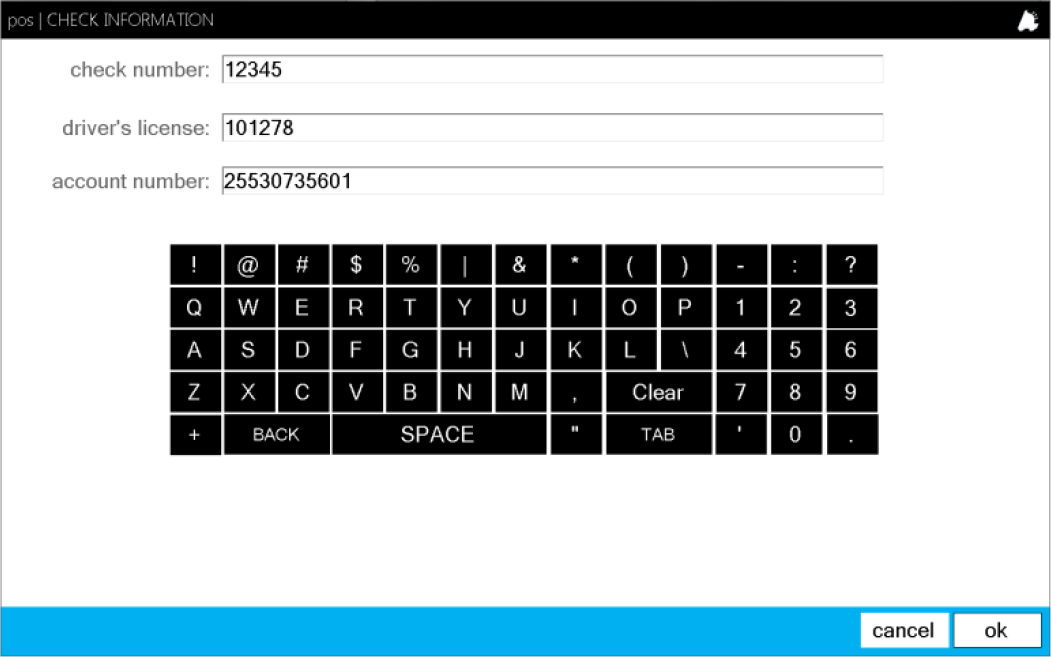
- CHECK – Pressing this option will prompt you to enter check number, driver’s license number, and account number.
- CREDIT CARD – If processing credit cards externally, this button can be programmed to input card type for reporting purposes. If you are processing via Mercury, simply choose this button and follow the on screen prompts for completion.
- GIFT CARD – If you are utilizing FasTrax’s closed loop gift card system, choose this tender button and follow the onscreen prompts.
- HOUSE CHARGE – If a house account is being used to “charge” a purchase, first choose the applicable account using a “HOUSE LOOKUP” button. This button can be added to the POS screen via the “POS BUTTON EDITOR” utility. After the correct account is chosen and associated to the transaction, choose the “HOUSE CHARGE” tender button to apply charges.
- HOUSE PAYMENT – Used to apply payments to house accounts.
- TAX EXEMPT – Choose to remove tax from current transaction.
- RETURN TO MAIN – Choose to return to main POS screen for transaction editing.
- Quick Cash Tender Buttons
Choosing these buttons will systematically reduce the balance due by the values indicated.
These can be used in addition to other tender types if splitting tenders is required.
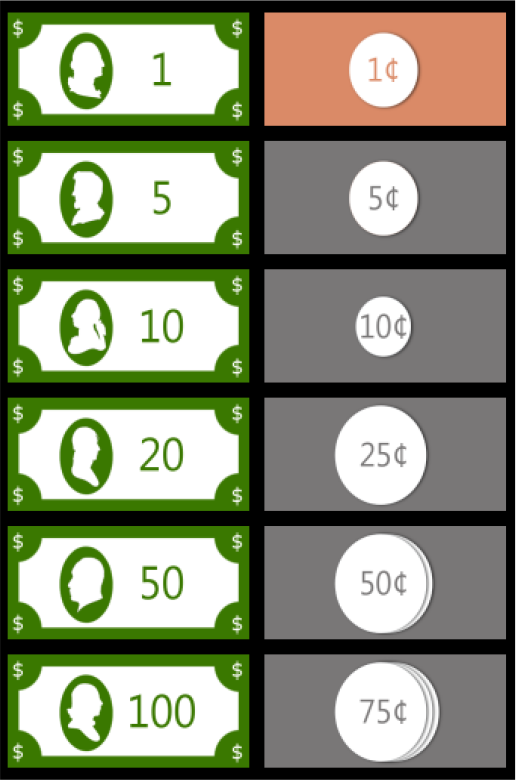 “Splitting Tenders” is a way to tender a transaction using multiple payment types.An example of this would be paying half a balance with cash then using a credit card for the remainder
 - CASH
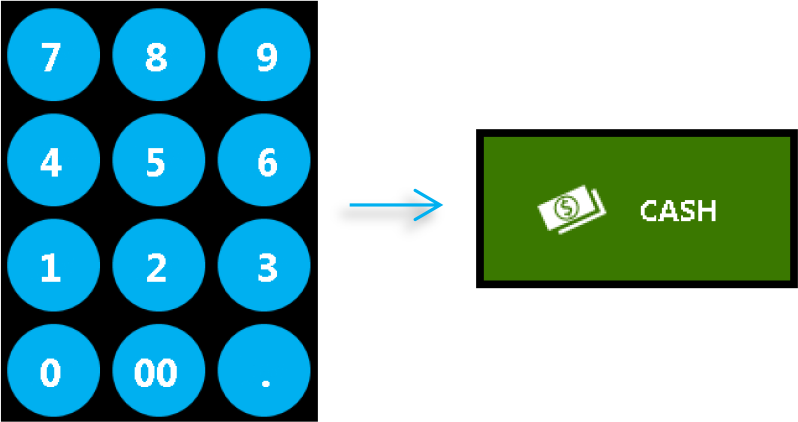
Simply choosing the CASH button will tender the sale for the exact balance due as cash.

Alternatively, you can use the number pad to systematically enter the amount of cash provided by your customer then press the CASH button.
This will tender the sale for the amount you entered while opening the cash drawer and providing feedback for “change due” if applicable.
- CHECK
If you accept checks, choosing this will open the “CHECK INFORMATION” window.
Enter the appropriate check number, driver’s license number, and account number.

- CREDIT CARD
Credit cards can be handled differently depending on your processing configuration.
In the following examples, we will first demonstrate accepting credit cards via integrated MERCURY processing.
The second example will be for recording credit card purchases when utilizing external processing terminals not directly integrated with FasTraxPOS.
- Integrated Credit Processing
- From the SubTotal screen choose the “CREDITCARD” button.
- This will open the first cashier prompt window–“have customer swipe card”.
Instruct your customer to swipe their credit card via the external Mercury provided swipe device.
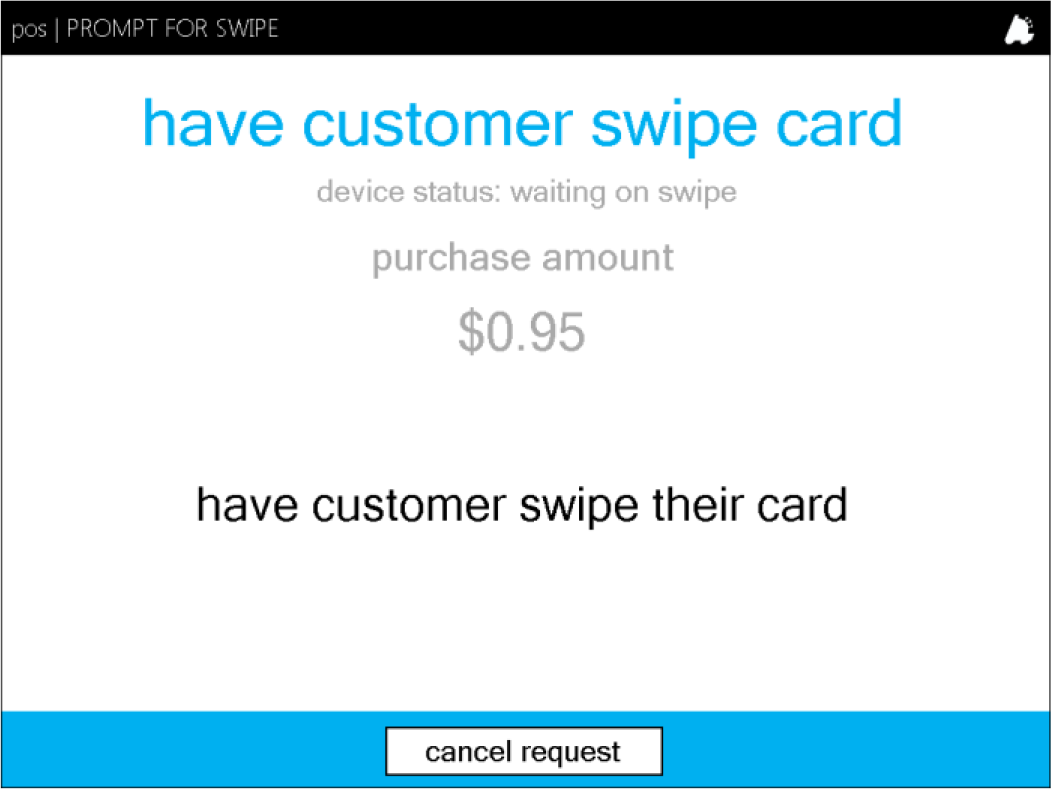
The customer facing card swipe will display prompts and directions for your customers.Customers have the ability to cancel transactions via the card swipe. - If the swipe is successful, the next window willprompt you to instruct your customer to signthe device.
Customers will also see a prompt on thedevice providing instruction for signature.
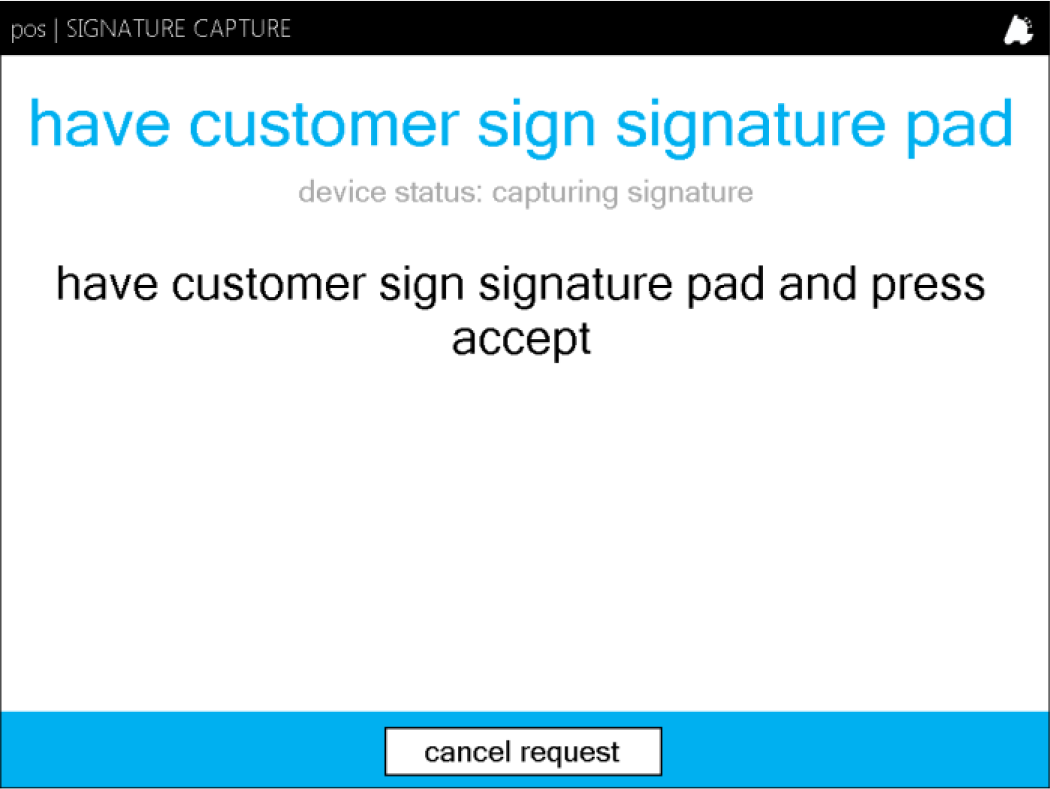
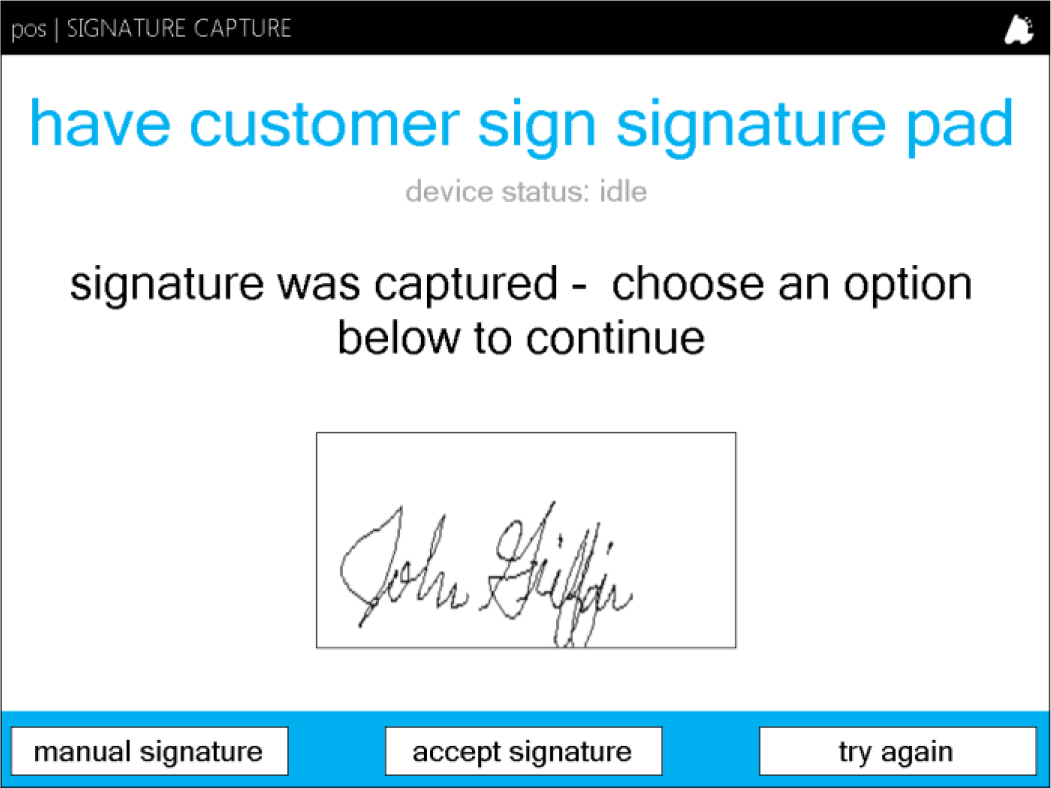
This will only prompt if you have chosen to “Capture Signature” in the settings portion of the actions module.Configurations not using this setting will move on to the accepted/denied portion of transaction. - Once signed, you will be presented with thedigital signature and options to acceptsignature, manual signature, and try again.
accept signature – completes transaction
manual signature – prints a credit slip with line for a traditional written signature
try again – prompts to reattempt signature
- “cancel request” button
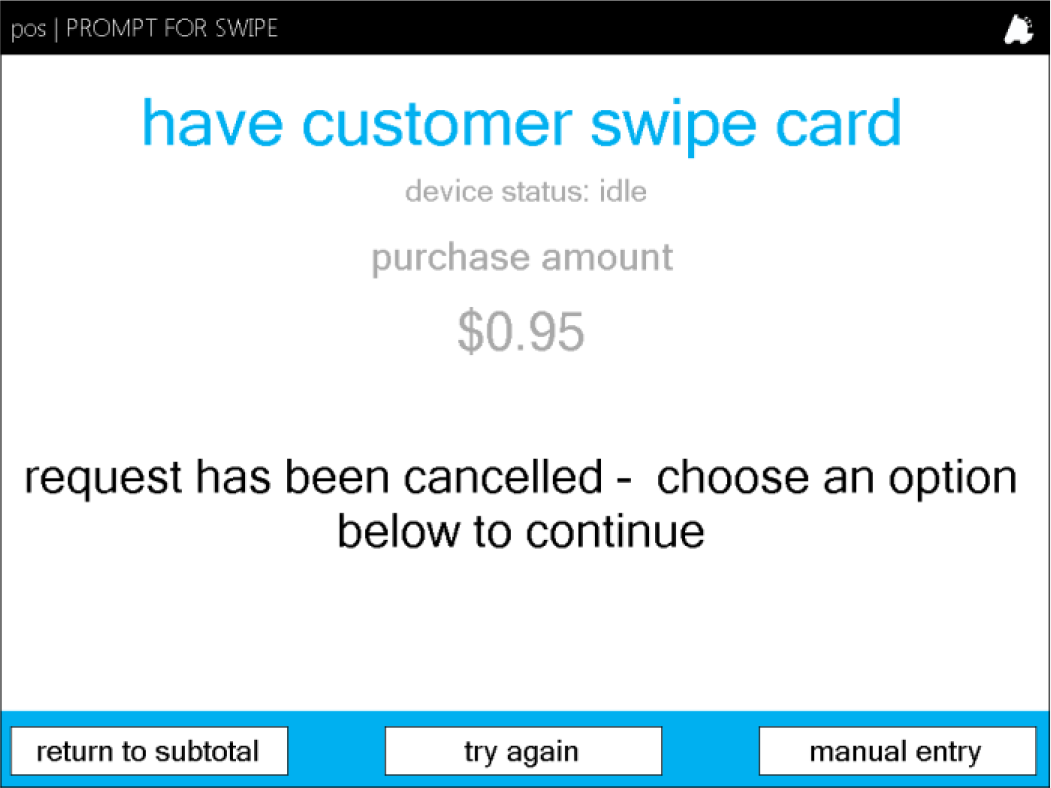
If the “cancel request” button is pressed during the credit card process, you will receive a window with alternate options.
return to subtotal – returns to subtotal screen to allow for alternate tender choice
try again – will prompt to reattempt card swipe
manual entry – opens window for manual card information entry
- Invalid Signature
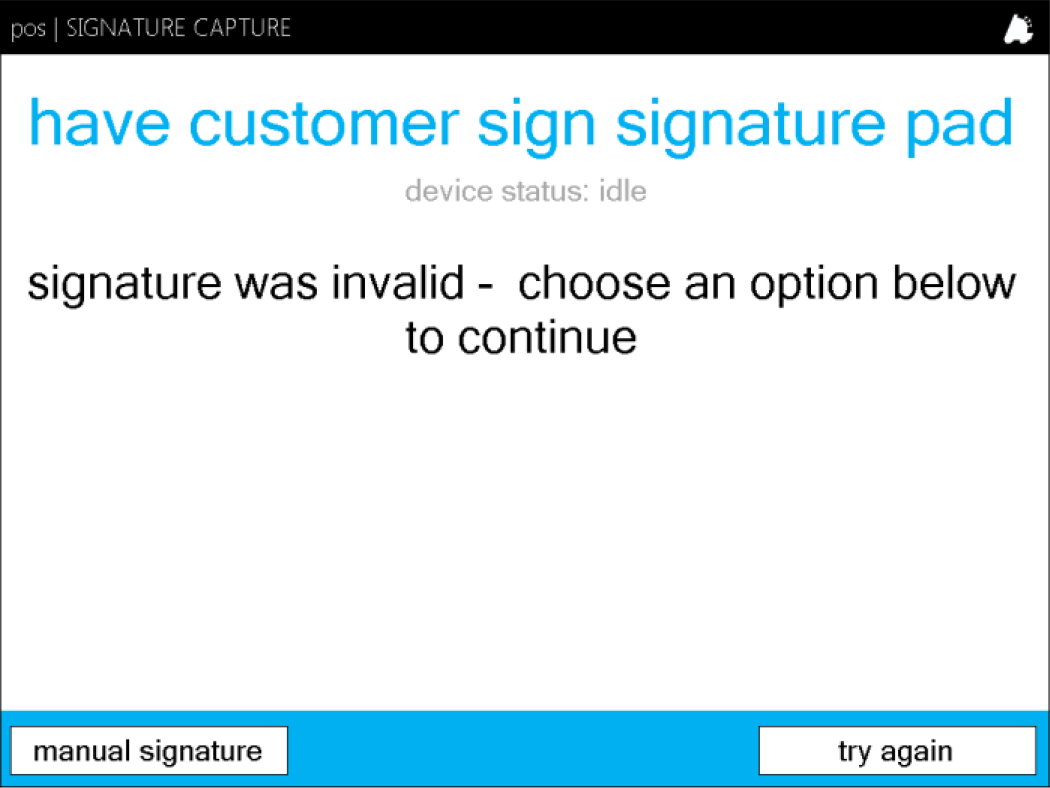
If the customer’s electronic signature is not recognized or is deemed incorrect, you will receive a window with alternate options.
manual signature – proceeds with the transaction by printing a traditional written signature request
try again – will prompt for a reattempt of digital signature
- “cancel request” button
- From the SubTotal screen choose the “CREDITCARD” button.
- External Card Processing (Non-FasTrax Integration)
- From the SubTotal screen choose the “CREDITCARD” button.

- This will open the multiple credit card typeoptions window.
- Choose the applicable card type you wish toassociate to this sale.
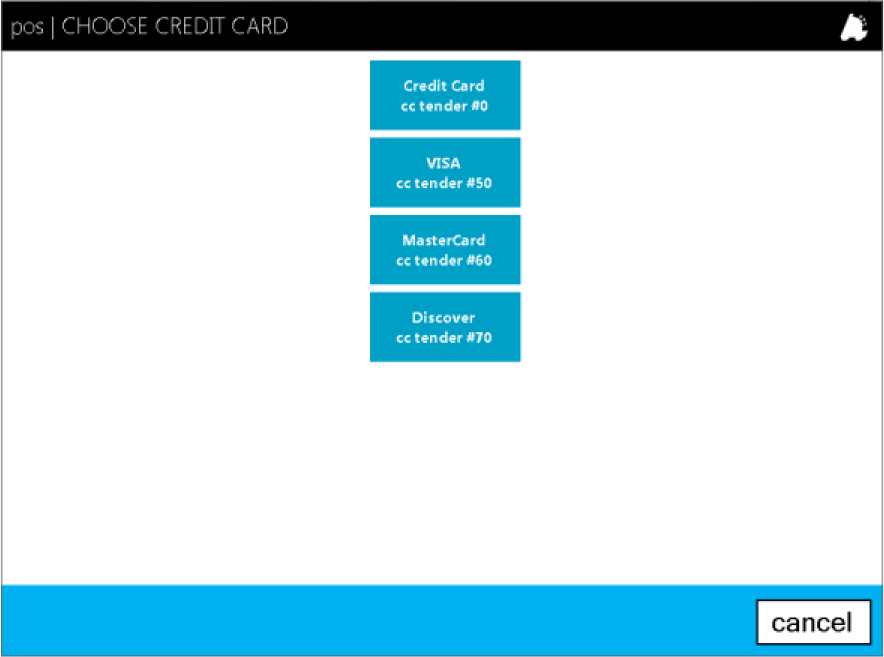 This process does not electronically verify credit card validity. Credit card validity is dependent on your external processing device and processor.This only provides a way to record and accept the tender for transaction completion.
- From the SubTotal screen choose the “CREDITCARD” button.
- Integrated Credit Processing
- Onscreen Number Pad | CC Partial Pay
- To split payment for credit transactions, utilizethe onscreen number pad.
Enter the intended amount of the partialpayment then choose the “CREDIT CARD”button.
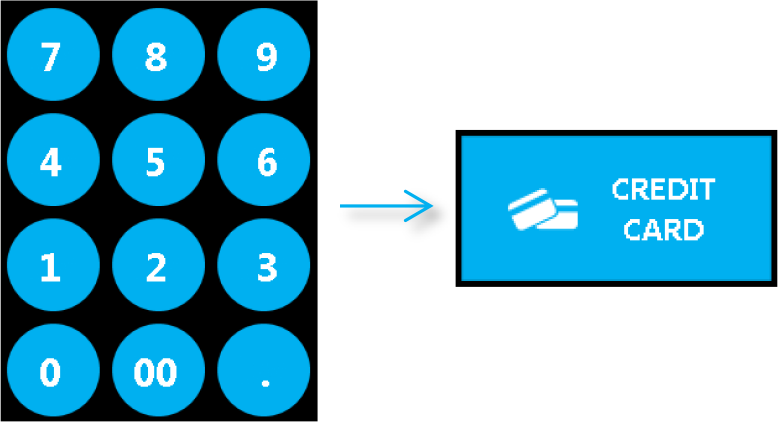
- Depending on your particular creditprocessing configuration (Mercury or externalprocessing), follow the previous steps fortransaction completion.
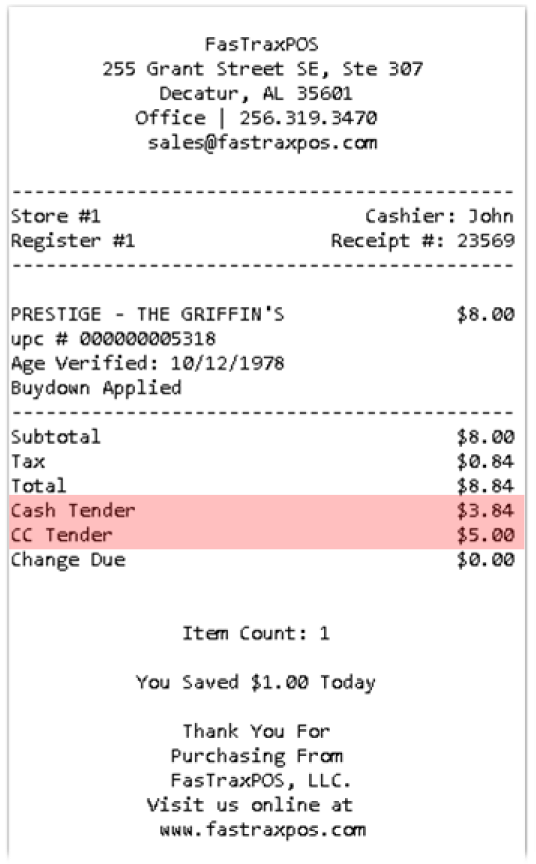 Notice on split tendered/partial payment receipts each tender and its amount are listed for reference.This reflects how the information will be written and reported for your procedural and reviewing policies.
- To split payment for credit transactions, utilizethe onscreen number pad.
- GIFT CARD
Through FasTrax’s closed loop gift card system you can sell, manage, and accept your own custom gift cards.
When configured gift cards will function and report the same as your other tenders.
- From the subtotal screen, choose the “GIFT CARD” button.
Split tender/partial payments available with “GIFT CARD” tender.Follow the steps outlined earlier in this guide. - The “GIFT CARD ENTRY” window will open.
From here, you can manually enter the gift card number, scan the gift card barcode (if applicable), or swipethe gift card.
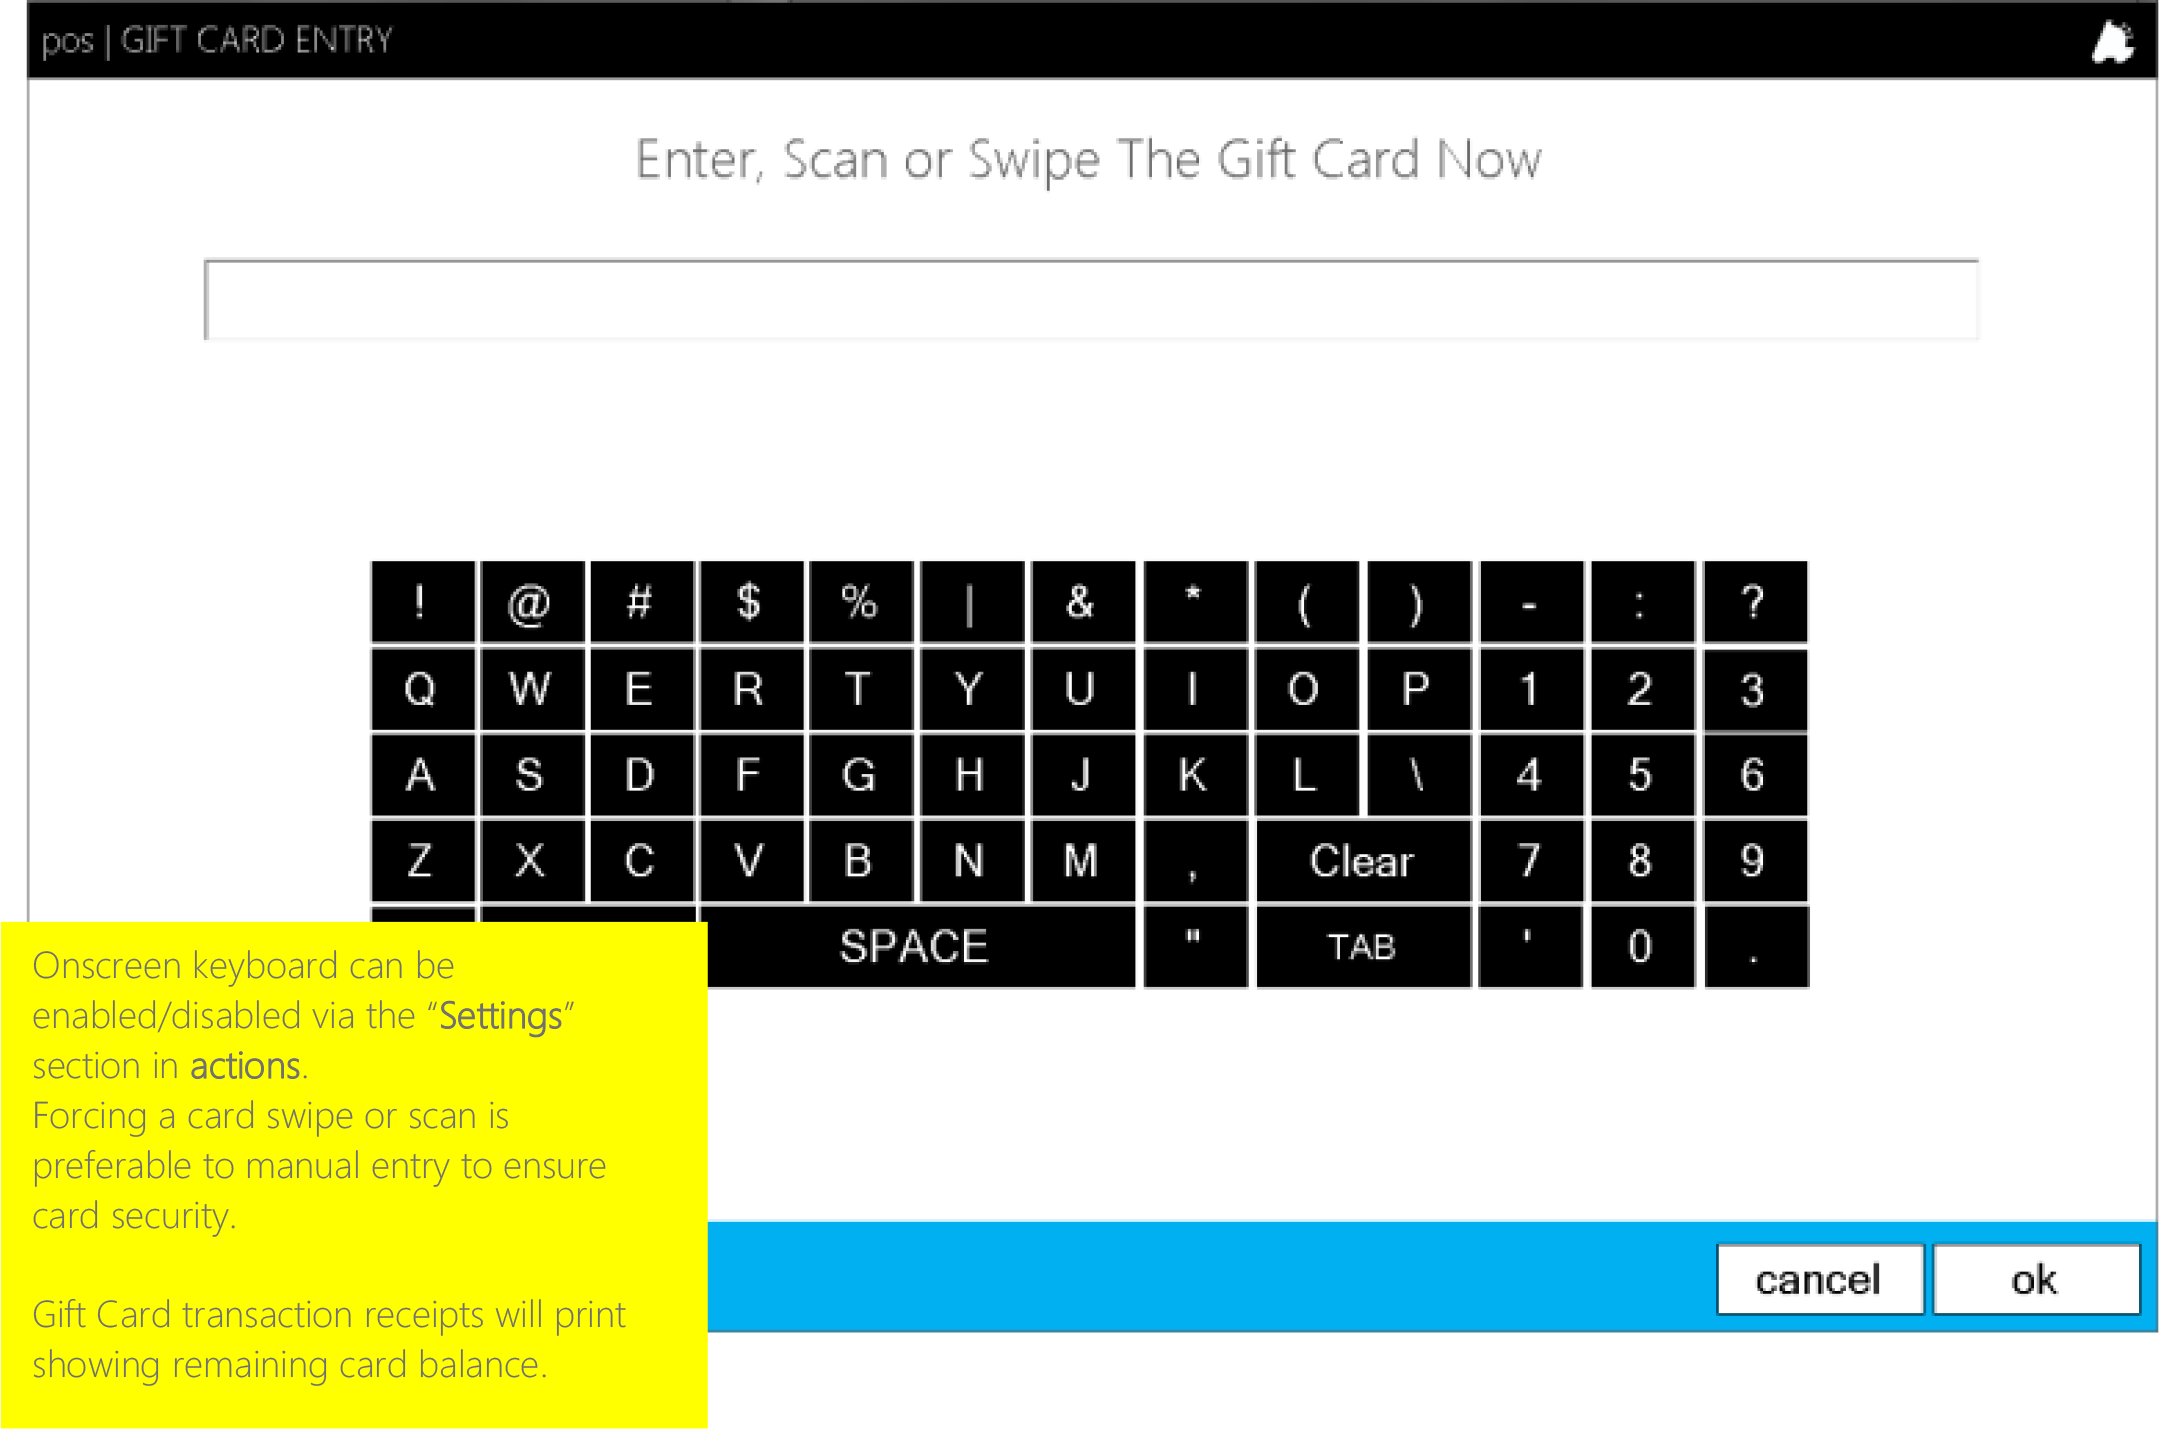
- From the subtotal screen, choose the “GIFT CARD” button.
- House Account Charge
House Accounts allow you to manage large purchase customers or resellers while passing both “cost+” and fixed level discounts on all or specified departments.
Any tender can be used to ring a House Account; however, if you allow for store credit, a dedicated House Charge tender must be used.
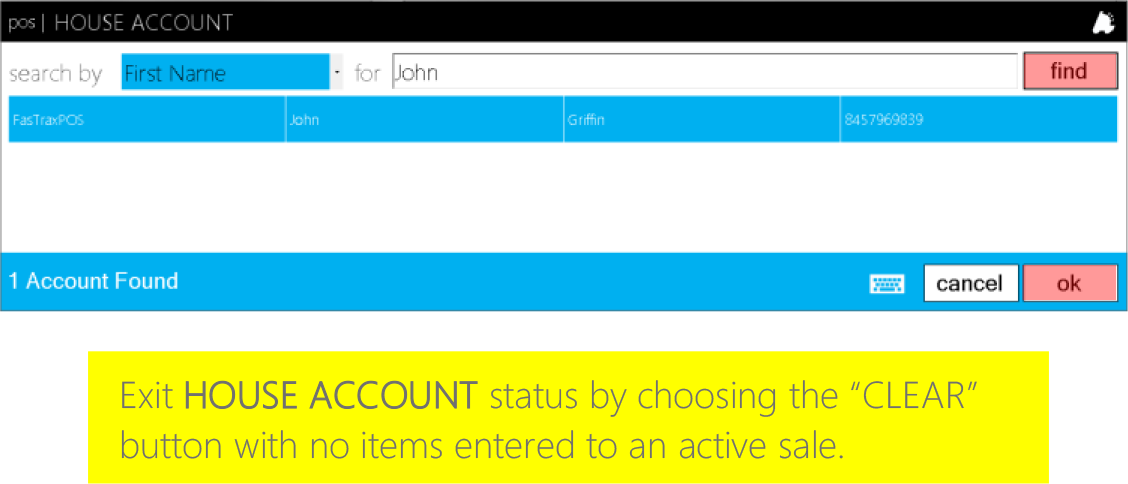
- Choose the “HOUSE LOOKUP” button.
 This button can be added to the POS screen via the “POS BUTTON EDITOR” located in the settings sections of the actions module.
 - From the “search by” drop down, choose how youintend to look up your account; Company Name,First Name, or Last Name.
This example will use “First Name”.

- In the “for” field, enter the applicable search datathen press the “find” button.
This will list all accounts matching your searchcriteria.
Choose the applicable listed account and press the“ok” button when you are ready to proceed.
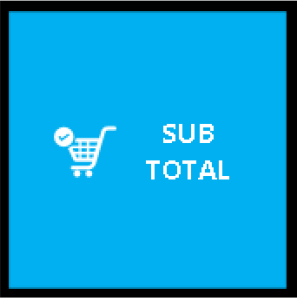
- Scan and/or enter items intended for this purchaseand choose the “SUB TOTAL” button whencomplete.
- Choose the “HOUSE CHARGE” button located onthe SUB TOTAL screen.
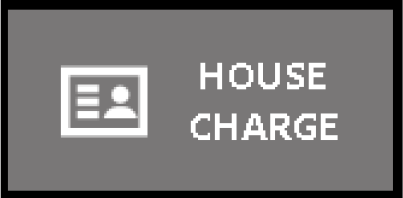 Charges using “HOUSE CHARGE” for house purchases immediately apply to the “balance” of accounts.House Charges report as a dedicated tender on reports.
- Choose the “HOUSE LOOKUP” button.
Additional Transaction Functions
Ringing multiples of an item
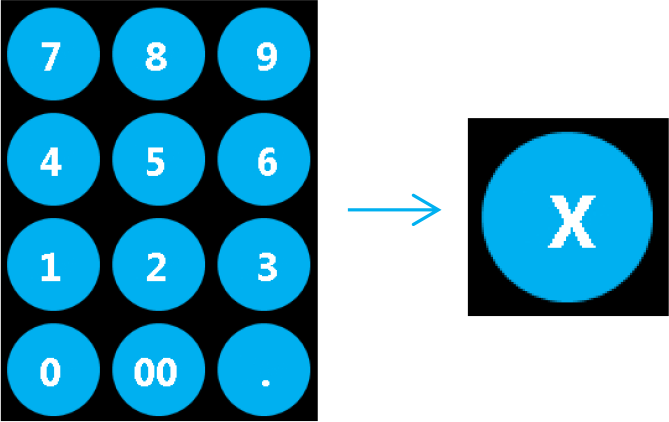
- Using the onscreen number pad, enter thenumerical quantity you wish to add of an item.
- Choose the “X” button.
- Enter the applicable item via the processes discussed earlier in this guide.
Percentage/Dollar Discounts
- Enter item
- Choose the applicable discount button.
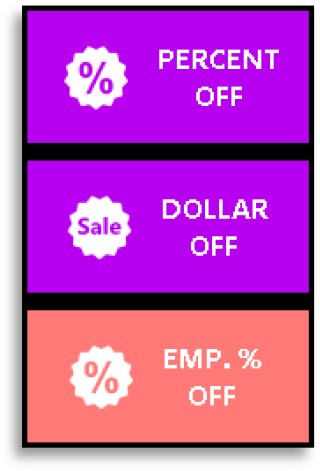 Discount buttons can be created via the “POS BUTTON EDITOR” utility.Discounts are designed to be applied to each item are entered.
Open Department Sales
- Using the onscreen number pad, enter the dollaramount you wish to sell to a department.
- Choose the applicable configured single ormultiple department buttons.
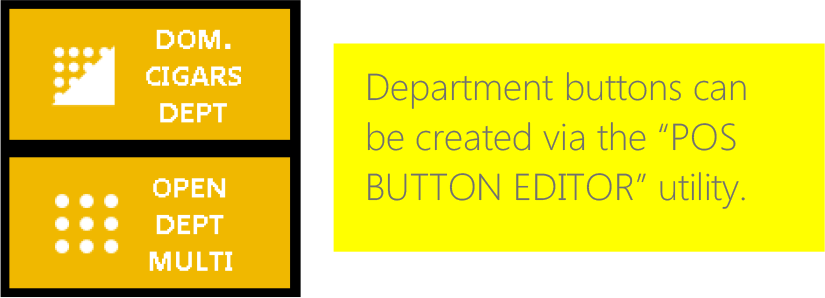
Tax Exempt
- Choose the “TAX EXEMPT” button.
- .Enter item(s)
- .Complete sale

Price Check
- Choose the “PRICE CHECK” button.
- Enter item

Cashier Tools | Walkthrough
Previously mentioned in this guide are tools designed to assist cashiers with functions other than entering items. Additional functions are required for the accurate handling of item removals, returns, and moneys.
Some of the following actions are reportable to the “negative cashier” report and are tagged appropriately below.
VOID ITEMS
- To remove unwanted or inadvertent item entriesfrom a current sale, choose the “VOID ITEMS”button.

- Choose/highlight the applicable item(s) from itemlist and choose the “void” button.
You will be returned to the POS screen fortransaction completion.
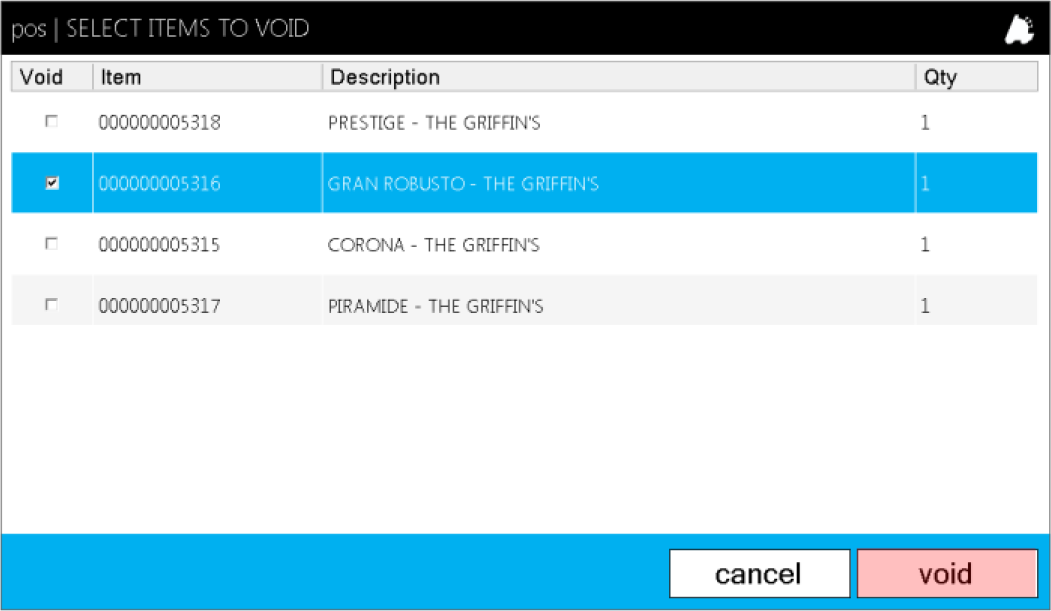
VOID ITEMS is a permissions based action. Check this ability only for applicable cashiers.Each item void is recorded and viewable via X, Z, and Negative Cashier report, by cashier.
CANCEL SALE
- To clear or cancel an unwanted sale, choose the“CANCEL SALE” button.
This will remove all entered items as well as clearthe current POS status to default.

 CANCEL SALE is a permissions based action. Check this ability only for applicable cashiers.Each cancelled sale is recorded and viewable via X, Z, and Negative Cashier report, by cashier.
SUSPEND SALE
- For ease of recall, enter a name or description ofthe suspended sale in the “SUSPEND SALE”window.

- To suspend a sale for later resumption, choose the“SUSPEND SALE” button after adding applicableitems to the transaction.
- Choose the “ok” button.
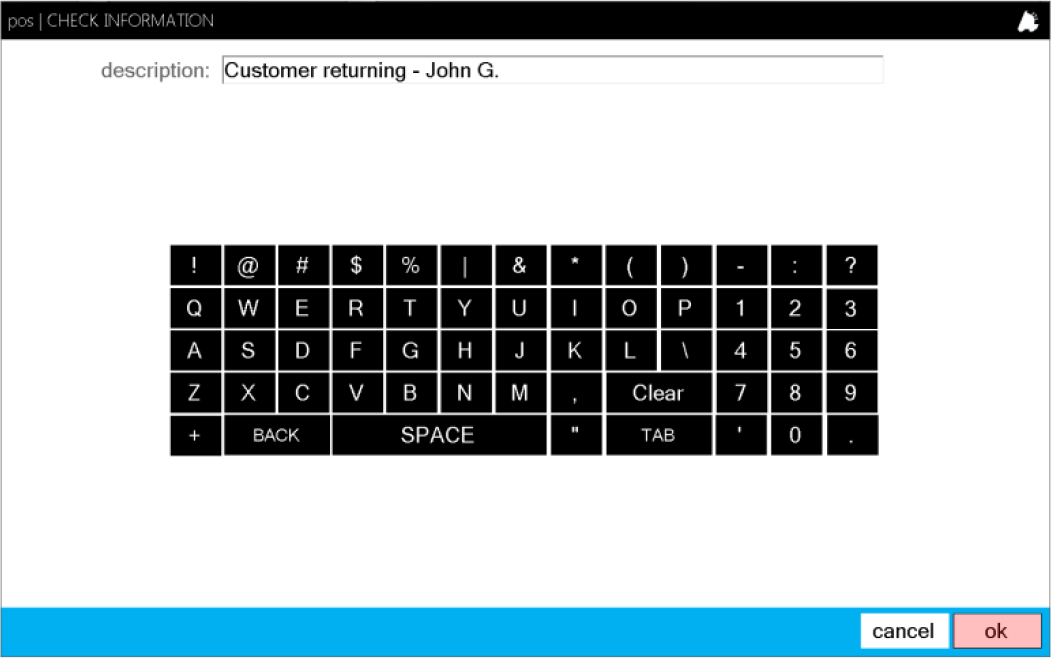 There is no limit to the time or amount of sales allowed for suspensions.Suspended sales work well for lounge environments with growing customer orders.
RESUME SALE
- To resume a previously suspended sale, choosethe “RESUME SALE” button.

- This will open the “RESUME SALE” list window.
Choose the applicable sale from the “Suspended”list. - Choose the “resume” button when you are readyto continue.
- Continue your transaction as normal; add orremove items and tender the transactio
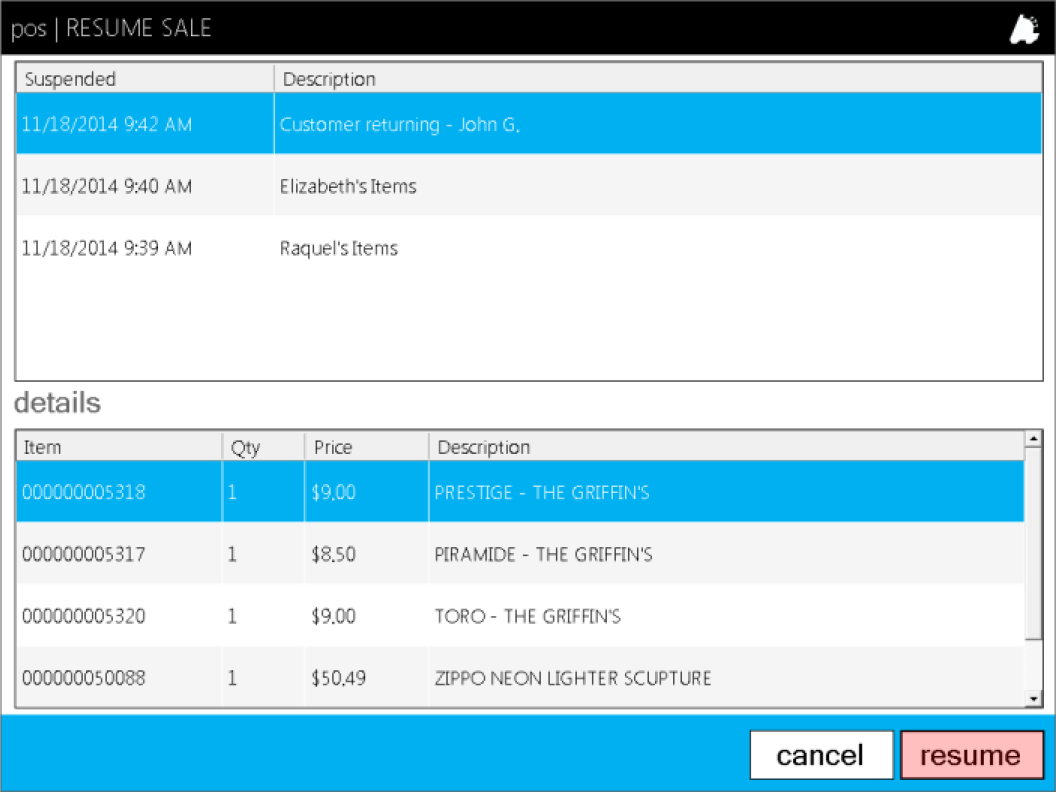 Notice the “Details” section of the “RESUME SALE” window displays all the items currently assigned to the sale.Resumed sales can be edited and re-suspended if necessary.
ITEM RETURN
Item returns can be performed by either choosing the “ITEM RETURN” button then entering items or by scanning the barcode located on the bottom of previous sales receipts.
ITEM RETURN | Button
- Choose the “ITEM RETURN” button.
- This will change the POS status to prompt foreither an item entry or scan a previsouly soldreciept.
- Using the steps preivously mentioned for enteringitems, add the applicable item for return.
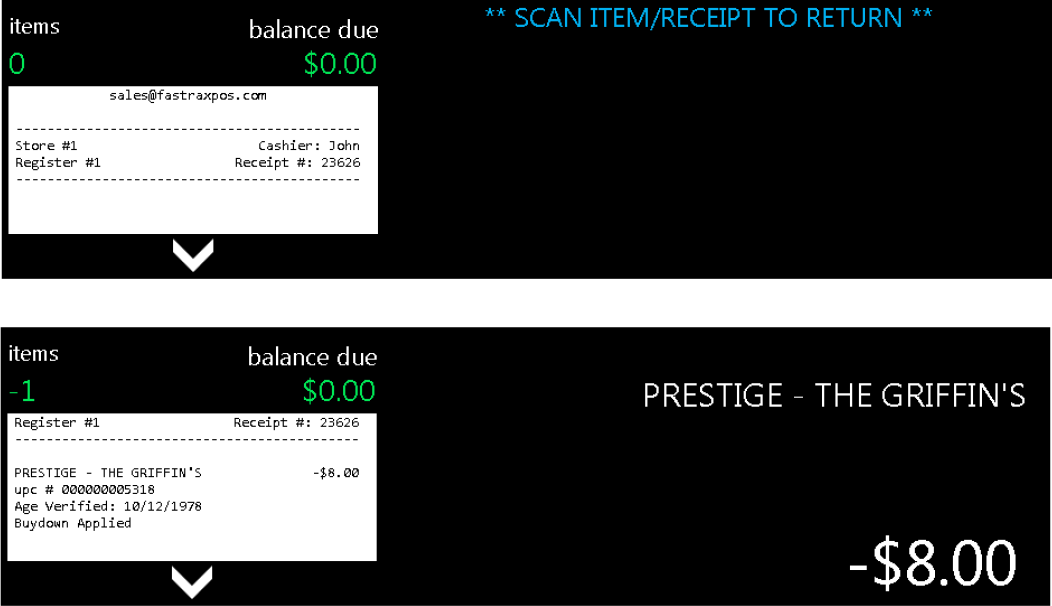 Notice that items appear as negative amounts when entered in return mode.When manually entering items, “ITEM RETURN” must be chosen prior to every item being returned.
 - Press “SUB TOTAL” when you are ready tocontinue and tender the return.
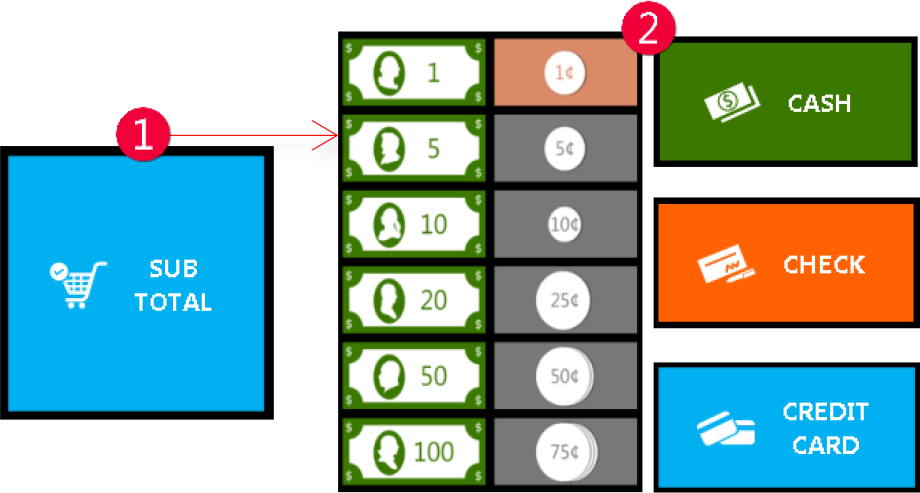
- Choose the appropriate tender for return.
ITEM RETURN | Receipt Barcode
- After pressing the “ITEM RETURN” button, scan thebarcode located on the bottom of the originaltransaction receipt.

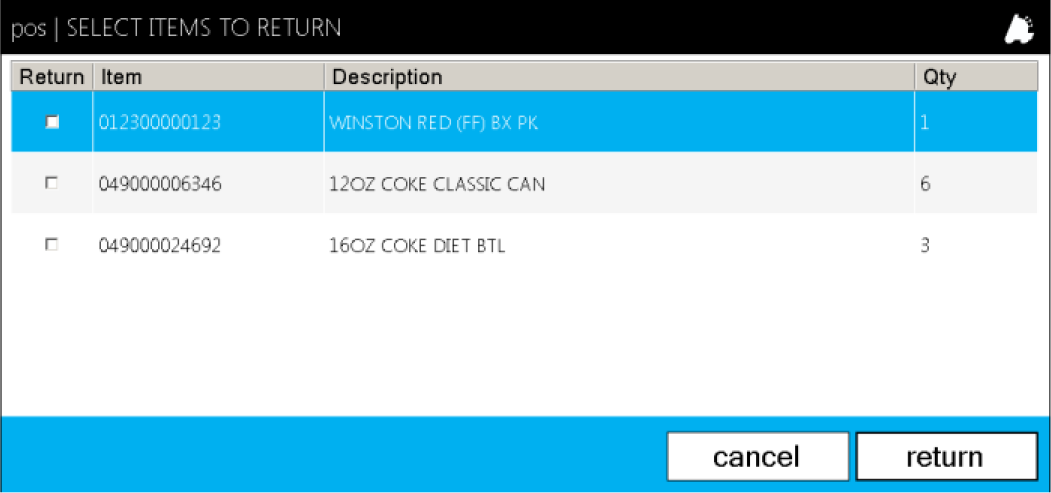
- This will open the “ITEMS TO RETURN” window. Items from the original sale will be listed.
- Highlight the item(s) you wish to return thenchoose the “return” button.
- When returned to the main POS screen, completethe return transaction following the steps listedabove.
NO SALE
- To open your cash drawer without completing atransaction, the “NO SALE” button can be used.
Cash drawer will not open if a sale is currently inprogress.

 NO SALE is a permissions based action. Check this ability only for applicable cashiers.Each NO SALE is recorded and viewable via X, Z, and Negative Cashier report, by cashier.
PAY IN
- To perform a cash pay in, choose the “PAY IN”button.

- From the “PAY IN” window, enter the amount ofcash you are receiving and a reference note forthe instance.
Choose the “ok” button when complete.
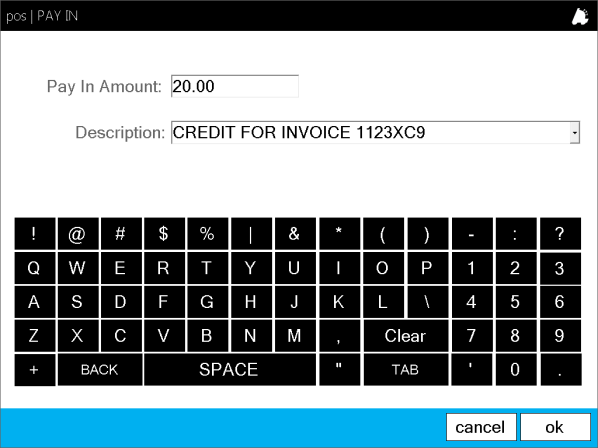 PAY IN is a permissions based action. Check this ability only for applicable cashiers.Each PAY IN is recorded and viewable via X, Z, and Negative Cashier report, by cashier.
PAY OUT
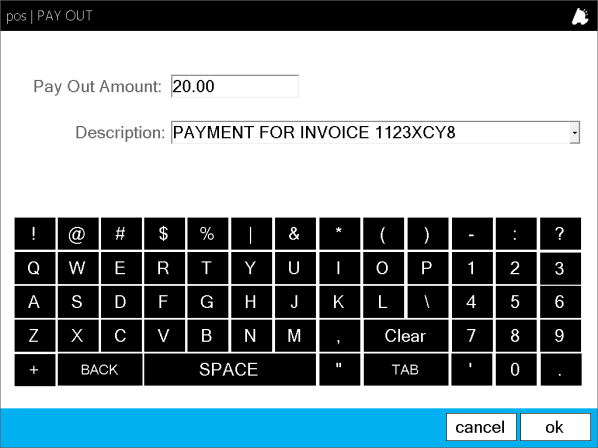
- To perform a cash pay out, choose the “PAY OUT”button.
- From the “PAY OUT” window, enter the amount ofcash you are removing and a reference note forthe instance.
Choose the “ok” button when complete.

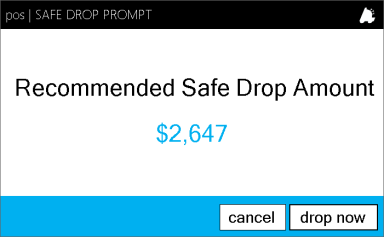
Safe drops can be performed by either choosing the SAFE DROP button or based on auto-prompt configuration via the Settings section in the actions module.
The auto prompt can be set to direct a cash drop when a designated dollar amount is reached at a designated time schedule (every 5 minutes, 10 minutes, etc.).
Using the MAX and MIN in drawer amounts will suggest an amount to drop.
SAFE DROP | Via Button
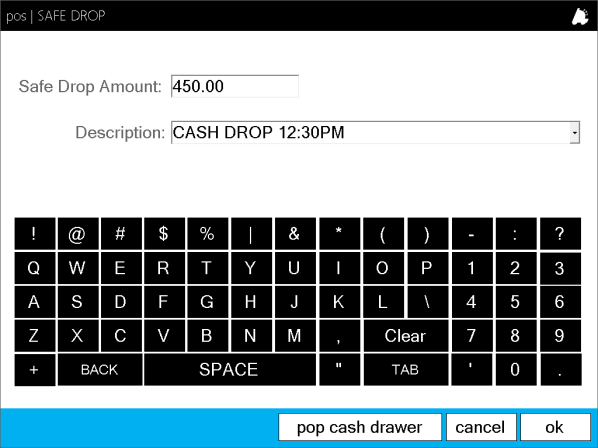
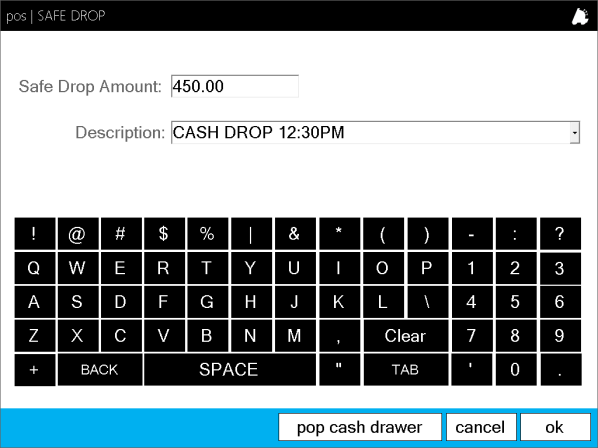
- To perform a cash safe drop, choose the “SAFEDROP” button.
- From the “SAFE DROP” window, enter the amountof cash you are removing and a reference note forthe instance.
- Choose the “pop cash drawer” button to openyour till.
Choose the “ok” button when complete.

SAFE DROP | Via Auto Prompt
- When the auto prompt window opens, you canchoose “cancel” or “drop now”.
- “drop now” will open the “SAFE DROP” windowwith the recommended drop.
- Choosing “cancel” will reset the auto prompt timer(prompt again in 5 minutes, 10 minutes, etc.).
- From the “SAFE DROP” window, enter the amountof cash you are removing with a reference note forthe instance.
- Choose the “pop cash drawer” button to openyour till.
Choose the “ok” button when complete.
STARTING TILL
“Starting Till” is the amount of cash your drawer/cashier begins the day with.
This cash amount will be excluded from your final drawer drop/deposit upon shift reconciliation.
STARTING TILL cash will be shown on REG X and REG Z reports in the “Cash Drawer Summary” as well as through the Reconciliation utility.
STARTING TILL
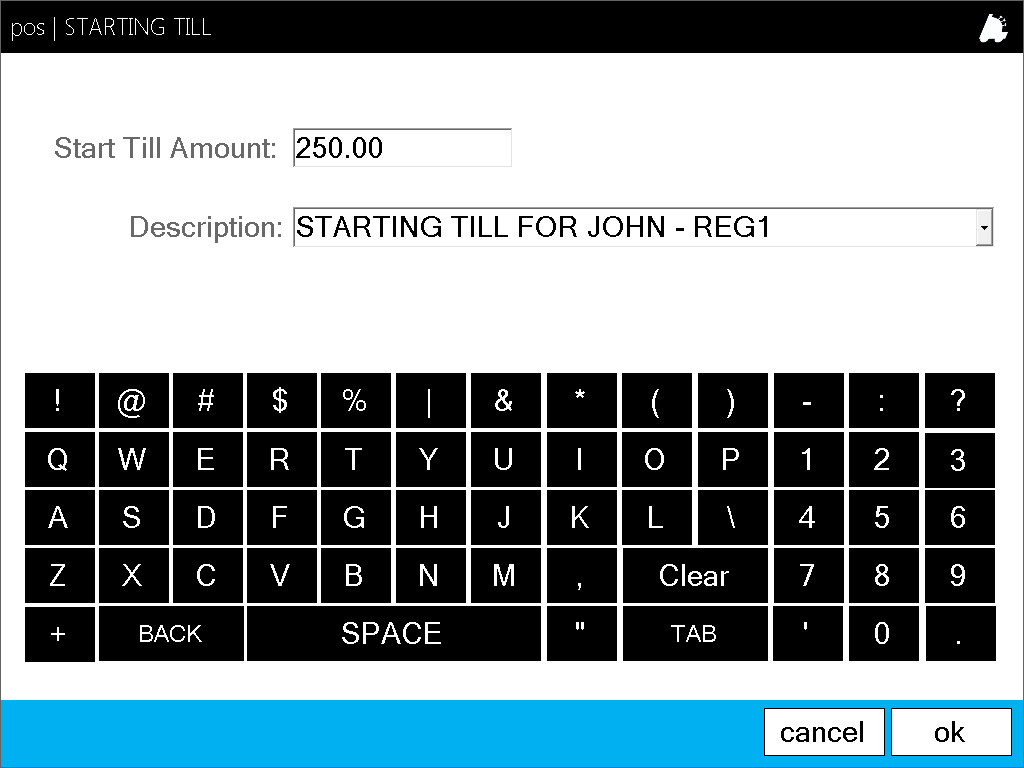
- To enter a starting till, choose the “STARTING TILL”button.

- From the “STARTING TILL” window, enter the starting till cash amount and a reference note for the instance.
- Choose the “ok” button when complete.

Gift Cards
With FasTrax’s closed loop gift card system, you are not only able to sell your custom gift cards, but also track and accept as purchasing tender.
Whether you are a single store or a 60 store corporate chain, selling and redeeming your proprietary gift cards is simple and quick!
The steps below will demonstrate how to sell and check gift card balances.
Gift Cards | Sell
- Using the on screen number pad (or hardwarekeyboard) enter the monetary amount youwish to sell/load onto your gift card.
- Choose the “SELL GIFT CARD” button.

- Add any additional items for the transaction (ifapplicable) then choose the “SUB TOTAL” button.
- Finalize and tender the sale like any other itemtransaction following the steps above.
Once the sale is complete, you will be prompted to enter the gift card information.
All tenders can be used for the sell/load of gift cards.
- This will open the “GIFT CARD ENTRY” window.
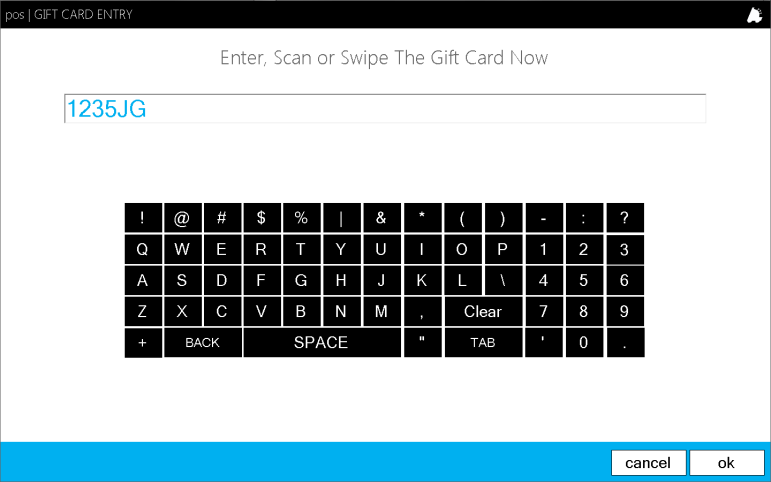
- Swipe, scan, or manually enter the number for thegift card.
Manual card entry can be disabled via the Settings section of the actions module.To help protect your customer’s card security, forcing swipes or scans is preferable to manual entry. - The transaction receipt will print with the gift cardbalance.
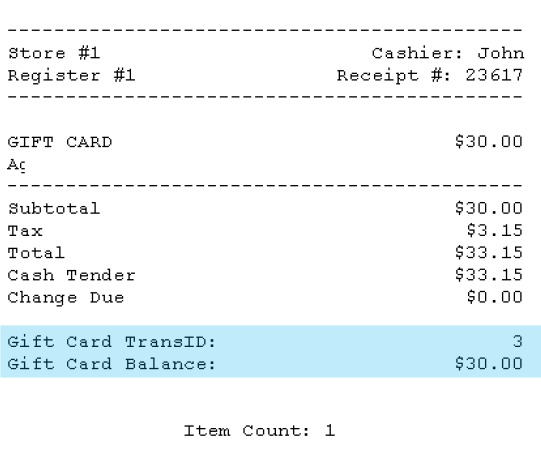
Gift card charges can be made from any store in your corporate network.
Gift Cards | Check Balance
- Choose the “SELL GIFT CARD” button.

- This will open the “GIFT CARD ENTRY” window.
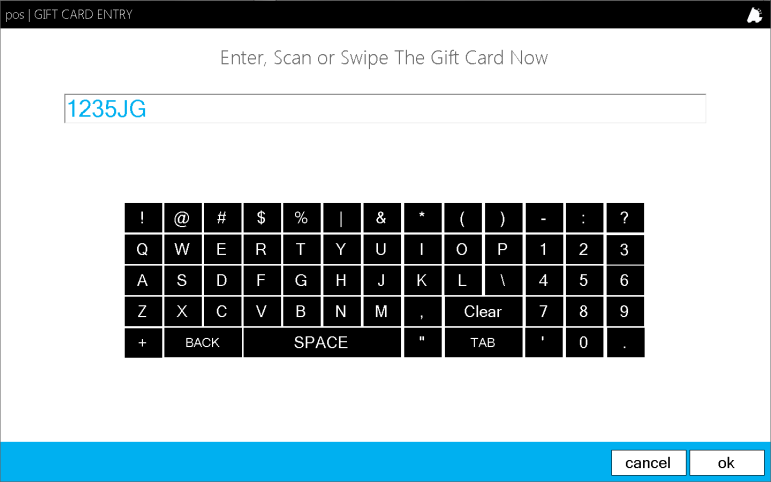
- Swipe, scan, or manually enter the number of thegift card.
Manual card entry can be disabled via the Settings section of the actions module.To help protect your customers’ card security, forcing swipes or scans is preferable to manual entry. - The “GIFT CARD BALANCE” window will open anddisplay the available card balance.
Choose the “ok” button to close the window.
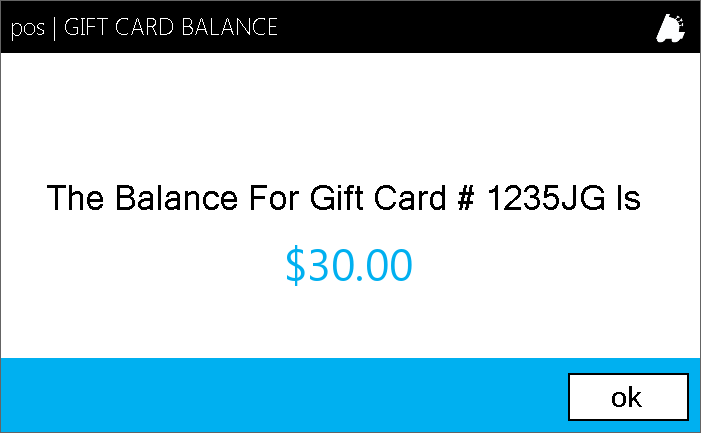
Gift card balance can be checked from any store in your corporate network.
Register X and Z
| REG X is a cashier function used to view current POS shift information.
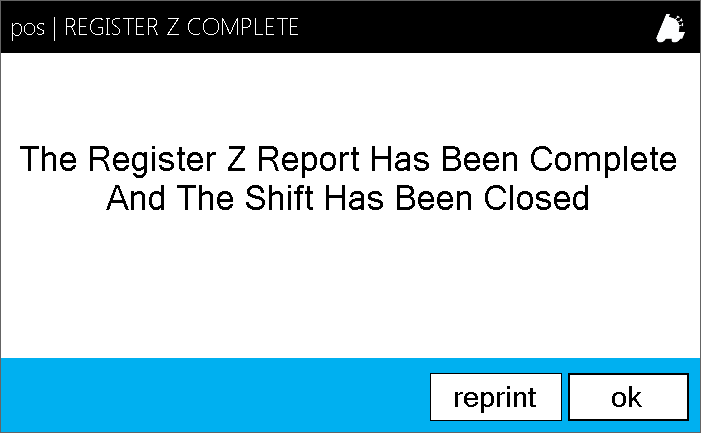
REG Z is a cashier function used to close the current POS/Cashier shift. The receipt printer report which can be included in this function includes the same information displayed via a REG X. In fact, the only difference between these two tools is the REG Z closes the shift and resets current data for the next cashier. An example printout of the information displayed by these two functions can be seen on the right side of this page. Pertinent login, sales totals, tax totals, cashier actions, tender details, department details, department group totals, and cash drawer summary appear as sections in this report. If you do not intend for your cashier to see this information, these can be set to blind. The cashier Z function can also be enabled/disabled via employee permissions in the Management utility. Once a REG Z is complete, the cash drawer will open and the cashier will receive the following window – Pressing the “ok” button will log the cashier out of the POS in preparation for either a cashier change or reconciliation/cash drawer information entry. |
 |
Shift Reconciliation
Shift Reconciliation is a function for balancing your drawer at the end of a cashier shift once a Register Z is ran.
Shift Reconciliation is located under the “reconciliation” portion of the actions module.
Reconciliations can be set as blind from the “Settings” section of the actions module. A blind reconciliation will only allow cashiers/managers to enter drawer information without seeing expected totals and possible variances.
Once Shift Reconciliations are completed, they can be reviewed via the “Reconciliation Report” in Director at both store and corporate interfaces.
Reconciliation Settings
Reconciliations Settings can be edited via the “Settings” sections of the actions module.
Once settings have been confirmed, choose “Save”.
point of sale will prompt for an application restart to apply changes and point of sale will close.
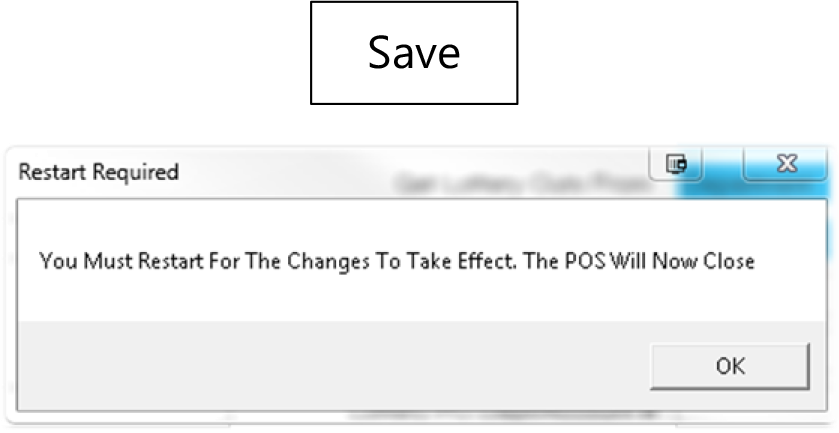
Once you have opened point of sale, choose the actions module, then the reconciliation section.
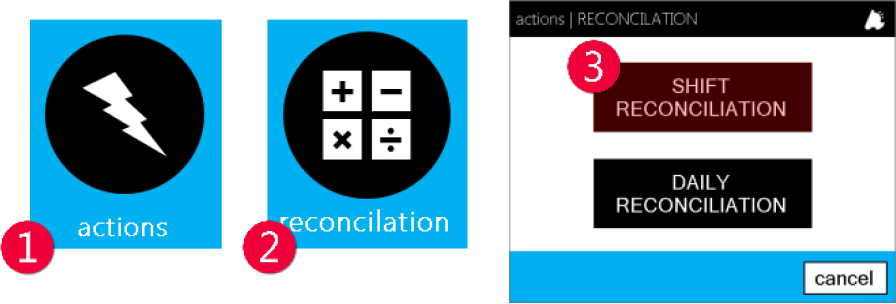
Choose “SHIFT RECONCILIATION” to begin.
New Shift Reconciliation
- From the reconciliation option in the actionsmodule, choose “Shift Reconciliation”.
- This will open the Shift Reconciliation window withavailable shifts for reconcile.
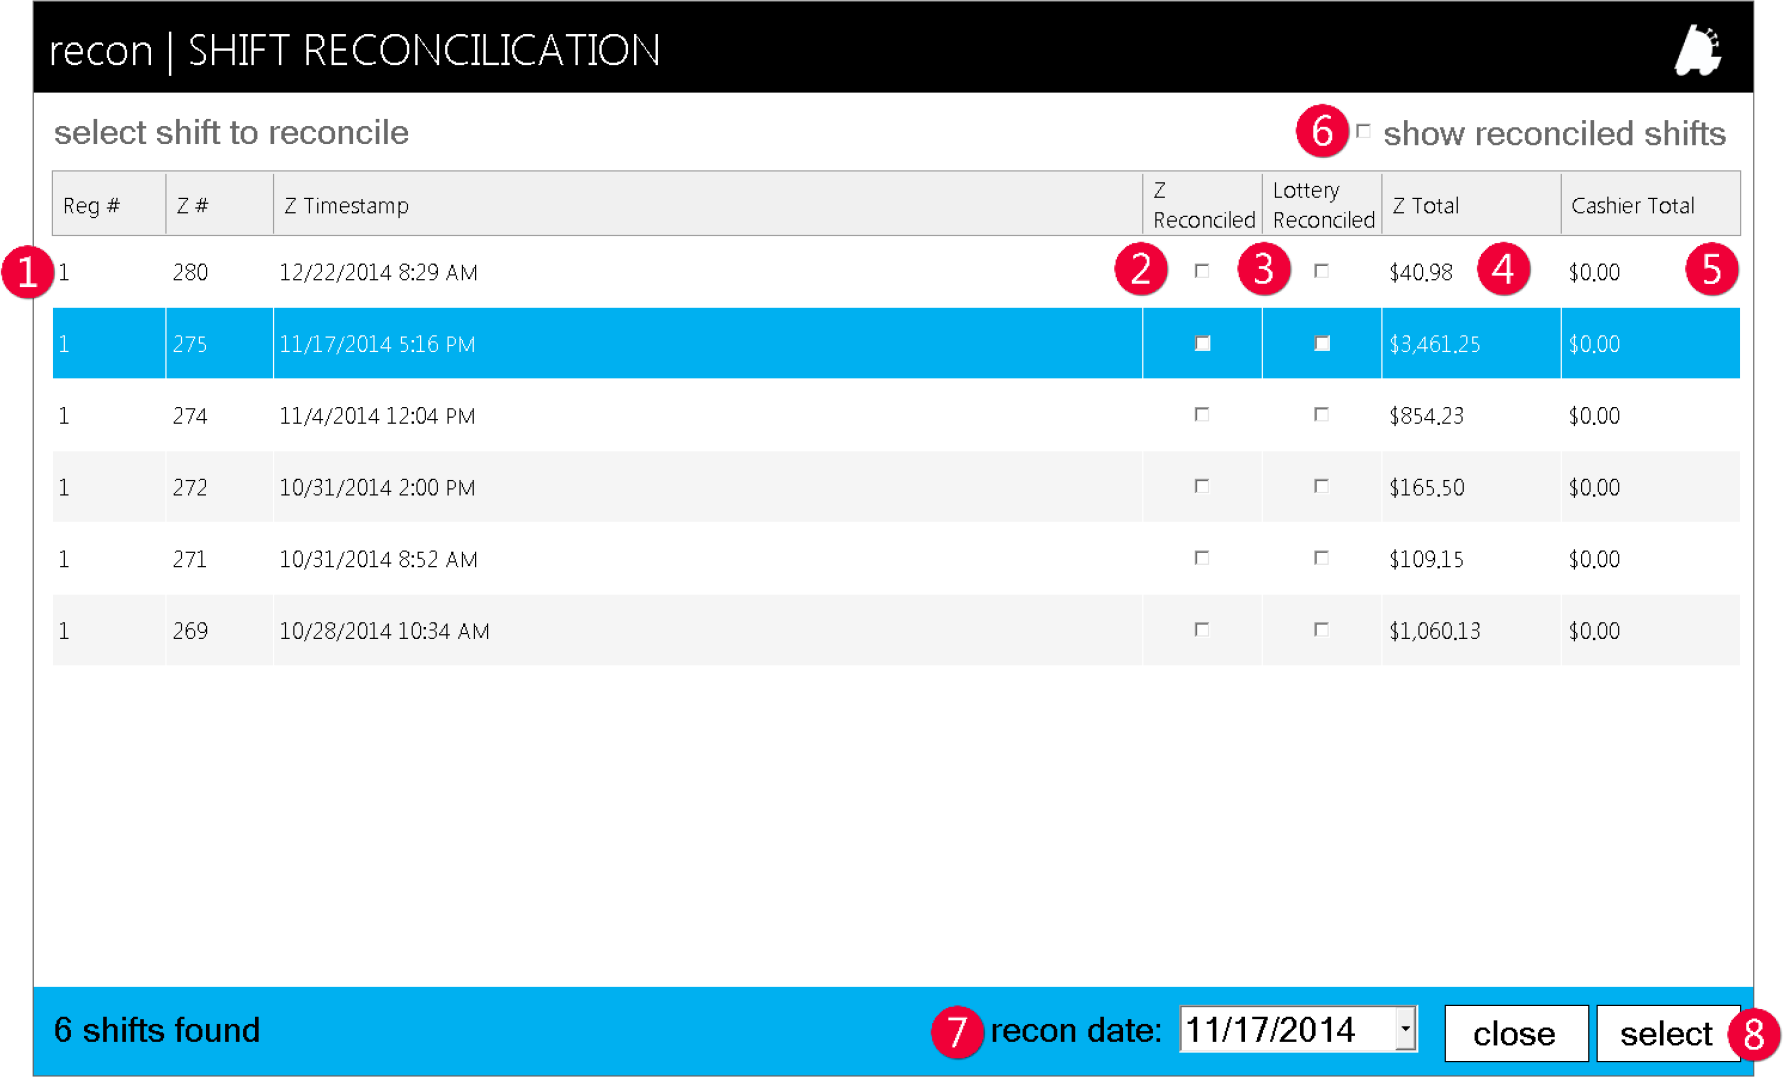
- Z List – list of unreconciled Zs. Highlight and choose “select” to edit
- Z Reconciled – once reconciled, this box will be checked
- Lottery Reconciled – if lottery is sold and being reconciled, this box will checkwhen Lottery Recon associated to its applicable Z is complete
- Z Total – once a Z is opened and edited, the total from the Z is populated.
- Cashier Total – employee entered drawer information is displayed here
- show reconciled shifts – when checked, previously completed reconciliationswill also populate the list for review
- recon date – filter to display specific dates from this dropdown
- select – when the applicable Z is chosen from the list, choose “select” to openand edit
- Once opened, enter totals from register drawer into their applicable field as shown below.
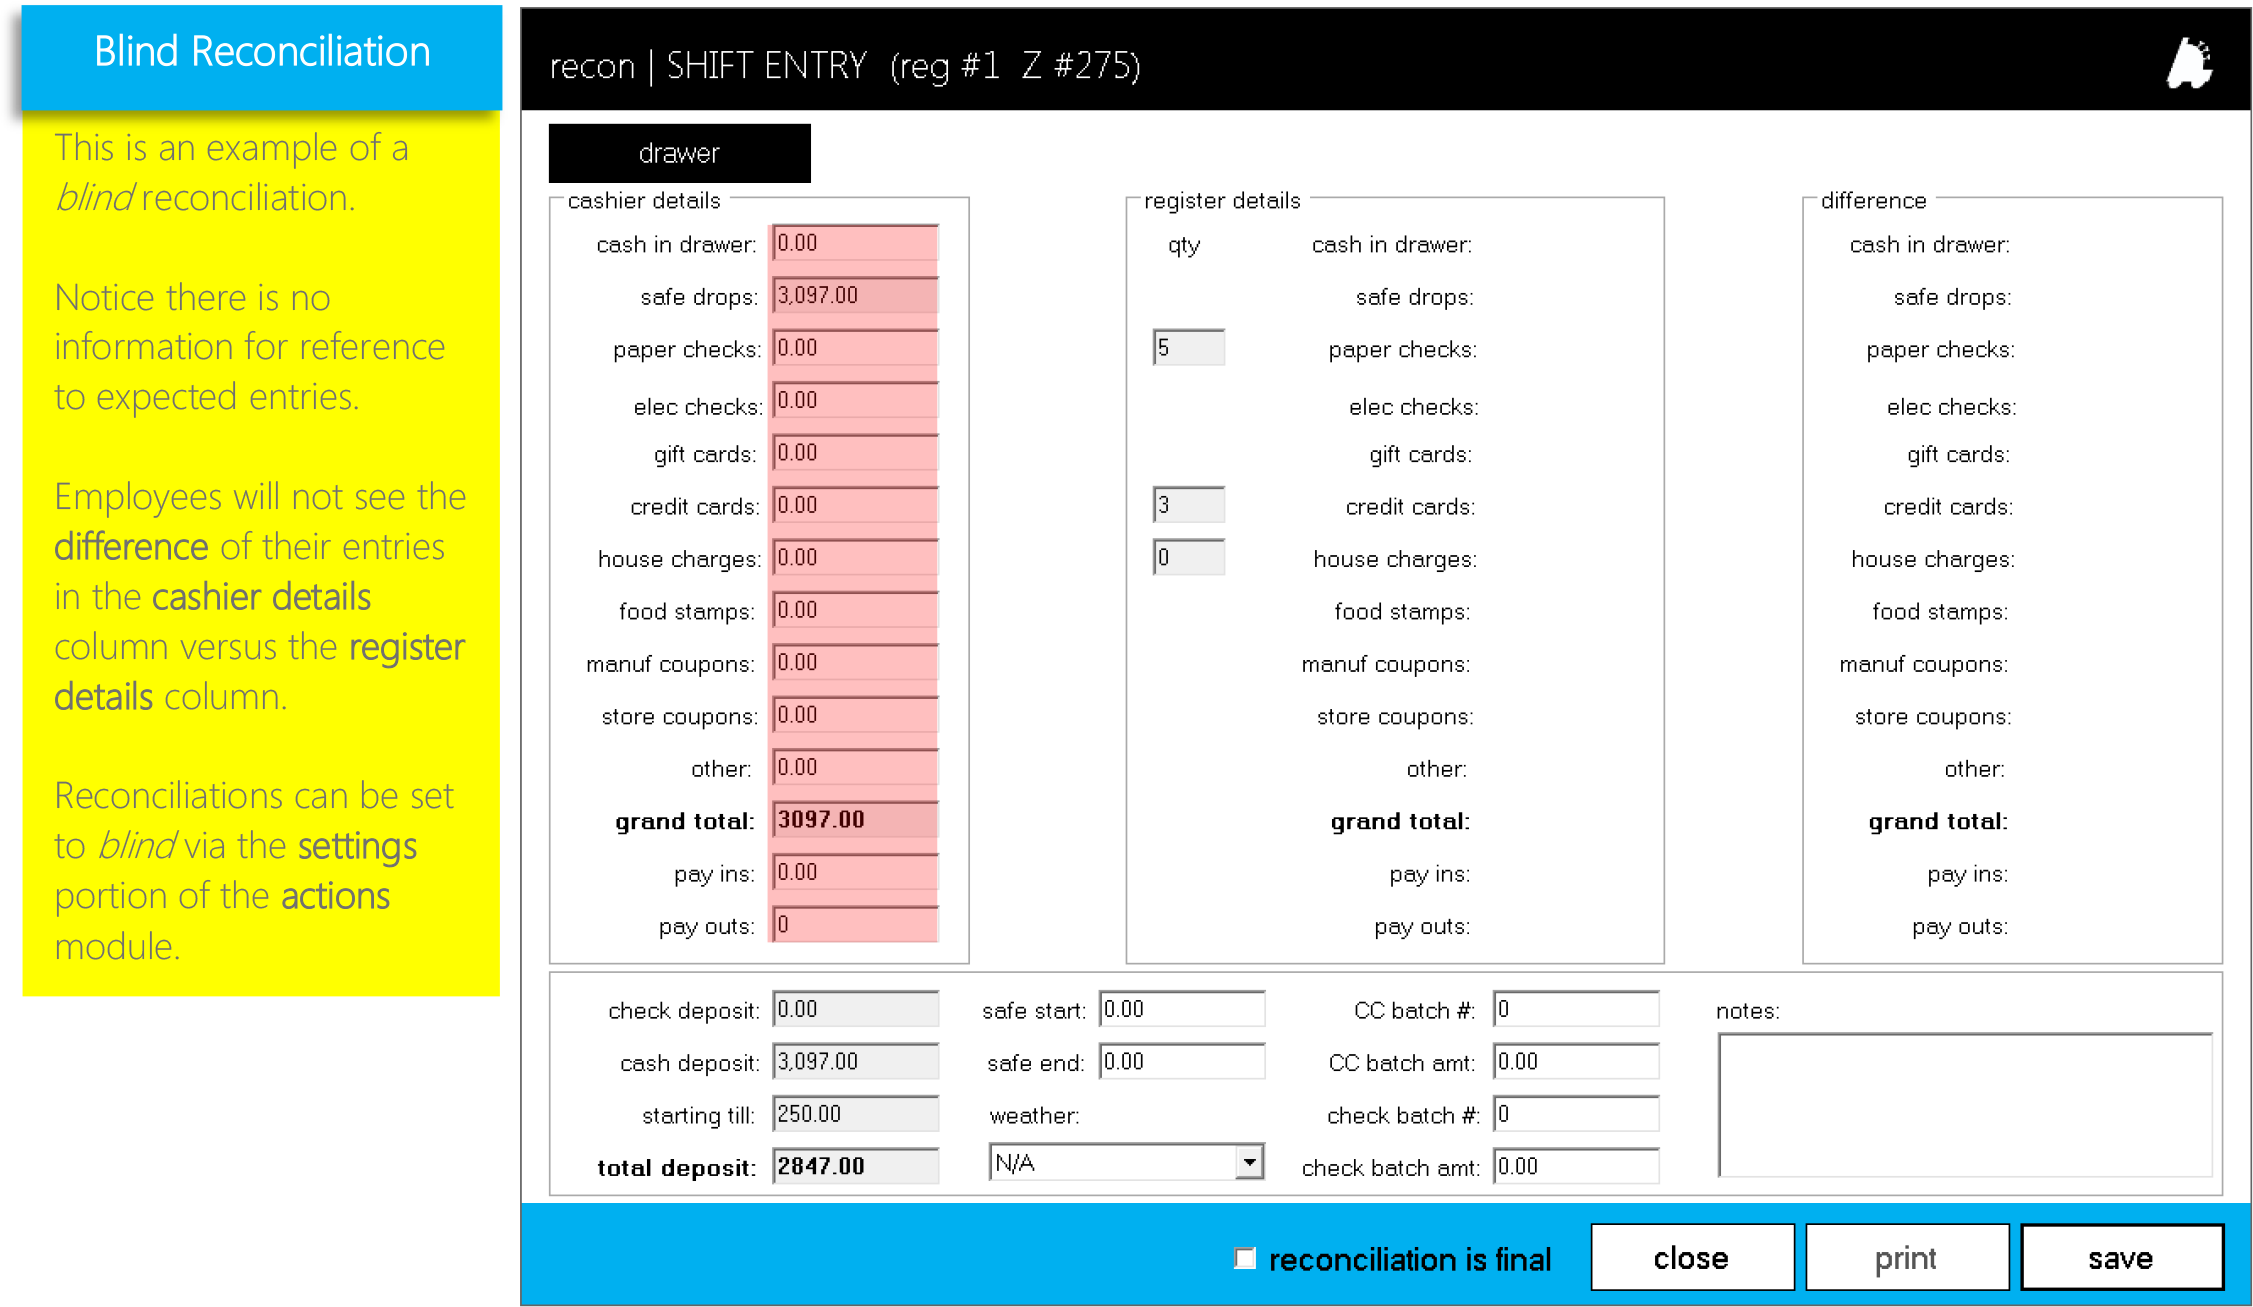
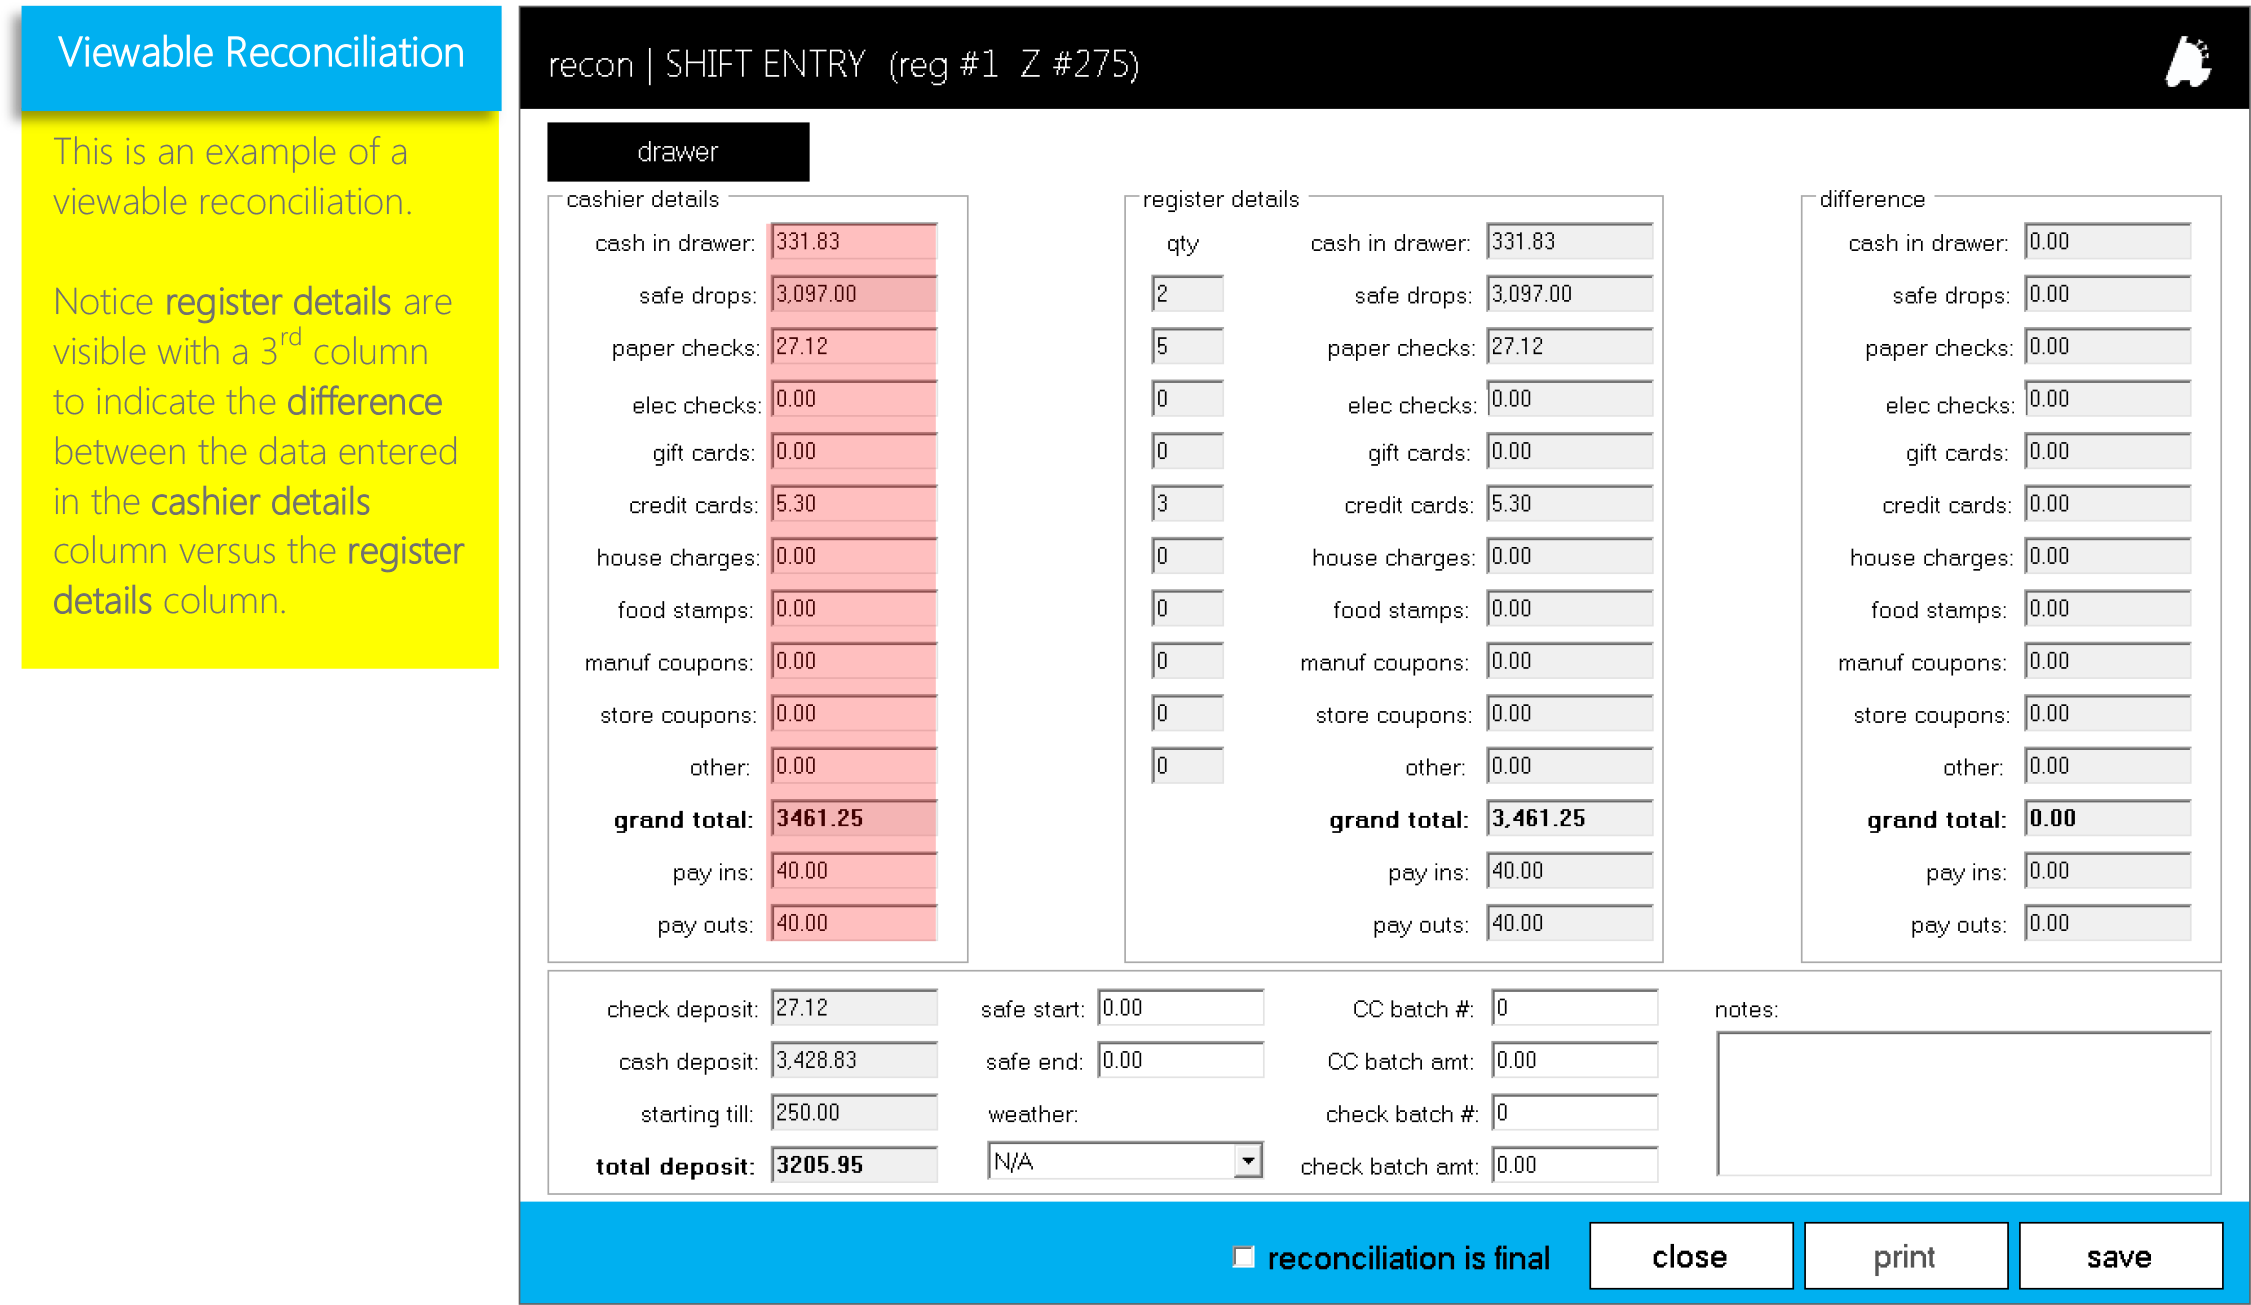
- After entering drawer totals under the “cashier details” column, enter any additional information you may requirein the following three fields.
- Utilize safe start and end to manually enter thesafe amount at the time of shift begin andreconciliation.
- The weather dropdown allows you to choosethe weather type for the shift currently beingreconciled. This can aid in providing extrainformation for analyzing customer traffic.
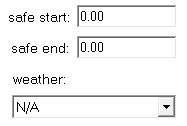
- The weather dropdown allows you to choosethe weather type for the shift currently beingreconciled. This can aid in providing extrainformation for analyzing customer traffic.
- If credit batching is performed manually or youhave received batching information prior toreconciliation, this information can be enteredhere for shift/drawer association.
- The check batch sections function the same ascredit batch sections.
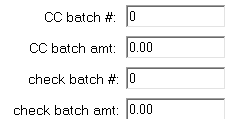
- The check batch sections function the same ascredit batch sections.
- Enter additional notes you find applicable tothe reconciliation being performed.
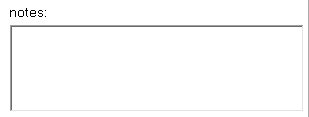
- Utilize safe start and end to manually enter thesafe amount at the time of shift begin andreconciliation.
- Once your drawer data is completely entered, youcan close, print, or save the recon.
- Choosing close will remove any entered data.
- Choosing print requires connection to astandard computer printer.
- Choosing save will apply entered data.Reconciliation data is not communicated tocorporate unless reconciliation is final ischecked.
- Choosing reconciliation is final before savingwill not allow you to return to edit shiftreconciliations.
Reconciliations can be edited after choosing save until reconciliation is final is checked prior to saving.Remember, previous reconciliations can be recalled by choosing the show reconciled shifts option from the reconciliations list window.Reconciliation information can be viewed via the Reconciliation Report located in Director under the Reports module.
POS Button Editor
The POS Button Editor is a utility designed to simplify the process of customizing your POS panels and buttons. Located in the settings section of the action module, managing your panels and buttons has been centralized with function descriptions and button preview so you can fully understand what you are building and how it will look before saving.
With a corporate interface, the POS Button Editor enables you the ability to build and manage your panels and buttons from a central location while having the satellite stores/terminals download your creation!
- Access the POS Button Editor via the settingssection of the actions module.
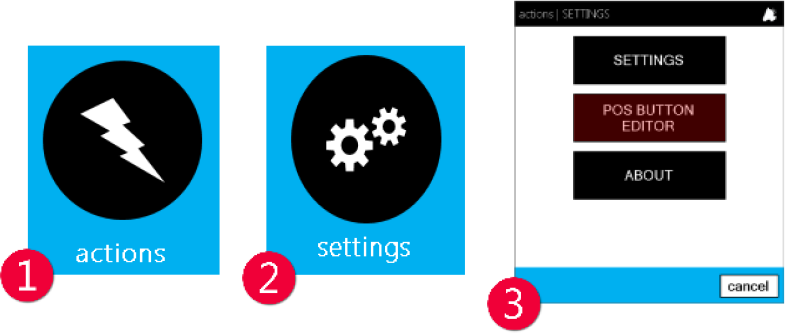
- Once chosen, the panel selection list will open.
Panels are the groupings of buttons your cashiers will utilize.
To edit an existing panel, highlight then choose the edit button.
To create a new panel, choose the new button.
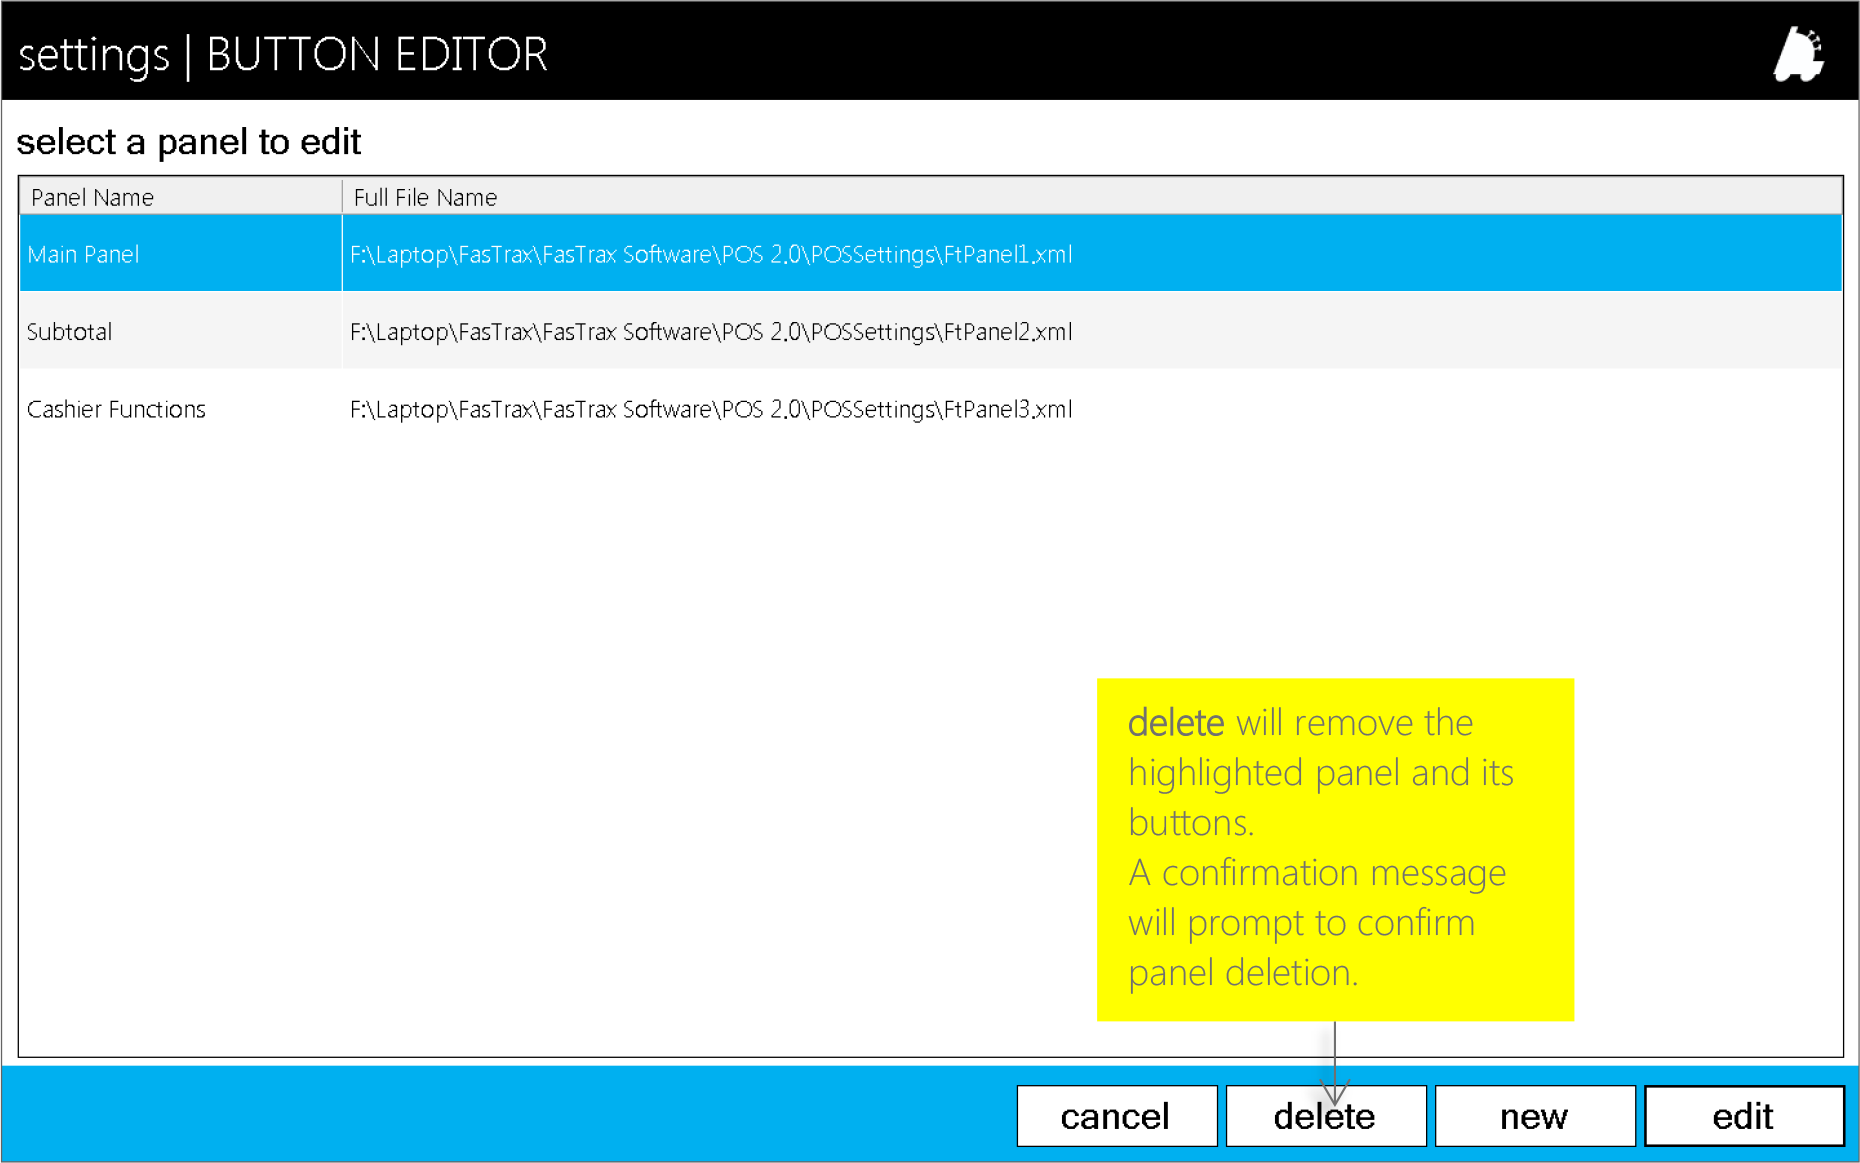
Creating a New Panel
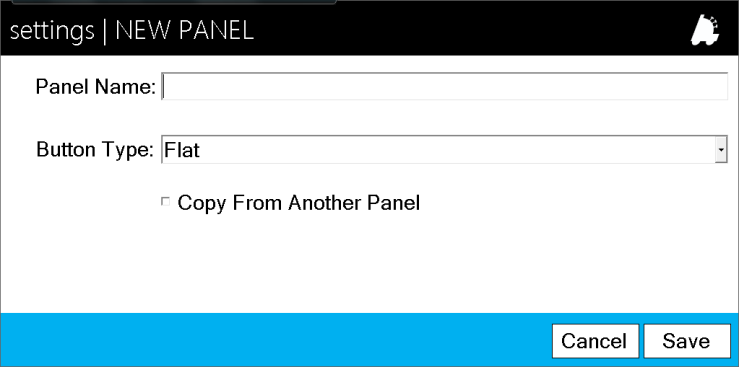
- From the panel list window, choose new.
- Enter the name of the new panel.
- Button Types are the visual appearance of buttons.This has no effect on function.
Flat is the default style. - Copy From Another Panel allows you to create anew panel based on an existing panel setup.
- Choose Save when you are ready to proceed.
- Once saved, the new panel will populate theprevious panel selection list.
Edit a New/Existing Panel
- From the panel list window, highlight theapplicable panel.
- Choose the edit button.
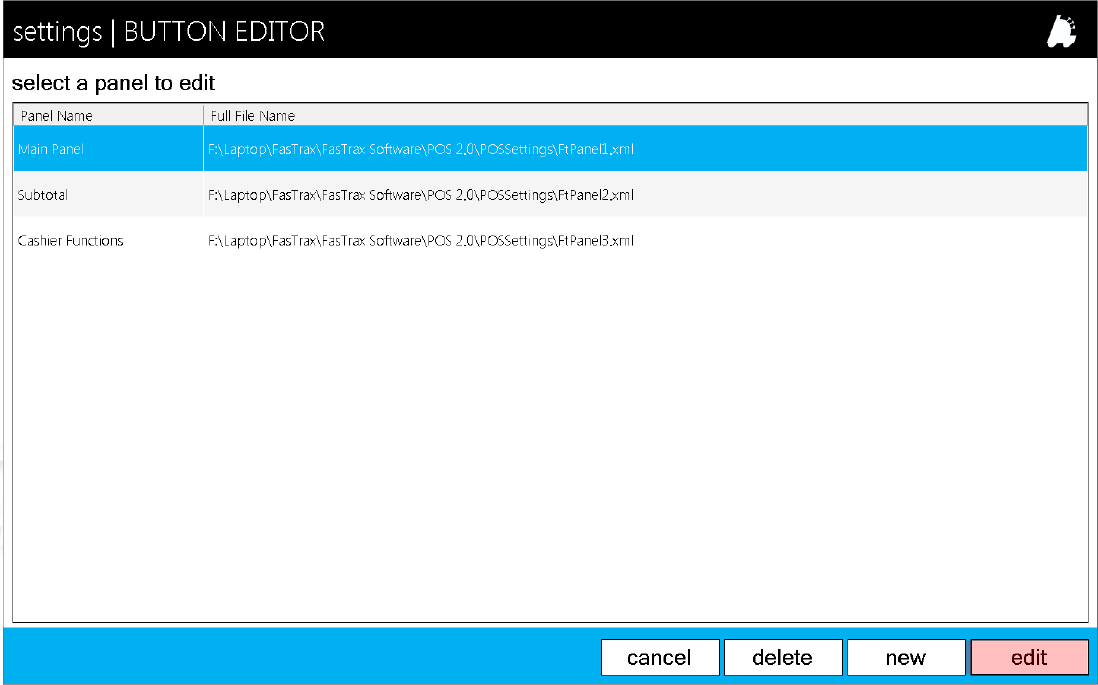 delete will remove the highlighted panel and its buttons.A confirmation message will prompt to confirm panel deletion.
 - An editable version of the panel will open.
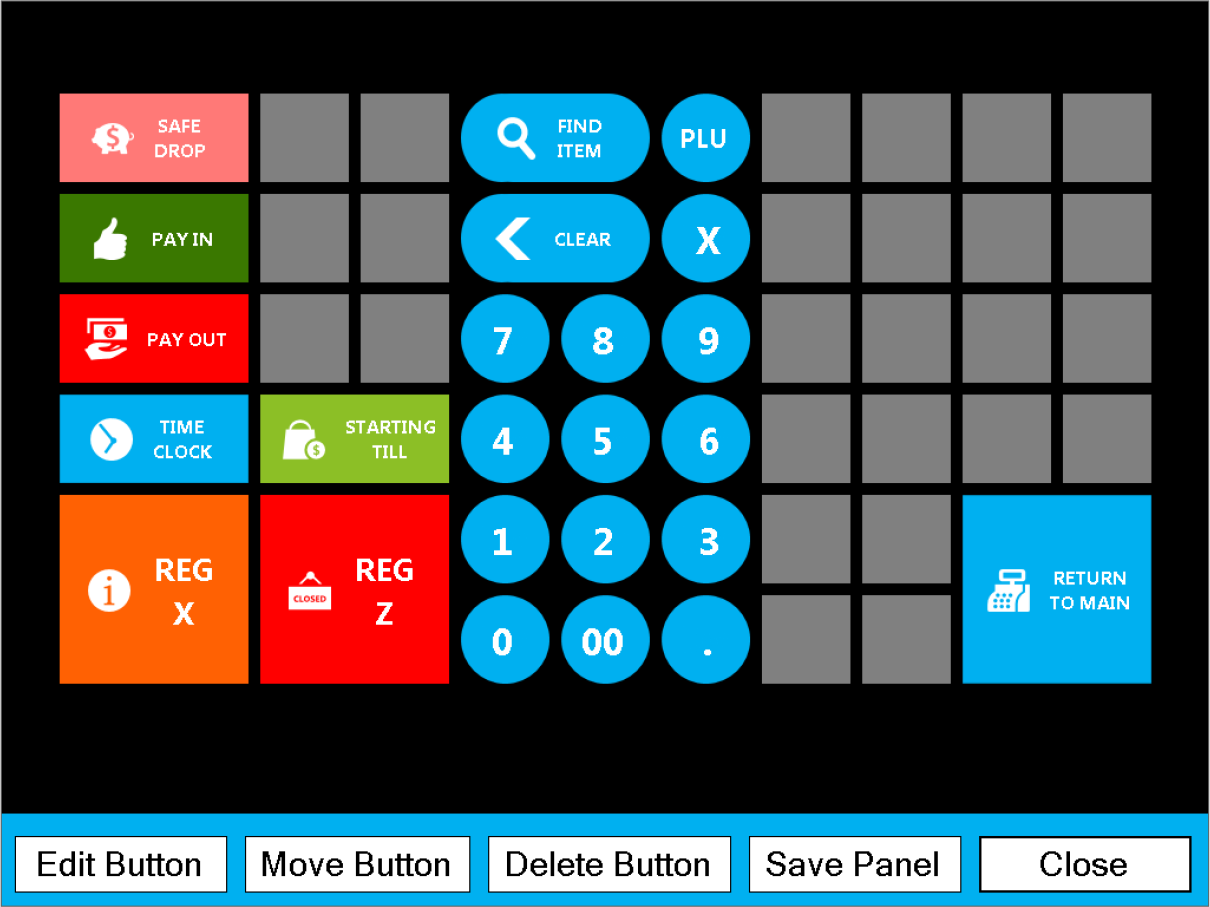 Edit Button – If an existing button is highlighted, will open the editor section.If a grey “blank” box is highlighted,, will open the editor section for a new button.Move Button – Highlight a button then choose the Move Button option. Choose the new location on the panel grid for the highlighted button.Delete Button – Highlight a button then choose Delete Button to remove existing buttons.Save Panel – Will save the current panel setup. If not chosen after button editing, you will be prompted to save before closing.Close – Closes the panel editor.
 - Choose the location for your new button.
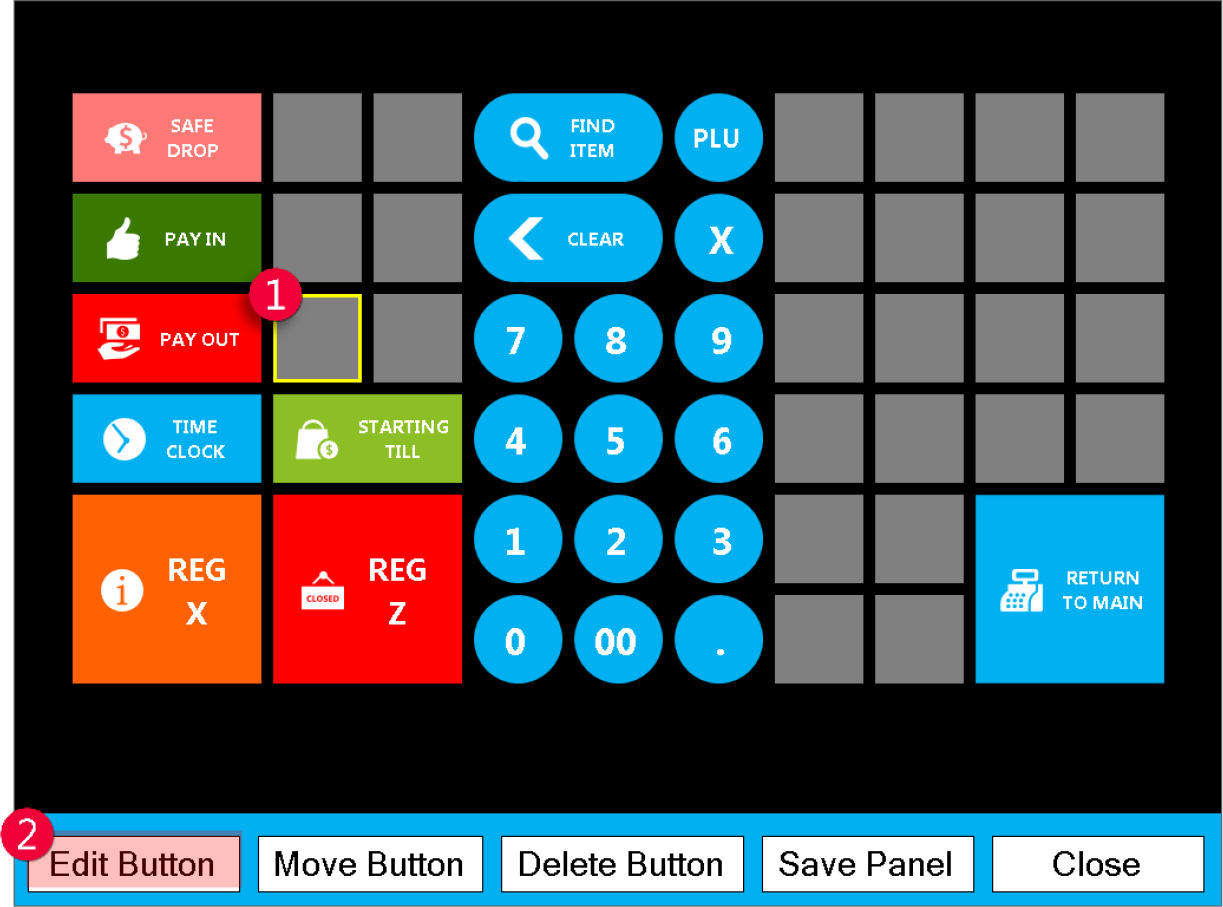 shown in the example to the right as a yellow highlight
 - Choose the Edit Button option.
- This will open the BUTTON DETAILS window.
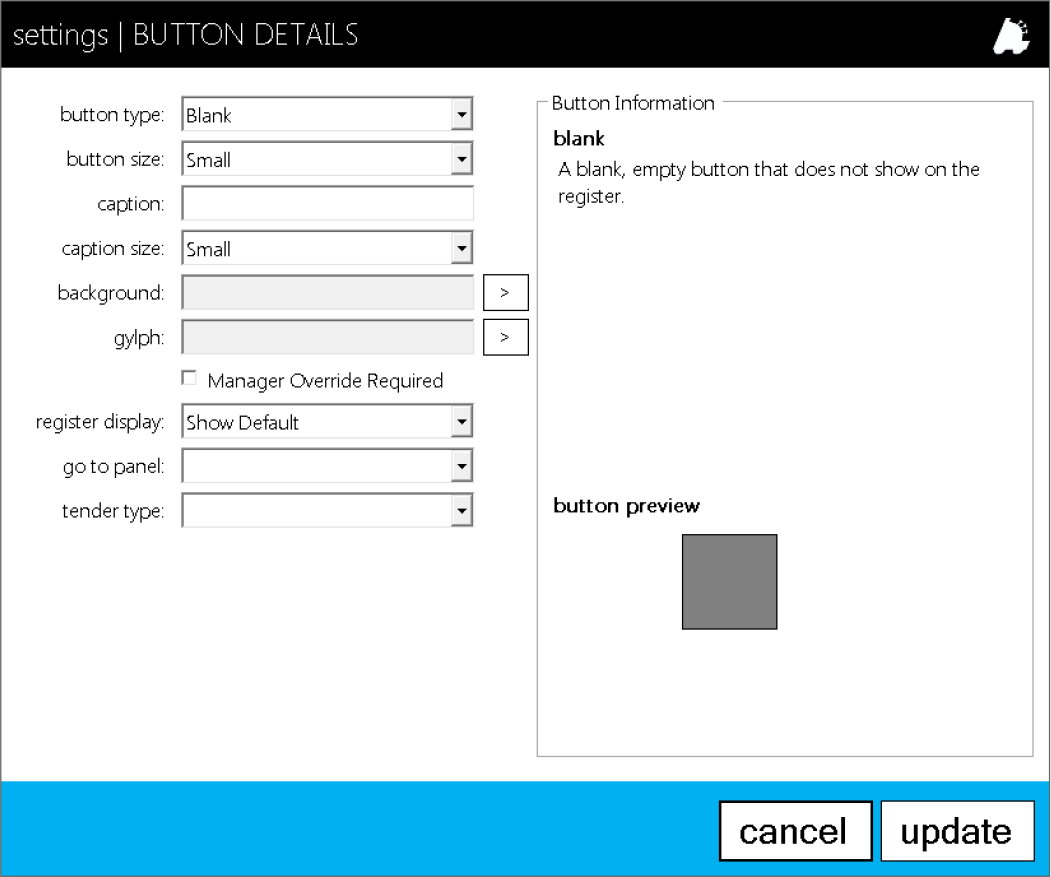
- button type – choose the button function
- button size – 1, 2, or 4 grey squares in size
- caption – text on button
- caption size – size of text on button
- background – button shape and color
- glyph – reference icon on button
- Manage Override Required – check for buttonsyou wish to require a manager to approvefunction.
- register display – after function completion,remains on current panel or changes to subtotal
- go to panel – after function is completed,changes to entered panel
- tender type –choose from available tenders ifthis is a tender button
- Button Information – description of thefunction of the button type
- button preview – visual preview of new button
- Enter the applicable details for your new button.
- Choose the update option when you are ready toproceed.
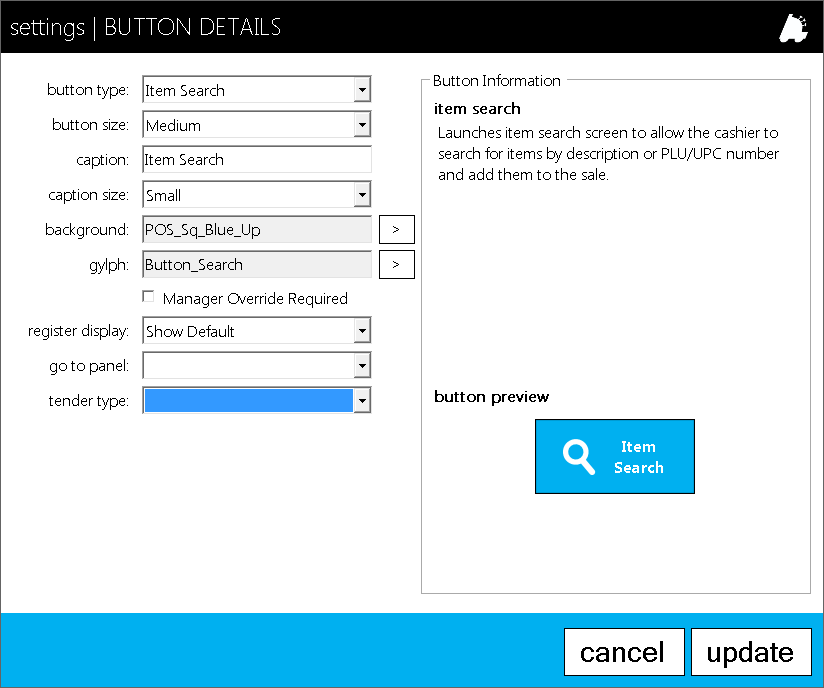 The example to the right demonstrates the structure of an Item Lookup button.
 - Once update is chosen, you will be returned to theeditable panel view with the addition of your newbutton.
- From here you can choose to edit, move, or deletebuttons.
- Choose Save Panel when you have finished withbutton editing
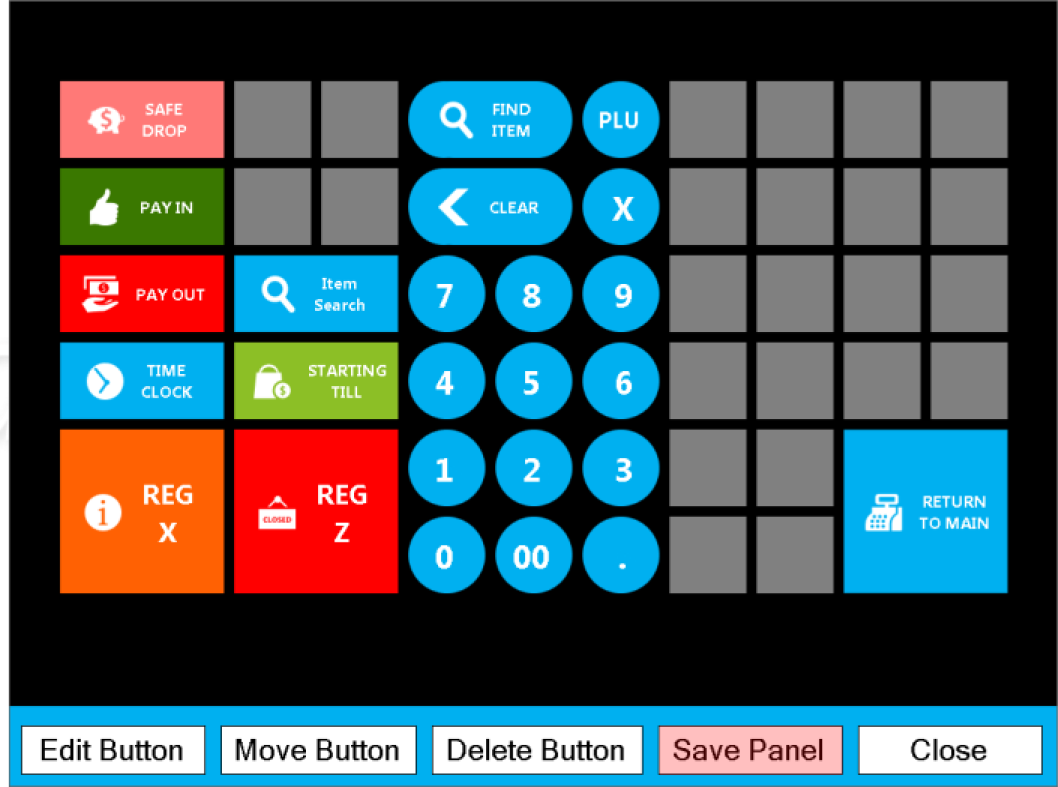
- You will be returned to the panel selection list aftercompletion of saving.
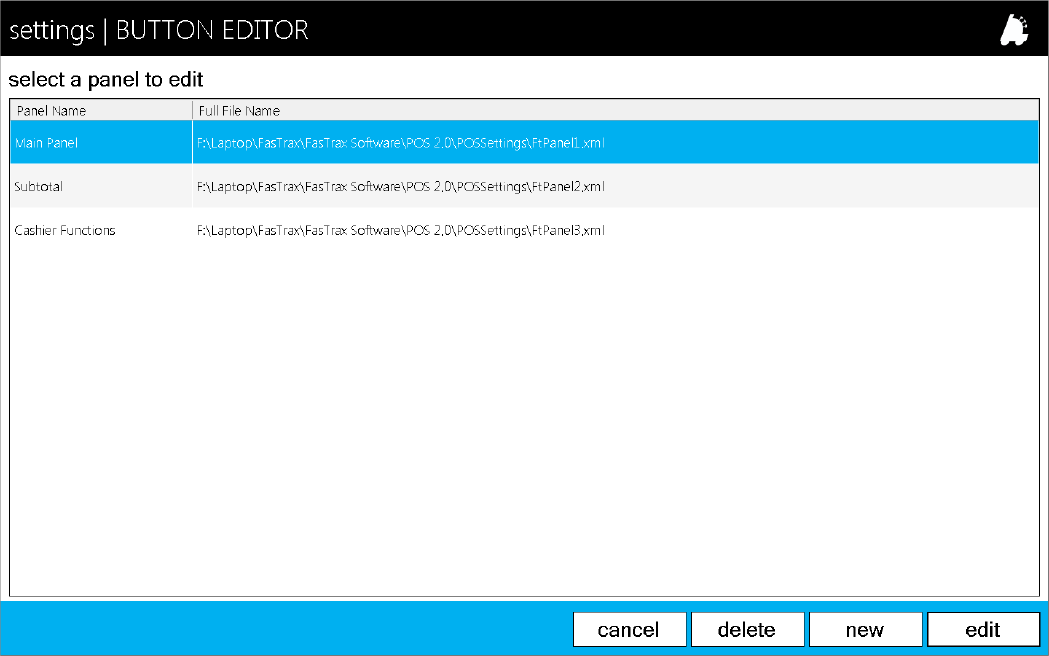 From here you can continue editing panels and buttons or choose the cancel button to return to the actions module to begin using your new button(s) via the POS!
Creating a Sell Item(s) Button
Buttons like the Sell Item and Open Department allow for single or multiple choice functions.
When these buttons are picked in the POS, they will open a window displaying the available applied options.
Sell Item Button
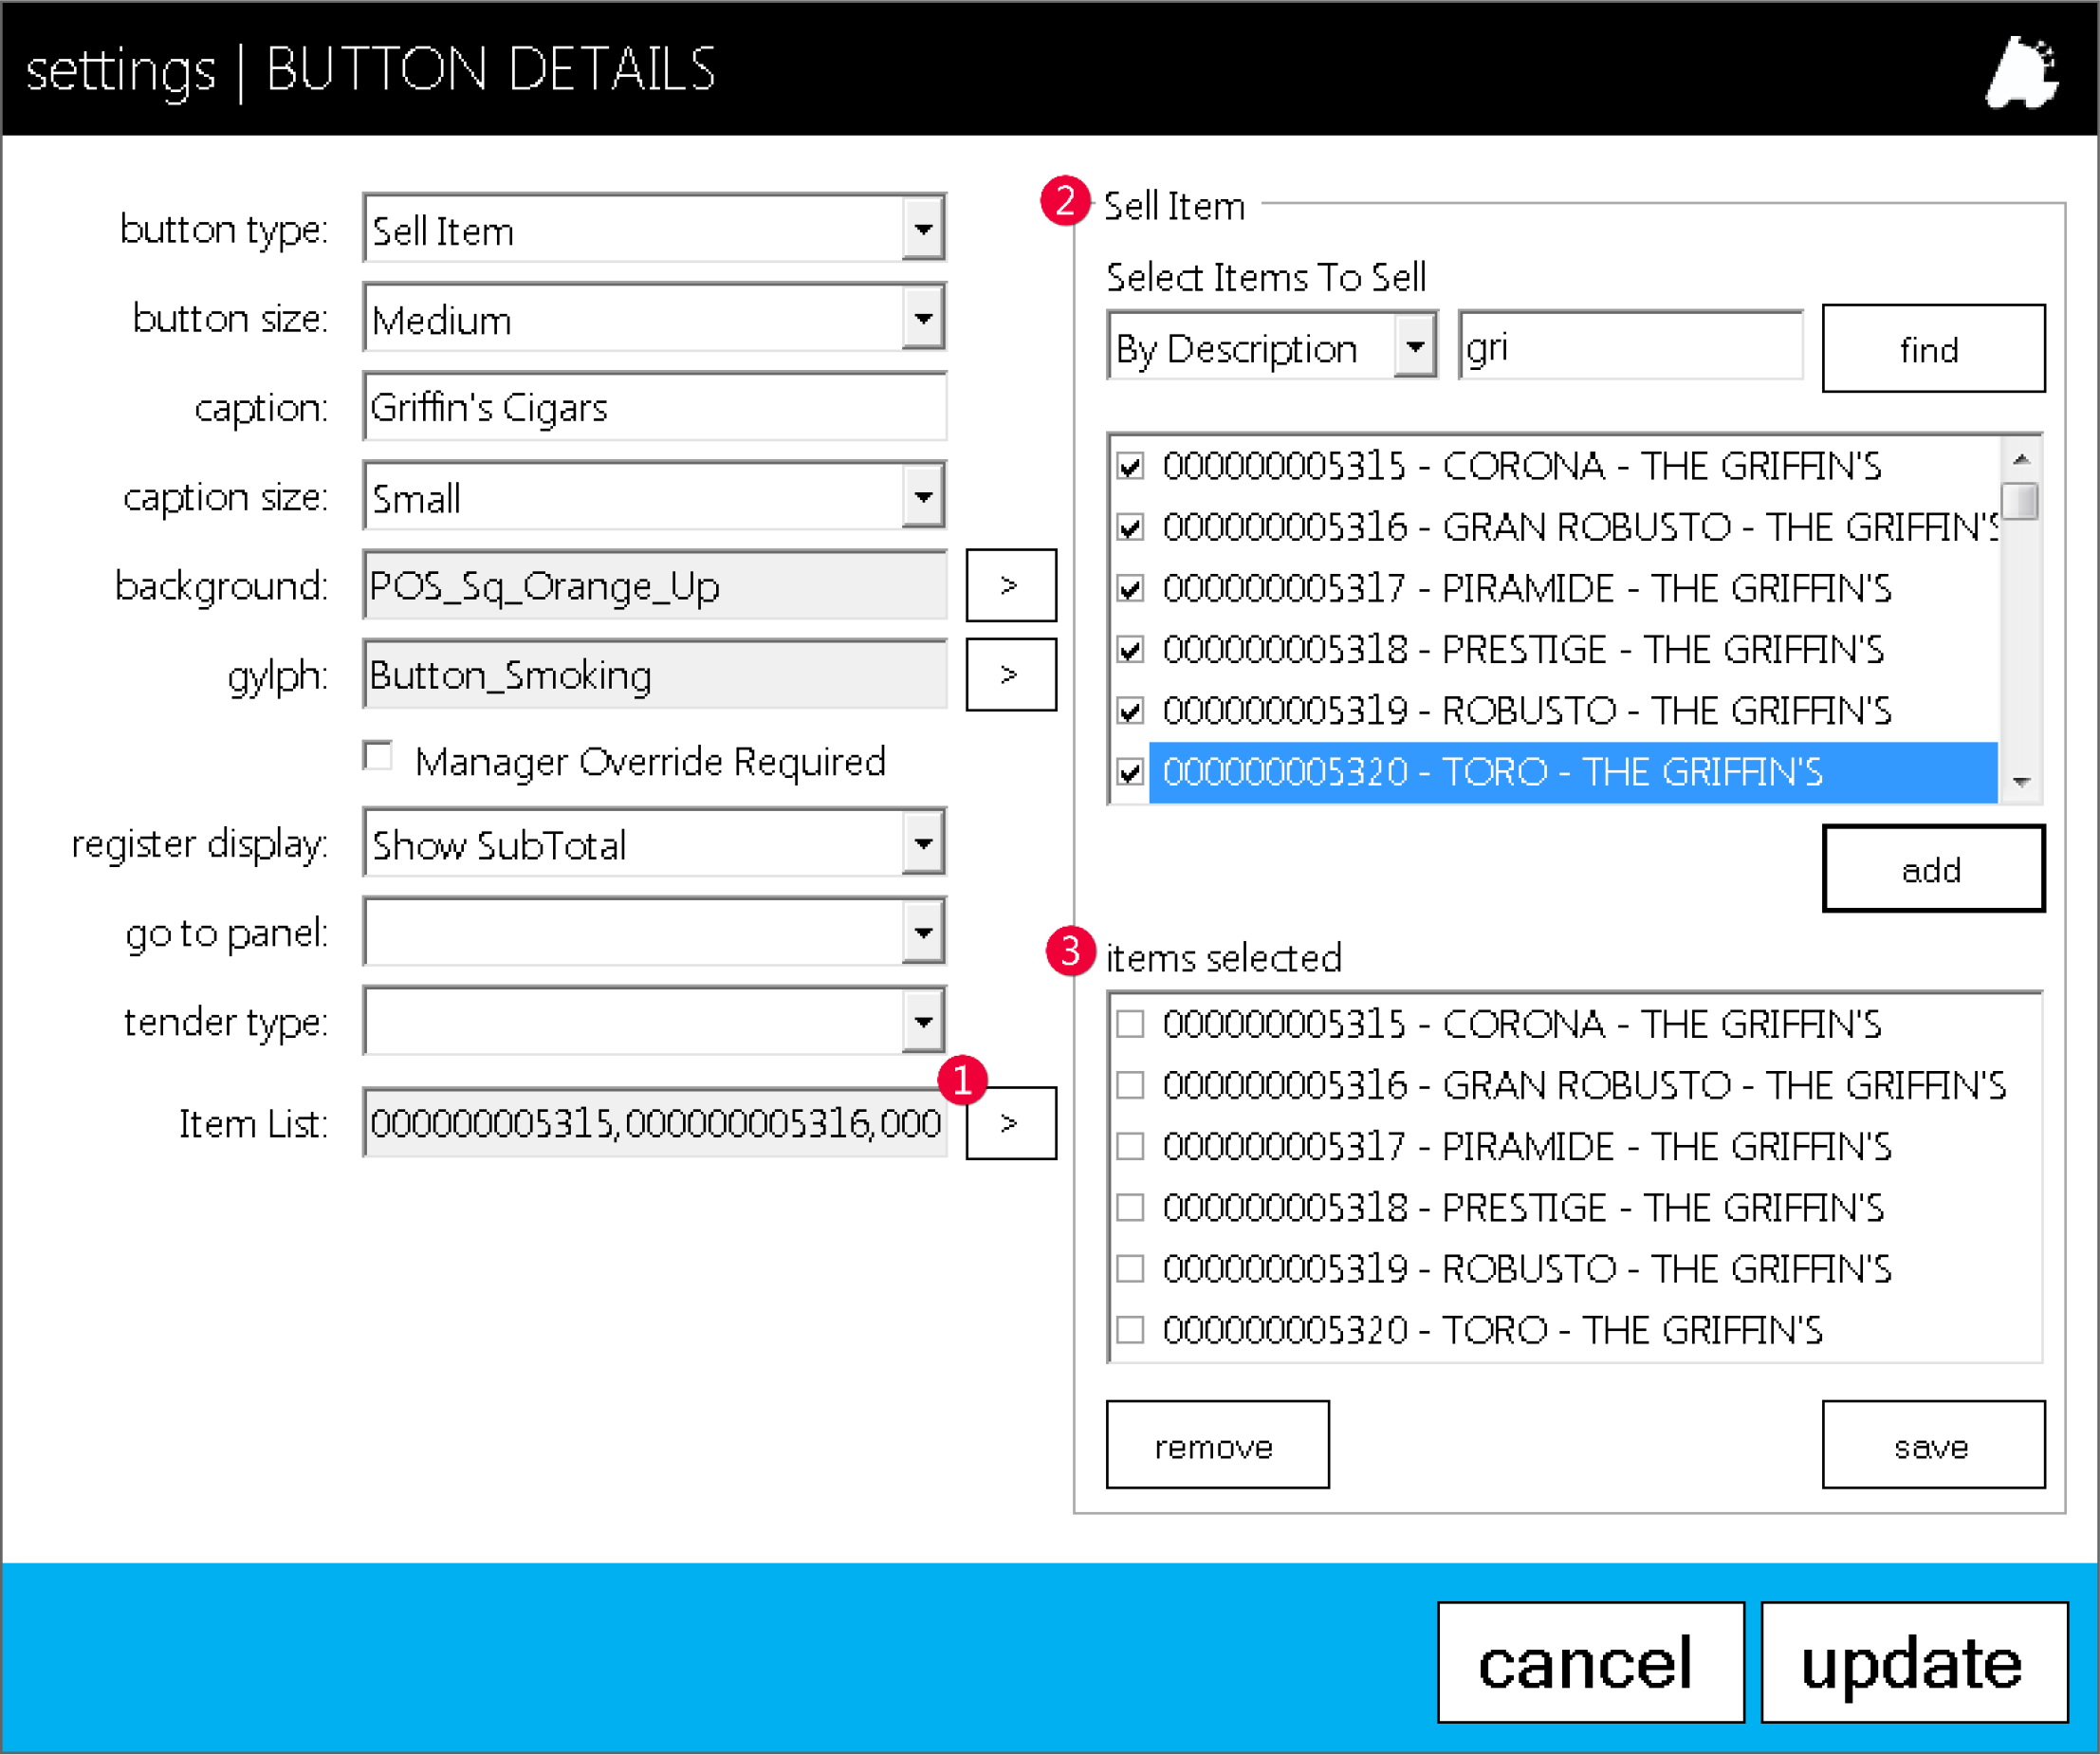
- Choose the arrow to open the Sell Items and items selected menus.
- From the Sell Item menu, filter by description orUPC, then check the item(s) you wish this button torepresent.
- Choose add
- Confirm in the items selected menu the correctentries, then press save.
- Choose update when finished with button setup.
Creating an Open Department(s) Button
Buttons like the Sell Item and Open Department allow for single or multiple choice functions.
When these buttons are picked in the POS, they will open a window displaying the available applied options.
Open Department Button
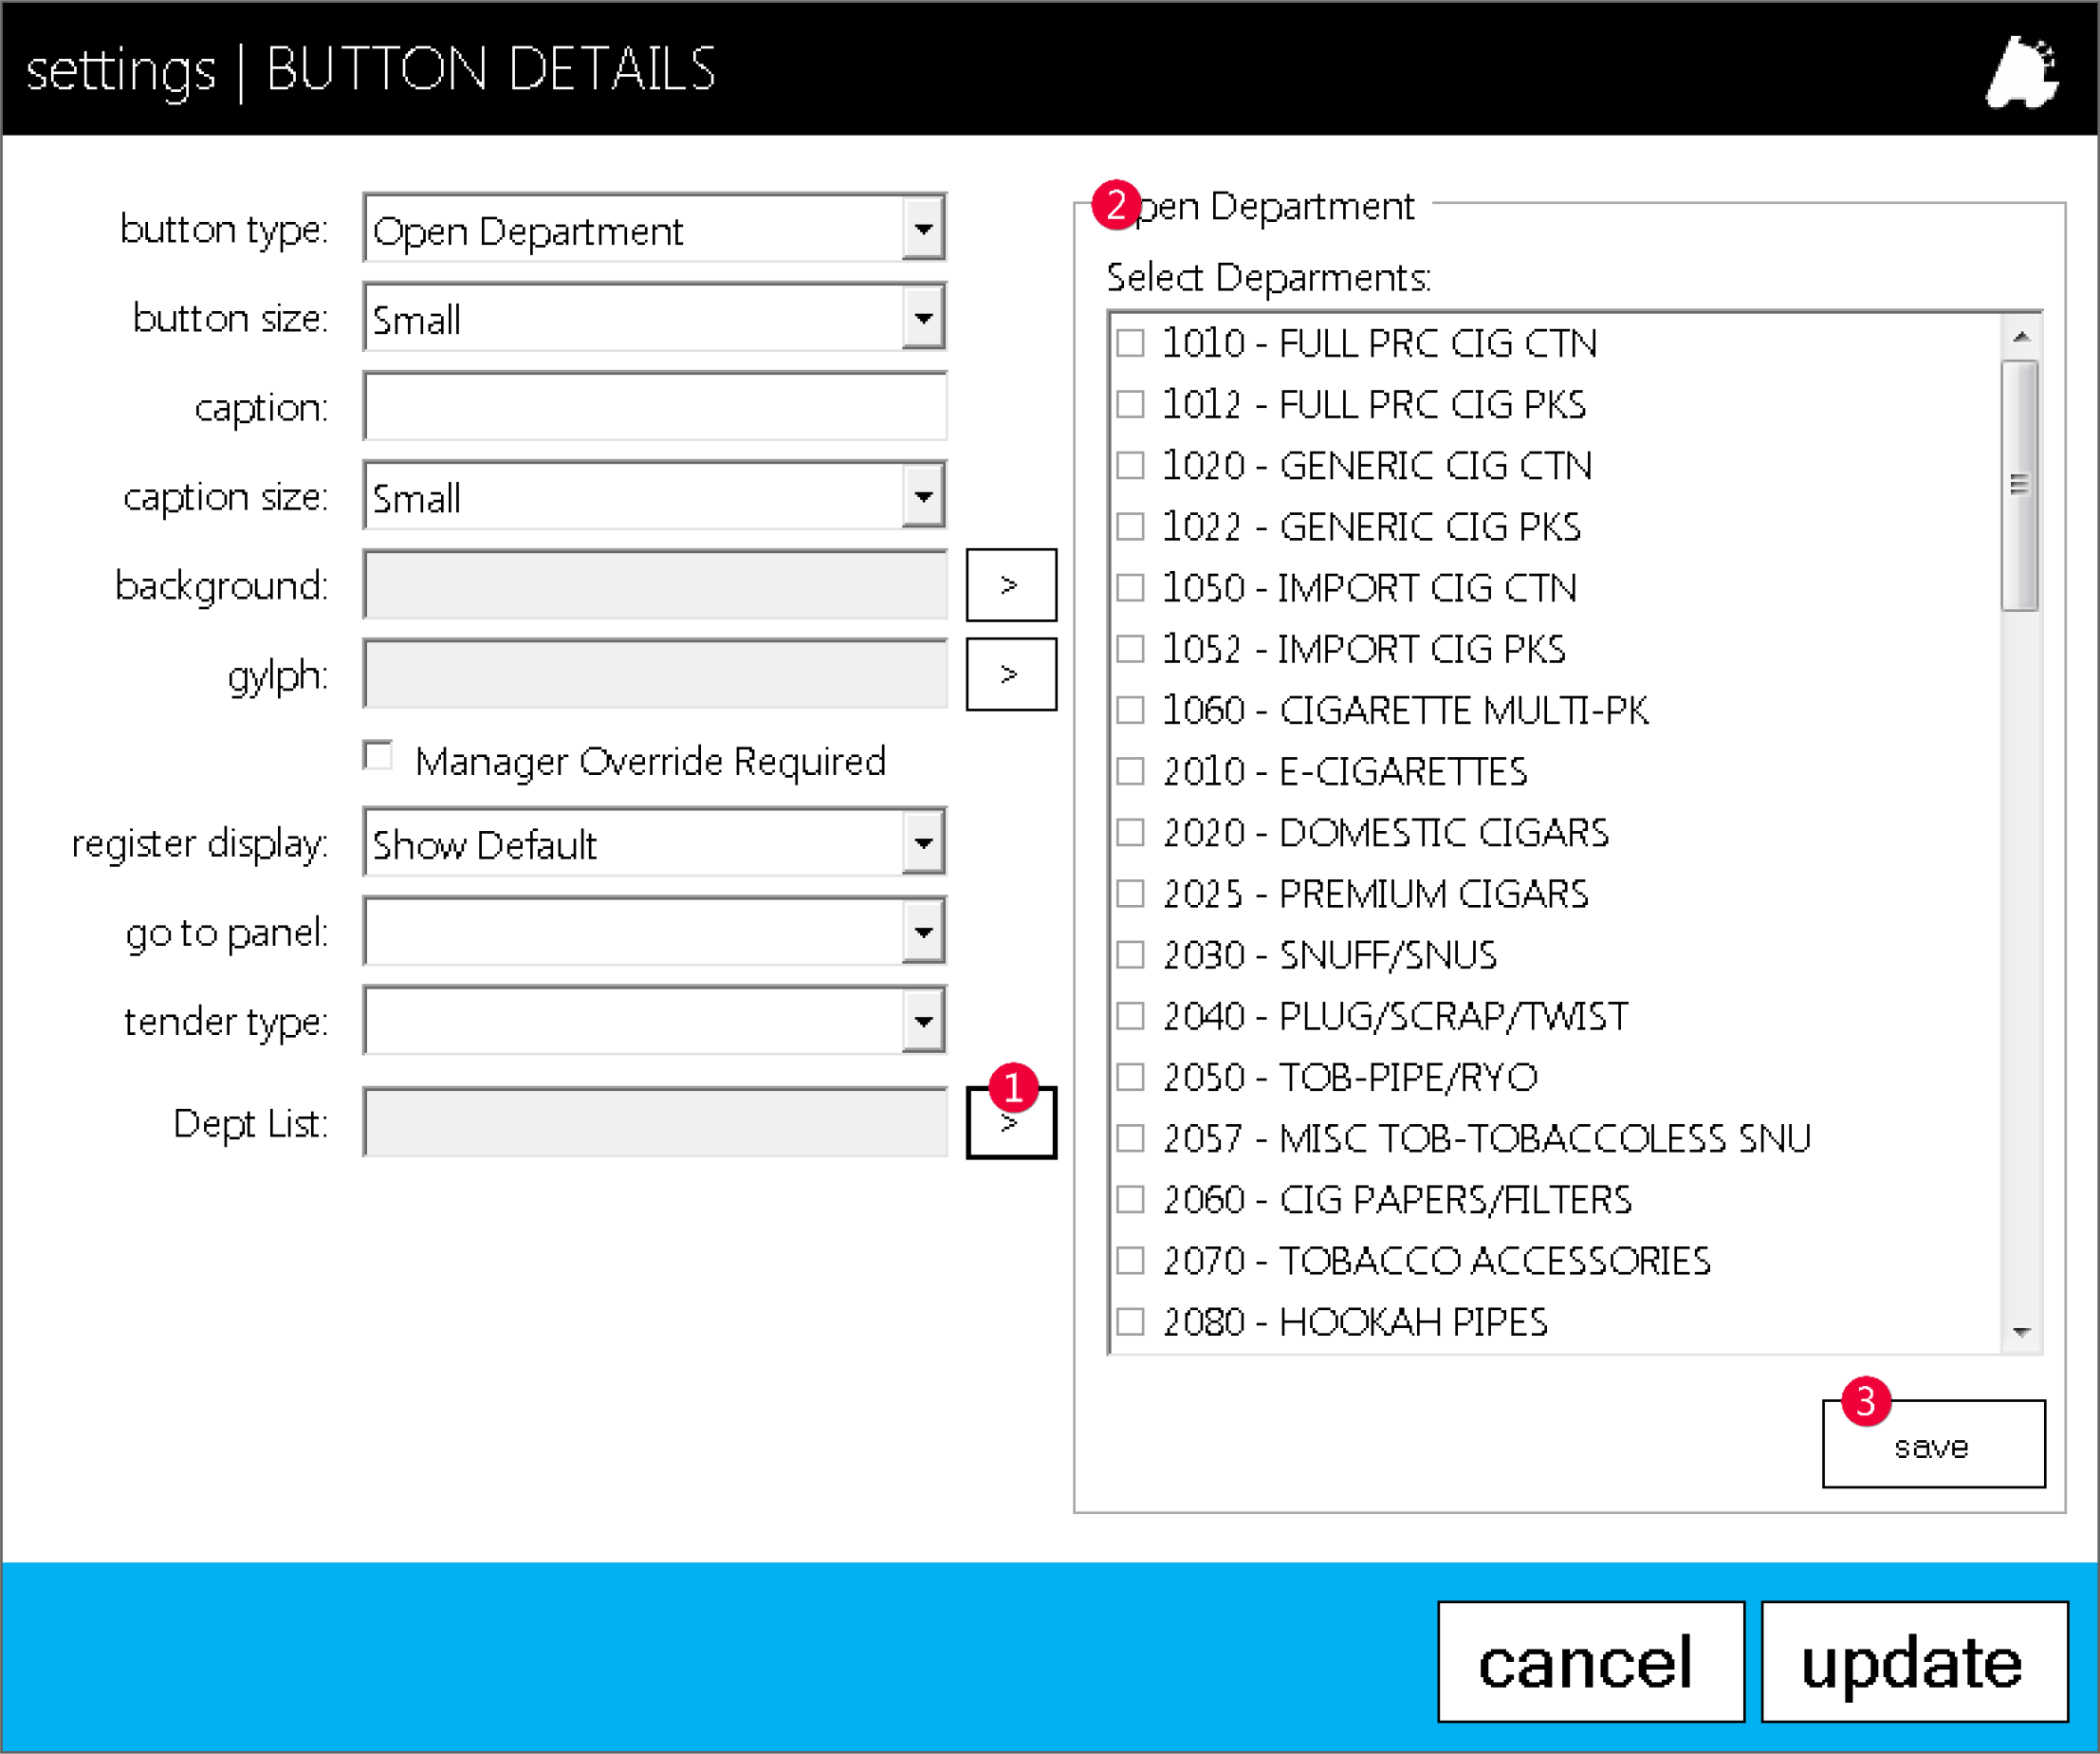
- Choose the arrow to open the Open Department menu.
- From the Open Department menu, filter by checkthe department(s) you wish this button to display.
- Confirm in the Select Departments menu the correctentries
- Choose the save button.
- Choose update when finished with button setup.
Saving and Loading of Panels with a Corporate Interface
With a corporate setup, you can build panels and buttons from your corporate workstation and save to your database for loading at the stores.
- After building your panels and buttons, navigateto the settings utility via the settings section of the actions module.
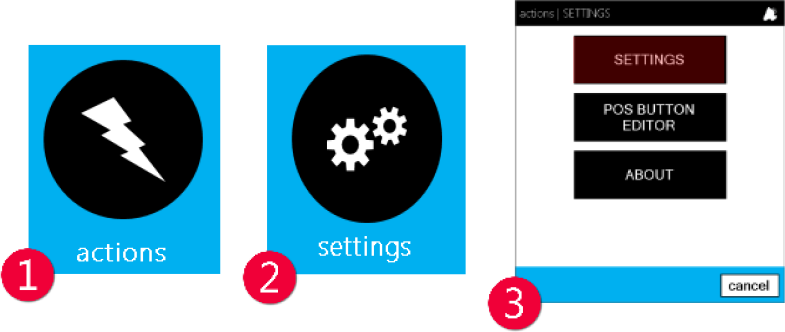
- From the settings utility, choose the Misc Register Settings.tab.
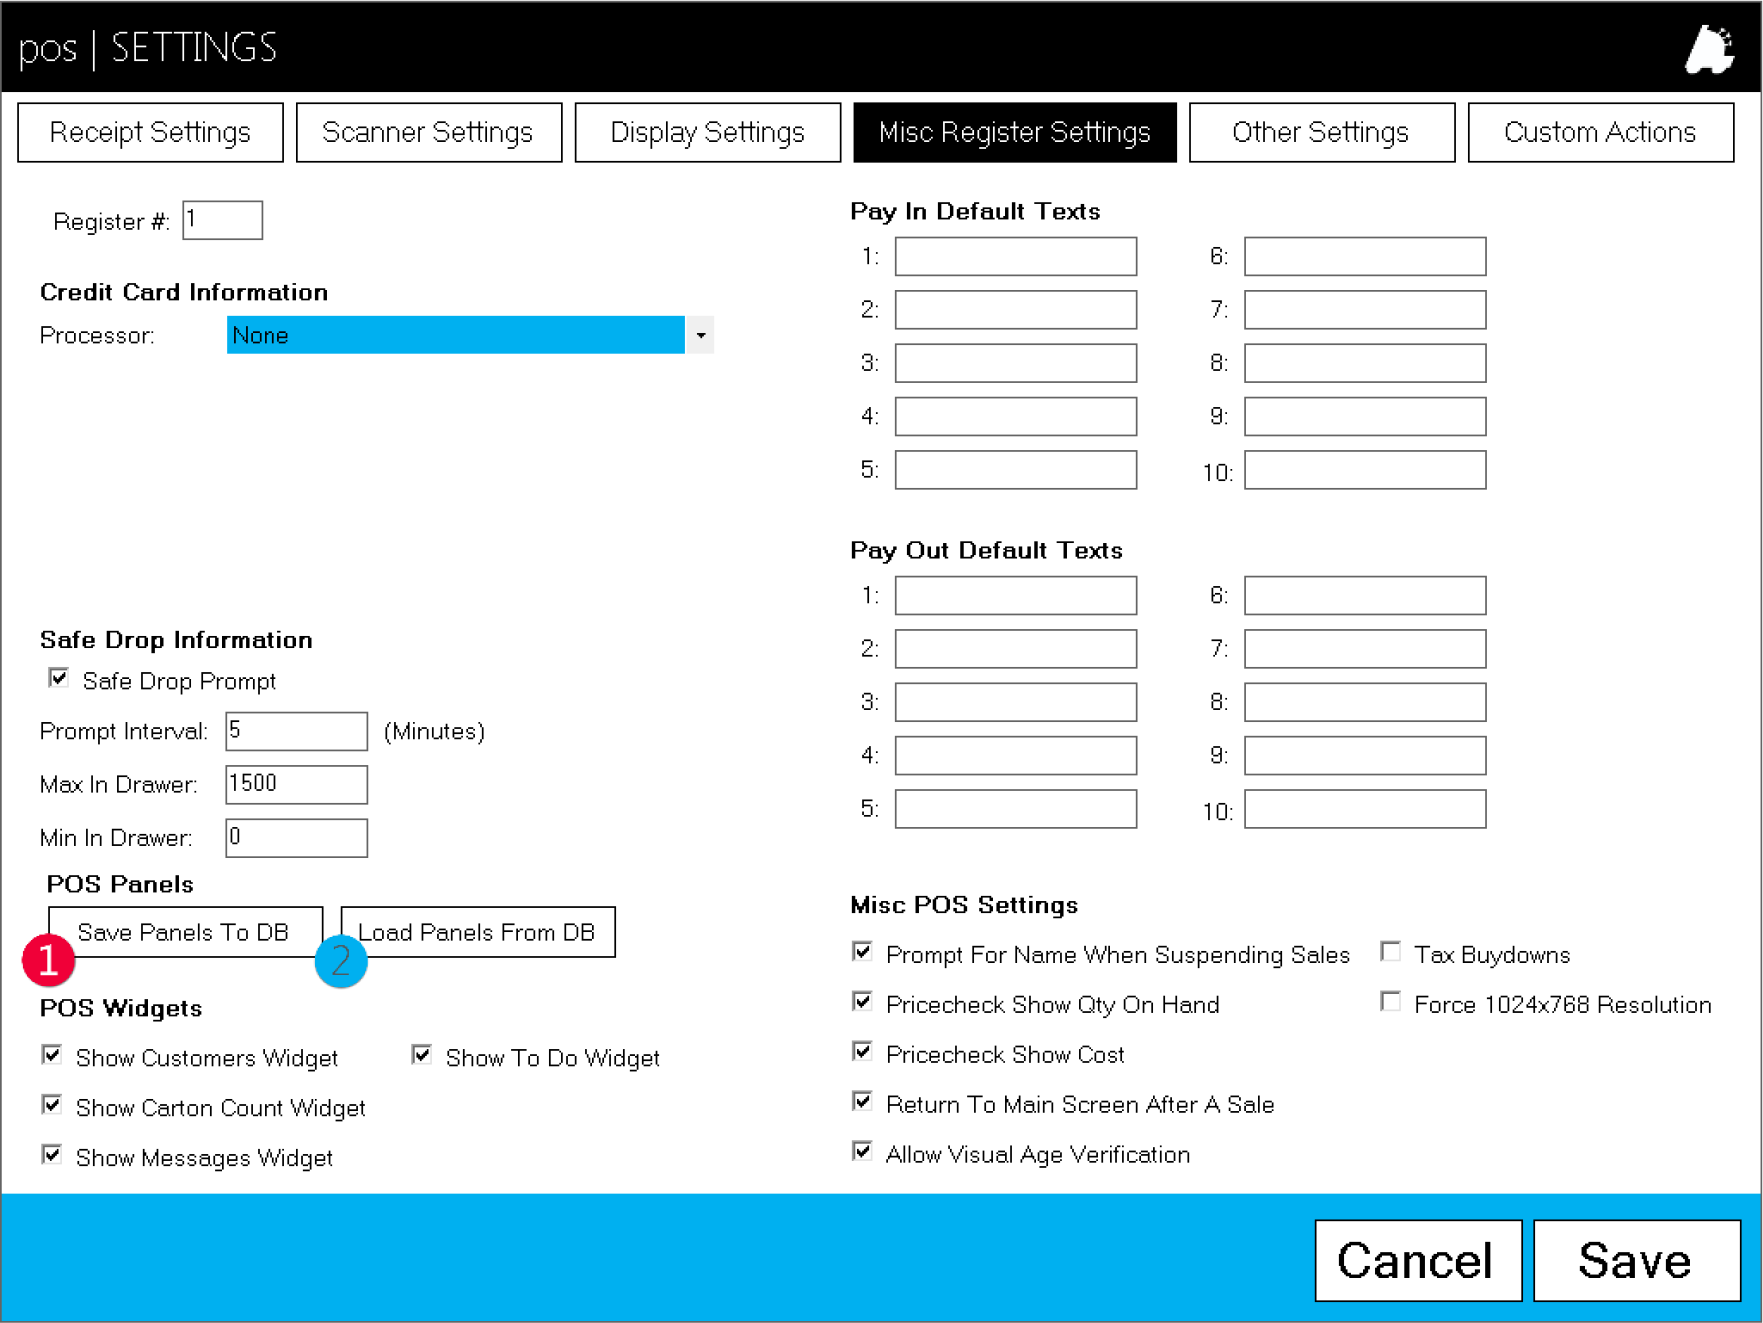
- From your corporate interface, choose the Save Panels To DB option.
- After saving, navigate to the same settings utility at your satellite/store terminal(s) and choose the Load Panels From DB button to load the saved panels from the corporate database.
- From your corporate interface, choose the Save Panels To DB option.
Overview of POS Offline Mode
Network interruption or hardware failure is always a possibility with your store(s) operation and infrastructure.
Unforeseen disconnects and down time can cause possible operation interruptions, data loss, and/or lost sales.
For this, FasTraxPOS has built tools to assist you in syncing databases and operations.
Syncing your register’s databases ensures continued operation in periods of possible network connectivity interruption.
Q: What does Offline Mode do?
A: Offline mode synchronizes the SQL database of your main register with that of supporting registers.
This allows for continued operations of registers if network connectivity is interrupted.
Q: What does this exactly do to the database?
A: This creates a copied database of required static data for store/register operations.
Q: How often should this be performed?
A: Syncing can be performed manually at anytime; however, we suggest setting a scheduled task to automatically run daily.
Q: On which machine(s) should this be performed?
A: On all secondary/supporting registers – Not the main register
If you have questions about applicable machines, please contact FasTrax support.
Q: How do you get to POS Offline Mode setup?
A: Simply log into the applicable secondary POS, choose the “actions” module, and select the “settings” option.
Q: Is this something FasTraxPOS Technical Support can assist me with?
A: Absolutely!
In fact, we would prefer you contact us the first time you attempt to ensure your understanding.
Q: What order should this be performed?
A: Follow the steps below for the absolute best results.
POS Offline Mode
Make sure that the machine has a Microsoft SQL Server instance installed – localhost\fastrax.
- After logging into FasTrax POS, choose the“actions” module, then the “settings” option.
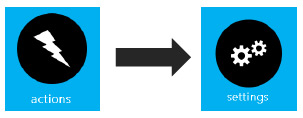
- This will open the “Settings” options window.
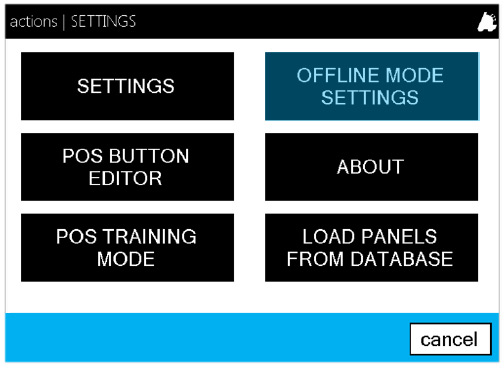
Choose the “OFFLINE MODE SETTINGS”button located at the top-right of the window. - This will open the “OFFLINE MODE SETTINGS”interface.
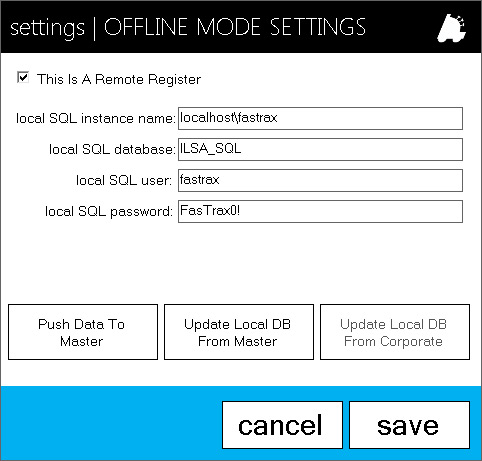
Enter data as shown in the picture to the above.If remote POS already has a previous installation of SQL, MAKE SURE TO USE A BLANK ILSA_SQL DATABASE and not the existing one. This can be found in the C:\Fastrax\InstallerFiles directory.Push Data To Master – used to send data from the remote register to the main database if not utilizing automatic POSDataSync utility.
Update Local DB From Master – used to update remote register’s database from main database if not utilizing automatic POSDataSync utility.
Neither of these need to be used – the system automatically handles this via the Windows scheduled task to pull data from the master and pushes data when reconnecting to the main database.
POS Offline Mode | DataSync Setup
To set up automatic database updating for offline mode, please follow the steps illustrated below.
Begin by opening your “Control Panel” from the Windows button on your desktop.
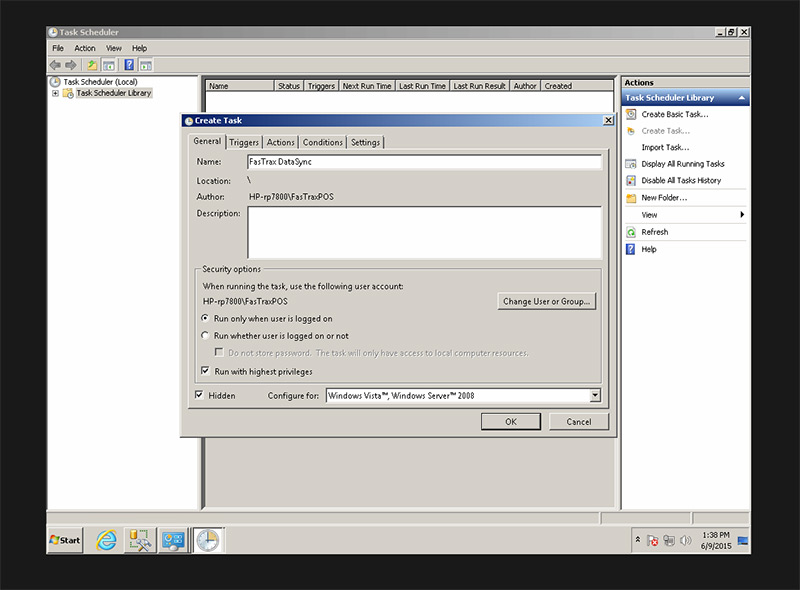
How to Perform POS Daily Procedures
This will guide you through the basic steps from beginning a shift on the POS, ending a shift, performing reconciliations, and end of day procedures.
Logging In: POS and Time Clock
- After Running POS, select your login method.
 Use Keypad: will prompt you to enter your username and passwordUse Fingerprint: will allow you to scan your registered fingerprint to log inUse Card: is not fully implemented yet, and should not be selected at the current time.
 - Enter your Employee ID and Password, or Scan your fingerprint to continue to the Home Screen
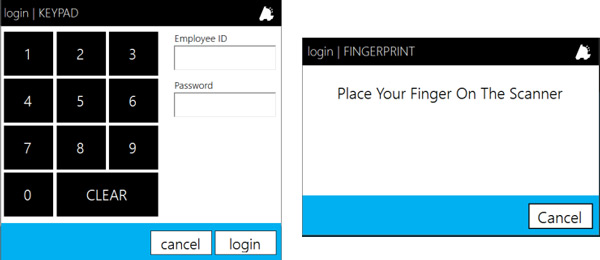
- Once on the Home Screen, the Time Clock module can be seen just below the cashier’s name in the upper left; tap the clock in button. You are now clocked in.
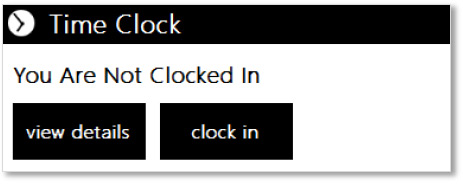 If you are already clocked in, the Time Clock module will show what time you last clocked in, and will display a clock out button rather than the clock in button.You can also review recent time entries by tapping view details.
 - Finally, once you are clocked in, you’re ready to start using the POS. Tap the open POS button in order to proceed to the POS Screen
Entering a Starting Till
- Once you have opened the POS screen, tap Cashier Functions.

- From the Cashier Functions screen, tap Starting Till

- On the pos | STARTING TILL screen, enter the amount of the starting till, and any necessary description.
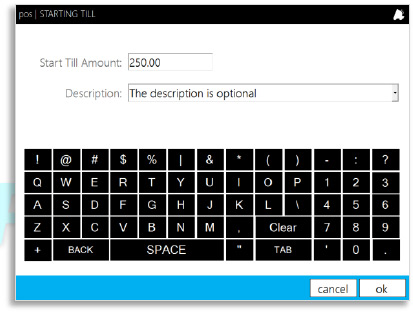
- Once completed, tap ok.
- This will put you back on the Cashier Functions screen. Tap Return to Main to get back to the main POS screen

Performing a Safe Drop
- After logging in to POS, tap the Cashier Functions button.

- From the Cashier Functions screen, tap the Safe Drop button.
 Depending on your POS setup, the POS may prompt you for a safe drop automatically. In this case, simply tap Drop Now, and proceed to step 3.
 - On the POS | SAFE DROP screen, input the Safe Drop Amount and the Description into the appropriate fields.
- Finally, tap OK to complete the safe drop.
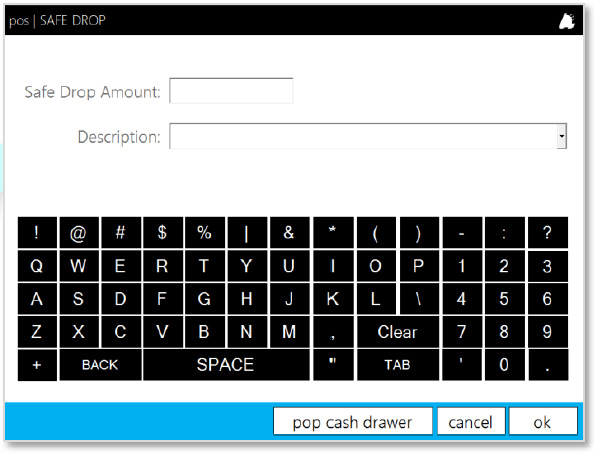
Performing a Register Z
- At the end of a cashier shift, a Register Z will need to be performed in order to close out the drawer. Start by pressing the Cashier Functions button in the POS
- Press the. Register Z button.

- This will print a Register Z Report from the receipt printer.
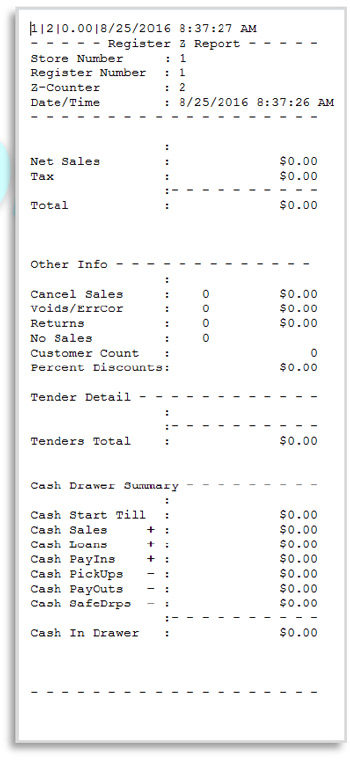 The information printed on the Register Z Report can be changed through the POS Settings to suit your company’s needs.
 - Finally, count down the cash drawer and perform a Shift Reconciliation.
Shift Reconciliation is not a necessary step in FasTrax POS. It only needs to be performed if it is company policy to do so.See the POS Reconciliation Guide for information on reconciling your shift.
Overview of Remote Sales
Remote sales provide a way to create a sale from the back office that can be tendered out in the POS. This allows for orders to be taken over the phone, or from an email without disrupting the flow of business at the register.
Remote Sales are created as suspended sales, so they can be resumed at any time, on any register.
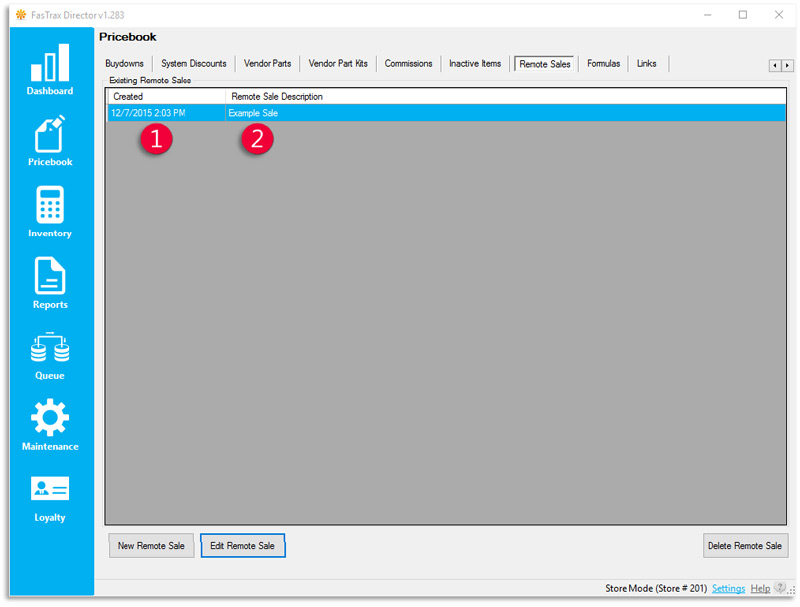
- Created – the date and time that the remote sale was created
- Remote Sale Description – description used to identify the sale at the POS
Creating a Remote Sale
- In Director, choose the Pricebook module.

- Then, choose the Remote Sales option from the menu ribbon.
- Choose the New Remote Sale button.

- Enter A Sale Description and select OK.
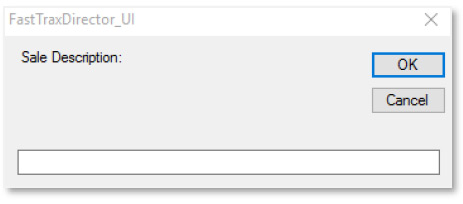
- In the Remote Sales Details window, click the Add Item button.

- Add an item to the sale using the Find Item window.
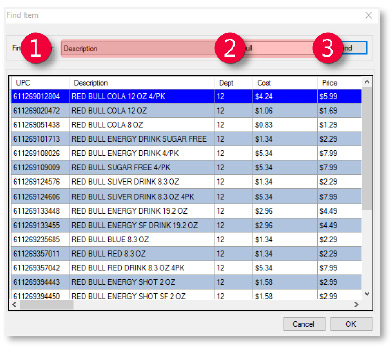
- Choose UPC, Description, or Vendor Part from the Find Items By dropdown.
- Enter the UPC Description or Vendor Part into the search box.
- Click Find to search for the item, select the correct item from the search results, and click OK.
- Enter the Qty to Sell in the box and select OK.
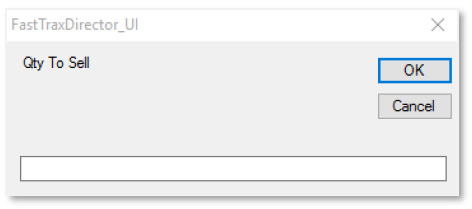
- Repeat steps 6 and 7 until all items are added to the remote sale.
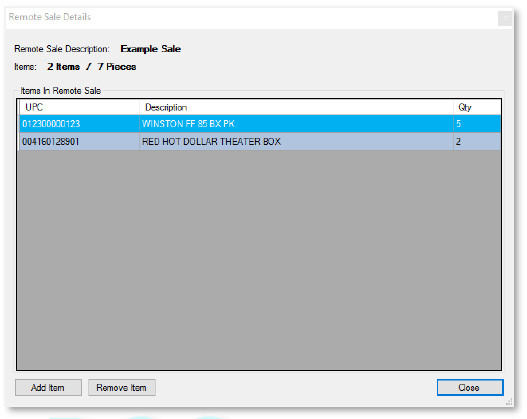
- Click the Close Button on the bottom right of the Remote Sales Details Screen.

- You’re now ready to finish the sale at the POS.Continue to the next portion of this document for POS completion!
Resuming a Remote Sale at the POS
- After logging into POS, Select open POS.
- Within the POS Screen, press the Resume Sale button.
- From the pos | RESUME SALE screen, locate the remote sale and tap it to select
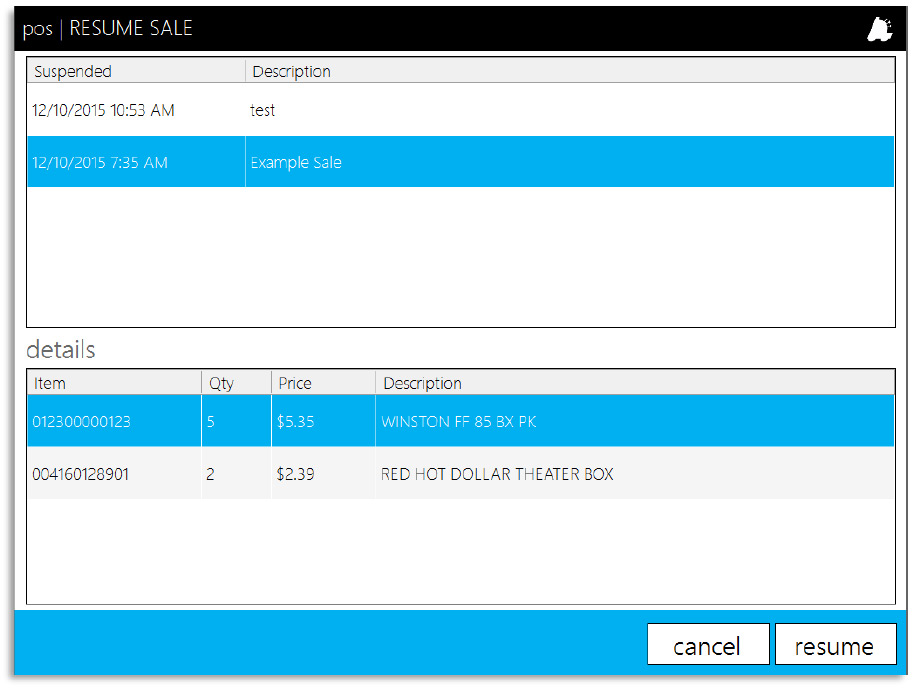
- Tap resume to resume the sale.
- Finish just like a normal sale at the POS
Overview of Enhanced Loyalty
Enhanced Loyalty is a premium feature of FasTrax Solutions that can reward your customers for coming back to your store over and over again. It allows for the creation of any number of Balance Types to track and reward purchases in different areas of your store. Contact your Lifeline technical analyst or FasTrax sales representative for more information on activating Enhanced Loyalty at your store today!
Loyalty Campaigns are set up to trigger off of a particular Balance Type when a Loyalty Customer has purchased enough merchandise to raise their points balance past a set threshold.
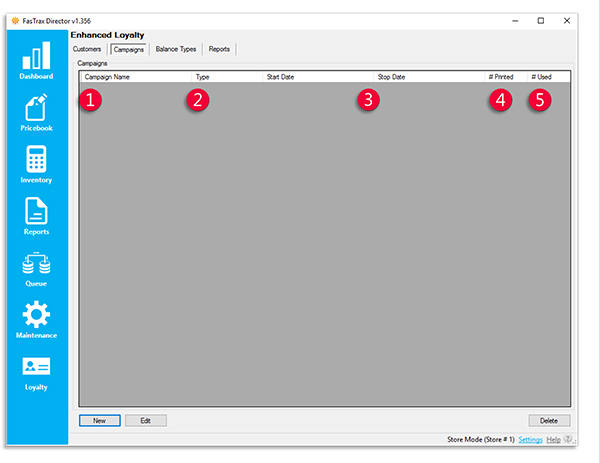
- Campaign Name – the name of the Loyalty Campaign
- Type – Shows the campaign type; Points per Item, Points per Dollar, or Manufacturer funded
- Start Date/Stop Date – Shows the date range for which the loyalty campaign will be in effect
- # Printed – The number of times any customer has reached the points threshold and had a coupon printed at the register
- #Used – The number of times a printed coupon has been redeemed for a discount
Creating a Balance Type
- In Director, choose the Loyalty module.

- Then, choose the Balance Types option from the menu ribbon.
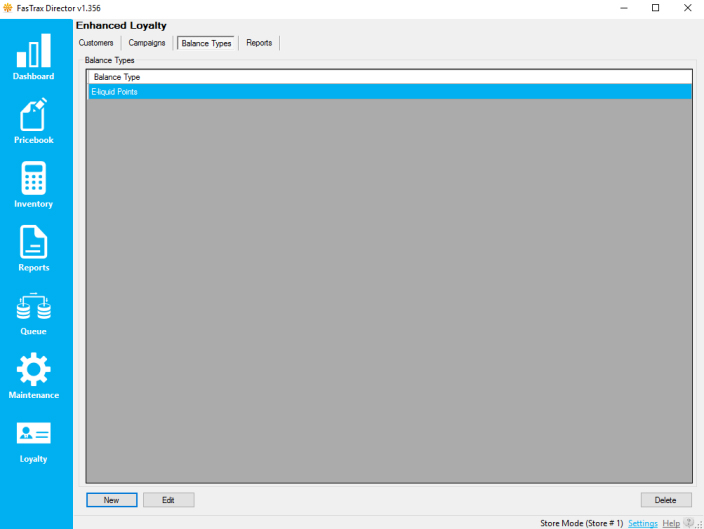
- Choose the New button.

- In the Balance Type Details section, enter a Balance Type Name and a Redeem Ratio.

Redeem Ratios are only used by Open Ended Campaigns. This is set by choosing the Open Ended Trigger Type when setting up your campaign. - Choose Save when complete.

Creating Loyalty Campaigns
- Select the Campaigns option from the menu ribbon

- After logging into Director, choose the Loyalty module.

- This will show you all campaigns you currently have in the system. Click the New button at the bottom left to open the Campaign Details Window.
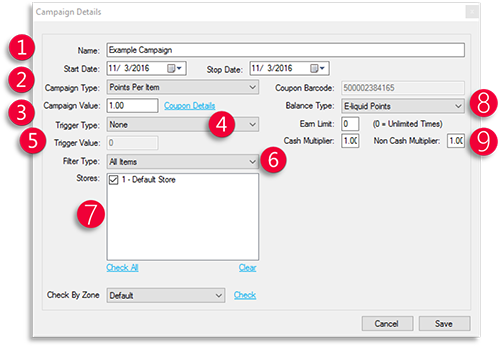
- Name and Start/End Dates – Give the campaign an identifier and an effective time frame
- Campaign Type – Chooses whether points are accrued by items bought or dollars spent
- Campaign Value – Value of the coupon to be printed when a points threshold is reached
- Trigger Type – Chooses whether points earned will be automatically spent to print a coupon or if they will continually accrue until redeemed at the customer’s discretion
- Trigger Value – The number of points required to print a coupon (not used for Open Ended campaigns)
- Filter Type – Determines what items are qualified to add points to a customer’s balance
- Items can be included by whitelist, meaning that only selected items qualify or by blacklist meaning that everyting qualifies except selected items.
- Store Selection – Determines which stores will be affected by the campaign
- Balance Type/Earn Limit – Chooses which existing balance type will be used for accruing and redeeming points, and chooses the maximum number of points that can be accrued
- Cash/Non Cash Multiplier – determines if extra points will be given for using cash on a sale.
- After the Campaign Details are filled out, click the Coupon Details link (only necessary if the Trigger Type is set to Points Earned)

- Enter in all Coupon Details in this window:
- Header/Text fields – Information to be printed on the coupon
- Expiration Type – Determines how long the coupon will remain valid
- Filter Type – Determines which items the coupon can apply to
- Limit to Once Per Sale – Toggle on or off
- Click the Save button to save the coupon data and exit back to the Campaign Details.

- Finally, click the Save button on the Campaign Details screen to save the campaign and close the window.

Enhanced Loyalty is a premium feature of FasTrax Solutions. Contact your Lifeline technical analyst or FasTrax sales representative for more information on activating Enhanced Loyalty at your store today!
Adding Loyalty Customers through POS
- After logging into POS, select Open POS

- Within the POS, click the Customer gem.

- This will bring up the Find Customer screen. To add a new customer from here, click New.

- On the Customer Details screen, add any data needed for the customer. When finished, click Save.
Pro Tip: If you have a 2D barcode scanner, you can scan the customer’s Driver’s License to enter their info automatically.
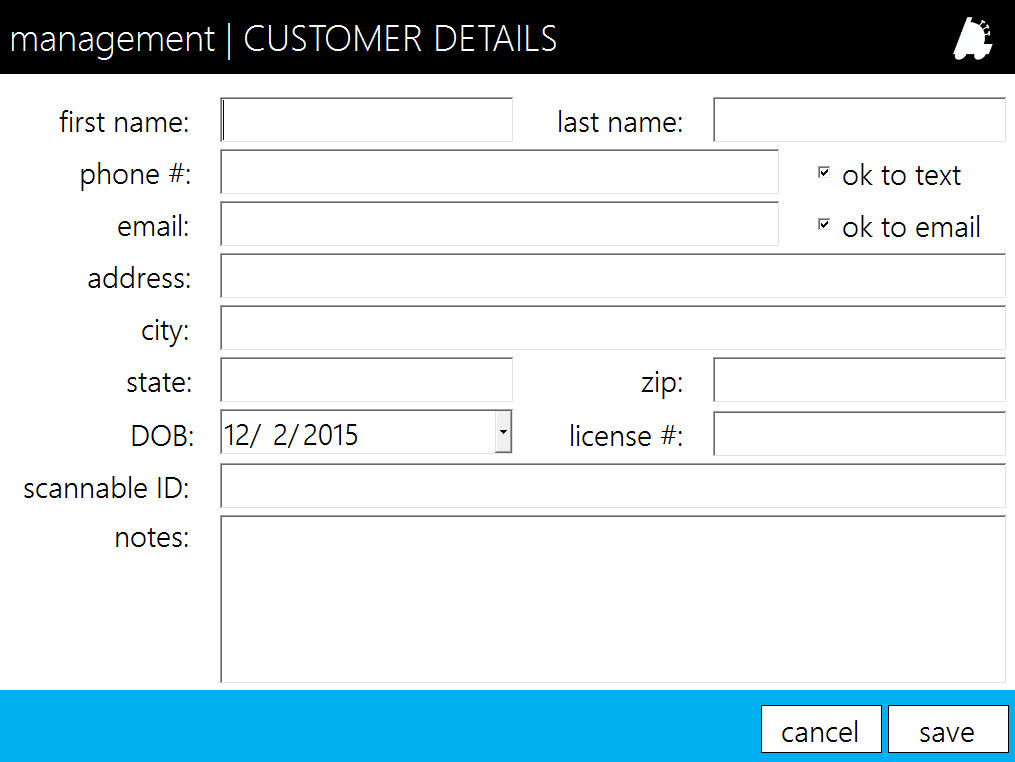
For assistance with configurations, please contact Technical Support at Support@FasTraxPOS.com
Lottery Reconciliation Setup – Director
Lottery Reconciliation is a form of inventory control specifically for your lotteries and games. This utility is used to establish a balance between Starting and Ending numbers within a game. To maintain accurate numbers, reconciliations should be entered and completed on a regular basis.
To utilize Lottery Reconciliation, games must first be setup in your Pricebook. Refer to the Pricebook manual for steps to setting items in the Pricebook via the Director. Since games/lotteries can be sold and reported the same as other items in your Pricebook, specifically utilizing Lottery Reconciliation is by choice. However, after games/lotteries are added to the Pricebook, they must be added as “Lottery Items” to use the Lottery Reconciliation utility.
The following will walk you through the steps of setting up Lottery Reconciliation on the Director and POS as well as performing a Lottery Reconciliation via the POS
- After logging into the Director,choose the “Inventory” module.
- Choose “Lottery Reconciliation” fromthe utilities banner.

- Choose the “Lottery Items” tab.
Lottery Items is where lotteries/games are setup for reconciliation.
This section is separated into Existing Lottery Items and Item Details.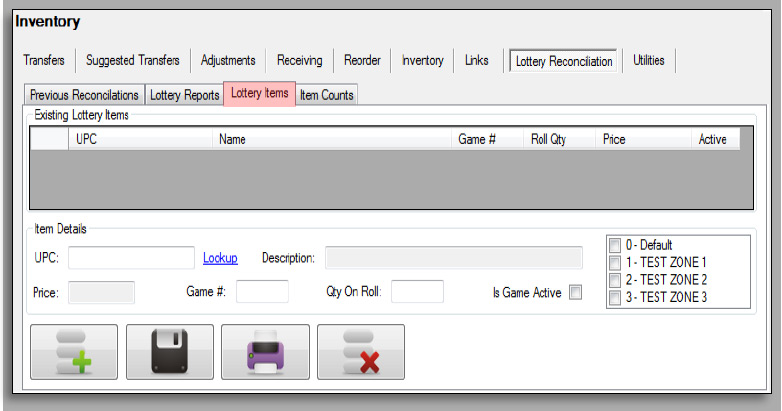
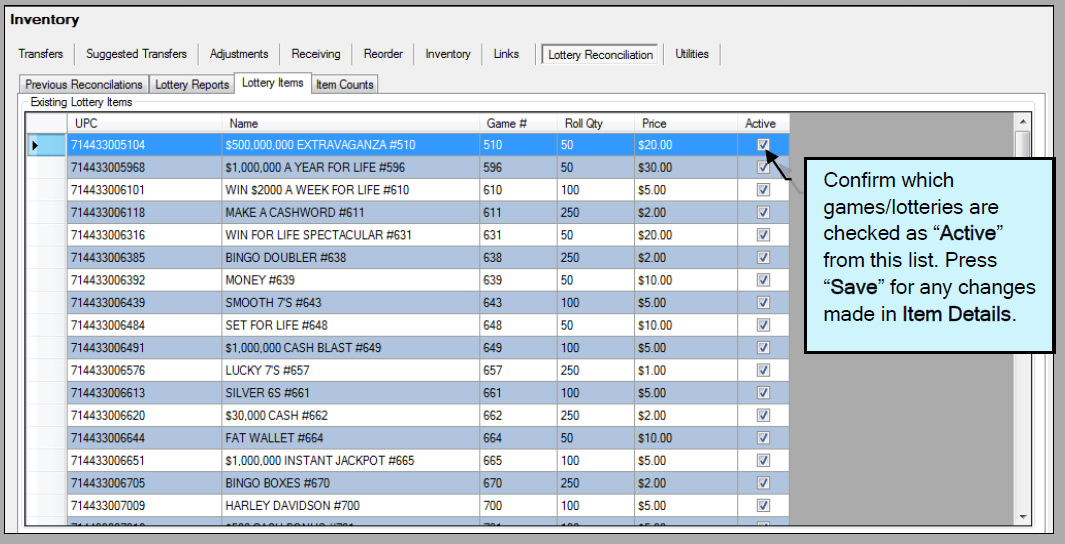
Existing Lottery Items – This is a list of games previously added for Lottery Reconciliation with specific details for each. By highlighting a specific game/lottery, you can edit appropriately in the Item Details section. You also have the ability to confirm whether a game is active.
Games/lotteries can be highlighted and deleted. This only removes the game from Reconciliation (the UPC remains available in your Pricebook). Any other changes required are performed through the Item Details section of the Pricebook module.
Item Details – This section is used for entering details of a game/lottery for tracking through Reconciliation.
When adding a new game/lottery, first ensure the UPC has been added to the Pricebook. If so, Lookup the UPC and enter specific details for Reconciliation use. Games can be checked “Active” if ready to be tracked through Reconciliation.
Please confirm all information entered is correct for the applicable game/lottery. Press the “Save” button after editing/adding items for Reconciliation. - Press
 to enter details for a new game/lottery to track through Lottery Reconciliation.

- Enter the UPC of the game/lotteryyou wish to add to the Reconciliationlist and then press the “Enter” buttonon your keyboard.
 If you do not know the complete UPC number, press “Lookup”. Here you can filter by Description, UPC Number or Vendor Part to choose the game/lottery you wish to add.
 - Basic information for the UPC willauto-populate (Description & Price).Enter the Game # and Quantity onRoll for the applicable game/lottery.

- If this is to be an active game, checkthe “Is Game Active” box.

- When assigning games/lotteriesfrom a central corporate system,choose the applicable PricebookZone(s) for each gameedited/added.

- Press the “Save” button when alldetails have been entered.

- Once saved, items added to the Lottery Reconciliation will appear in the Lottery Itemslist.
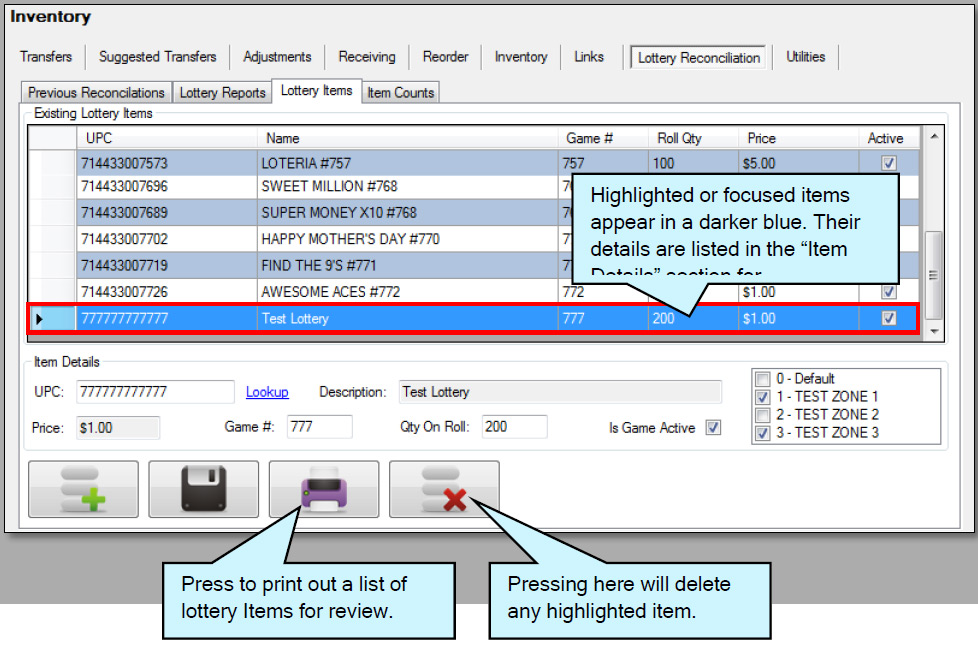 If an item requires editing:
Highlight the applicable item from the item list and edit the required details field. Press the “Save” button when complete.
If an item requires removal:
Highlight the applicable item from the item list and press the “Delete” button.
Lottery Reconciliation
Since Lottery Reconciliation is used to track Lottery sales, proper input is necessary to maintain the integrity of Lottery records. Properly entering the “Start #” and “End #” will assist in tracking Lottery sales on a daily basis.
Book activations and Online Lottery information are tracked through this utility. Please ensure proper data input.
If there are ever any deviations from normal Lottery operations, a “Notes” section has been provided to properly record these events.
- Launch the Reconciliation program.This can be accomplished by eithera Recon shortcut located on your POS desktop or from within the FasTrax POS software.

- Using your Employee/Cashiernumber and password, login.
- Press the “Lottery Reconciliation”button.
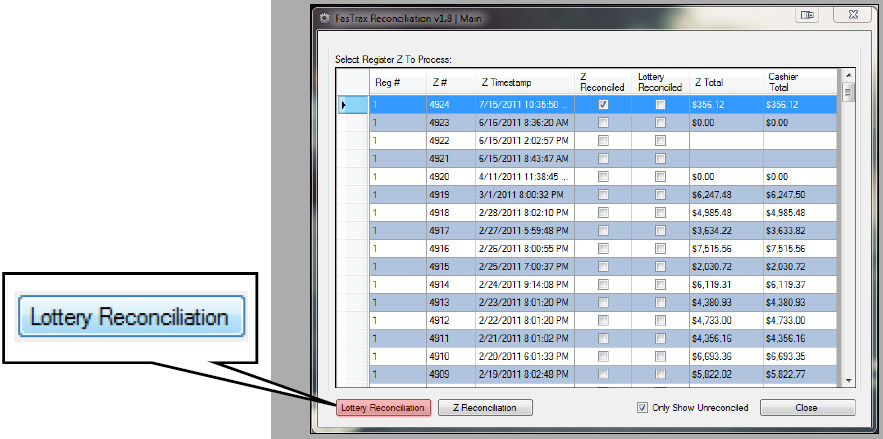
- Check any applicable Z for thebusiness day being reconciled andpress the “Continue” button.
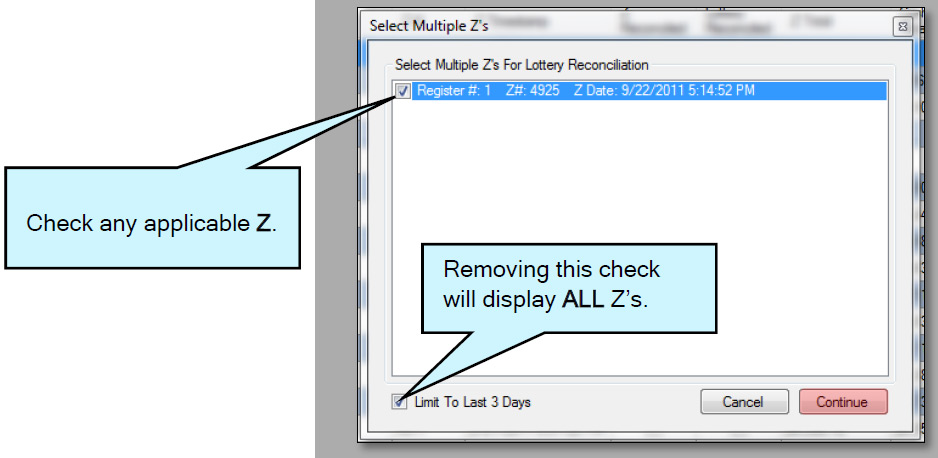 Choosing multiple Zs enables you to perform a single Lottery Reconciliation for a business day.
- This will open the “Lottery Reconciliation” window.
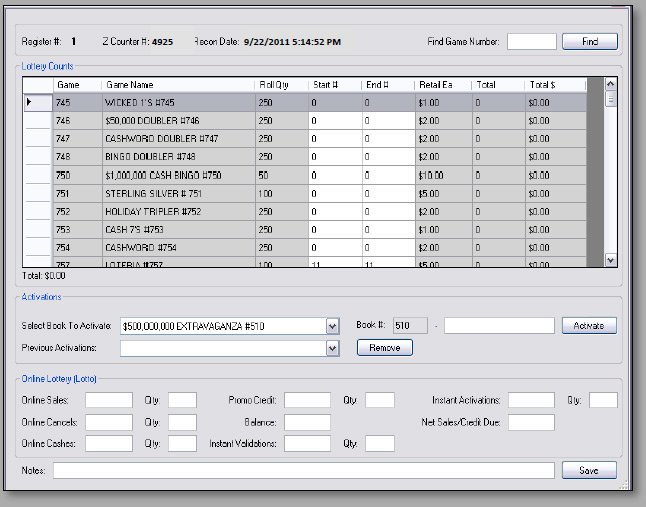
- When searching for a particulargame to edit the “Start #” and “End#”, enter the game number into the“Find Game Number” field and pressthe “Find” button.
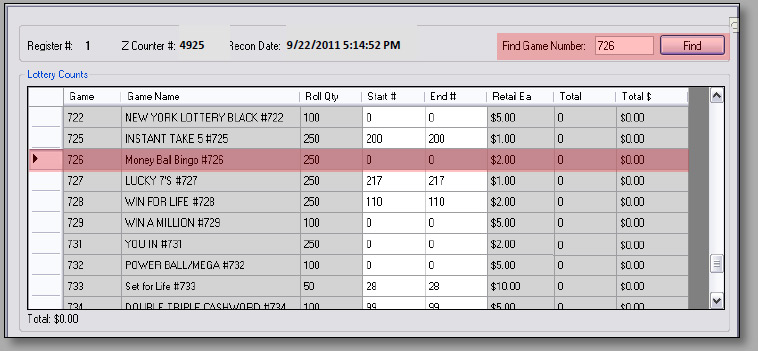 The Lottery Reconciliation window is separated into three sections.
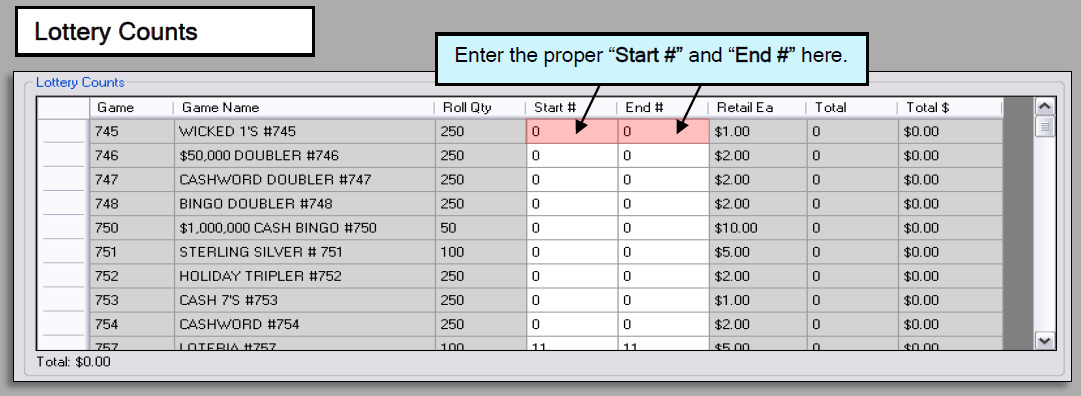
Lottery Counts – This section is used to enter the “Start #” and “End #” for currently sold games. This is for inventorying lottery games. Daily, the “End #” will become the “Start #” of the next day.
Remember, games must be checked “Active” to track through Reconciliation.
Activations – This section is used to activate game books. When a book number for a game changes (new book), select the proper book (game) and enter the new book number. Press the “Activate” button. If you want to apply this activation/change to your actual inventory, you must activate and receive this new book via the Director as well.
If activations are made by mistake, “Previous Activations” can be removed from games by choosing the applicable activation from the dropdown menu and pressing the “Remove” button.

Online Lottery (Lotto) – This section is used to enter information provided from the Lotto machine for record and reconciliation purposes. - There is a “Notes” section forentering any pertinent information forchanges or entries made in theLottery Reconciliation.

- After confirming all entered Lottery information (Counts, Activations &Online Lottery), for ALL games,press the “Save” button.
 Once reconciled on the POS, Lottery Reconciliations can be reviewed, adjusted and received through the FasTrax Director.
Use the “Lottery Reconciliation” utility in the “Inventory” module of the FasTrax Director for reports and additional Lottery/Games control and reports.
The following steps will assist you in completing Lottery Reconciliations through the FasTrax Director.
Previous Reconciliations
After entering and accepting (Save) Lottery Reconciliations on the POS, Previous Reconciliations can be reviewed, adjusted, printed and new books activated/received.
If entries have been made in error, resulting in a variance, Previous Reconciliations can be adjusted to reflect correct counts/numbers if applicable.
When new books are activated at the POS, these new books can be activated and received on the Director to completely track inventory(s) if applicable.
- After logging into the Director,choose the “Inventory” module.
- Choose “Lottery Reconciliation” fromthe utilities banner.

- Choose the “Previous Reconciliations” tab.
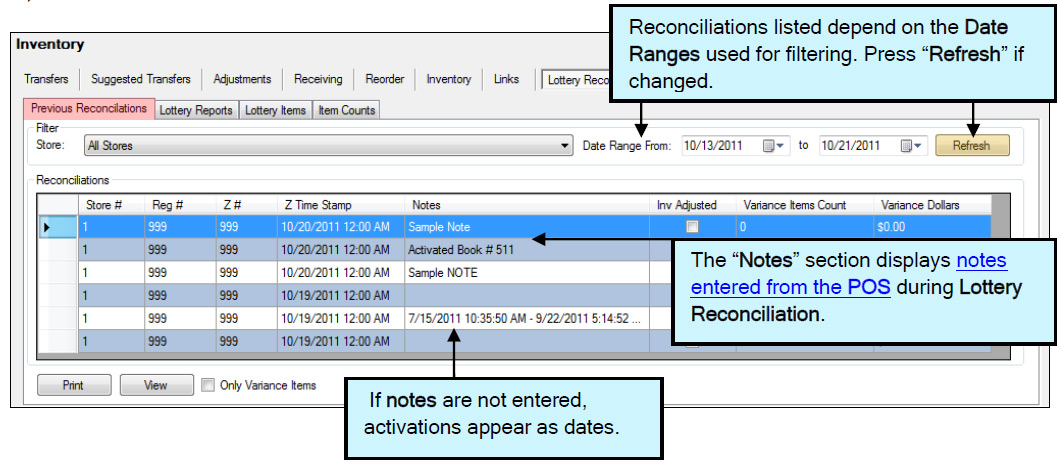
- To view a specific reconciliation,highlight the applicable line andchoose the “View” button.
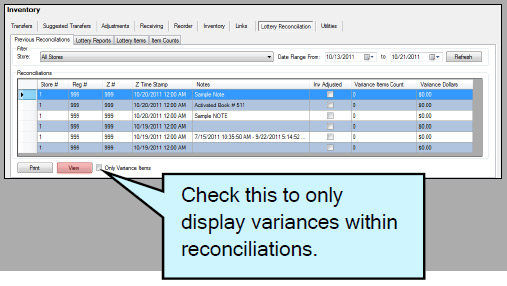
- This will open the “Lottery ReconDetails” window.
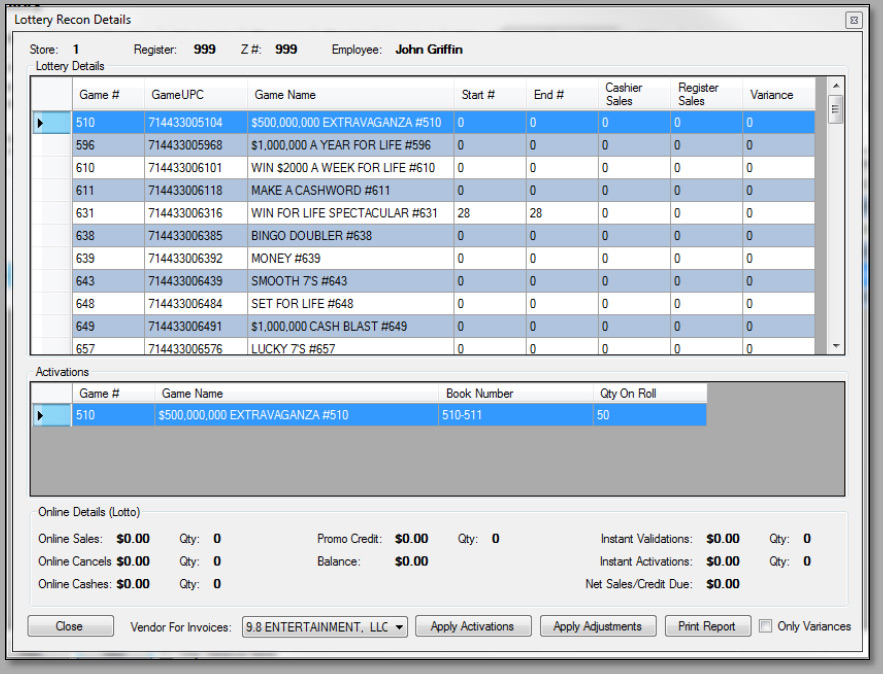
VARIANCES
- Variances, if present, are displayed in the “Variances” column. If a previous reconciliation has a variance which requires an adjustment, highlight the applicable game and enter the correct “Start #” or “End #”.
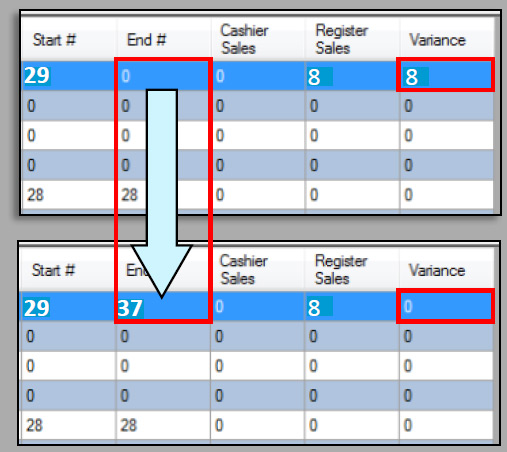 Variances, if present, are created from an incorrect “Start #” and “End #” correlation resulting from incorrect reconciliation entries.
- Once adjustments are complete, press the “Apply Adjustments” button.

ACTIVATIONS
- If new book activations have occurred and you wish to apply these activations in order to “receive” these new books, choose the activation and vendor from the “Activations” list.
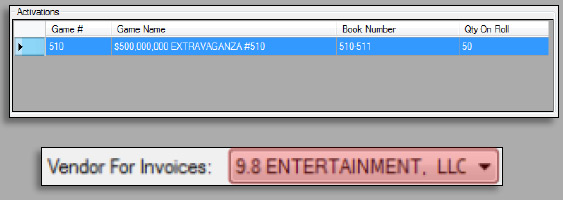
- Choose the “Apply Activations” button.

- This will create an invoice for the new book, thus enabling you to “receive” this book.
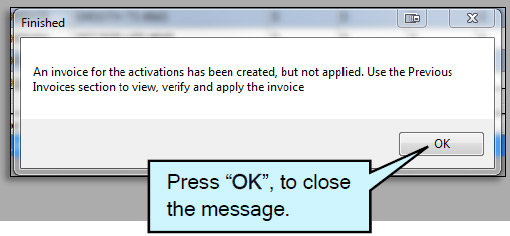
The purpose for receiving new books is to assist in tracking the inventory of games/lotteries. - In the Inventory module, choose “Receiving”. Under the “Previous Invoices” tab, thecreated invoice will be listed. Highlight the applicable invoice and press the “ViewInvoice” button.
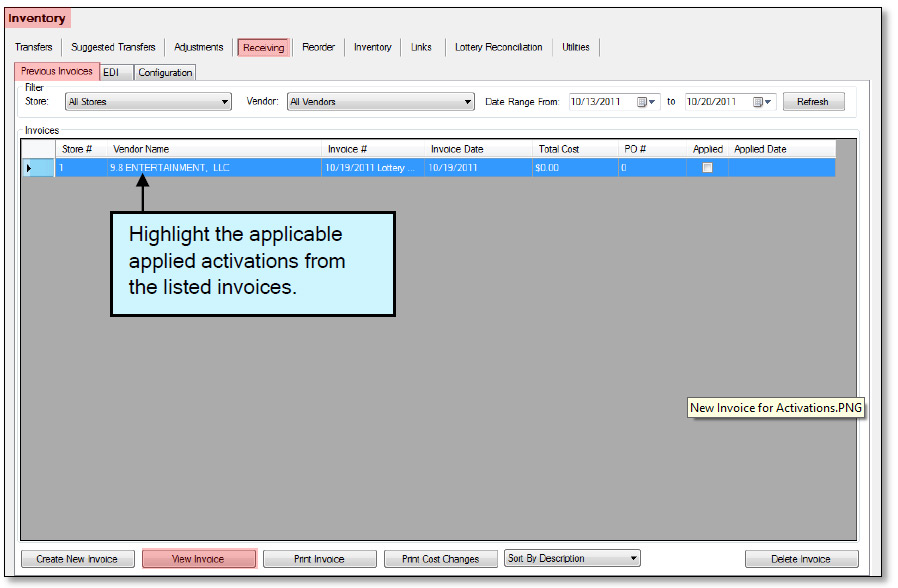
- This will open the “Receiving Worksheet”. From this worksheet you can make changesto an invoice, if applicable. When complete, press the “Apply Invoice” button.
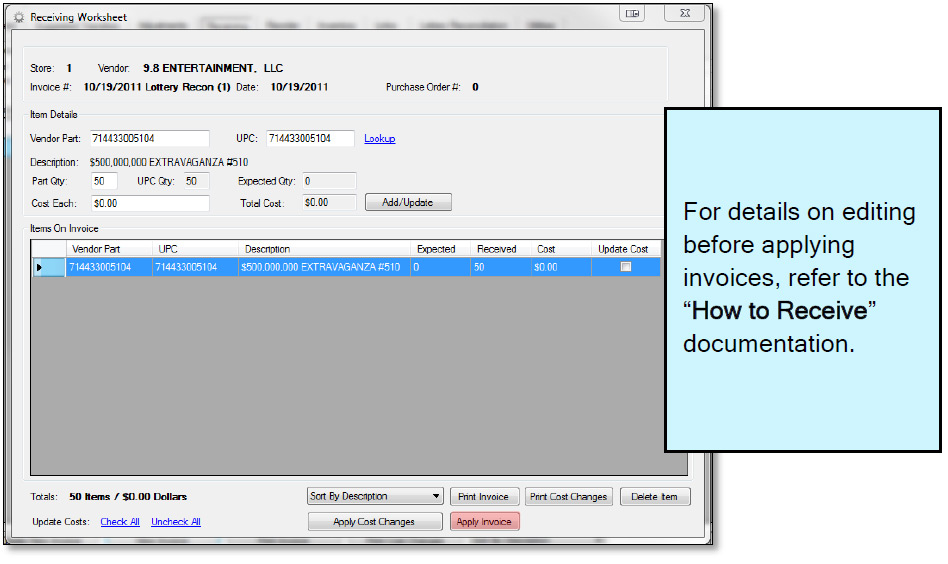
For details on editing before applying invoices, refer to the “How to Receive” documentation.
- Variances, if present, are displayed in the “Variances” column. If a previous reconciliation has a variance which requires an adjustment, highlight the applicable game and enter the correct “Start #” or “End #”.
Lottery Reconciliation Setup – POS
After setting games/lotteries in Lottery Items via the Director, details for Reconciliation and games will need to be set at the POS.
Know the applicable Lottery/Lotto department numbers for entry. This information can be found via the Director.
It is important for Setup information to be entered correctly. Confirm all departments entered are correct for accurate reconciliations and reports.
- Launch the Reconciliation program.This can be accomplished by eithera shortcut located on your POSdesktop or from within the FasTraxPOS software.

- Choose the “Settings” option.
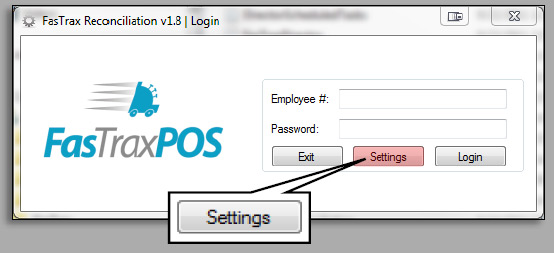
- Set applicable values under the“General Settings” tab:Lottery Sort Direction – Choose between Ascending and Descending for report presentation.
Force Lottery – Enabling this forces a Lottery Rec. to be performed before a Z Rec. can be completed.
Lottery Sales Dept # – Refer to Director.
Lotto Sales Dept # – Refer to Director.
Get Payouts From – Choose a preset Department or Payout Account for tracking Lottery Payouts.
Lottery PO Dept # – Refer to Director.
Lotto PO Dept # – Refer to Director.
Lottery Has Multiple Zs – Enabling allows you to choose multiple Zs for a Lottery Reconciliation.
Sort Games By – Sort the reconciliation list by Game Number or Bin Number.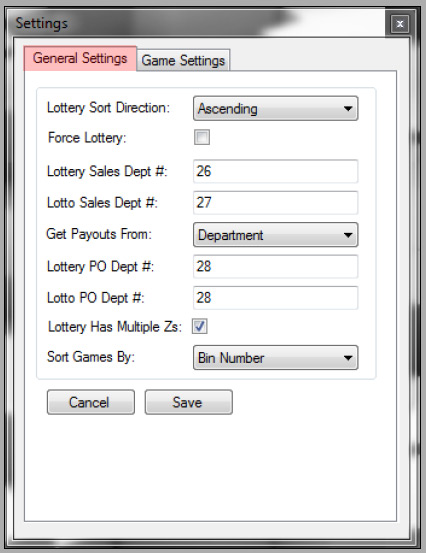
- Change to the “Game Settings” tab.
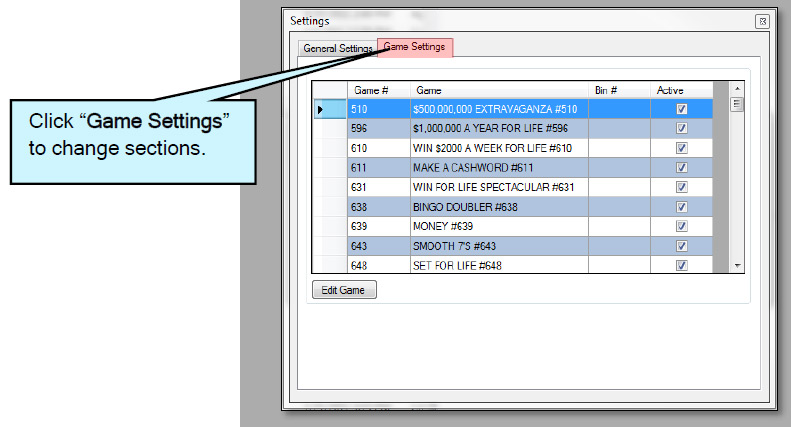
- Highlight an applicable game andclick “Edit Game”.These steps will need to be repeated for each applicable game.
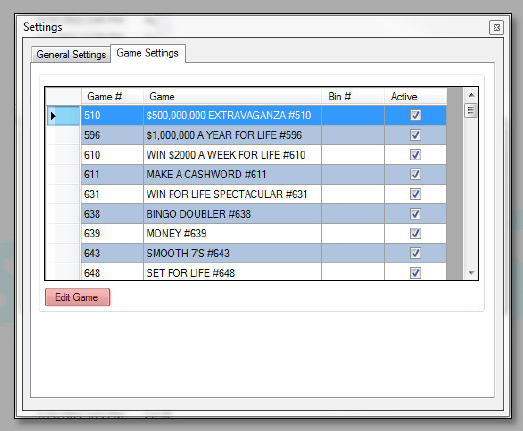
- Toggle the “Active” flag. Checked is“Active”; not checked is “In Active”.
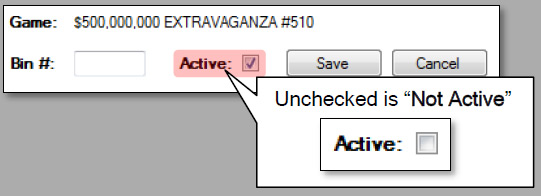

*If Active, enter the Bin Number.
- Press the “Save” button when youare finished editing all applicablegames.
 Repeat these steps for each applicable game.
Overview of Uplifts
Uplifts is a premium module from FasTrax that notifies customers via a secondary display of a potential sale that they may not know about, as well as giving the cashier a sales pitch to read. This allows everyone on both sides of transactions to be aware of potential sales.
Uplifts can be used in conjunction with system discounts and loyalty to create a powerful sales tool that keep both the employees and customers notified of special offerings and increases add on and impulse sales!
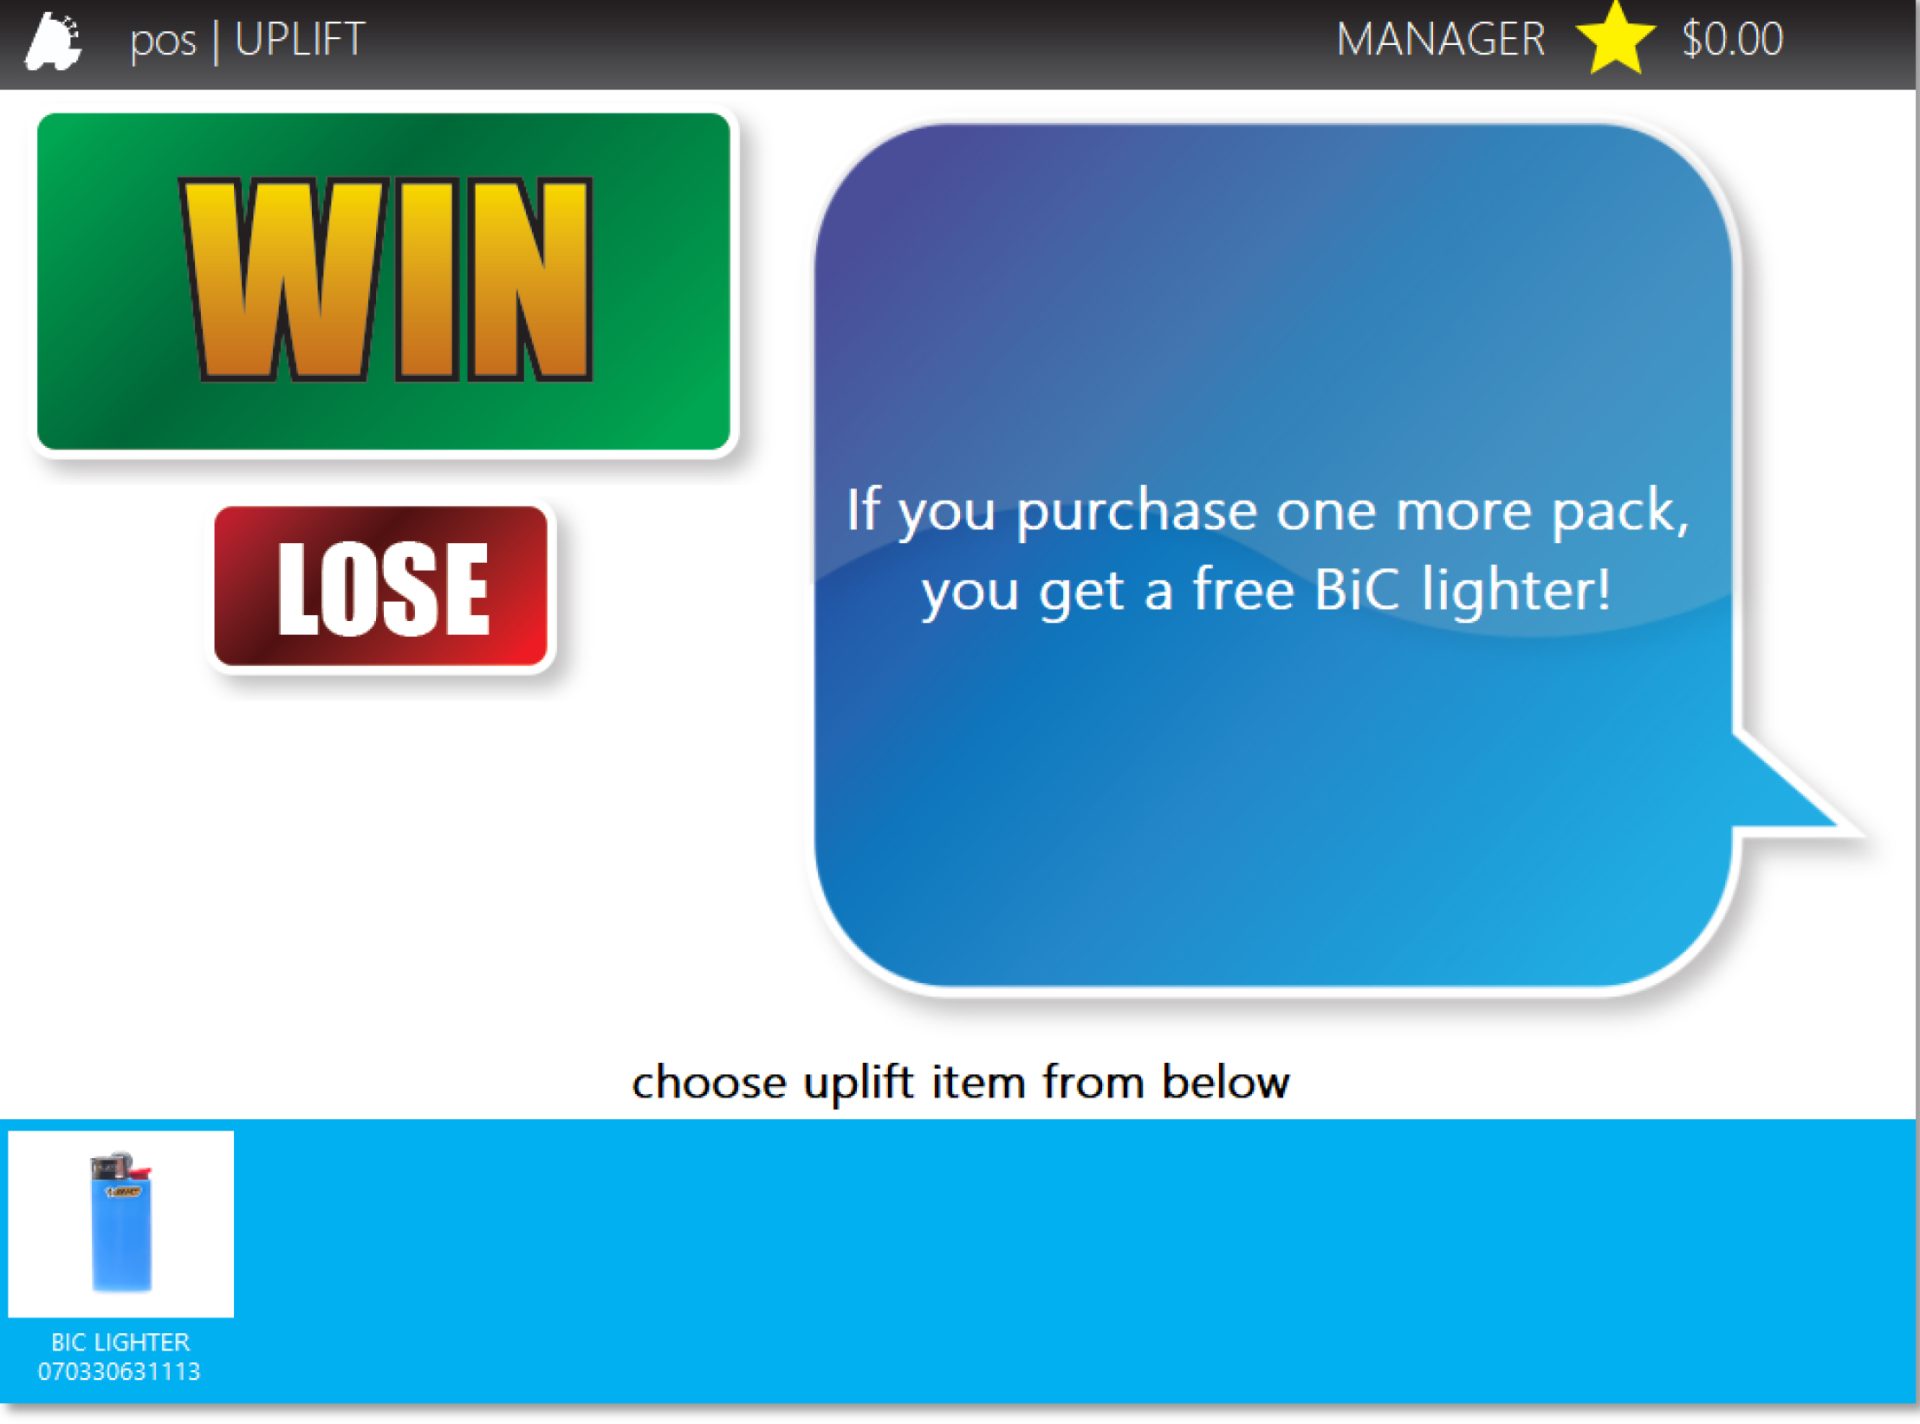
Setting Up an Uplift
1. The uplift needs to first be created on the FasTrax Control Center, which can be found at controlcenter.fastraxpos.com. Log in using your previously provided log in credentials.
2. After logging in, choose the “Signage” tab, followed ![]()
![]()
by the “Uplifts” button that appears.
3. Choose the “Add New” button towards the top right of the ![]()
window
4. The following fields need to be set on the “Edit Uplift” page:
a. Name
b. Start Date
c. End Date
d. Trigger Value
e. Spiff Min Qty

5. When complete, choose the “Save” button towards the ![]()
top of the window

1. After opening Director, choose the “Pricebook” module 
2. Next, choose the “Uplifts” tab ![]()
3. This shows a listing of the current uplifts. Select one you
wish to view or edit, and choose the “Edit Uplift” button ![]()
4. This brings up the “Uplift Details” window
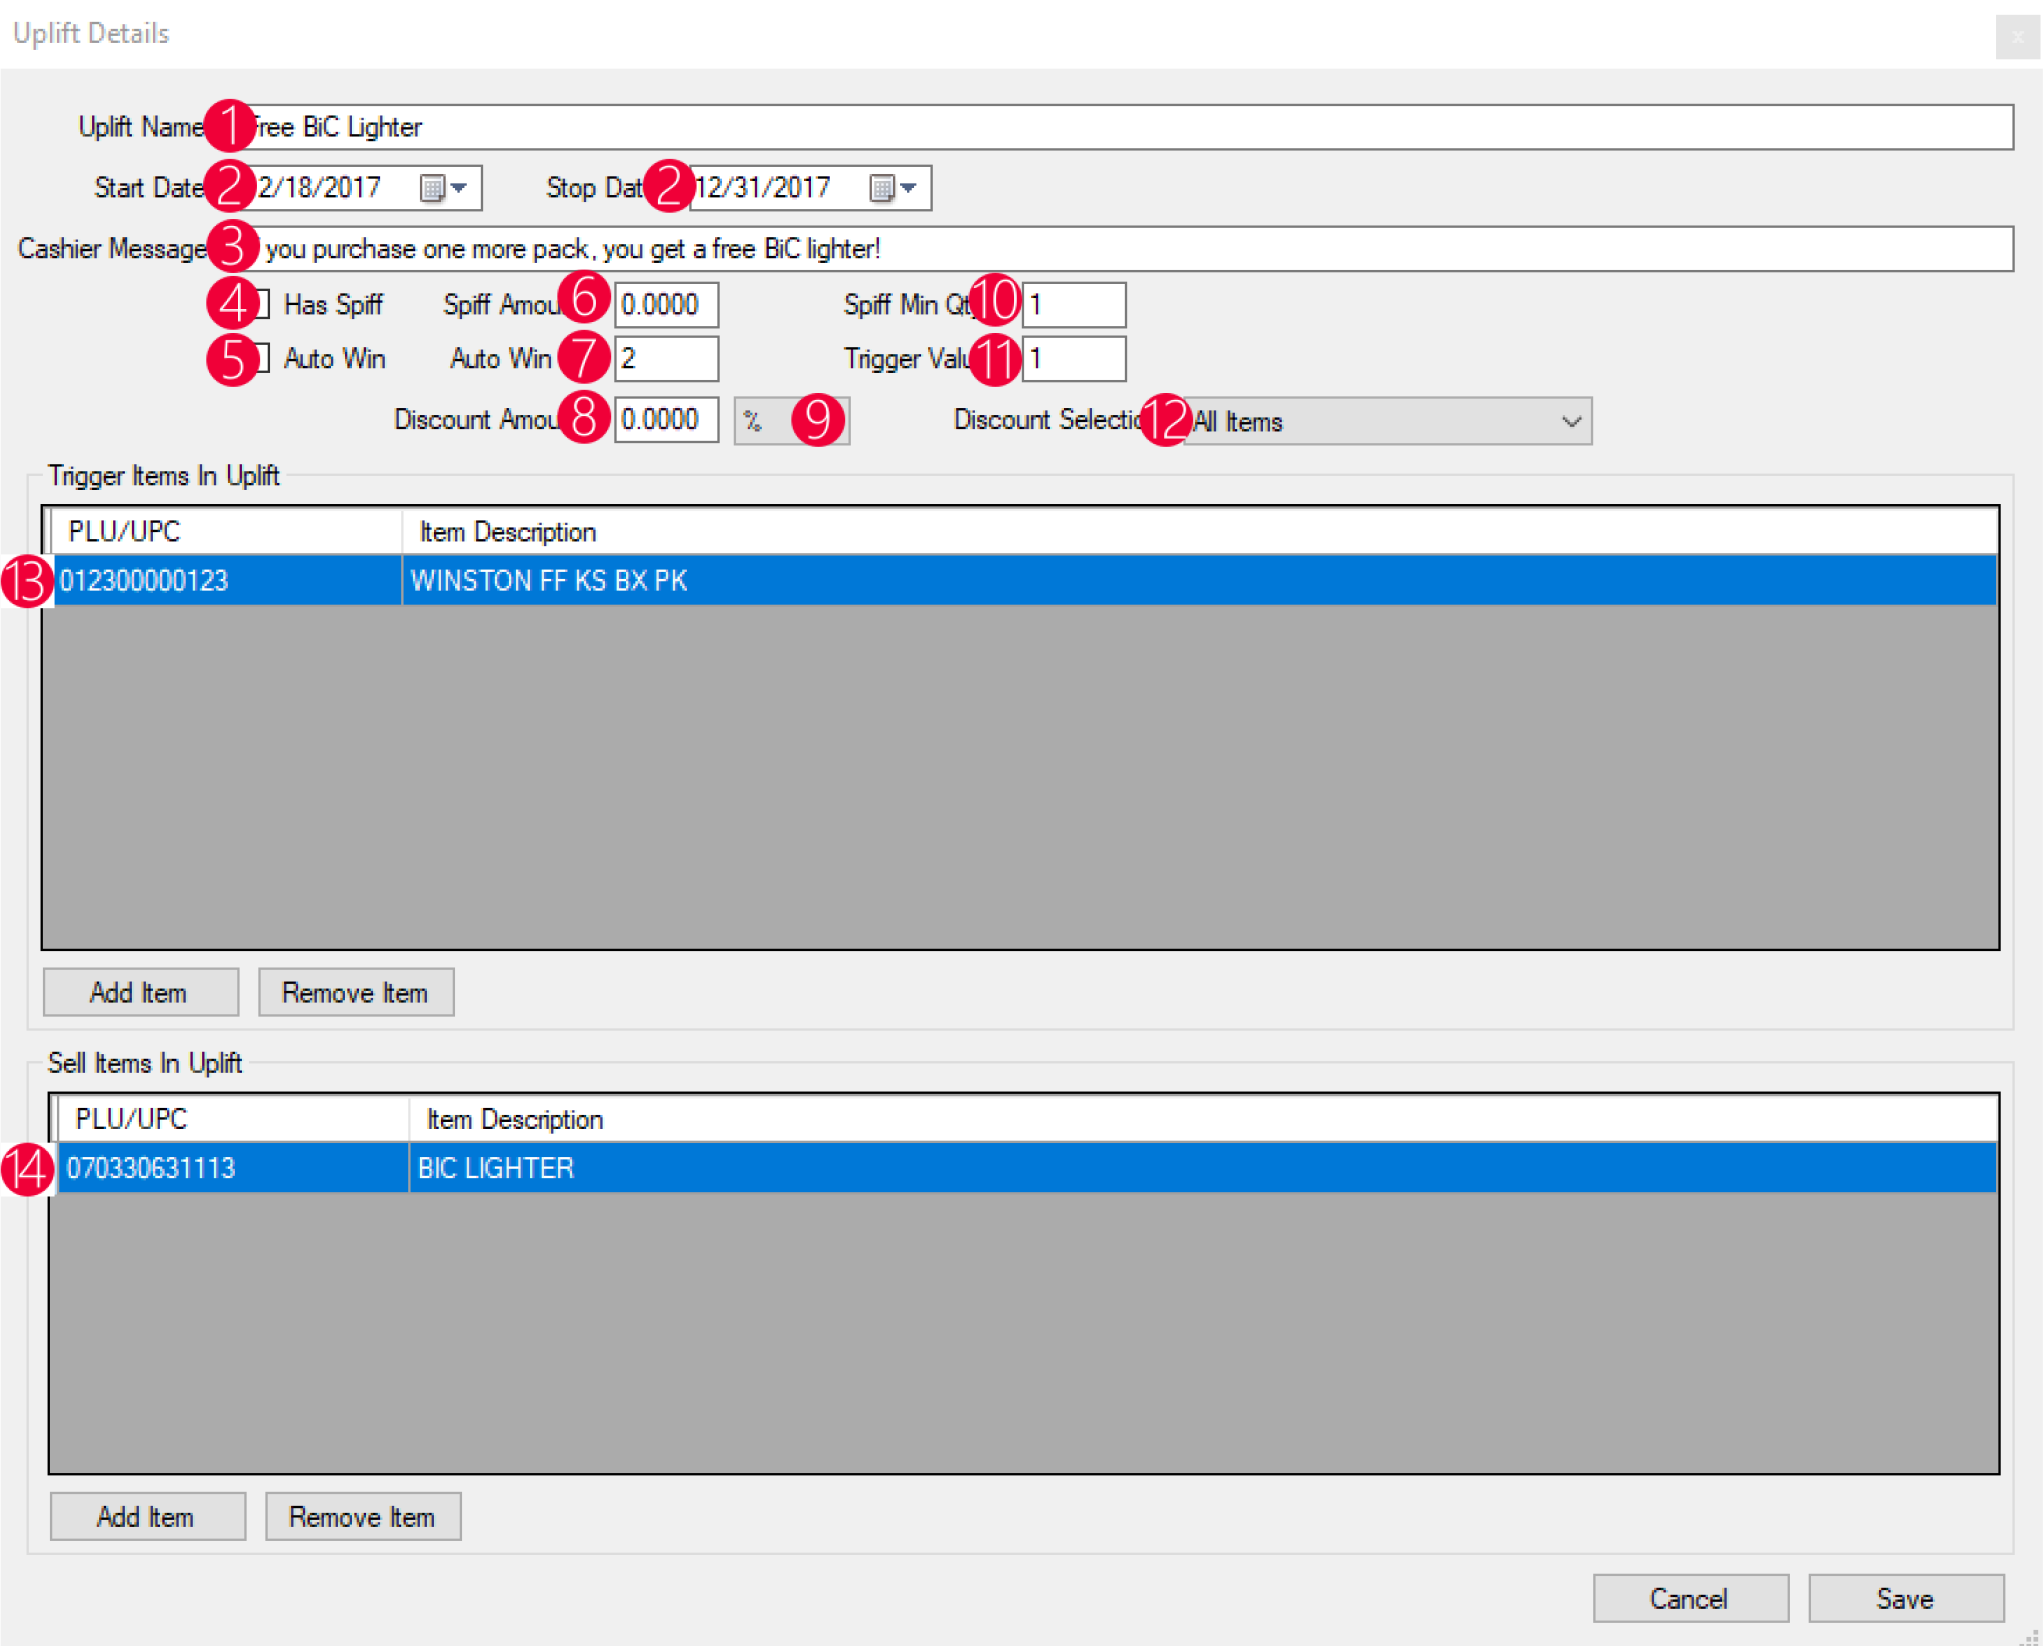
1. Uplift Name – The name of the uplift
2. Start Date / Stop Date – The dates that the uplift is effective
3. Cashier Message – The pre-programmed dialogue that shows up on the uplift that tells the cashier what to say
4. Has Spiff – Flags the uplift to spiff the cashier when won
5. Auto Win – Automatically flags the uplift as “Won” when the trigger and sale items are already on the transaction before the subtotal button is pressed
6. Spiff Amount – The spiff amount awarded to the cashier
7. Auto Win At – The amount needed of the sell item to auto win the uplift on the transaction
8. Discount Amount – The discount amount of the uplift if not using a system discount
9. % or $ – Is the discount amount a percentage or dollar amount
10. Spiff Min Qty – The minimum quantity needed to be sold for the spiff to be applied
11. Trigger Value – The number of items in the trigger list needed to be sold in order for the uplift to prompt the cashier and customer
12. Discount Selection – The option to discount all or a single item in the uplift if using a discount amount % or discount amount $ (numbers 8 and 9)
13. Trigger Items In Uplift – The list of items that will trigger the uplift, prompting the cashier and customer
14. Sell Items In Uplift – The items that will receive the discount if the uplift is won
5. Choose the “Save” Button after choosing applicable uplift settings . ![]()


Uplift Reports
1. After opening Director, choose the “Reports” module ![]()
2. Next, choose the “Sales Reports” tab ![]()
3. Choose the “Uplift Reports” to run the reports
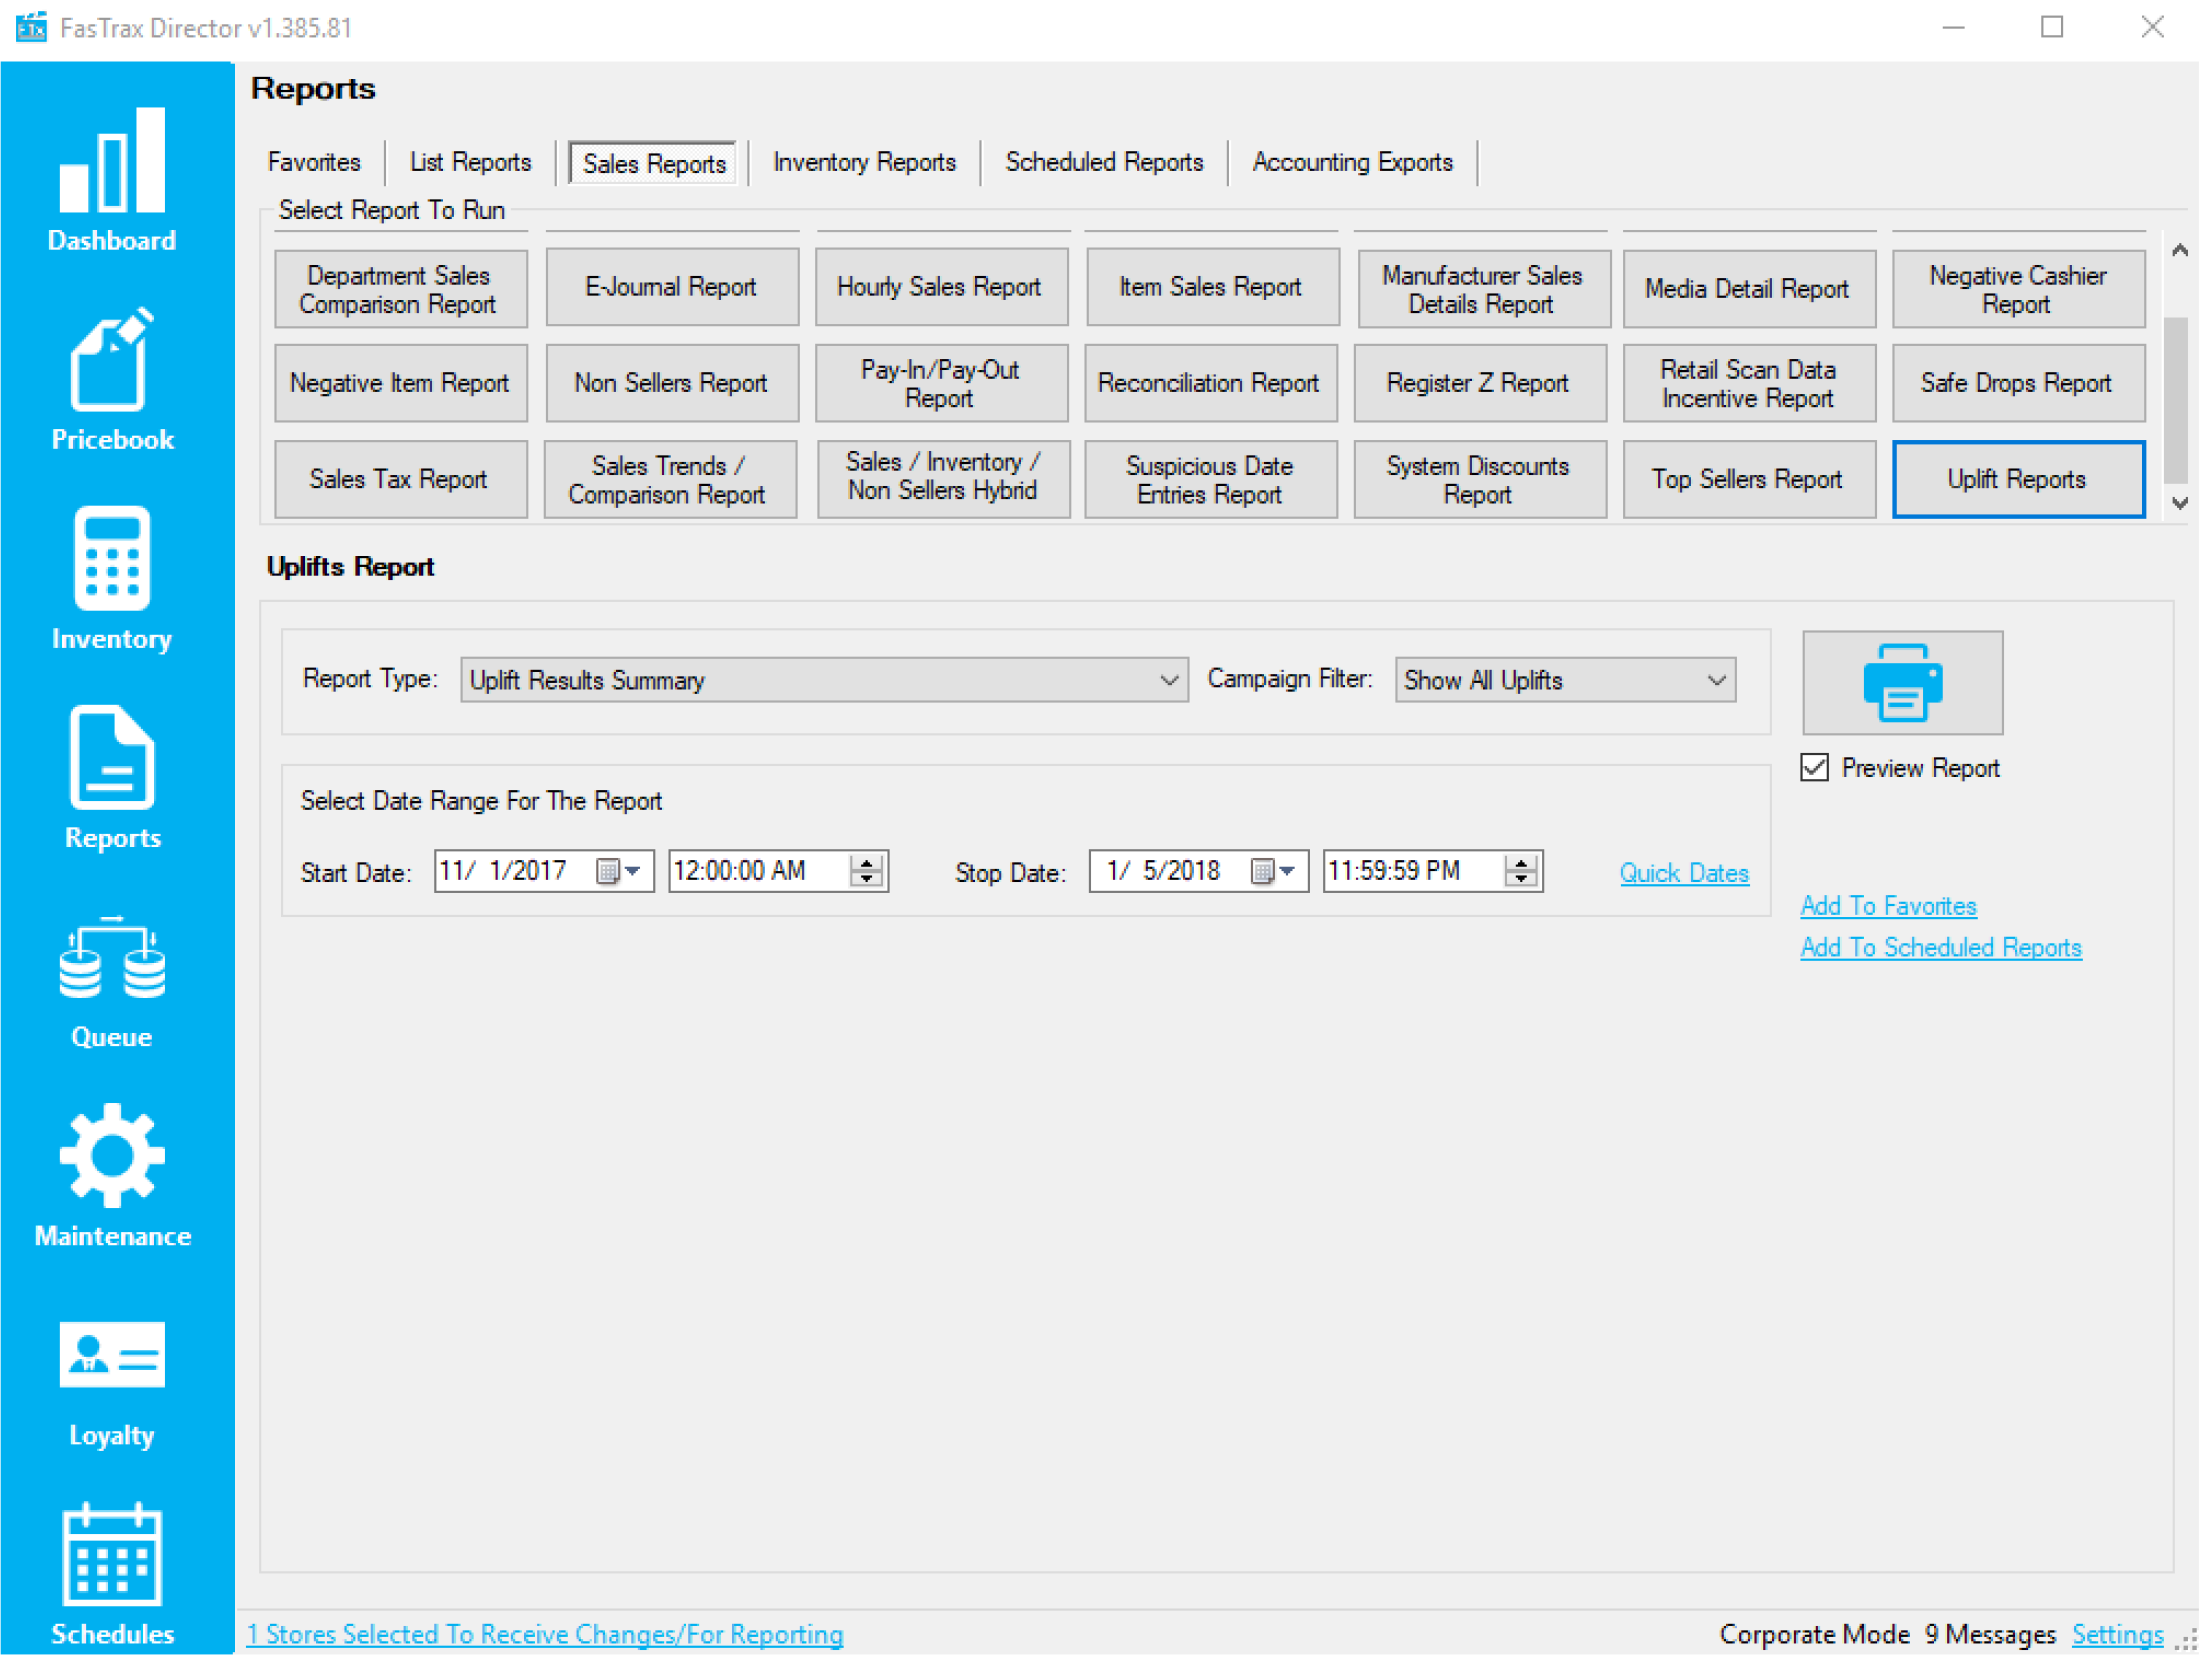
For assistance with configurations, please contact Technical Support at Support@FasTraxPOS.com
Overview of Receiving Invoices
Invoices are used to add products into a store’s inventory. Invoices can be received in a variety of ways across the system too, utilizing Director, the POS, or handheld software.
Receiving all invoices into the system is required in keeping track of inventory and easily updating costs.
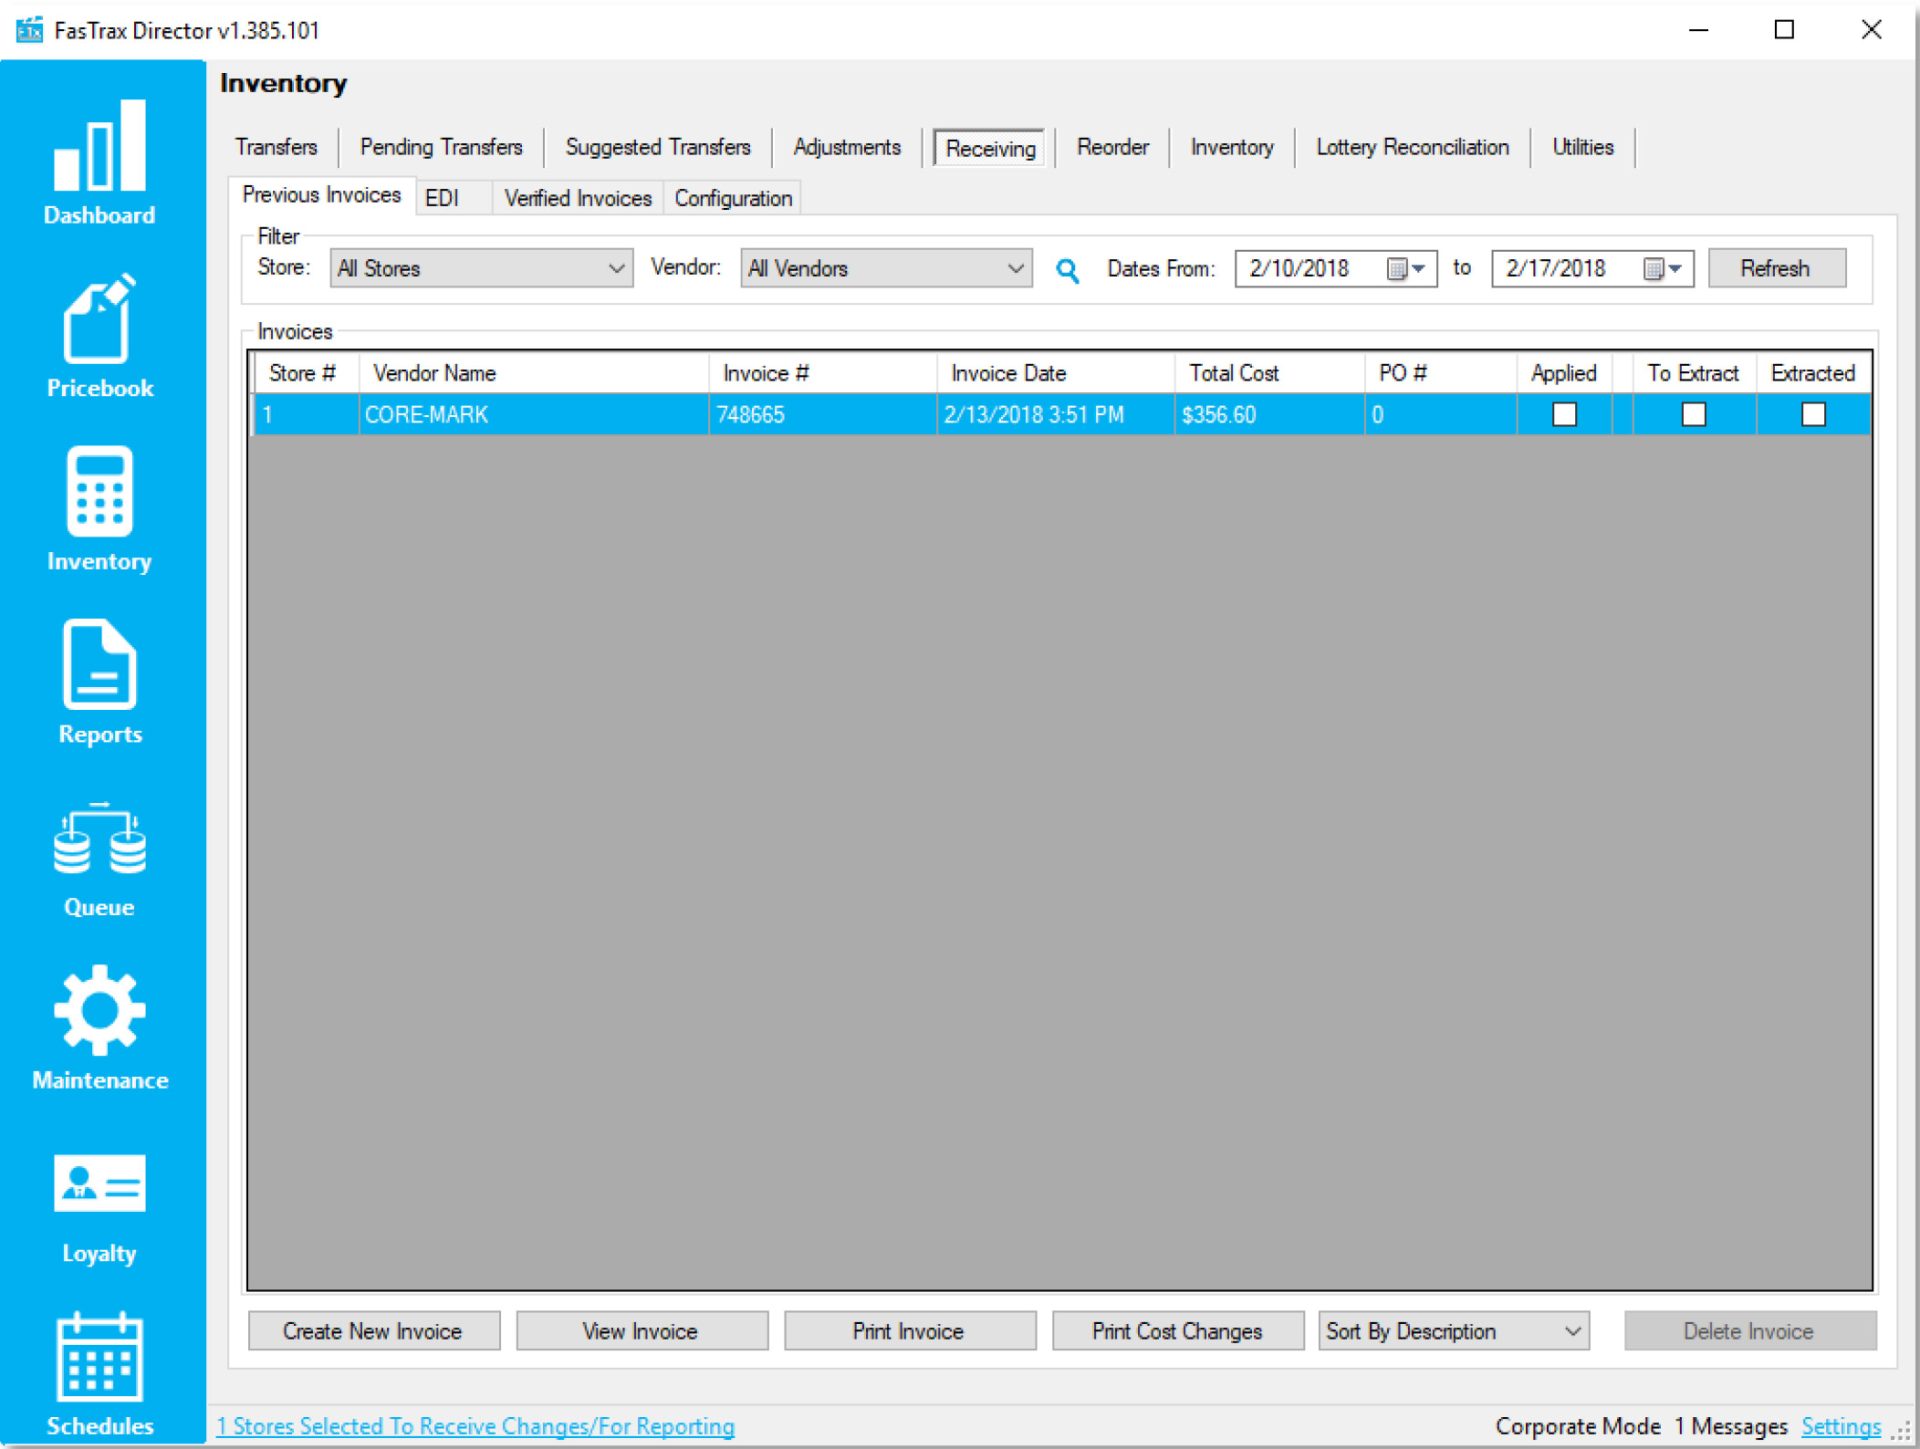
Receiving – Previous Invoices in Director
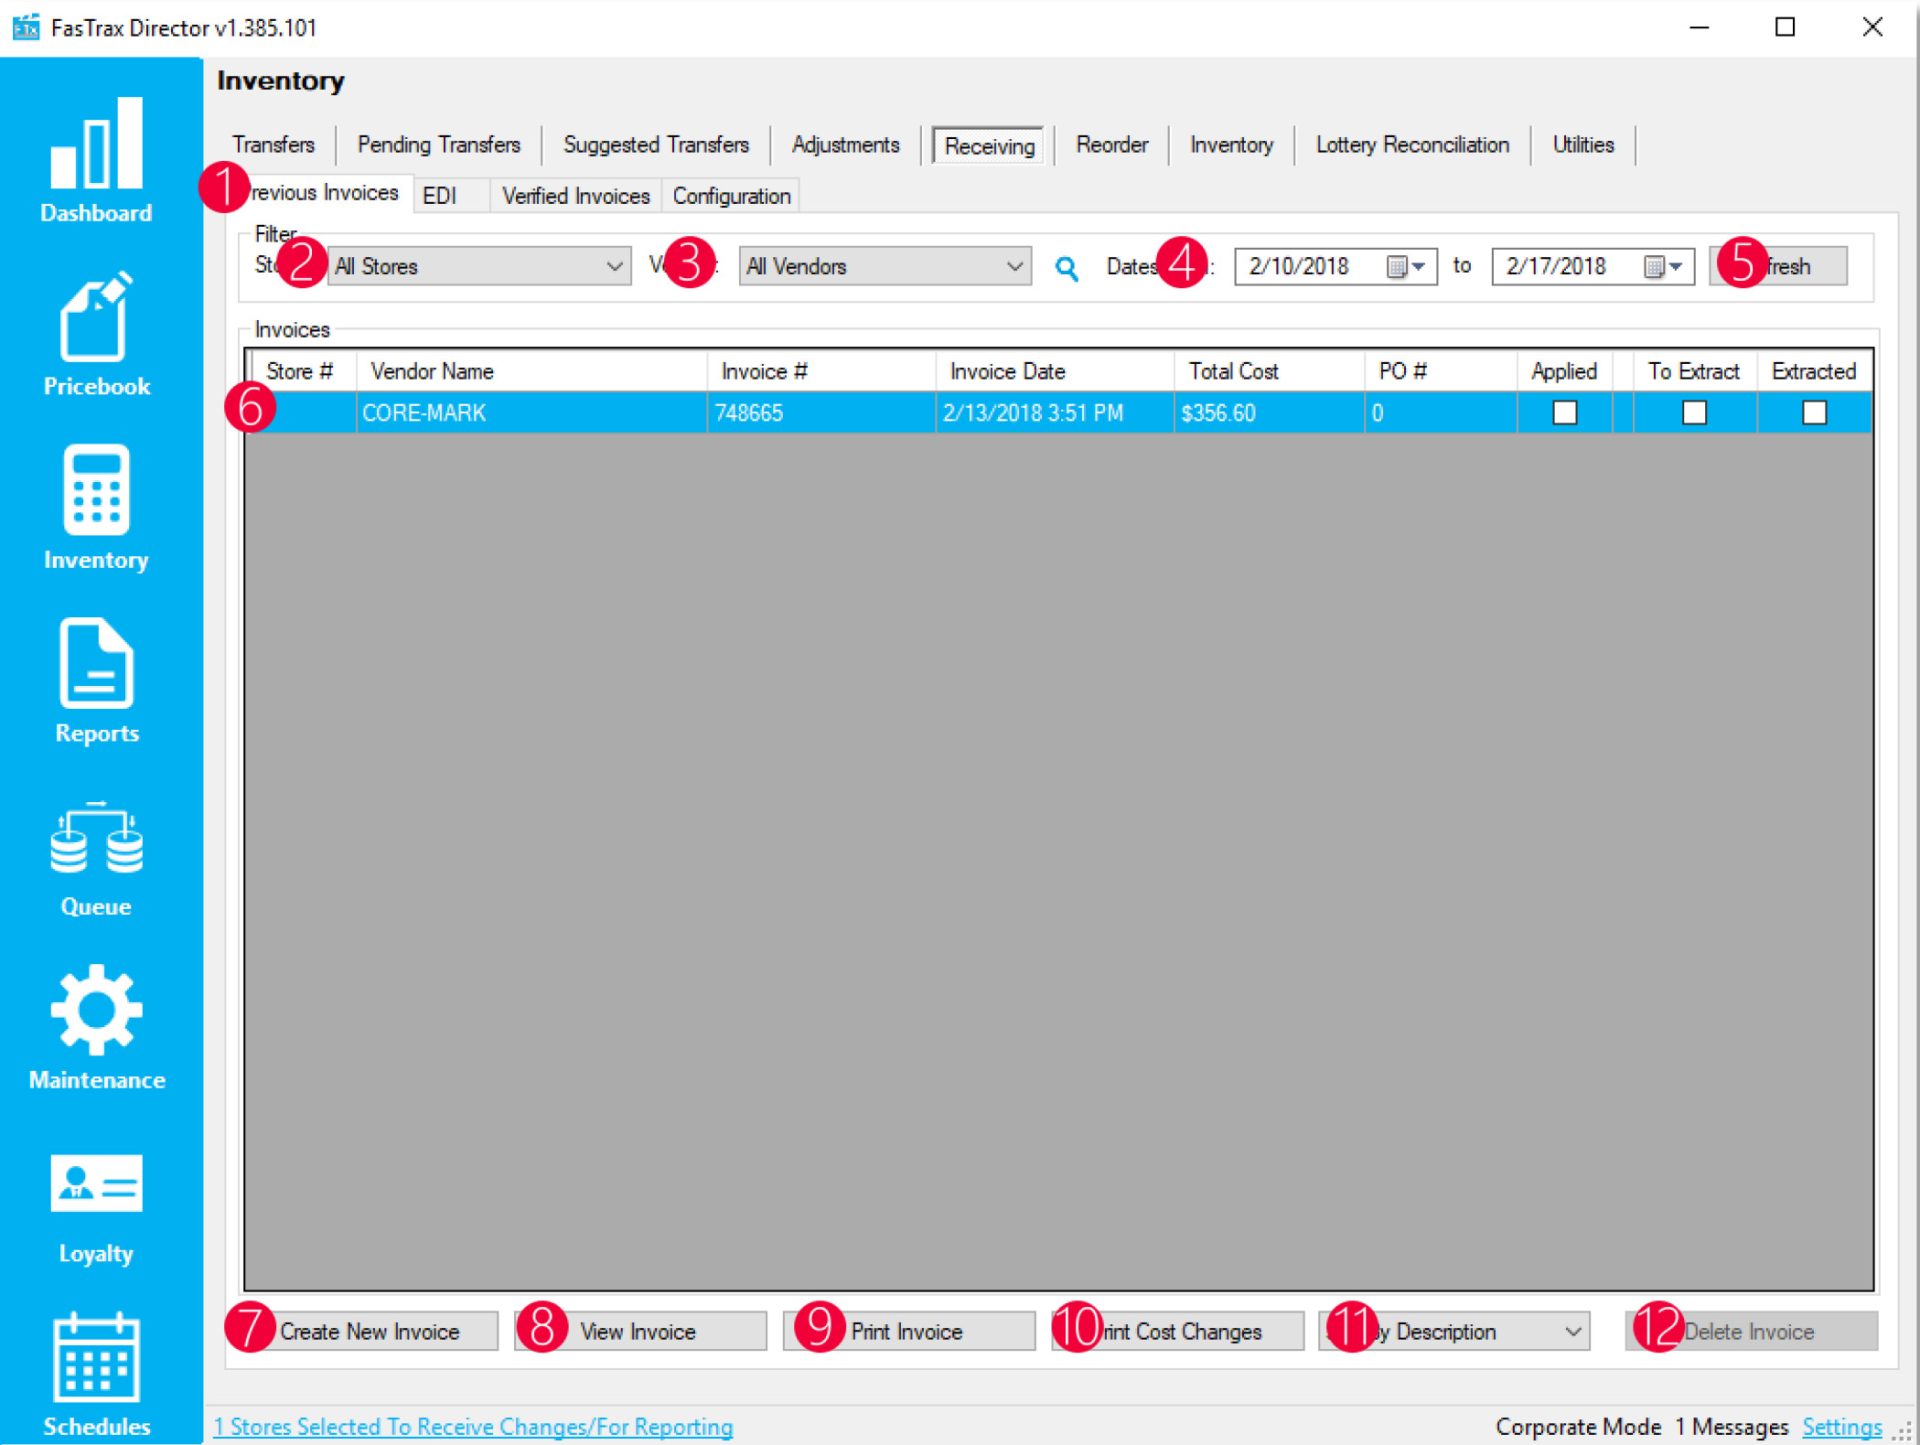
- Previous Invoices – This tab shows all invoices from the below selected filter options
- Store – This filter allows either all stores or individual stores
- Vendor – This filter allows all vendors or individual vendors
- Date Range – A start and end date filter that filters by invoice dates
- Refresh – This refreshes the invoices in the below grid, applying new filters or showing newly received invoices
- Invoices – This grid shows all invoices, both applied and unapplied, based on the above filter settings
- Create New Invoice – Allows the user to create a new invoice
- View Invoice – Opens the worksheet to view the selected invoice. Double clicking an invoice also does this
- Print Invoice – Prints the selected invoice
- Print Cost Changes – Prints cost changes on the selected invoice
- Sort Option – Sorts invoices by description, UPC, or vendor part
- Delete Invoice – This is by default disabled and a machine setting. If enabled, allows the user to delete invoices

Create New Invoice in Director
When choosing the “Create New Invoice” button on the “Previous Invoice” screen, the user will be presented with the following window.
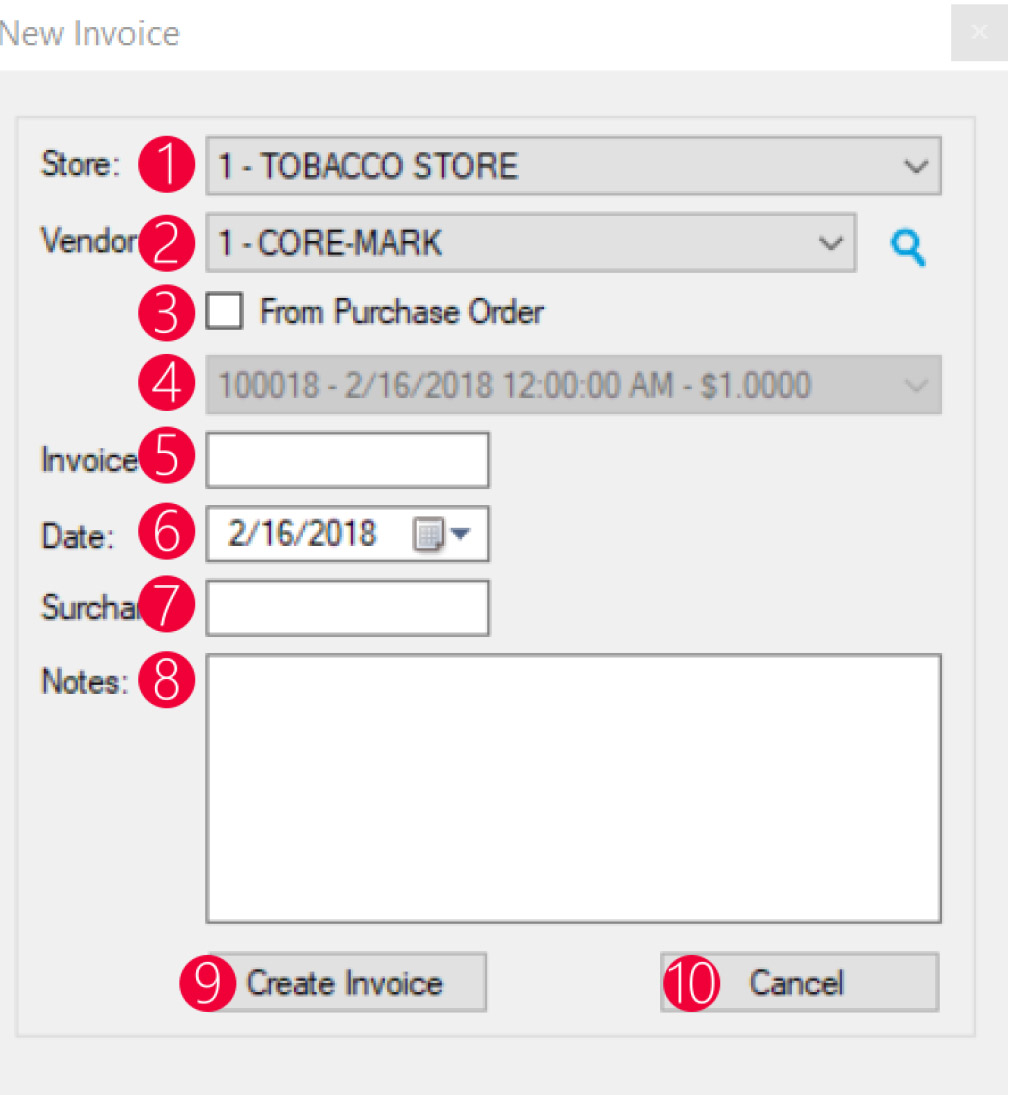
- Store – Chooses the store that the invoice will be created for
- Vendor – Chooses which vendor that the invoice will be for
- From Purchase Order – This checkbox allows the invoice against a purchase order
- Purchase Order Dropdown – When the “From Purchase Order” checkbox is chosen, this dropdown populates purchase orders that the invoice will be created against
- Invoice # – Text box where the invoice number is input (invoice numbers have to be unique per vendor)
- Date – The date of the invoice
- Surcharge – If there is a surcharge fee for the invoice
- Notes – Allows notes to be entered in for the created invoice
- Create Invoice – Creates the invoice based on the input parameters
- Cancel – Cancels the invoice from being created
Invoice Worksheet in Director
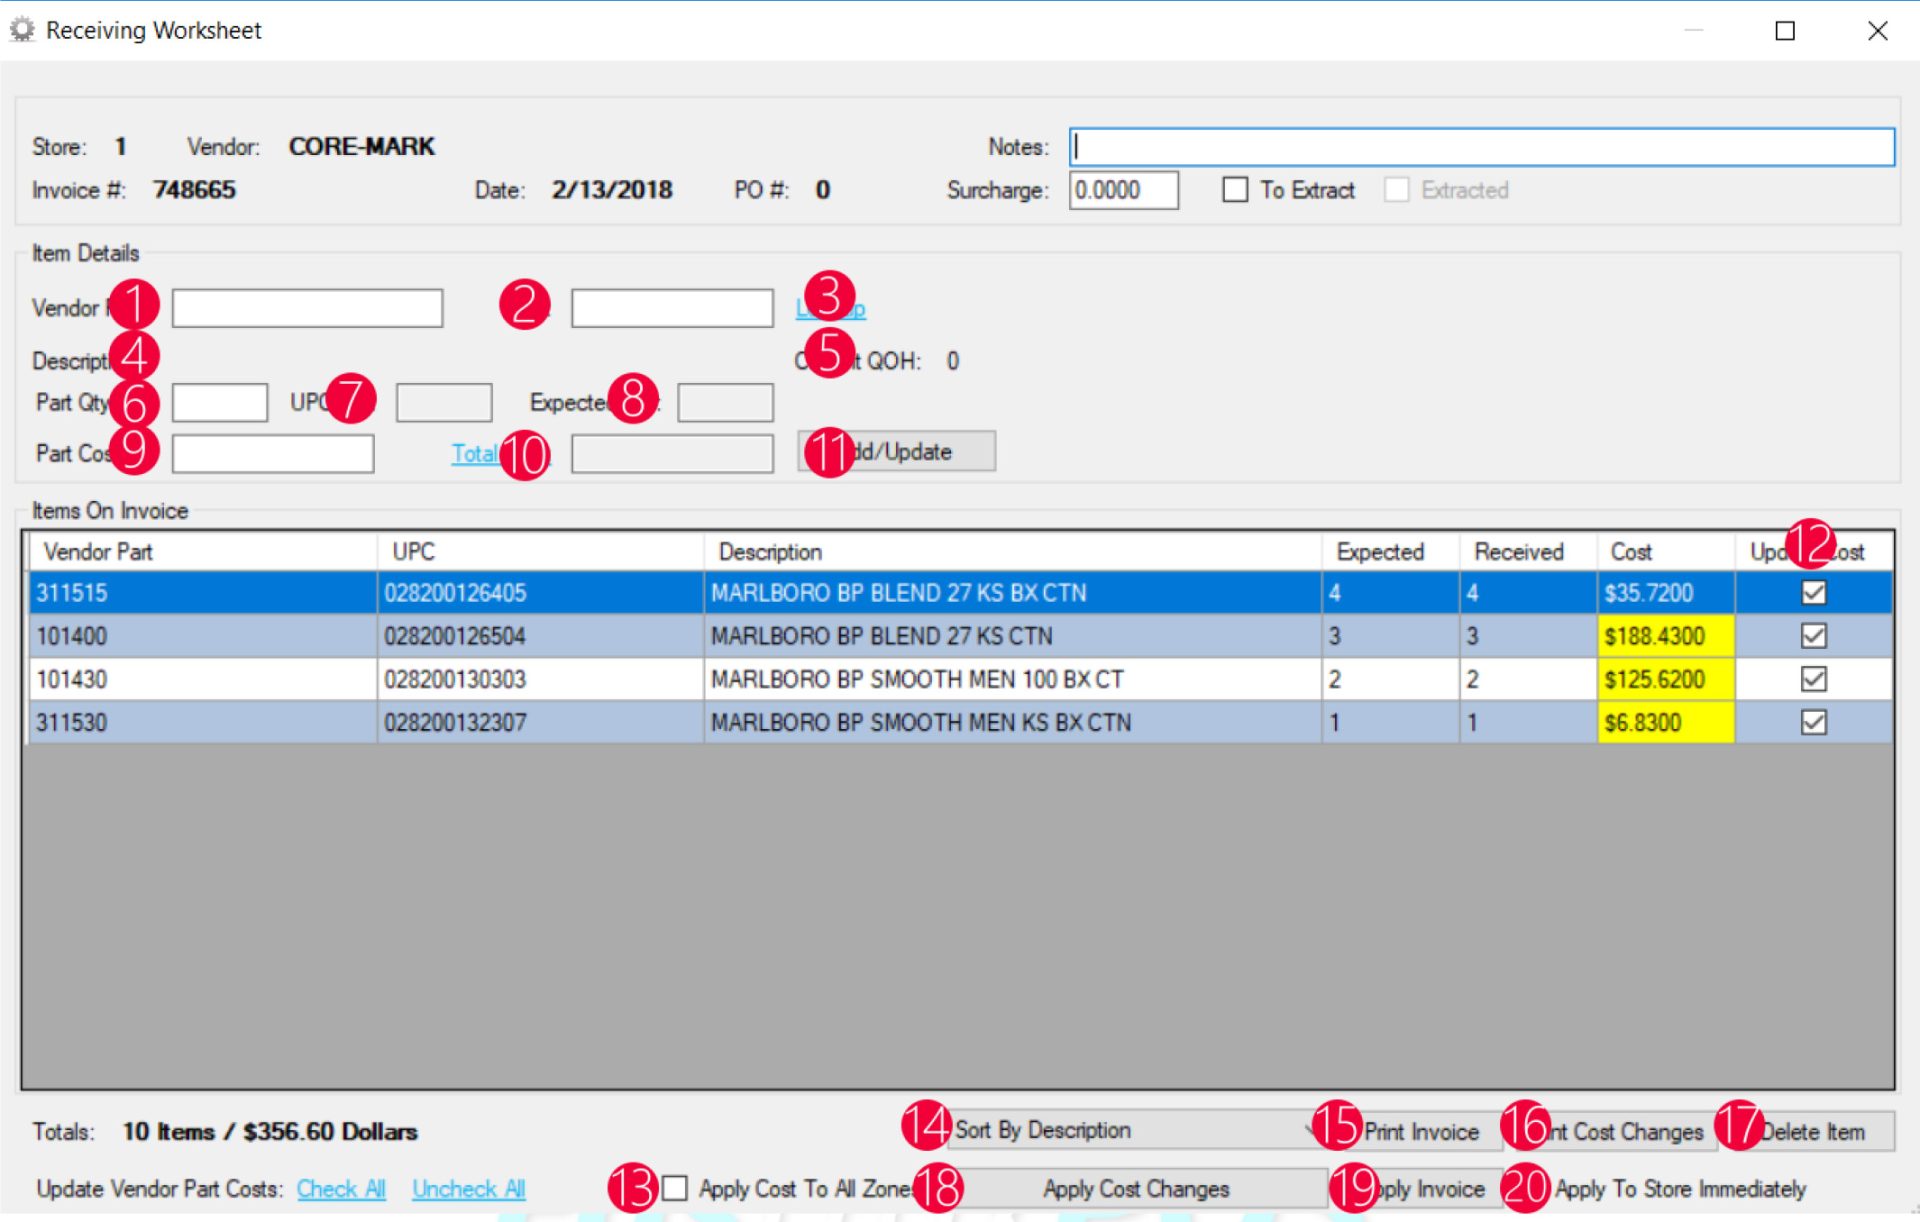
- Vendor Part – Entering the vendor part and pressing enter will look the item up, adding it to the invoice
- UPC – Entering the UPC allows the user to look up and add the item to an invoice by the UPC, prompting the user to use the vendor part if it exists
- Lookup – Allows the user to search for the item by other parameters
- Description – The items description after it has been added in the vendor part or UPC field
- Current QOH – The current quantity on hand of the item
- Part Qty – The number of vendor parts being added to the invoice
- UPC Qty – The number of UPCs contained in the part quantity
- Expected Qty – The quantity that was ordered on the PO if a PO was utilized
- Part Cost – The cost of the vendor part
- Total Cost – The total cost of the number of vendor parts being received
- Add/Update – Adds the vendor part to the invoice
- Update Cost – Checkbox that when checked, updates the cost of the vendor part and last cost of the item
- Apply Cost To All Zones – Applies the checkboxes cost changes to all pricebook zones
- Sort – Allows the invoice to be sorted by different methods when printing
- Print Invoice – Generates a report showing the invoice in a printable format
- Print Cost Changes – Generates a report showing all cost changes in a printable format
- Delete Item – Deletes the item on the invoice worksheet
- Apply Cost Changes – Applies all checkboxed cost changes to vendor parts and last cost
- Apply Invoice – Applies the invoice to inventory
- Apply To Store Immediately – When in corporate mode, applies the invoice bypassing the queue
Verified Invoices
Verified invoices are used to verify the counts of applied invoices, generally processed and completed via EDI. The actual process of invoice verification has to be done at store level on the handheld.
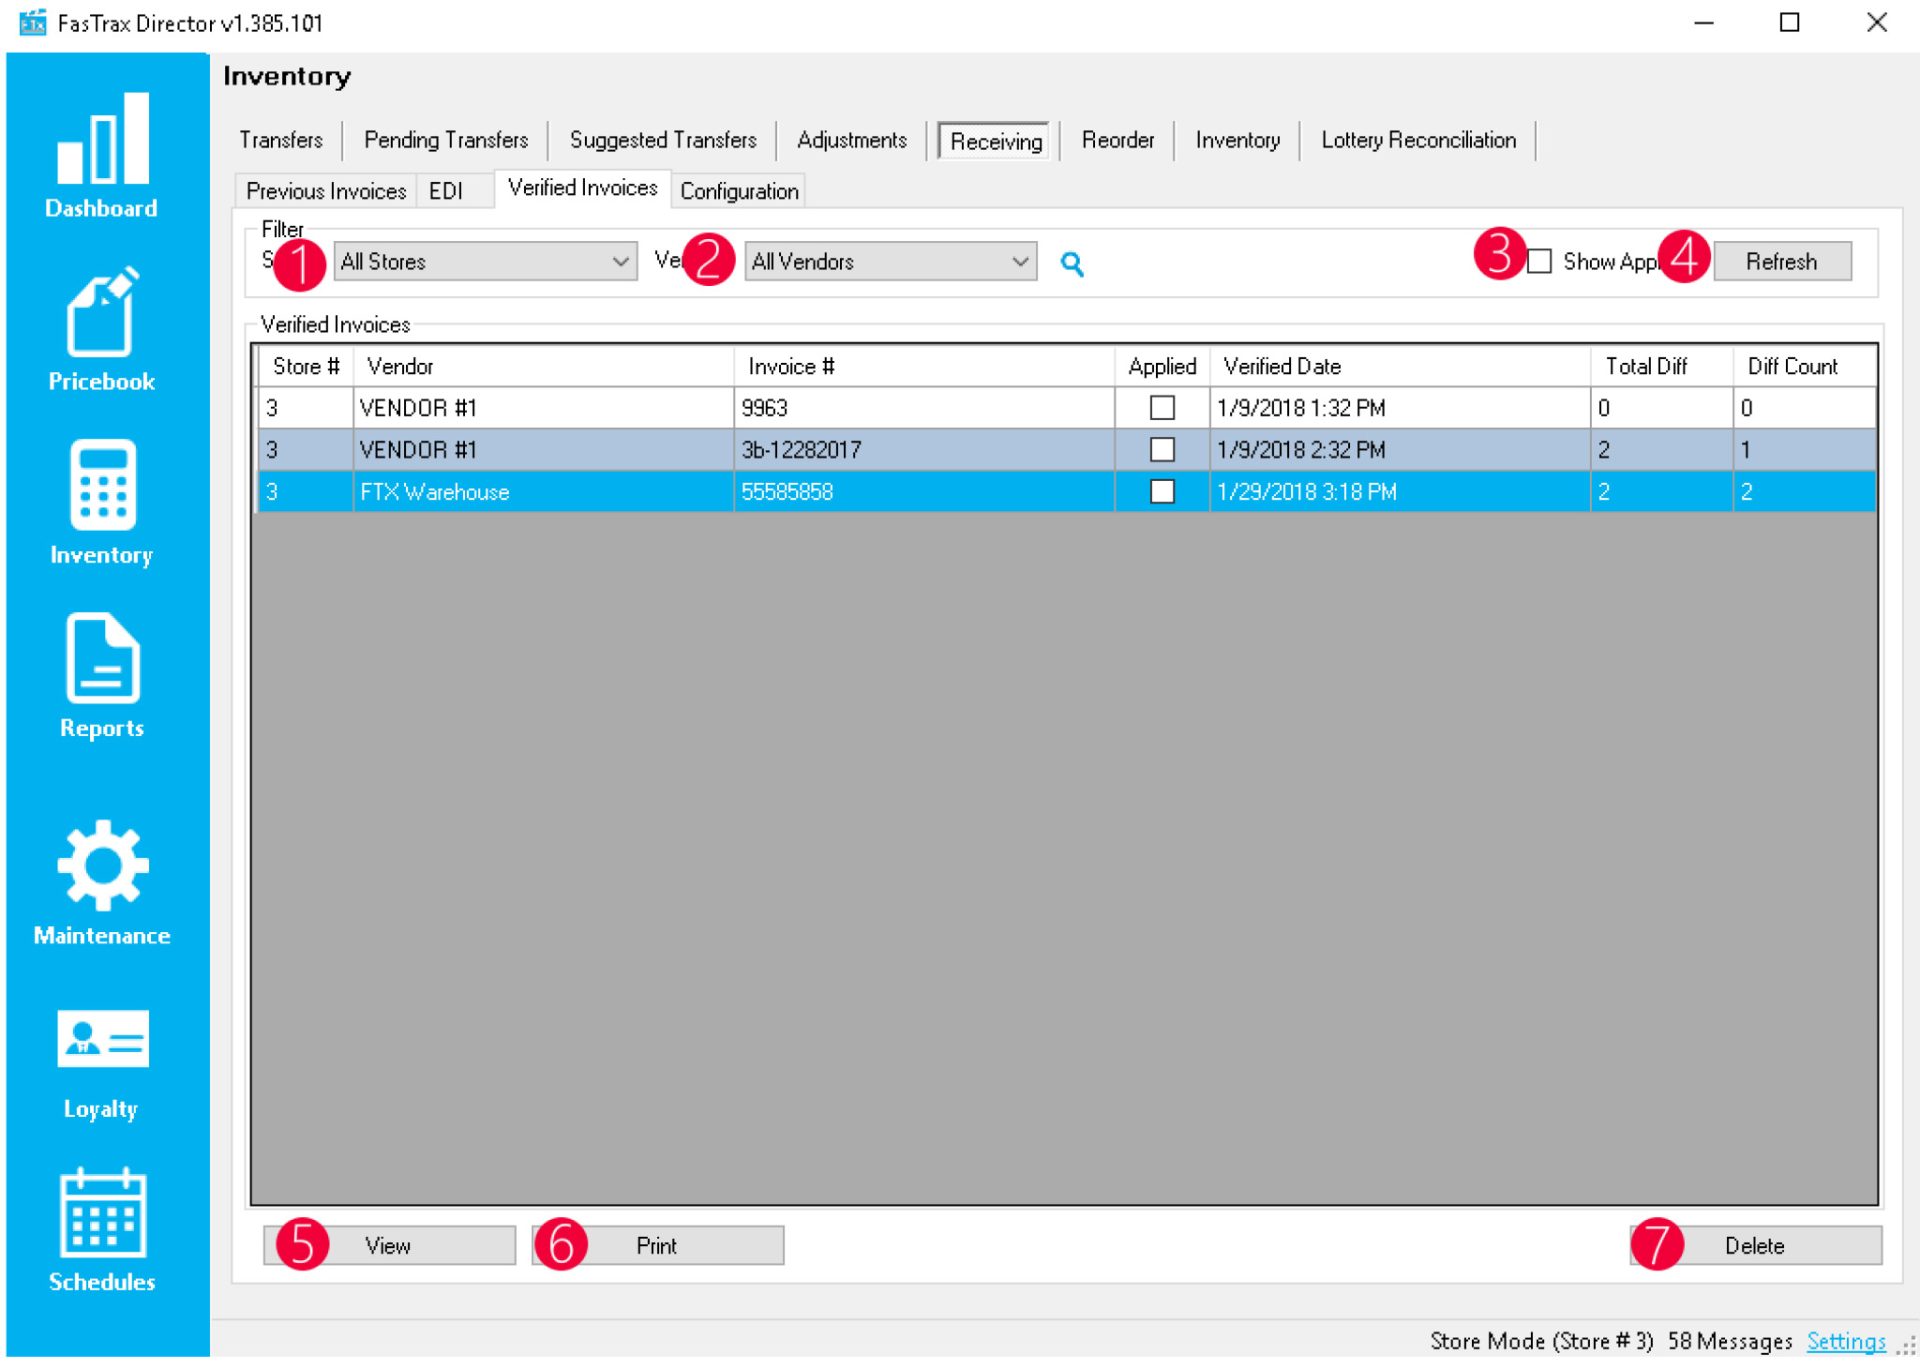
- Store – Allows the user to filter by store to populate the verified invoices grid
- Vendor – Allows the user to filter by vendor to populate the verified invoices grid
- Show Applied – Allows the user to show applied verified invoices
- Refresh – Refreshes the verified invoice grid, applying updated filters
- View – Views the selected invoice
- Print – Generates a printable report of the selected invoice
- Delete – Deletes the selected invoice verification
Verified Invoices Details Worksheet
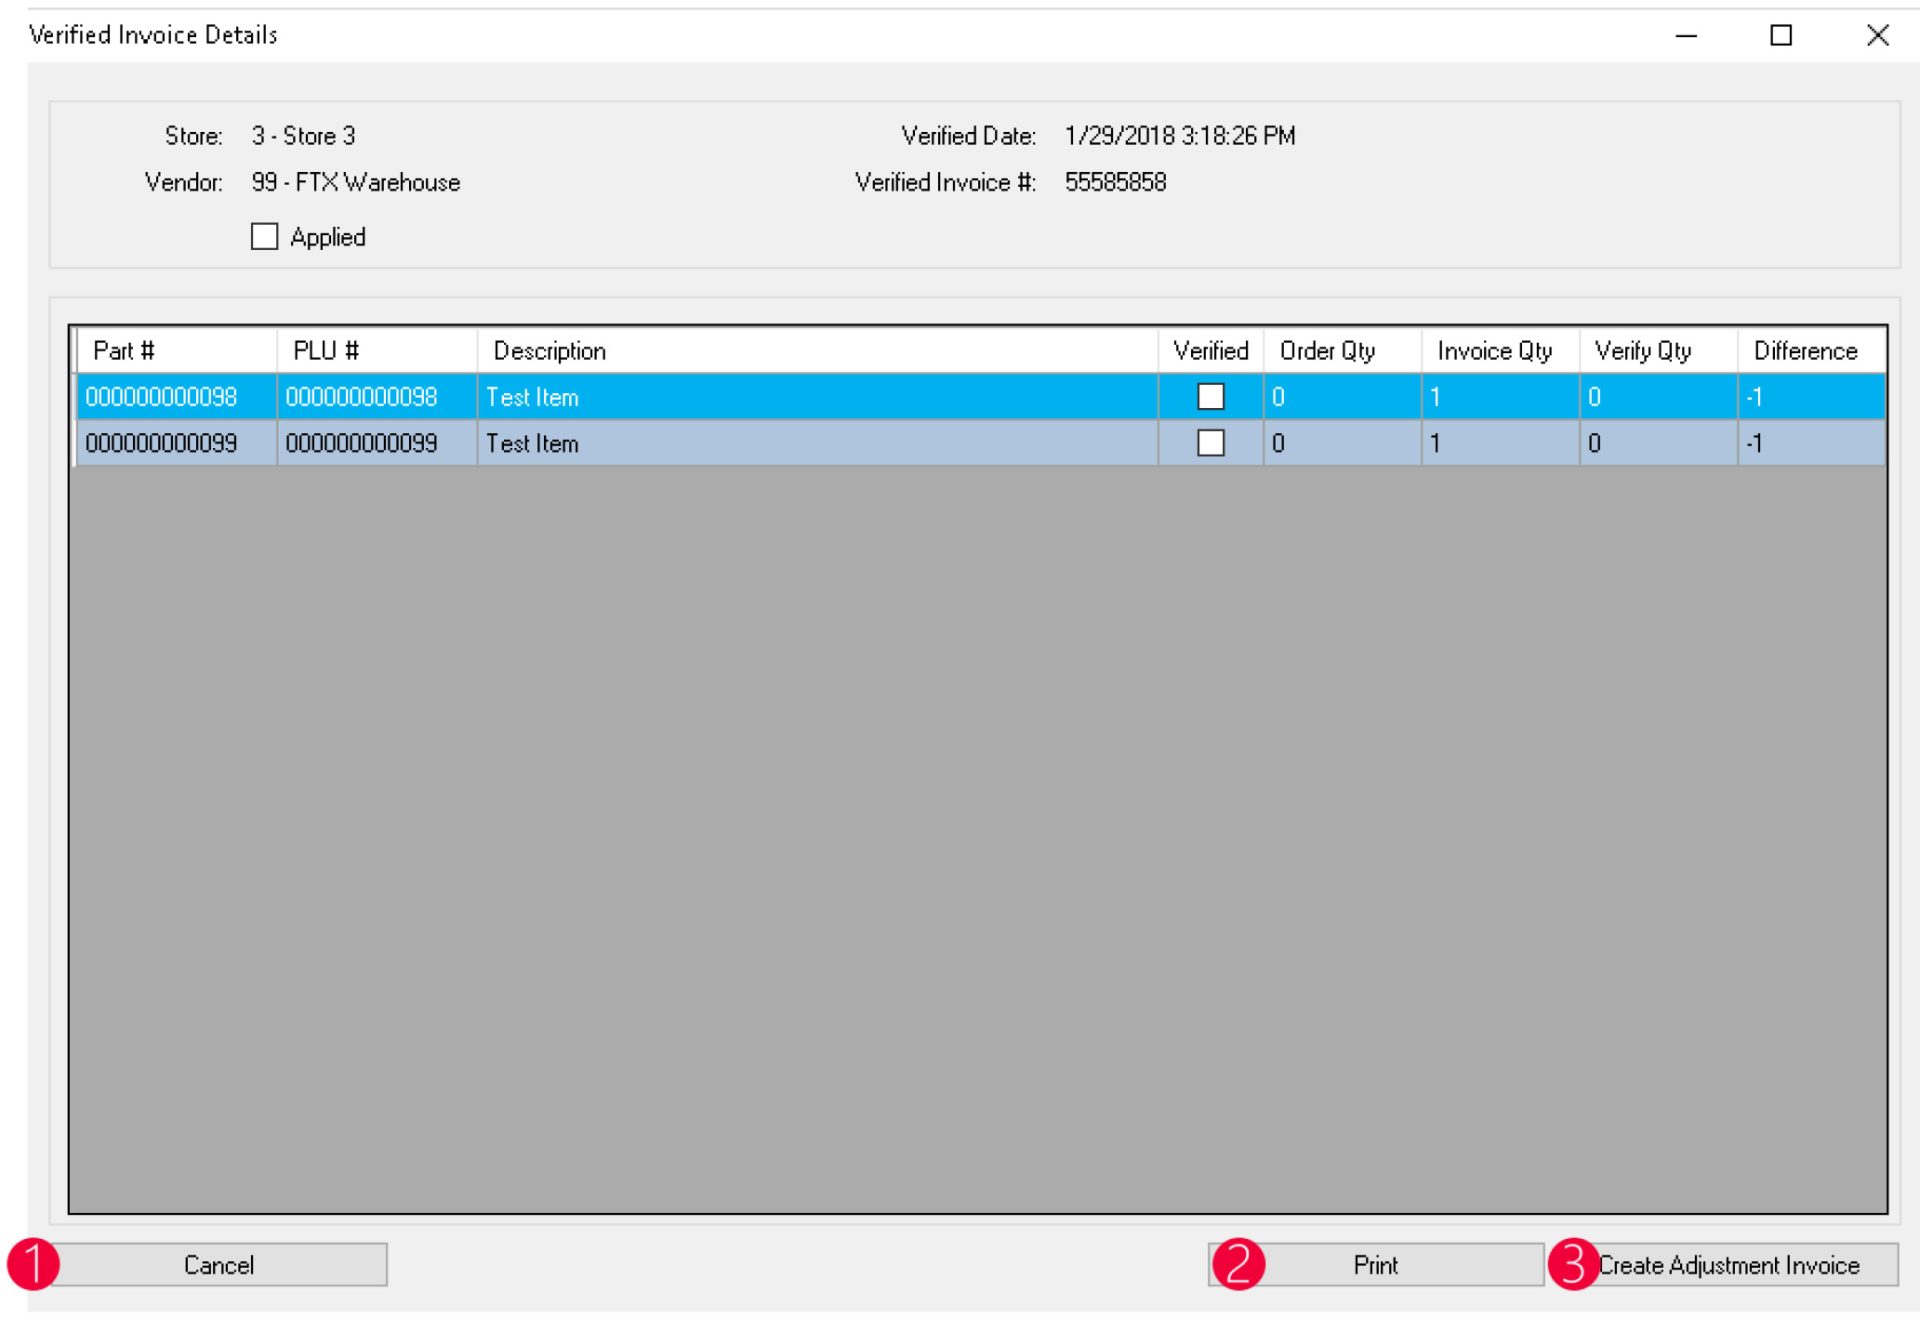
- Cancel – Cancels out of the worksheet
- Print – Generates a printable report of the worksheet
- Create Adjustment Invoices – Creates an adjustment invoices based on the differences in the invoiced quantity and the verified quantity via the handheld
Receiving – Previous Invoices in POS
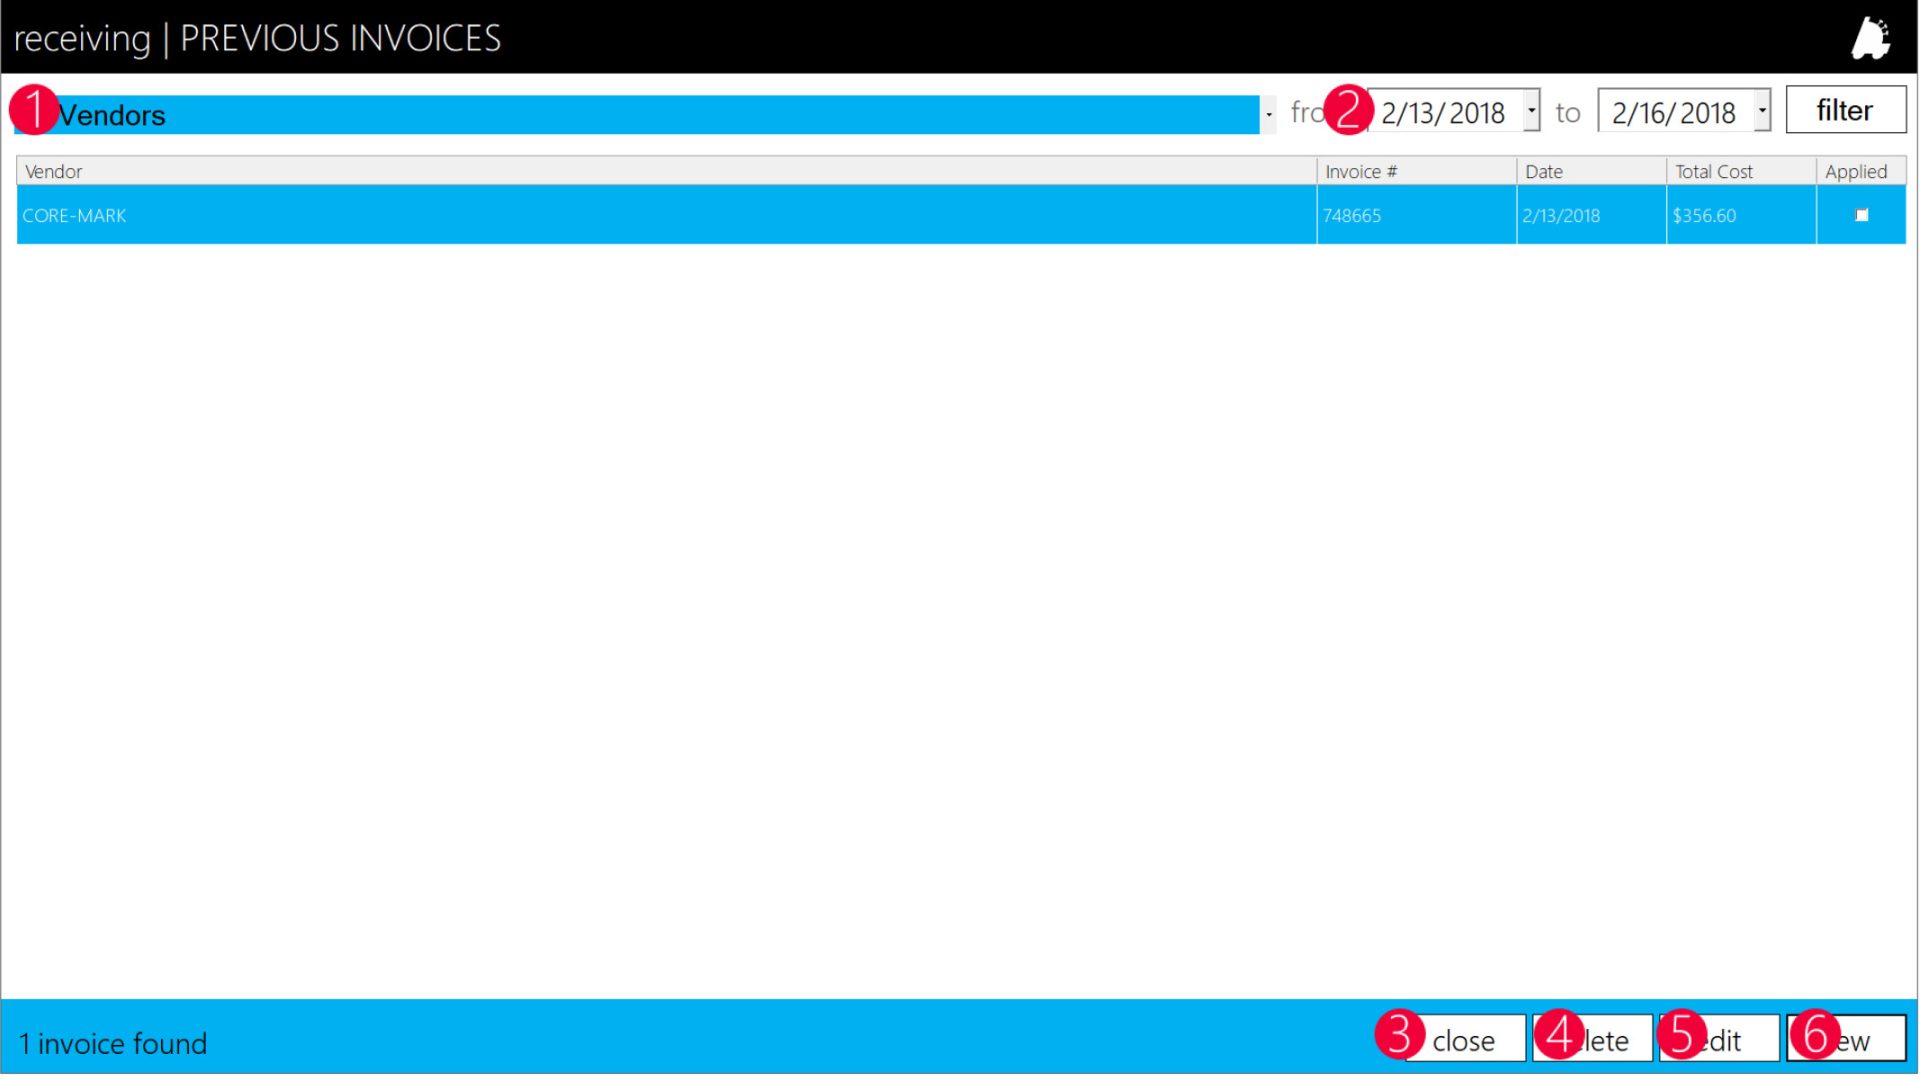
- Vendors – This filter allows all vendors or individual vendors
- Date Range – Choose the start and end dates to filter the invoices listed
- Close – Closes the previous invoices page
- Delete – Deletes the selected invoice
- Edit – Allows the user to edit the selected invoice
- New – Allows the user to create a new invoice
Create New Invoice in POS
When choosing the “New” button on the Previous Invoices screen in the POS, the user will be presented the following window:
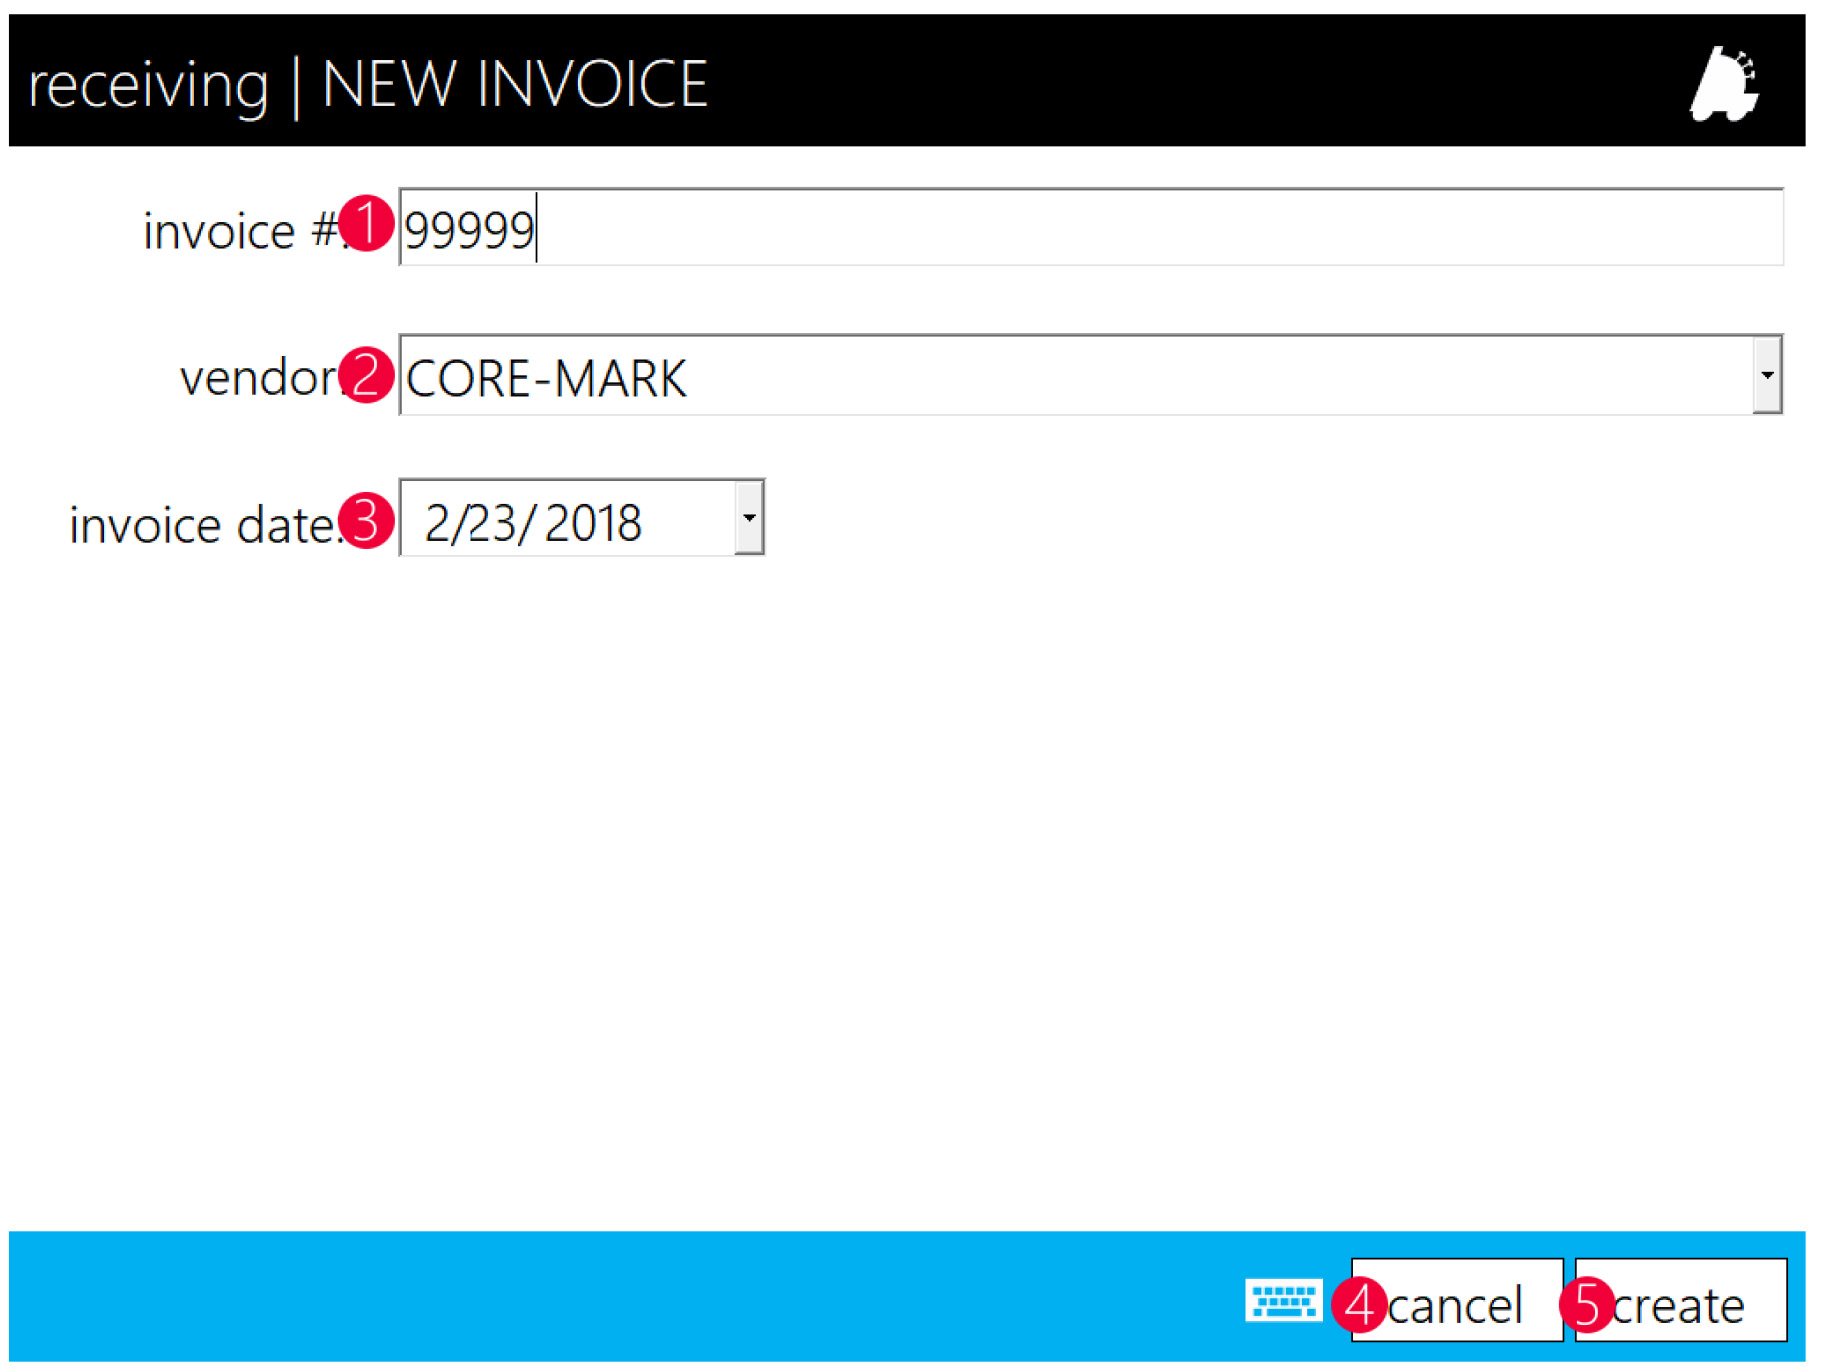
- Invoice # – Text box where the invoice number is input (invoice numbers have to be unique per vendor)
- Vendor – Chooses which vendor that the invoice will be for
- Invoice Date – The date of the invoice
- Cancel – Cancels the invoice creation
- Create – Creates the invoice
Invoice Worksheet in POS
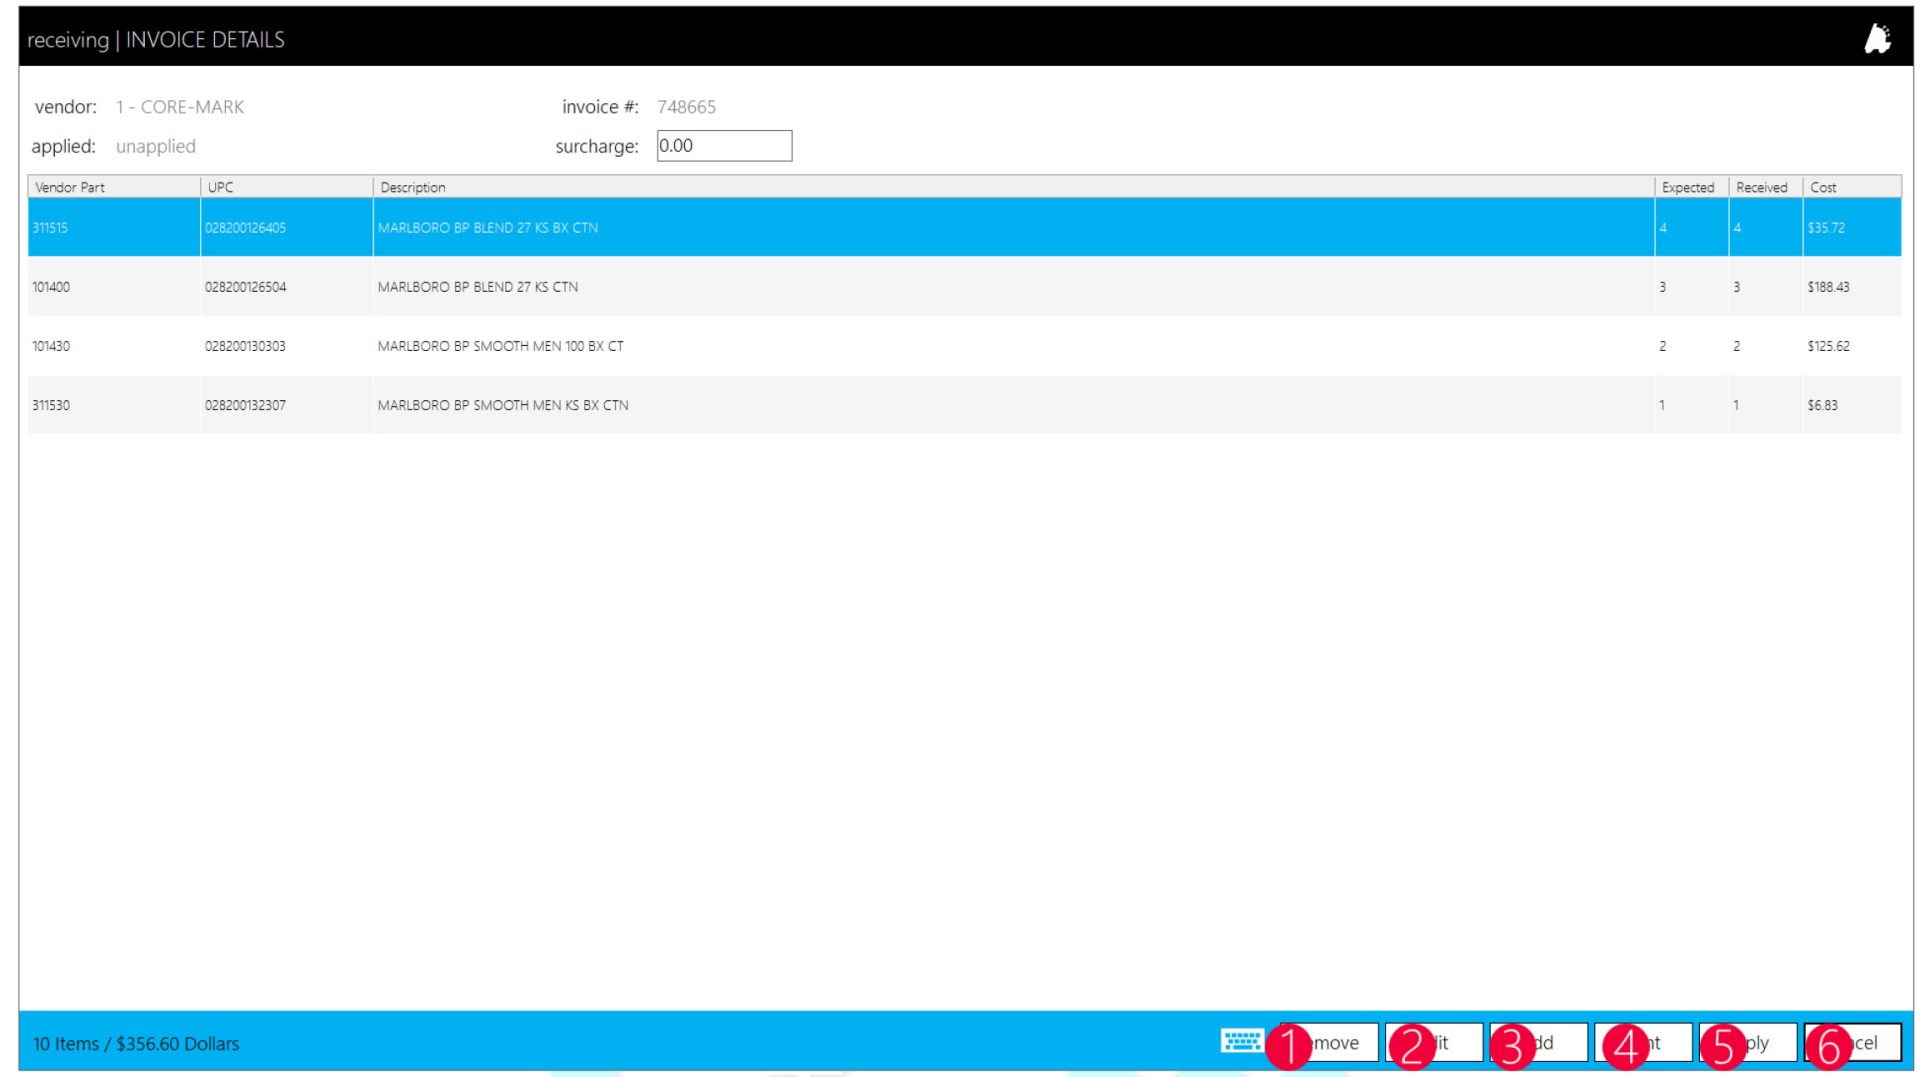
- Remove – Removes the selected row from the invoice
- Edit – Edits the selected row on the invoice
- Add – Brings up a window to add a new vendor part to the invoice
- Print – Generates a printable worksheet of the selected invoice
- Apply – Applies the invoice to invoice
- Cancel – Cancels out of the invoice worksheet screen
Overview of Importing Zebra Label Templates
Zebra labels can be custom designed using Zebra’s free software called ZebraDesigner*. The labels that are created in ZebraDesigner are easily importable within Director and can be printed from both POS and Director.
Below is an image showing how a label looks in text form and allows the user complete control in creating, editing, and deleting Zebra labels using a combination of ZebraDesigner* and FasTrax Director.
*ZebraDesigner can be downloaded and used for free from Zebra’s website.
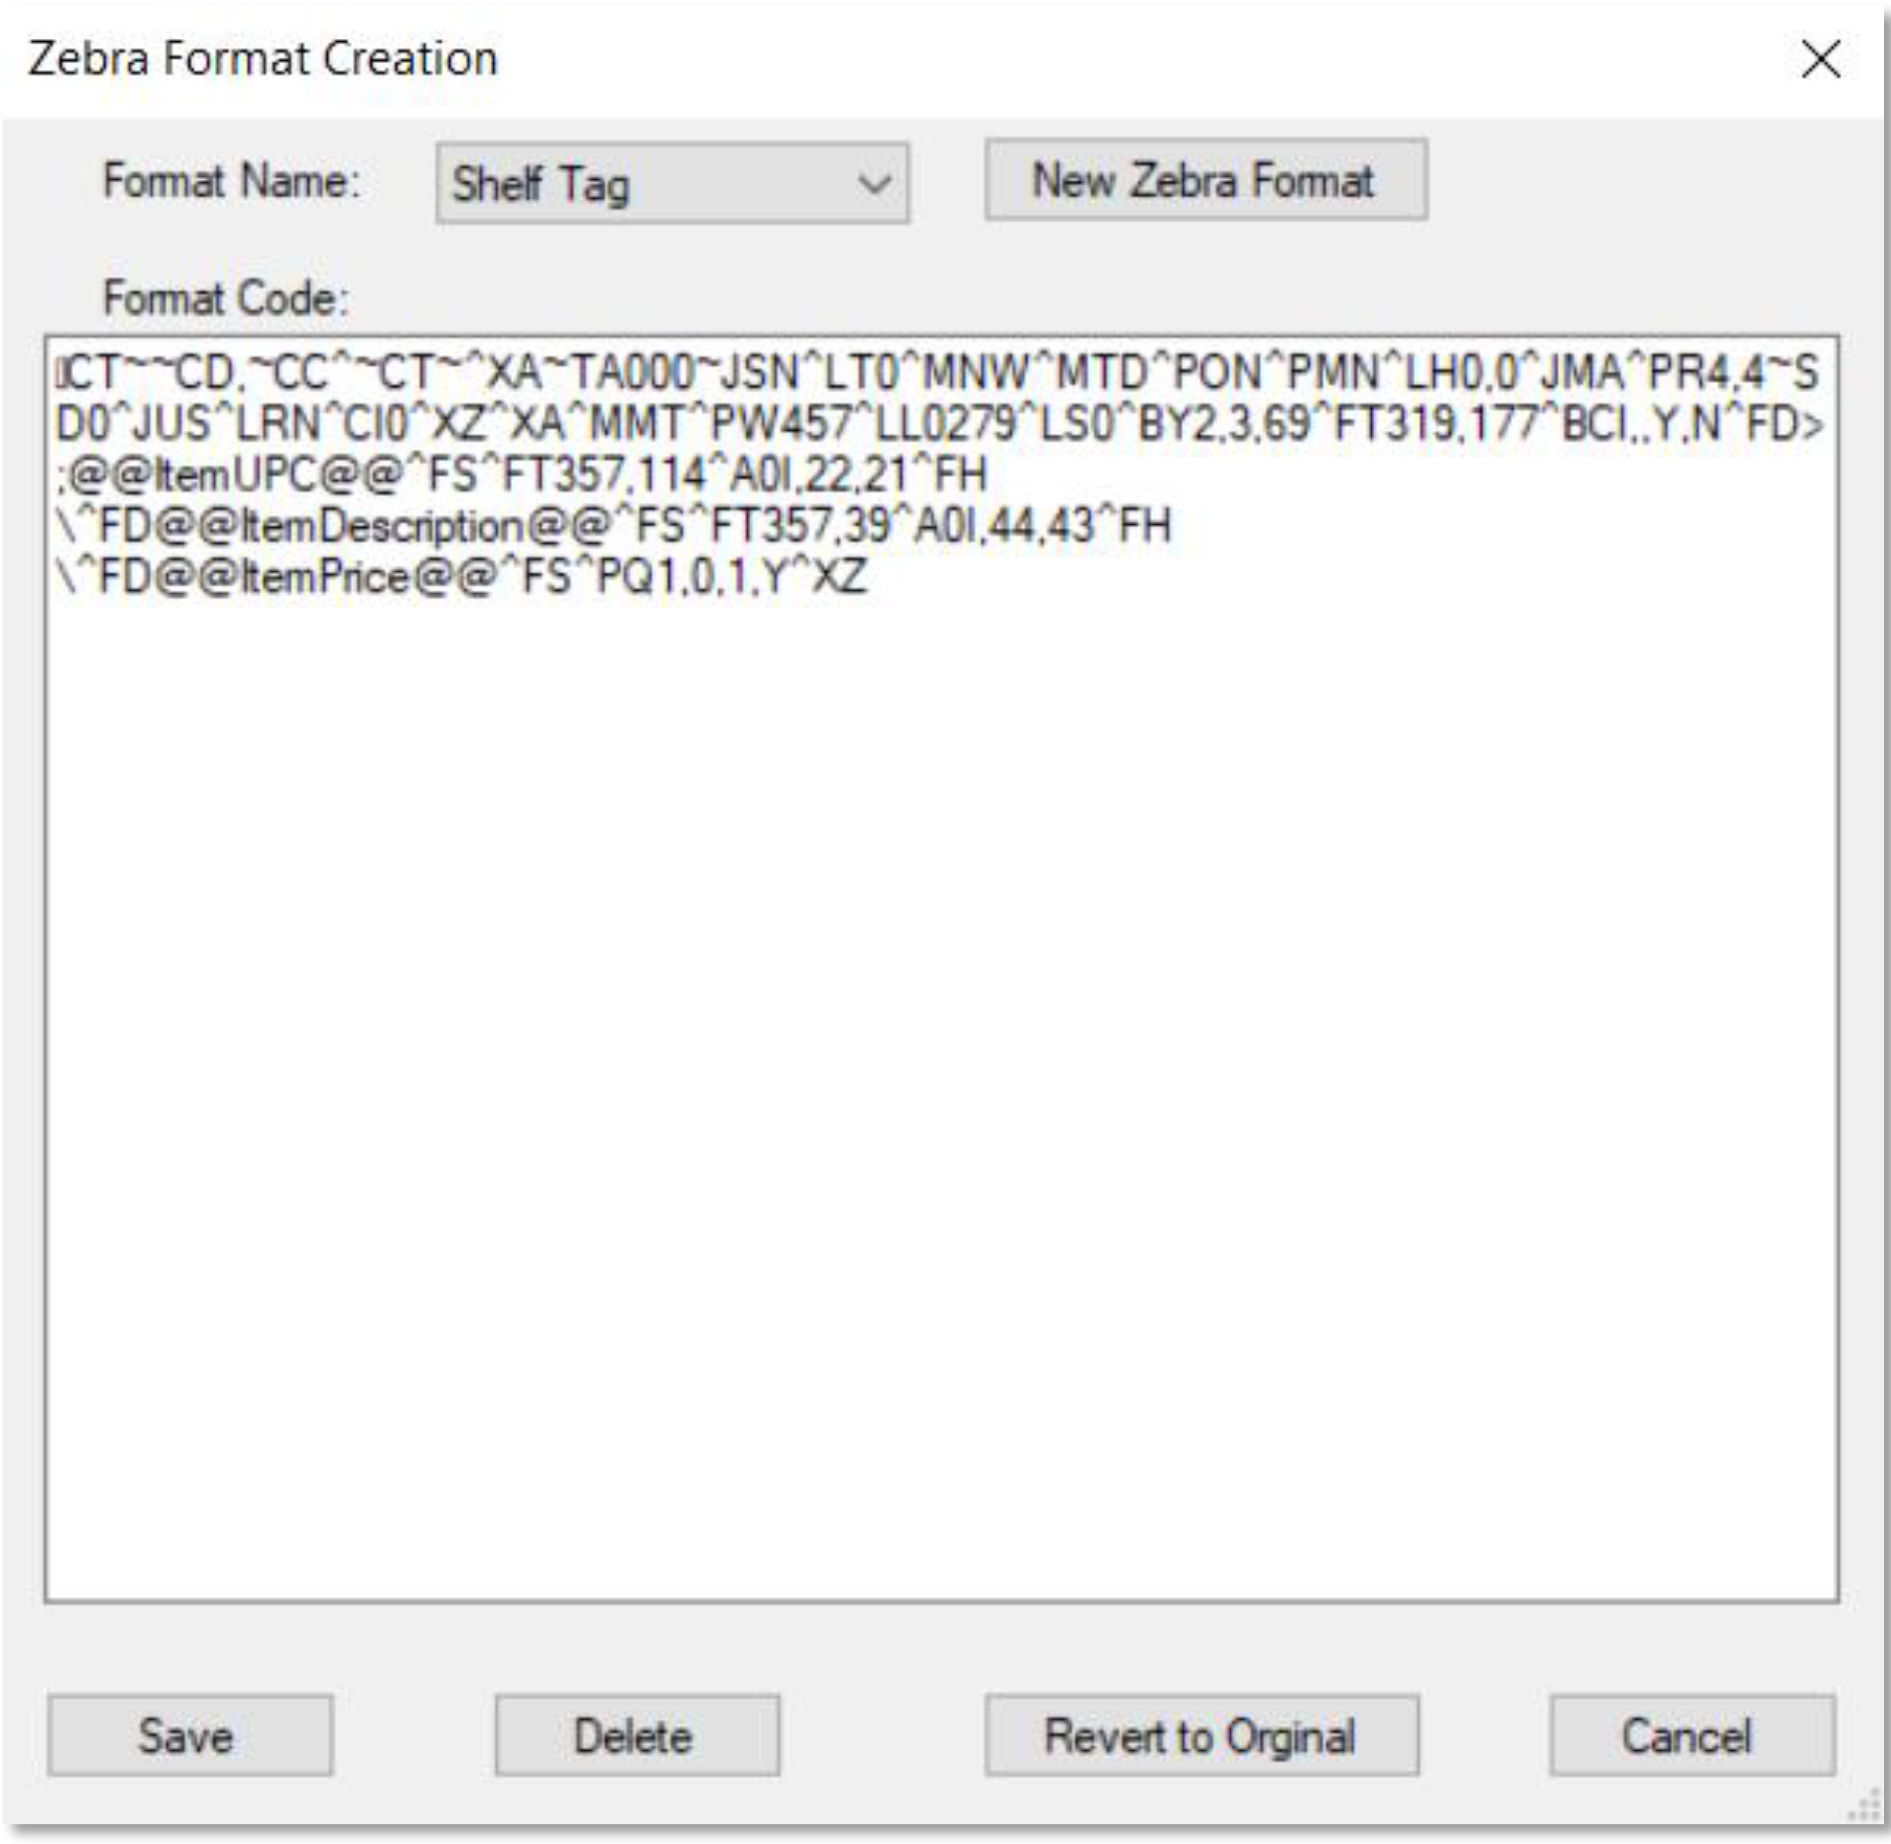
Finalizing a Label in ZebraDesigner
Within the ZebraDesigner software, any size label can be created that is compatible with your Zebra printer. There are only the following requirements:
1. All variables used must be fixed text values. The variables that are available are below:
a. @@ItemUPC@@ = the item’s UPC
b. @@ItemPrice@@ = the item’s price
c. @@ItemDescription@@ = the first part of an item’s description
d. @@ItemDescription2@@ = the second part of an item’s description
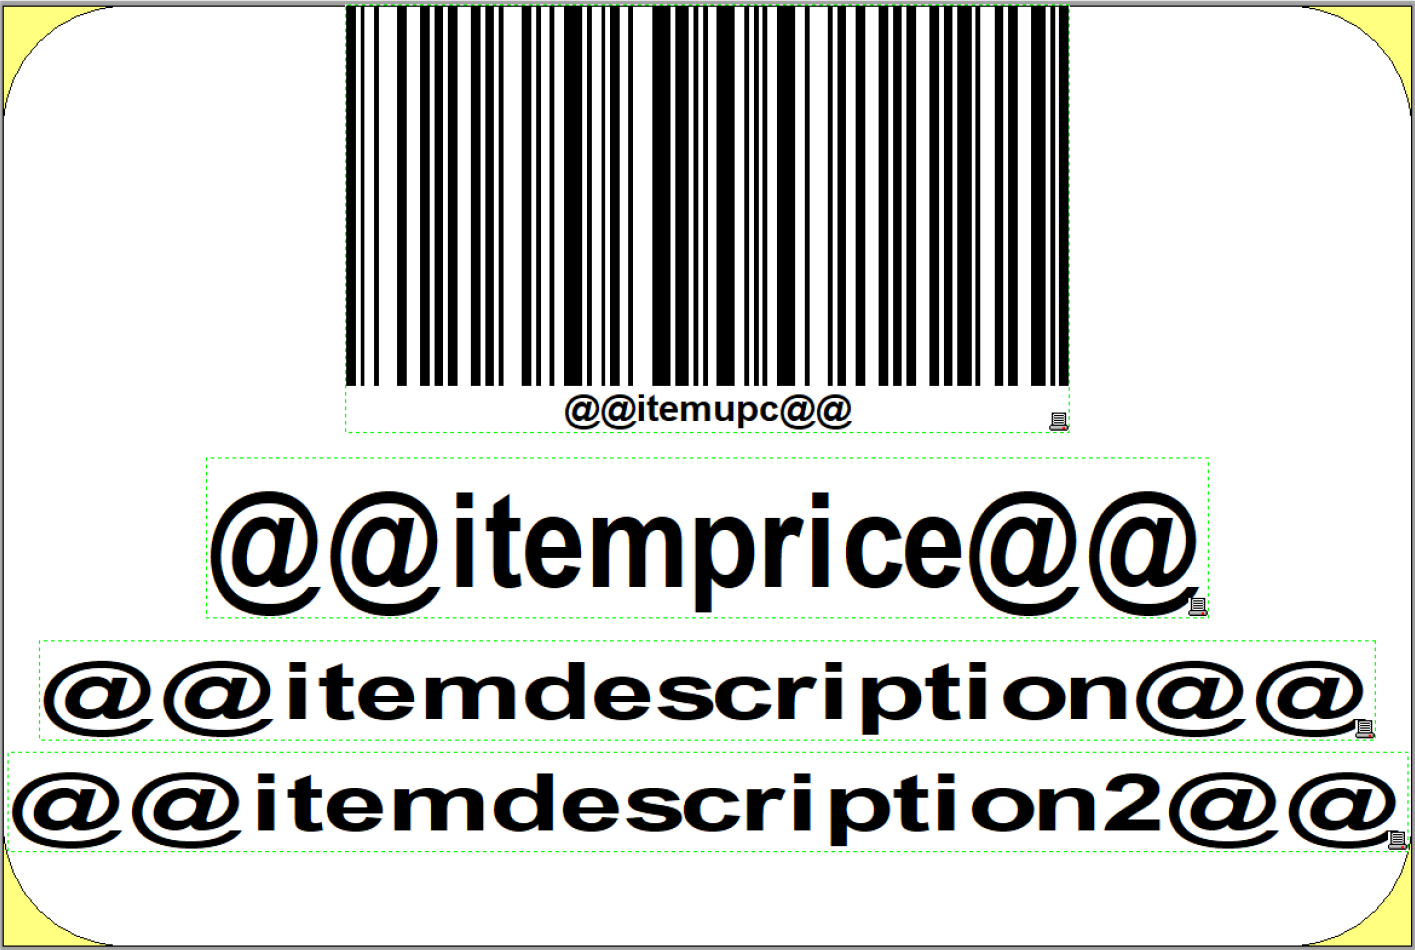
2. After saving the template, print the template as a file. Be sure to remember the location of where this was saved, as it will be needed in the future when opening in notepad

Importing a Label in Director
When importing a template into Director, Director is required to be in Support mode. This requires a user with Admin privileges to enable this setting, which can be found using the bottom Settings hyperlink in Director.

Next, after opening Director and before logging in, click on the FasTrax logo to bring up the menu used to import labels. It will require a password, which by default is FasTrax0! if it has not been changed.
When the utilities window opens, choose the Other tab followed by the Zebra Label Formats button.
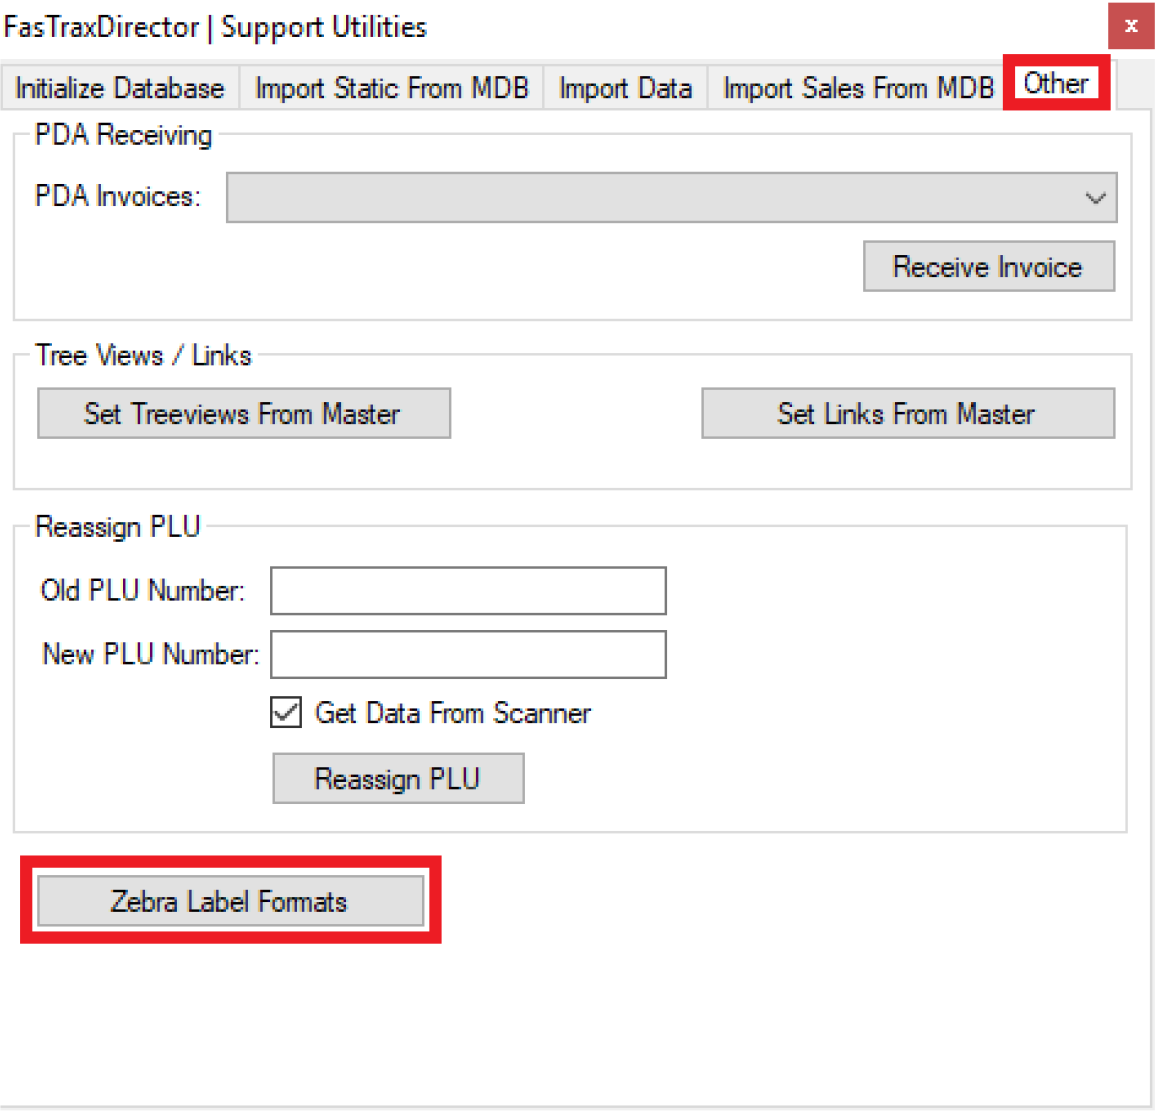
This opens the window below, which allows you to create, delete, and save new label formats.

To import the newly created label, choose the new button and give the label a name.
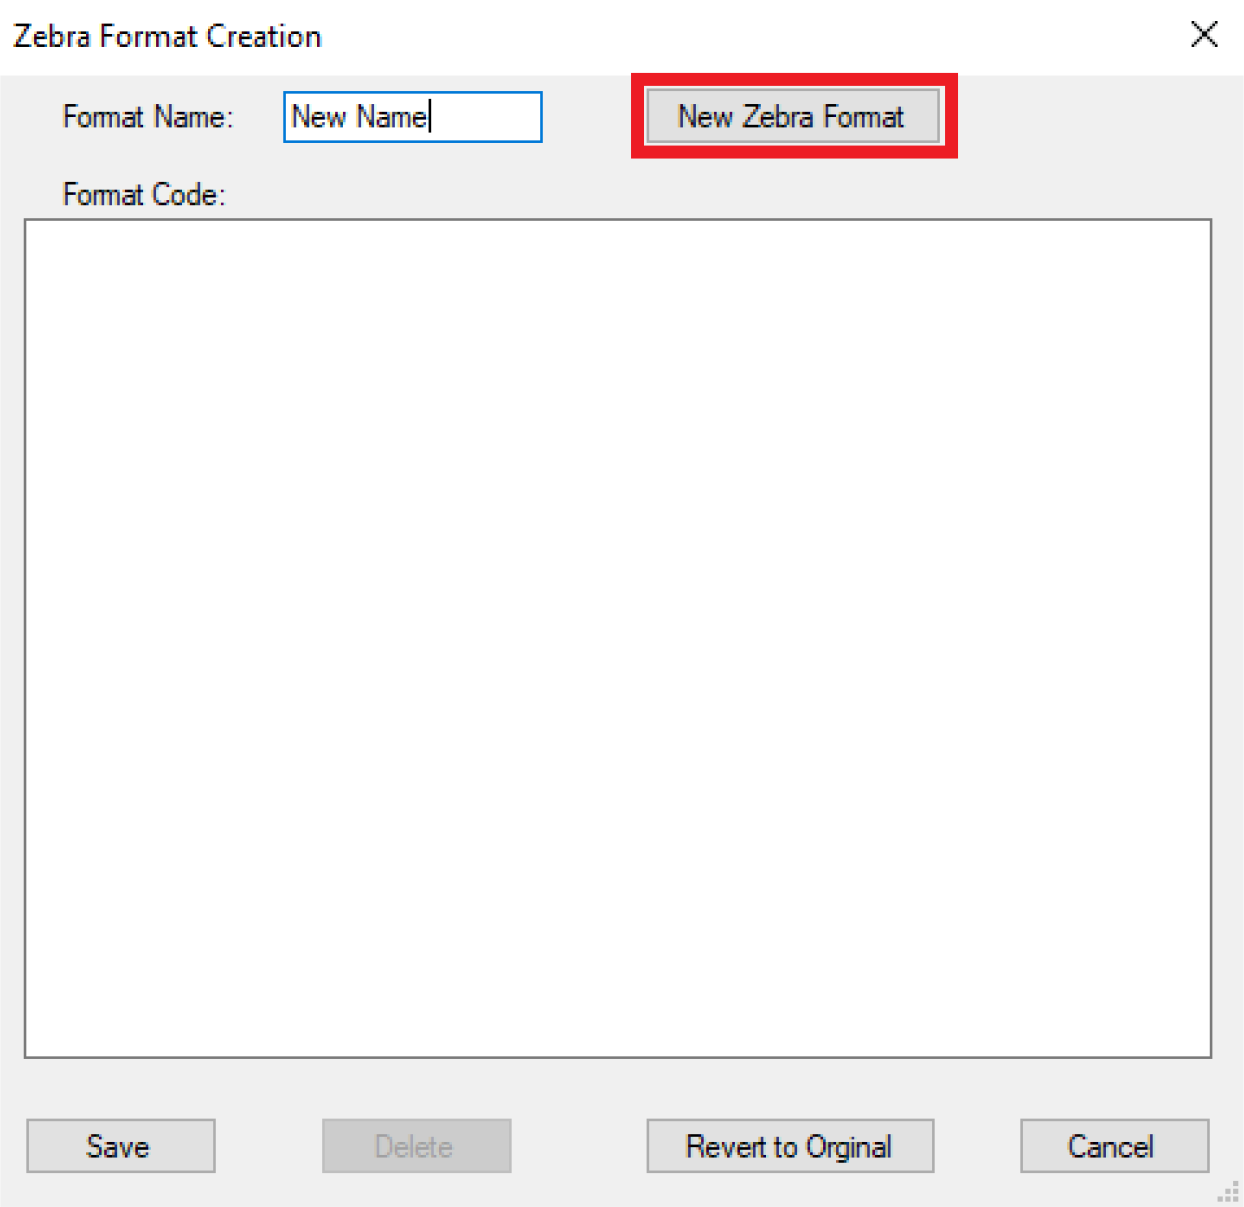
Next, the label itself will have to be opened in notepad. This can be accomplished by navigating where the .prn file was saved (Step 2 in finalizing a Zebra label), right clicking the .prn file, and choosing to open within notepad.
Now that the file is opened in Notepad, copy all the text from the window and paste it into the format code text block within Director.
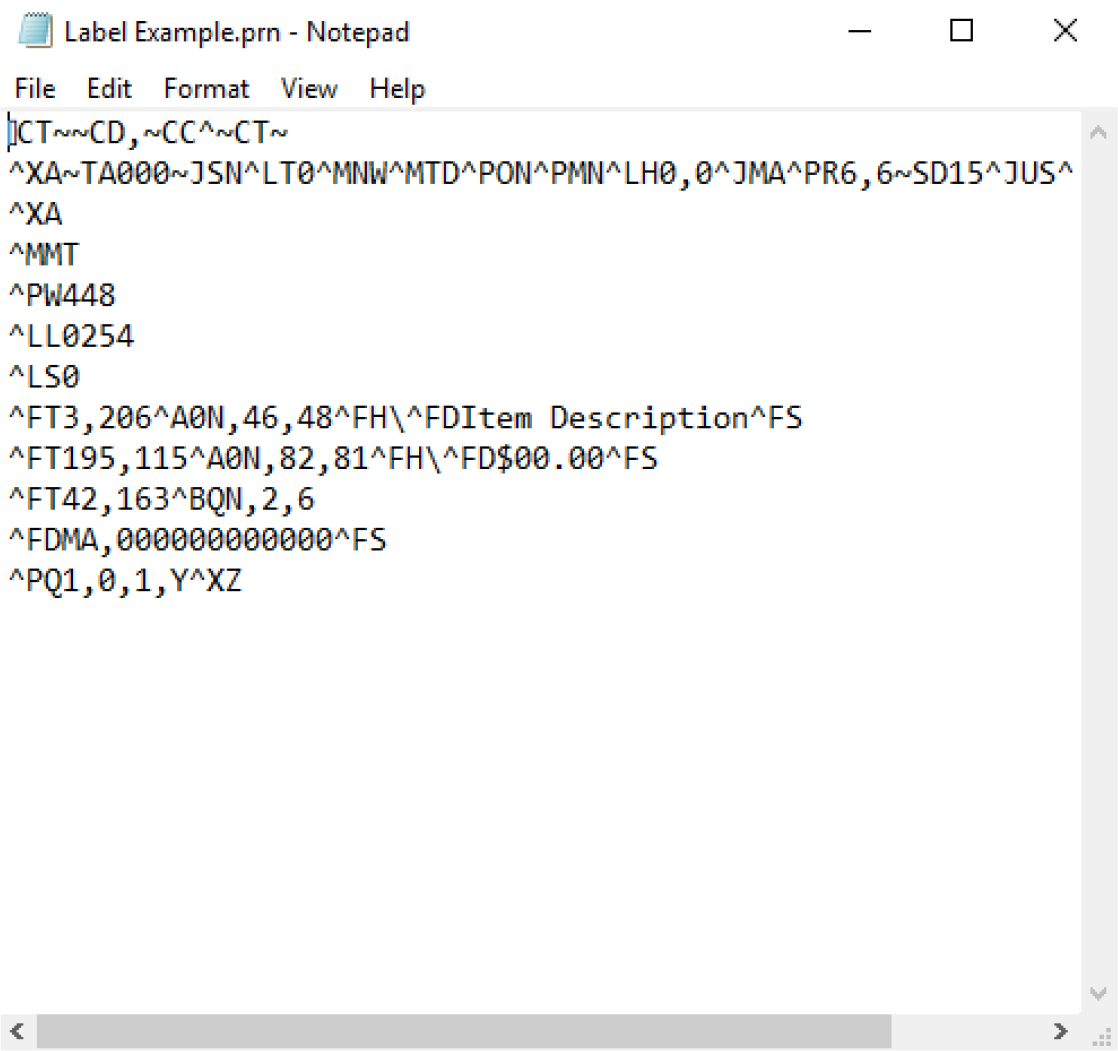
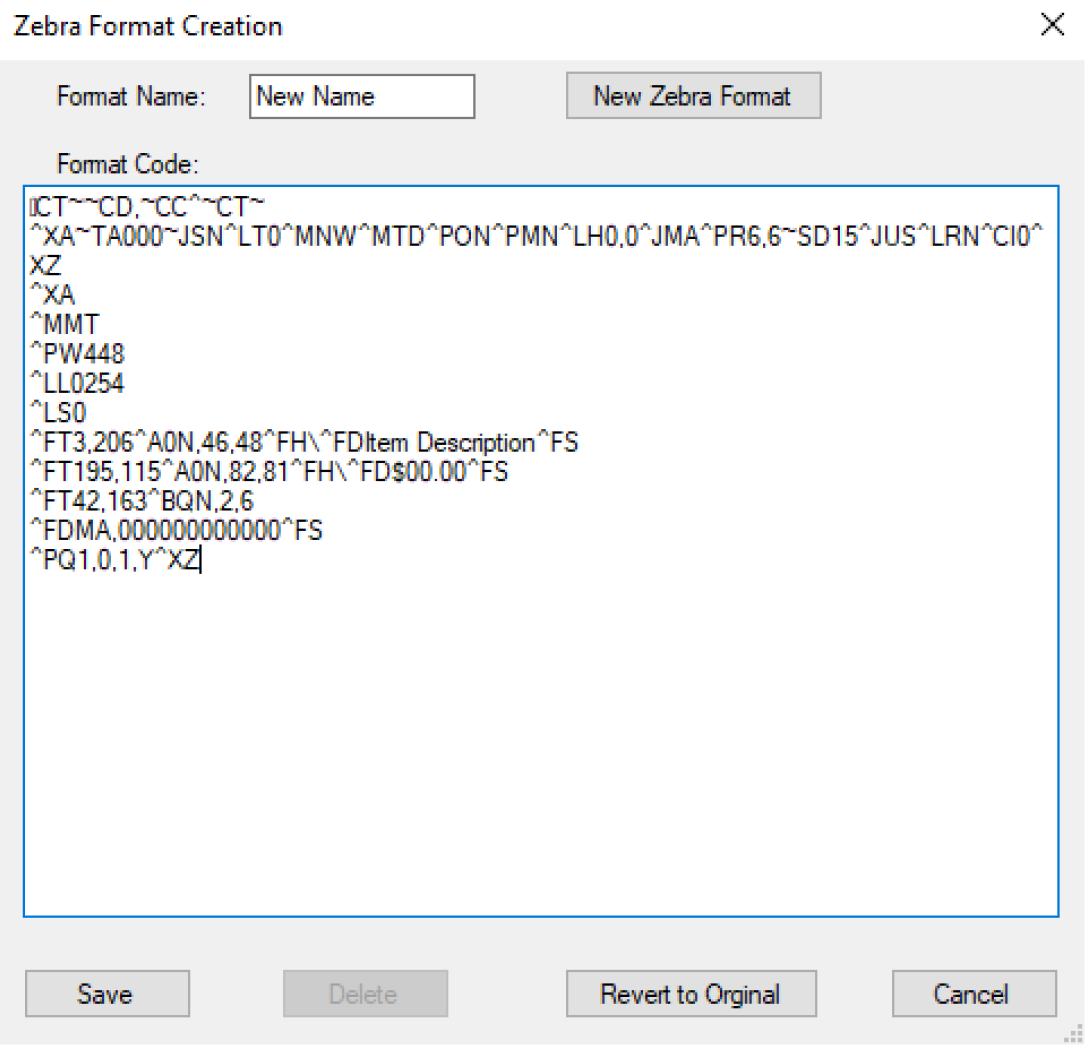
Finally, choose the save button to save the format in the database. Now, it can be used in both Director and POS from anywhere that you could previously print labels.
Overview of Importing Dymo Label Templates
Dymo labels can be custom designed using Dymo’s free software called Dymo Label*. The labels that are created in Dymo Label are easily importable within Director and can be printed from both POS and Director.
The Dymo Label software saves custom labels as a .label file, which when placed within a specific folder, is read by both the POS and Director.
*Dymo Label can be downloaded and used for free from Dymo’s website.
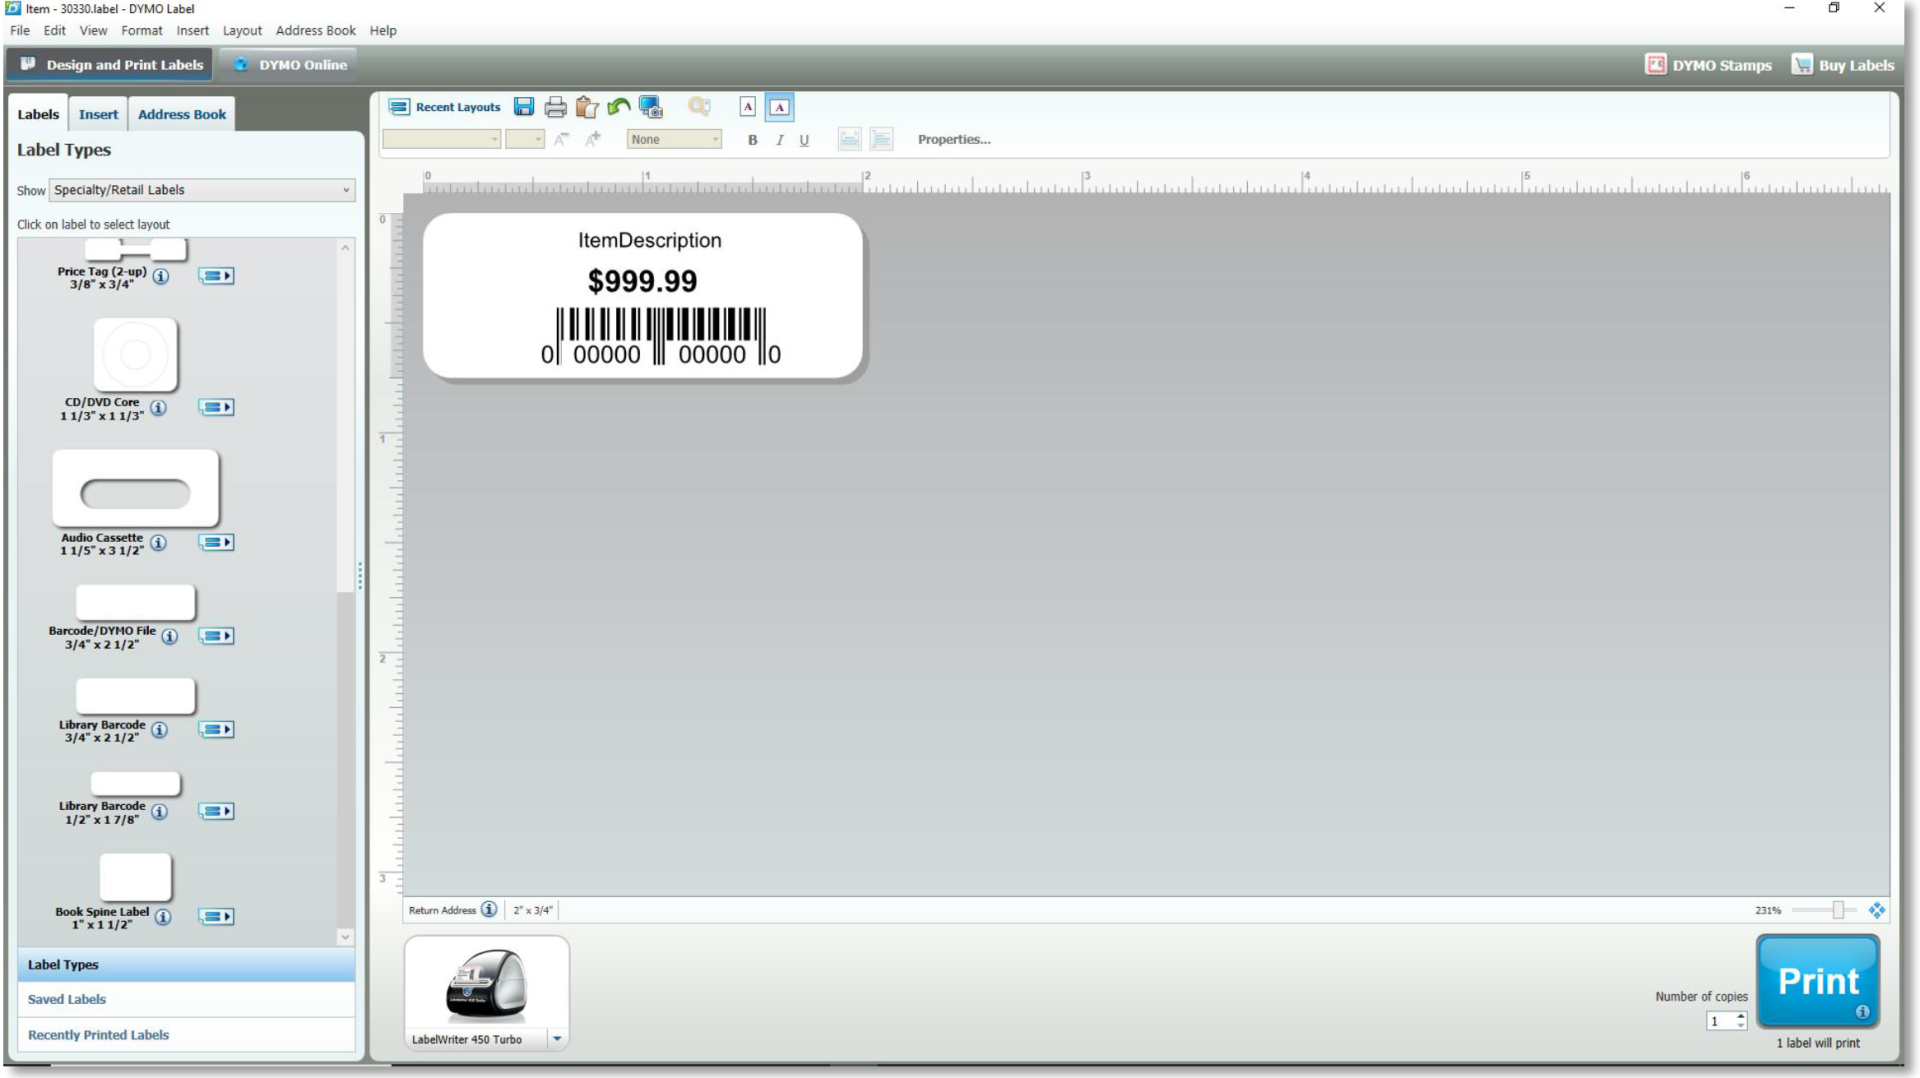
Finalizing a Label in the Dymo Label Software
Within the Dymo Label software, any size label can be created that is compatible with your Dymo printer. There are only the following requirements:
1. All variables used must be variable objects. The variables that are available are below:
a. ItemBarcode = the items UPC
b. ItemPrice = the item’s price
c. ItemDescription = the first part of an item’s description
d. ItemDescription2 = the second part of an item’s description
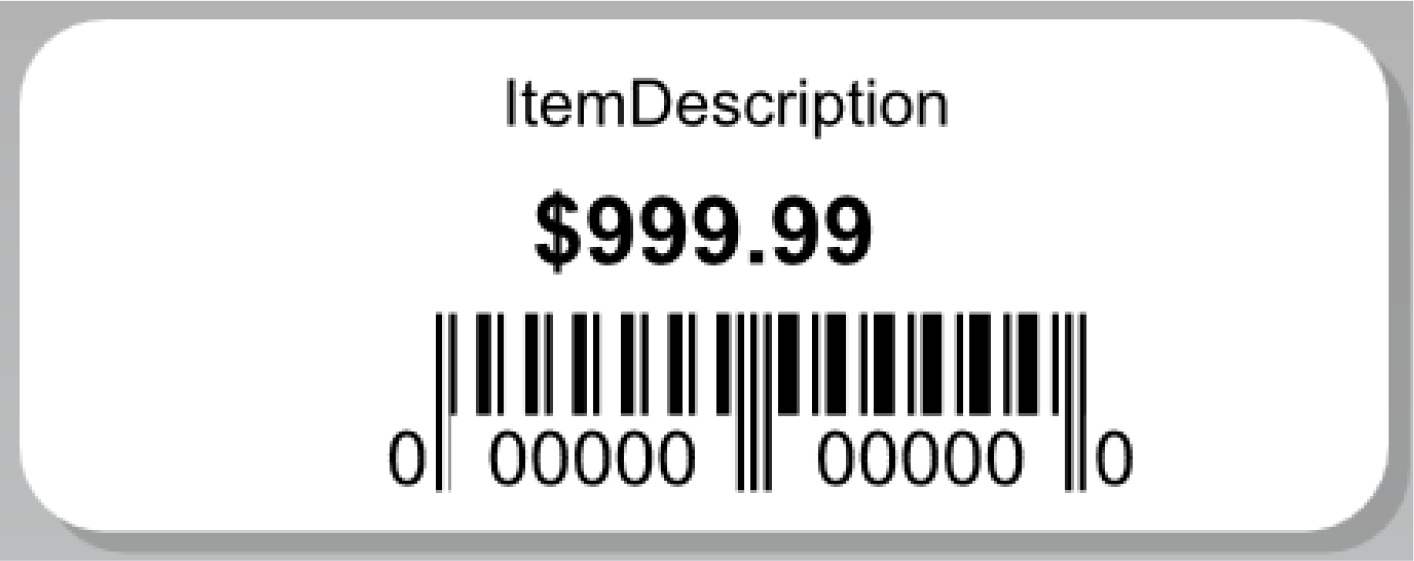
2. When complete, save the label in the C:\Fastrax\DymoLabelTemplates directory.
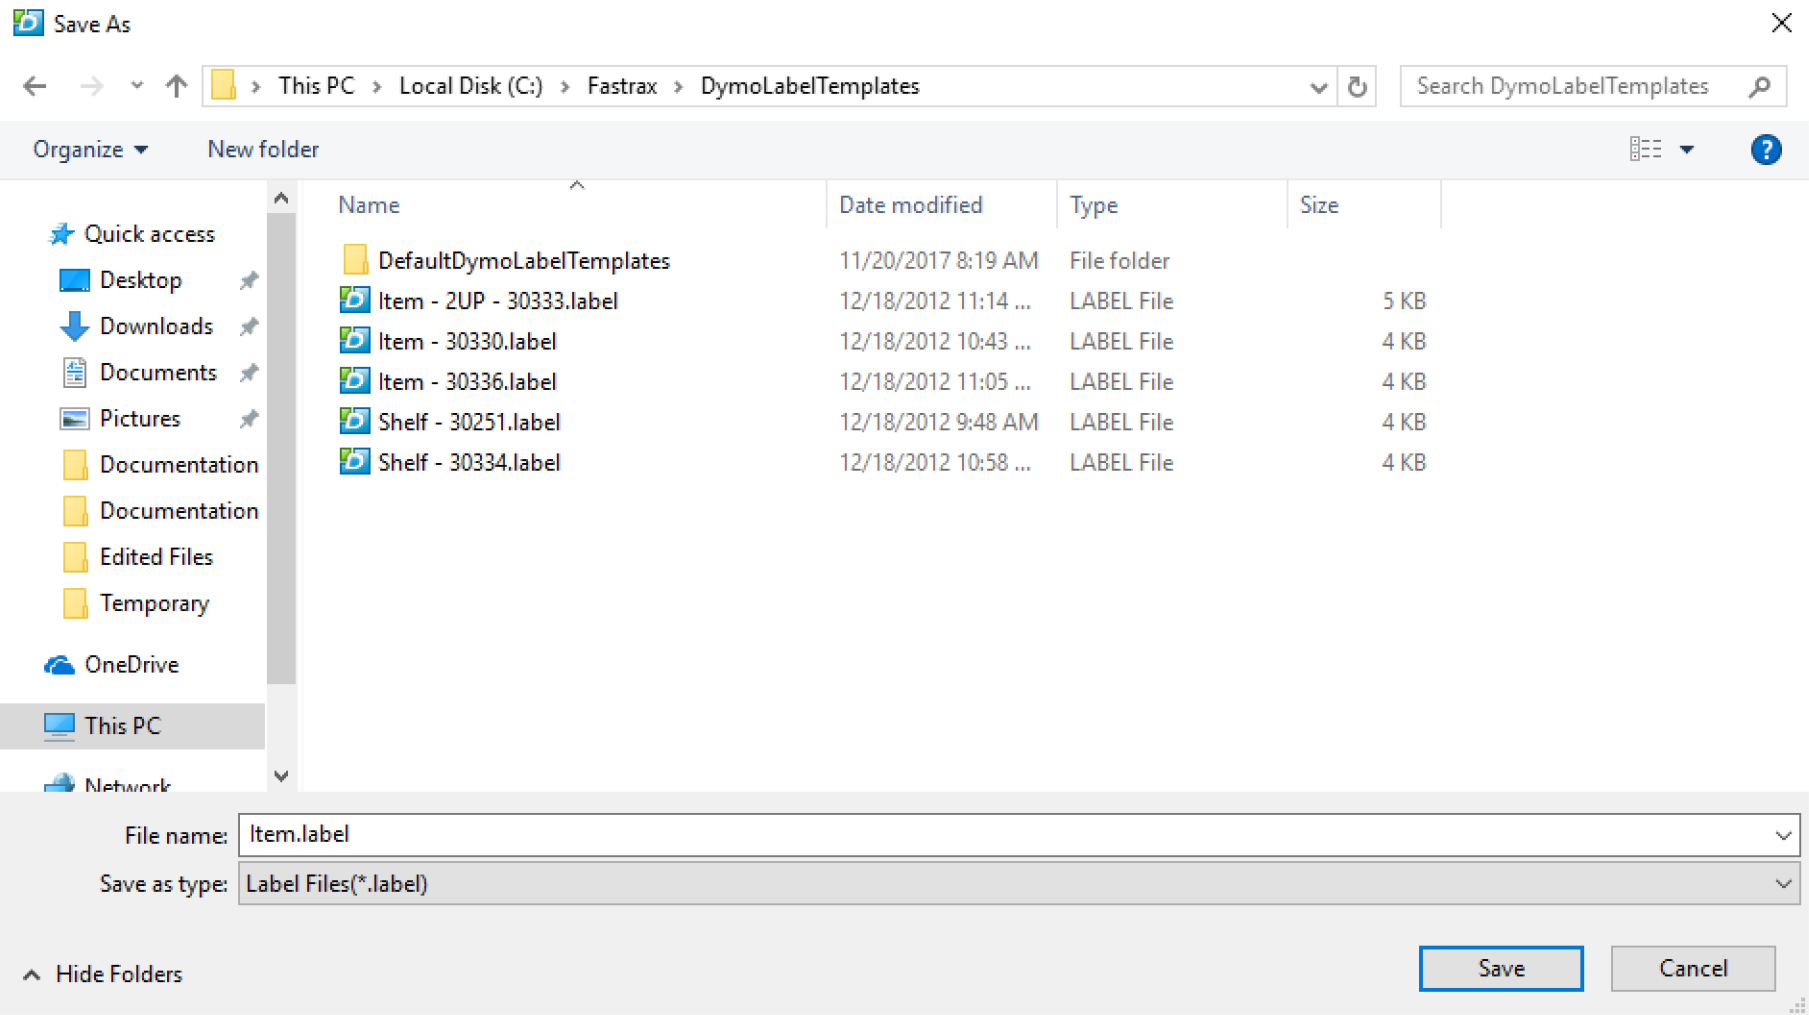
3. Now the label can be used in both Director and POS from anywhere that you could previously print label.
Overview of Age Verification
Age verification is a powerful feature that helps safeguard against underage sales. When set properly, the point of sale will prevent the sale of items where the customer is not old enough to make the purchase. This is an additional safeguard to employees manually checking the customer’s age.
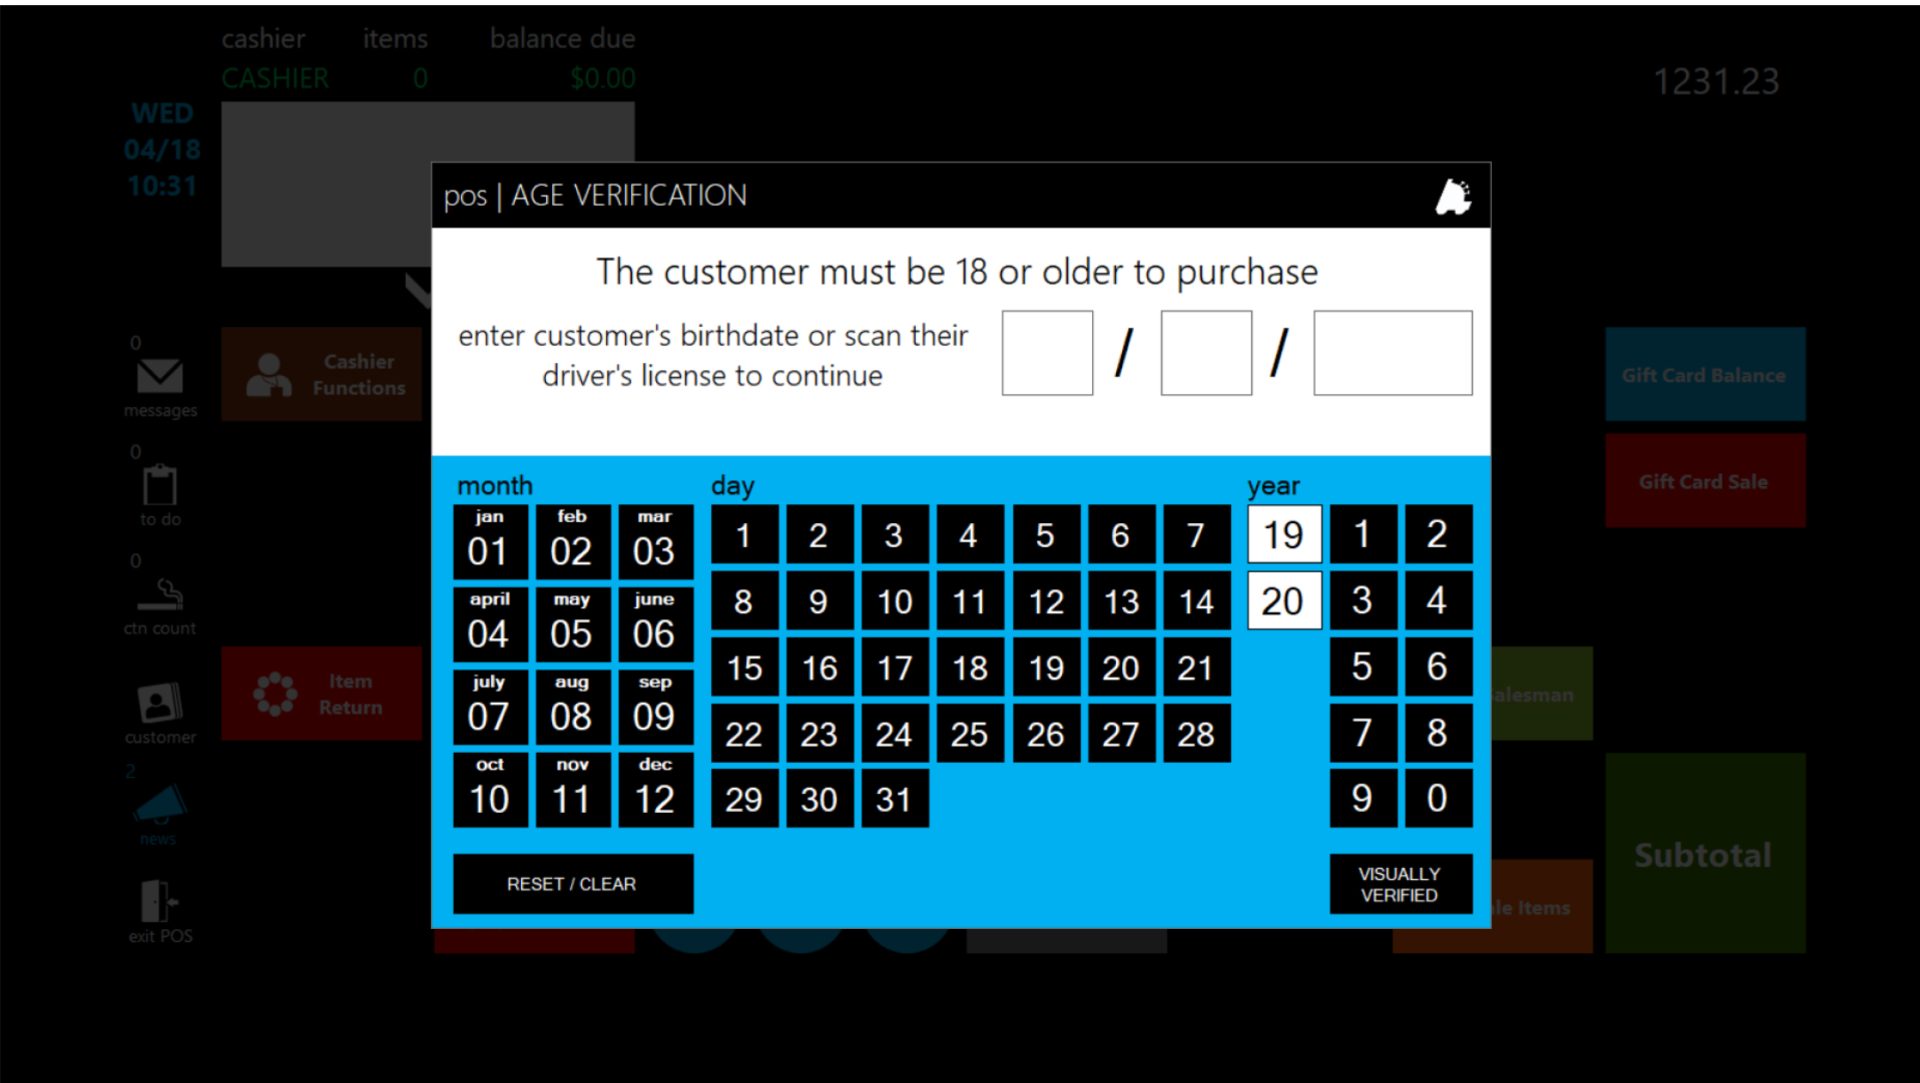
- Now choose the “Departments” tab on the ribbon
- When done, choose the save button after editing the values

- On POS Flags, to enable an age restriction, input an age in the “Age Required” field

- Next, choose the “POS Flags” tab on the ribbon
- From within Director, choose the “Maintenance” button

- On the “Department Details”, set the “POS Flag” with an age restriction on a department that needs to have an age restriction and then choose save.
 Now, when ringing sales up on items within that department, the POS will have a screen like below. This will require the cashier to enter a birthday for the customer or scan the customer’s driver’s license in order to proceed with the sale.
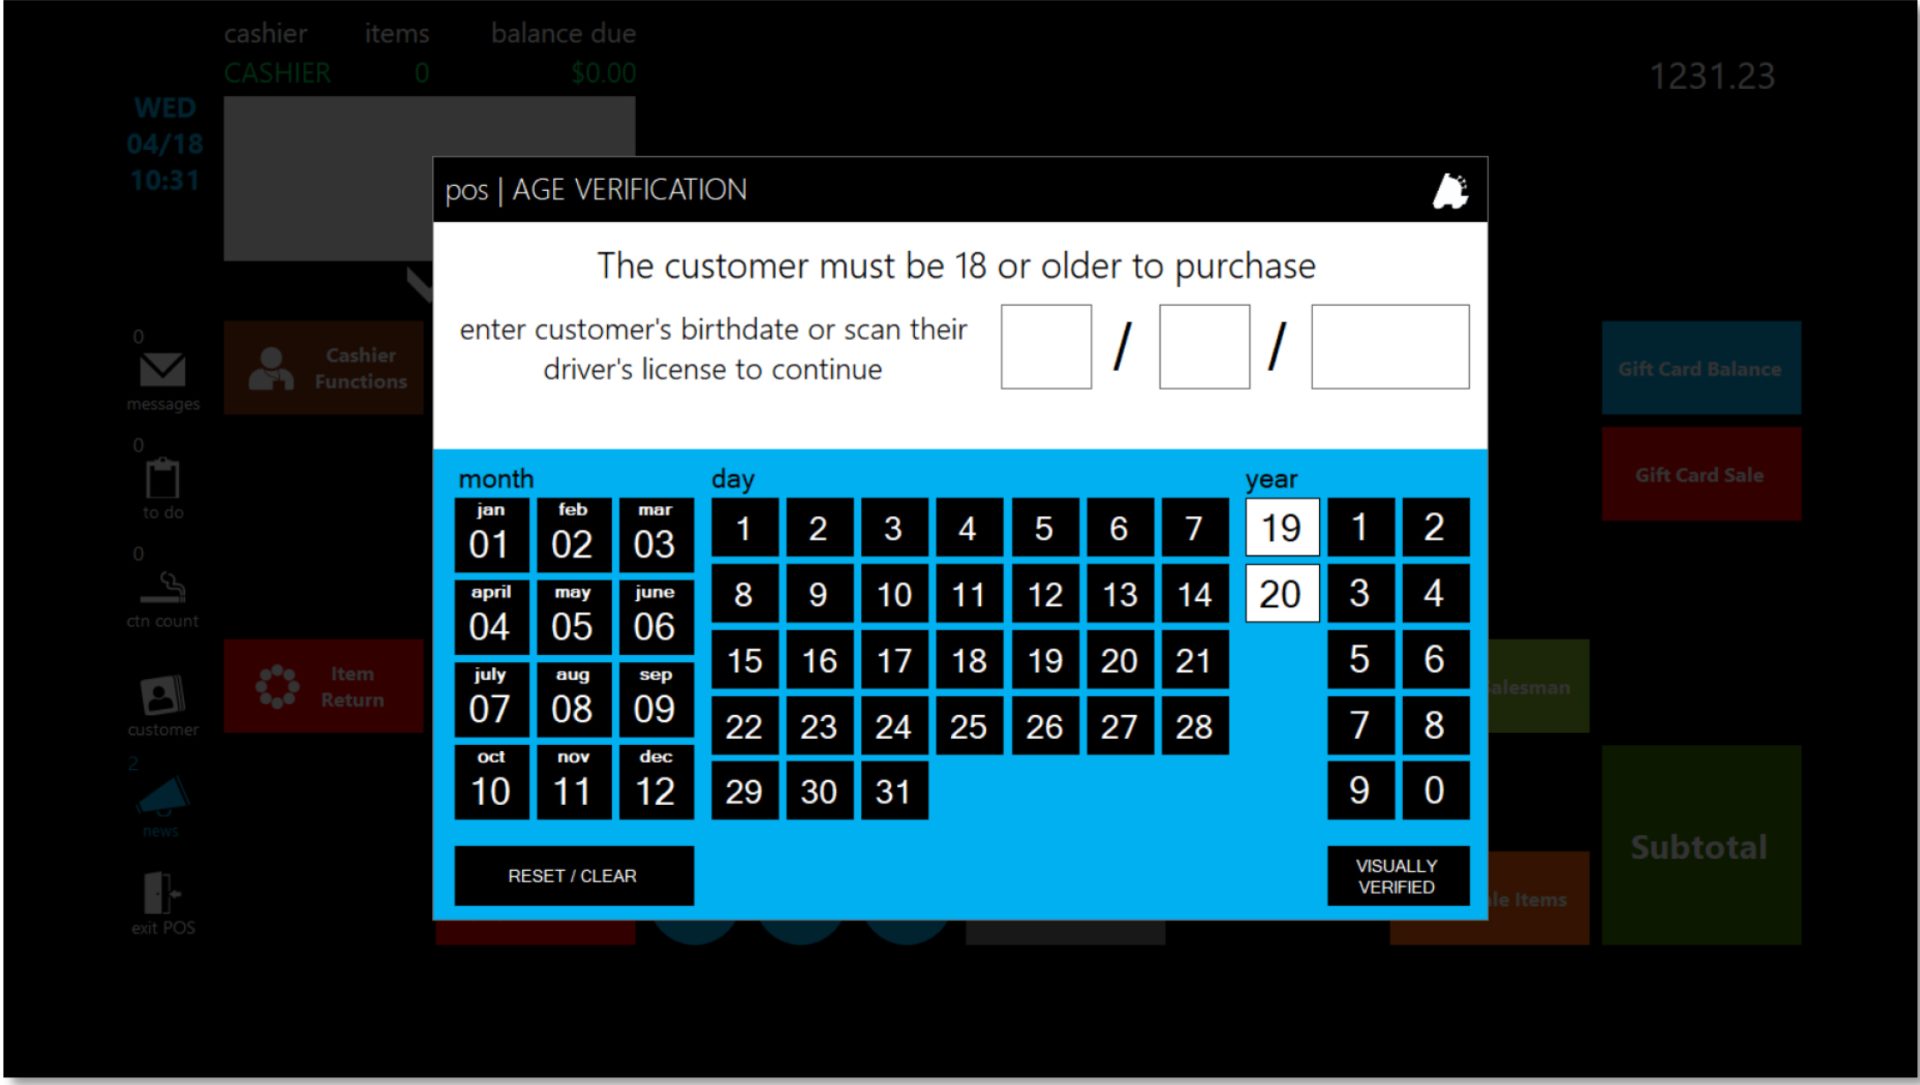
The next page will show settings that can be adjusted within the POS to alter the age verification window.
POS Settings that Alter Age Verification
- After logging into the POS, choose the “Actions” button

- Next, choose the “Settings” button

- Then, choose the next “Settings” button
- From the settings screen, choose the “Register Settings” button

- Allow Visual Age Verify – Adds a visually verified button

on the age verification window
that allows the cashier to bypass
entering a birthdate if the customer
looks well over the age required - Force DL Scan For Age Verify – On the age verification

screen, forces a driver’s
license to be scanned.
Manual age verification
isn’t allowed
- Allow Visual Age Verify – Adds a visually verified button
Overview of Tax Rates and Groups
Tax rates and tax groups are required to properly charge customers taxes. They are set up within the POS, and cannot be adjusted at corporate.
A tax group is what holds specific tax rates. Multiple groups can be created, giving a wide variety of taxing options for items. Up to 4 tax rates can be assigned, and any combination of these rates can be applied to tax groups
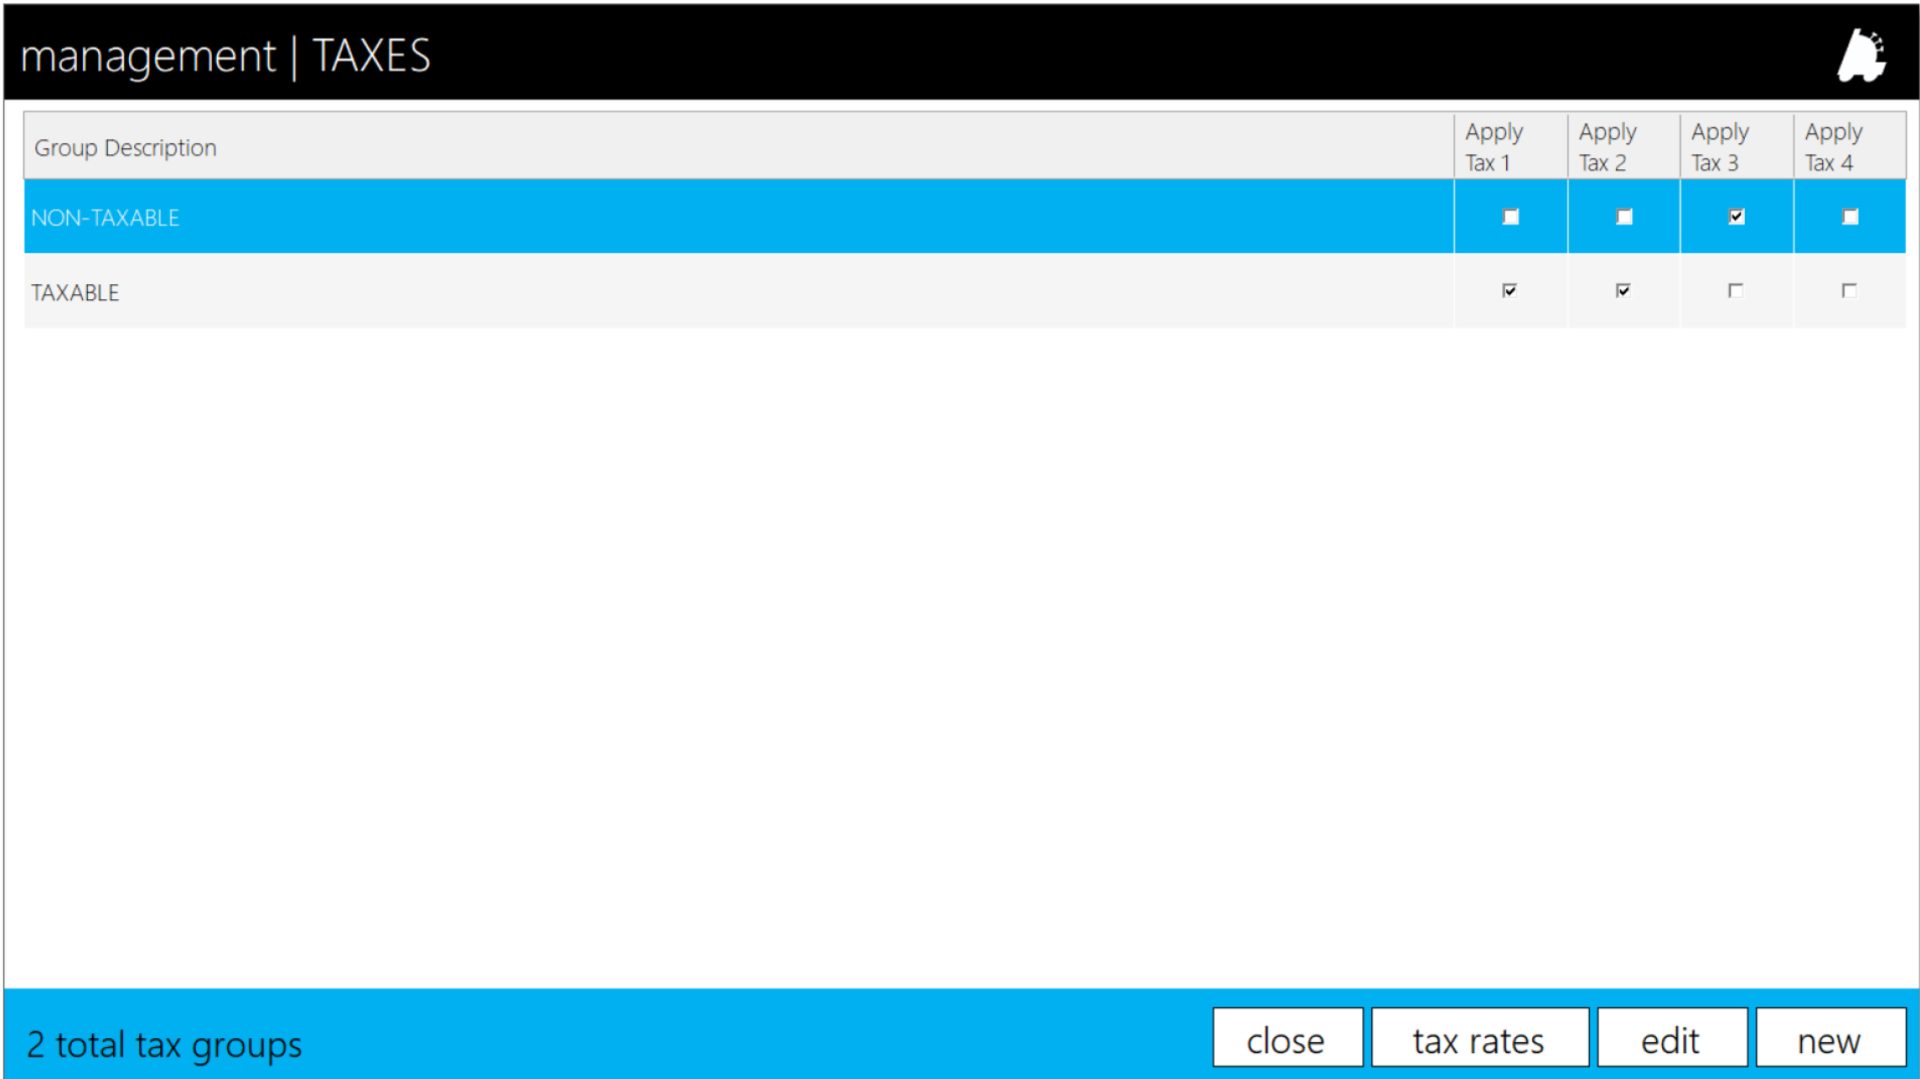
Adjusting Tax Rates
- Open the POS by double clicking the POS icon
- Log into the POS
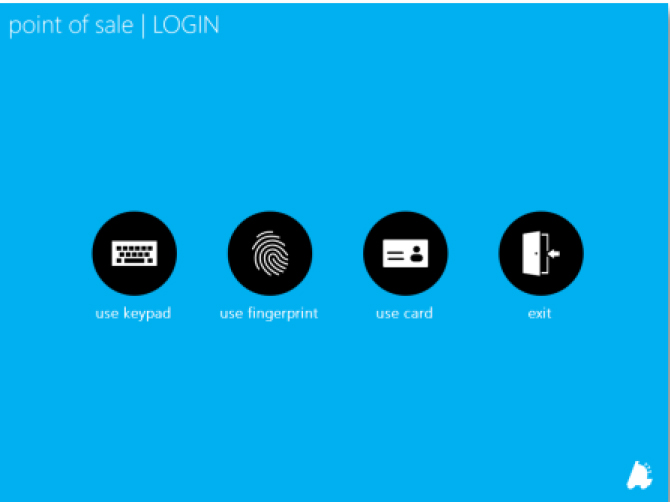
- Choose “actions”

- Choose “management”
- Choose “TAXES”

- Choose “tax rates”

- This screen allows you to adjust tax rate(s) and the name of the rate(s)
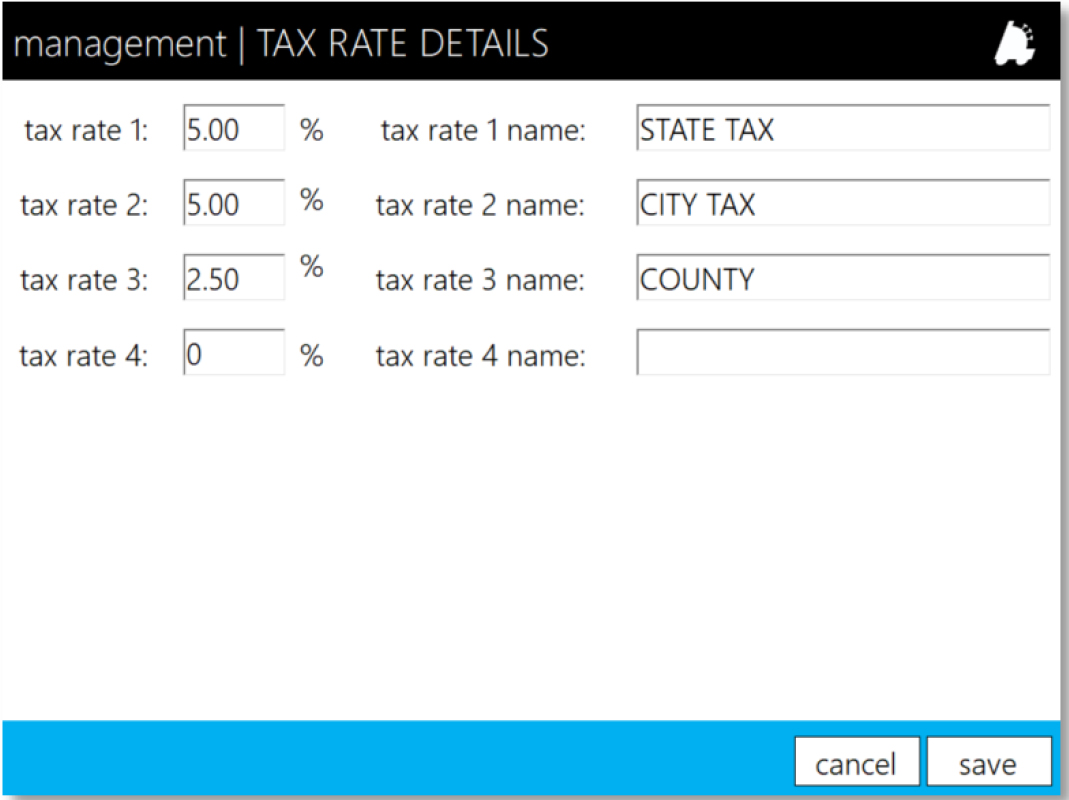
- When done, choose “save”
Tax rates are set at each store. If in a corporate environment, it is very important to make sure that every store and corporate have the tax groups set up in the same order. Failure to do this could cause taxing or reporting issues.
Adjusting Tax Groups
- Open the POS by double clicking the POS icon

- Log into the POS

- Choose “actions”

- Choose “management”

- Choose “TAXES”

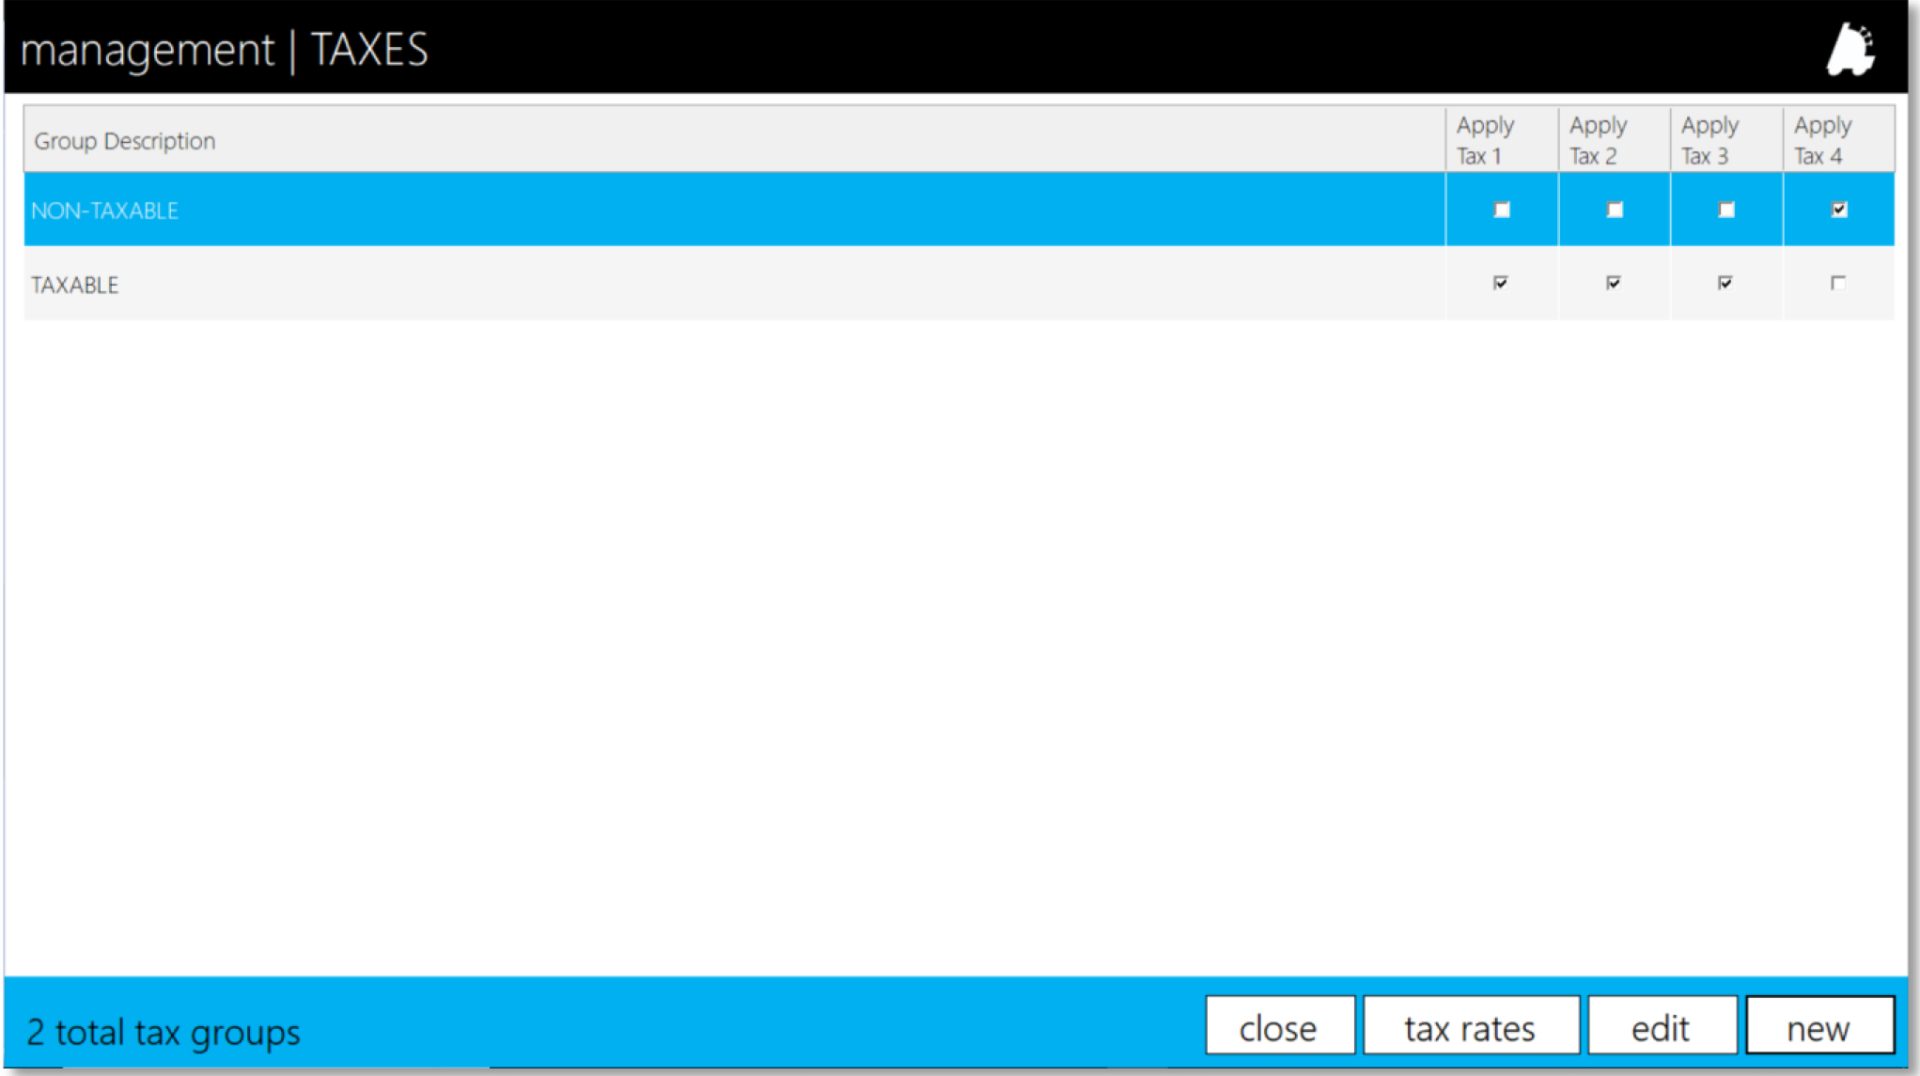
Tax groups are what tax rates are associated with. New tax groups can be created by choosing the “new” button, and existing tax groups can be altered by highlighting a group and choosing the “edit” button. When creating or editing a tax group, tax rates are assigned to the group(s).
How Taxes Are Applied To Items
Individual items are taxed based on the “department” that they are in. Departments are tied to a specific “POS Flag”. The “POS Flag” is what is contains the tax group. So, tax rates are associated to items in the following order:
Tax Rate(s) > Tax Group > POS Flag > Department > Item
Overview of Online Pending Transfers
Online pending transfers is a simple, intuitive way for stores to request transfers from another location while corporate is notified and approves/denies the transfer.
The originating store creates a transfer request and sends it to corporate. Corporate then can adjust the request and send it to the intended store. The store then can verify transfer quantities, sending this back to corporate. Corporate can once again adjust as needed, finally sending it back to the originating store. The originating store can then apply the transfer.
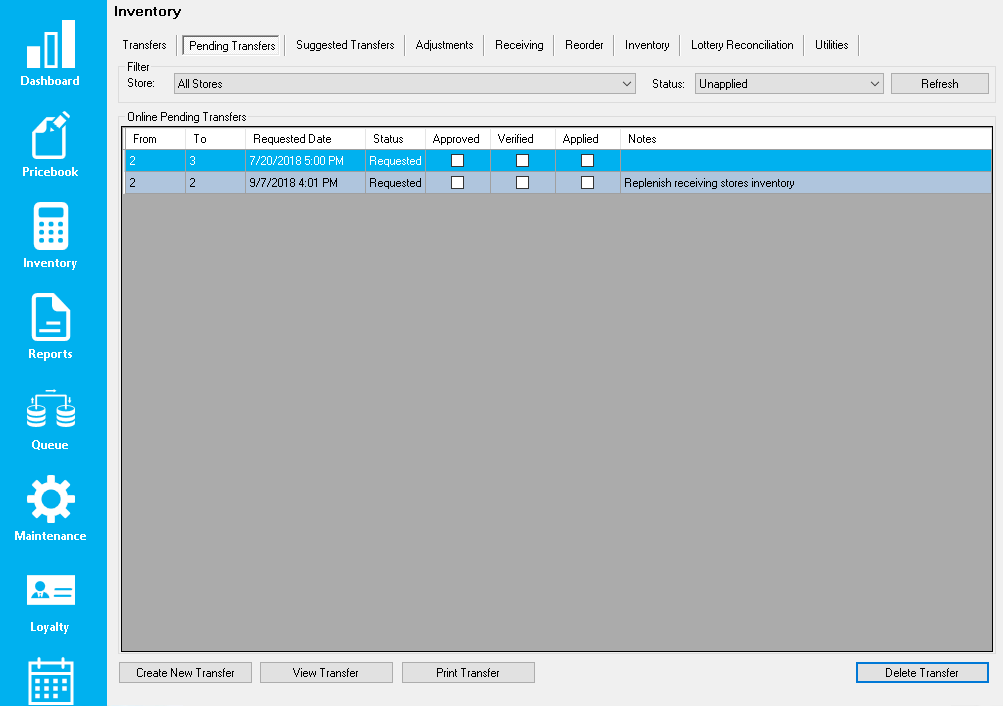
Enabling Online Pending Transfers
- From within the POS, choose “actions”

- Next, choose “settings”

- Next, choose “SETTINGS”

- Next, choose “Other Settings”

- Finally, make sure “Enable Online Pending Transfers” is check boxed and choose save
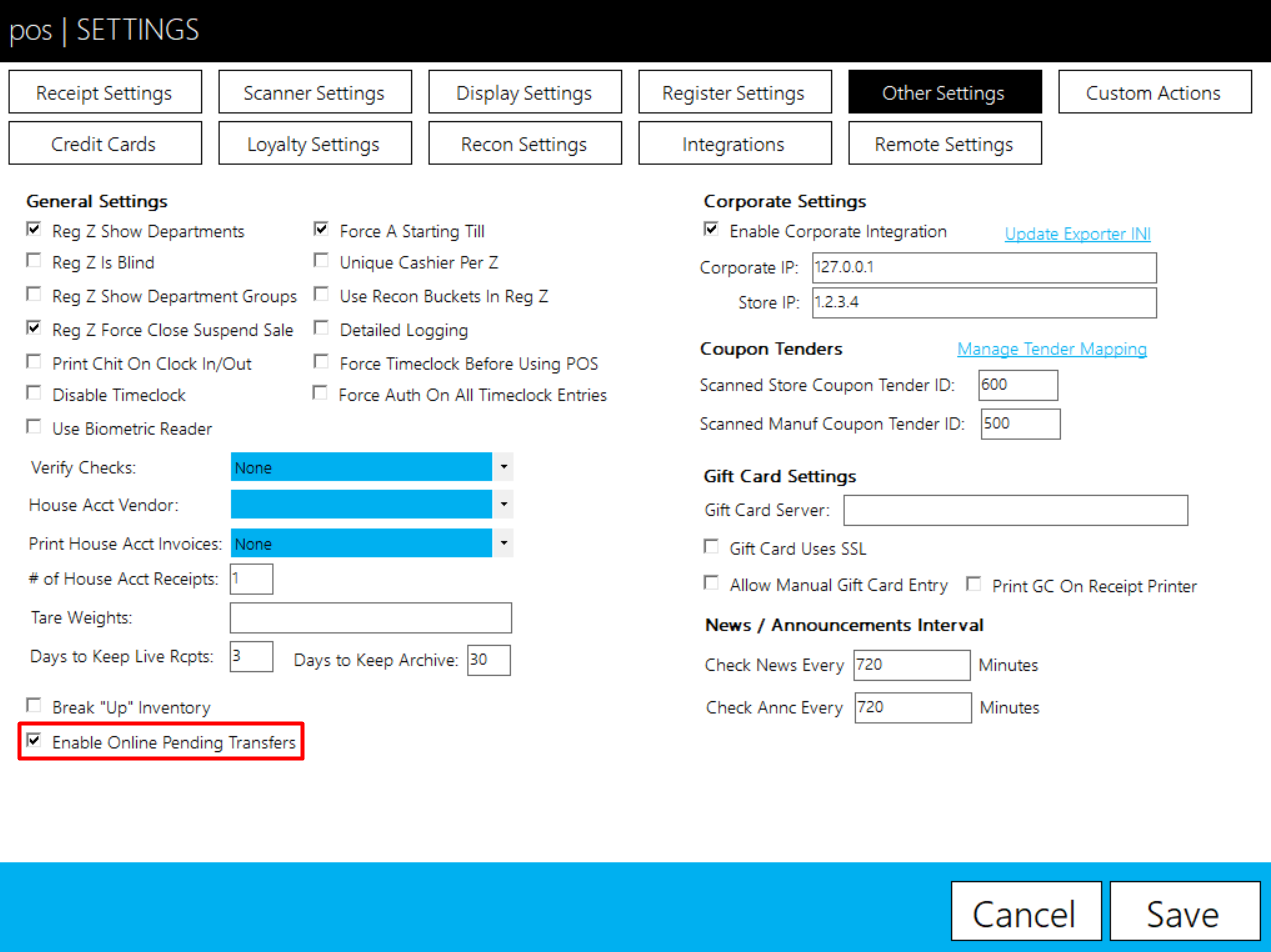
Creating a House Account
- From within the POS, choose “actions”

- Next, choose “inventory”
- Next, choose “PENDING TRANSFERS”
 The below screen will now show
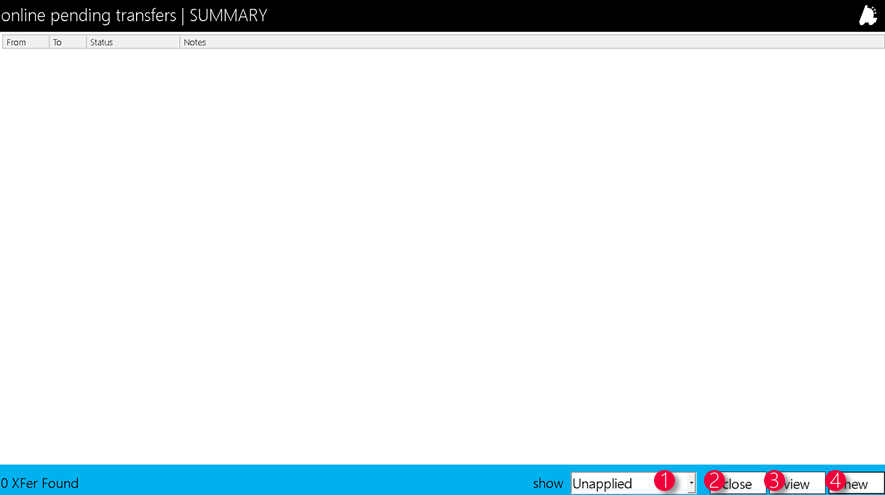
1. show dropdown – A filter that filters between the following: unapplied, unsent, requested, approved, verified, in transit, and applied
2. close – Closes the window
3. view – Views the selected row in detail
4. new – Creates a new transfer request - Choose “new”

- Enter the from store, to store, and any notes needed, and choose “create”
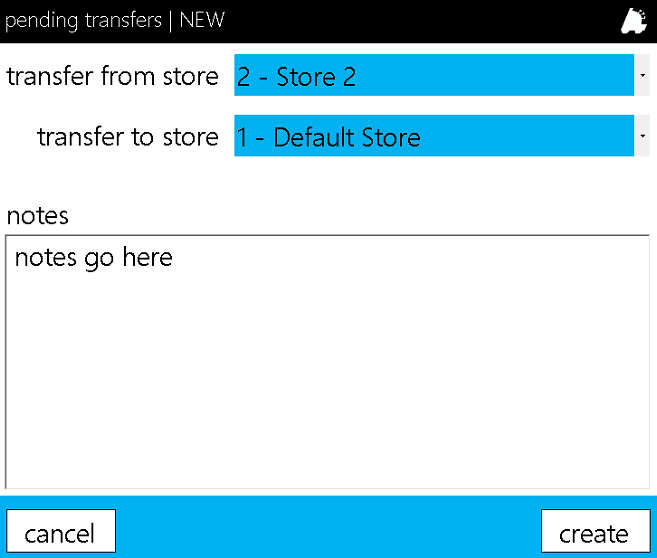 The below screen will now show up
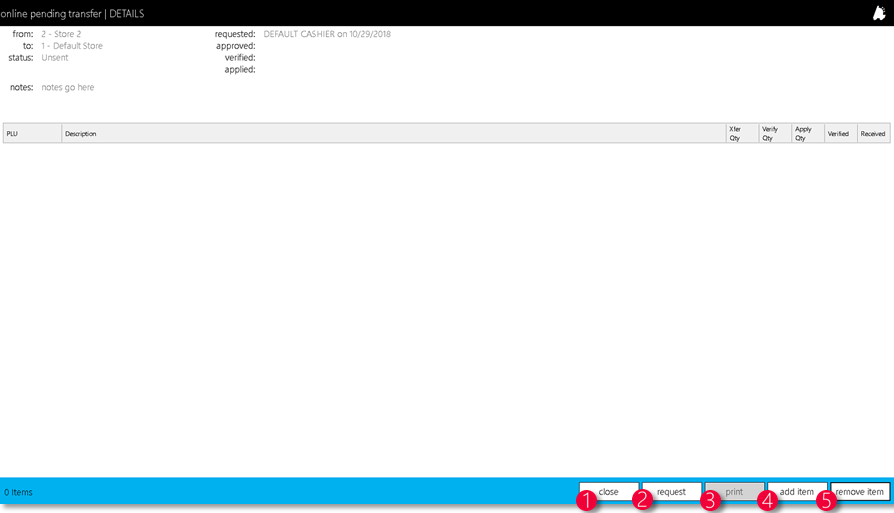
1. close – Closes the window
2. request – Sends the request to corporate
3. print – Prints a report version of the request
4. add item – Brings up the add item window
5. remove item – removes the selected item - Choose add, search for the item, enter the “qty to xfer”, and “add item”

- Repeat until done requesting item and choose “request”

Creating a House Account
- At corporate and within Director, choose the “Inventory” module

- Choose the “Pending Transfers” tab

- Double click the transfer needed to be reviewed or click once and then the “View Transfer” button
 The below screen will then show up
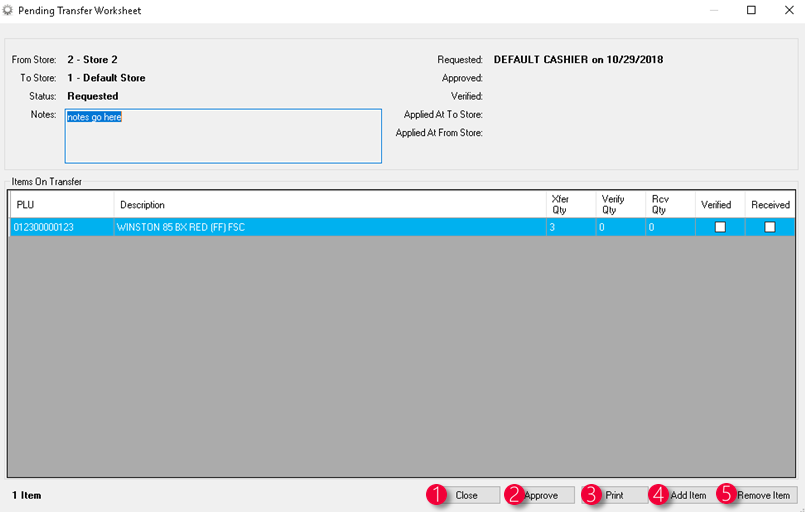
1. Close – Closes the window
2. Approve – Approves the transfer for the reviewing store to review
3. Print – Prints the worksheet
4. Add Item – Brings up the window to add an item
5. Remove Item – Removes the selected item from the worksheet - After making any changes needed, choose “Approve”
 The transfer is now able to be edited and verified at the store the requesting store intended.
Verifying the Transfer at the Second Store
- From within the POS, choose “actions”

- Next, choose “inventory”

- Next, choose “PENDING TRANSFERS”

- Choose the transfer by double clicking it or by selecting it and choosing “view”

- Double click or click and item and then choose “verify” to verify the quantity on an item, enter the “verified qty”, and choose “verify”
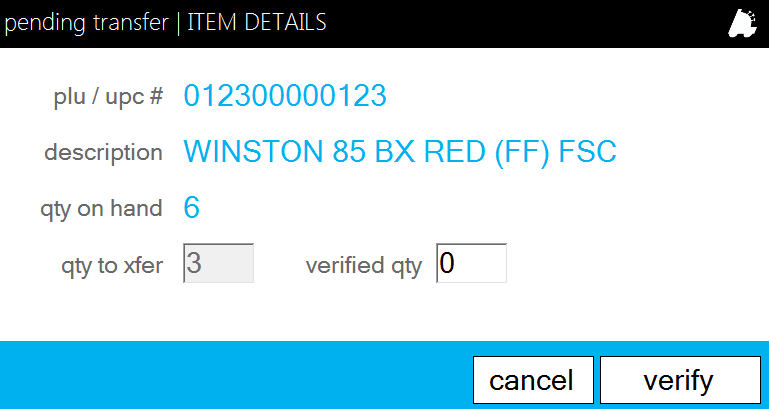
- When done verifying each item on the transfer, choose the “verify” button and “yes” to flag the transfer as verified for corporate


Reviewing and Approving the Verified Transfer at Corporate
- At corporate and within Director, choose the “Inventory” module

- Choose the “Pending Transfers” tab

- Double click the transfer needed to be reviewed or click once and then the “View Transfer” button

- After viewing the transfer and confirming details, choose the “In-Transit” button followed by “Yes” to confirm the transfer to be received at the originating store.

Receiving the Transfer at the Originating Store
- From within the POS, choose “actions”

- Next, choose “inventory”

- Next, choose “PENDING TRANSFERS”

- Choose the transfer by double clicking it or by selecting it and choosing “view”

- On each item, double click to view and enter the reviewed quantities, followed by clicking “apply”
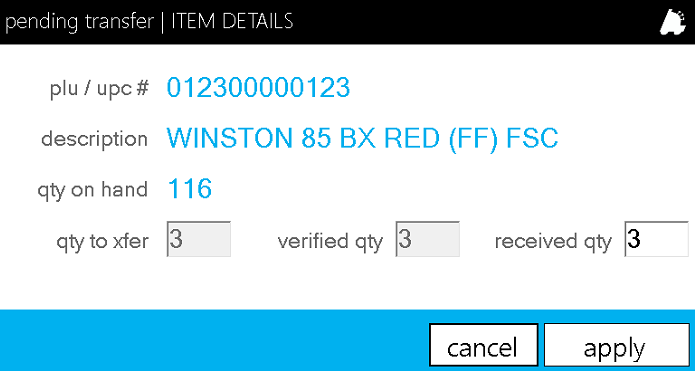
- When done reviewing, choose “apply” to apply it to inventory. Choose “yes” at the confirmation screen
What is FTX Community?
FTX Community is a place to connect with other companies using FasTrax POS and other products of FasTrax Solutions. Get tips on implementation, exchange ideas, or just see how other retailers are utilizing FasTrax to drive their business.
Logging in to FTX Community
- Request a community login by emailing your Lifeline Technical analyst at websupport@fastraxpos.com.
- Log in to Director and navigate to the FTX Community by going into the Dashboard, then selecting FTX Community.

- Click the Log In link at the far right of the Director window, and enter your Username and Password, then press Enter, or click the Login button

Creating a Thread on a Message Board
- Once logged in to FTX Community, Choose which Board you want to view or post to by clicking the board’s name, and clicking Go To Board.

- In the FTX Community – Board window, click Create Thread to post a new topic.
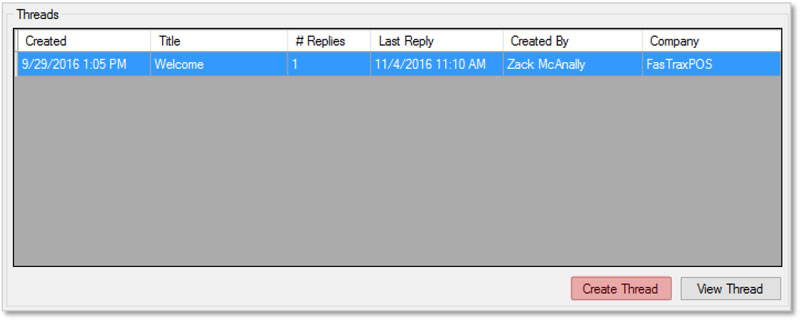
- Enter the Title and Body of the thread in the Create Thread window, and click Create Thread when finished.
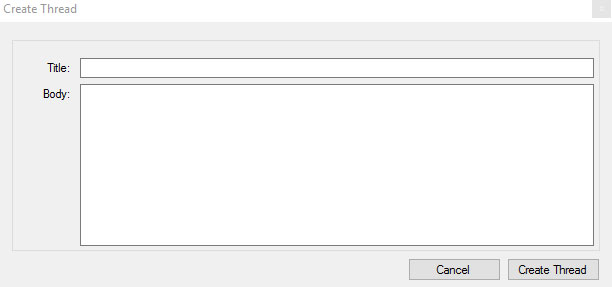
Viewing and Replying to a Thread
- After logging in and selecting a board, select the thread you wish to view and click View Thread.

- This will show the Thread Body, and a list of all replies currently attached to the thread. To add a reply, click the Add Reply button at the bottom right of this window.
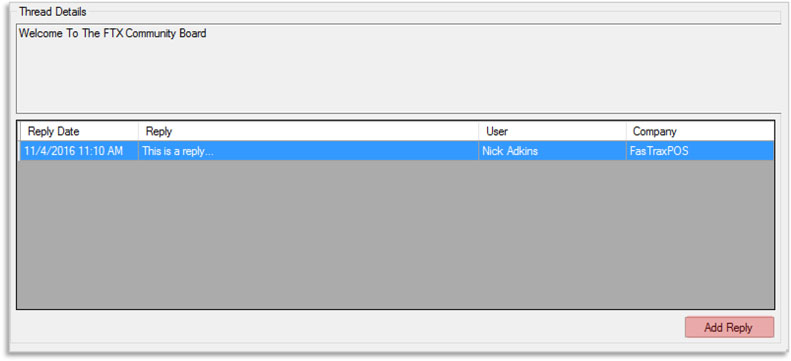
- Type what you want to say in the Reply box, and click the Add Reply button to save the reply to the board.
Overview of Item Details
Departments are groupings of items that share similar properties, such as groceries, soft drinks, magazines, ect.
Below is an image of the department properties screen from within Director. The next page will cover each editable field on this page and what it is used for.
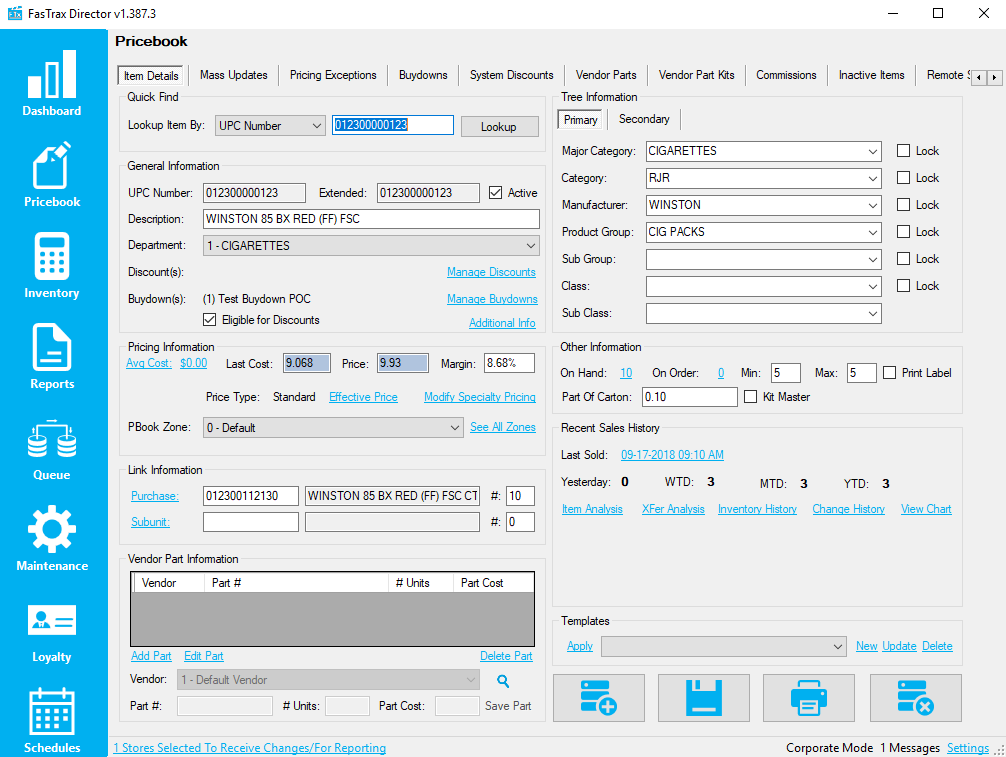
Item Details Field Descriptions
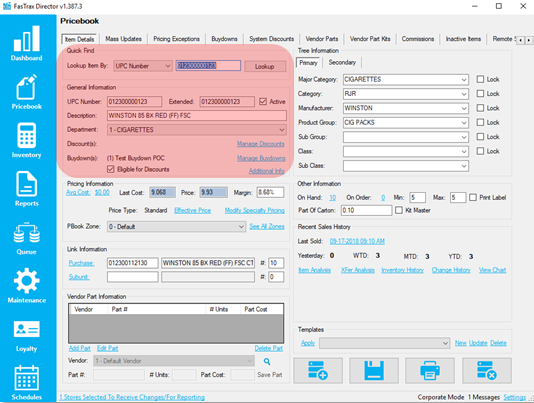
Quick Find & General Information
- Lookup Item By – Dropdown and editable field to search for existing items
- UPC Number – The UPC number of the product
- Description – The item’s description
- Active – If unchecked, items cannot be sold, inventoried, ordered, transferred, or adjusted
- Department – The item’s assigned department
- Discount(s) – Lists the system discount the item is in, if any
- Manage Discounts – Utilized to bring up a new window to add and remove system discounts
- Buydown(s) – View the buydowns that the item is in
- See All Buydowns This Item Is In – View all buydowns the item is in, as well as remove and add to buydowns
- Additional Info – See page 10 for additional information
- Eligible for Discounts – Defines if an item can be discounted via a system discount
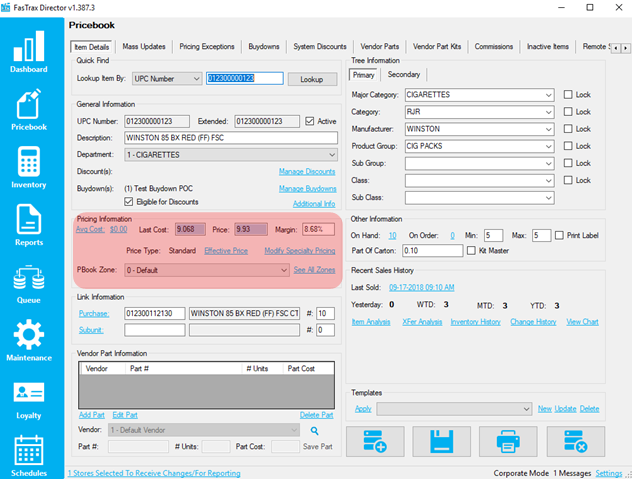
Pricing Information
- Avg Cost – Shows average cost for specific store and gives option to manually update the average cost
- $0.00 (Average Cost Value) – Shows the average cost for the selected pricebook zone
- Last Cost – Shows the last cost received from any vendor for selected pricebook zone before buydowns are applied
- Price – The retail price of the item before any discounts or buydowns are applied
- Margin – The current margin for the selected item before any discounts or buydowns are applied
- Effective Price – Brings up a windows that shows the final price and margin after all discounts, buydowns, and promotions are applied
- Modify Specialty Pricing – Allows the option to set pricing from standard to mix-n-match, pik-a-pak, open pricing, or weighted pricing
- PBook Zone – Selects different pricebook zone, allowing different sets of costs, pricing, and pricing types
- See All Zones – Shows all costs, prices, and margins for all pricebook zones
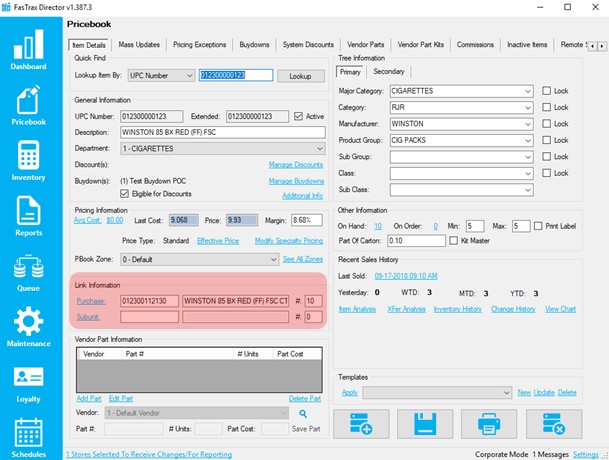
Link Information
- Purchase – Shows the purchase unit UPC and how many subunits are contained within the purchase unit
- Subunit – Shows the subunit UPC and how many subunits are contained within the purchase unit
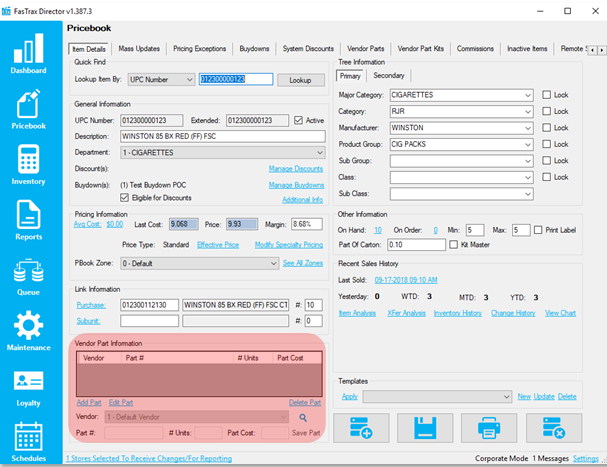
Vendor Part Information
- Add Part – Allows a vendor part to be added to the selected item
- Edit Part – Allows a selected vendor part to be edited on the selected item
- Delete Part – Deletes the selected vendor part from the selected item
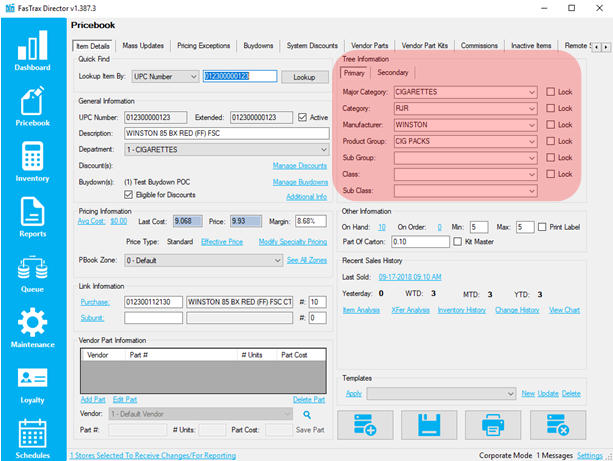
Tree Information
- All Dropdowns – Allows you to set various item properties for the selected item, which allows grouped reporting and price/cost changes, as each property is a filter
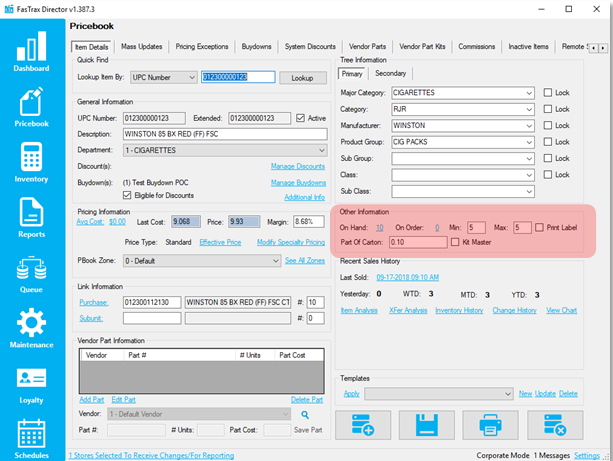
Other Information
- On Hand – Shows the total sum of the onhands for all store’s selected. If clicked, shows a breakdown for said stores
- On Order – Shows any open purchase orders that the item is on
- Min – The minimum QOH allowed before ordering to the max if utilizing Min/Max reorders
- Max – The maximum QOH allowed when reordering if utilizing Min/Max reorders
- Print Label – Prints labels when invoices are received
- Part Of Carton – Used to set the part of carton value if utilizing part of carton buydowns
- Kit Master – Used to flag an item as a kit master (which holds no inventory and should contain no cost or price)
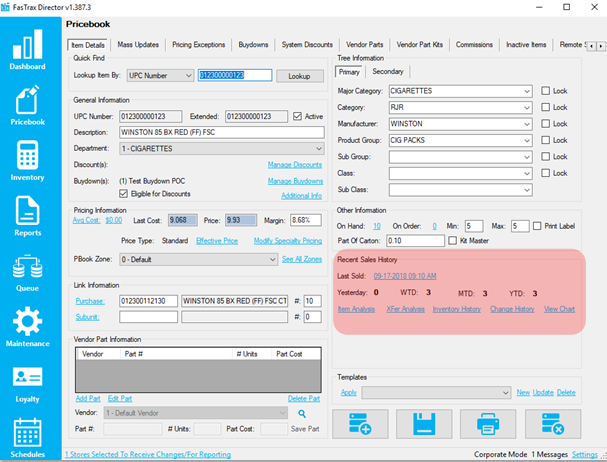
Recent Sales History
- Item Analysis – Allows user to see detailed movement of an item, with inventory snapshots each day
- XFer Analysis – Allows user to see QOH, quantity sold, and last sold dates for quick transfer analysis
- Inventory History – Shows the inventory history for all stores selected in between the date filter
- Change History – Shows any and all changes done to an items cost and/or price
- View Chart – Shows a sales chart for the selected item
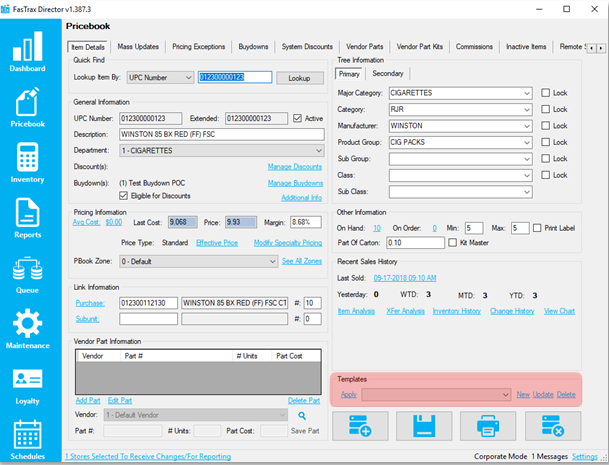
Templates
- Apply – Applies the selected template to the selected item
- New – Creates a new template based on the current items attributes
- Update – Updates the current template to the current items attributes
- Delete – Deletes the current item template
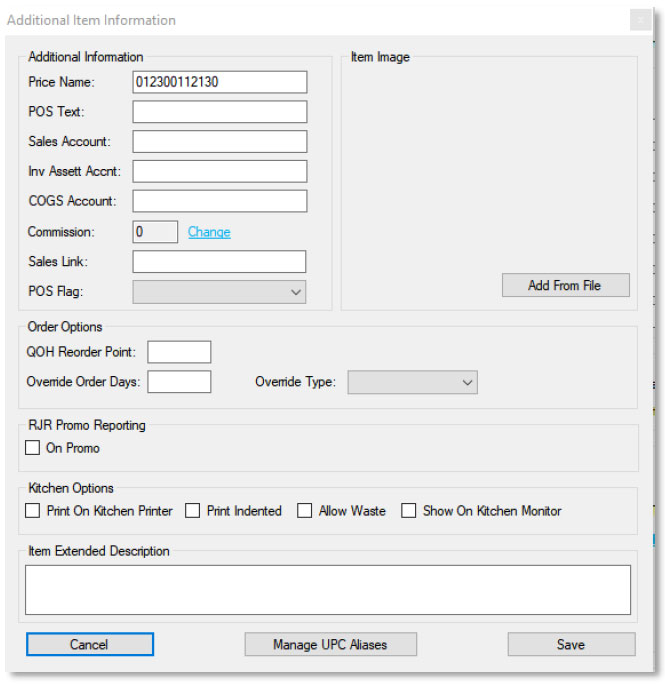
Additional Information
- Price Name – Where the selected UPC looks to find its’ pricing / costs. This is generally used for specialty pricing
- POS Test – This text shows on the POS when the item is scanned, overriding the item description
- Sales Account, Inv Asset Accnt, & COGS Account – Used for accounting exports and overrides the set values on the exact department fields
- Commission Change – Allows assignment and removal of item to commission campaigns
- Sales Link – Ties another UPC to the sale every time the selected item is sold
- POS Flag – Allows manual change of the POS Flag, which overrides the department POS Flag
- Order Options – Allows the item to override the department override values for reorders
- On Promo – Flag used for flagging promo items for the RJR scan data report
- Kitchen Options – Settings utilized for kitchen printers, monitors, and waste
- Item Extended Description – Longer, more extended description for selected item
- Manage UPC Aliases – Allows multiple, alternative UPCs to ring up selected item
Overview of Pricebook
Pricebook is the most important part of FasTrax Director. It is the place where all items, discounts, and vendor parts are created and managed.
This document will cover the basics of creating and managing items in the Item Details section of the Pricebook. It will cover pricing, assigning items to departments, and creating item links.
Adding a New Item
- In Director, choose the Pricebook module.

- This will take you to the Item Details section of the Pricebook.
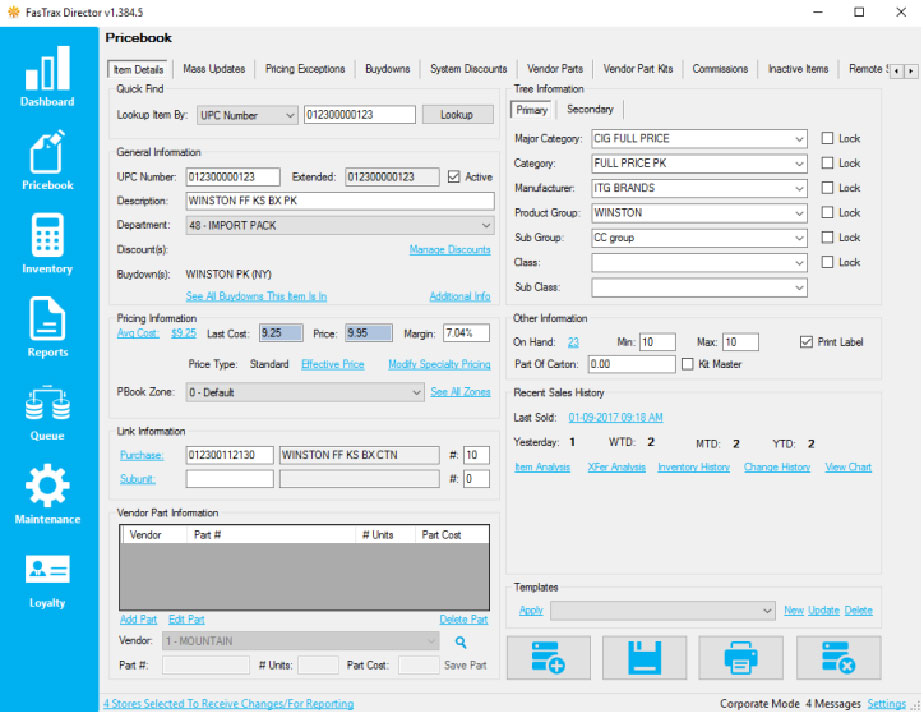
- Choose the Add button.
Alternatively, you can simply type the UPC of the new item in the Lookup Item By field in the Quick Find section and Press Enter. This will prompt you to create the new item.
- Enter the UPC/PLU you wish to add, and press Enter (or click OK).
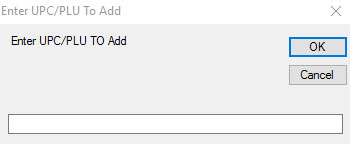
- In the General Information section, add a Description for the item, and select a Department from the dropdown menu.
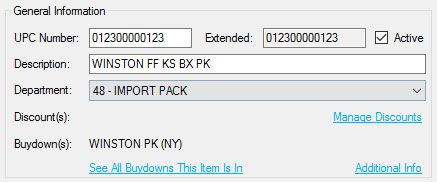
- In the Pricing Information section, add a Last Cost and Price for the item.

After entering the Last Cost, you can enter a Margin rather than a Price, and the system will fill in the price accordingly. - Next, fill out any applicable Tree Information for the item.
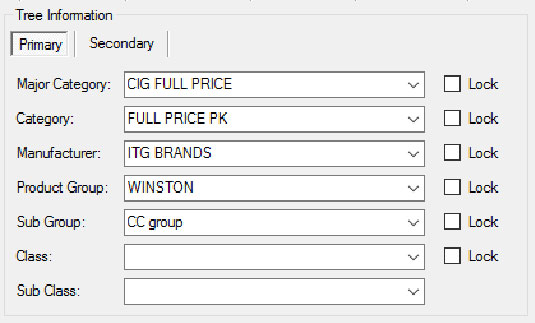
Tree information is optional, and can be left blank if you prefer. However, the more thorough your tree information is, the easier it will be to update prices in Mass Updates later on. - Once all information is entered, click the Save button.

This section was just the basics of getting an item ready to sell. There is much more that can be added or changed in Item Details that will be covered in later sections.
Adding an Item Link to an Item
Item Links are used in FasTrax POS to create parent/child relationships between items. This allows a parent unit to be “broken down” into multiple child units for individual sale. These breakdowns will happen automatically at the POS any time the quantity on hand for the child unit falls below zero.
- After logging into Director, choose the Pricebook module.

- Within Item Details, use the Quick Find section in the top left to look up the item you wish to change.
 In this example, we will add the link to the Parent Unit. Doing so will automatically add a matching link to the Child Unit.
 - Look at the Link Information section, and enter the UPC and the Link Quantity of the Child Unit as shown.

The Link Quantity is the number of child units that make up the parent unit. In this example, the child unit is a pack of cigarettes, and the parent is a carton. The Link Quantity is 10 because there are 10 packs in a carton of cigarettes. - Once finished, click the Save button to finish creating the link.

Adding Open Pricing to an Item
Open pricing is used to get the POS to prompt the cashier for the retail price of the item. When entering an open price, a minimum price is specified as well as a default price. The default will be used if the cashier makes no changes when prompted at the POS, and the minimum price is the lowest the cashier is allowed to enter.
- After logging into Director, choose the Pricebook module.

- Within Item Details, use the Quick Find section in the top left to look up the item you wish to change

- Look at the Pricing Information section, and click on the link that says Modify Specialty Pricing
Pro Tip: make sure you’ve selected the correct Pricebook Zone before continuing.
- This will open the Specialty Pricing window. Use the Use Price Type dropdown menu to select Open Price.
The Use Price Type dropdown can be used to select Mix-Match pricing as well. Mix-Match pricing is a legacy feature, and it is recommended to use System Discounts instead.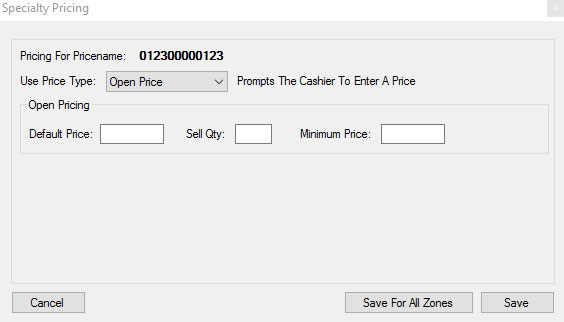
- Enter the following information.

- Default Price: The price that will automatically appear when the cashier is prompted.
- Sell Qty: The quantity to be sold at this price (usually 1).
- Minimum Price: The lowest price the POS will allow the cashier to enter for this item.
- When finished, click Save.

Adding Weighted Pricing to an Item
Weighted pricing is used to sell items such as produce that have a price-per-pound assigned to them. These items will prompt the cashier for a weight at the time of the sale. The weight will then be multiplied by the price entered here in order to give the final selling price of the item.
- After logging into Director, choose the Pricebook module.

- Within Item Details, use the Quick Find section in the top left to look up the item you wish to change.

- Look at the Pricing Information section, and click on the link that says Modify Specialty Pricing

- This will open the Specialty Pricing window. Use the Use Price Type dropdown menu to select Weighted Price.
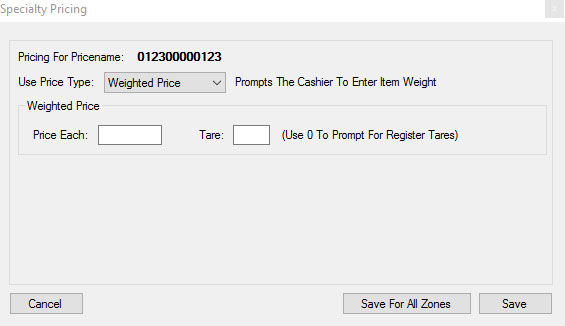
- Enter the following information:

- Price Each: the price per pound of the item
- Tare: the weight of the container the item will be weighed in.
- When finished, click Save.

Adding Pik-A-Pak Pricing to an Item
Pik-A-Pak pricing is used to sell items that have different price points for different quantities. For instance, an item that costs $3.50 for one, but only costs $10.00 if the customer buys three. Pik-A-Pak pricing will cause the POS to present the cashier with a list of quantities to choose from when the item is scanned.
- Look at the Pricing Information section, and click on the link that says Modify Specialty Pricing

- After logging into Director, choose the Pricebook module.

- Within Item Details, use the Quick Find section in the top left to look up the item you wish to change.

- This will open the Specialty Pricing window. Use the Use Price Type dropdown menu to select Pik-A-Pak.
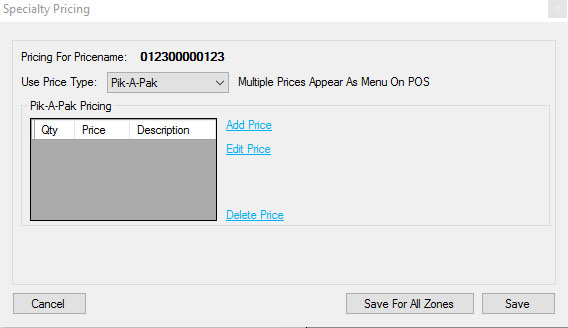
- For each quantity at which the item is to be sold, enter the price as follows:

- Click Add Price
- Enter the Price
- Enter the Sell Qty
- Enter the Description for this price point
- Click Save Price
- Once all prices and quantities have been entered correctly, click Save.

Overview of Pricebook Aliases, Kits and Other Options
This document will cover how to create PLU Aliases for an item, which can be used if the manufacturer changes a UPC, or if an item doesn’t come with a printed barcode to scan, then a shorter number can be assigned that a cashier can simply type in on the POS side to ring up an item.
In addition, this document will cover Item Kits. Kits are used to create groups of items to be sold together as a gift basket (for example). Finally, after Aliases and Item Kits, this document will cover the remaining information that can be set up for an item outside of this and the previous documents.
Adding Aliases
- Open Director, and select the Pricebook module

- After looking up the item you wish to add an alias for, click the Additional Info link found in the General Information section.
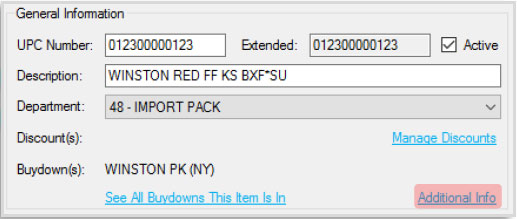
- In the Additional Information window, click the Manage UPC Aliases link

- Next, click Add Alias

- Enter the PLU Alias in the text box, and click OK.
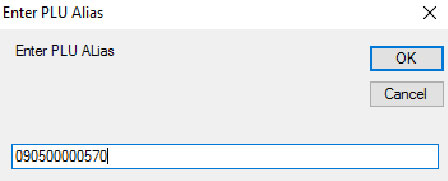
It doesn’t matter if the item already has an alias, you can add as many as you need. - Choose whether you want the alias expanded to 12 digits
Creating an Item Kit
- In Director, choose the Pricebook module.

- Then, create an item to be the Kit Master. To do this, create the item normally, then check the Kit Master check box in the Other Information section

- Next, click the Manage Kit Items link to open the Kit Details window.
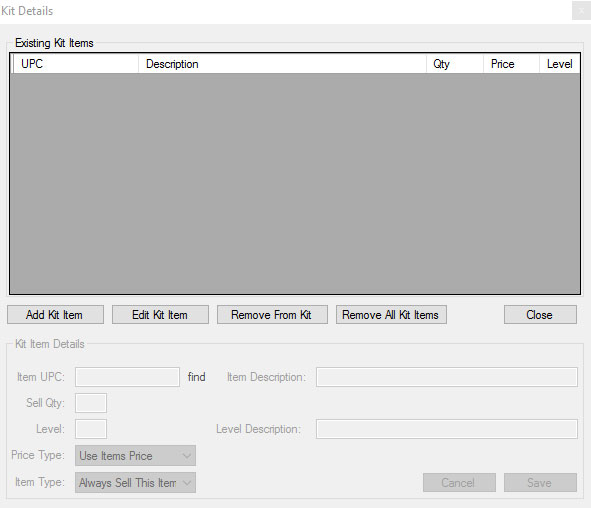
- Click Add Item, then enter the following information (repeat for each item that is to be included in the kit):

- Item UPC – the UPC of the item you wish to add to the kit (use the Find link to search if you don’t know the UPC. The Item Description will populate automatically once you enter a valid UPC.
- Sell Qty – the number of this item to sell when the kit is sold at the POS.
- Level – denotes applicable list of items for the Choose From List item type.
- Price Type – chooses whether to use the item’s usual retail price, or to use a different specified price
- Item Type – choose Always Sell This Item to sell the item without prompting, or Choose From List to create a multiple choice prompt.
- Save – click after all items are added.
If Choose From List is selected, and there are two items in Level 1 and 3 items in Level 2, the cashier will be prompted to choose between the two level 1 items, then they will have to choose between the 3 level 2 items.
Additional Item Setup Options
- After logging into Director, choose the Pricebook module.

- Within Item Details, navigate to the applicable item. Choose the Additional Info link.
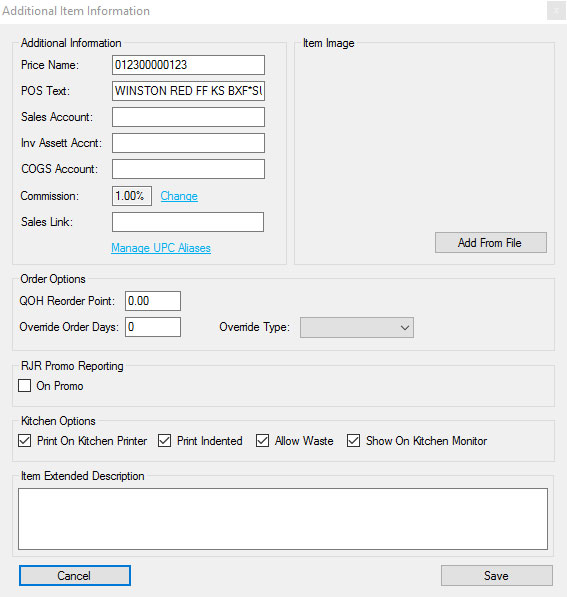
- Price Name – should be the same as the UPC Number unless multiple items are being put in the same Pik a Pak pricing. (see specialty pricing doc for more info).
- POS Text – description to be displayed at the POS (if it needs to be different from the description.
- Account Codes – The three different account blanks below POS Text are used for some customer-specific accounting exports, and can be ignored for most people.
- Commission – the flat amount awarded to a cashier who sells this item (if applicable).
- Sales Link – UPC of any item that is always meant to be sold with this one.
Item Images – To add an item image, click the Add From File button in the Additional Item Information window, and select the picture file to attach to the item.

Kitchen Options – These options allow for a store setup where a secondary monitor and printer are used to communicate ticket details to the kitchen. See the Kitchen Setup documentation for more information.

Item Extended Description – Any additional information you want on the item for the cashiers to see when the item is Price Checked.

Overview of Pricebook Item History
The Item Details portion of the pricebook has several tools to view and analyze an item’s history of sales, quantity on hand, purchases, and even price history. The Reporting module has options for looking at this information in a much broader scope; for instance, seeing the quantity on hand for all items at once instead of one at a time. However, this document will focus on the tools in Item Details for in-depth tracking of sales, purchasing and inventory for an individual item.
Quantity on Hand
After looking up any item in Director, you can immediately see a total quantity on hand for all stores by looking in the On Hand number in the Other Information section.
Note that this is a combined quantity for all stores currently selected for reporting. See below for instructions on selecting stores.

Clicking on the On Hand number will display Current on Hand Quantities for each selected store.
This window also shows retail and cost for the item at each store.
To control which stores are shown in this area, you will need to click the X stores selected to Receive Changes/For Reporting link at the very bottom of the window.
This will bring up the window pictured on the right. Just check the box for each store you want to see inventory for, then click Done
Inventory Tracking Tools
In the Recent Sales History section of Item Details, the item’s last sale date and time can be seen as a blue hyperlink.
This section also shows sales for yesterday, as well as Week-To-Date, Month-To Date and Year-To-Date sales.
![]()
Clicking this link will display the information from the most recent receipt for that item.
Note that this screen will also show a line item for any buydown that was active on the sale.
![]()
Xfer Analysis: This link will bring up a window that allows you to select a date range, and click Refresh to show Quantity on Hand, Sales, and the last sell date of the item. This can be used to determine if transferring inventory between stores is advisable.
![]()
Inventory History: This tool will show on hand quantities for each store, for each day in the selected range. It also shows the applicable Retail and Cost on those days.
![]()
Item Analysis
Item Analysis can be accessed by clicking on the Item Analysis link in Item Details in Director.

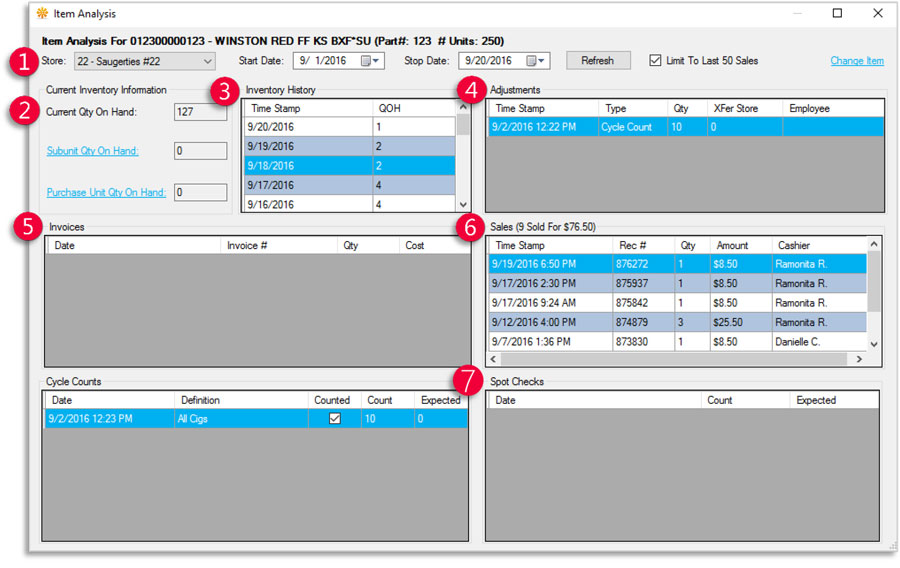
- Filters – Settings for Store, Start Date, and Stop Date. After all the filters are set, clicking Refresh will show relevant inventory activity.
- Current Inventory – Shows current on hand quantity for the selected item as well as inventory quantities for and Purchase Unit or Subunits.
- Inventory History – Shows quantity on hand at the beginning of each day
- Adjustments – Shows all adjustments made to inventory from Transfers and Adjustments to Cycle Counts and Invoices.
- Invoices – Shows dates, times and invoice numbers for any invoices including this item.
- Sales – Shows individual receipt numbers and related cashiers for all sales involving this item.
- Cycle Counts/Spot Checks – These two sections show inventory counts that have been done with this item, and display the counted and expected quantities.
Item Detail Analysis
Item Detail Analysis gives several options for viewing inventory data for an item.
Inventory data can be viewed for an individual store or for all stores at once using the Store dropdown
The Type dropdown offers the following options for viewing your data:
- Inventory Data – shows non-sales-related inventory activity such as transfers, adjustments, invoices, and cycle counts.
- Sales Grid – (pictured) Shows sales activity for this item
- Sales Bar Chart – Groups sales by month and creates a bar graph to help visualize sales trends.
- Sales Line Chart – Groups sales by month and creates a line graph to help visualize sales trends.
The Start/Stop fields allow you to set the date range for the analysis.
Once all the above settings are set the way you want, click Load Analysis
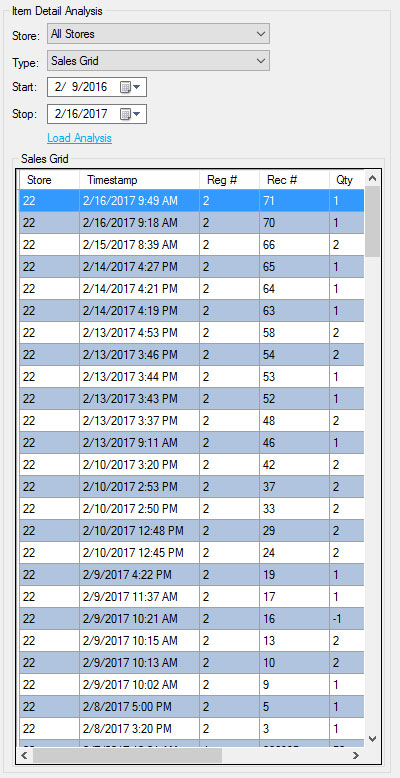
Other Tools
View Chart: Clicking the link for View Chart will show a bar chart of the last nine months of sales (similar to the bar chart from Item Detail Analysis).
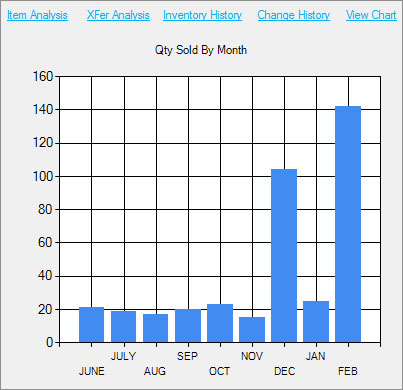
The last tool in the Item Details toolbox is the Change History link.

Clicking this link will bring up the Item History window
This window shows cost and price change history by date. It also shows where the changes were made (Item Details, Mass Updates, or from an invoice) as well as the login that was used to make the change.
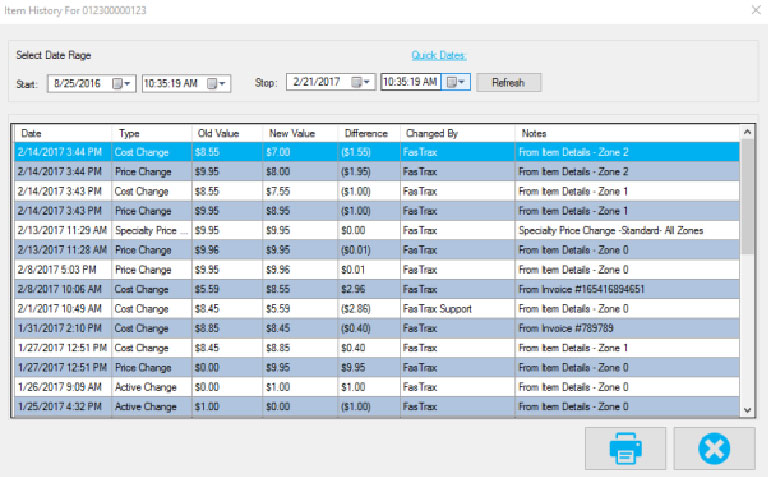
Overview of Mass Updates
Mass Updates gives you the power to change prices, costs, and other information for large groups of items all at once. If your pricebook is well organized, Mass Updates can greatly simplify pricebook management and help you save time.
Mass Updates Tree View allows you to quickly and easily filter to the items that need updating, and the various utilities in Mass Updates not only allow for changing tree info and costs/prices, but also allow you to add items to Loyalty Campaigns, Buydowns, or System Discounts.
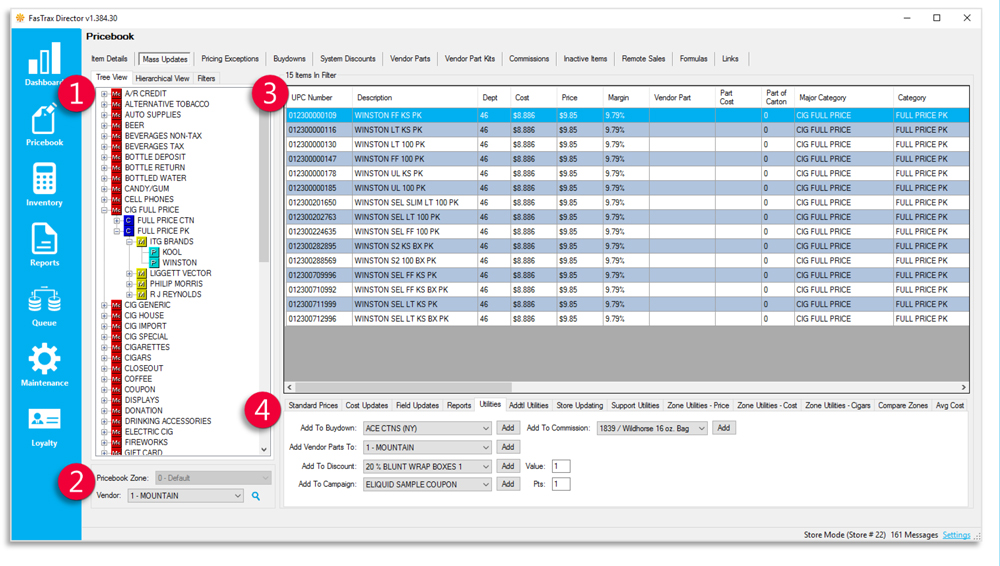
- Mass Update Filters – Multiple options for filtering your Mass Updates view to the items you need to see
- Tree View – Shows tree information for the entire pricebook; allows for each heading to be “expanded” to see sub-headings. Clicking any heading/subheading will filter to items in that group.
- Hierarchical view – Allows selection and filtering of items by selecting the Major Category, then the Category etc. that you wish to filter to.
- Filters – Allows Mass Updates to be filtered by department, price, cost, or any other tree information.
- Pricebook Zone/Vendor Selector – Allows you to choose which Pricebook Zone your changes will affect as well as which Vendor and Vendor part cost changes affect.
- Mass Updates View – Shows all items that will be affected by any changes made.
- Tool Selection – From Standard Prices, to Average Cost, this is where to find all the tools used in Mass Updates
Tree Information can be set up on the individual item when it is created, or through Mass Updates. The Tree View in Mass Updates is derived directly from the information entered in the Tree Information section in Item Details. See below:

Ultimately, it’s best to have items grouped together if they have the same prices. In the picture above, clicking the Winston heading in Mass Updates will filter to all Winston packs that have the same price. This way, if the prices change, we can click our Winston heading, and update the prices for all full price Winston packs all at once.
Mass Cost Updates
- After logging into Director, choose the Pricebook module.

- Choose the Mass Updates option from the Menu Ribbon, and go ahead and Filter to the items you wish to update

- Choose the Cost Updates tab on the tool selection ribbon.

- Select the type of cost change to be done:
- Set Cost – replaces the current cost with the one entered in the blank.
- Add $ to Cost – adds the amount entered to the current cost
- Add % to Cost – increases the cost by a percentage of its current value
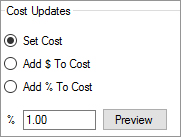
- Choose whether the cost change will Apply to Vendor Part, and choose which Vendor this will apply to in the dropdown.

- Once all options are set the way you need them, click Preview to continue.

- Using the Change Preview window, verify that the change is correct. Here, you can remove any items if needs be, or change the affected Pricebook Zone.
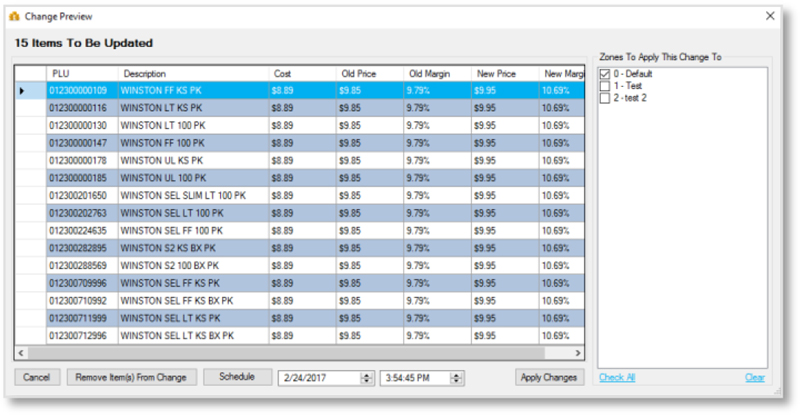
- Click Apply Changes
 If you have changes that don’t need to take effect yet, choose the date and time for them to take effect, and click Schedule instead of Apply Changes
Mass Field Updates
The Field Updates tool in Mass Updates can be used to update any of the 14 Tree Information fields, as well as the following fields:
- Department Number
- Link PLU
- POS Text
- POS Flag Name
- QOH Reorder Point
- Override Order Days
- Override Type
- After logging into Director, choose the Pricebook module.

- Choose the Mass Updates option from the Menu Ribbon, and Filter to the items you wish to update.

- Choose the Field Updates tab on the tool selection ribbon

- Choose the update options
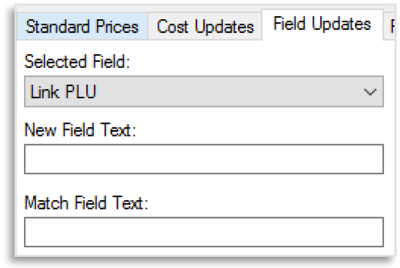
- Selected Field – the name of the field to be Mass Updated
- New Field Text – The new information to be put in the Selected Field.
- Match Field Text – Used to tell the system what text to replace when updating the Selected Field
The Match Text field is only used to when the Change “Match Text” to “New Text” option is used below, and can be left blank if not using that button
- Click Set Selected Field to New Field Text to update all items in filter,
Alternatively, click Change “Match Text” to “New Text in order to only update the selected field only where the text currently in the field matches the Match Text
Overview of Cost and Price Import
Using the Cost and Price Import tool is a simple, fast way to import all prices and/or costs to a Pricebook Zone from a specific vendor.
This can be performed as needed, and serves to view costs changed by a vendor before actually receiving an invoice. This assists in utilizing the Alternate Vendor feature within the ordering system for comparing item costs.
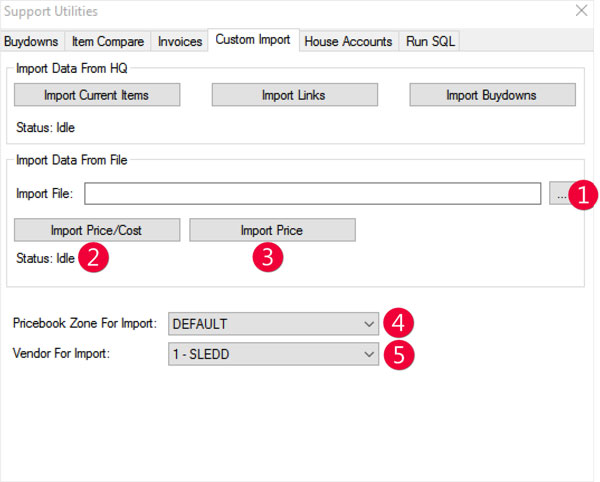
- Pricebook Zone For Import – choose the Pricebook Zone to be updated
- Import Price/Cost – imports both price and cost
- Import Data From File – the file location and name
- Import Price – imports price
- Vendor For Import – choose the applicable Vendor to be updated
This should only be performed at corporate. Remember to manually send down changes to stores, as a queue record will not be created by the import
Importing Cost and Price
- After logging into Director, choose the Pricebook module.

- Within Pricebook choose the Mass Updates tab
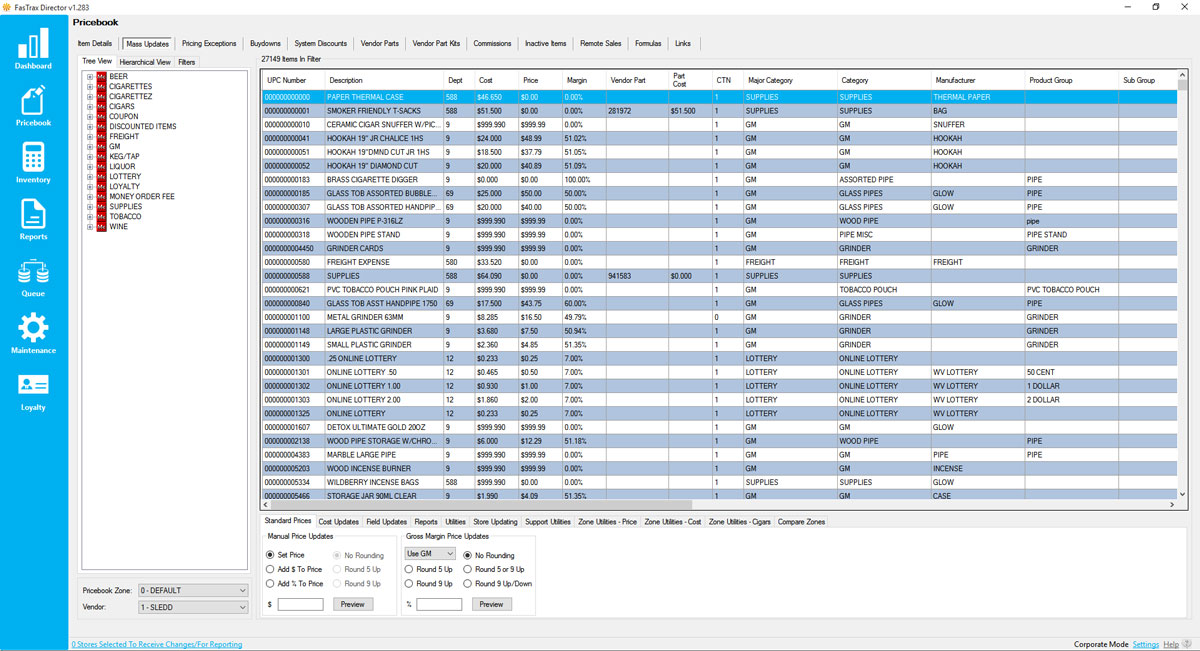
- In the tabs below the item grid, choose Support Utilities, then click Launch Support Utilities

- Choose Custom Import from the window that opens
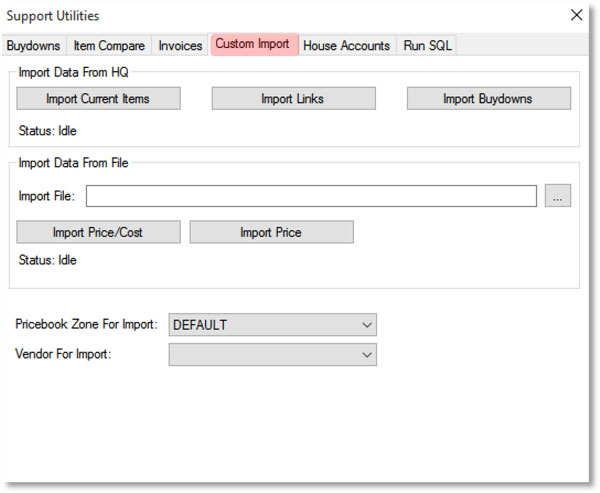
- Choose the file supplied by your vendor on your computer after clicking the … button then Choose the CVS fileto be imported
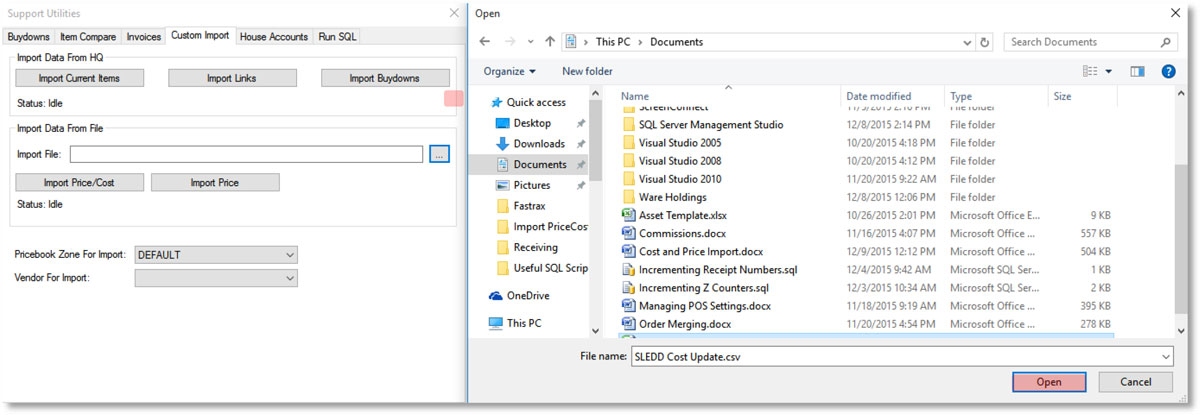
- Choose the Pricebook Zone For Import and Vendor For Import from their applicable dropdowns
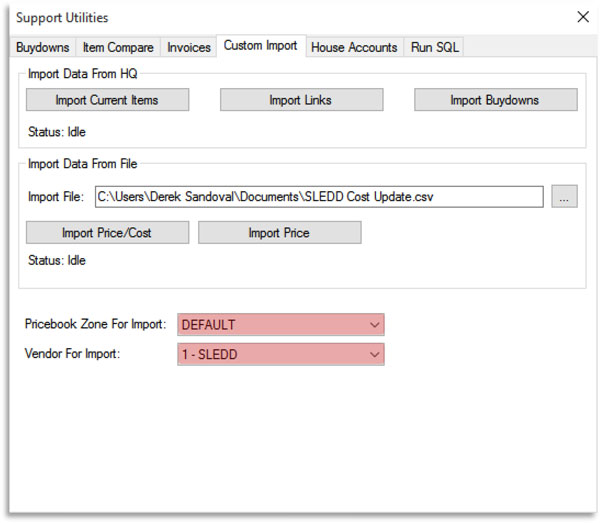
- Choose either Import Price/Cost to update the cost and retail price or Import Price to update just retail price
There is no undo for this, so make sure that you check the file thoroughly and the options selected before choosing to import.
File Format Requirements
- The file will need to be in CSV format, otherwise known as Comma Separated Values.
A file in CSV format will have a .csv file extension. These types of files can be opened in Notepad and Excel. An Excel file has the option to be saved in a CSV format. - The following values will be used for Cost and Price imports:
UPC,Cost,Price - The following values will be used in Price imports:
UPC,Price
Overview of Pricing Exceptions
Pricing Exceptions are a simple and intuitive way of further implementing pricing control over items in your corporate price book. Like with Pricebook Zones, Pricing Exceptions allow you to manage price points on items in specific stores from your corporate system. Where Pricebook Zones aid you in grouping stores and setting specific prices to each zone, Pricing Exceptions will allow you to dynamically manage specific item prices by each store, not just zones, on a more granular level.
An example of this would be:
When using Pricebook Zones, you have 9 stores. Within your 9 stores, you have broken your retail area into 3 parts, or Pricebook Zones – A, B and C. Out of your 9 stores, 3 are in zone A, 3 are in zone B and 3 are in zone C.
Each of these 3 zones has different retail prices for items –
Zone A – packs of Brand X Cigarettes are $3.50
Zone B – packs of Brand X Cigarettes are $4.00
Zone C – packs of Brand X Cigarettes are $4.50
This means that the 3 stores assigned to zone A sell Brand X for $3.50, zone B stores sell for $4.00, etc.
With Pricing Exceptions, you can further manage Brand X’s price by store, despite zone association.
An example of utilizing Pricing Exceptions in the previous scenario follows –
Store 1, in zone A, needs to price packs of Brand X Cigarettes at $3.35 due to neighboring competition or regional demand.
Instead of changing the entire zone price (or creating a new zone for this one store), set an exception. The other 2 stores in zone A will continue to honor the price of $3.50 for a pack of Brand X while store 1 is able to sell for $3.35.
This also means that store 1 will continue to observe price book changes made for zone A, with the allowance being that of items set to an exception.
This functionality allows your price book to be flexible while providing you a linear form of granular item management. However, Pricing Exceptions are not limited to singular items for singular stores.
If, again using our example above, 1 store from each zone required a unique price for our pack of Brand X, you can set one exception to carry 3 levels, 1 for each store. The stores not assigned an exception will continue to observe their respective default zone prices, happily unaware of any changes!
Please use the following documentation to assist you in creating and utilizing Pricing Exceptions.
The following guide will demonstrate the setup of a singular item, at 2 exceptions for 2 stores as example.
Pricing Exceptions Guide
- After logging into FasTrax Director, choose the“Pricebook” module

- From the “Pricebook” module, choose thePricing Exceptions tab.

- Choose the New Exception button located atthe bottom of the “Existing Pricing Exceptions”window.
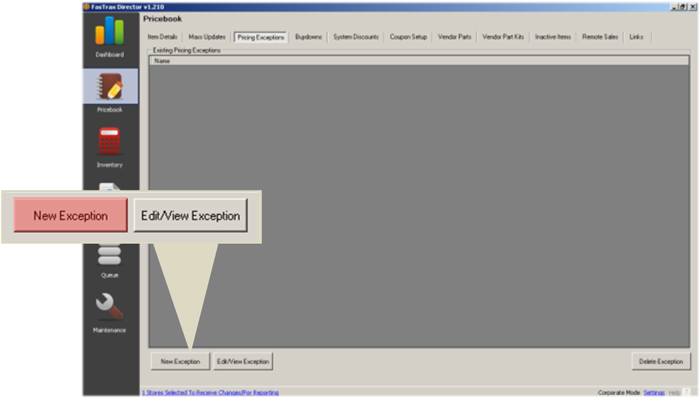
After creation, return here and choose the “Edit/View Exception” button to edit any existing Pricing Exceptions. - This will open a small window for you to enterthe applicable “Exception Name” and “# ofExceptions”.
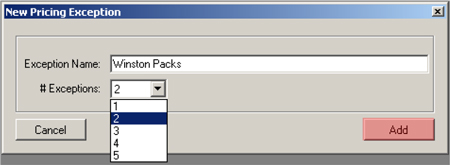
Enter a name applicable to your usage.
In this example, I will name it “Winston Packs” representing the specific item I wish to set an exception for.
For “# of Exceptions”, I am choosing 2 since my Winstons require 2 retail prices different from my existing zone price(s).
Once you are satisfied with the name andexception count, choose the “Add” button.Be mindful when naming your exceptions. This will aid you when returning to edit or remove exceptions.
The “# of Exceptions” is in reference to how many levels or exception prices your item(s) require.
Currently there is a max of 5 levels per exception.
- This will open a “Pricing Exception Details for…” worksheet window.
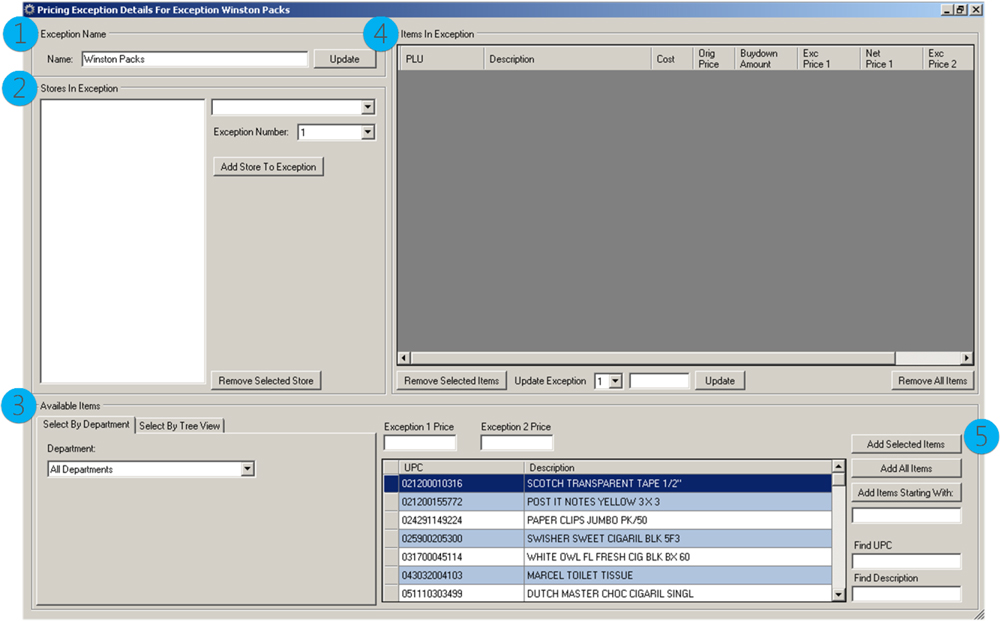
- Exception Name – This displays the name of the exception you are viewing.
- Stores In Exception – This section allows you to choose which store(s) are assigned to applicable exceptions. Since you can have multiple exceptions under a single definition, you can choose which price exception a store receives.
In our guide example, I am setting up 2 exceptions for a pack of Winstons. We will have each of our 2 stores assigned to 1 of the exceptions. - Available Items – This section is for filtering to theitem(s) you wish to assign an exception price.
This filter functions the same as in Mass Updates. Youcan either choose to show all items in a specific department or utilize your tree view categorizations you have set on items via Item Details.
Notice, there are 2 price entry points for “Exception Price 1” and “Exception Price 2”. This is due to our example being created for 2 exceptions. Enter the applicable exception price you wish this item to be. - Items In Exception – Once you have set your stores and added your item(s) via the “Available Items” section, thislist will show those items and their exception prices.
From this section you can remove one or all of the listed items as well as update a specific exceptions price. - This section is for use with the “Available Items” area of this worksheet. If additional, more specific filtering is necessary, this section will assist you.
See below for explanation –
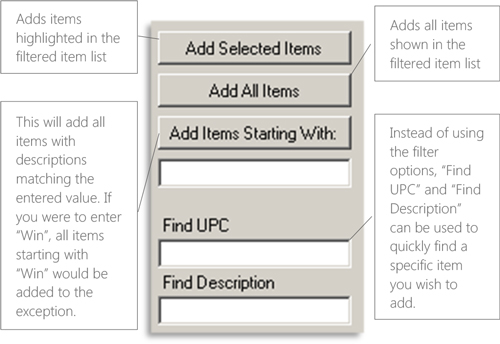
- From the “Stores In Exception” section, choose the stores and exception number you wish for each store to observe.
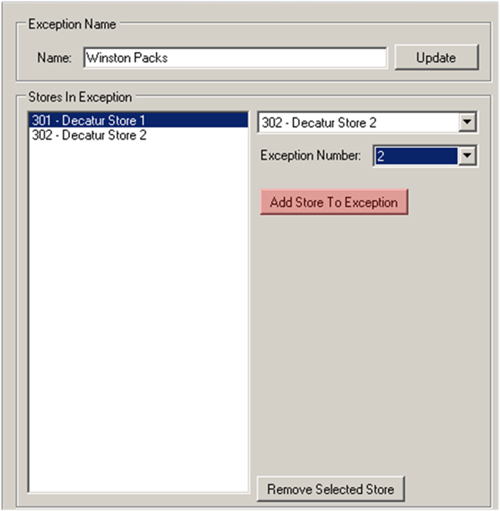
Choose the “Add Store To Exception” button when you have picked and matched the correct store and exception number.
Notice in our example, we have added our 2 stores that will have exceptions for this item. Since we plan to have 2 exceptions, we need to assign the applicable exception number to it’s store. Our example has Store 1 set to “Exception Number” 1 and Store 2 set to “Exception Number” 2. It is not necessary to create an Exception Number for each store; multiple stores can be assigned a singular Exception Number if necessary.
Later, when we choose our item, we will add the price for each exception number. - Next, move down to the “Available Items”section.
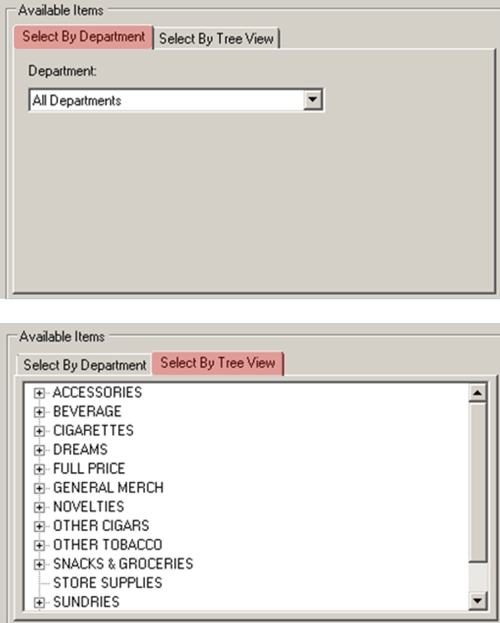
You have two choices for filtering available;Select By Department or Select By Tree View
Department filtering will list every item assigned to aspecific department where the *Tree View option willfilter closer to a specific item level.
*Tree View option is only as good as the information you create and assign to items. For more information on categorizations and Tree View, review the Pricebook document.In our example picture below, we have used Select By Tree View as our filter.
Using the categorizations assigned via Item Details, we are able to narrow down our search for the correct item
- After filtering to your exception item(s), enter the intended exception price(s).

Since our example requires 2 exceptions, we have entered the intended exception price for both. - After highlighting the intended item andentering the applicable price exceptions,choose the “Add Selected Items” button.
If you have filtered to a group of items that will all share a pricing exception, choose the “Add All Items” button.“Add Items Starting With” will add items that match the entered description/name.
Entering “Win” will add all items that currently have a description starting with “Win” to the item exception
“Find UPC” & “Find Description” will populate the item list with items matching the entered parameters.
- After choosing to add your selected items, your worksheet will now resemble the example below. Remember to send exceptions and their changes to your stores via the Queue module!
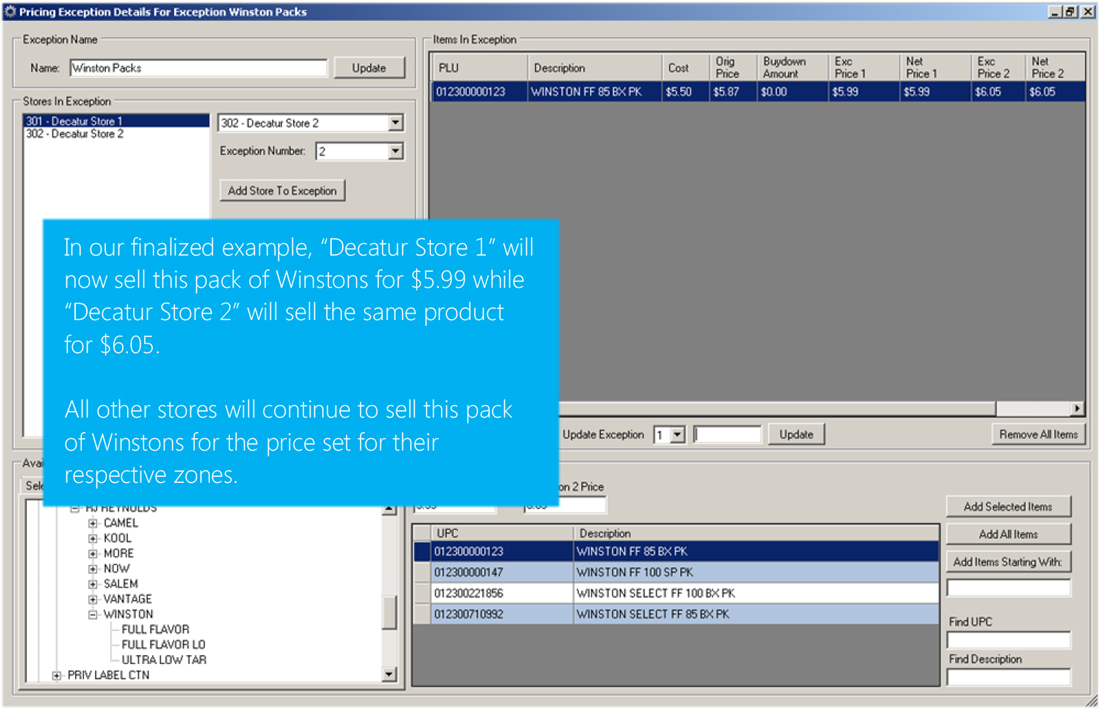
Notice under the “Item In Exception” list, you have a breakout of information for the applied items.
The “Cost” and “Orig Price” fields refer to the Default Zone cost and pricing data. Any current Buydowns are listed as reference for the “Net Price” fields.
The “Net Price” fields are reflective of the final retail price this item will sell for, counting both Buydowns and Exception Pricing.
More detailed information for the results of exception pricing can be found in Item Details under the “Effective Price” hyperlink of your applicable item.
Editing Pricing Exceptions
After creating a Pricing Exception, you may need to edit or remove it. Editing Pricing Exceptions functions much the same as initially creating them.
- Return to the Pricing Exceptions utility via thePricebook module.
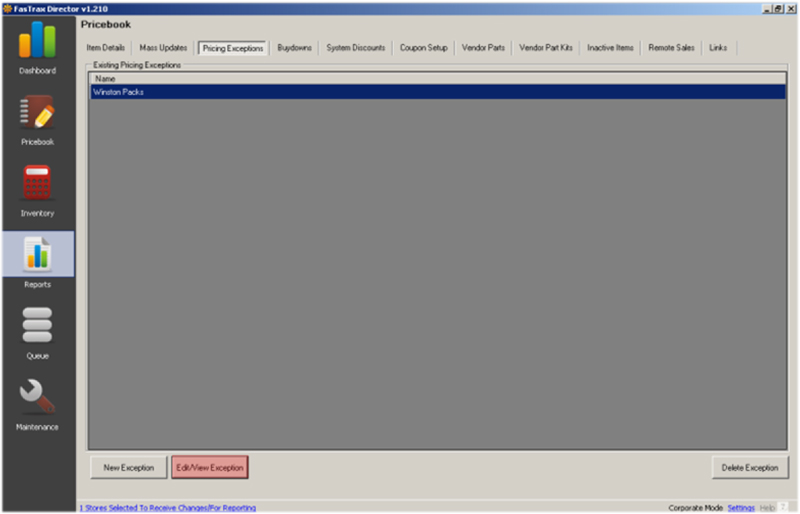
Once there, you will see your existing PricingExceptions listed. Simply highlight theapplicable Pricing Exception and choose the“Edit/View Exception” button located at thebottom-left of your utility window.If you wish to delete an exception, highlightthe applicable Pricing Exception and choosethe “Delete Exception” button. - If you are choosing to edit an existing PricingException, once you have chosen the“Edit/View Exception” button, the worksheetwindow for the applicable exception will open;just as when you originally created it.
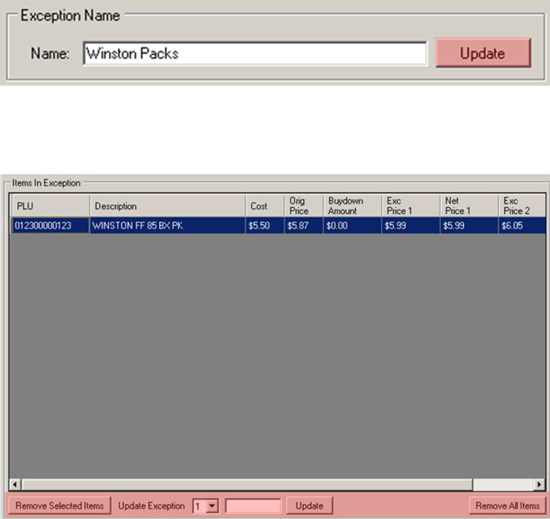
Changes to exceptions will require you to send to stores from your Corporate Queue module before they will take affect at applicable stores.- If you wish to change the name of the exception,this can be accomplished via the “Exception Name”section.
Simply enter the new name and choose the“Update” button. - If multiple items were set, you can remove these viathe “Item In Exception” window.
Highlight the applicable item and choose “RemoveSelected Items”. If multiple items are assigned tothis exception and you wish to remove all, choosethe “Remove All Items” button. - If you wish to change the price for an exception,choose the correct exception number from the“Update Exception” dropdown, enter the new priceand choose the “Update” button.
- If you wish to change the name of the exception,this can be accomplished via the “Exception Name”section.
Effective Pricing
Effective Price is a price-centric informational quick view available via the Item Details module.
After entering the Item Details module and searching for an item, the “Effective Price” hyperlink can be found in the “Pricing Information” section.
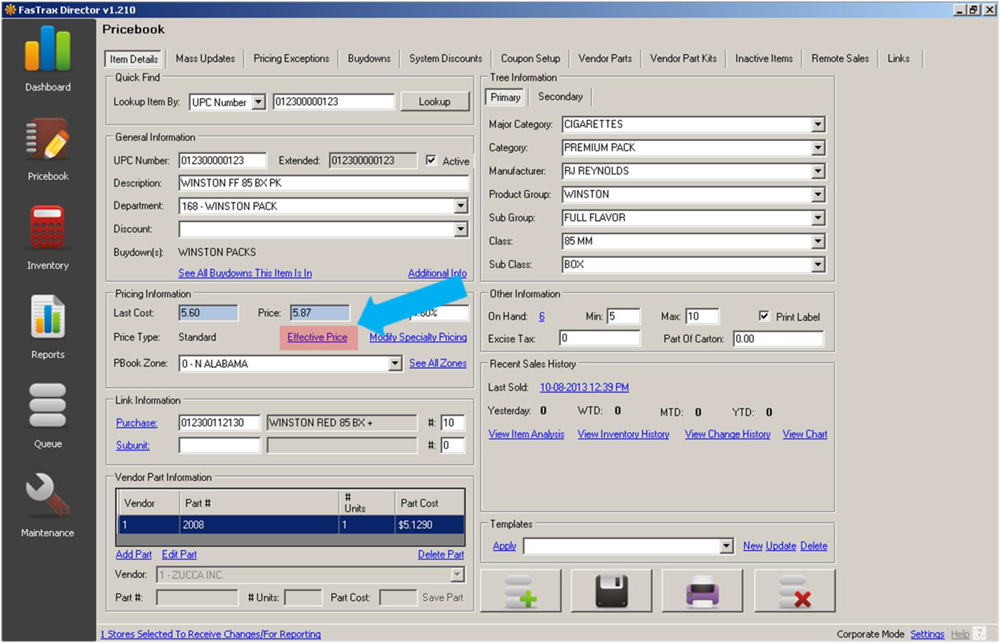
Choosing the hyperlink will display an information breakout similar to the list view in Pricing Exceptions.
This list does provide data such as System Discounts and Margins specific to the applicable item.

Q – Is there a limit to the amount of items I can set to an exception?
A – No, Pricing Exceptions were implemented with families of items in mind. Normally, most, if not all, SKUs of aspecific brand share a price point.
Q – Is there a limit to the amount of exceptions under a definition I can set?
A – Yes, Pricing Exceptions are limited to 5 per definition at the moment. If more exception levels are required, a newdefinition can be created for these items and stores.
Q – Can individual stores control their Pricing Exceptions?
A – No, Pricing Exceptions are intended for corporate use only.
Q – Can a single store setup use Pricing Exceptions?
A – No, Pricing Exceptions are intended for corporate-to-multiple store systems/setups. There are a multitude ofother utilities available to manage pricing for items in single store setups; Item Details, Mass Updates, System Discounts, Buydowns, Mix-Match, Pick-A-Pack, etc.
Q – Will items under a Price Exception still observe Buydowns and System Discounts?
A – Yes, Pricing Exceptions effectively replace the “Retail Price” set for the zone/item (visible in Item Details).Buydowns and System Discounts still apply to items.
Q – Are Buydowns calculated in Effective Pricing?
A – Yes, Buydowns & System Discounts are calculated against the Exception Price to provide you final Effective Price(sell price) and Effective Margin (final price versus cost).
Buydowns
Buydowns – This enables you to schedule either a Buydown or Promotional discount on items. Both types function the same.
A Buydown is a reduction of an item’s retail price derived from a reduction of the item’s cost from the supplier, vendor or manufacturer. These cost reductions are dependent on either a set quantity and/or date range.
A Promotion is a reduction of an item’s retail price for the purpose of eliminating stock or driving product interest.
Examples of this would be:
- The next 50 sold of a certain item are $1.00 off
- An item, or group of items, is $1.00 off for a period of a specific 2 weeks.
- An item, or group of items, is $1.00 for the next 50 sold or next 2 weeks, whichever is completed first
- In the Pricebook module, click on the “Buydowns” Tab.

- This will bring up the “Buydowns” utility.

This utility is separated into three sections; Buydowns/Promo List, Buydowns/Promo Details and Associated Items List.


- To create a new Buydown/Promo, click the “Add/Plus” button.
- In the Detail section, first decide if this is to be a Buydown or a Promotion.

When choosing if this is to be a Buydown or Promo remember, both types operate the same. However, the ability to label a type will assist in record and book keeping.
- Now, begin entering any pertinent information for this Buydown/Promo.

- Choose the applicable Buydown/Promo Style.

- If you are utilizing a Date Range, enter the Start/End dates and times this Buydown/Promo will function.

These dates can be edited at any time allowing you to reuse Buydowns/Promos!
- Once all descriptive details for this Buydown/Promo have been entered, press the “Save” button.

If you are using a By Range setting, enter the Start/End date this Buydown/Promo will honor. When the End Date is reached, no more items will honor this price reduction.
If a Quantity with Date Range is being utilized, the Buydown/Promo will run until either the Quantity or Date is reached, whichever comes first.
Items will now have to be set to this Buydown/Promo
Items can also be added to Buydowns/Promos via Mass Updates!
- Press the “Add Items To Buydown” button.

- This will bring up the “Buydowns” utility.

This utility is separated into three sections; Buydowns/Promo List, Buydowns/Promo Details and Associated Items List.

- To add items to a Buydown/Promo, first filter to the item(s) you wish to add. This can be accomplished by either Department or Tree View.

All items must be designated to a Department, however, using the Tree View with categorized descriptions makes filtering especially simple. This process is similar to assigning Buydowns/Promos via Mass Updates.
- Filtered items will appear in the “Available Items” List screen.

From this list, highlight applicable items you wish to add to this Buydown/Promo.
Remember, holding the Ctrl Button while performing Mouse Clicks will allow you to highlight multiple items! - Once items have been highlighted, press the “Add Selected Items” button.

Add All Items – This will add all items contained in the filter list.
Add Items That Start With – Type in a UPC or Description and items from the filter list fitting this will be added.
Find UPC – Enter a UPC and the item will be located in the filter list.
Find Description – Enter a description and items meeting this will be located in the filter list. - Added items will appear in the “Items In Selected Buydown” section.

- When all applicable items have been added, press the Close/X button located in the top right corner of the Add Items screen.

Overview of System Discounts
System Discounts are methods of applying reduced pricing for items based on quantities and priorities. A number of styles can be used to build specific campaigns based on dollars, percentages, and/or quantities utilizing start and stop date ranges.
Dollar and percentage discounts reduce applied items by entered amounts, while the “Buy x Get y Free” method will remove the lowest priced item within the applied group. The “x Items For y Dollars” method will reduce all items by the appropriate amount(s) to match a targeted group price (e.g. 3 for $1.00). Since System Discounts can be set by priority (application order), items can be applied to multiple discounts allowing the flexibility to utilize multiple discounts in a single transaction as thresholds are met.
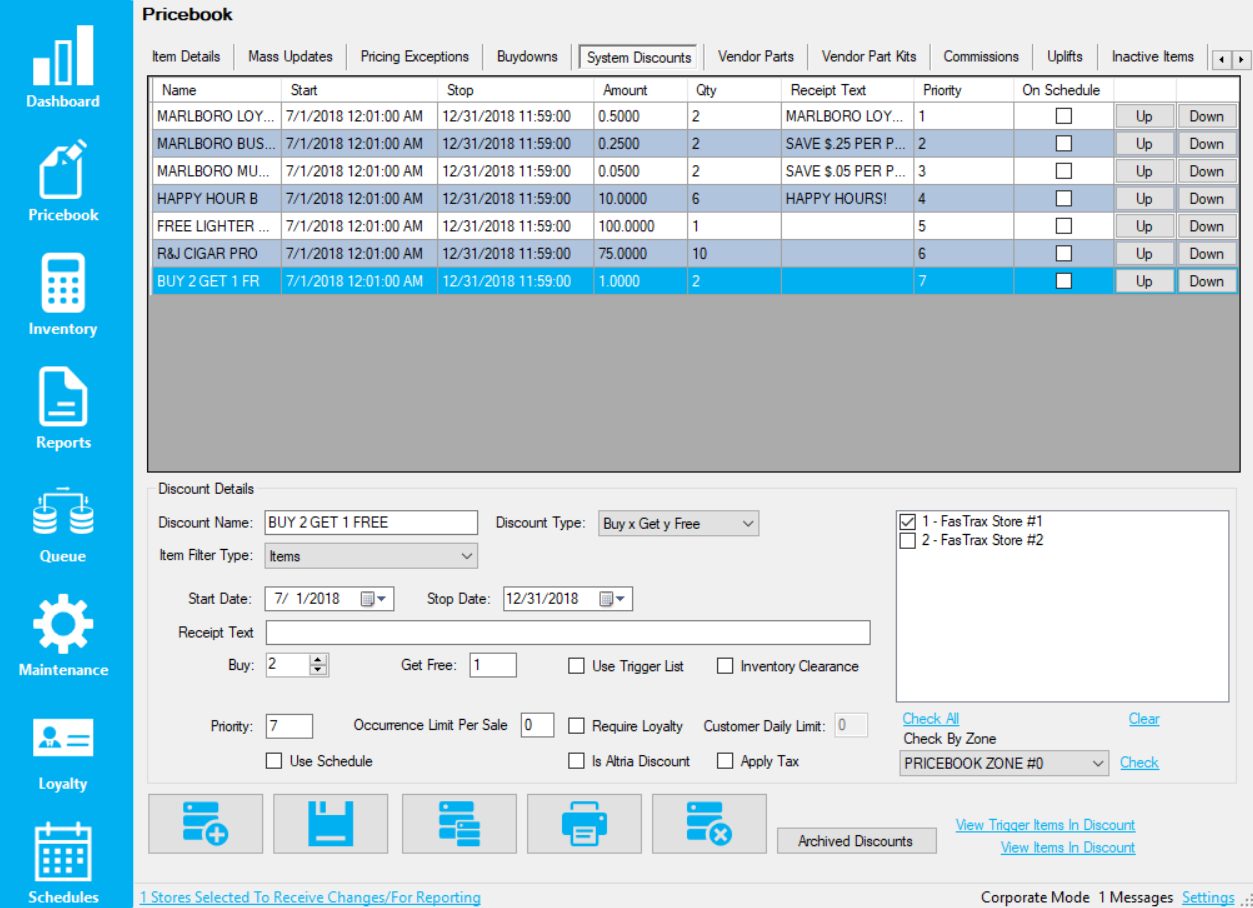
Creating a System Discount
This guide will illustrate the “Buy x Get y Free” method of System Discounts. The free item will automatically be the lowest priced.
Other System Discount Methods:
$ Off Each Item – when the quantity is met, a dollar amount is removed from each item
% Off Each Item – when the quantity is met, a percentage is remove from each item
X Items For y Dollars – when the quantity is met, each item is reduced to equal a set amount (2 for $1, 3 for $5, etc)
Buy x Get y % off – when the buy quantity is met, gives a percent discount off a specified number of items
- In Director, choose the “Pricebook” module

- Then, choose the “System Discounts” tab

- Choose the “Add” button

If you are editing an existing system discount, simply click to highlight a discount in the grid and edit its values in the “Discount Details” portion of the screen. - In the “Discount Details” portion of the screen, enter the parameters you wish for the discount to follow
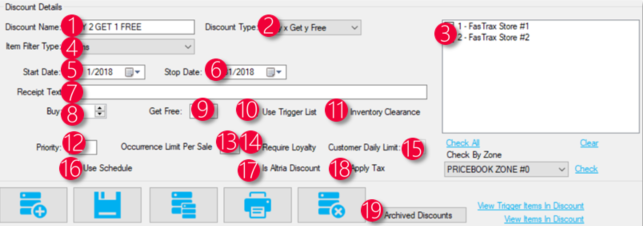
- Discount Name – This field is the name of your choosing to identify the discount
- Discount Type – This field is the type of discount assigned, which is one of 4 different types
- Store Selector – These checkboxes allow you to assign specific stores to specific discounts
- Item Filter Type – This filter dropdown allows you to choose the method of what items are in the discount, either choosing specific items (that are assigned manually) or by a department/tree categorization of item(s)
- Start Date – The date the discount is set to start
- Stop Date – The date the discount is set to stop
- Receipt Text – When the discount is triggered, what text will be on the receipt that is visible for the customer
- Buy – The quantity needed to be bought on the discount types of “Buy x Get y Free” and “x Items For y Dollars”. On the discount types of “$ Off Each Item” and “% Off Each Item”, this field is labeled “Qty”
- Get Free – The number of free items when the “Buy” amount is reached. On the discount type “x Items For y Dollars”, this field is labeled “For” and it expects a dollar amount. On the methods “$ Off Each Item” and “% Off Each Item”, this field is called “$ Off Each Item” and “% Off Each Item” respectively
- Use Trigger List – When checked, the discount will not fire until the triggered amount of items is purchased (this enables a new field called “Trigger Qty” where this value is placed)
- Inventory Clearance – Marks the discount to be automatically archived whenever the item(s) within it are at a 0 QOH (clearing inventory out)
- Priority – The prority level of the discount. The lower the numberical value, the higher on the priority the discount is
- Occurrence Limit Per Sale – The number of times a discount can be applied in a sale
- Require Loyalty – Flags the discount to be a loyalty-customer only discount
- Customer Daily Limit – Limits the discount to be only triggerable a certain number of times in a day for a loyalty customer
- Use Schedule – Flags the discount to only trigger on specific days/times of the week. This makes a hyperlink called “Manage Schedule” visible, where the days/times can be set
- Is Altria Discount – Flags the discount as an Altria funded discount
- Apply Tax – Determines if tax is charged before the discount is applied or after
- Archived Discounts – Shows a list of all discounts that have been previously archived
Choose “Save” when complete

You can view what items are in what discounts, as well as trigger items by choosing the appropriate hyperlink: “View Trigger Items In Discount” or “View Items In Discount”
Managing Discount Schedules
Once a system discount is created, a schedule can be applied to the discount in order to limit it to only being applied at certain times or on certain days of the week. This is an optional step, and only needs to be applied if the discount is not meant to be applied during all hours and all days of the week.
- With a discount selected, click the “Use Schedule” box to put a check in the box and reveal the “Manage Schedule” hyperlink

- Choose the “Manage Schedule” hyperlink to bring up the “Choose Availability” window
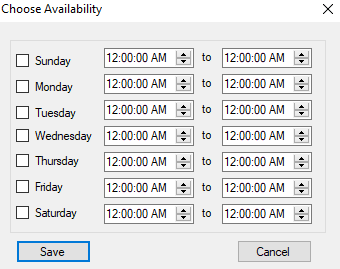
- Check the boxes for the days and adjust times for each day to your need, and then choose save

- Finally, click the Save button to save the discount.

Applying Items to System Discounts in Item Details
- After logging into Director, choose the “Pricebook” module

- Within “Item Details”, navigate to the applicable item and choose the “Manage Discounts” hyperlink

- This will open the “Discount’s Item Is In” window
- From the discount dropdown
- Choose the applicable discount name
- Choose “Add to Discount”
- Choose “Close”
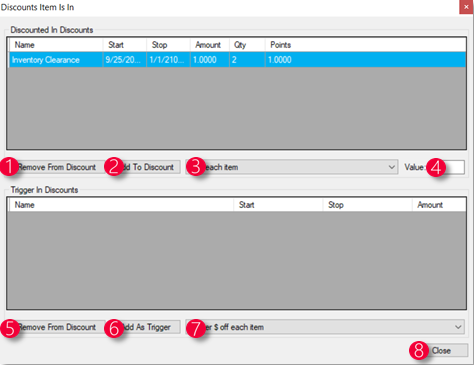
1. Remove From Discount – Removes the item from the selected “Discounted In Discounts”
2. Add to Discount – After selecting the system discount from the dropdown (4), choosing this will add the item to the system discount
3. System Discount Dropdown – Allows the specific system discount selected to be added when pressing the “Add to Discount” button
4. Value – A multiplier that multiplies the system discount value by the number in this field
5. Remove From Discount – Removes the item from the selected row in “Trigger In Discounts”
6. Add As Trigger – After selecting the system discount from the dropdown (7), choosing this will add the item as a trigger item in the system discount
7. System Discount Dropdown – Allows the specific system discount selected to be added when pressing the “Add As Trigger” button
8. Close – Closes the “Discounts Item Is In” window
- Choose “Save” when complete

Items can also be removed by following the above steps but instead of adding, choosing the options to remove.
Always remember to save your changes, and if in a corporate environment to send the Queue records to the applicable store(s).
Applying Items to System Discounts in Mass Updates
- From within Director, choose the “Pricebook” module then “Mass Updates” from the menu ribbon


- Within “Mass Updates”, filter to the applicable item(s) and choose the “Utilities” tab from the bottom ribbon
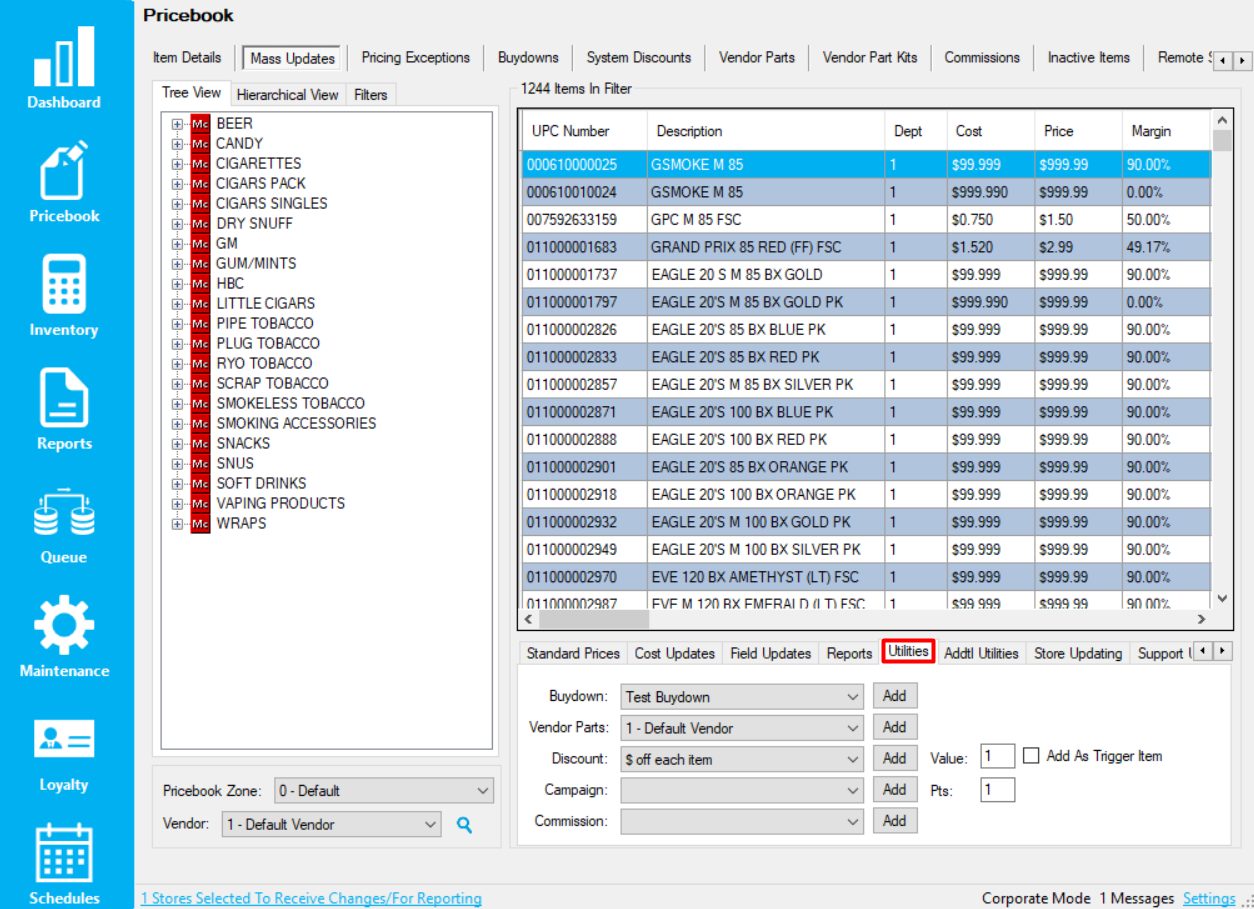
- From the “Utilities” tab
- Choose the applicable discount
from the “Add To Discount”
dropdown menu - Verify the “Value” intended and
choose to check the “Add As
Trigger Item” if needed

- Choose the applicable discount
When using Mass Updates, make sure to filter items first and verify that only the intended items are filtered.
If a mistake occurs, you can remove items from System Discounts by using the “Addtl Utilities” tab.
Removing Items from System Discounts in Mass Updates
- From within Director, choose the “Pricebook” module then “Mass Updates” from the menu ribbon


- Within “Mass Updates”, filter to the applicable item(s) and choose the “Addtl Utilities” tab from the bottom ribbon
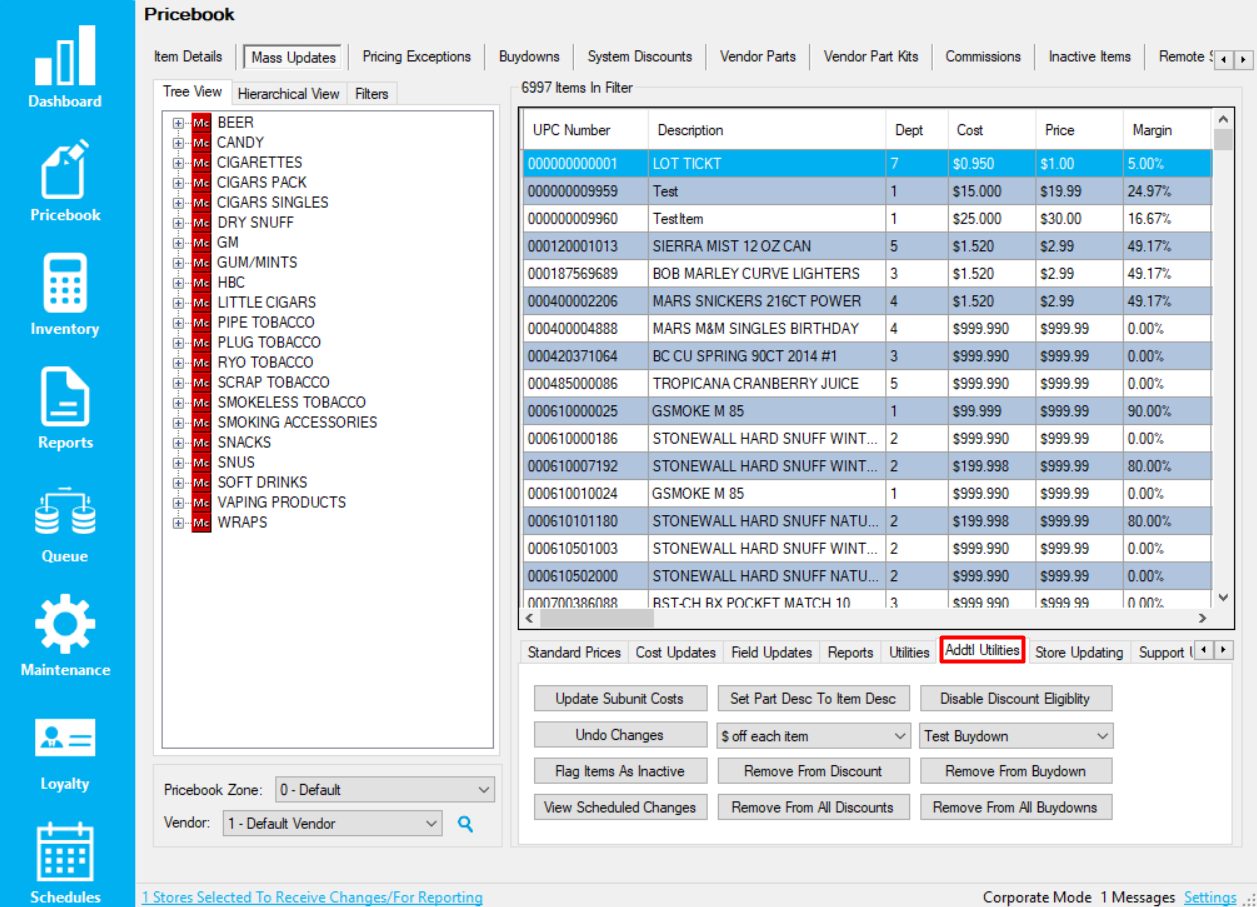
- From the “Addtl Utilities” tab
- Choose the applicable discount
from the “Remove From Discount”
dropdown menu - Choose the option “Remove
From All Discounts” to remove
the item from every discount it
is in.
- Choose the applicable discount
When using Mass Updates, make sure to filter items first and verify that only the intended items are filtered.
If a mistake occurs, you can add items back to the discount by following the previous page.
Flagging Items as Ineligible for System Discounts
- After logging into Director, choose the “Pricebook” module

- Within “Item Details”, navigate to the applicable item
and review the “Eligible For Discounts” checkbox- If the checkbox is check, system discounts can be
applied to the item - If the checkbox is not checked, system discounts
will not be applied to the item, even if it is in
a system discount
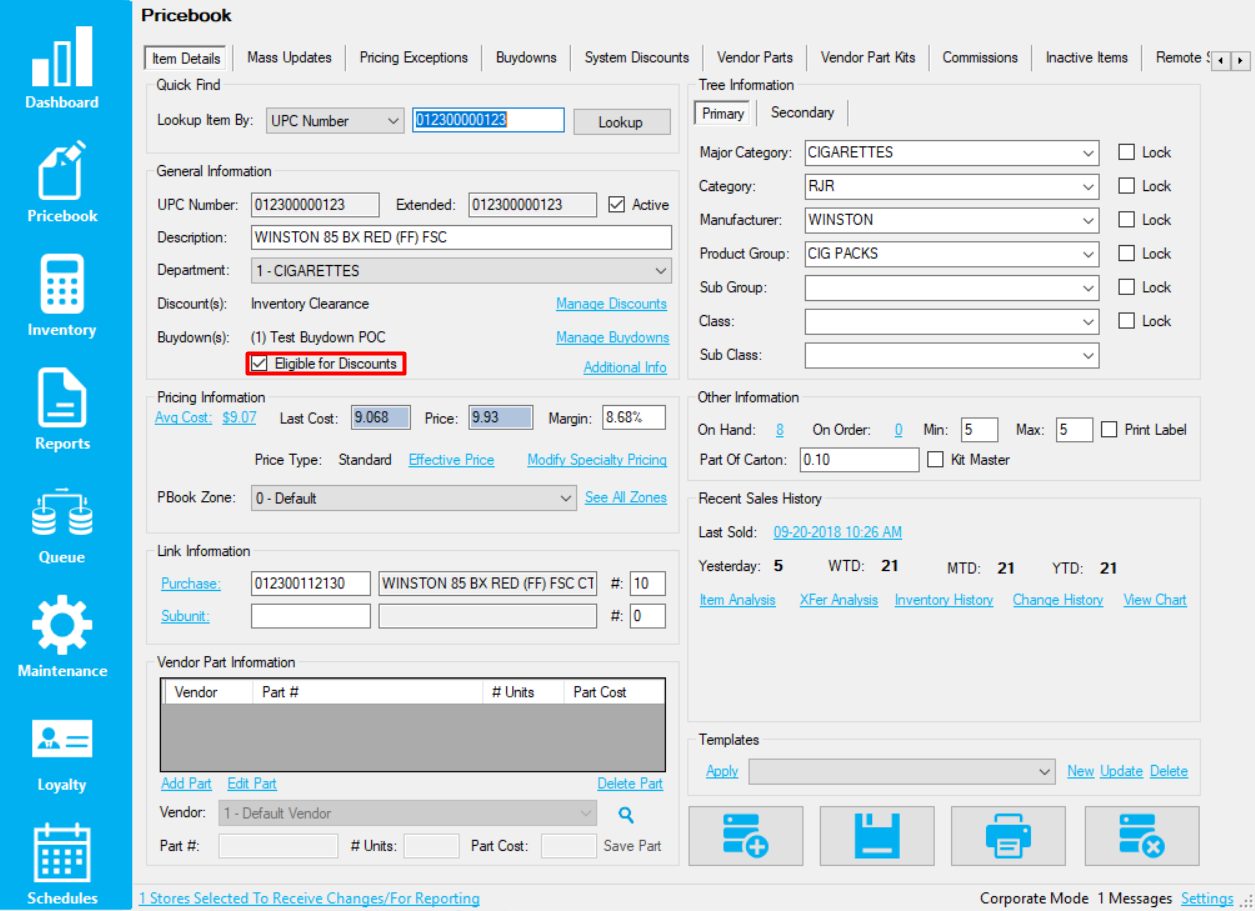
- If the checkbox is check, system discounts can be
Setting up Vendors
To receive items from vendors through FasTrax, vendor(s) will need to be set up. Setting and associating vendors will allow you to create and receive POs (Purchase Orders created by Store) as well as receive vendor invoices.
Vendors whom you will be utilizing EDI with will need to be created including their EDI information. This is done through the EDI Setup utility in Vendors. More information for this can be found in the EDI section HERE
Large amounts of items can be assigned Part Numbers if the applicable vendor(s) supply a properly formatted file containing these Part/Item Numbers. For more information on compatible formats, speak with FasTrax Support.
- After logging into the Director, choose the “Maintenance” module.
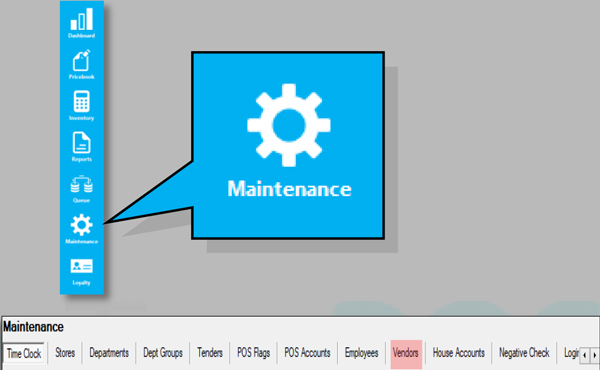
- Choose the “Vendor” tab from the options listed along the top bar.
- This will open the “Vendors” utility.
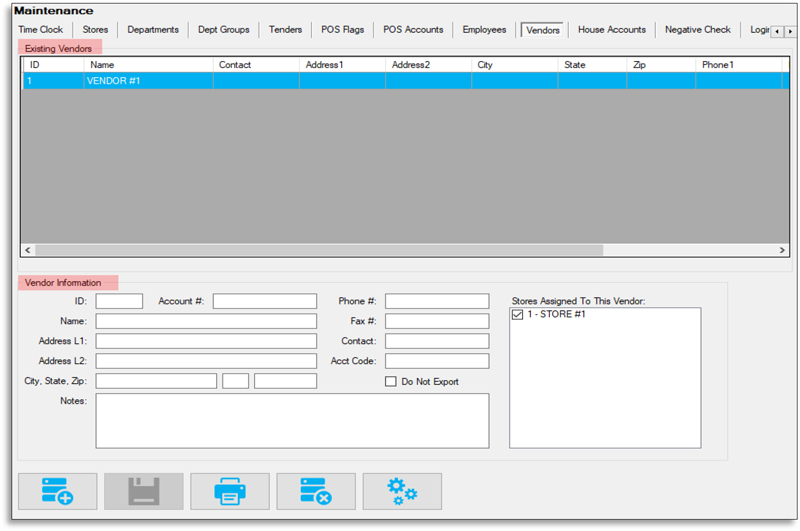
This utility is separated into two sections; Existing Vendors and Vendor Information.
Existing Vendors

Created Vendors are listed here. To edit these, highlight and edit through the Vendor Information portion of this utility.
Vendor Information
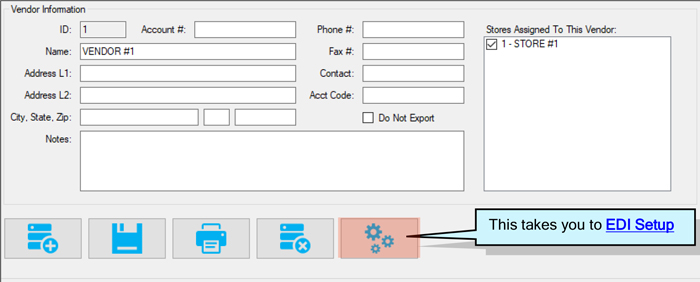
Enter vendor information in this section. A Vendor ID is automatically assigned. However, this ID can only be edited before saving. A Vendor Name is the only detail which must be added. All other information is entered at your discretion. Assign store(s) to appropriate vendors. - To add a new Vendor, click the “Add/Plus” button.

- Enter pertinent vendor information. The Account # is in reference to a number you may already utilize for current accounting information.
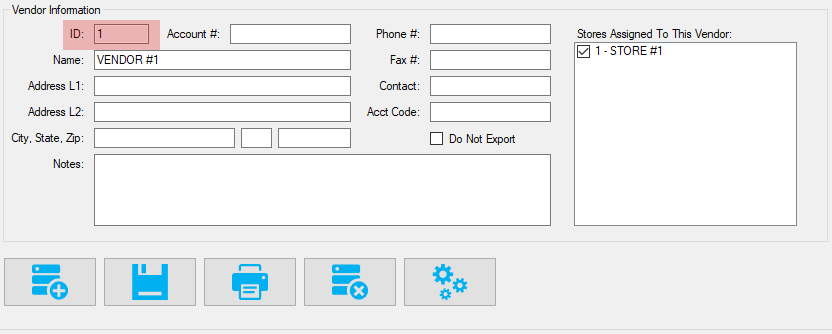
The ID is auto assigned when the “Add” button is pressed. However, before saving, this ID can be edited and/or changed to whatever you deem applicable.
IDs CANNOT be changed after the Vendor is saved. - Before pressing the “Save” button, confirm the entered information is correct for this Vendor.


Vendor information can be edited after being saved. Remember, the only detail which cannot be changed after saving is the Vendor ID.
To edit, simply return to the Vendor utility and highlight the Vendor you wish to edit. Press the “Save” button after changes are completed. Existing Items in your Pricebook will retain edited Vendors.

Newly added/saved vendors will now appear in the “Existing Vendors” list.
To edit, simply highlight and change anything in the “Vendor Information” section requiring attention. Press the “Save” button once you are finished editing.
Assigning Vendors to Items
When utilizing vendors, items must be assigned to vendors before creating Purchase Orders and receiving items via Vendor EDI.
These assignments are made through Item Details, Vendor Parts, or Mass Updates.
These utilities are used to assign Part Numbers to items. These Part Numbers, by default, are the item’s UPC. However, actual Vendor Part/Item Numbers must be entered before generating orders and receiving EDI.
Item Details – Assigning vendors through this utility is an item-by-item basis. Vendor Name and Part/Item Number are the only details available for entry.
Vendor Parts – This utility allows you to enter the most complete vendor detail for items.
Mass Updates – Through Mass Updates, large numbers of items can be assigned Vendors and Part Numbers, however, the part numbers assigned will be default UPC numbers. More editing may be required if specific Vendor Part/Item Numbers are required for generating re-orders and receiving EDI.
Assigning Vendors via Item Details
- After logging into the Director, choose the “Pricebook” module.
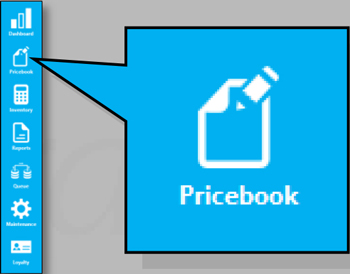
- Enter the UPC Number of the item you intend to assign a Vendor.
Press
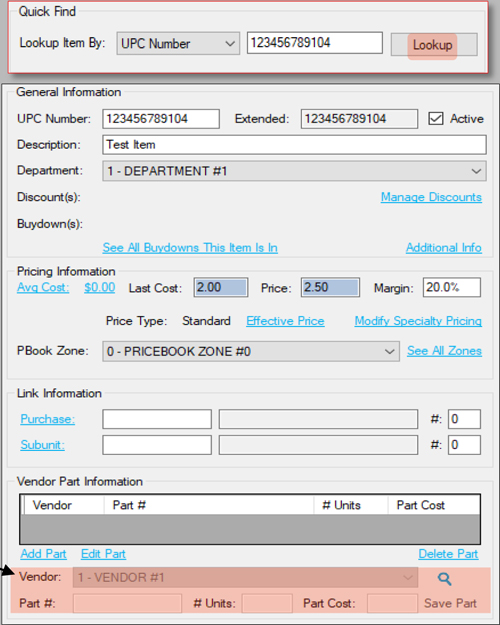
After pressing the “Lookup” button, if the item exists, information for the item will populate the Information sections.
If no item exists, you will need to create it. Please see “How to Add and Edit an Item” for more information.
You will be entering information in the “Vendor Part Information” section located at the bottom of the utility.
- Choose the applicable vendor from the drop down in “Vendor Part Information”.
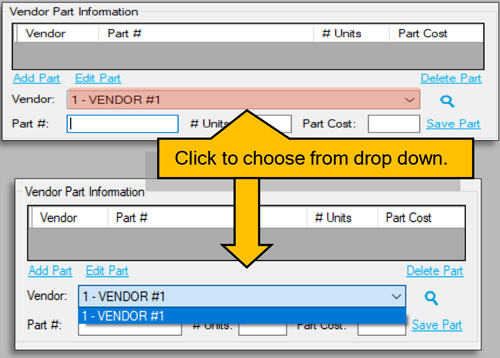
Choose the applicable vendor from this list. - After choosing the proper Vendor, enter the Part Number. Then, enter the Number of Units this Part Number represents of the retail item.

# Units – If multiples of this item are received as a singular unit, this number represents how many units (after being received) this item is separated and sold as.
If you are generating orders or receiving via EDI, this will need to be the Part/Item Number used by the applicable vendor.
If you will be receiving this item via the handheld or Director from a vendor supplied invoice, any number entered will suffice. Since this number can be edited at any time, the UPC is a suggested default number. - Press the “Save” button when finished.

Press Save Part and the Save Icon to save information.Changes can be made through Item Details if necessary. However, an additional Vendor Part record will be created for the edited item(s).
Since multiple records for a single item are not usually intended, editing is best performed through the Vendor Parts utility.
For more information on creating and editing vendor parts through the Vendor Parts utility, proceed to the Vendor Parts portion of this manual.
Assigning Vendors via Vendor Parts
Vendor Parts – This utility allows you to enter the most complete vendor detail for items.
Along with a Vendor Part Number, details such as Part Description, Unit Description and can be added/edited.
Removing Vendor assignations or simply removing multiple Part Number records is also a key function of this utility.
- After logging into the Director, choose the “Pricebook” module.

- Choose “Vendor Parts” from the list of utilities in the Pricebook module.

- This will open the Vendor Parts utility.
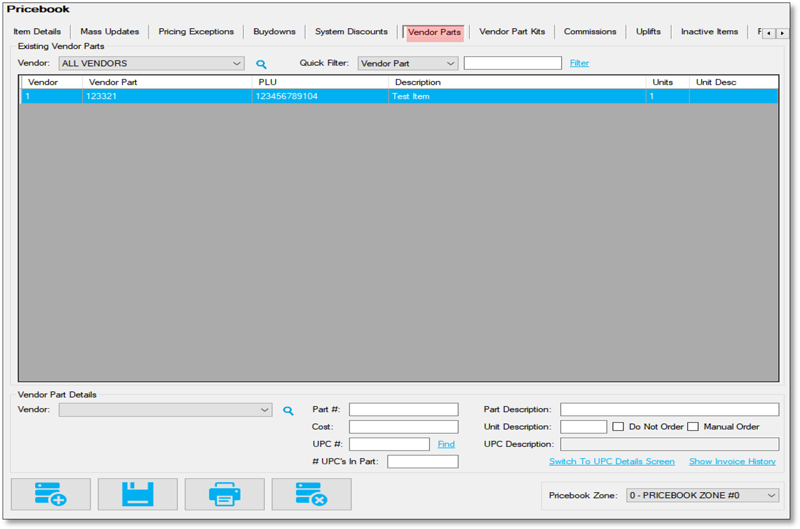
This utility is separated into two sections; Existing Vendors Parts and Vendor Part Details.Existing Vendors Parts
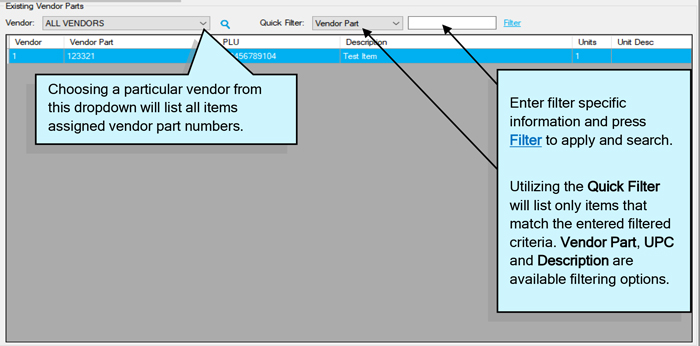
This section enables you to see all items assigned to a particular vendor. Choosing the applicable vendor from the Vendor dropdown will populate the item list with all assigned items. From this list, parts can be removed from vendors. Quick Filter assists in filtering by a particular Description, UPC or Vendor Part to assist in assigning and editing items with vendors.Vendor Part Details

Part # refers to the vendor supplied reference number for this item.Vendor Parts Details provides a section for editing and adding item-to-vendor specific information. After choosing the correct vendor, enter any desired details for the current item. Press
 after confirming entered details.
Pricebook Zone
If an item’s COST is different depending on Pricebook Zone, the correct cost will need to be entered and saved for each applicable Pricebook Zone.For an item, choose the applicable Pricebook Zone from the dropdown, enter/edit cost and “Save”.
Complete for each Zone.
Assigning Vendors via Mass Updates
Mass Updates is the easiest and quickest utility for assigning numerous items a vendor and part number.
When using Mass Updates to assign Vendor Parts, the utility will associate the filtered items to the Vendor chosen. Items will also be assigned a Vendor Part Number. However, when assigned, these numbers are the items UPC by default. If vendor specific part numbers are required for EDI or re-order, these will need to be edited through either Item Details or the Vendor Parts utilities.
After items are assigned Vendors and Vendor Part Numbers, stores will need to be updated through Store Updating and the “Queue” module.
For more information/assistance on using Mass Updates to assign Vendors, refer to (Add Vendor Parts) of the “Mass Updates” document.
Please remember Mass Updates is a powerful utility and care must be taken before mass editing items.
Always confirm that filters used have resulted with applicable items.
Always confirm the details of changes before applying.
After items are assigned Vendors and Vendor Part Numbers, stores will need to be updated through Store Updating and the “Queue” module.
Vendor EDI Setup
The setup for vendor EDI is based on information provided by your vendor for pulling and receiving invoices.
The steps for EDI involve the vendor placing a specifically formatted invoice in a determined area (server, FTP, email or specific directory) which the FasTrax software pulls from when prompted by the user (you). After importing, the vendor invoice is received in the same fashion as any invoice. Invoice editing is available for EDI invoices.
After checking EDI availability with your vendor(s), FasTrax will need to assist you in the setup of EDI for usage due to the necessary formatting and file path designations.
- The setup for EDI is found under “Vendors” in the Maintenance module.
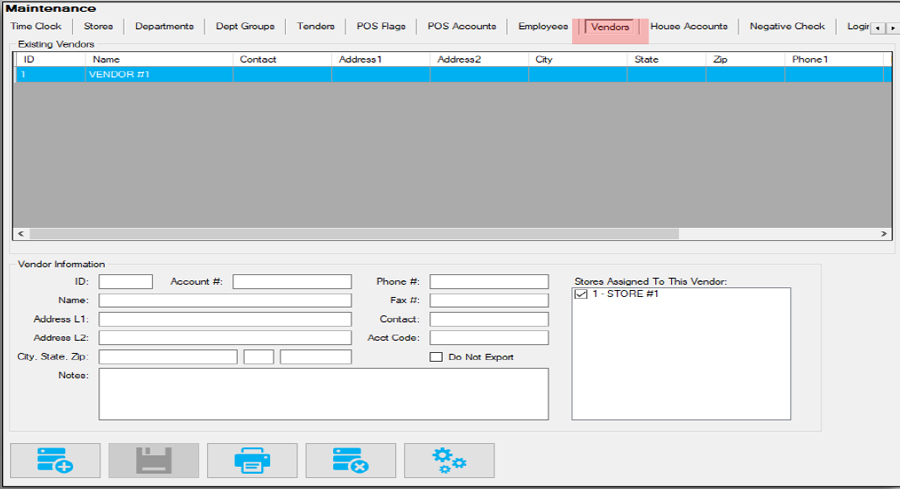
- After choosing the correct vendor from the vendor list, using the “EDI Setup” button opens a menu for inputting specific vendor information/settings used in retrieving EDI invoices.
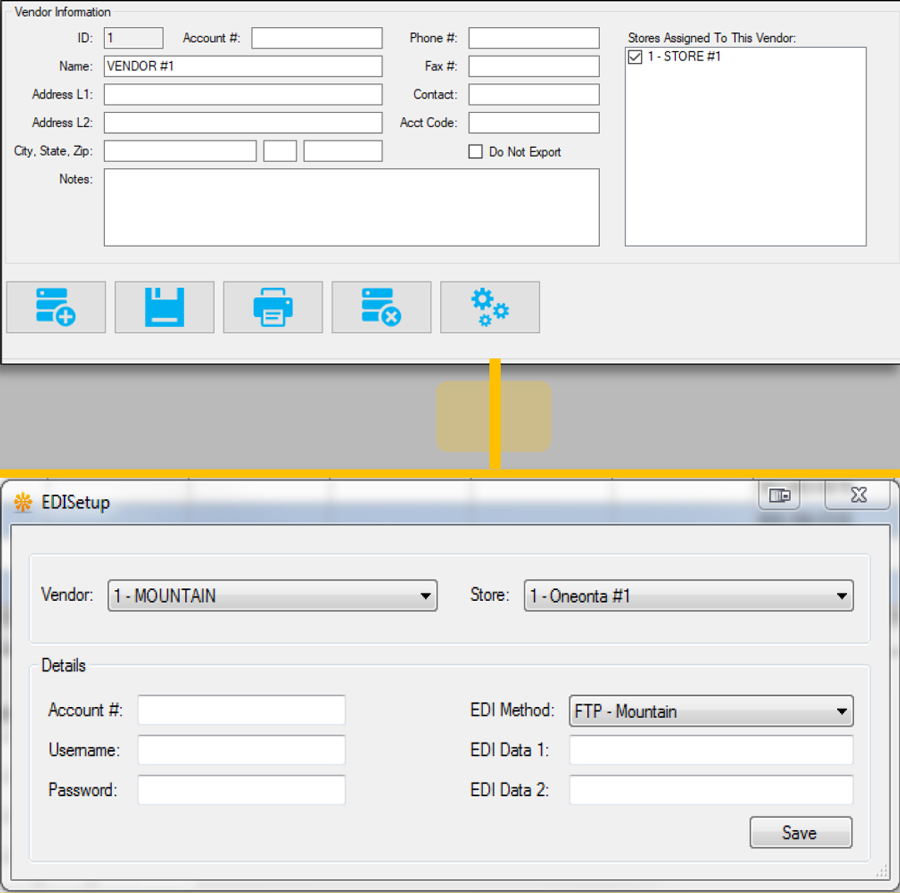
Remember, after checking EDI availability with your vendor(s), FasTrax will need to assist you in the setup of EDI for usage due to the necessary formatting and file path designations.
Overview of Commissions
Commission Campaigns are a simple, fast, and intuitive way of adding a spiff to specific item(s) and keeping track of the payouts to employees that made the sale. Campaigns are reportable for payouts via the Sales section of the Director Reports module.
Campaigns have the option to be tracked at store level directly within the POS. Employees can see how much they have made during a specific time period on each campaign, as well as compare their rank to others both in the store and across the company via the Campaign Leaderboard.
This will surely ignite the competitive spirit of employees and lead to increased sales!
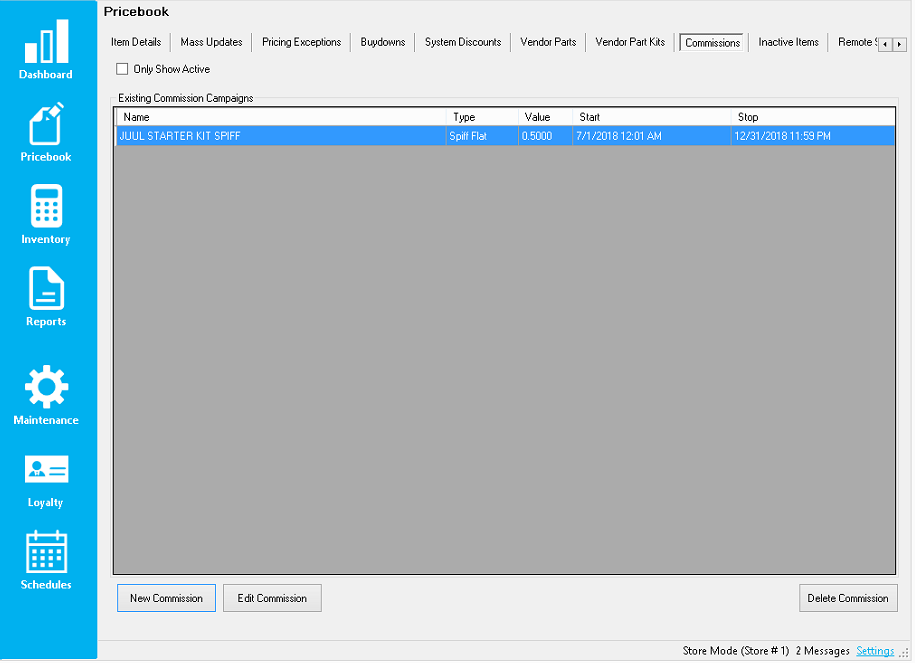
Creating a Commission Campaign
- In Director, choose the Pricebook module.

- Then, choose the Commissions option from the menu ribbon.

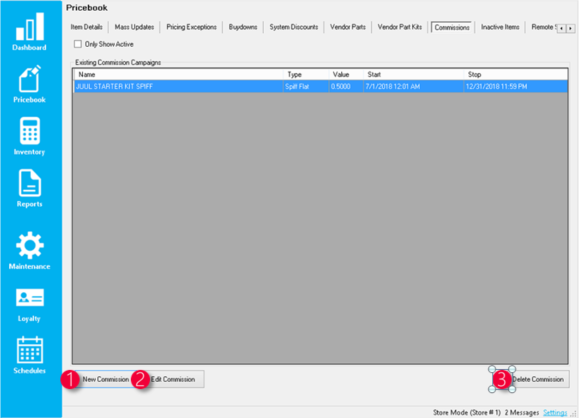
1. New Commission – Pressing this brings up a new window to create a new commission campaign
2. Edit Commission – Pressing this will bring up the edit window to edit the highlighted commission campaign in the grid
3. Delete Commission – Pressing this will delete the highlighted commission campaign in the grid - In the Discount Details section, enter the parameters you wish for this discount to follow.
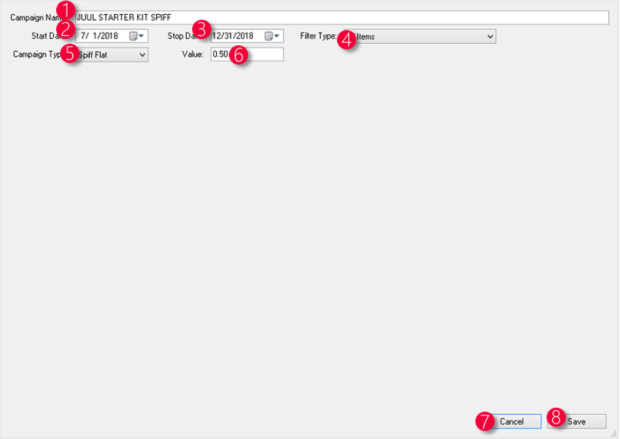
- Campaign Name – Text field to input the name to be used for the commission campaign
- Start Date – What date the campaign starts
- Stop Date – What date the campaign ends
- Campaign Type – What campaign type will be utilized: Spiff Flat gives a flat dollar amount per item sold that is assigned to the spiff whereas Spiff Pct gives a percentage of the retail price of the items sold that are in the campaign.
- Value – The value of the campaign when items are sold
- Filter Type – A dropdown that allows the items contained to be specific items or based on filters
- Cancel – Cancels out of the window, not saving changes
- Save – Saves changes that are made
- Choose Save when complete

Apply Commission Campaign to Items via Item Details
- After logging into Director, choose the Pricebook module.

- Within Item Details, navigate to the applicable item.
Choose the Additional Info link.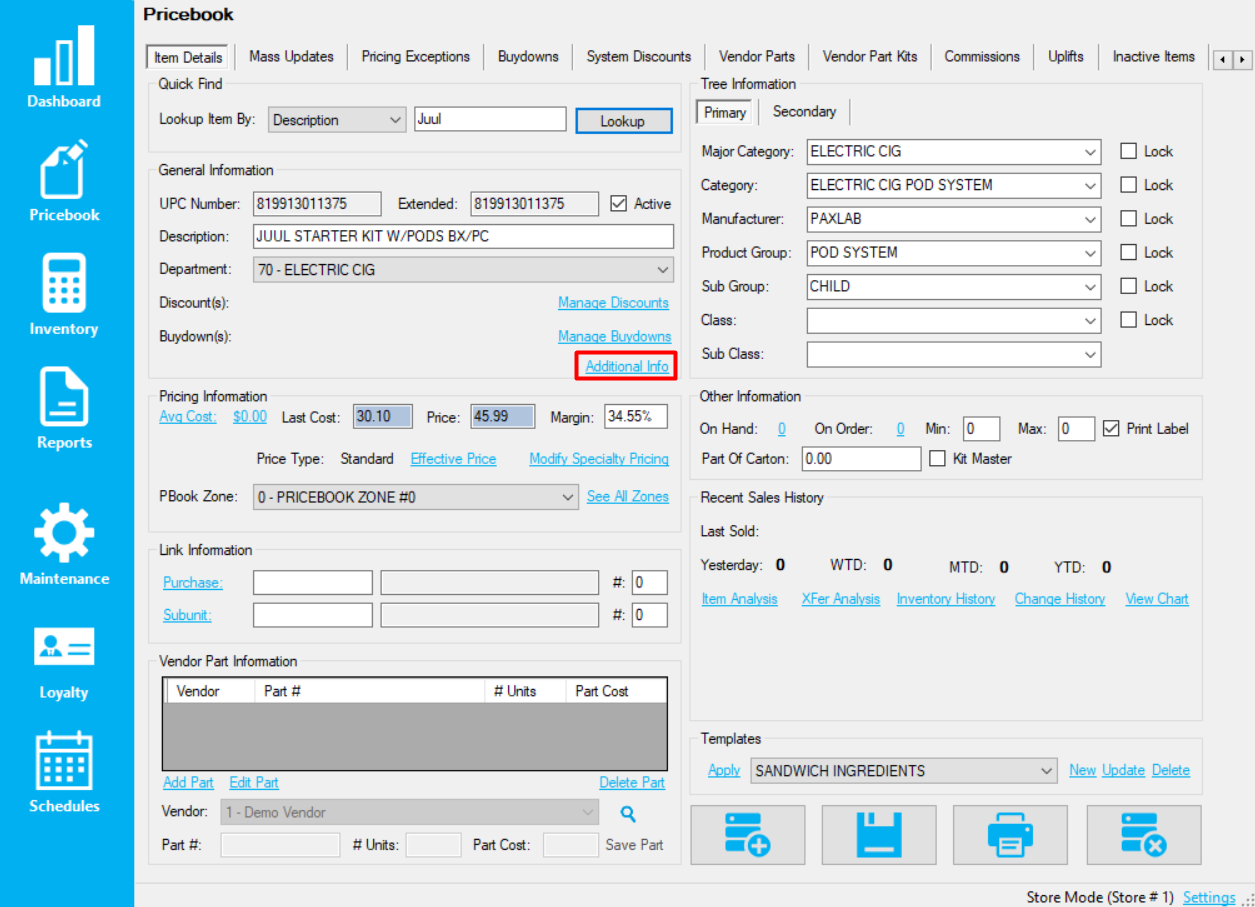
- This will open the Additional Info window.
- From this Additional Info window
- choose the Change hyperlink beside “Commission”
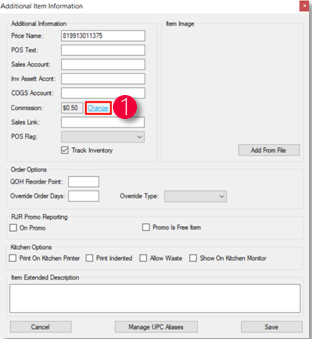
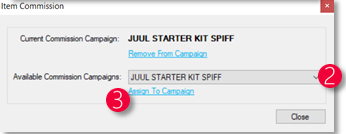
- select the applicable Commission Campaign from the
dropdown - choose “Assign to Campaign”Items can also be removed from campaigns from this same window.
Choose the Remove From Campaign option when in the Item Commission window then Close.
Choose Save to apply changes to items.
- choose the Change hyperlink beside “Commission”
- Choose Close and Save to save all changes

Apply Commission Campaign to Items via Mass Updates
- After logging into Director, choose the Pricebook module then Mass Updates from the menu ribbon.


- Within Mass Updates, filter to the applicable item(s) and choose the Utilities tab from the bottom ribbon.
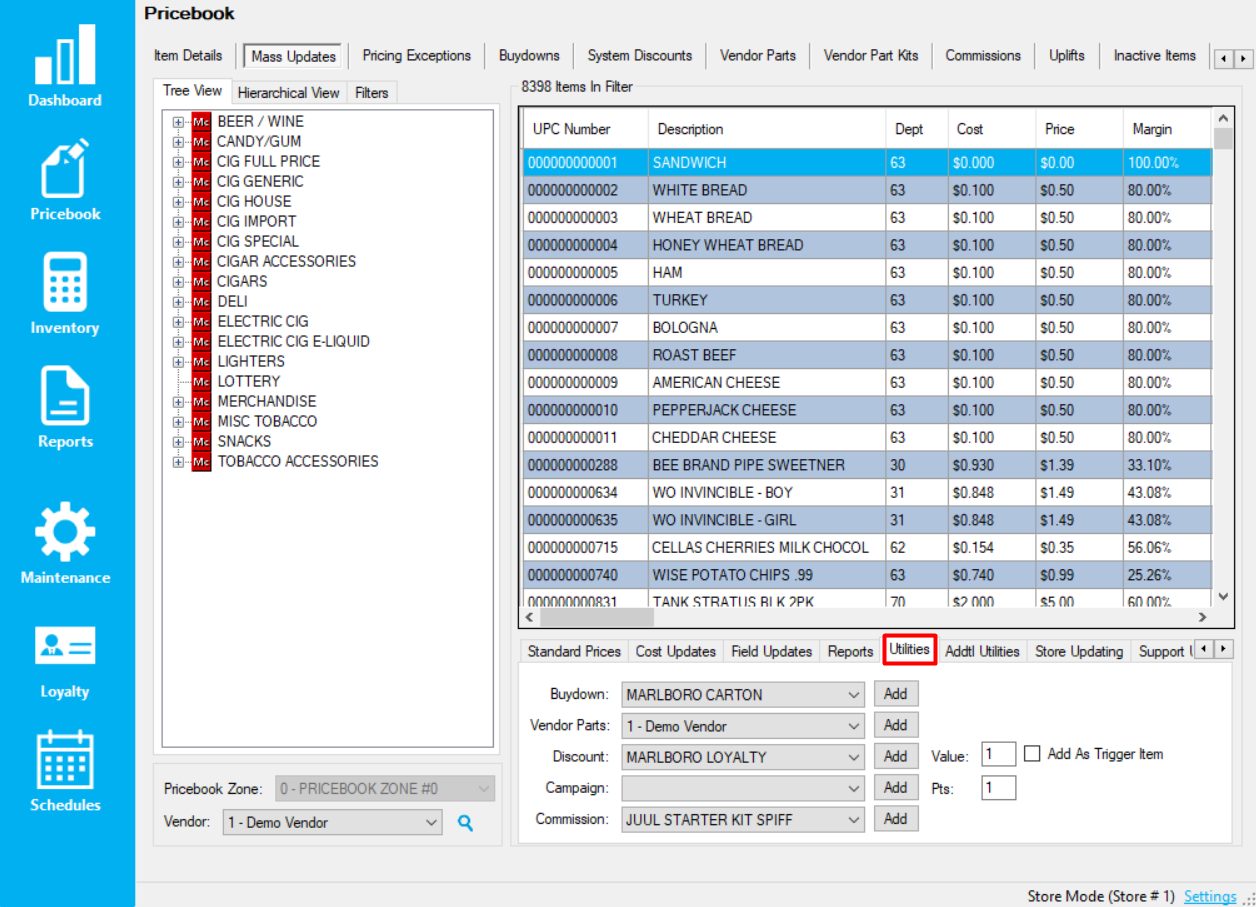
- From the Utilities tab
- choose the applicable campaign from the dropdown menu

- choose Add.
When using Mass Updates, take care to ensure you have filtered to intended items.
If you do accidently apply to unintended items, items can be managed by returning to the Commissions section, choose the Edit Commission link and remove applicable items.
- choose the applicable campaign from the dropdown menu
Required Settings for the POS
- After logging into the POS:
- choose the actions icon
- choose the settings icon
- choose the POS BUTTON EDITOR button
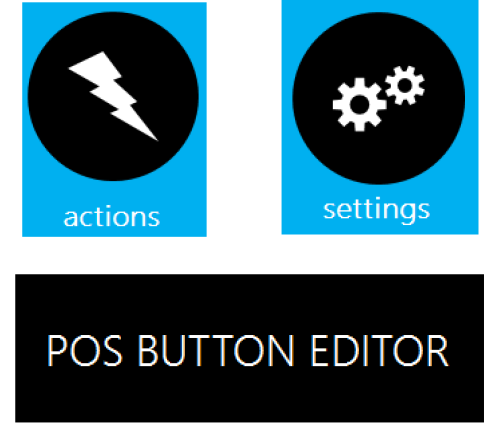
- Choose the applicable panel where the buttons will be placed and
choose EDIT, then choose a blank button on where you’d like the
button to be and choose Edit Button.
- Use the highlighted button types and parameters; non highlighted parameters are by preference
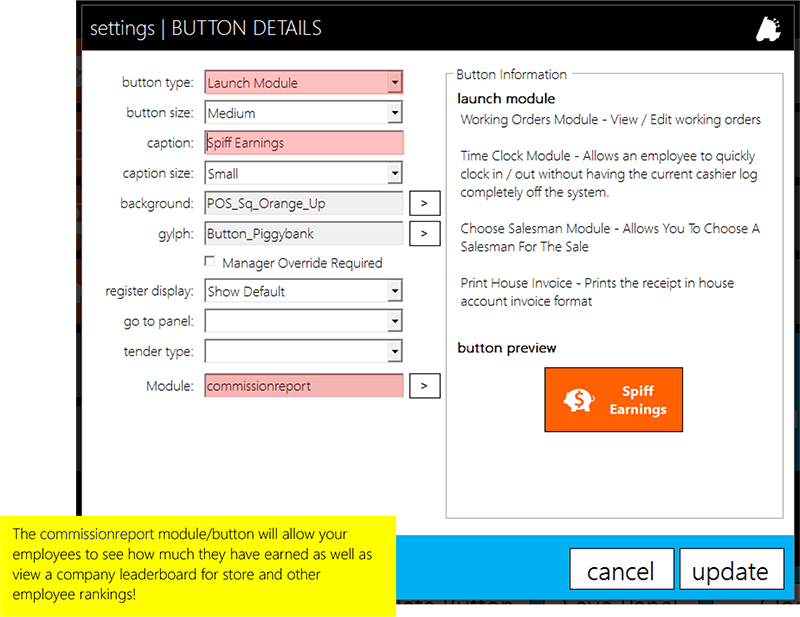
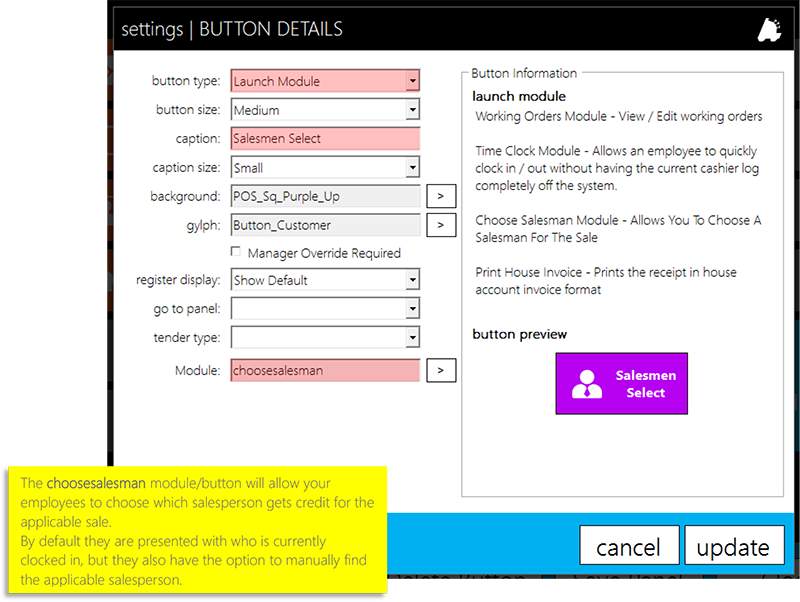
- Choose Update to save the button parameters then Save Panel to save the changes made to the panel.
- Next, open POS Settings by choosing actions, then settings, and finally the SETTINGS button.
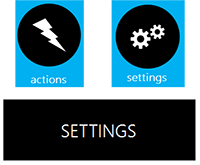
- Finally, navigate to the Misc Register Settings tab and choose the checkbox Prompt For Salesman.
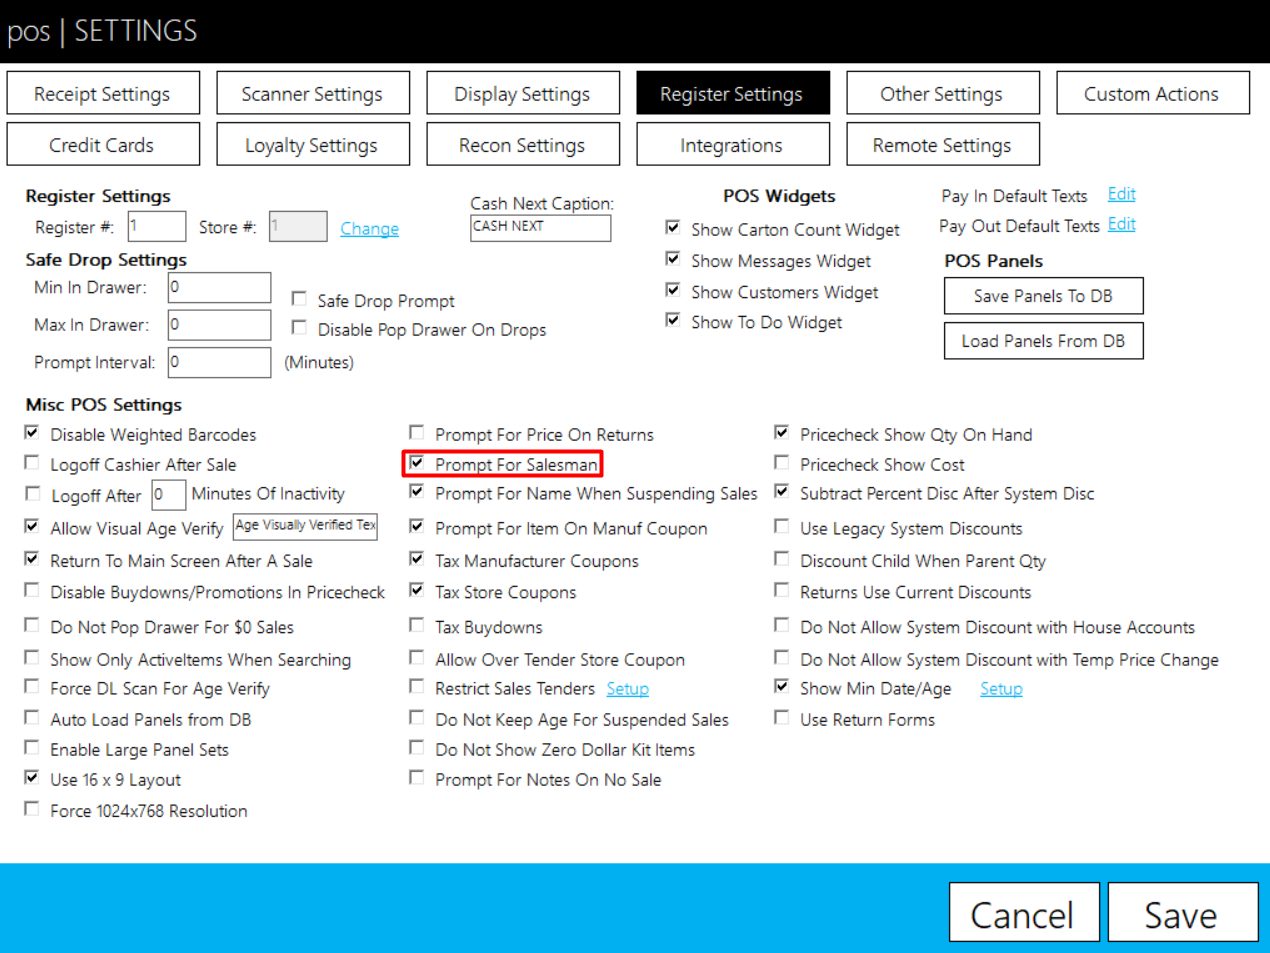
- Choose Save and the POS will close to save the changes made.

Using Weighted Average Cost
Weighted Average Cost enables you to more accurately track and calculate what you have been paying for your store’s inventory. With each new invoice, the average cost is updated automatically in order to give you a clear picture of your average cost for each of your stores.
Once Use Average Cost is enabled, all new invoices will be factored into the average cost. This calculation is weighted based on the number of units received on each invoice. With this feature enabled, sales and inventory reports will reflect the average cost of the item rather than showing the most recent cost (or the most recent cost at the time of the sale in the case of sales reports). Here’s how to get started:
- First, open Director and click the Settings Hyperlink located in the bottom right of the Director window

- This will open the Setttings window. Now check the box for Use Average Cost

- Click the Save button and close and restart Director.

If you need to update Average Cost for one item manually, use the following steps:
- In Director, click on Pricebook. This will show the Item Details Screen.

- Look up an item that the average cost needs to be changed on, and click the Avg Cost hyperlink in the Pricing Information section of the page.

- Now, enter the average cost value in the Manual Avg Cost field and click Update Avg Cost.

In order to manually update average cost for many items at once, use the following steps:
- In Director, go to Pricebook, then click Mass Updates on the menu ribbon.
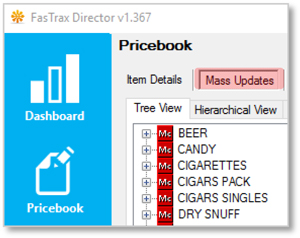
- Filter your Mass Updates grid to the items in question, then click the Avg Cost tab at the bottom right of the Mass Updates screen.

- Enter the new average cost in the Enter a New Value to Update Average Cost To field.
Note that changing the Average Cost manually will cause all previous average cost calculations to be ignored.
Overview of Remote Sales
Remote sales provide a way to create a sale from the back office that can be tendered out in the POS. This allows for orders to be taken over the phone, or from an email without disrupting the flow of business at the register.
Remote Sales are created as suspended sales, so they can be resumed at any time, on any register.
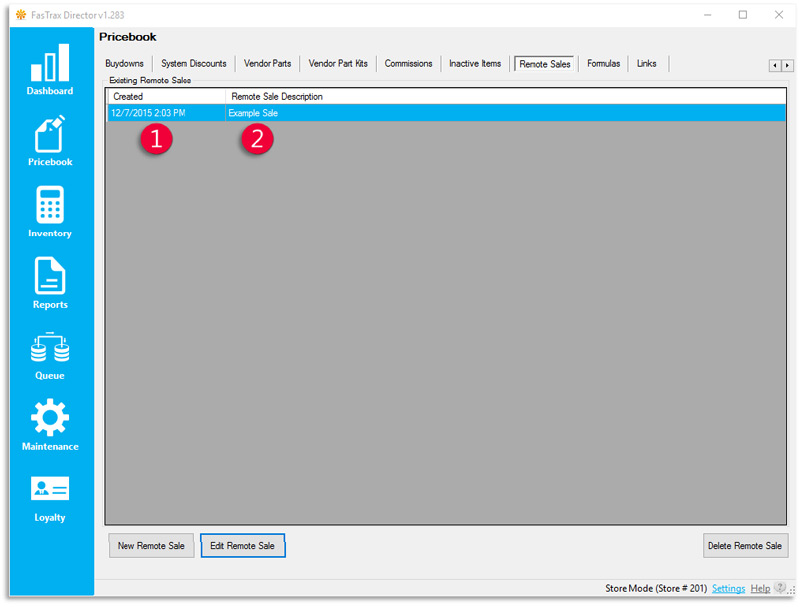
- Created – the date and time that the remote sale was created
- Remote Sale Description – description used to identify the sale at the POS
Creating a Remote Sale
- In Director, choose the Pricebook module.

- Then, choose the Remote Sales option from the menu ribbon.
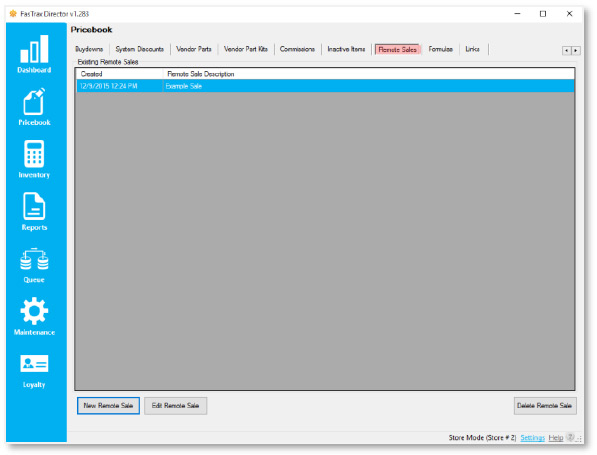
- Choose the New Remote Sale button.

- Enter A Sale Description and select OK.
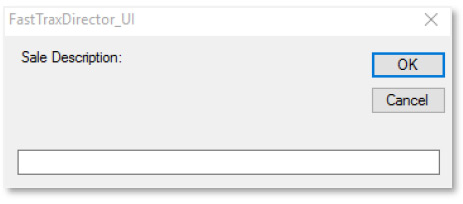
- In the Remote Sales Details window, click the Add Item button.

- Add an item to the sale using the Find Item window.
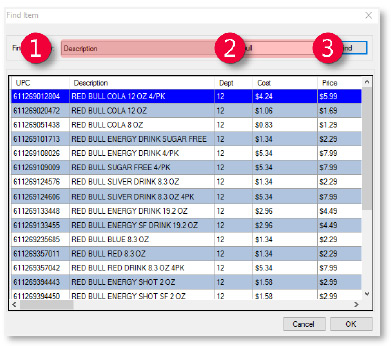
- Choose UPC, Description, or Vendor Part from the Find Items By dropdown.
- Enter the UPC Description or Vendor Part into the search box.
- Click Find to search for the item, select the correct item from the search results, and click OK.
- Enter the Qty to Sell in the box and select OK.
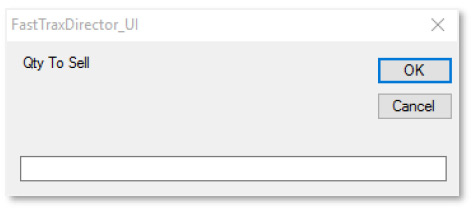
- Repeat steps 6 and 7 until all items are added to the remote sale.
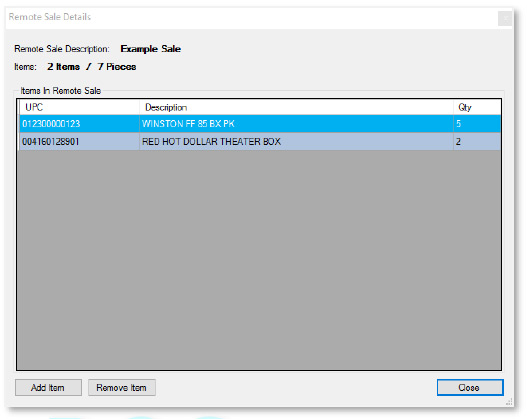
- Click the Close Button on the bottom right of the Remote Sales Details Screen.

- You’re now ready to finish the sale at the POS.Continue to the next portion of this document for POS completion!
Resuming a Remote Sale at the POS
- After logging into POS, Select open POS.
- Within the POS Screen, press the Resume Sale button.
- From the pos | RESUME SALE screen, locate the remote sale and tap it to select
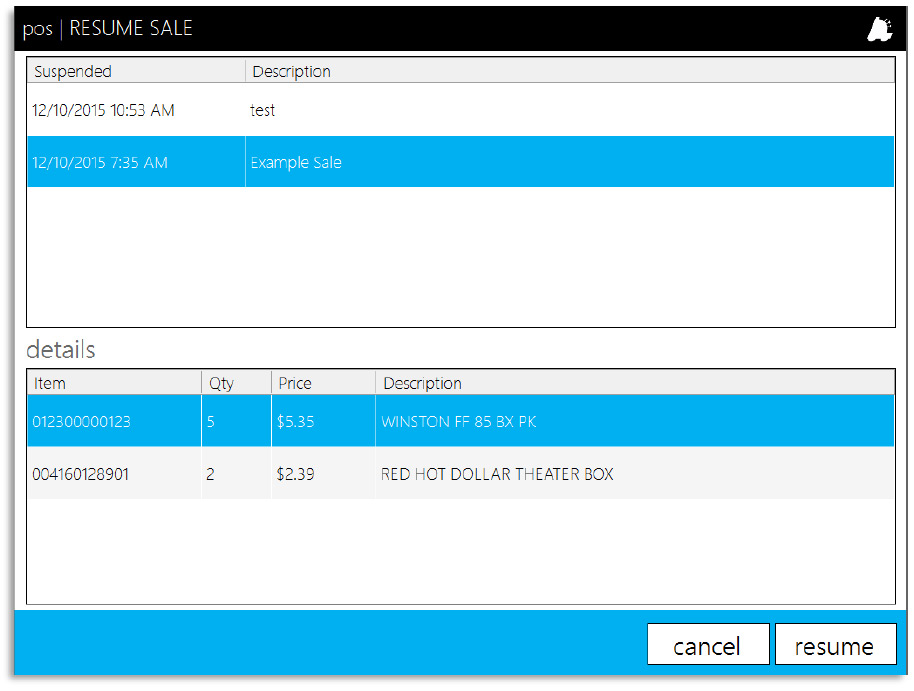
- Tap resume to resume the sale.
- Finish just like a normal sale at the POS
Overview of Pending Transfers
Pending Transfers provide a method for a store to request merchandise from another store. This allows for inventory to be transferred from one store to another while still allowing for the store transferring the merchandise to adjust the transferred quantities before the transaction is complete.
There are three steps to the Pending Transfer process. First, the requesting store creates the transfer and sends it to the store from which they are requesting merchandise. Second, the other store reviews the request and verifies what inventory they can send, and sends the updated request back to the requesting store. Finally, the requesting store reviews the updated transfer, and verifies it against the physical merchandise that the other store has sent them, and applies the transfer to their inventory.
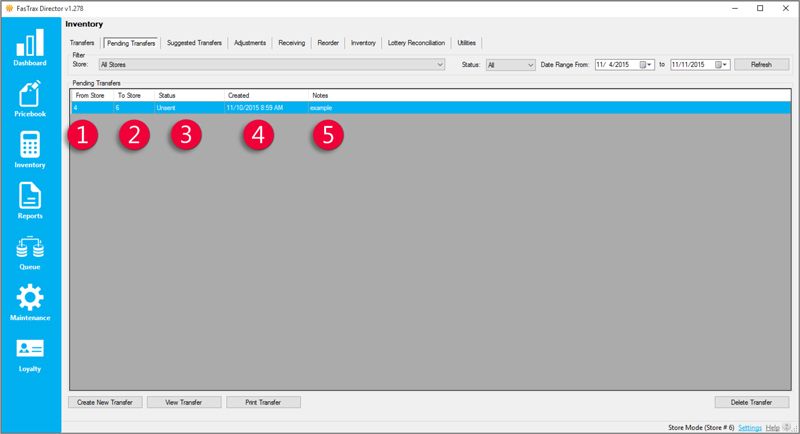
- From Store – The store that the inventory will be coming from.
- To Store – The store that created the request and will have inventory coming to it.
- Status – An indicator designed to tell what step the pending transfer is currently on.
- This will say ‘Unsent’ for a new transfer, or ‘In Progress’ for a transfer request that has been sent.
- Created – The date that the transfer was created.
- Notes – Optional field to add notes for your records and bookkeeping.
Creating a Pending Transfer
- In Director, choose the Inventory module.

- Then, choose the Pending Transfers option from the menu ribbon.
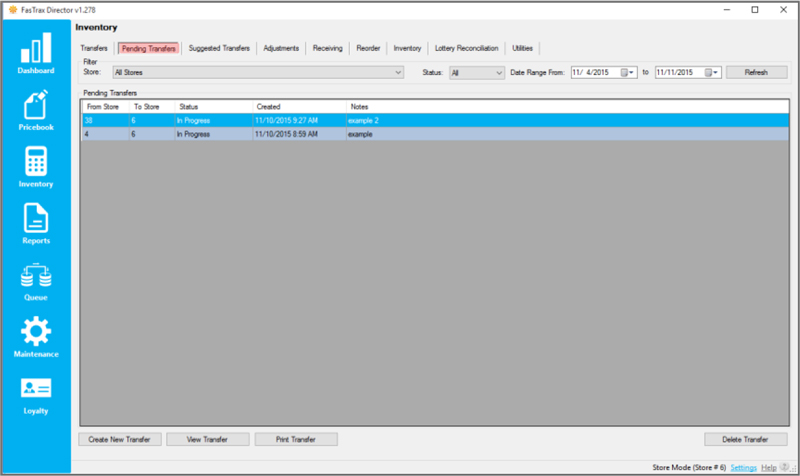
- Choose the Create New Transfer button.

If you already have the transfer created,you can instead select the View Transfer button to edit its contents. - In the New Pending Transfer window, select the From Store using the Dropdown menu, and enter any necessary Notes in the text box.
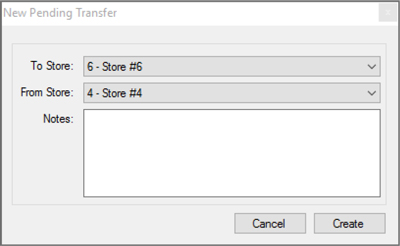
Note that the To Store has defaulted to the current box to the current store, and cannot be changed to anything else. - Choose Create when finished, and the Pending Transfer Worksheet will open.

Adding Items and Sending the Transfer Request
- On the Pending Transfer Worksheet, Select Add Item; this will open the Find Item window.
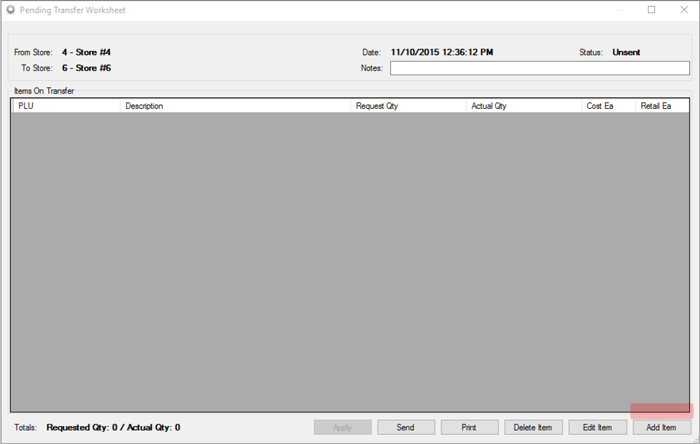
If you already have items on the worksheet, you can Change themn with the edit item button, or remove them with the delete item button. - Type in the UPC Number for the item to be transferred, and click Find.
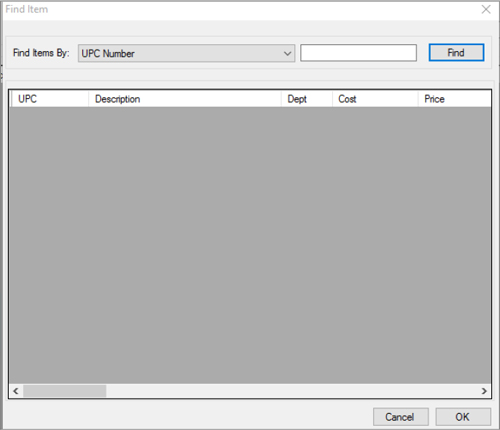
Items can also be located by their Description or Vendor Part Number by selecting the appropriate option form the Find Items By dropdown menu. - Enter the Requested Qty in the Pending Transfer Details window, and click Save.
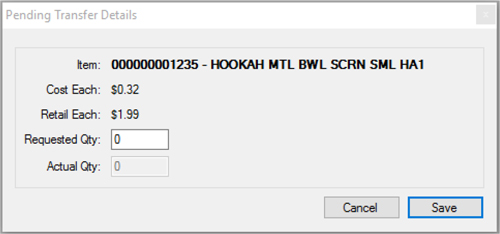
- Repeat steps 1 through 3 until all needed items have been added, then click Send.

Updating Quantities and Applying the Pending Transfer
After a Pending Transfer has been sent, the store that it was sent to (which was selected as the From Store above) reviews the Pending transfer and updates the quantities
- In the Pending Transfers screen, select a new Pending Transfer that needs to be updated and click the View Transfer button.
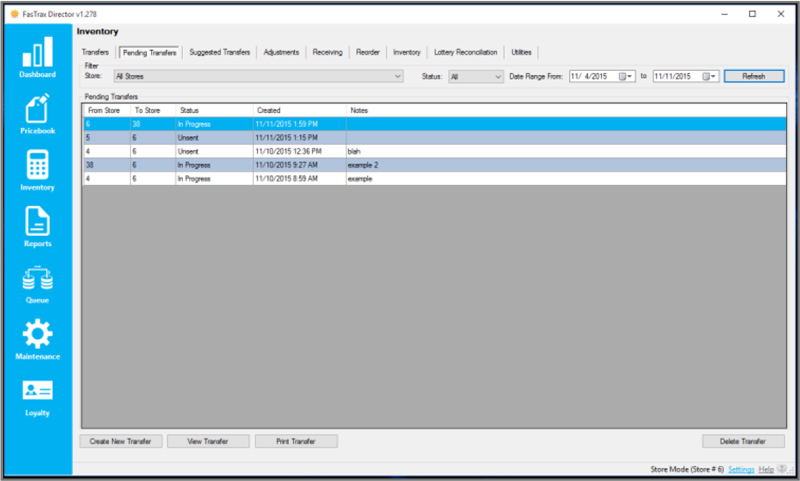
Pro Tip: Pending Transfers that come from another store will have that store number in the To Store field, and will have a Status of “In Progress”. - Double-click any item you want to edit in the Pending Transfer Worksheet.
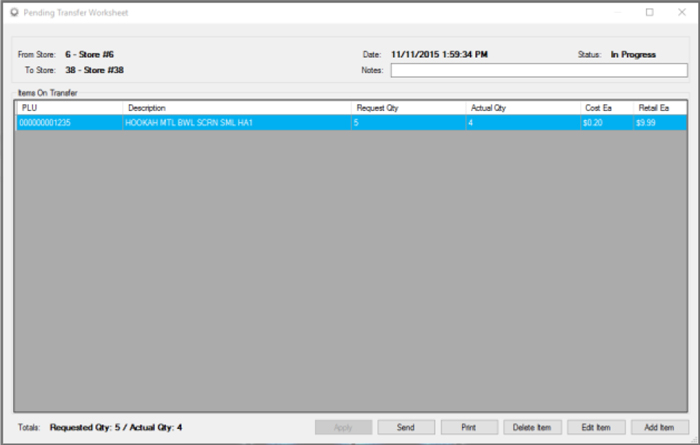
- Update the Actual Qty and click Save.
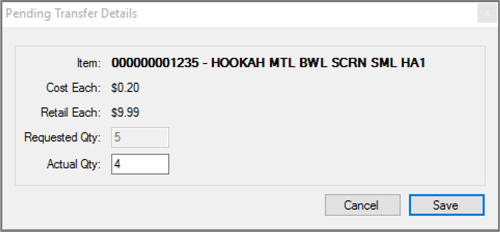
- Repeat steps 2 and 3 until finished updating items; then click Send
 to apply changes to this store’s inventory and send the transfer back to the requesting store.
Overview of Adjustments
Adjustments are a simple way to alter inventory levels, both positive and negative amounts. This movement is applied immediately and tied directly with the logged in user.
The user first has to have permission to view or create adjustments. An adjustment can be altered or deleted as long as it has not been applied. If it has been applied, it can only be viewed.

Creating and Applying Adjustments
- From within Director, choose the “Inventory” module

- Next, choose the “Adjustments” tab

- Next, choose the “Create New Adjustment” button

- Choose the store, enter a memo if needed, and choose the adjustment date in the pop up window. Then choose the “Create Adjustment” button
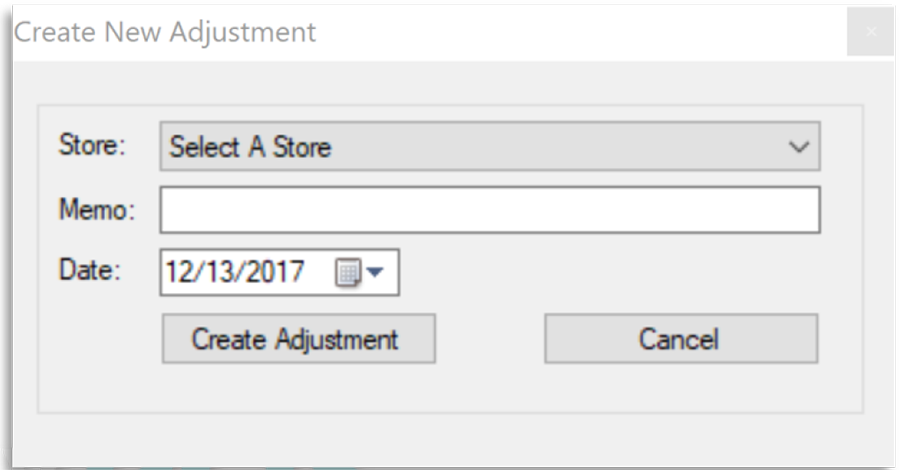
- The adjustment details screen is the next window that pops up. Enter in a UPC in the “Item To Adjust” text box. Alternatively, you can search for an item by using the “Find” hyperlink.
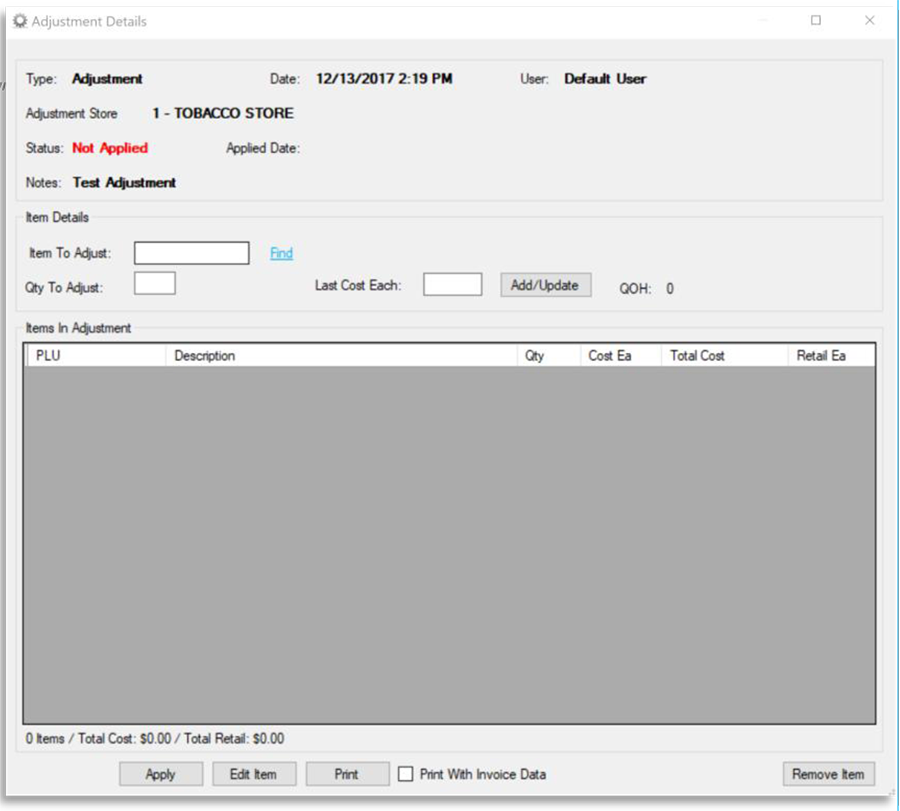
- When the item is entered, press enter to fill in the description and last cost. Choose a positive or negative value for the “Qty To Adjust” text box and then choose the “Add/Update” button to add that item to the adjustment
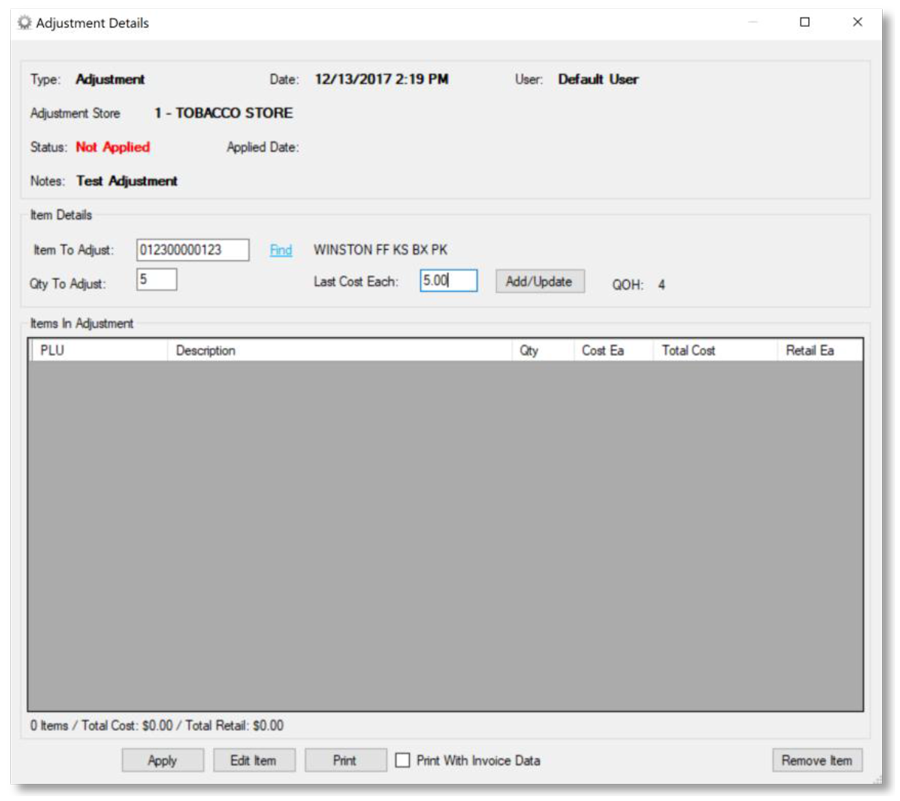
- Repeat the previous steps to add multiple items if needed.
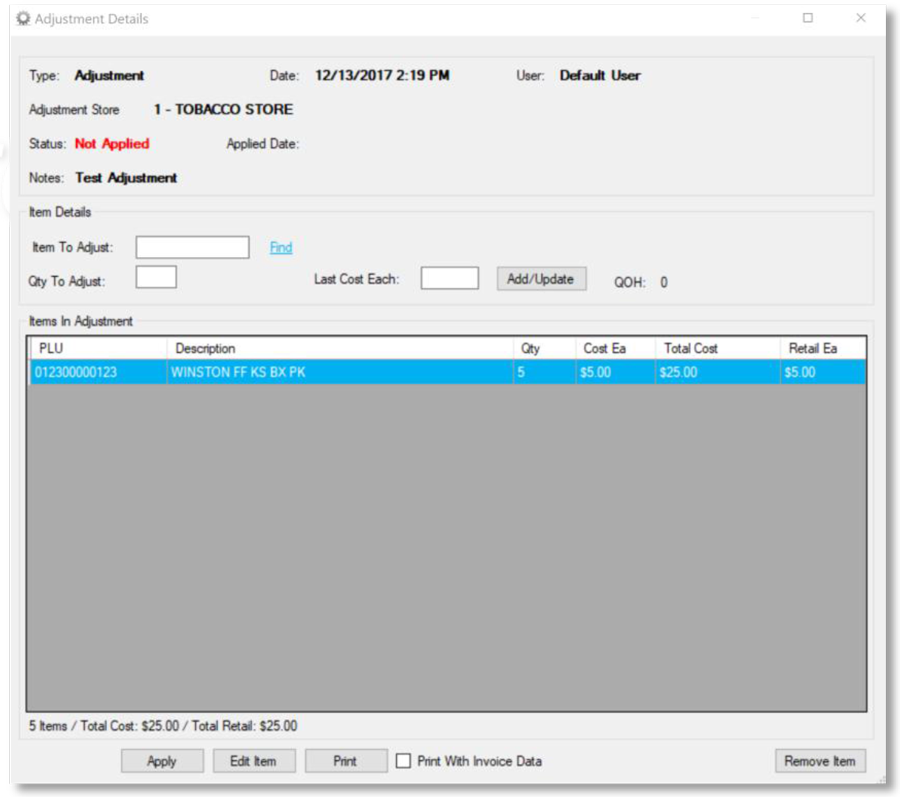
- When complete, choose the “Apply” button and choose yes to the following prompt

If Director is in store mode, it will apply immediately. If it is in corporate mode, the adjustment will need to be sent down via the queue .
Overview of Receiving Invoices
Invoices are used to add products into a store’s inventory. Invoices can be received in a variety of ways across the system too, utilizing Director, the POS, or handheld software.
Receiving all invoices into the system is required in keeping track of inventory and easily updating costs.
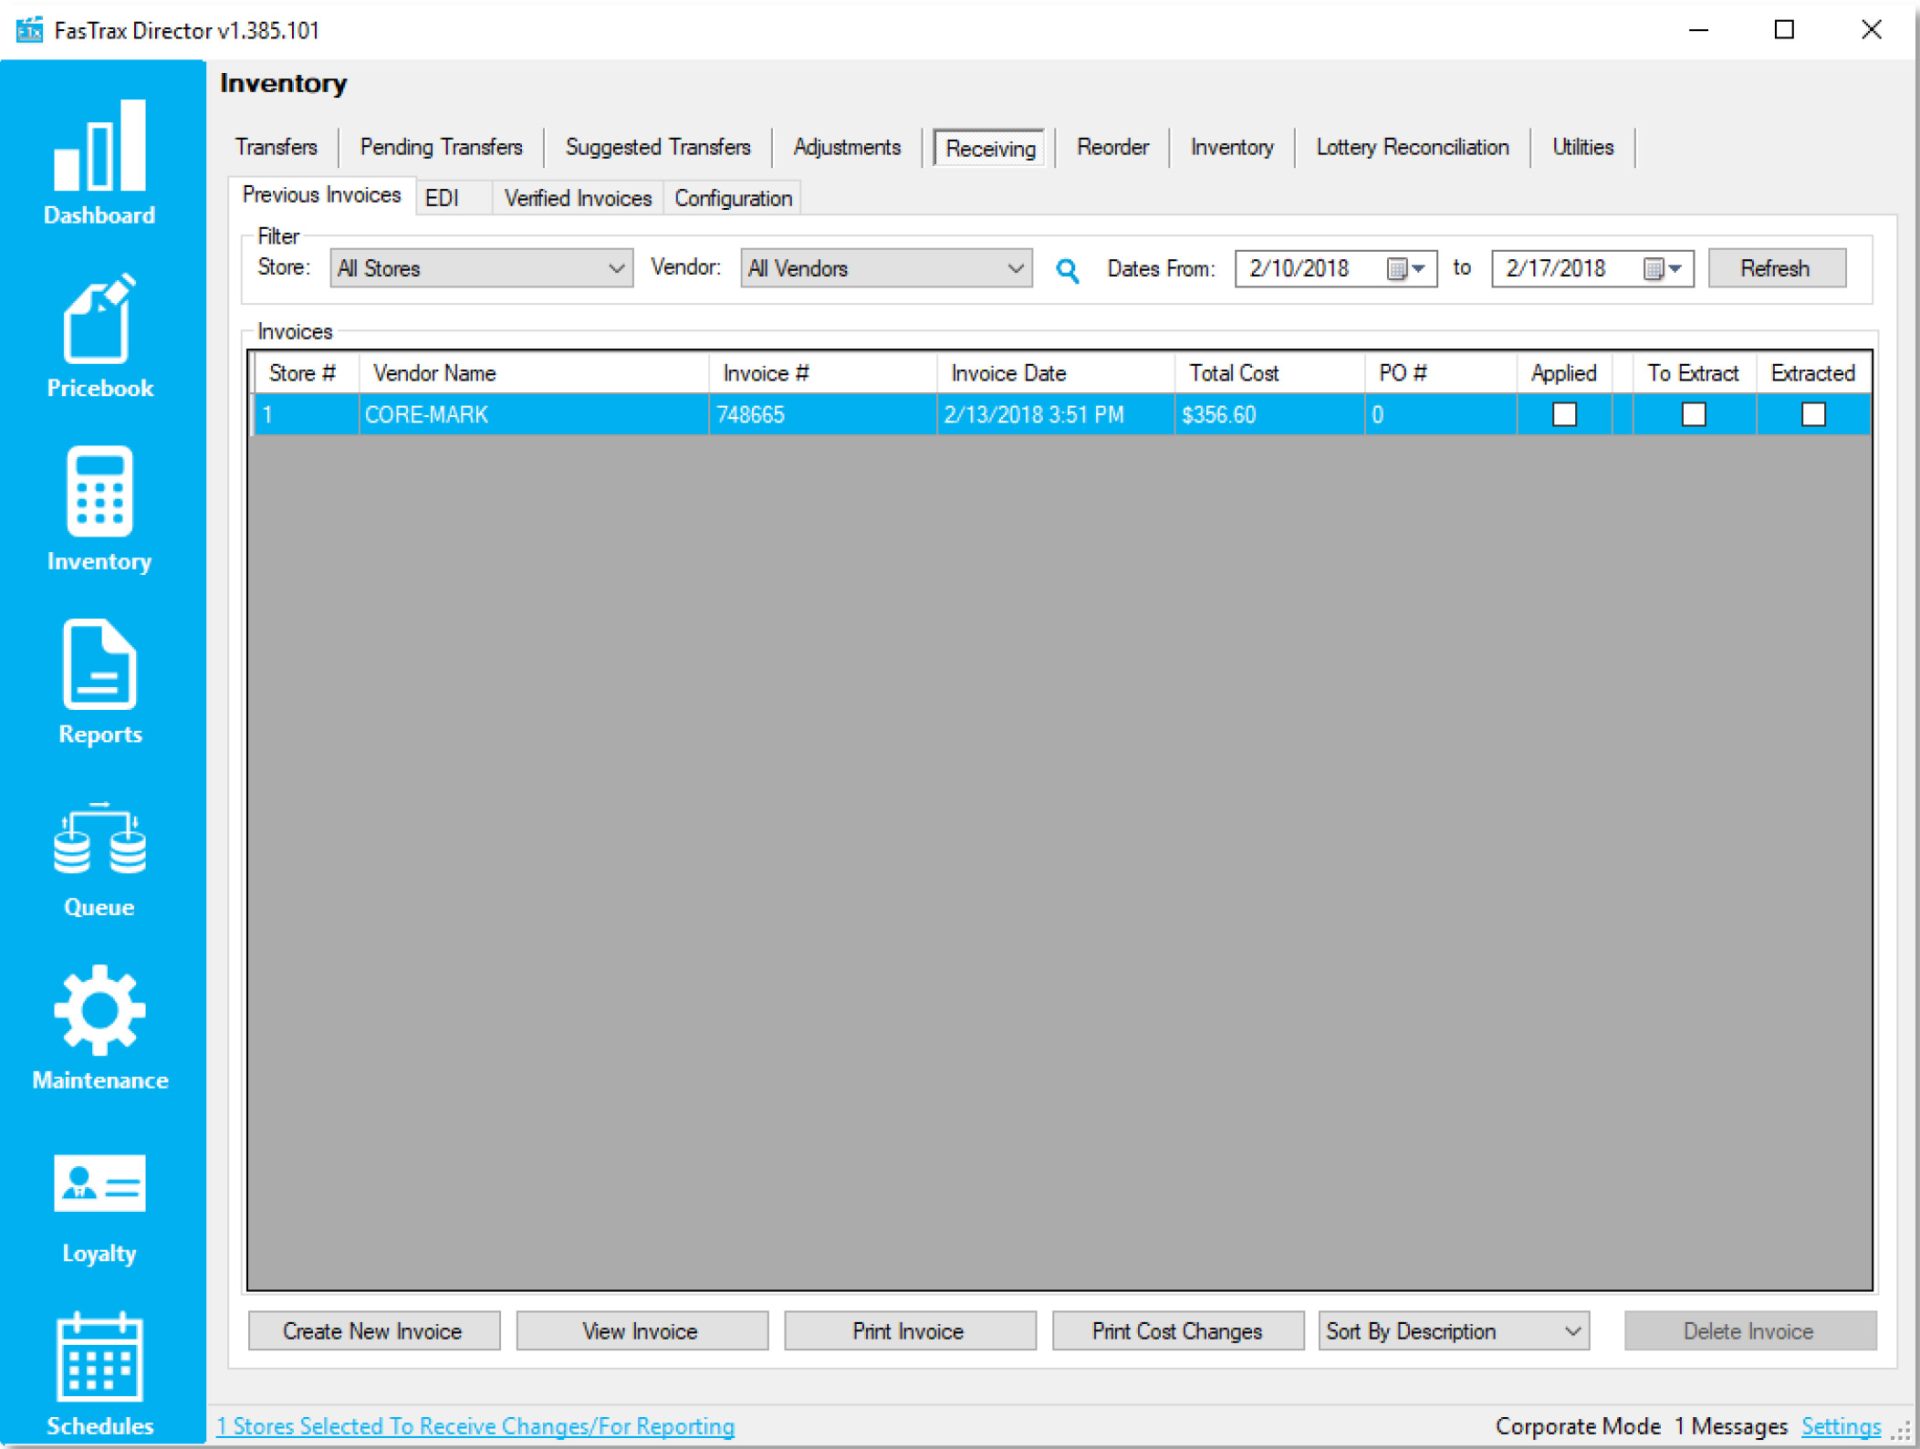
Receiving – Previous Invoices in Director
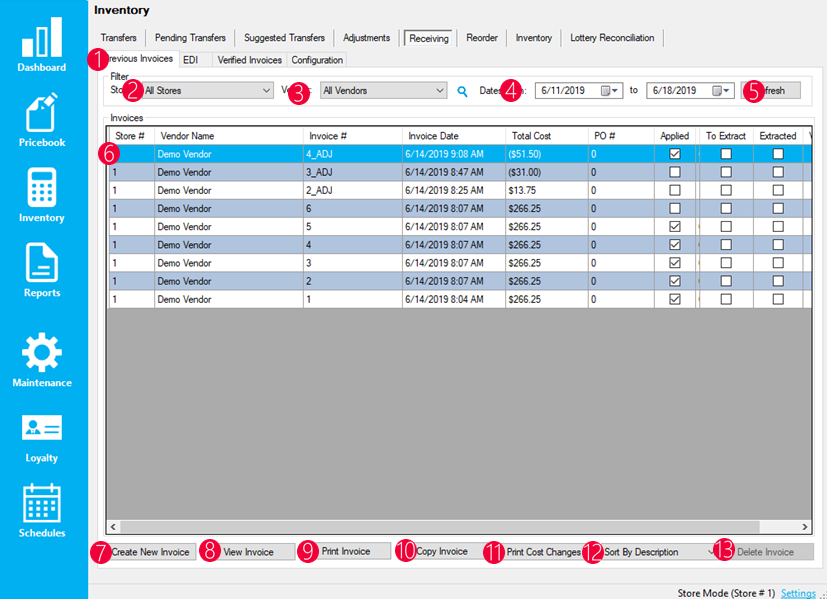
- Previous Invoices – This tab shows all invoices from the below selected filter options
- Store – This filter allows either all stores or individual stores
- Vendor – This filter allows all vendors or individual vendors
- Date Range – A start and end date filter that filters by invoice dates
- Refresh – This refreshes the invoices in the below grid, applying new filters or showing newly received invoices
- Invoices – This grid shows all invoices, both applied and unapplied, based on the above filter settings
- Create New Invoice – Allows the user to create a new invoice
- View Invoice – Opens the worksheet to view the selected invoice. Double clicking an invoice also does this
- Print Invoice – Prints the selected invoice
- Copy Invoice – This copies the selected invoice
- Print Cost Changes – Prints cost changes on the selected invoice
- Sort Option – Sorts invoices by description, UPC, or vendor part
- Delete Invoice – This is by default disabled and a machine setting. If enabled, allows the user to delete invoices

Create New Invoice in Director
When choosing the “Create New Invoice” button on the “Previous Invoice” screen, the user will be presented with the following window.
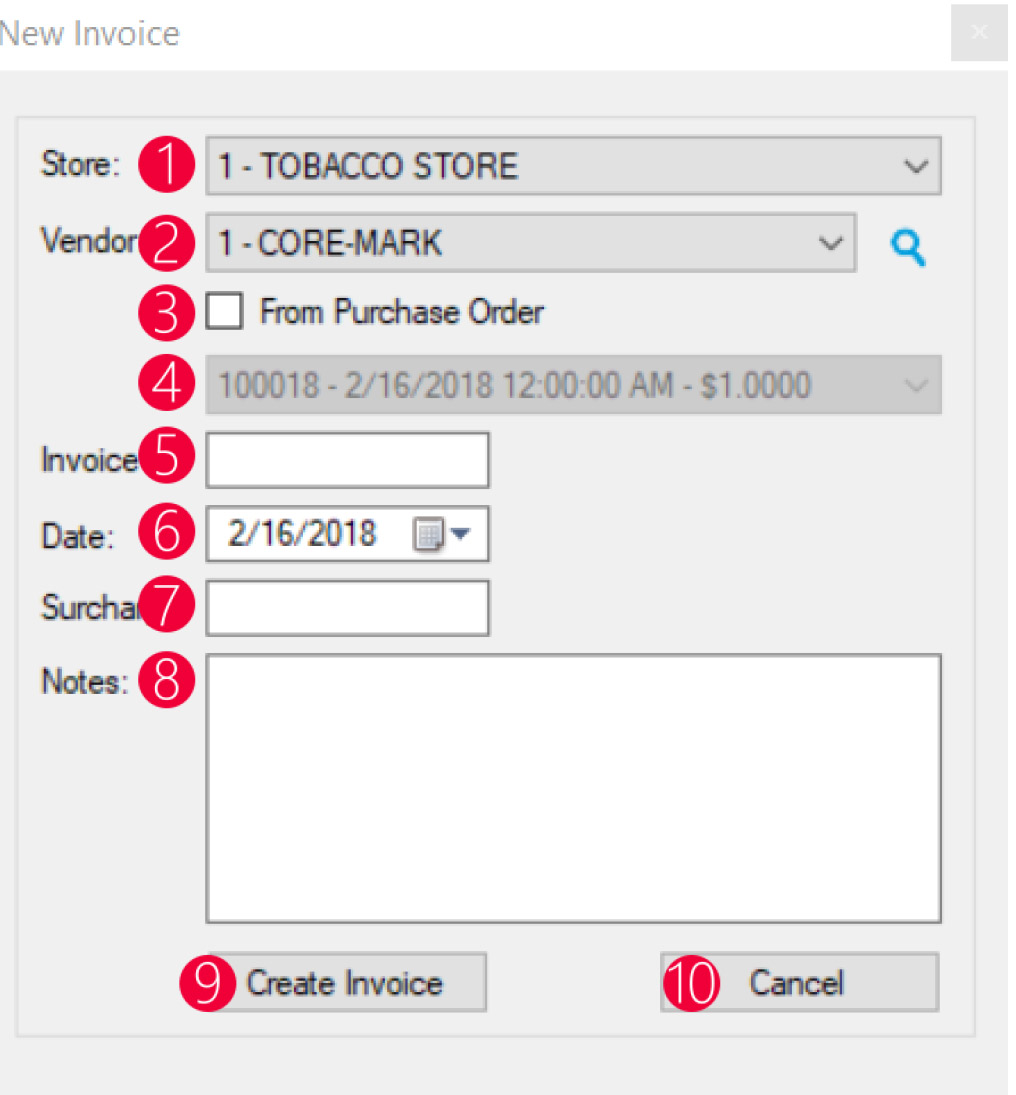
- Store – Chooses the store that the invoice will be created for
- Vendor – Chooses which vendor that the invoice will be for
- From Purchase Order – This checkbox allows the invoice against a purchase order
- Purchase Order Dropdown – When the “From Purchase Order” checkbox is chosen, this dropdown populates purchase orders that the invoice will be created against
- Invoice # – Text box where the invoice number is input (invoice numbers have to be unique per vendor)
- Date – The date of the invoice
- Surcharge – If there is a surcharge fee for the invoice
- Notes – Allows notes to be entered in for the created invoice
- Create Invoice – Creates the invoice based on the input parameters
- Cancel – Cancels the invoice from being created
Invoice Worksheet in Director
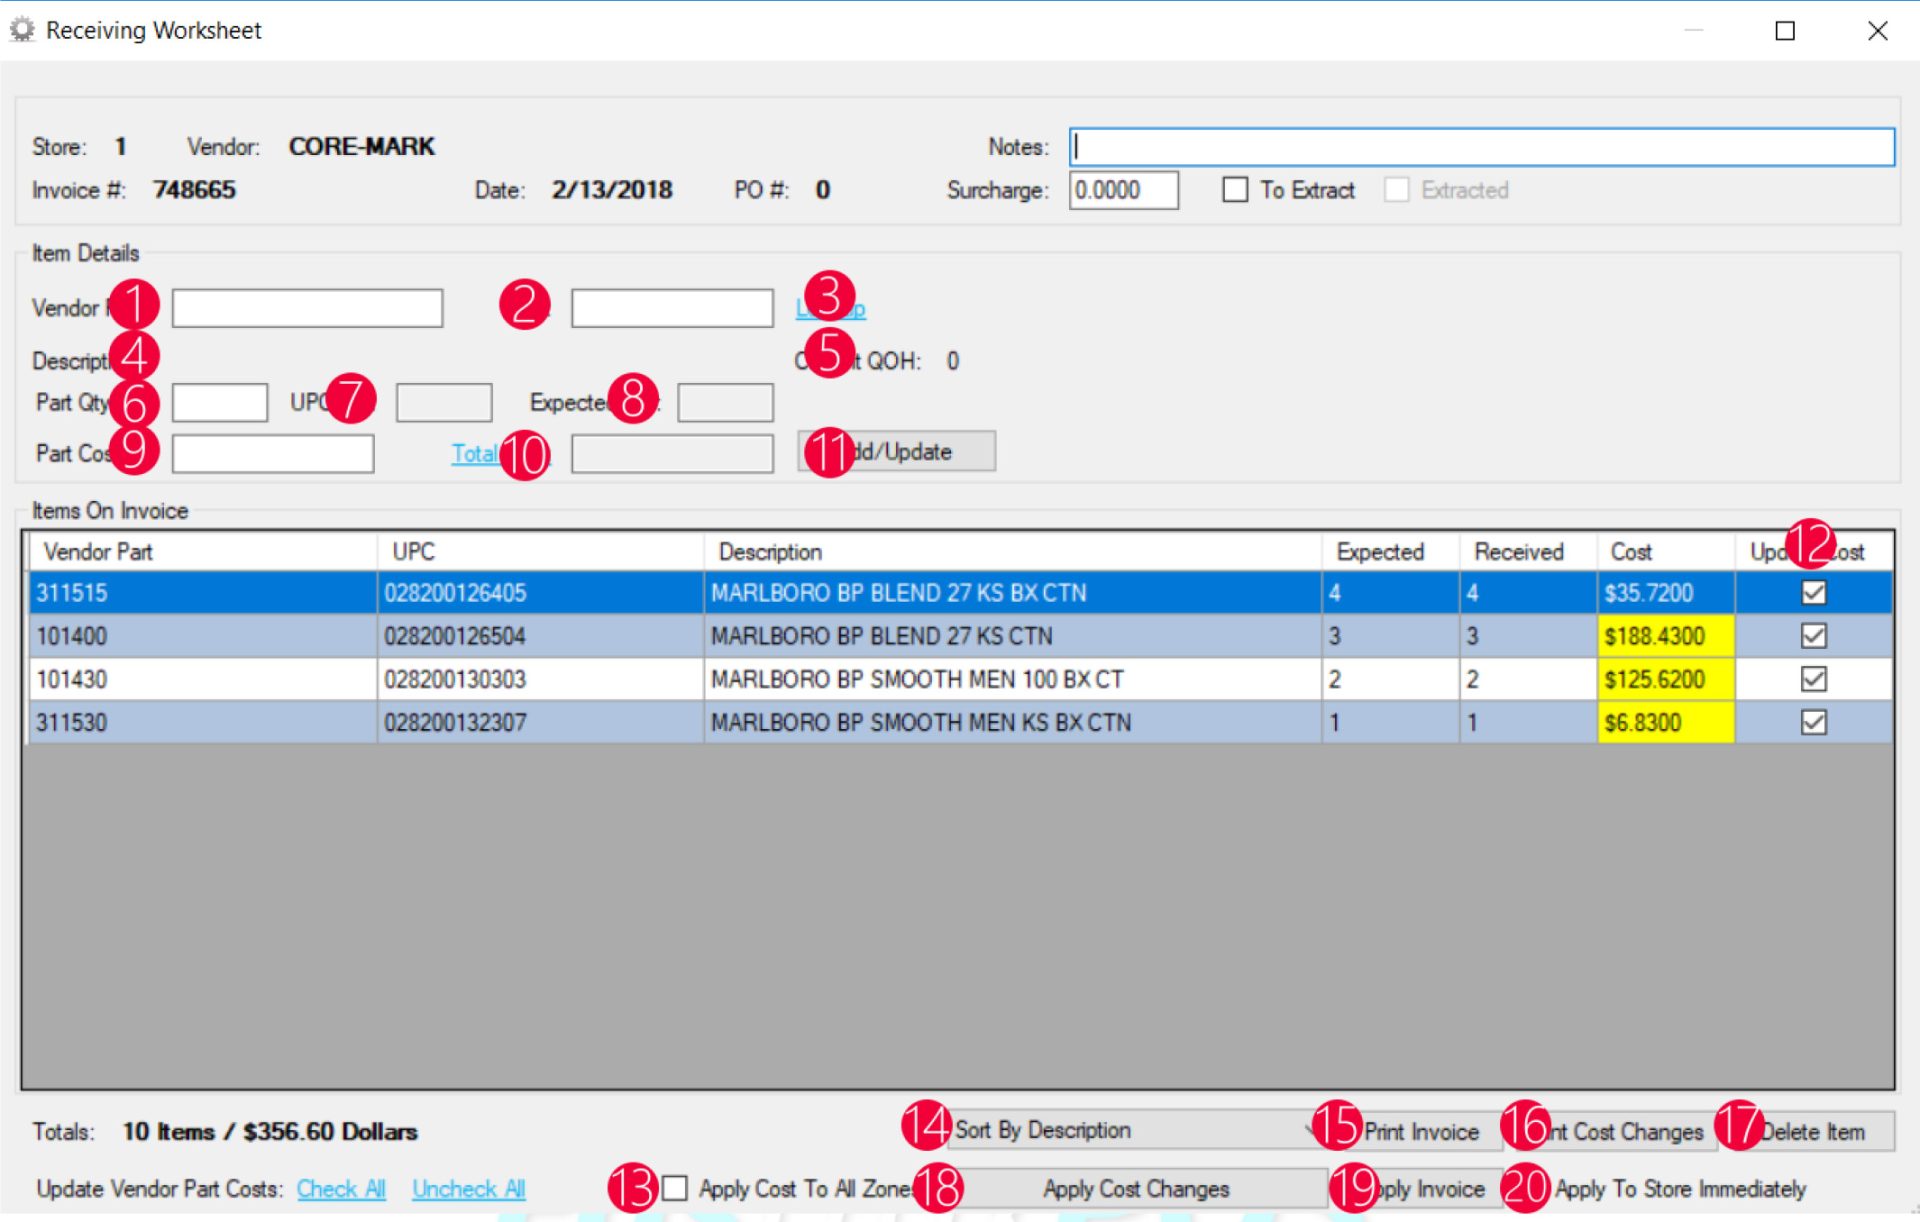
- Vendor Part – Entering the vendor part and pressing enter will look the item up, adding it to the invoice
- UPC – Entering the UPC allows the user to look up and add the item to an invoice by the UPC, prompting the user to use the vendor part if it exists
- Lookup – Allows the user to search for the item by other parameters
- Description – The items description after it has been added in the vendor part or UPC field
- Current QOH – The current quantity on hand of the item
- Part Qty – The number of vendor parts being added to the invoice
- UPC Qty – The number of UPCs contained in the part quantity
- Expected Qty – The quantity that was ordered on the PO if a PO was utilized
- Part Cost – The cost of the vendor part
- Total Cost – The total cost of the number of vendor parts being received
- Add/Update – Adds the vendor part to the invoice
- Update Cost – Checkbox that when checked, updates the cost of the vendor part and last cost of the item
- Apply Cost To All Zones – Applies the checkboxes cost changes to all pricebook zones
- Sort – Allows the invoice to be sorted by different methods when printing
- Print Invoice – Generates a report showing the invoice in a printable format
- Print Cost Changes – Generates a report showing all cost changes in a printable format
- Delete Item – Deletes the item on the invoice worksheet
- Apply Cost Changes – Applies all checkboxed cost changes to vendor parts and last cost
- Apply Invoice – Applies the invoice to inventory
- Apply To Store Immediately – When in corporate mode, applies the invoice bypassing the queue
Verified Invoices
Verified invoices are used to verify the counts of applied invoices, generally processed and completed via EDI. The actual process of invoice verification has to be done at store level on the handheld.
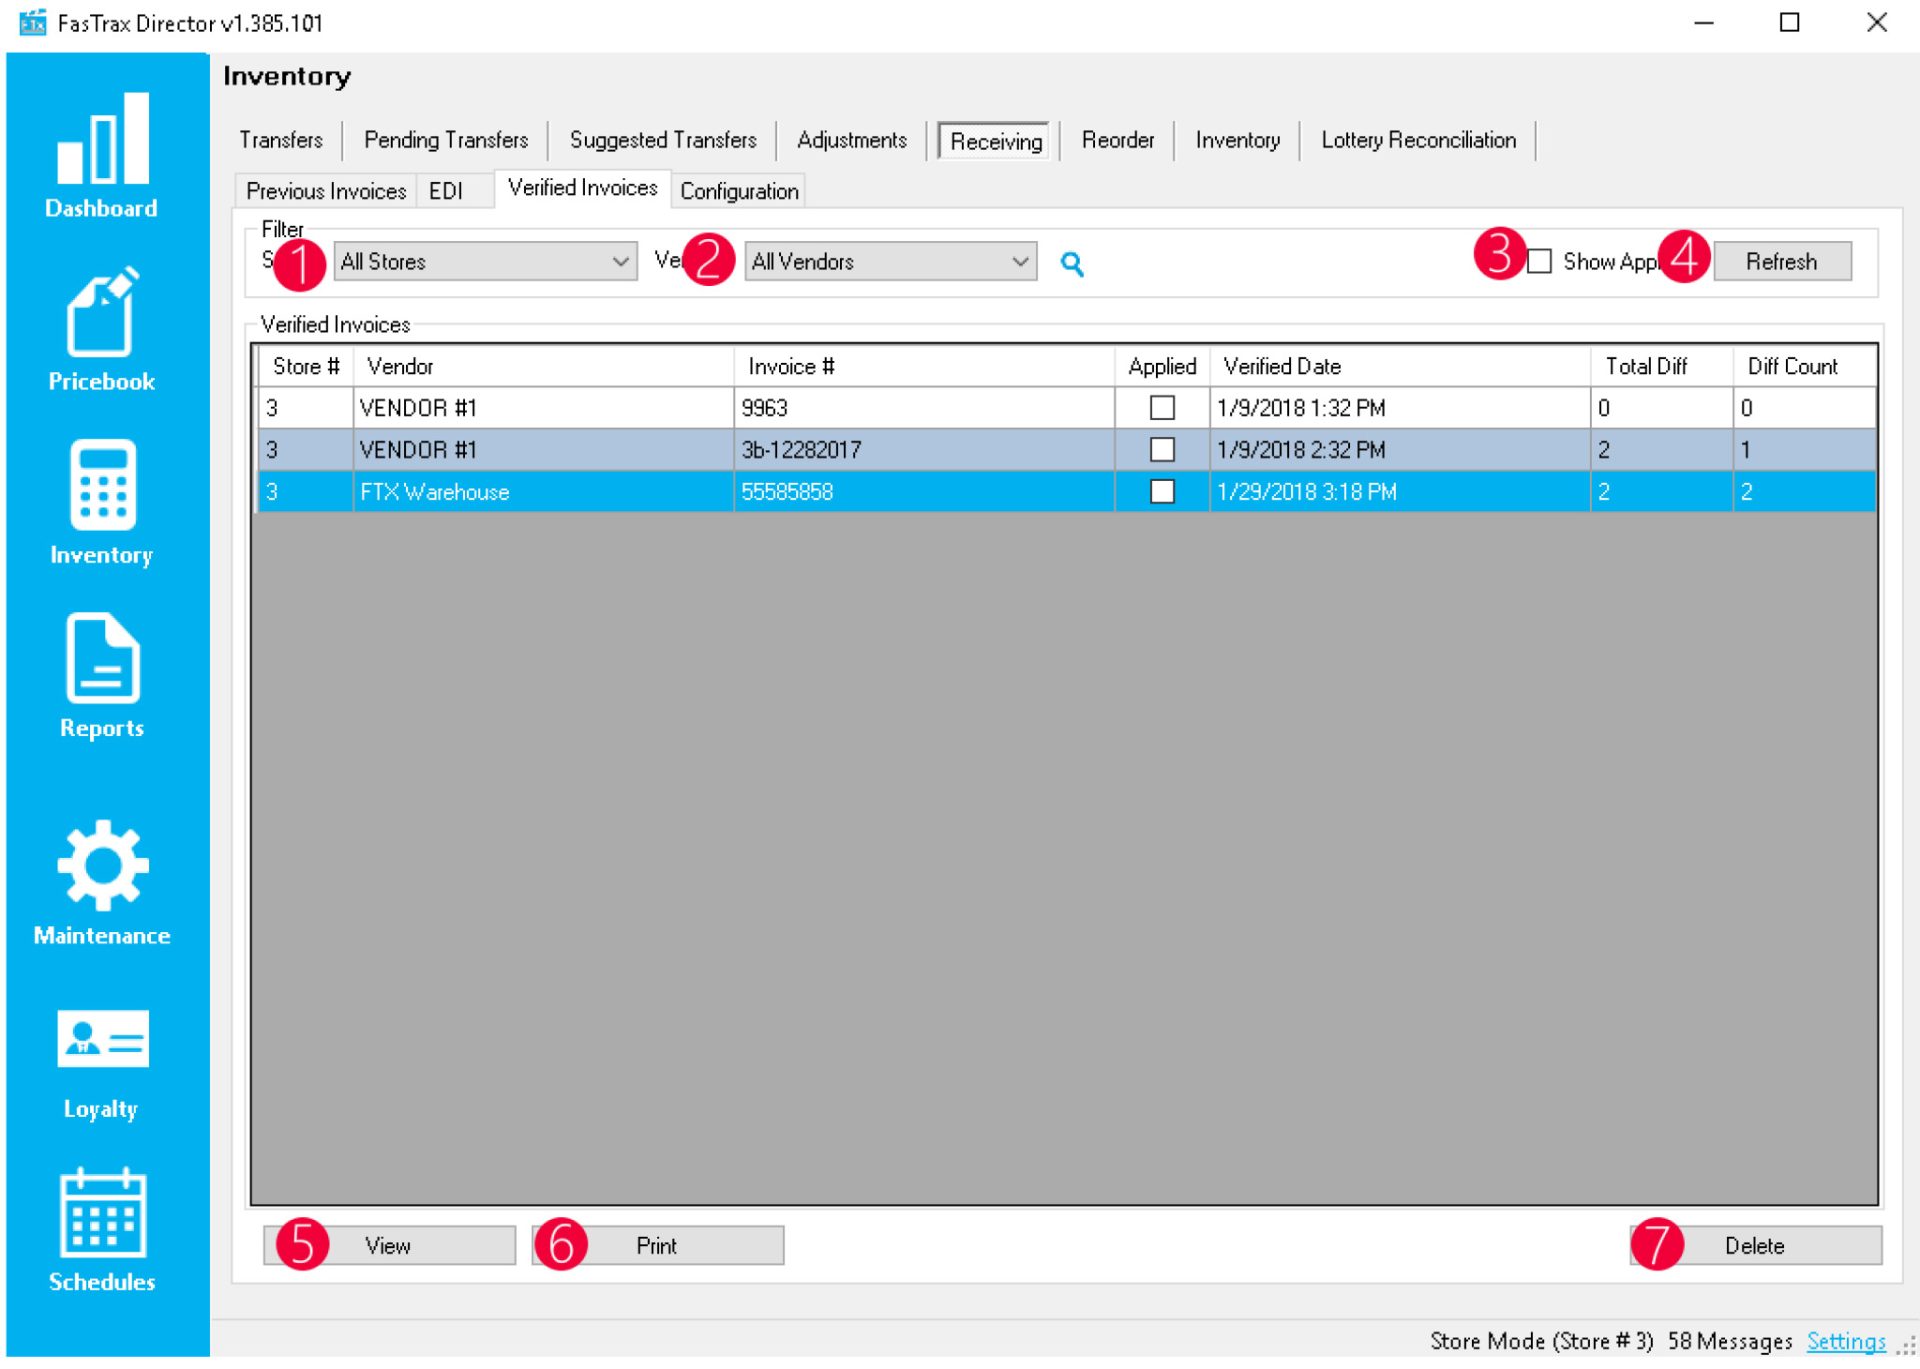
- Store – Allows the user to filter by store to populate the verified invoices grid
- Vendor – Allows the user to filter by vendor to populate the verified invoices grid
- Show Applied – Allows the user to show applied verified invoices
- Refresh – Refreshes the verified invoice grid, applying updated filters
- View – Views the selected invoice
- Print – Generates a printable report of the selected invoice
- Delete – Deletes the selected invoice verification
Verified Invoices Details Worksheet
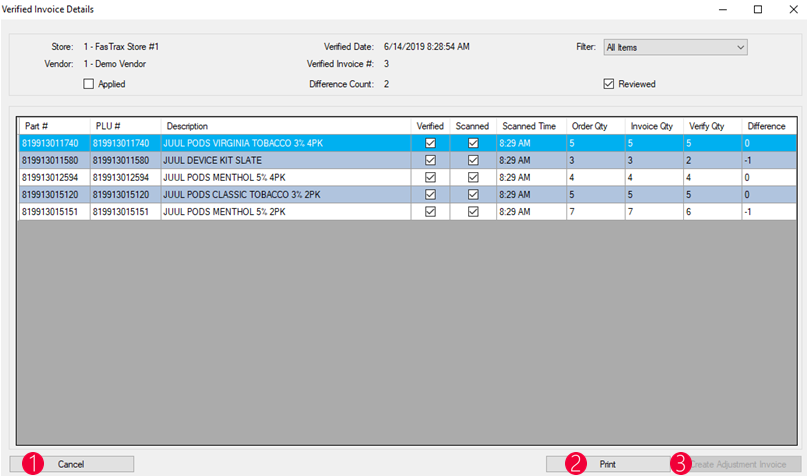
- Cancel – Cancels out of the worksheet
- Print – Generates a printable report of the worksheet
- Create Adjustment Invoices – Creates an adjustment invoices based on the differences in the invoiced quantity and the verified quantity via the handheld
Receiving – Previous Invoices in POS
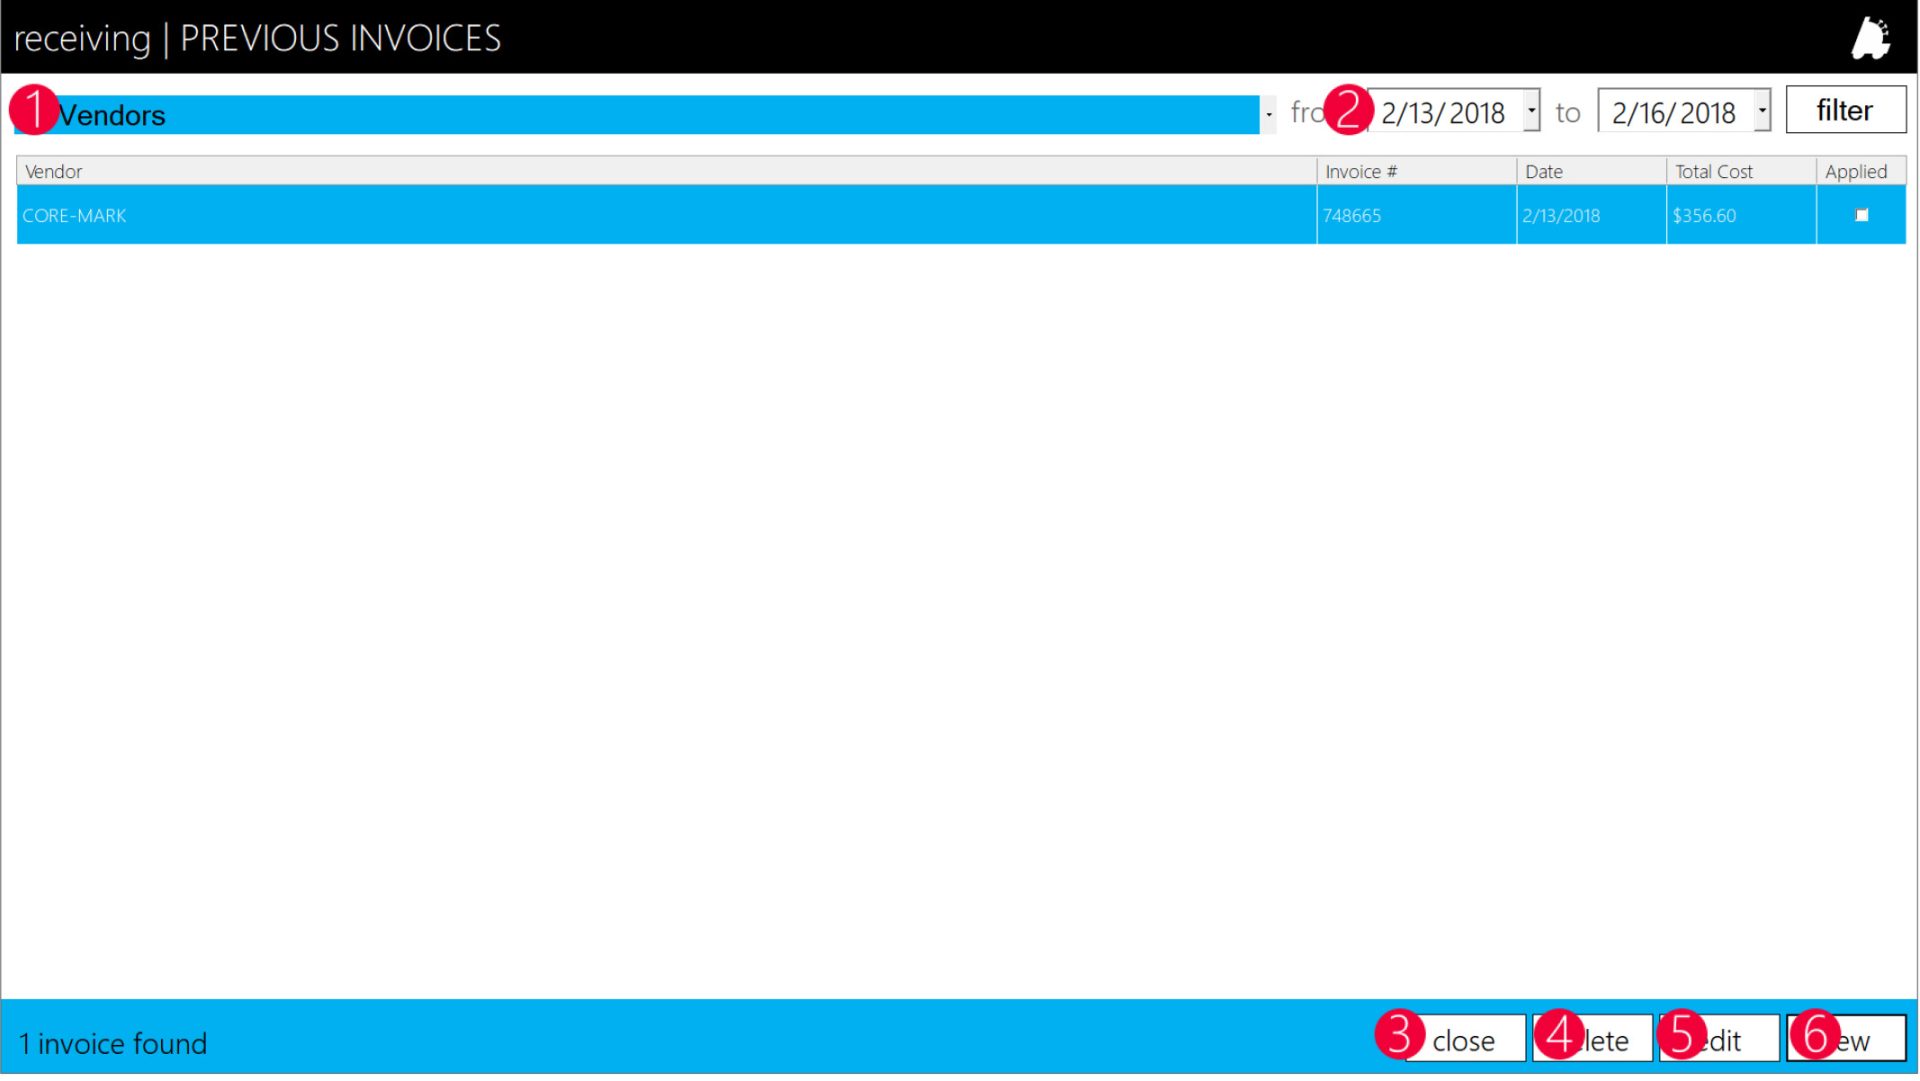
- Vendors – This filter allows all vendors or individual vendors
- Date Range – Choose the start and end dates to filter the invoices listed
- Close – Closes the previous invoices page
- Delete – Deletes the selected invoice
- Edit – Allows the user to edit the selected invoice
- New – Allows the user to create a new invoice
Create New Invoice in POS
When choosing the “New” button on the Previous Invoices screen in the POS, the user will be presented the following window:
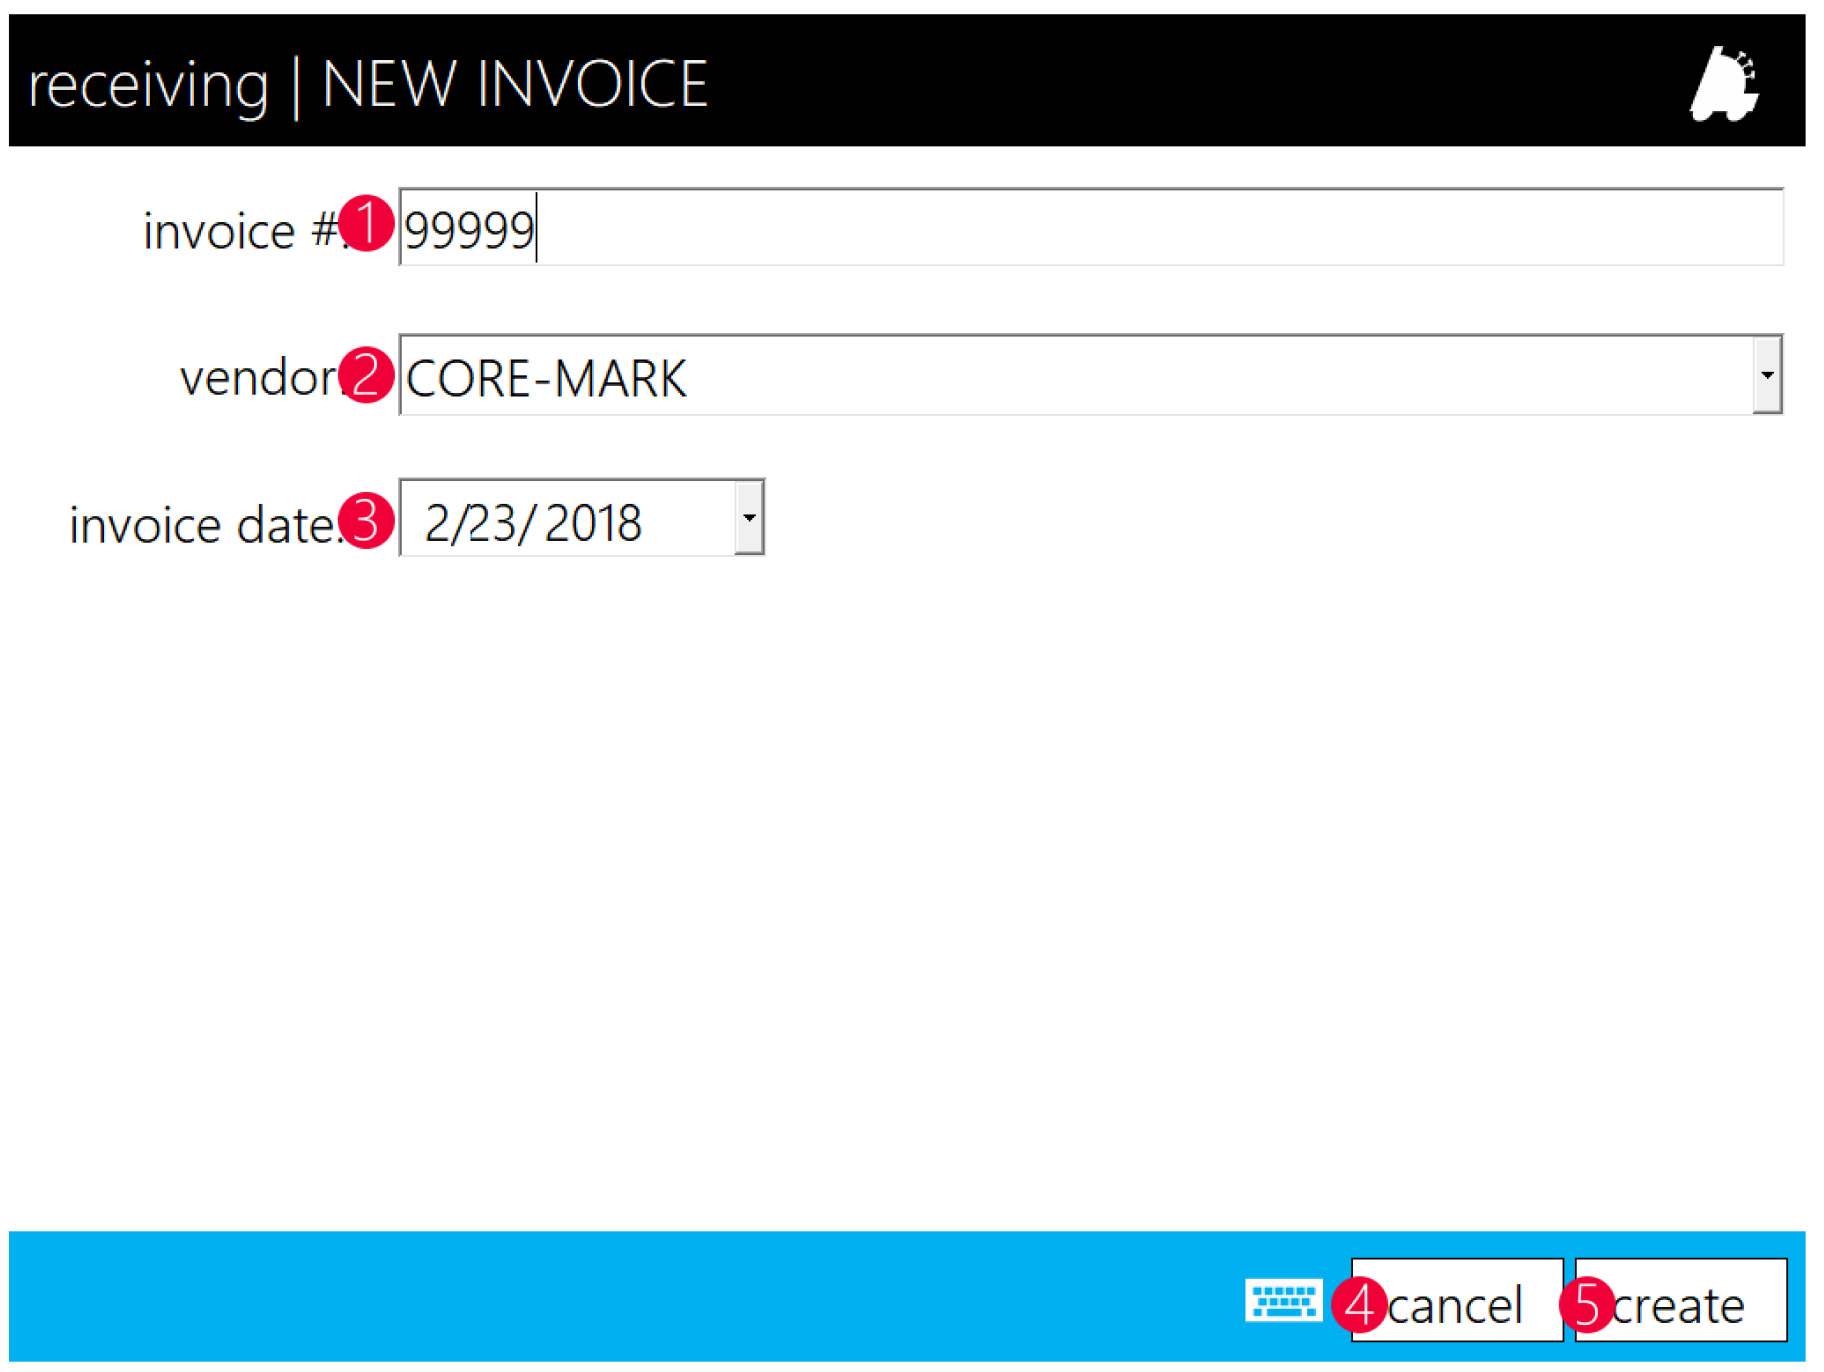
- Invoice # – Text box where the invoice number is input (invoice numbers have to be unique per vendor)
- Vendor – Chooses which vendor that the invoice will be for
- Invoice Date – The date of the invoice
- Cancel – Cancels the invoice creation
- Create – Creates the invoice
Invoice Worksheet in POS
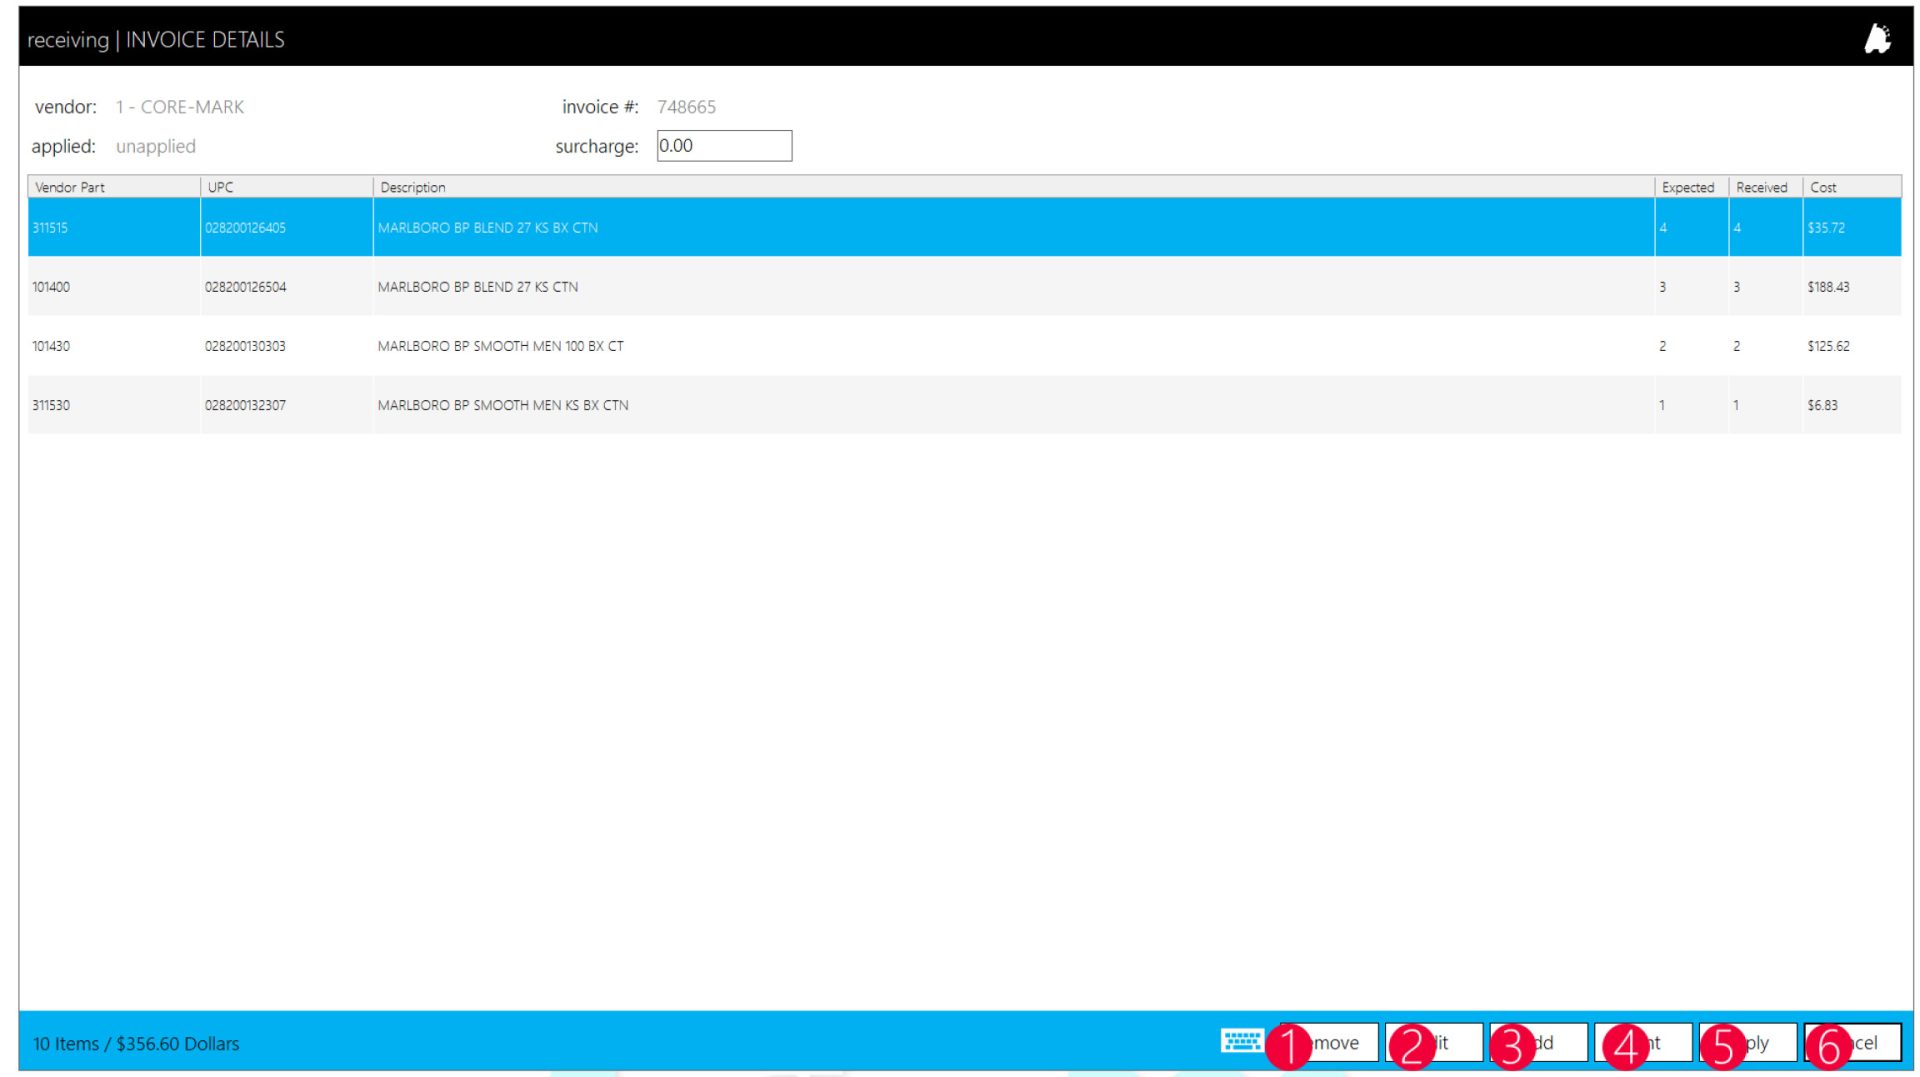
- Remove – Removes the selected row from the invoice
- Edit – Edits the selected row on the invoice
- Add – Brings up a window to add a new vendor part to the invoice
- Print – Generates a printable worksheet of the selected invoice
- Apply – Applies the invoice to invoice
- Cancel – Cancels out of the invoice worksheet screen
Overview of Reorders
Utilizing FasTrax for reorders can same the end user time, and it can give a very detailed analysis of why specific quantities are being order. There are several order methods, which are described below:
List All Items From Vendor – This lists every available vendor part from the selected vendor on the order form
Reorder By Min/Max – This orders items based on a minimum/maximum threshold set by the user on each item
Reorder By Days Of Inventory – This orders to keep a specific number of days of inventory on hand based on historical sales data
Reorder By Items Sold (Replenishment) – This orders based on what was sold in a specified time frame
Reorder Using A Blank Order Form – This creates a blank order form that the user enters every item to be ordered
Reorder Using Hybrid Days / Replenishment – This orders items based on the days of inventory method except for newly created items, which use replenishment
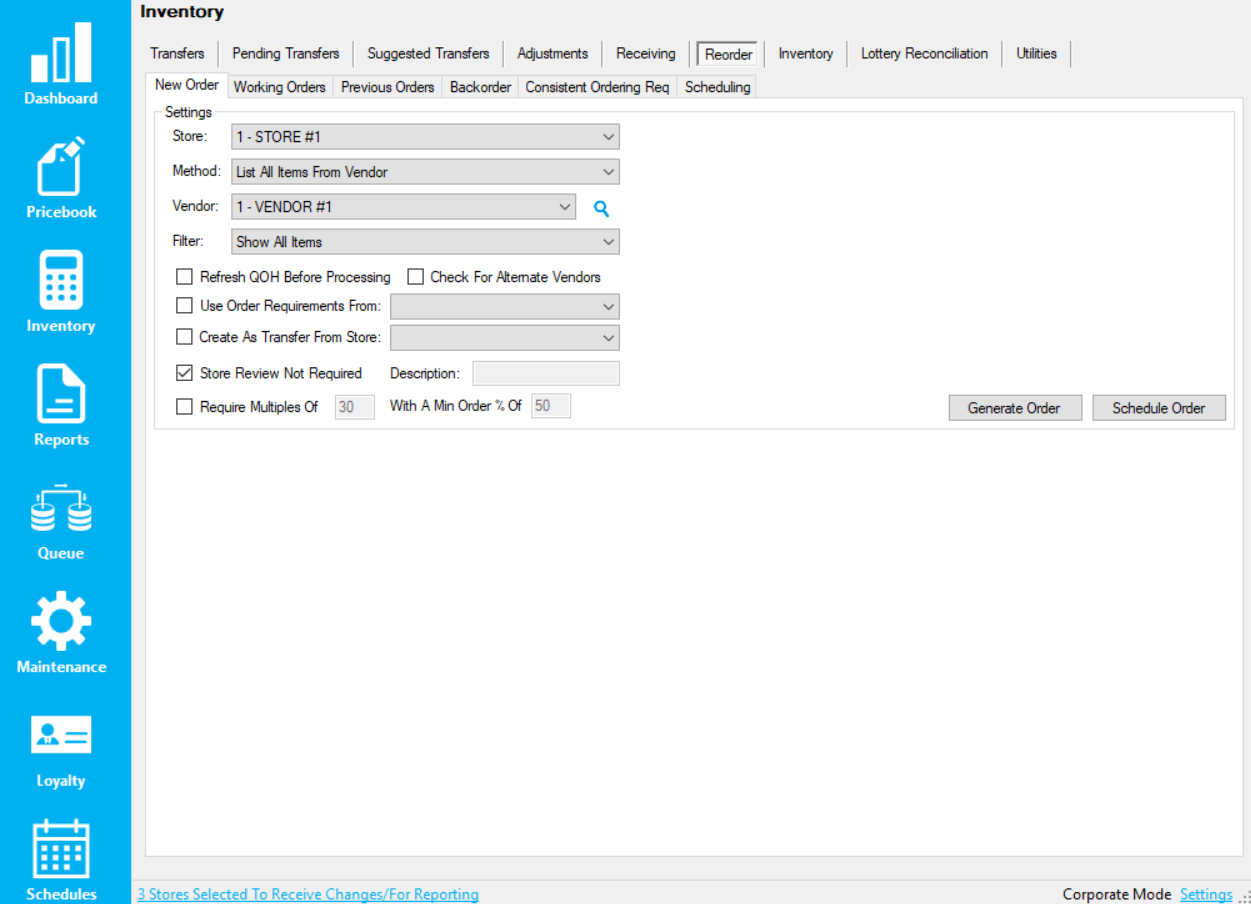
Basic Reorder Parameters
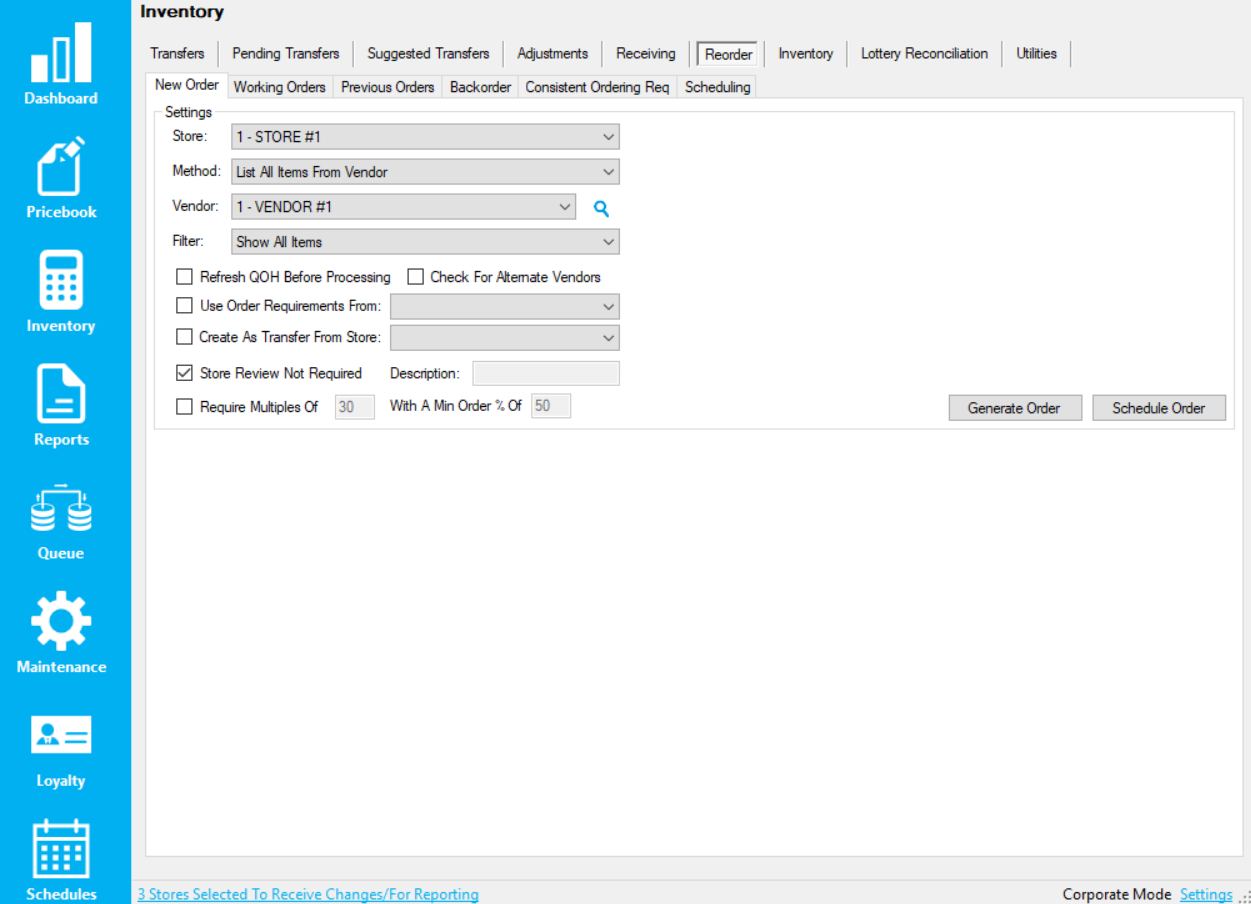
Settings
- Store – Store selector to which the reorder will be generated against
- Method – The method use to determine what is being reordered
- Vendor – What vendor the order will be generated for
- Filter – What filter of items are to be ordered
- Refresh QOH Before Processing – Reaches out to the store and grabs the latest QOH
- Check For Alternate Vendors – Checks for any alternative vendors when generating the order that the part is a lower price
- Use Order Requirements – Makes the order follow consistent ordering requirements set by manufacturers
- Create As Transfer From Store – Creates the order as a transfer from another store
- Store Review Not Required – Finalizes order and assigns a purchase order number. Otherwise, creates a working order that the store adds input and sends back to corporate for approval
- Require Multiples of – When checked, will add or subtract items from an order to get the total number of pieces ordered to be an even multiple of the user-configured value
- Schedule Order – Allows the order to be scheduled and ran on a user specified schedule
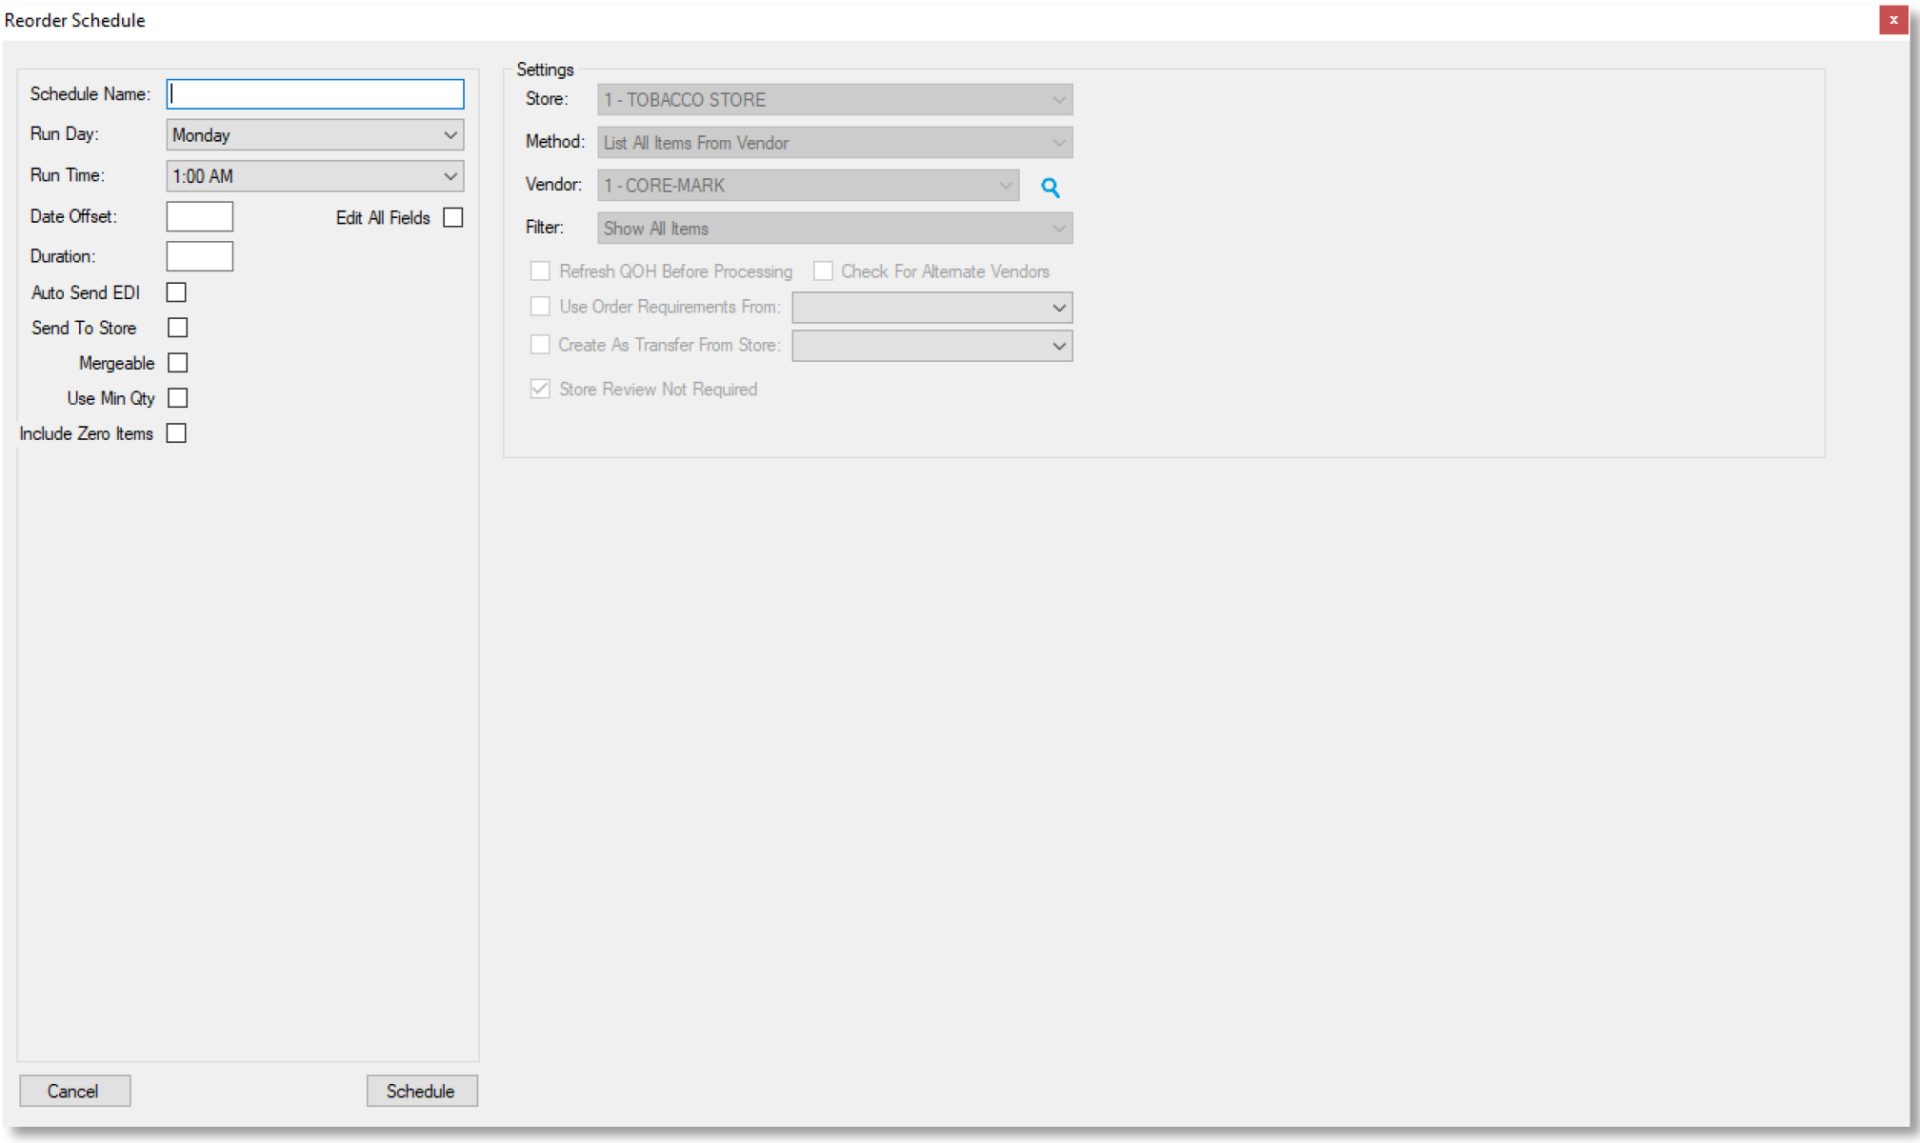
Reorder Schedule
- Schedule Name – An identifier for the scheduled order
- Run Day – The day of the week the order is scheduled to run
- Run Time – The time the order is scheduled to run
- Date Offset – How many days back from the current date to look back at sales (Start Date on time filter)
- Duration – How many days forward from the date offset to look at sales (End Date on time filter)
- Auto Send EDI – Auto sends the purchase order to the vendor
- Sent To Store – Automatically send the purchase order or working order to the store
- Mergeable – Merges multiple orders from the same vendor for the same store if applicable
- Use Min Qty – Forces the order to always order at least the minimum value that is set for the vendor part
- Include Zero Items – Includes items on the order that had sales during the time period at a 0 quantity that had sales but doesn’t have an order value (due to the order method)
Generating a Replenishment Order
- After opening Director, choose the Inventory Module

- Next, choose the reorder tab on the navigation ribbon And the Reorder By Items Sold (Replenishment) in the Method dropdown.
- Choose the date range from which to analyze sales and order based on those sales

- Choose the value for rounding subunits in Round Up When Subunit Reaches X Percent
 Round up when subunit reaches X percent rolls the subunit level of an item up to a purchase unit and orders based on this percentage. An example would be 50%; when 5 packs are sold, it would order 1 carton. Another would be 80%; when 8 packs are sold, it would order 1 carton.
Generating a Days of Inventory Order
- After opening Director, choose the Inventory Module

- Next, choose the Reorder tab on the navigation ribbon and the Reorder By Days Of Inventory in the Method dropdown.
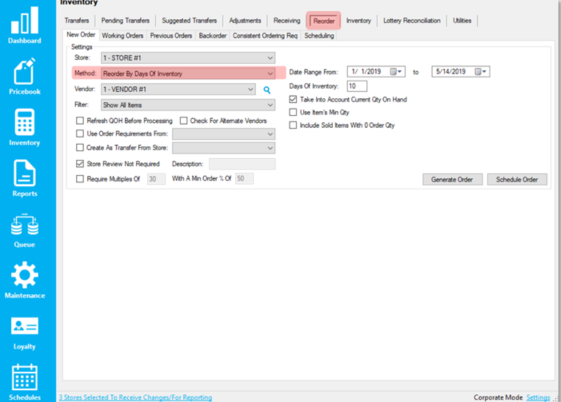
- Choose the date range from which to analyze sales and order based on those sales weighted average per day.

- Choose the number of days to keep inventory for and to take current QOH
 If utilizing days of inventory as a reorder method, you first have to keep an accurate on hand inventory at the store(s). If the average sales per day of an item is 1 the QOH is currently 2, and you’re keeping 10 days inventory, this would order 8 to bring the QOH up to 10 for 10 days on hand.
Generating a Hybrid Days of Inventory / Replenishment Order
- After opening Director, choose the Inventory Module

- Next, choose the Reorder tab on the navigation ribbon and the Reorder Using Hybrid Days / Replenishment in the Method dropdown
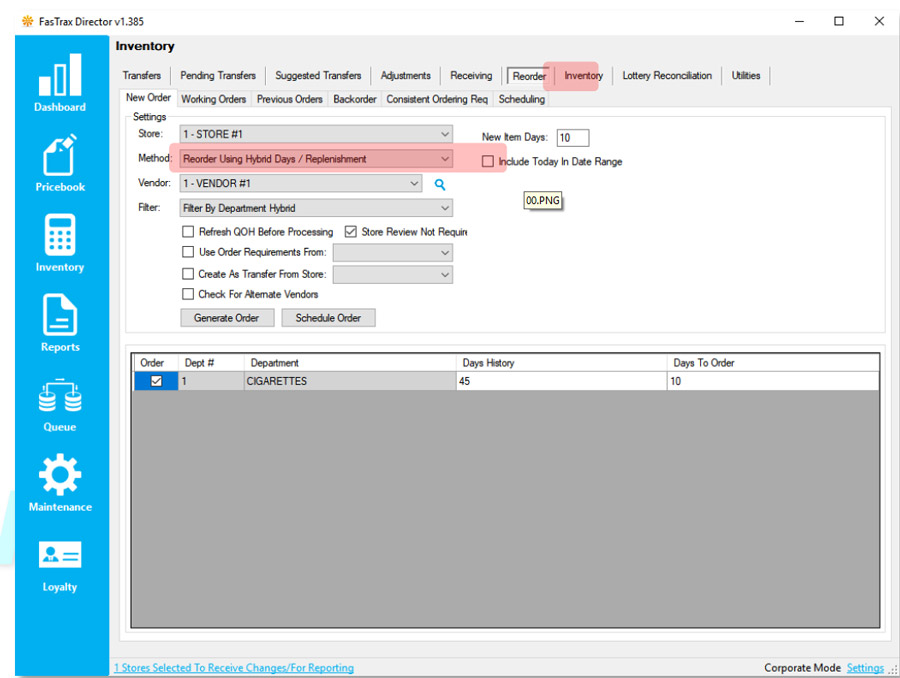
- Choose the new item days and to include today in date range for the replenishment side of the order

- Choose the department(s), number of days to analyze sales data, and days to order
 This order type combines the previous two offerings, allowing new items to be reordered based on replenishment since they won’t have the sales history as older items, while all older items utilize the Days of Inventory method.
Reorder Worksheets
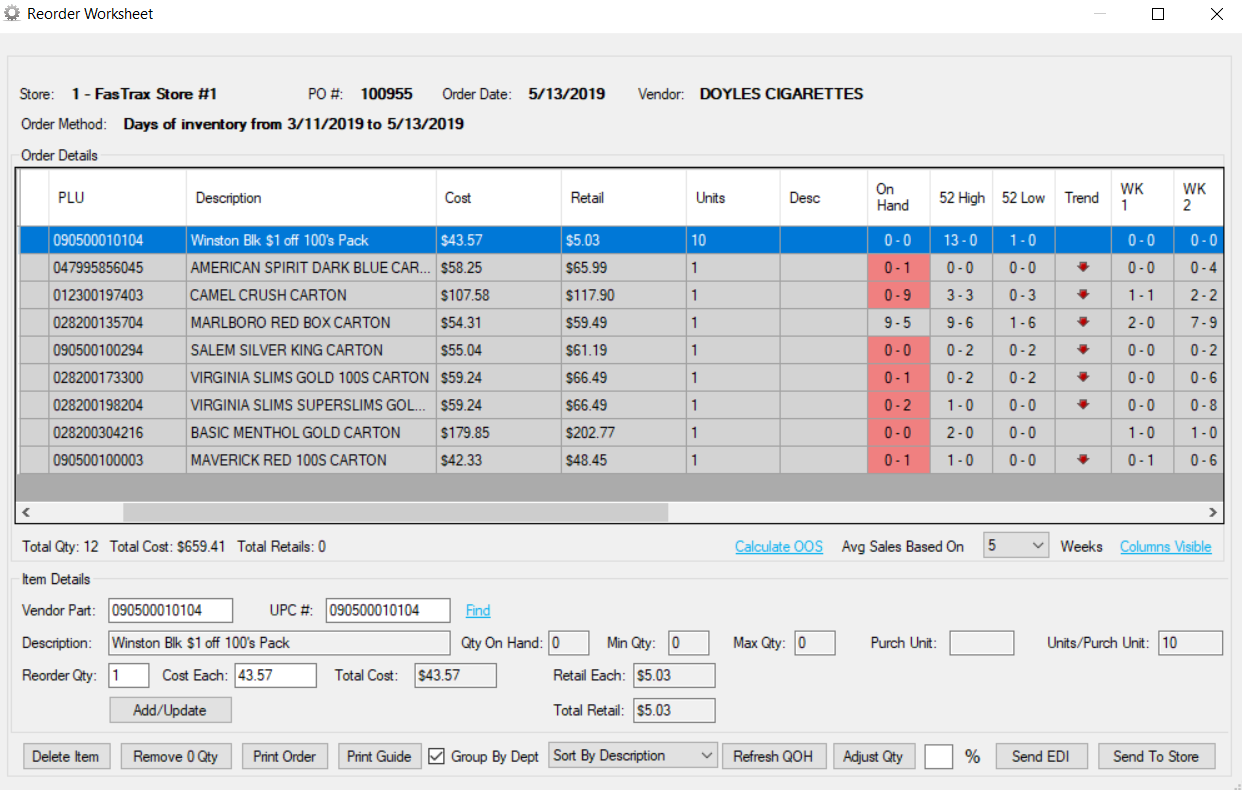
- Order Qty – How many vendor parts are to be ordered
- Add/Update – Allows additions / changes to the selected vendor part on the order
- Delete Item – Delete’s the item from the order
- Remove 0 Qty – Removes all items with an order quantity of 0
- Print Order – Prints the order form
- Print Guide – Prints the 52 High/Low with historical sales data on each item
- Refresh QOH – Refreshes the QOH for items on the order
- Adjust Qty – Adjusts the selected row’s quantity, adding a percentage
- Send EDI – Sends the order to the vendor electronically if EDI is set up
This order type combines the previous two offerings, allowing new items to be reordered based on replenishment since they won’t have the sales history as older items, while all older items utilize the Days of Inventory method.
Generating a List All Items From Vendor With Replenishment Order
- After opening Director, choose the inventory module

- Next, choose the Reorder tab on the navigation ribbon and the List All Items From Vendor With Replenishment in the Method dropdown
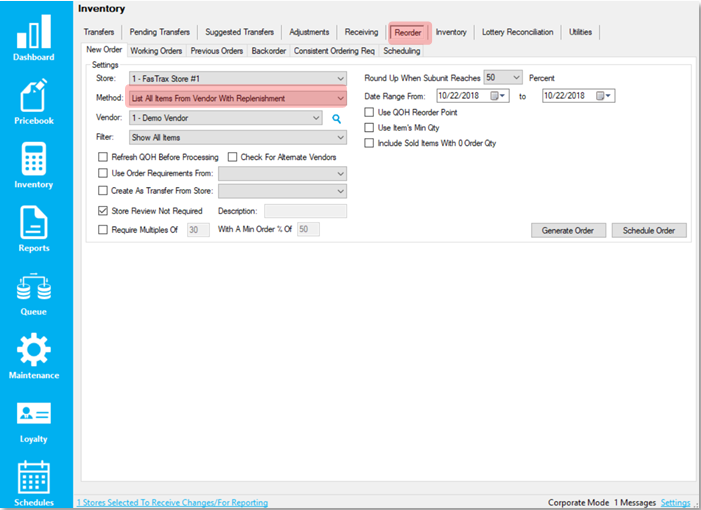
- Choose the date range and other applicable settings and choose Generate Order
Creating an EDI Purchase Order
EDI orders are those filled by electronically creating and sending POs, locally, to an applicable vendor, and/or electronically receiving an invoice(s) from a vendor.
Setup for Vendors utilizing EDI should be accomplished with assistance from FasTrax Support. Certain file formats are required for this utility to operate properly. Please contact FasTrax Support for any further assistance/questions.
- If there are any items you do not wish to include on the generated PO, highlight from the Order Details list and press

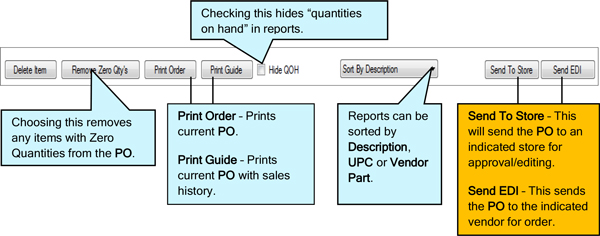
- Generating the order will take you tothe “Order Details” section of theReorder utility.
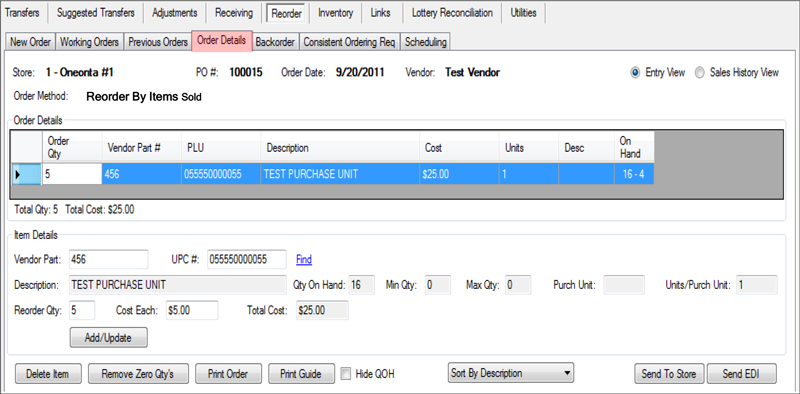
The Order Details section is for editing any items or quantities generated on the order. Items can be removed and/or added to a PO. Cost of items can also be edited from this screen.

The “Order Details” section is separated into two portions.

Generated POs can be edited through this section. This section displays pertinent information for generated items; PO number, date and vendor.
Choosing “Sales History View” will display item information by a weekly sales history, thus assisting in manual quantity entry.
Quantities, if needed, can be edited by entering the desired amount(s) per item.
Items can be removed by highlighting and pressing
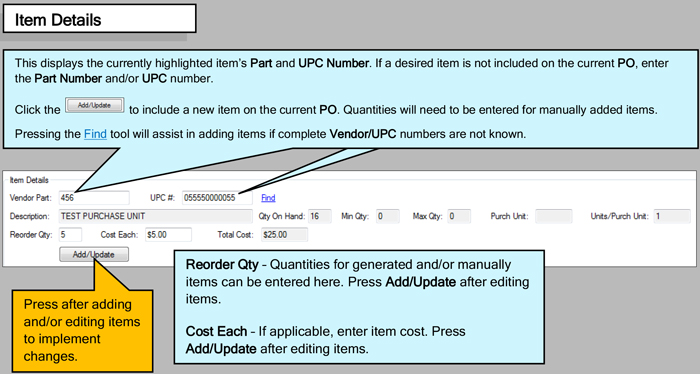
Reorder quantities and Cost are editable in this section. If the generated quantities are not satisfactory, edit and press

If additional items are desired to be added to the PO, enter either the item’s Vendor Part or UPC # then press to add item(s).
 - After confirming invoice filteringcriteria is correct, press the“Generate Order” button.

- If an order based on “Sales” is beingcreated, an applicable Date Range will need to be identified to generatean accurate order.
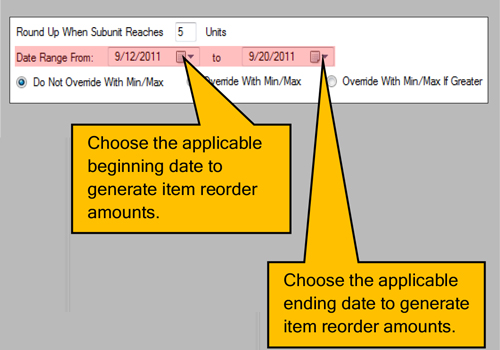
Do Not Override With Min/Max – If Min/Max are set for item reorders, a manual input for reorder will override these Min/Max presets.
Override With Mix/Max – If Min/Max are set for item reorders, Min/Max presets will auto fill reorder amounts.
Override With Min/Max If Greater – If Min/Max are set for item reorders, reorder amounts will default to Min/Max presets if the suggested amount is lower than Min/Max.
Min/Max on hand amounts are set to items via Item Details.
- Choose the applicable vendor fromthe “Vendor” dropdown.

- Change the “Method” to theapplicable “Reorder By Items Sold(Replenishment)”. This is chosenfrom the available dropdown.
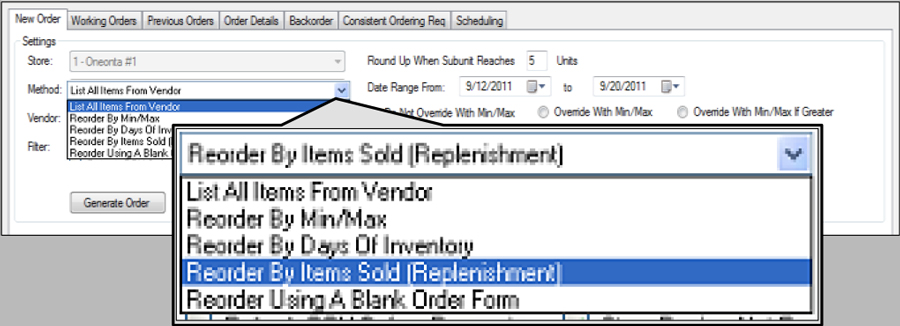
- If not already by default, choose the“New Order” tab within the Reorderutility.

- Choose the “Reorder” utility from theoptions listed along the top utilitytab.

- After logging into the FastraxDirector, choose the “Inventory”module.
- After confirming PO information iscorrect, press the “Send EDI” button.

If an order/PO is generated and not sent, it can be reviewed, edited, deleted and sent at a later time through the “Previous Orders” section.
- Choose “Previous Orders” from the Reorder utility.

- Filter to the correct vendor and/or date, or highlight the applicable PO.
- Choose the applicable option for the highlighted PO.

Delete Order – Choosing this will delete any highlighted PO, waiting or sent.
Close Order – Choosing this will close any highlighted PO, waiting or sent. Closed POs are not deleted, but are simply removed from the list. Closed POs are still editable.
- Choose “Previous Orders” from the Reorder utility.
Receiving EDI from a Purchase Order
After creating Purchase Orders sent via EDI, these Purchase Orders can then in turn be received as Vendor Invoices upon order arrival.
When receiving an EDI Invoice created from a Purchase Order, you will need the Vendor Invoice Number. Your applicable vendor will supply this number.
- After logging into the FastraxDirector, choose the “Inventory”module.
- Choose the “Receiving” utility.


- From this section, press the “CreateNew Invoice” button.

This will open the “New Invoice” window.
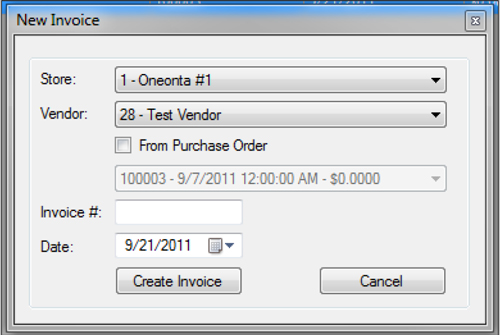
- Choose the applicable vendor from the Vendor dropdown.
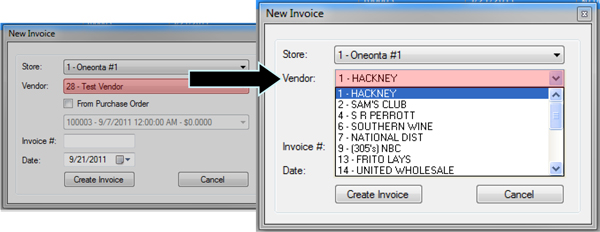
- Check “From Purchase Order”.

- Select applicable Purchase Orderfrom dropdown.
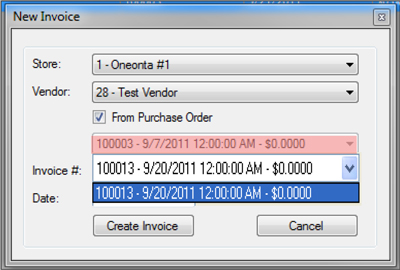
- Enter the applicable Vendor InvoiceNumber for the previously generatedPO.
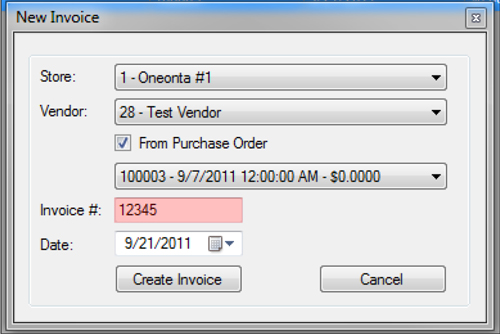
- Press the “Create Invoice” button.

- Verify quantities and costs arecorrect for the items listed.
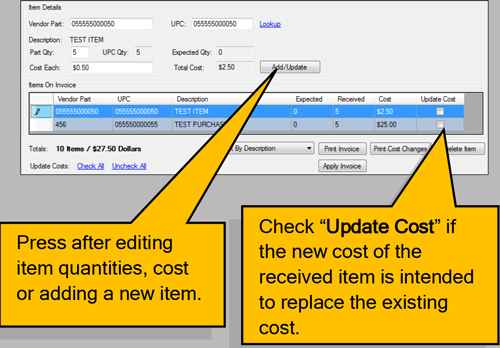
If an item requires a change in quantity or cost:
- Highlight the applicable item andedit Part Qty or Cost Each.
- Press the “Add/Update” button tosave changes before highlightinganother item.
If items not listed on an invoice need to be added and received:
- Enter the Vendor Part or UPC.
- Edit the quantity and cost.
- Press the “Add/Update” button.
Sometimes items are damaged before receiving. If items need to be completely removed from an invoice:
1)Highlight the applicable item andpress the “Delete Item” button.
This will remove the item and change the invoice “Totals”. - 10)Press the “Apply Invoice” button to receive the invoice.

Update Costs:
Check All – Pressing this will check all items to Update Cost as received.
Uncheck All – Pressing this will uncheck all items flagged to Update Cost as received.
How to Perform a Hand Held Cycle Count
- After entering FasTrax PSM on thehand held, choose “Inventory”.
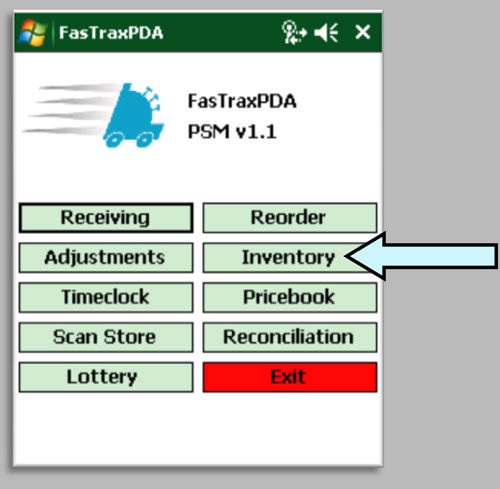
Note – FasTrax PSM is accessed by pressing the “Start” option on the Hand Held home screen. Choose FasTrax PSM from this drop down.
- Select “Cycle Counts”:
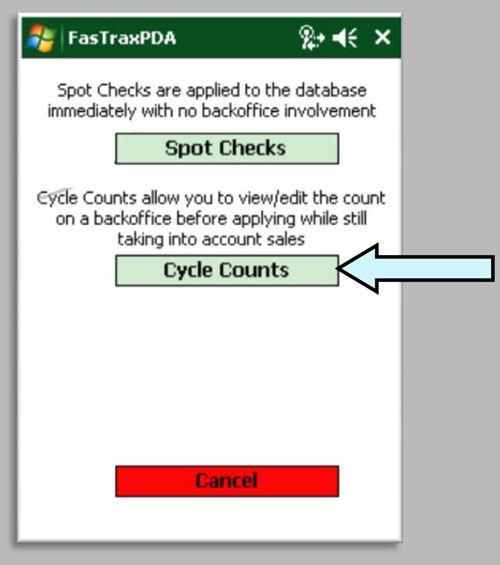
Spot Checks – This is used for quick quantity checks/replacement. This is NOT to be used in lieu of Cycle Counts. This feature does not take in account current sales or invoices. The setup and usage follow the same steps as performing a Cycle Count.
Cancel – This will return you to the main screen of FasTrax PSM.
- Choose “Login” after the appropriateEmployee ID and Password areentered.
Note – Employee numbers and Passwords are created in the FasTrax Director through the “Maintenance” tab.
- If you are performing a new CycleCount, select the “Begin A NewCount” option.
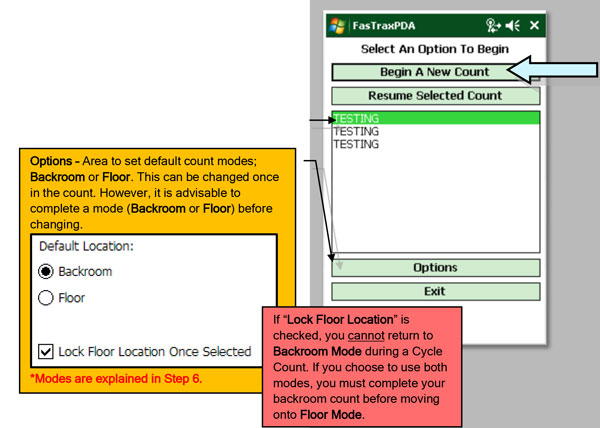
If you are resuming a previous cycle count, select the name of your Cycle Count from the list and select “Resume Selected Count”.
- You have the option of selecting apreexisting definition or you canselect “No Def”. Press “Continue”when a selection is made.
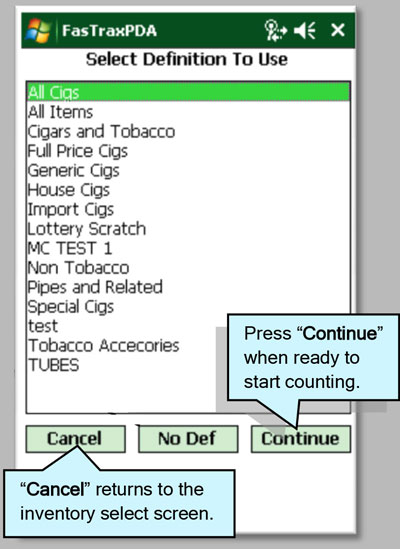
Definitions are a preset list of items from the Pricebook. These are useful for specific, repetitive or employee assigned Cycle Counts. See “How to setup Cycle Count Definitions” for more information. Pg##
If “No Def” is selected, the inventory will not include any Non-counted (not scanned) items from your pricebook. It is advisable to use definitions to keep track of ALL items in your pricebook; not just what is on the shelf.
- You have two modes for scanningitems into a Cycle Count. They are“Backroom Mode” and “Floor Mode”.Press “Continue” when the propermode is selected and the item isscanned.
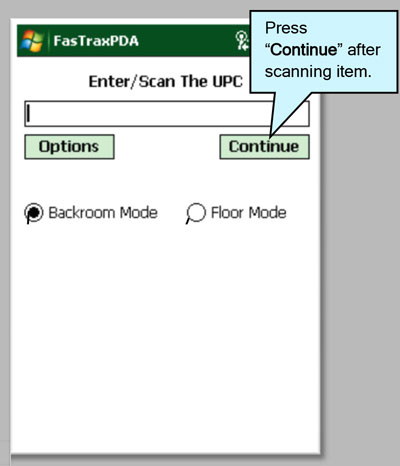
“Options” is a section for handling duplicate item scans. See Step 7 for further explanation.
If you choose Backroom Mode, it is expected that you are counting items in a stock room and that no inventory adjustments such as sales, receiving, transfers, etc. will be made to these items during the count.
If you choose Floor Mode, the system takes a snap shot of the current “On Hand Quantity” of the item at the time of scanning. From that point it tracks any inventory adjustment made during the cycle count.
“Floor Mode” allows the ability to perform a complete store Cycle Count while the store is operating.
- The “Options” button allows you to select whether you will be prompted when an item isscanned more than once during a Cycle Count. Press “Return To Entry” when selectionfor handling duplicates is chosen.
- “Prompt On Duplicates” selected:
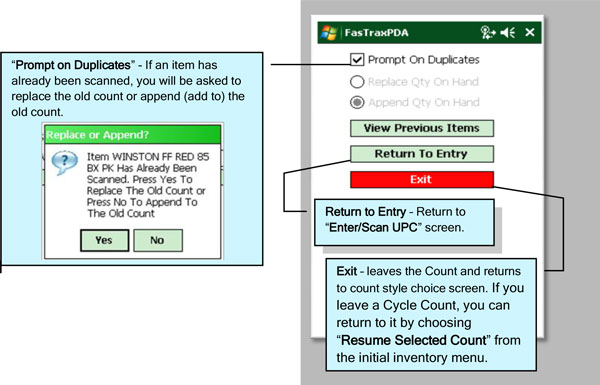
You will not be prompted if you scan an item in Backroom Mode and the same item in Floor Mode. These modes are handled separately during the Cycle Count and added together during reconciliation.
- If “Prompt on Duplicates” is notselected, you have the option toselect “Replace Qty On Hand” or“Append Qty On Hand”
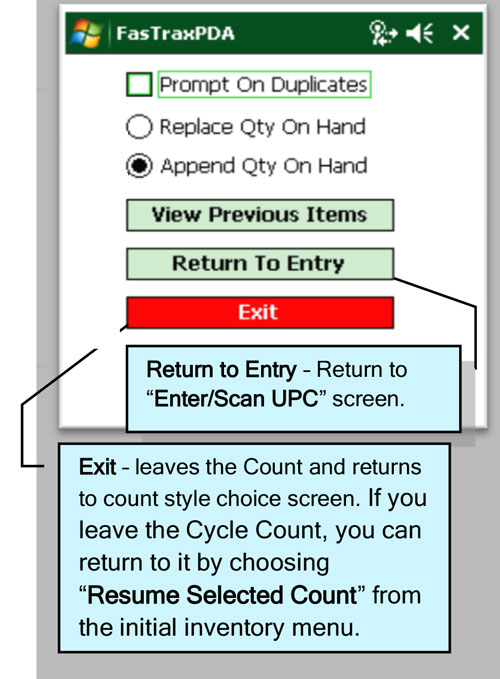
Replace Qty On Hand – Whenever an item is scanned, the quantity entered will become the On Hand Quantity. Multiple scans of an item will not append.
Append Qty On Hand – If an item is scanned multiple times, the entered quantities will automatically append.
- “Prompt On Duplicates” selected:
- To update quantities:
- Scan item or manually enter UPC.
- Enter the quantity you have counted.Select “Save” to go to the next item. Repeat this process until all items are counted.
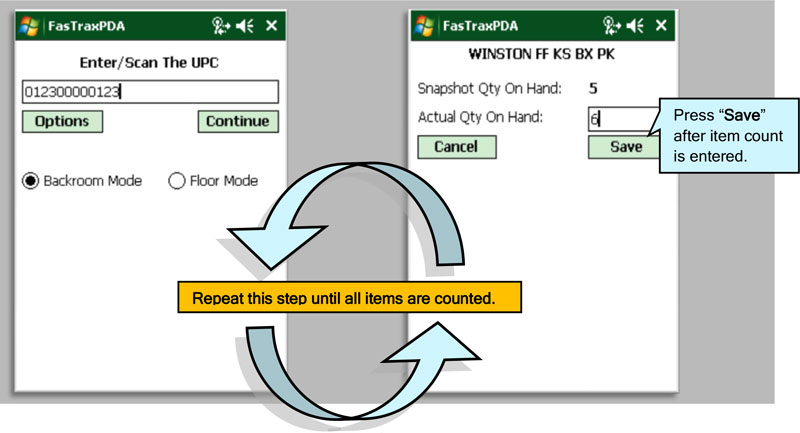
- When the Cycle Count is complete, select “Options” and Select “Exit”.
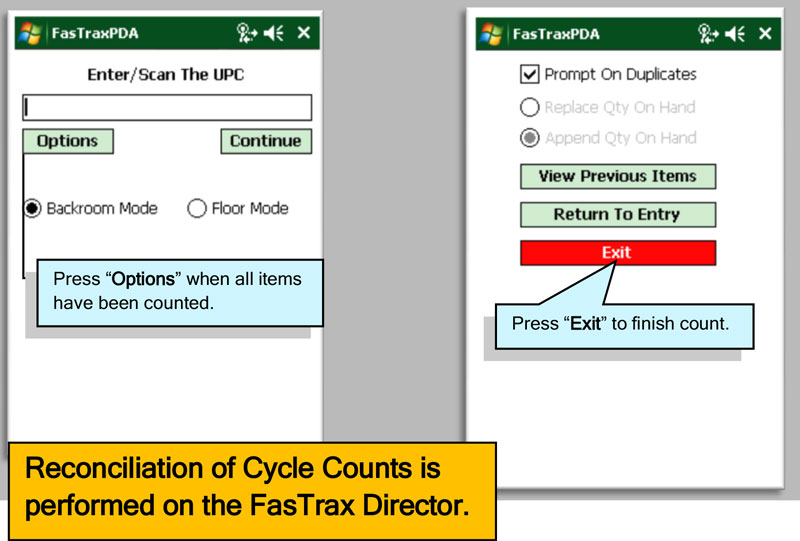
Reconciling Cycle Count in FasTrax Director
- After logging in, choose “Inventory”from the options located on the leftof the Director.
- Once in “Inventory”, choose the “Inventory” tab from the row of options listed at the top of the Director.

- Then select the “Cycle Count Tab”.

- In the “Date Range From” area, enter/select the dates you have performed Cycle Countsand press the “Refresh” button.

- From the displayed list, highlight the intended Cycle Count and select
 at the bottom left. You can correct issues, print reports and reconcile your inventory.
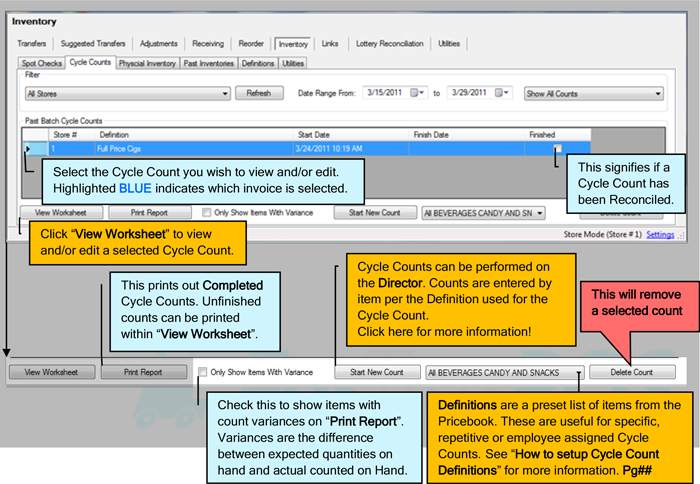
- Once in “View Worksheet”, verify that item counts are correct. The Backroom Count and Floor Count columns will reflect what was entered on the handheld. Corrections can be entered in these columns.
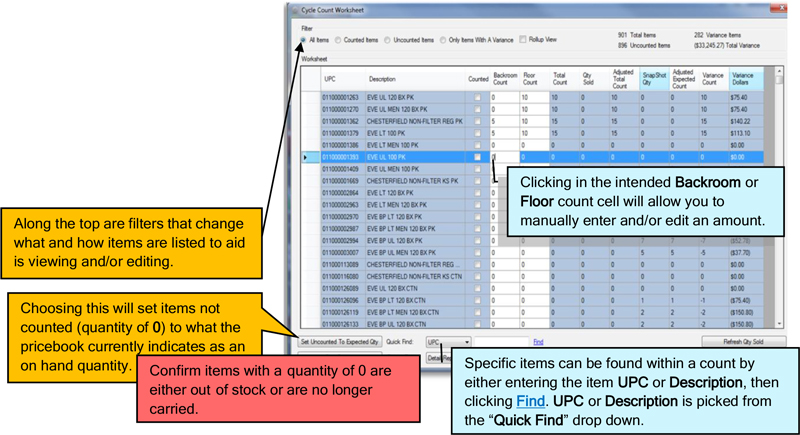
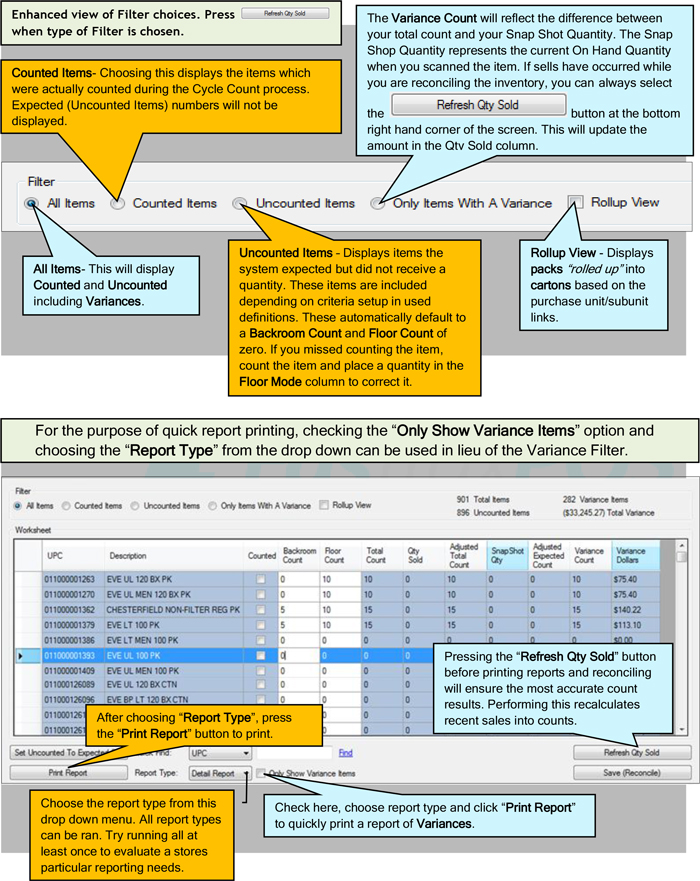
- After confirming and/or editing thecount, press the “Save (Reconcile)”button. This applies the quantities tothe pricebook. Ensure theseamounts are correct before savingthe Cycle Count.
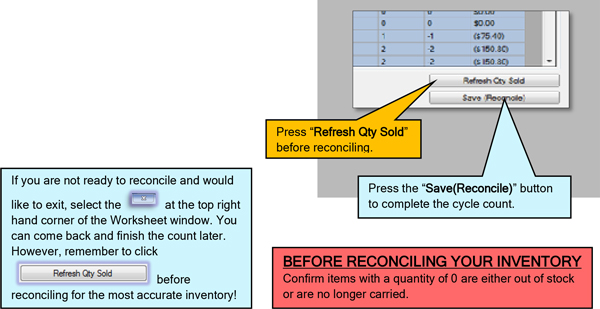
Congratulations! You have completed your inventory!
Reports to Gather a Total Inventory Cost
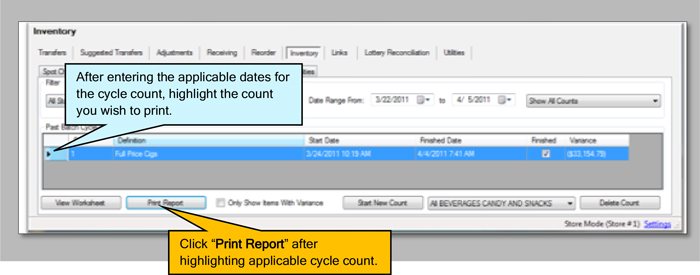
If the completed cycle count was a complete store scan and you require a Total Cost of the inventory, select the desired inventory and “Print Report”.
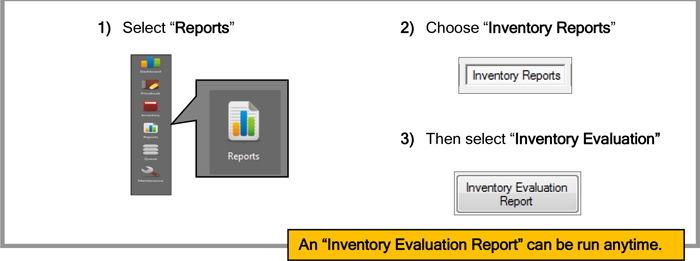
If multiple cycle counts were completed (as multiple definitions), it is not necessary to print each count separately to obtain a total inventory cost. If an “Inventory Evaluation Report” is run immediately after reconciling counts, a singular total inventory cost is printed.
Overview of Scheduling Reports
Scheduling reports is a simple way to save time and get the exact data you need to see without having to spend the time to run the report.
Scheduled reports can be both email and sent via Director messaging, so no matter the delivery method preferred, it can be done. Reports can be sent in the PDF, Excel, Excel (Data Only), and Word formats. There are no limits to the number of reports that can be scheduled; however, be mindful to not schedule too many reports at the same time so that server performance isn’t hindered.
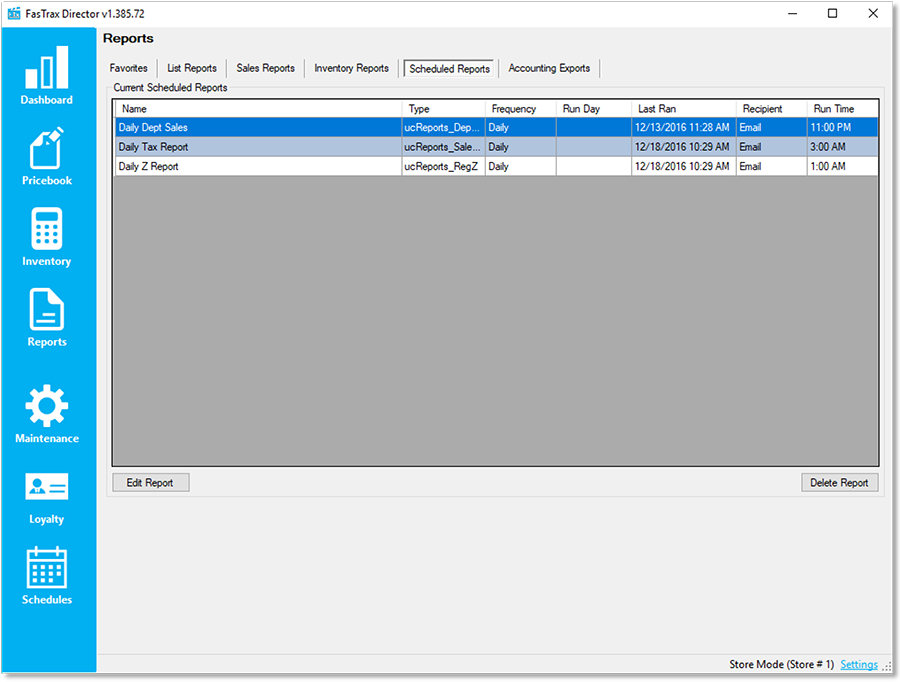
How to Schedule a Report
- From within Director, choose the “Reports” button

- After choosing any report and inputting the desired parameters, choose the “Add to Scheduled Reports” hyperlink

- The “Add To Scheduled Reports” window will show up. Input the preferred delivery method and time, as well as give the scheduled report a name
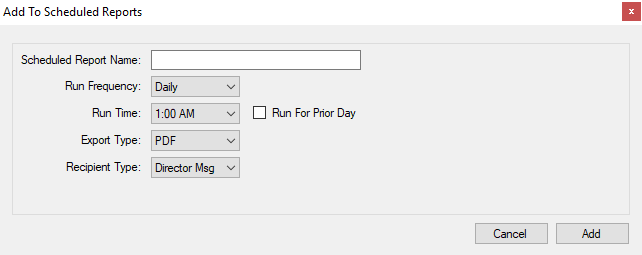
- Choose the “Add” button

The FasTrax Scheduled Tasks program must be set to run as a scheduled task every hour on the machine that functions as the server.
Overview of Retail Scan Data Incentive Reports
There are two different retail scan data incentive reports within FasTrax Director that can be sent in to their respective manufacturers, Altria and RJ Reynolds. These are an easy way to bring in additional revenue by providing sales data that they request in very specific formats.
These can be found within FasTrax Director within the “Reports” module, under the “Sales Reports” header. To participate, working closely with an Altria and RJ Reynolds representative will be required, as they provide credentials and certifications that have to be completed first.
Following this guide will show how to properly set up items, multipack discounts, loyalty discounts, buydowns, promotional discounts, and the unit of measure.
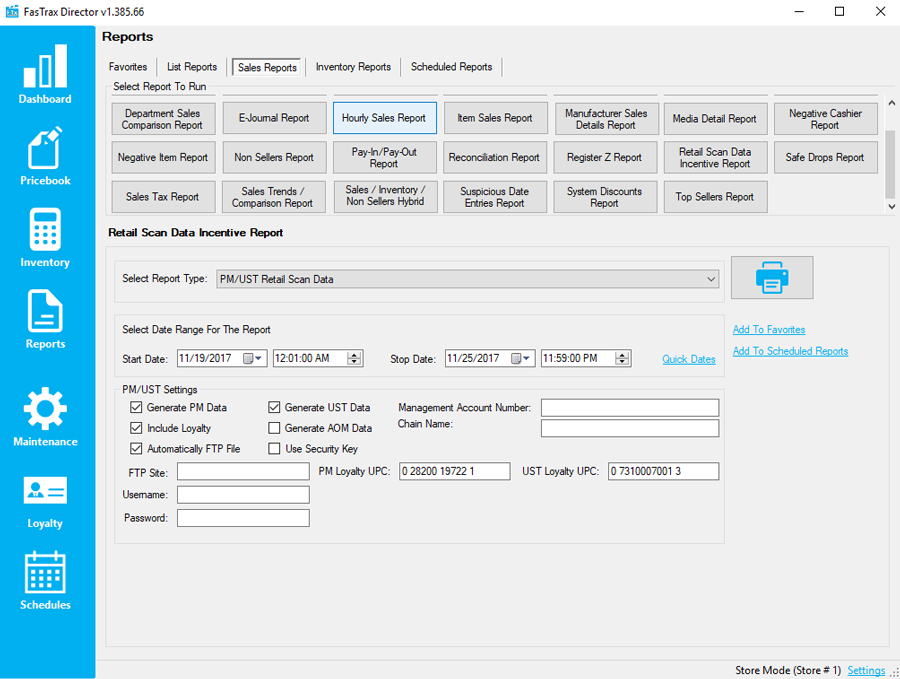
Item Requirements
Items need the following parameters set up in “Item Details” in order to pass certification and send weekly:
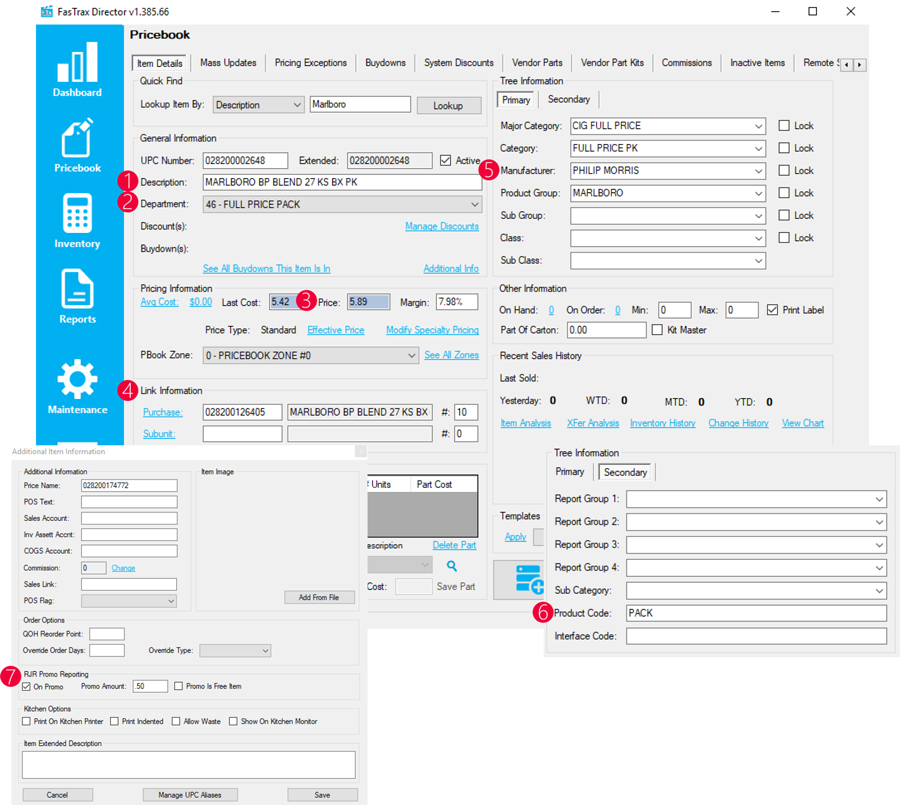
- Description – This should be detailed and easily decipherable
- Department – The RJ Reynolds and AOM portion of the Altria report reports on the department level
- Price – This should be the price before any discounts or buydowns
- Link Information – Properly associating both packs to cartons and cans to rolls together are required
- Manufacturer – The correct manufacturer is required on each and every item
- Product Code – This is located under the “Secondary” tree information tab and requires the unit of measure value
- RJR Promo Reporting – This is located in the “Additional Info” hyperlink and is used on the RJ Reynolds report to report the promotional value of promotional items, such as promotional packs
Buydown Requirements
Buydowns need to have the correct naming scheme and the checkbox checked to show in the report
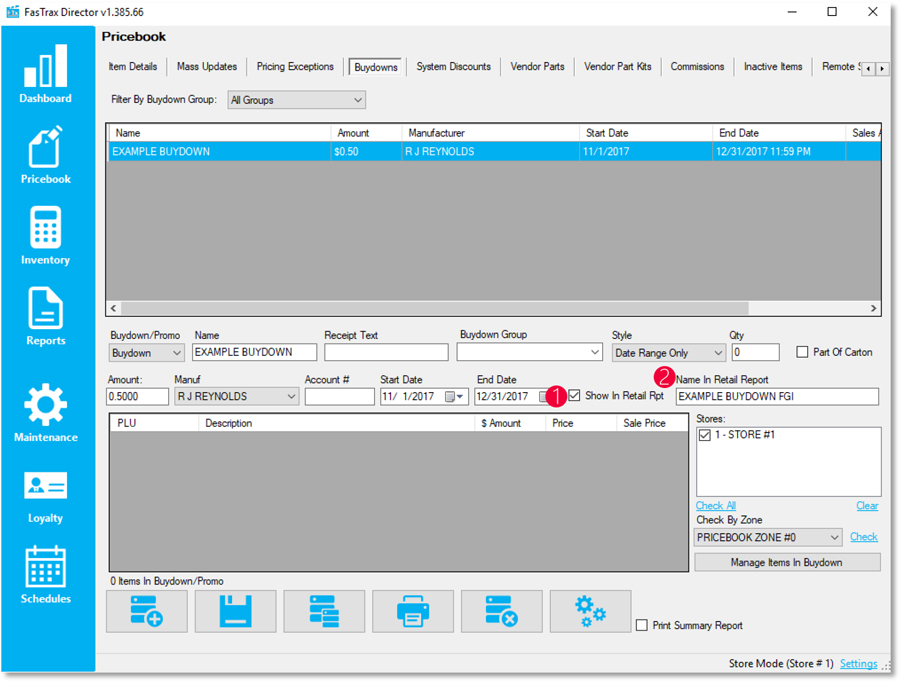
- Show In Retail Report – This should be checked for all buydowns that are to be reported
- Name In Retail Report – This is the name that will be reported in the scan data report of the buydown
Multipack & Loyalty Discount Requirements
When discounting multiple packs in the same transaction, system discounts MUST be utilized. Specialty pricing or manually discounting item(s) are not options.
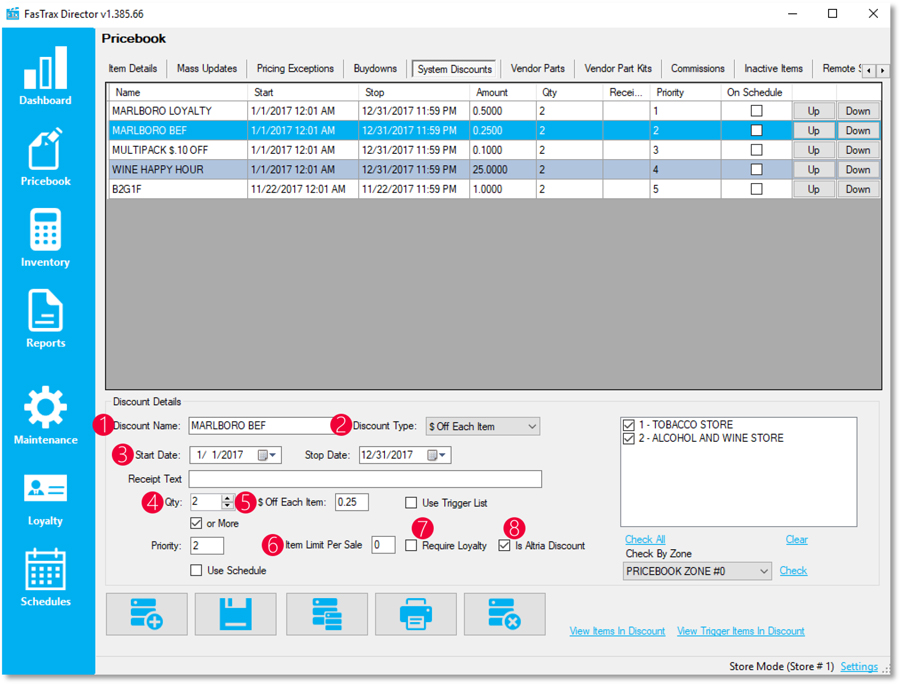
- Discount Name – Assign the discount name according to what the representative requires
- Discount Type – Choose the discount type, which is most commonly “$ Off Each Item” for multipack and loyalty discounts
- Start / End Date – The date range the discount will be active
- Qty – The item threshold required before the discount triggers
- $ Off Each Item – The amount discounted off each item attached to the discount
- Item Limit Per Sale – The number of times the discount can trigger in a single transaction
- Require Loyalty – When checked, required a loyalty customer on the transaction to receive a discount
- Is Altria Discount – Checked for Altria funded discounts, such as business enhancement funds or loyalty
PM/UST Retail Scan Data Fields
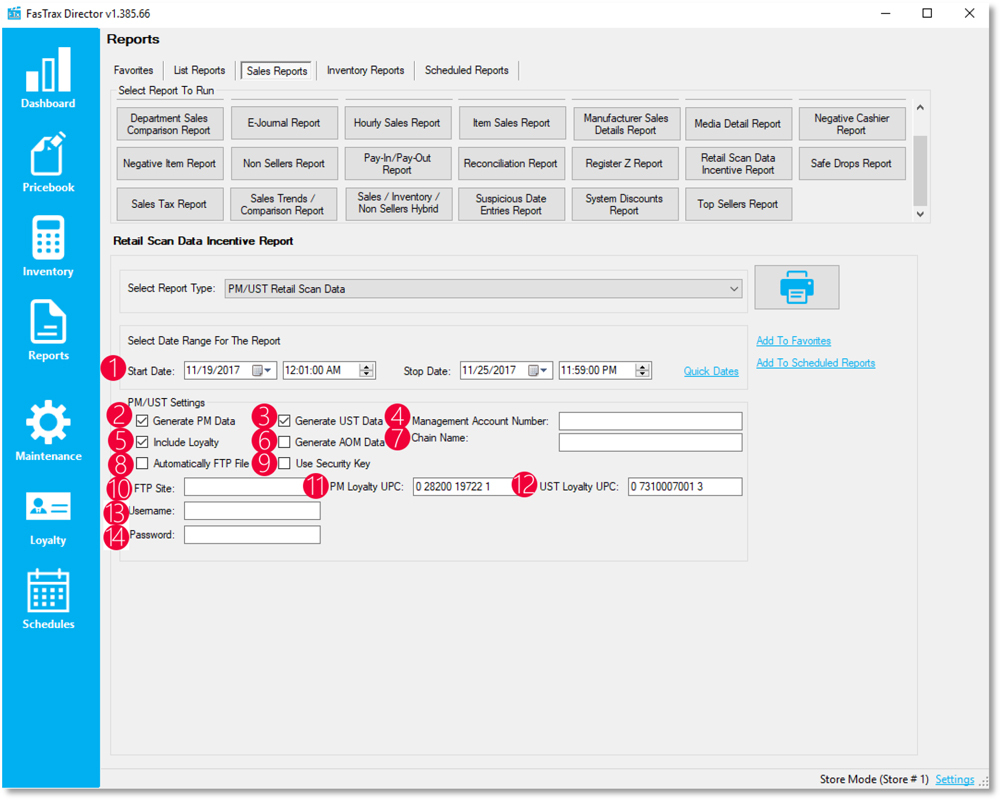
- Start / End Date – The time frame of data to be on the report
- Generate PM Data – Includes Philip Morris products in the report
- Generate UST Data – Includes UST products in the report
- Management Account Number – The account number provided by the Altria representative
- Include Loyalty – Includes loyalty sales data, campaigns, and discounts in the report
- Generate AOM Data – Allows user to choose specific departments to include in report
- Chain Name – Name of company on business license
- Automatically FTP File – Automatically sends scan data report to Altria
- Use Security Key – Uses a security key if required when automatically FTPing the file to Altria
- FTP Site – The URL of the FTP site the report is to be sent to, provided by the Altria representative
- PM Loyalty UPC – The UPC for PM loyalty discounts that is provided by the Altria representative
- UST Loyalty UPC – The UPC for UST loyalty discounts that is provided by the Altria representative
- Username – The username for the FTP server provided by the Altria representative
- Password – The password for the FTP server provided by the Altria representative
RJ Reynolds Scan Data Fields
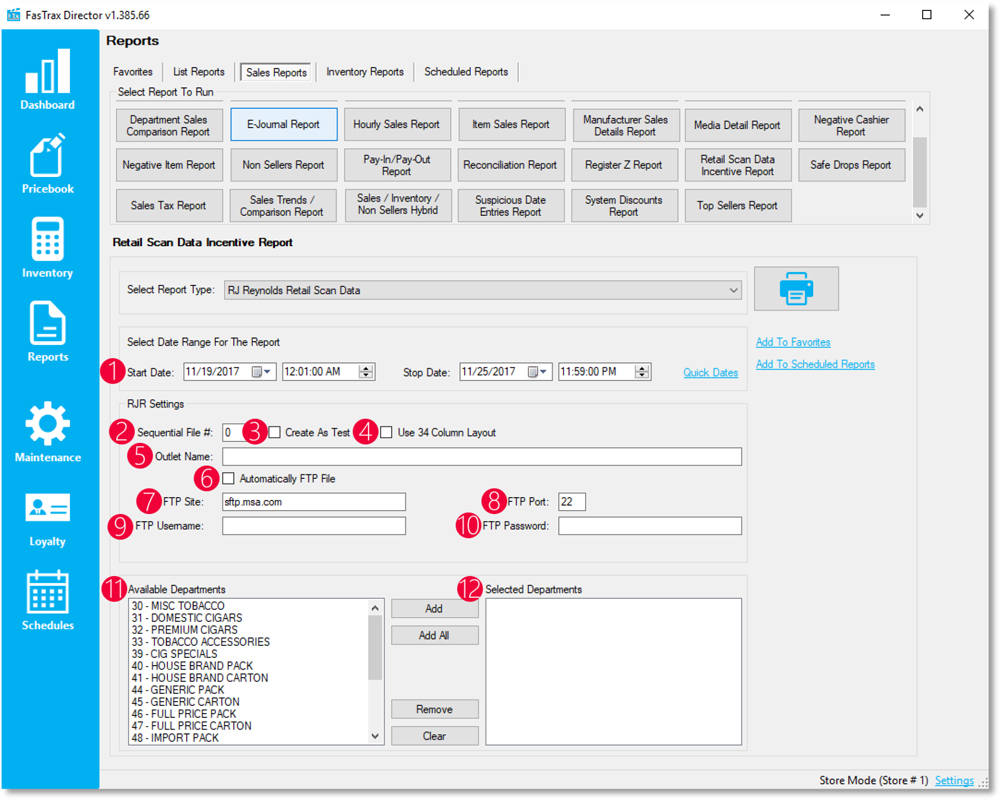
- Start / End Date – The time frame of the data to be on the report
- Sequential File # – The sequential file number
- Create As Test – Generates test data for certification
- Use 34 Column Layout – Uses the 34 column layout of the report if required by RJ Reynolds representative
- Outlet Name – Name of company on business license
- Automatically FTP File – Automatically sends scan data report to RJ Reynolds
- FTP Site – The URL of the FTP site the report is to be sent to, provided by the RJ Reynolds representative
- FTP Port – The port number for the FTP site, provided by the RJ Reynolds representative
- FTP Username – The password for the FTP server provided by the RJ Reynolds representative
- FTP Password – The password for the FTP server provided by the RJ Reynolds representative
- Available Departments – The list of available departments capable of being included in the report
- Selected Departments – The list of departments that will be included in the report
POS Required Settings
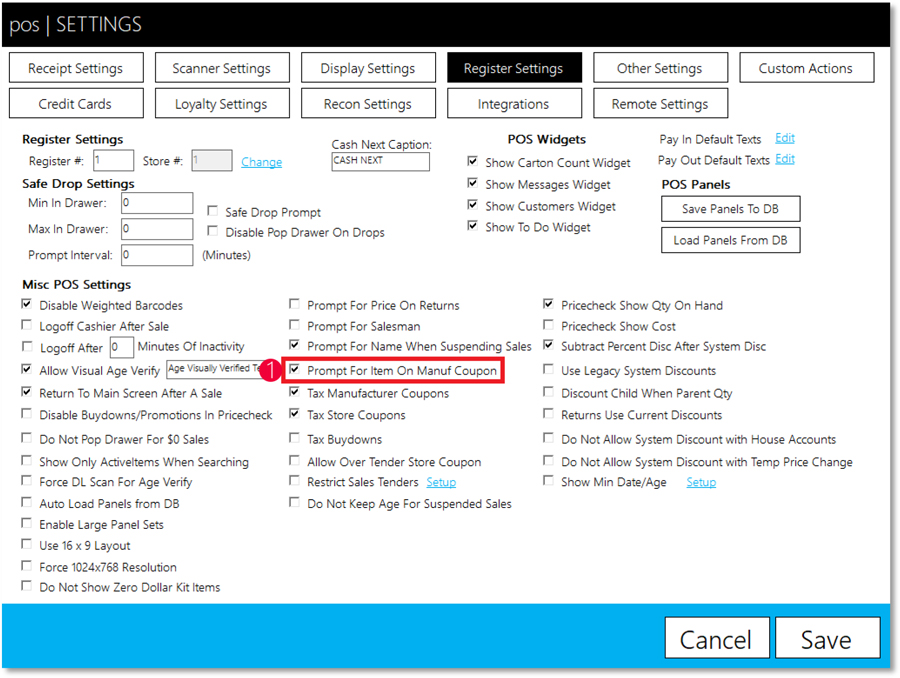
- Prompt For Item On Manuf Coupon – This setting prompts the cashier to tie a coupon to a specific item, each time a manufacturer coupon is scanned. It is required for both Altria and RJ Reynolds, so the representatives know the reasoning for pricing differences
Store Parameter Required Settings
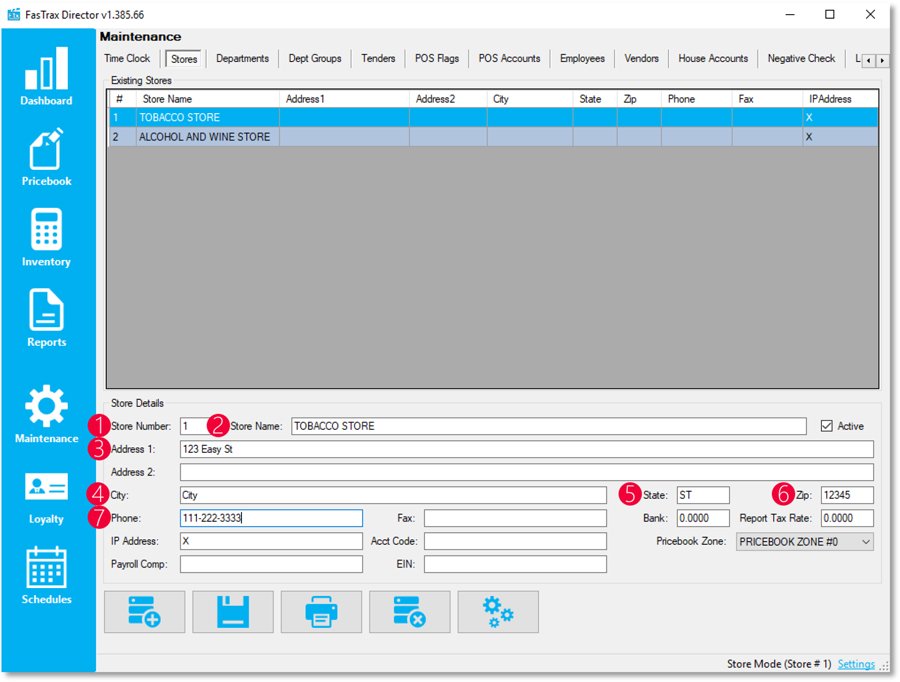
- Store Number – The store number on the business license
- Store Name – The store name on the business license
- Address – The store address on the business license
- City – The city on the business license
- State – The state on the business license
- Zip – The zip code on the business license
- Phone – The phone number on the business license
Common Feedback & Questions
- Does FasTrax utilize loyalty reporting option 1 or option 2 for the Altria Retail Scan Data Report?
- FasTrax utilizes option 1
- How does the Marlboro Loyalty discount look when set up?
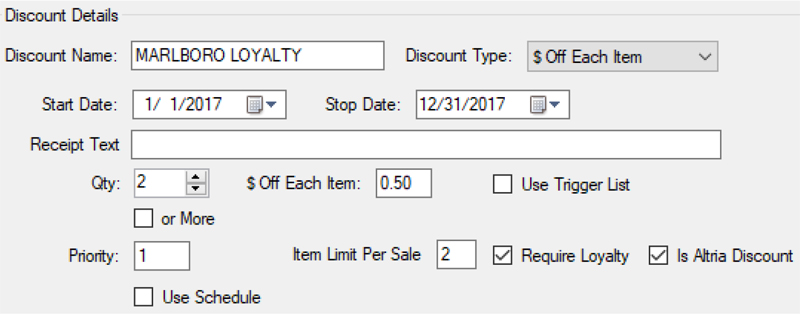
- How does a typical multipack discount look when set up?
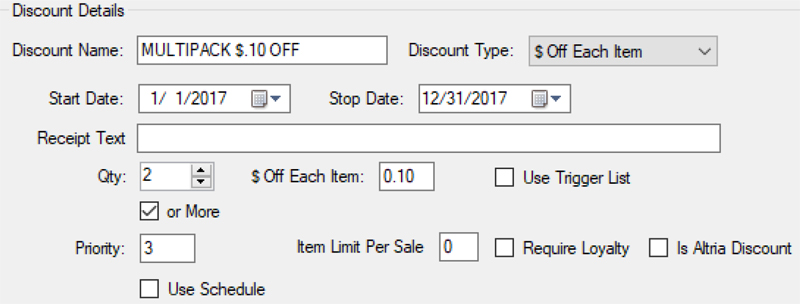
- How does the Altria business enhancement discount look when set up?
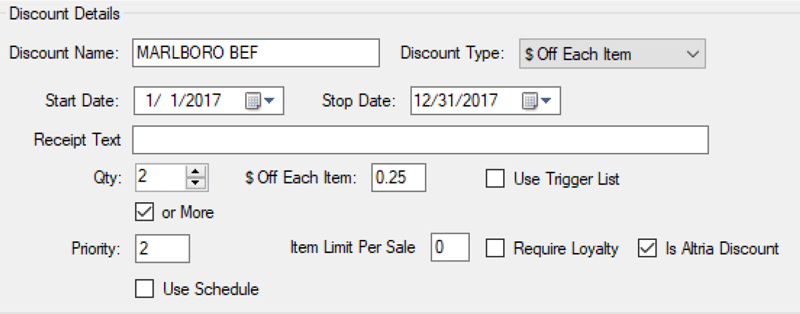
- Unit of measure is causing validation warnings
- This would be because the product code of the item is incorrect or not set at all. Refer to the item setup of this document to see how to resolve this
- Value added promotions is causing validation warnings
- The promotional value of the item has not been set. Refer to the item setup of this document to see how to add the “RJR Promo Value”
- Can multiple discounts fire for the same items, such as loyalty and multipack?
- Yes, just make sure the discount priority level for the loyalty discount is a higher value than the others
- How do you look at a specific transaction that received a validation warning?
- For the both reports, there is a column that contains a series of numbers that has transaction information. It is in the following format: XXXYYZZZZZ where X = store number, Y = register number, and Z = receipt number. You can run an e-journal report to view the actual receipt of the transaction
Overview of Accounting Exports
Accounting exports are a simple way for FasTrax Director to export a flat file that contains accounting information.
These various files can be imported into a variety of accounting software, such as Quickbooks, Sage BusinessWorks,
and Microsoft Dynamics GP (Great Plains).
Below is an image of the account exports. This document will cover assigning all accounting codes that will be used in
the accounting exports, as well as exporting the accounting file itself.

Setting Up Accounting Codes
In order for the accounting exports to function correctly, accounting codes have to be set across the system and in a
specific INI file. Each of the following pages will contain where and what accounting codes exist.
1. Store Accounting Code

2. Department Inv Code
3. Department COGS Code
4. Department AP Code

5. Tender Acct Code

6. Vendor Acc Code

7. Buydowns Account #

8. Item Sales Account
9. Item Inv Assett Accnt
10. COGS Account

As a note, items pull their accounting codes from the
department that they are in. This field is used if an item
needs to utilize an accounting code that is different than
the department that it is in
Quickbooks Specific Accounting Codes
The Quickbooks export has a few extra fields that need to be set. These can be found by navigating to the following
location: Reports Module – Accounting Exports Tab – QB Format – Manage Account Codes

1. Tax Name Field Value
2. Tax Rate 1 Account Code
3. Tax Rate 2 Account Code
4. Tax Rate 3 Account Code
5. Tax Rate 4 Account Code
6. Tax Rate 5 Account Code
7. Tax Rate 6 Account Code
8. Tax Rate 7 Account Code
9. Tax Rate 8 Account Code
10. Invoice Account Name
11. PayIns Account Code
12. PayIns Offset Code
13. PayOuts Account Code
14. PayOuts Offset Code
15. Mobile Coupons Code
16. Loyalty Coupons Code
17. Freight Account Code
18. Buydowns Account Code
19. Buydowns Offset Code

The Different Accounting Export Formats
There are several different accounting export formats. They all can be found within Director in the following location:
Reports Module – Accounting Exports
Below are the different formats:
RM Format – The Richmond Masters format
BW Format – The BusinessWorks format
QB Format – The Quickbooks format
GP Format – The Great Plains format
All formats have the following varied parameters that can be altered when running the export:
1. Date Range (start and stop date)
2. Export Path (where the exported file is sent via Director)
3. The option to export invoices
4. The option to export sales
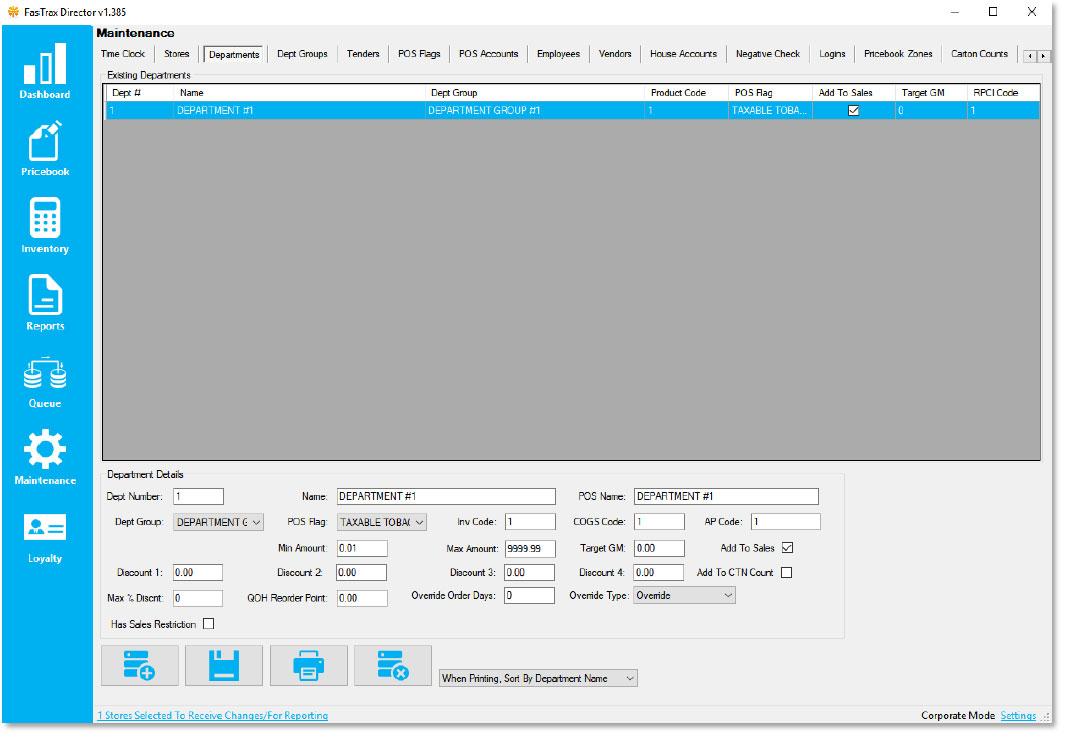
Department Field Descriptions
- Dept Number – The unique, numerical department number
- Name – The department name that is shown throughout Director
- POS Name – The department name that is shown throughout the POS
- Dept Group – Used to roll multiple departments up to one, larger group
- POS Flag – Contains age verification, positive or negative transaction flag, and tax groups
- Inv Code, COGS Code, & AP Code – Utilized for accounting software exports
- Min Amount – The minimum sale amount allowed for selected department
- Max Amount – The maximum sale amount allowed for selected department
- Target GM – The targeted gross margin to be made on the selected department
- Add To Sales – Adds totals sales to selected department to net sales for the day
- Discount 1, 2, 3, & 4 – An entire department level discount that is assigned to house accounts
- Add To CTN Count – Adds the selected department to the carton count limiter
- Max % Discnt – The max amount any item from selected department can be manually discounted at register
- QOH Reorder Point – For replenishment orders, allows all items in selected department to supersede order rules
- Override Order Days – For days of inventory orders, allows all items in selected department to supersede order rules
- Override Type – For overriding order parameters, allows to increase, decrease, or completely override the set order parameters
- Has Sales Restriction – Assigns selected department to utilize sales restrictions
Overview of Departments
Departments are groupings of items that share similar properties, such as groceries, soft drinks, magazines, ect.
Below is an image of the department properties screen from within Director. The next page will cover each editable field on this page and what it is used for.
When creating and / or editing Pricebook items, part of the item setup involves assigning items to a Department. These Departments are necessary for the proper function, grouping, and categorization of items.
Along with granting the user a more organized method of item editing and reporting, crucial POS functions are associated to Departments via the assigned POS Flag. POS Flags control the taxes applied to items, if identification is required to purchase an item, and various other sale specific options. POS Flags directly affect the register side of item management.
Once a POS Flag is created and assigned to a Department, Departments can be assigned to a Department Group. Although there are no function specific options in Department Groups, they do offer a “top level” form of organization. When a User is utilizing the Mass Updates utility or running reports, starting a filter from the Department Group is a quick way to weed out unwanted information.
Please see the sections below for an overview of POS Flag, Department Group, and Department setup.
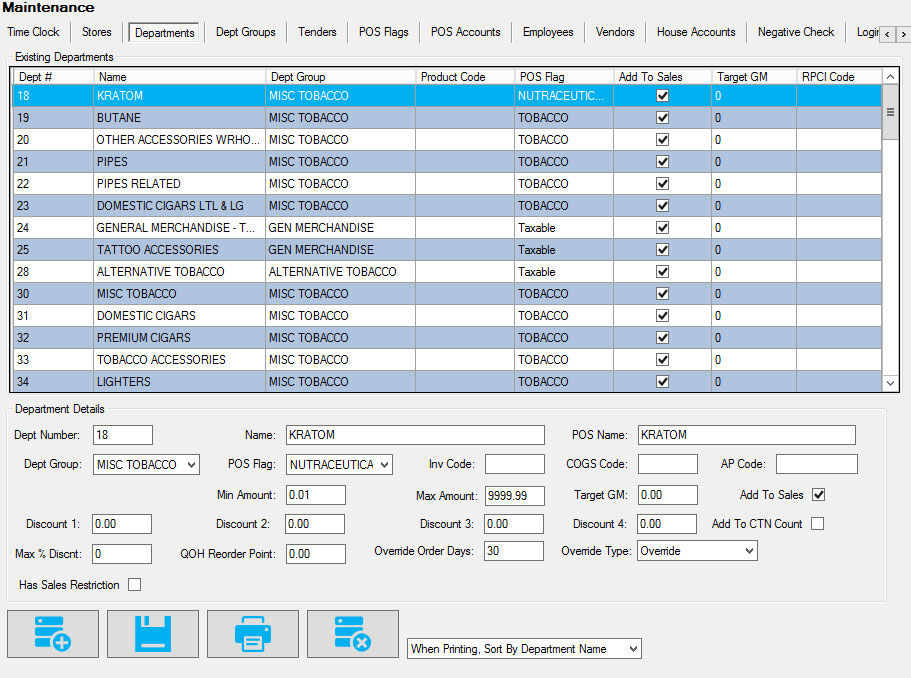
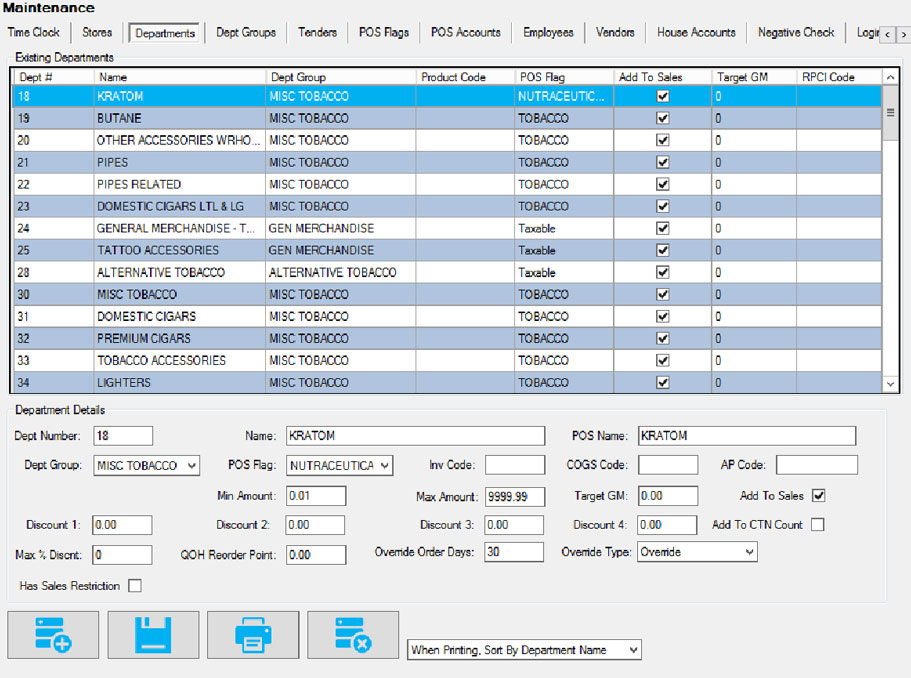
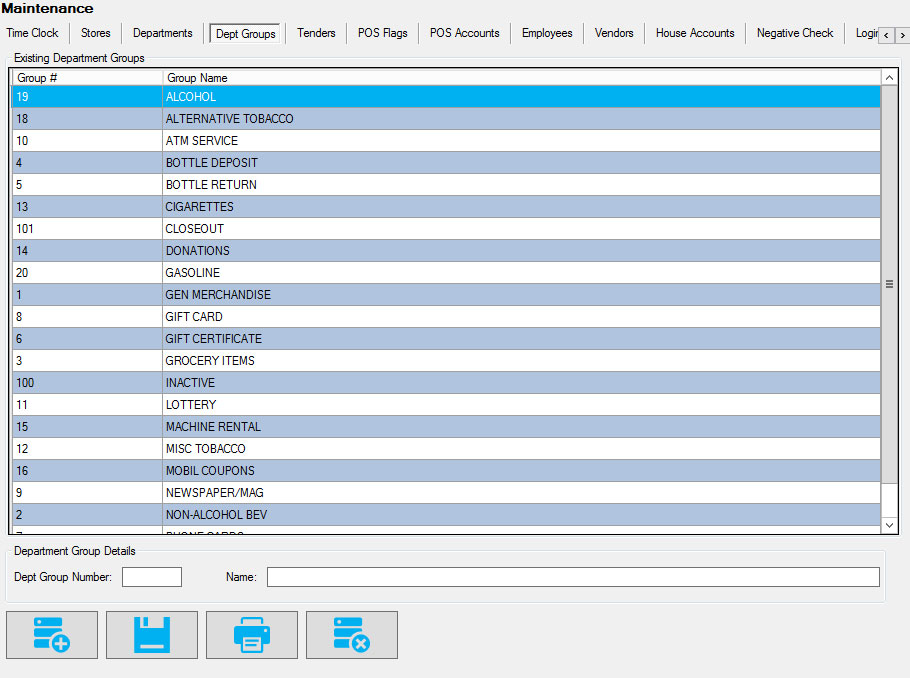
POS Flags control assigned sales parameters for items when entered at the POS/Register.
Taxes applied, age requirements, and price changes are a few of the options controlled via POS Flags for tendered items.
- After logging into Director, choose the Maintenance module.
- Once in the Maintenance module, choose “POS Flags”

- This will open the “POS Flags” utilityIf this is a new install and you are using a FasTrax supplied starter database, you may notice there are a few POS Flags already setup.
These are often used flags we have preconfigured. You are welcome to edit these to fit your particular needs.
Remember to choose the SAVE option to apply any changes you make.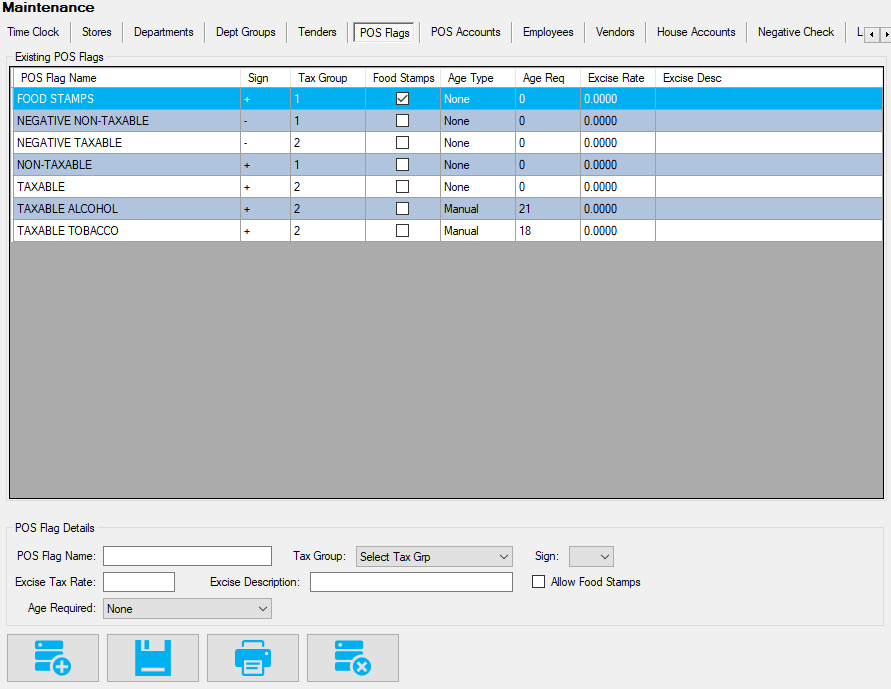
- If this is to be a new POS Flag, first choose the “Add POS Flag” button
If you wish to edit an existing flag, simply highlight the applicable flag from the “Existing POS Flags” grid and edit in the “POS Flags Details” area.
- Using the “POS Flags Details” section, enter applicable information for this flag.

- POS Flag Name – Name your flags according to the groups they are servicing. Normally, Tobacco products are not taxed and sold the same a General Merchandise. This will assist when assigning flags to Departments.
- Tax Group – These are created at the POS/Register via the Store Setup Utility. Tax Groups apply the tax rates you setup to the items in Departments assigned particular POS Flags.
(e.g. – items in Departments assigned a flag named “Tobacco” may only apply a State Sales Tax of 8% where a general merchandise Department’s items will charge a State and City tax rate). - Sign – This marks the department as a positive or negative department. Negative department items ring at the register as a negative amount.
- Excise Tax Rate – This is where the percentage for an excise tax can be added. This is a % of the cost.
- Excise Description – This is the description of the excise tax rate
- Age Required – Age required to purchase items from department
- Allow Food Stamps – Allow Food Stamp tender
- After confirming applicable information is entered correctly, choose the “Save” option.

If necessary, POS Flags can be edited at later times. However, be aware that changes to POS Flags will affect how items function at your register(s).
Please confirm changes are correct before saving.
Department Groups
Department Groups are a top level form of grouping for your Pricebook.
Departments can be organized into Department Groups assisting with the filtering functions often used in Pricebook editing and reports.
Multiple Departments can be set to groups; however, it is not necessary to setup multiple Department Groups. If desired, all Departments can be set a singular Department Group.
- After logging into Director, choose the Maintenance module.
- Choose the “Dept Groups” utility

- This will open the “Department Groups” utilitySince Department Groups serve only as an organizational tool, they can be freely edited and deleted without concern for data loss.
However, at least one group must be created for all departments to use if individual groups are not necessary.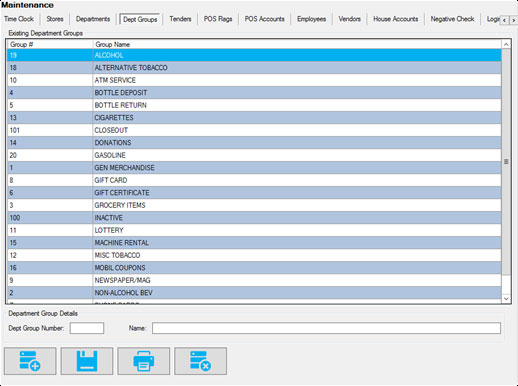
- If this is to be a new Department Group, first choose the “Add Dept Group” button.If you wish to edit an existing group, simply highlight the applicable group from the “Existing Department Groups” grid and edit in the “Department Group Details” area.

- Using the “Department Group Details” section, enter the applicable information for this group.

- Dept Group Number – This number is assigned by you. If you are currently utilizing this form of tiered Pricebook, you may already have a specific numbering sequence. If not, sequential numbers will suffice.
- Name – The name of the groups depends on how you currently or plan to utilize editing and reporting functions.
Notice in the example picture, the groups are generally named for the departments they contain.
- After confirming applicable information is entered correctly, choose the “Save” option.

Again, Department Groups are only utilized for their grouping function to assist you with categorization in editing your Pricebook and reporting functions.
At the very least, you must have at least one Department Group created for Department assignation.
Departments
Departments are groupings of like items to assist with hierarchal filtering, editing, reporting, and functionality.
Since Tobacco related items require different register treatment from General Merchandise, placing these items in a dedicated Department ensures the proper taxes and mandated functions apply to these items only.
Along with the parameters set by applicable POS Flags, Departments can also contain more specific parameters for Discount levels (House Account/Loyalty use).
Unlike Department Groups, these cannot be freely deleted. Since items are directly linked to Departments, please move items to a new Department before removal of existing assigned Department.
- After logging into Director, choose the Maintenance module.
- Choose the “Departments” utility

- This will open the “Departments” utility
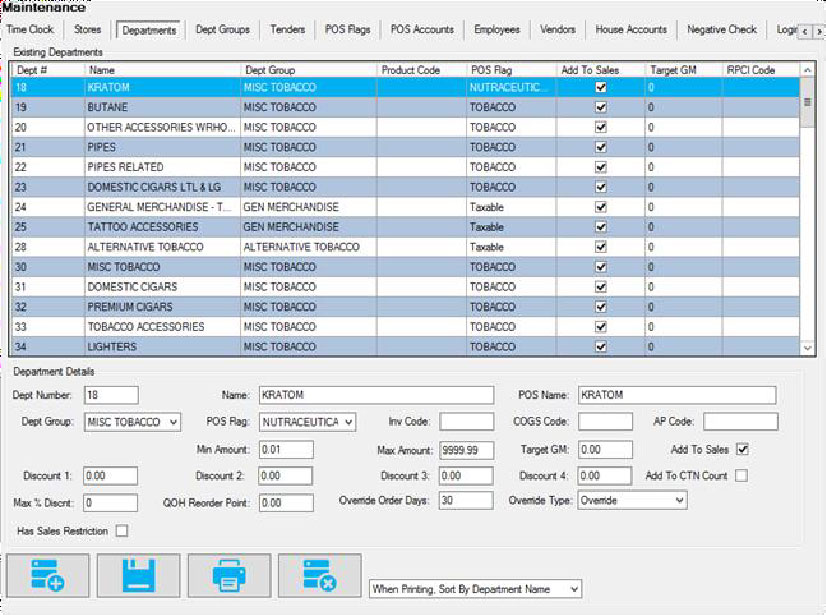
If this is a new install and you are using a FasTrax supplied starter database, you may notice there are a few Departments already setup.
These are often used Departments we have preconfigured. You are welcome to edit these to fit your particular needs.
Remember to choose the SAVE option to apply any changes you make. - If this is to be a new Department, first choose the “Add Department” button.
If you wish to edit an existing Department, simply highlight the applicable Department from the “Existing Departments” grid and edit in the “Department Details” area.
- Using the “Department Details” section, enter the applicable information for this department.

- Dept Number – Numerical designation for department. This only serves as a reference. This allows you to stay consistent if a current system requires a specific numbering system for accounting packages.
- Name – Name of Department.
- POS Name – Name that appears at the POS for Department sales.
- Dept Group – Department Group this Department is assigned to.
- POS Flag – POS Flag this Department is assigned to. This decides the Taxes and other parameters the Department honors.
- Inventory Code – Inv Code, COGS Code, and AP code are utilized for account exports
- Min/Max Amount – Minimum/Maximum amount per Open Department item entered at the POS.
- Target GM – If “Open Departments” are to be used for sales (sales directly to a Department; not via an item UPC) setting this “General Margin” will provide Departmental percentage feedback in sales reports since item cost is not utilized for an “Open Department” sale.
- Add to Sales – When checked, sales are totaled and included in normal sales reports.
Unchecking may be useful for store or company transactions not intended for normal daily sales reports. - Discounts – Used for House/Loyalty accounts to receive specific Department Discounts. Each Department has four levels to enter a percentage rate for discounting item’s retail price when sold.
- Add To CTN Count – When utilizing the carton count limiter, this checkbox forces the POS to use the carton count rule
- Max % Discount – Max percent discount allowed when manually discounted on POS
- Reorder Options – Used to supercede reorder settings at a department level when reordering
- Has Sales Restriction – Use when applying a sales restriction to department
- Disclaimers– This assigns a disclaimer to the department, which prints on the receipt.
- After confirming applicable information is entered correctly, choose the “Save” option.

Once a Department is created, they can be edited following the same steps used to create. Highlight the intended Department from the “Existing Departments” list and edit via the “Department Details” section.
Since Departments are groups of items, confirm via Item Details or Mass Updates that applicable item s are properly assigned to Departments. Refer to the Pricebook Usage Guide for item assignation.
Remember, if a Department is deleted, item assigned will not function properly. If a Department is to be deleted, move all currently assigned items to a new Department before deletion.
How to Create Employee & Cashiers
- After logging into the FasTrax Director, select the “Maintenance” icon.
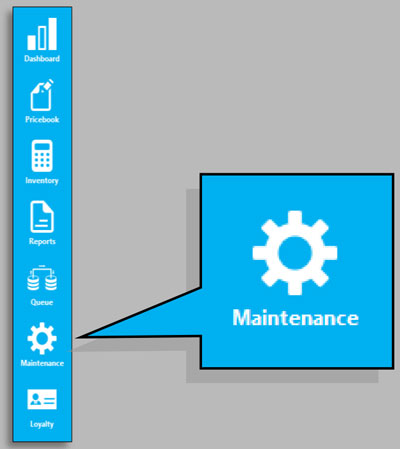
- Select “Employees” from the available selections listed along the top of the Director.

- From the Employee screen choose the Add/Plus button located at the bottom of the screen.
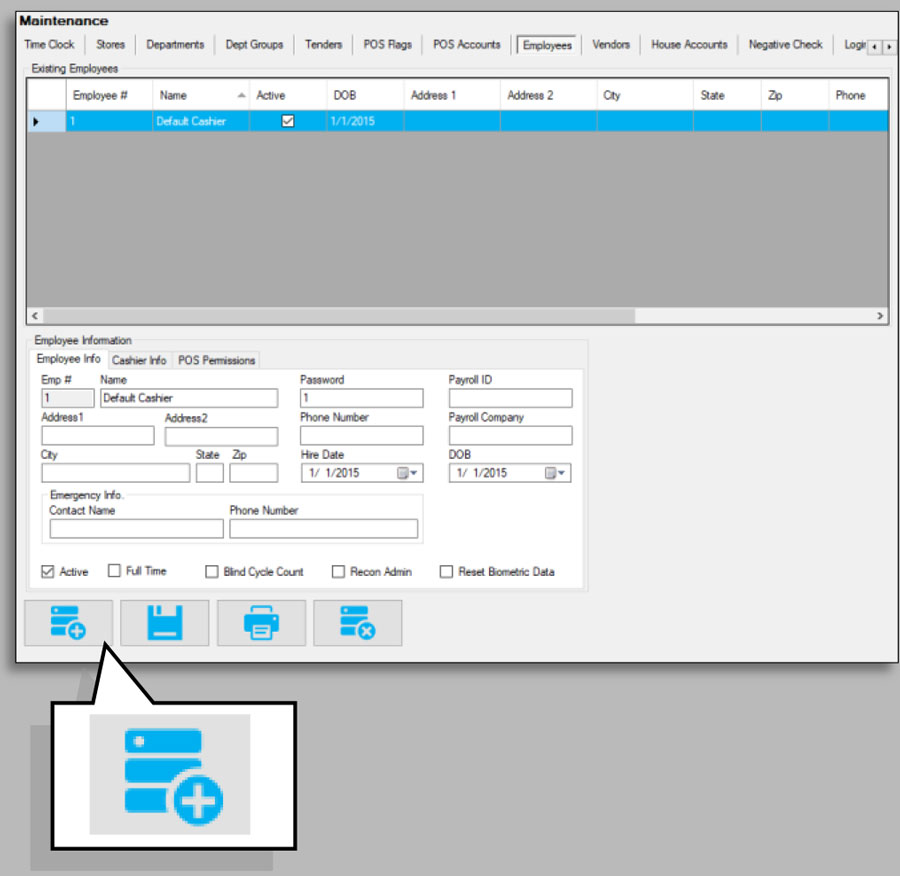
The top portion of this screen shows existing employees. You can edit by highlighting an employee and changing any information in the lower section(s).
The lower portion of this screen shows the editable attributes of an employee/cashier. - In the lower portion, there are separate tabs for Employee and Cashier information. Fill in the information for this Employee.
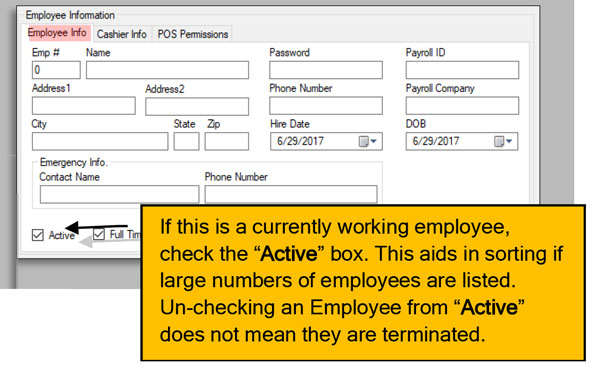
The Employee Number, Name and Password are all that have to be entered for an employee. These are necessary for Clocking In/Out on the POS. Any additional information is optional.
- Once the Employee information is entered, click the tab that is labeled “Cashier Info”.
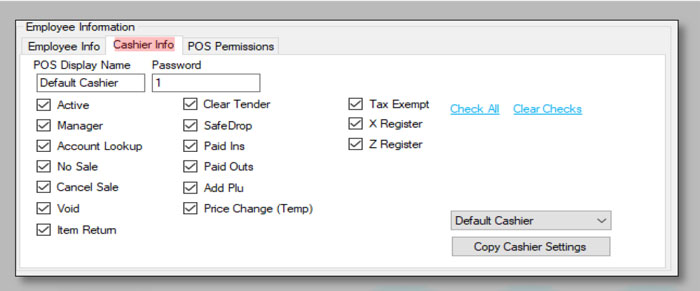
- Enter the cashier name as you want it to show on Z tapes and reports. Enter the numerical password for this employee. Passwords cannot start with “0” or “9”. Lastly, check any attribute you want this cashier to have while logged in and operating the POS.
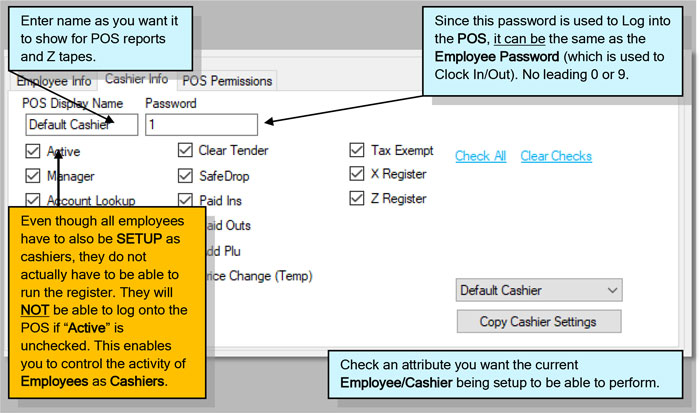
- On the “Cashier Info” screen, there are a set of quick options for setting Cashier attributes.
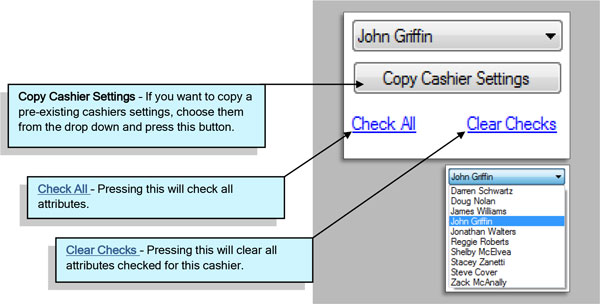
- After you have completed entering information for this Employee/Cashier, choose the “Save” button located at the bottom of the Director.

How to Edit Employees & Cashiers
- After following steps 1 & 2 from the “How to Create Employees & Cashiers” section, choose the employee/cashier you wish to edit.
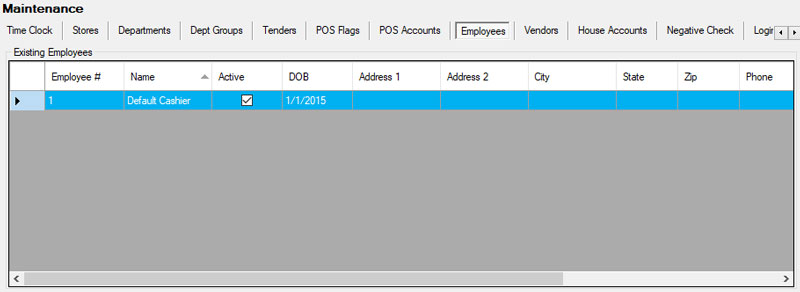
- Edit any applicable information from the “Employee Info”, “Cashier Info”, and “POS Permissions” tabs.
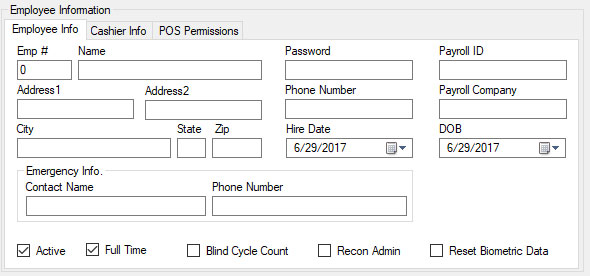
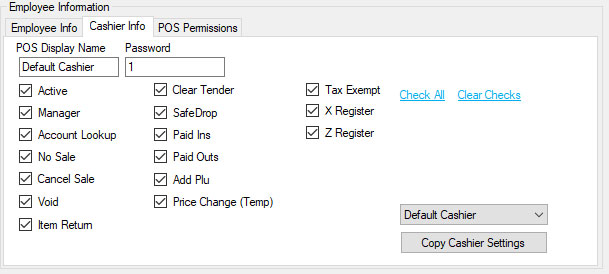
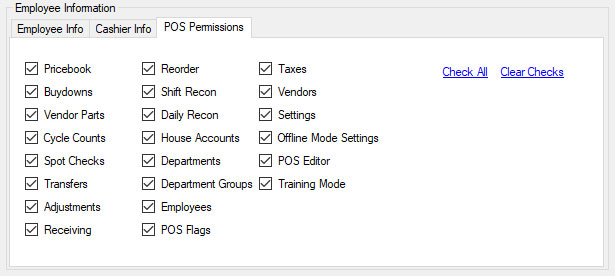
- Press the “Save” button when finished editing.

How to Delete Employees and Cashiers
- After following steps 1 & 2 from the “How to Create Employees & Cashiers” section, choose the employee/cashier you wish to delete.
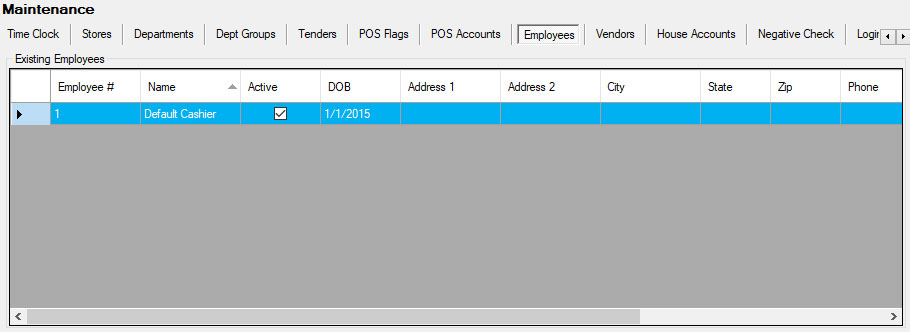
- After highlighting the applicable Employee/Cashier you wish to delete, press the “Delete” button.

Note – Employees and cashiers cannot be deleted/removed independently of each other. Remember that employees have to be set as cashiers as well. However, a cashier’s functions and attributes can be limited via the “Cashier Info” tab.
Overview of House Accounts
House Accounts are a simple and intuitive way of tracking customer sales, with options of giving them department level discounts, cost plus pricing discounts, an in-store charge tab, or pre-programmed tax exemption options.
House accounts have the option of charging sales to a tab and then paying towards their owed balance over time. All of this data is easily reported on from within Director.
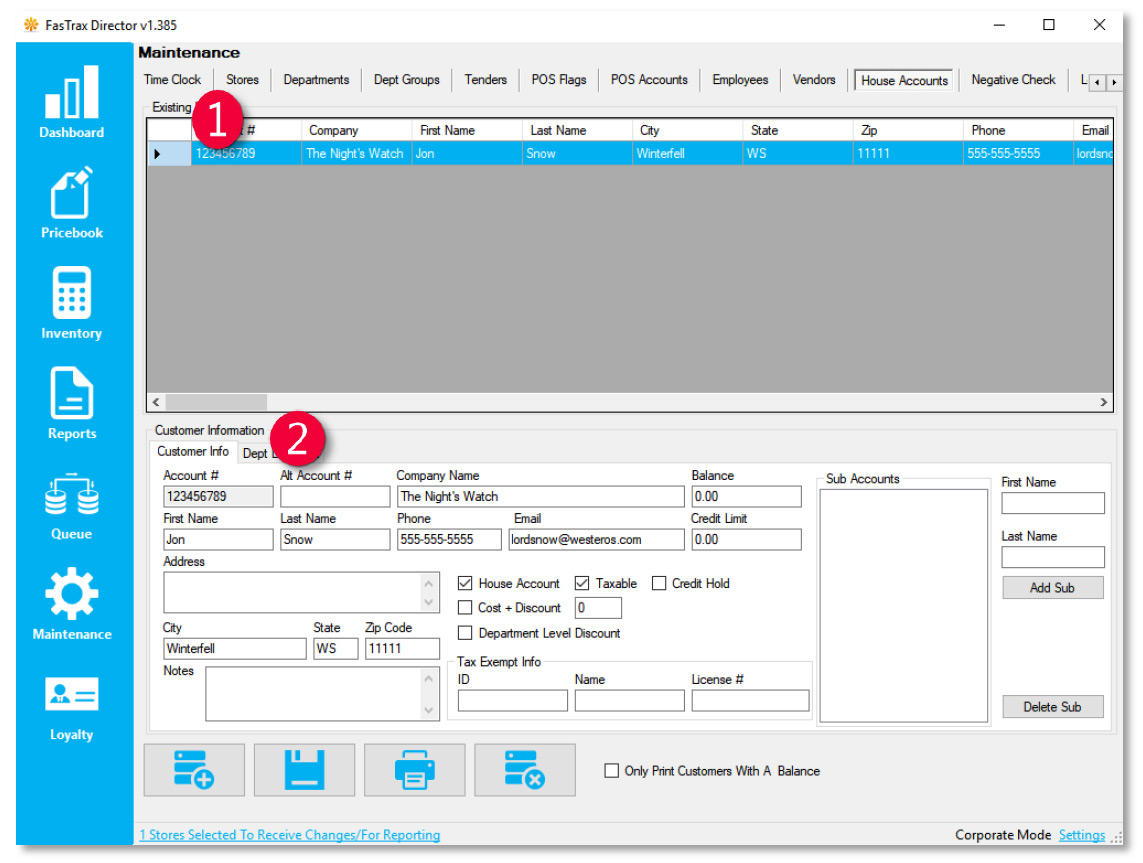
- Existing Customers – A listing of all customers that have been previously entered
- Customer Information – Fields that are editable when entering or editing customers
Creating a House Account
- After logging into Director, choose the Maintenance module.

- Within Maintenance, choose the House Accounts tab
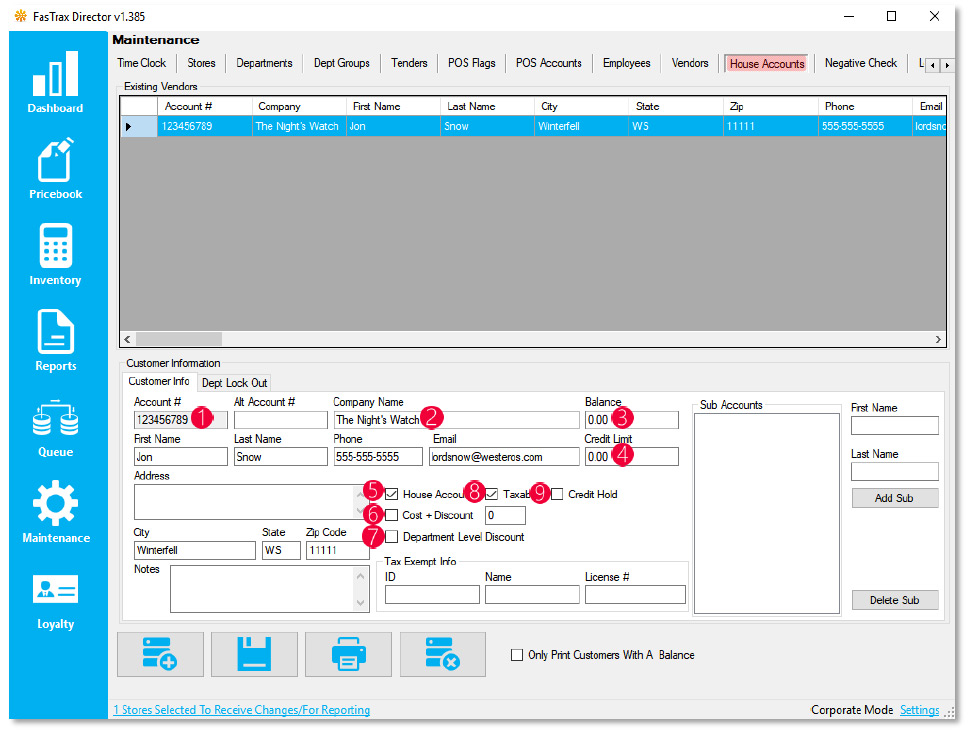
- Account Number – The numerical house account number
- Company Name – The house account / company name
- Balance – The current balance owed by the selected house account
- Credit Limit – The max credit limit allowed for the selected house account
- Designates the house account
- Cost + Discount pricing
- Department level discount designation
- Taxable or non-taxable designation
- Designates house account charge hold
The “Dept Lock Out” tab allows house accounts to be locked out of purchasing from selected
POS Button Creation
- After logging into the POS and going to the panel editor, create a button with the following parameters for the house lookup, which is used to add a house account to the sale
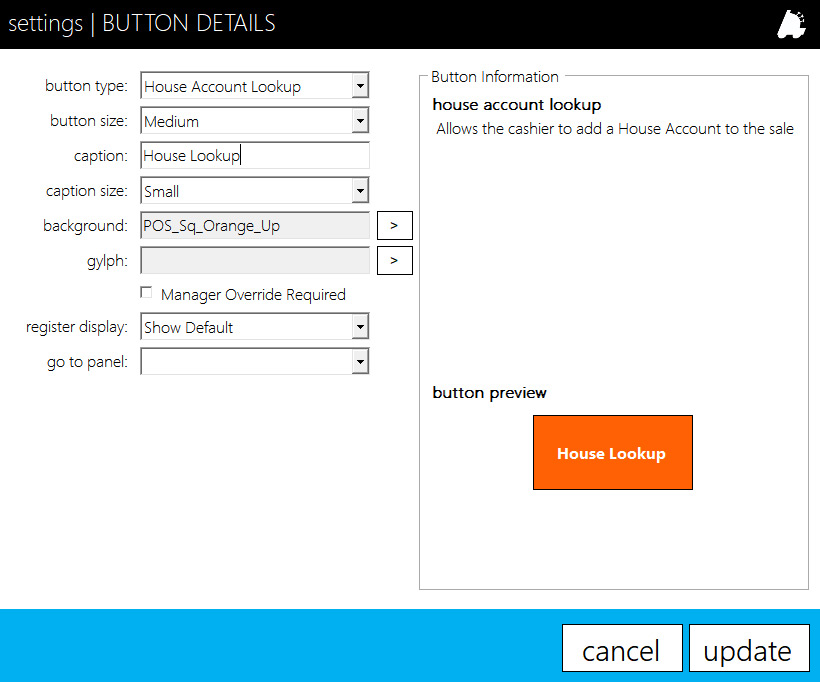
- If utilizing house charges, create a button with the following parameters on the subtotal panel
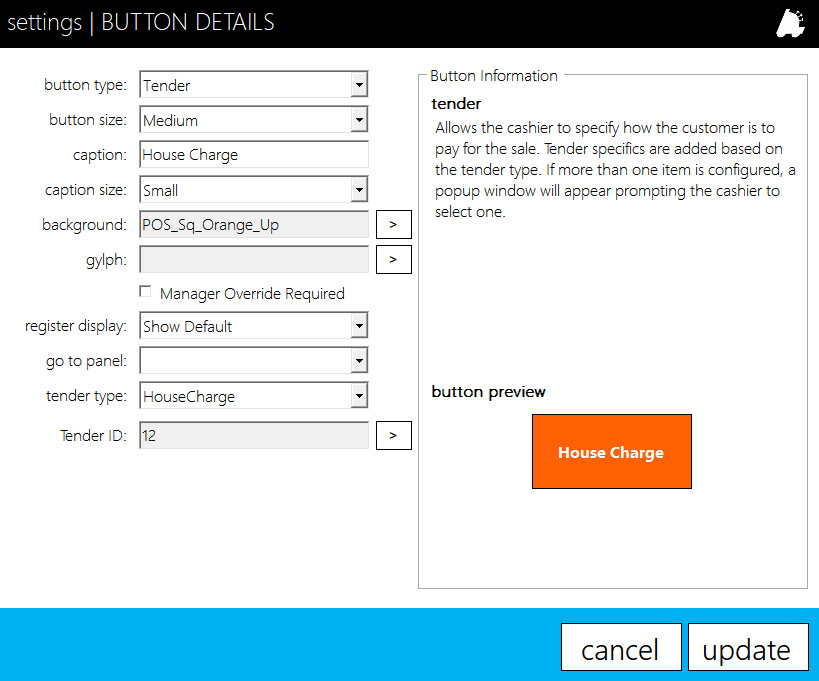
- If utilized house charges, house payments allows the account to pay towards their charged balance. Create a button with the following parameters.
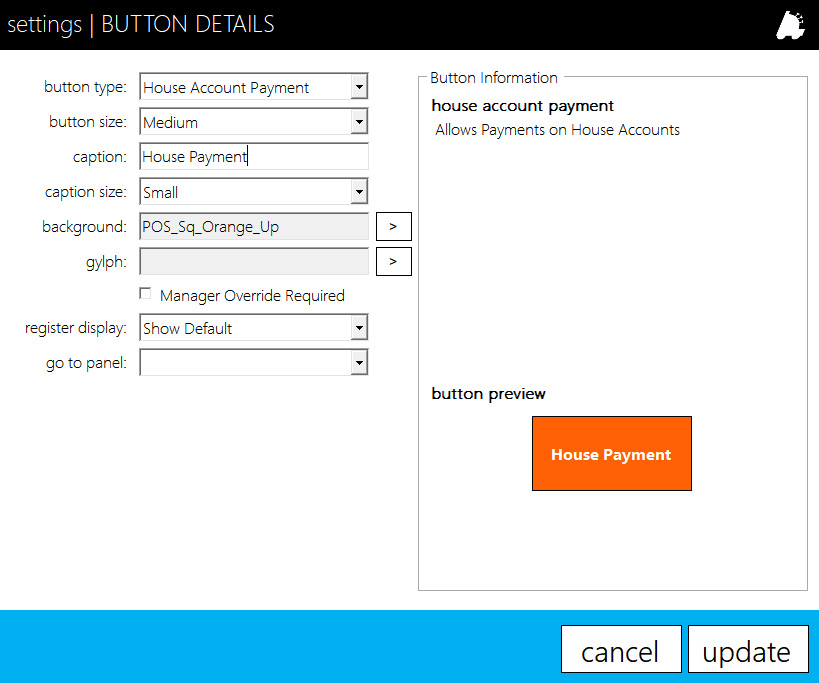
Remember that a house charge is effectively a tab that allows house accounts to charge to and pay back at a later date.
Reporting On House Accounts
- All activity from house accounts, sales, charges, and payments, can be seen via reporting from within Director reports
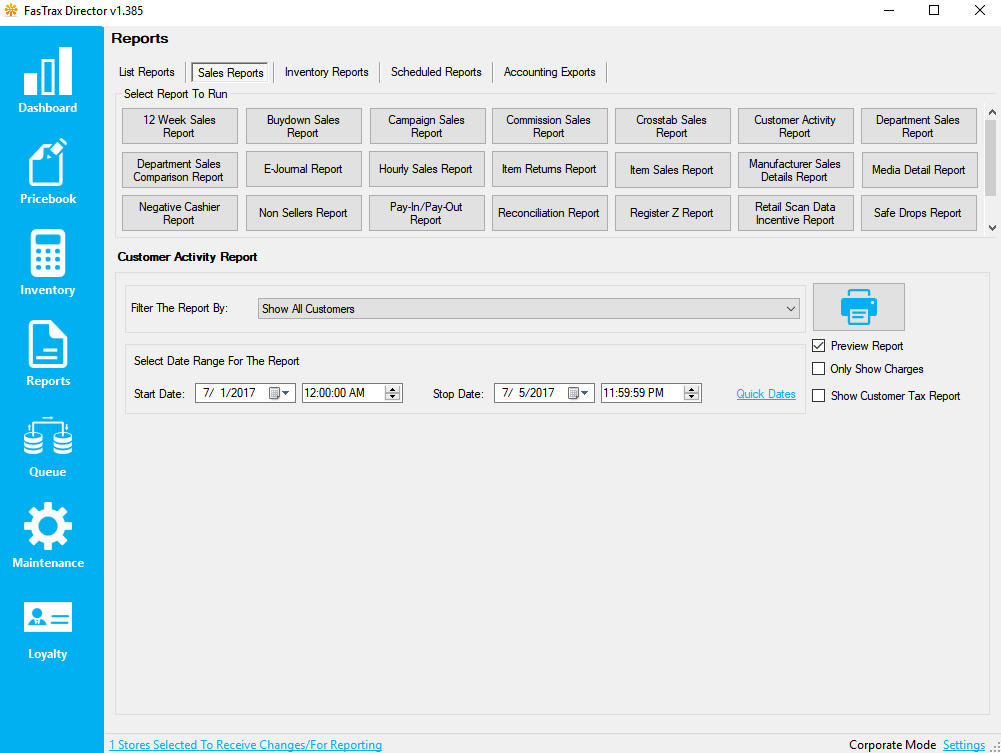
Overview of Carton Counts (Limiter)
Depending on your location or contract agreement with manufacturers or vendors, you may be limited in the amount of cartons able to be sold on a single transaction.
Exceeding these limits may result in fines or loss of benefits per your purchase agreements.
For this, FasTraxPOS has built tools to assist you in alerting and controlling excessive sales.
Using the Carton Counts function can proactively alert your cashiers to possible contract violations.
Q: What does Carton Counts do?
A: Carton Counts is a way for you to control the amount of cartons sold on a single transaction per manufacturer/vendor contract agreements.
Q: What does this do to the database?
A: This creates a count limit based on a family of UPC prefixes. UPC prefixes are the leading 5-7 digits on a family of products’ UPC.
Q: Do I have to do this?
A: Limits are based on contract agreements you may have with manufacturers or vendors.
Q: On which machine(s) should this be performed?
A: Carton Counts (Limits) are entered via Director (corp or store) depending on enterprise setup, then sent to stores via the “Queue” module to take effect.
If you have questions about applicable machines, please contact FasTrax support.
Q: How do you access Carton Counts through the POS?
A: Carton Counts is edited through the Director. The POS will prompt you when limits are met or exceeded.
Q: Is this something FasTraxPOS Technical Support can assist me with?
A: Absolutely!
Q: In what order should this be performed?
A: Follow the steps below for the best results.
Carton Counts (Limiter) Setup
- After logging into Director, choose the“Maintenance” module, then the“Departments” option located along the top.

- This will open the “Departments” optionswindow.
Grouping items you wish to honor Carton Counts (Limiter) into specific departments will assist in future creation and maintenance of Carton Counts definitions. - Highlight an existing department you wish tocheck for Carton Counts as shown below.
- Check the “Add To CTN Count” option.
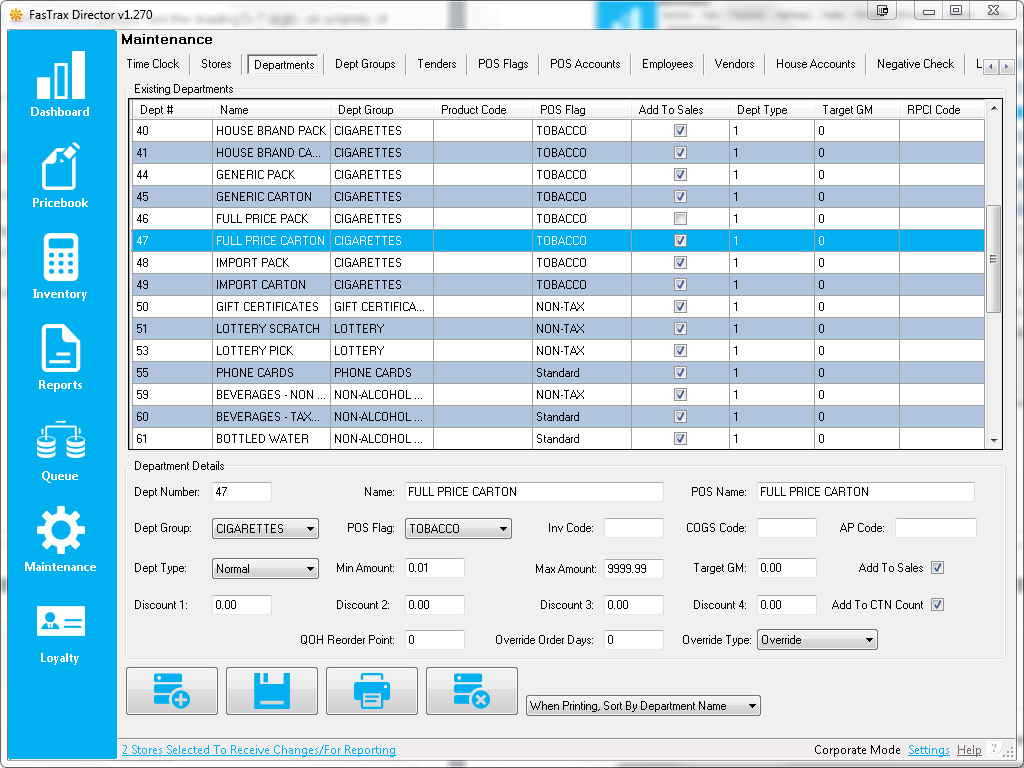
After choosing “Save” to apply changes, department changes will need to be sent to stores via the “Queue” module to take effect.
- After checking and saving applicabledepartments, while in the “Maintenance”module, choose the “Carton Counts” optionlocated along the top.

- This will open the “Carton Counts” optionswindow.
Choose the “Add” button at the bottom tocreate a new definition, or highlight an existingdefinition to edit.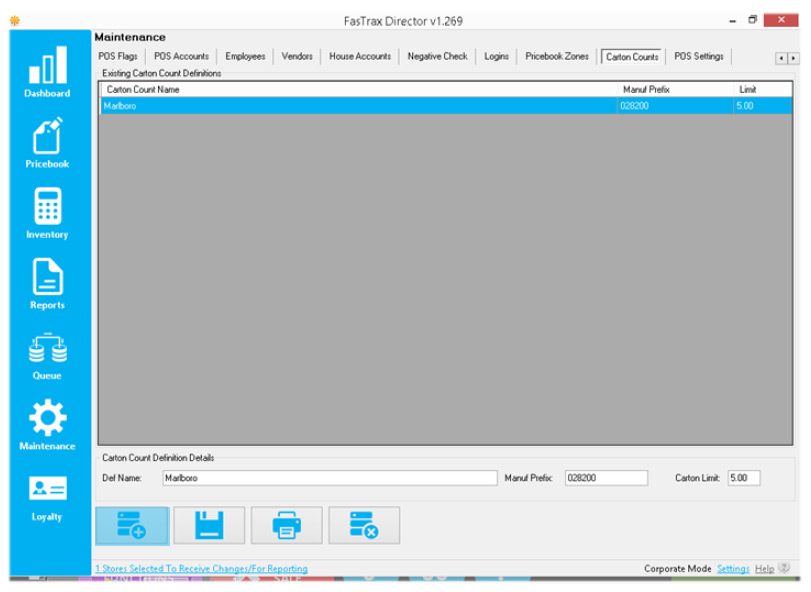
- Using the “Carton Count Definition Details”section, enter the data required for theapplicable manufacturer carton limit.
Marlboro product shown as example below
Def Name – This would usually reflect themanufacturer.
Manuf Prefix – The beginning portion of amanufacturer’s barcode, usually referred to asa family code. These are typically the first 5-7digits common to a manufacturer’s product.
Carton Limit – The numeric carton limit value.If carton to pack relationships are linked inyour Pricebook, packs entered will counttoward this limit.
- Choose the “Save” button when finished.
Changes (both to Departments and Carton Counts) will need to be sent to stores via the “Queue” module to take effect.
POS Interface | Carton Counts (Limiter)
Once sent to stores, Carton Counts (Limiter) will prompt cashiers when limits are met or exceeded.
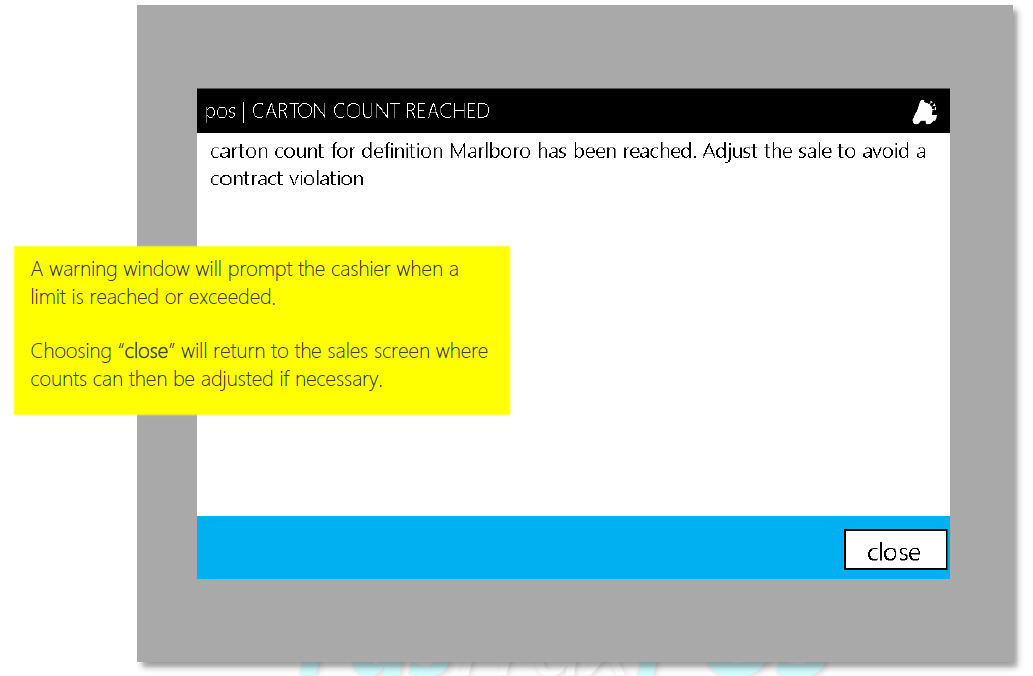
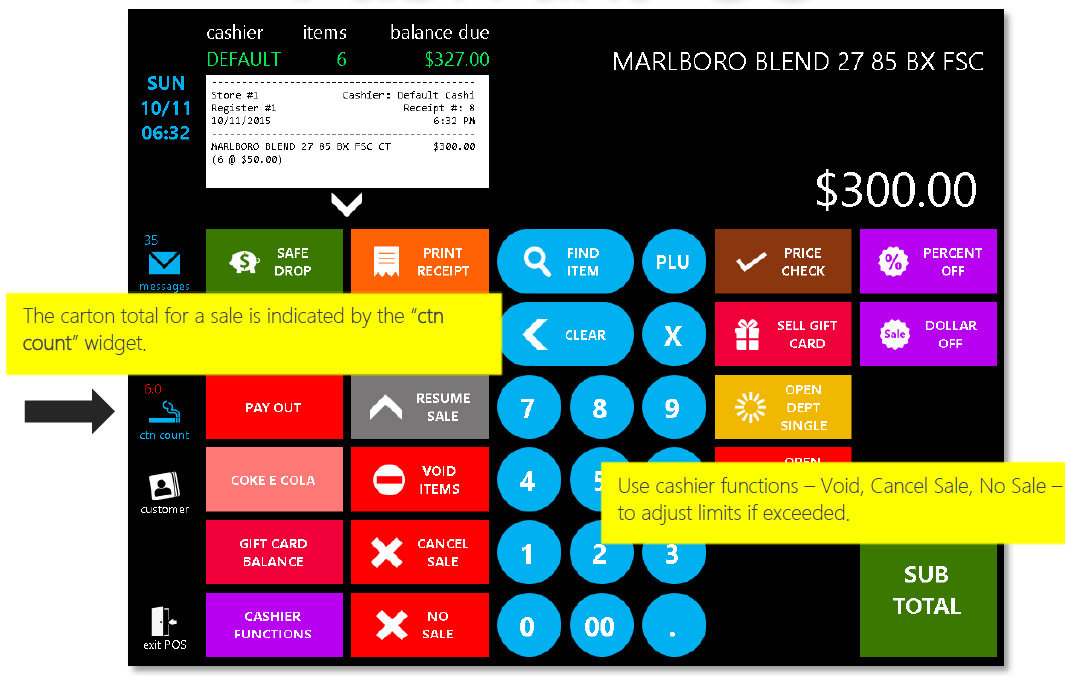
Gift Card Setup and Configuration
Requires
POS w567 (and newer)
GiftCardLoader.exe
TenderProcessor webservice folder
TenderProcessorDatabaseCreation.SQL script
POS w567 should contain:
POS.exe
Fastrax.data.dll
IpadMercuryDll.dll
Newest Register.bat
Newest UnRegister.bat
TenderProcessor contains:
App_Data folder (empty)
bin folder
TenderProcessor.asmx
Web.config
- Create “Gift Card” department and tender via FasTrax Director->Maintenance
- Gift Card department number is not specific; any number is acceptable
- Confirm if department is taxable
- Gift Card tender ID should be 710
- Gift Card department number is not specific; any number is acceptable
- Create “TenderProcessor” Database
- Open SQL Management Studio
- Log in as “SA”
- Password “Password0&”
- Right-click “Databases” under the “Object Explorer” and choose “New Database”
- Enter “TenderProcessor” as the Database name; choose “OK”
- Under “Object Explorer”, open “Security” then “Logins”
- Double-click “Fastrax” and choose “User Mapping” from the Login Properties – Fastrax window
- Check “TenderProcessor”, then check “db_owner” from the Database role membership window
- Choose “OK”
- Choose “New Query”; located above Object Explorer
- From the available databases dropdown, choose “TenderProcessor”
- Choose “File”, then “Open”, then “File”
- Navigate to the location you have placed the “TenderProcessorDatabaseCreation.sql” script
- Choose “Open”
- Once the query screen is populated with the script, choose “Execute”
- Set up and configure the TendorProcessor webservice
-If this is a multi-store/Corporate setup, TenderProcessor webservice only needs to be added on thecorporate server.
-If this is a single store setup, TenderProcessor webservice will need to be setup on the main SQLmachine.
TenderProcessor contains:
App_Data folder (empty)
bin folder
TenderProcessor.asmx
Web.config
- Copy the TendorProcessor folder to inetpub ->wwwroot
- Configure the “TenderProcessorConnectionString” information in the Web.config
- Match the Data Source, ID & Password with the Web.config in FTCorpWebservice directory
- Open IIS Manager and “Right Click” on the TenderProcessor folder and choose convert to application
- Confirm the assigned Application Pool is set to enable 32 bit applications.
- If necessary, create a new pool for the TenderProcessor; choose to enable 32 bit applications
- Via the Command Window, reset IIS
- Choose the Windows “Start” button
- Type “cmd” in the “Run” box (could be “Search programs and files”); press “Enter”
- In the black command box, type “iisreset”;press “Enter”
- IIS will reset
- Once IIS is reset, test the site
- Move the “GiftCardLoader.exe” to C:/FasTrax/POS, if not already present
- Setting up TenderProcessor on POS
- Add/Edit the following settings in POS.ini
[GiftCardProcessor]
Host=localhost – IP of machine running TenderProcessor
HostPort=80 -port of machine running TenderProcessor
HostUsesSSL=false -use of SSL on the of machine running TenderProcessor
ForceGCSwipe=false – used by POS forces cashier to swipe the gift cards-If this is a multi-store/Corporate setup, “Host” is the Public IP of the corporate server.
-If this is a single store setup, “Host” should be either “localhost” or the Local IP of the main DB machine - Add the following buttons to the POS
- Ensure POS is version 567 or higher
- GiftCard Balance button from the Misc Tab; used to get Gift Card Balance
- Prog Dept Button and set the Department Number to the newly created Gift Carddepartment. Set the “ISGIFTCARD” value to “True”
- GiftCard Tender button from the Tenders Tab and set the GiftCardTendID to 710 – New tender is created in step 1 of this doc; 710 is suggested ID
- Add/Edit the following settings in POS.ini
Director Settings
Even though Gift Cards can be sold, redeemed and checked via the POS, to fully utilize Gift Cards, customers will
want the ability to track and view their Gift Cards in a more efficient manner.
FasTrax Director offers an interface that enables customers to fully view and track transactions sold on Gift Cards via
a couple of simple settings.
Even though these settings are not necessary for Gift Cards to be sold and function, this feature is required to
complete the module.
- Set Director Settings to Enable Gift Cards
- Once logged into FasTrax Director, click the “settings” hyper link at the bottom right of the window.
- From this new window, click “Show Gift Cards Tab”.
- This will enable the Gift Cards Director interface where cards, balances and transactions can
be checked. - This section is found under the “Maintenance” module.
- This will enable the Gift Cards Director interface where cards, balances and transactions can
- This can also be enabled by adding “ShowGiftCards=1” to the FasTraxDirectorSettings.ini under
[Settings]
- Create/Set FasTraxGiftCards.UDL
- This should already be located in the “Installer Files” folder.
- Move from the “Installer Files” folder to C:/FasTrax
- Configure to point to the “TenderProcessor” database.
If the FasTraxGiftCards.UDL is not located in the “Installer Files” folder, or on the machine –
- COPY an existing .UDL (e.g. FasTraxSQL.UDL)located in C:/FasTrax/
- Rename to “FasTraxGiftCards.UDL”
- Place new FasTraxGiftCards.UDL in C:/FasTrax/
- Configure to point to “TenderProcessor” database
- This should already be located in the “Installer Files” folder.
Cashier Gift Card Functions
Sale of a Gift Card
NOTE – ONLY 1 GIFT CARD ALLOWED PER SALE or REDEMPTION
- Enter the intended dollar amount of Gift Card and choose the Gift Card Sale button
- This is the newly created Prog Dept Button
- Choose SubTotal and tender with the correct payment type.
- Now the POS will prompt the cashier to swipe or enter the Gift Card Number.
- Cashier can manually input Gift Card Number via on screen keypad.
- A local MSR/Card Scanner is necessary to load gift cards via swipe.
Mercury pin pads and external card swipes are not compatible.
- Once the Gift Card information has been filled out correctly, press the “Submit” button.
- Sale will complete and print the Gift Card Number with the Card Balance on the receipt.
Redeem Gift Card
NOTE – ONLY 1 GIFT CARD ALLOWED PER SALE or REDEMPTION
- Cashier enters items for sale.
- Cashier chooses SubTotal when ready to tender sale.
- Choose the Gift Card Redeem/Tender button.
- This is the newly created GiftCard Tenders button.
- POS will prompt for the Gift Card Number at which point the cashier will swipe or enter the Gift Card Number
- Cashier can manually input Gift Card Number via on screen keypad.
- A local MSR/Card Scanner is necessary to load gift cards via swipe.
Mercury pin pads and external card swipes are not compatible.
- Once the Gift Card information is entered, press the “Submit” button
- This will cash out the sale and deduct the balance from the card via the database.
Partial Tenders
Gift Cards can be partially tendered.
However, if you “Cancel Sale” the POS will prompt you to refund the already tendered amount to the card.
This is handled like a normal refund, only when the “Gift Card Sale” button is chosen, you will have to enter the card
number or swipe the card when tendering to credit the refund.
Overview of Loyalty Campaigns
Loyalty Campaigns provide a method of rewarding customers for repeat business by giving discounts in the form of store coupons that can be redeemed on subsequent visits; the coupons can be printed for all customers or only for loyalty customers.
Once a customer is signed up for a Loyalty Account, Their sales are tracked, and coupons are printed after their purchases. These coupons can be set to be redeemed at the store that printed the coupon, or at every store, depending on relevant company policies.
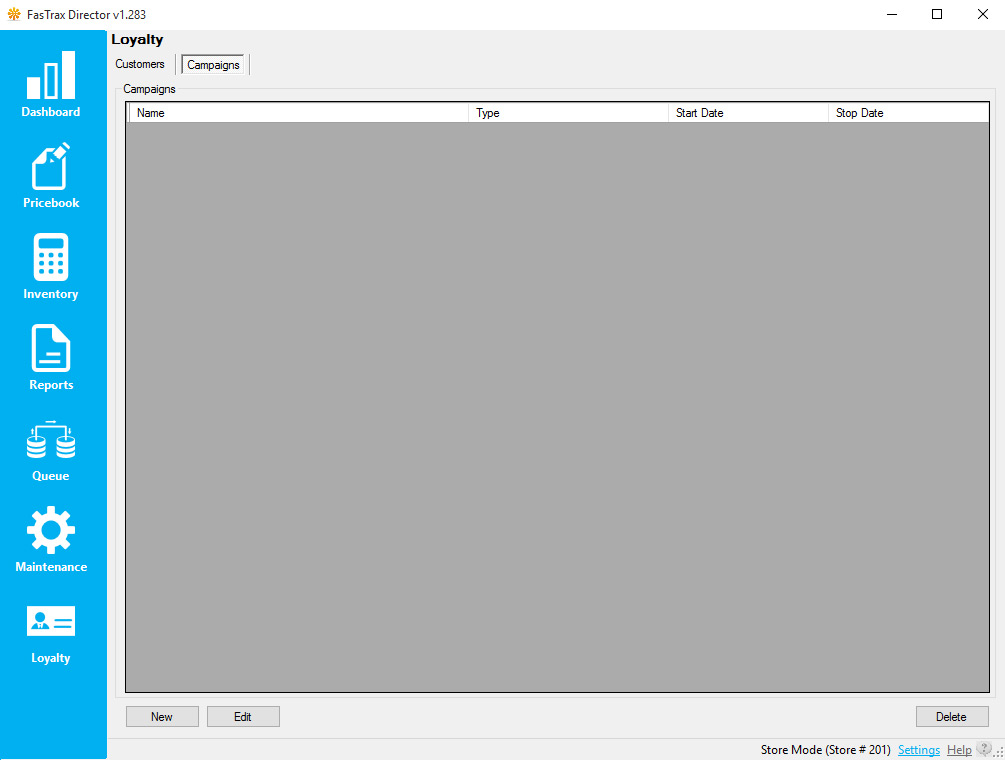
- Name – the name of the Loyalty Campaign
- Type – tells what the Campaign gives to the customer
- Currently, Postsale Coupon is the only type of campaign.
- Start Date – the beginning of the campaign
- Stop Date – the end of the campaign
- Note that this is different from the Expire Date of the coupon and has no effect on coupons after they are printed.
Creating a Loyalty Campaign (Director)
- In Director, choose the Loyalty module.

-
Then, choose the Campaigns option from the menu ribbon.
- Choose the New button.
If you are editing an existing Loyalty Campaign, simply highlight the applicable line and choose the Edit button instead.
- In the Campaign Details section, enter the parameters you wish for this discount to follow.Campaign Types include:
Post sale coupon: Prints a coupon after the sale of qualifying items to provide a discount on the next visit.PM/UST/RJR Points Rewards: When a loyalty customer has bought enough qualifying items, they get a discount on that transaction. Points are tracked for each type separately.
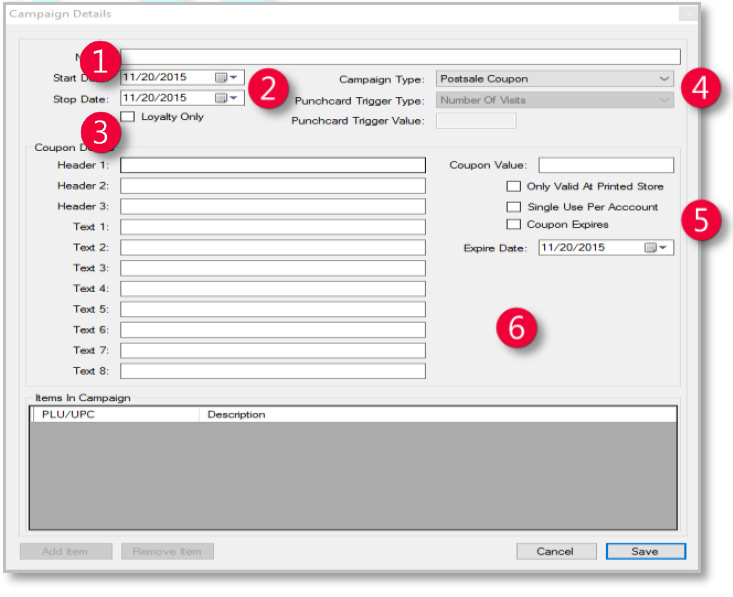
- Name – name of the Campaign for your reference.
- Start/Stop Date – specifies when the campaign begins and ends.
- Loyalty Only – specifies that this campaign will only take effect when sale is made to a Loyalty Customer.
- Campaign Type – the chosen style of Loyalty Campaign.
- Coupon Value – depending on the campaign type, this is the dollar amount removed when coupon is applied.
- Expire Date – This is the expiration date of the printed coupons; this is independent of the Stop Date entered above.
- Choose Save when complete.

Adding Items to a Loyalty Campaign
- After logging into Director, choose the Pricebook module.

- Choose Mass Updates from the menu ribbon.
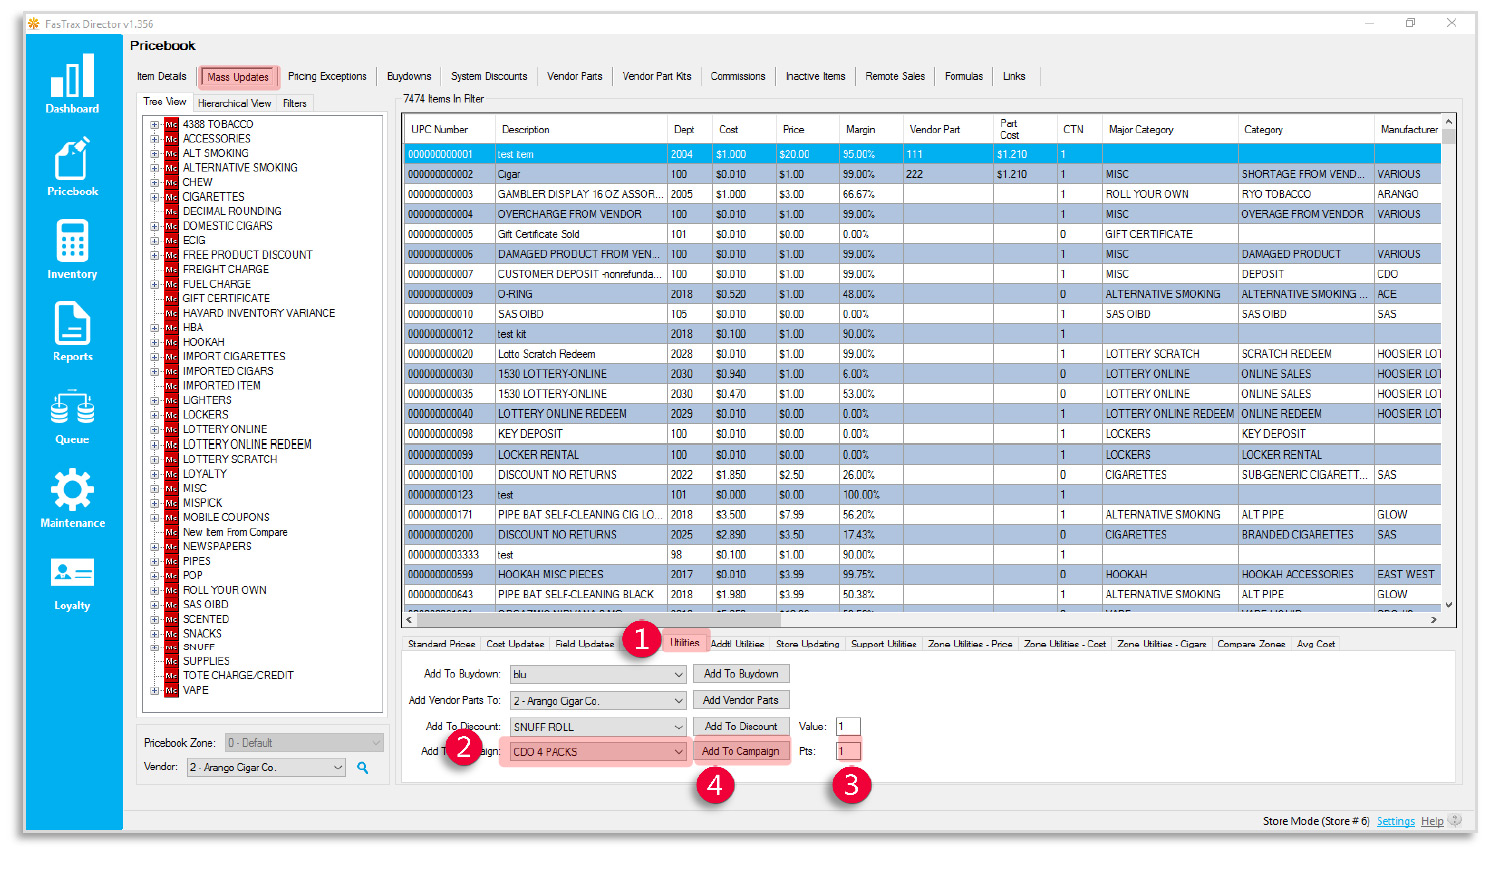
- Filter to the items you want to include in the Campaign
- Add the Items to the campaign.
- Select the Utilities tab
- Choose your campaign from the Add to Campaign dropdown
- Choose a Pts value for the items being added (Ex. 1 point for a pack of cigarettes, 10 pts for a carton).
- Click Add to Campaign to assign all items in the filter to the selected campaign.
Adding Loyalty Customers via the POS
- After logging into POS, select Open POS

- Within the POS, click the Customer gem.

- This will bring up the Find Customer screen. To add a new customer from here, click New.

- On the Customer Details screen, add any data needed for the customer. When finished, click Save.
Pro Tip: If you have a 2D barcode scanner, you can scan the customer’s Driver’s License to enter their info automatically.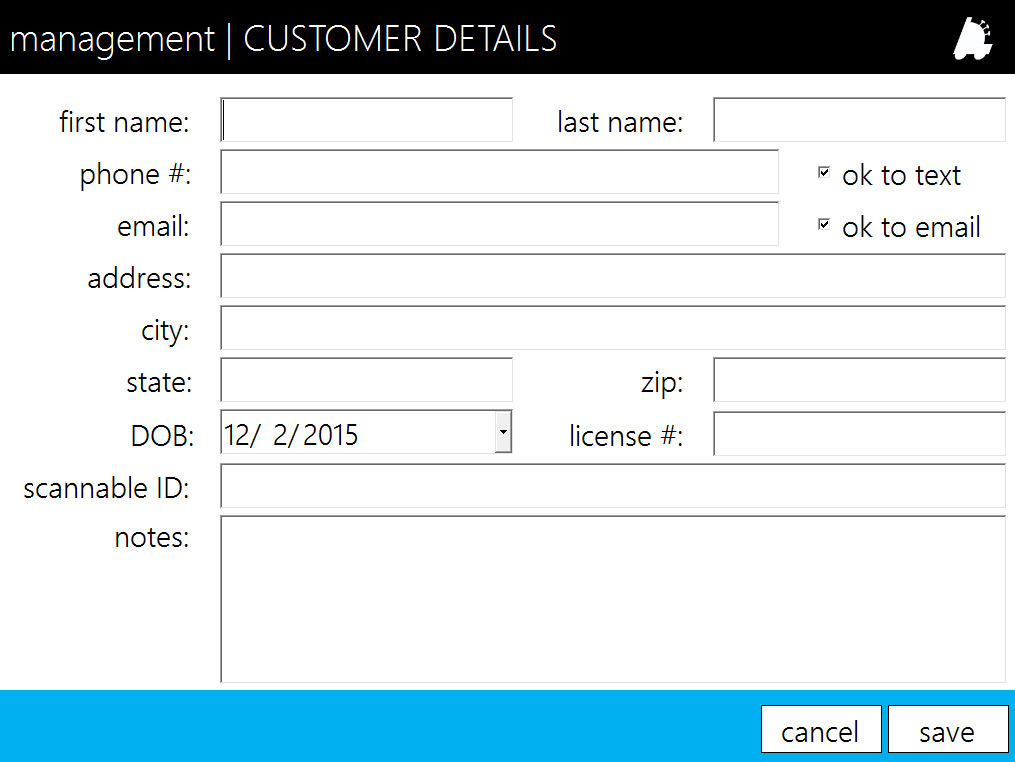
Overview of Sales Restrictions
Sales Restrictions allow for certain departments in your pricebook to be restricted so that they cannot be sold during certain days or certain hours.
This guide will briefly cover how to set up sales restrictions and assign departments to those restrictions.
Creating A New Sales Restriction
- Open Director and Navigate to Maintenance

- Select Sales Restrictions from the menu Ribbon.

- Create the sales restriction:

- Add New – This button must be clicked before any other info is added
- Restriction Name – Enter any name that will help you remember what is going to be restricted
- Stores For Restriction – Check the box for any stores to which this restriction will apply
- Restriction Schedule – Check every day and enter appropriate times when restricted items are NOT allowed to be sold
- Save – Click this button once all other information is correct
Adding Departments to a Sales Restriction
- In Director, choose the Maintenance module.

- Select Departments from the menu ribbon.

- Click to Select a department to restrict

- Click the Has Sales Restriction box; then select the restriction you wish to apply from the Sales Restriction dropdown menu.

- Finally, click the Save button.

The Sales Restriction dropdown will not appear until after the Has Sales Restriction box is checked
Overview of Managing POS Settings from Corporate
Managing POS Settings via corporate is a quick and simple way to make on the fly setting changes that directly affect the store’s POS operations.
Settings are first pulled back from the store so you can view what is currently set.
If specific changes are required, changes can be made and sent instantaneously to the store!
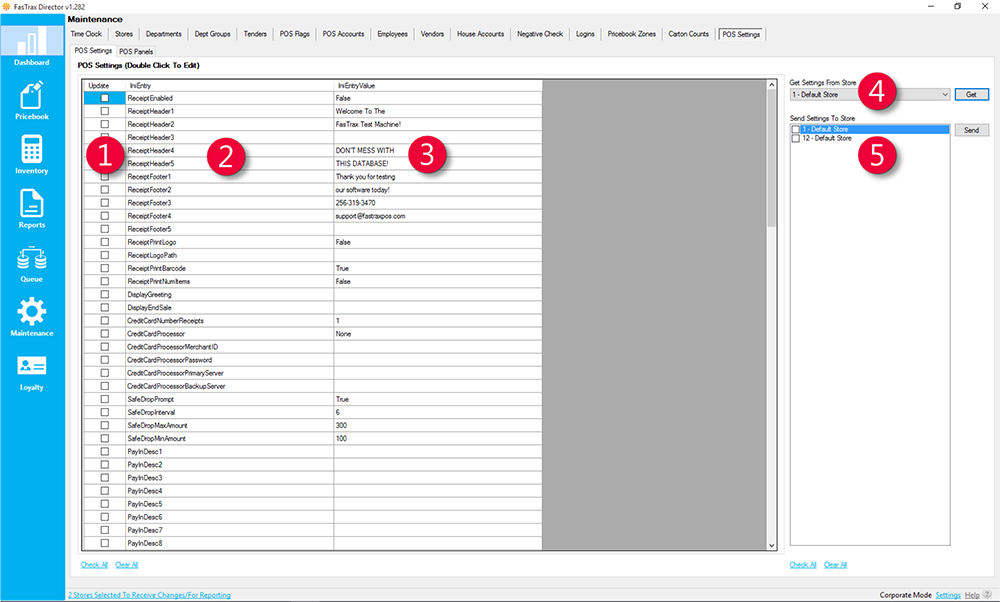
- Update – checkbox that signifies if a setting value has changed
- IniEntry – the setting name
- IniEntryValue – the setting value
- Get Settings From Store – choose which store to pull settings from
- Send Settings To Store – choose which store(s) to send settings
The POS Settings tab can only be seen in corporate mode.
If in store mode, this tab will not appear
Changing POS Settings from Corporate
- After logging into Director, choose the Maintenance module.

- Within Maintenance choose the POS Settings tab
- Choose the applicable store settings you wish to pull from the Get Settings From Store dropdown and choose Get

This pulls the POS Settings that are currently running at the selected store.
If a communications error is received, it could be related to a firewall or IP address change. Contact support for assistance.
- After retrieving the applicable store’s settings, the POS Settings grid is now populated with editable fields.
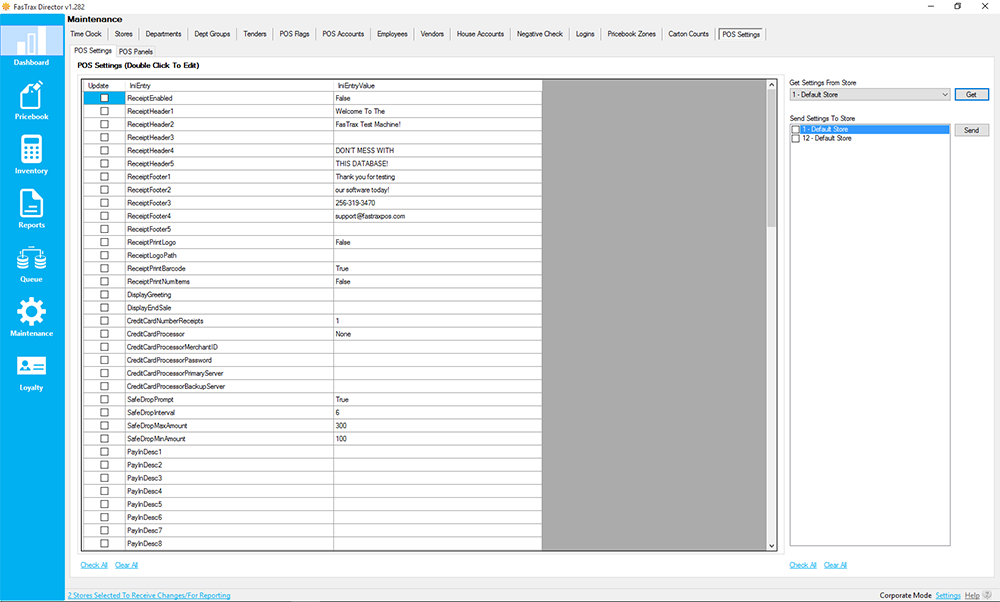
- Double click in the appropriate IniEntryValue field you wish to make changes.

- Enter new Value: in the POS Settings Details window.
- Choose Save when complete.
Notice that the checkbox field labeled Update will now have a check contained in it whenever a value is updated. When checked, this updated setting is sent to the store when you choose to Send.

Sending POS Settings
- Send changes by selecting the applicable store checkbox under Send Settings To Store, then choose Send
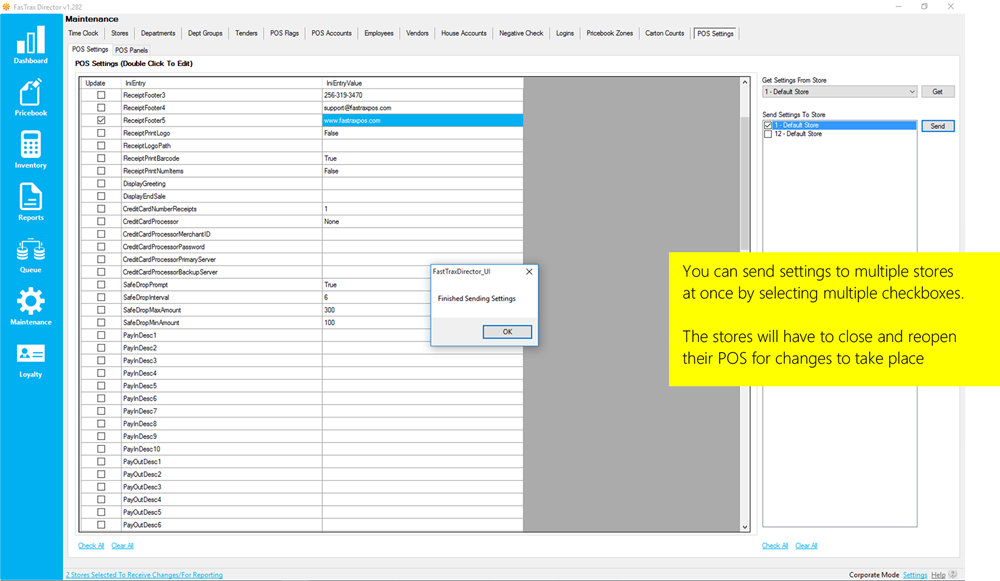
Overview of Permissions
Utilizing the detailed FasTrax permissions allows restrictions to be placed on employees in Director, POS, Handheld, and Reconciliation applications. This allows users to give employees the ability to do exactly what they need to do, without having to worry about actions that they should not be involved in. All permissions are set up in Director on individual user accounts.
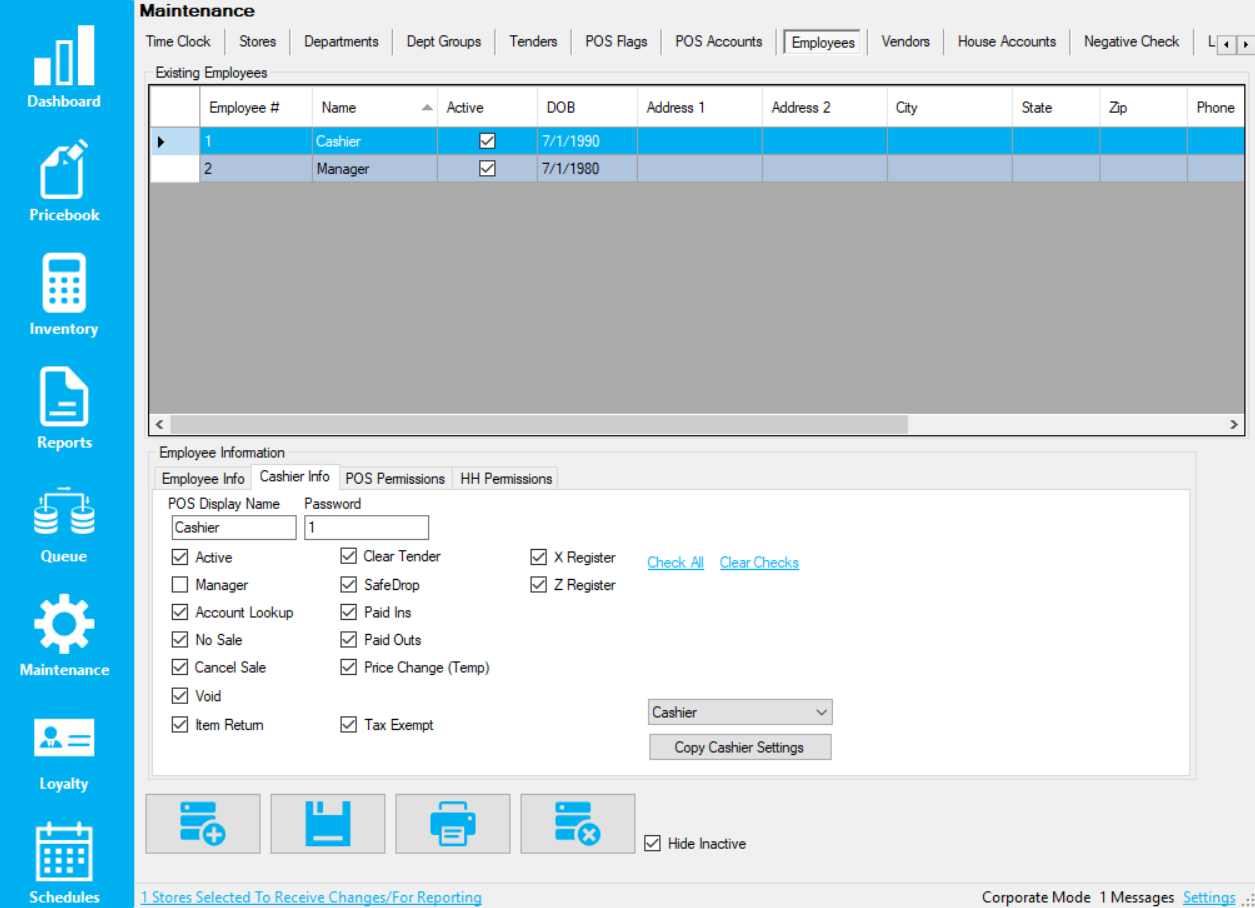
Employee Permissions
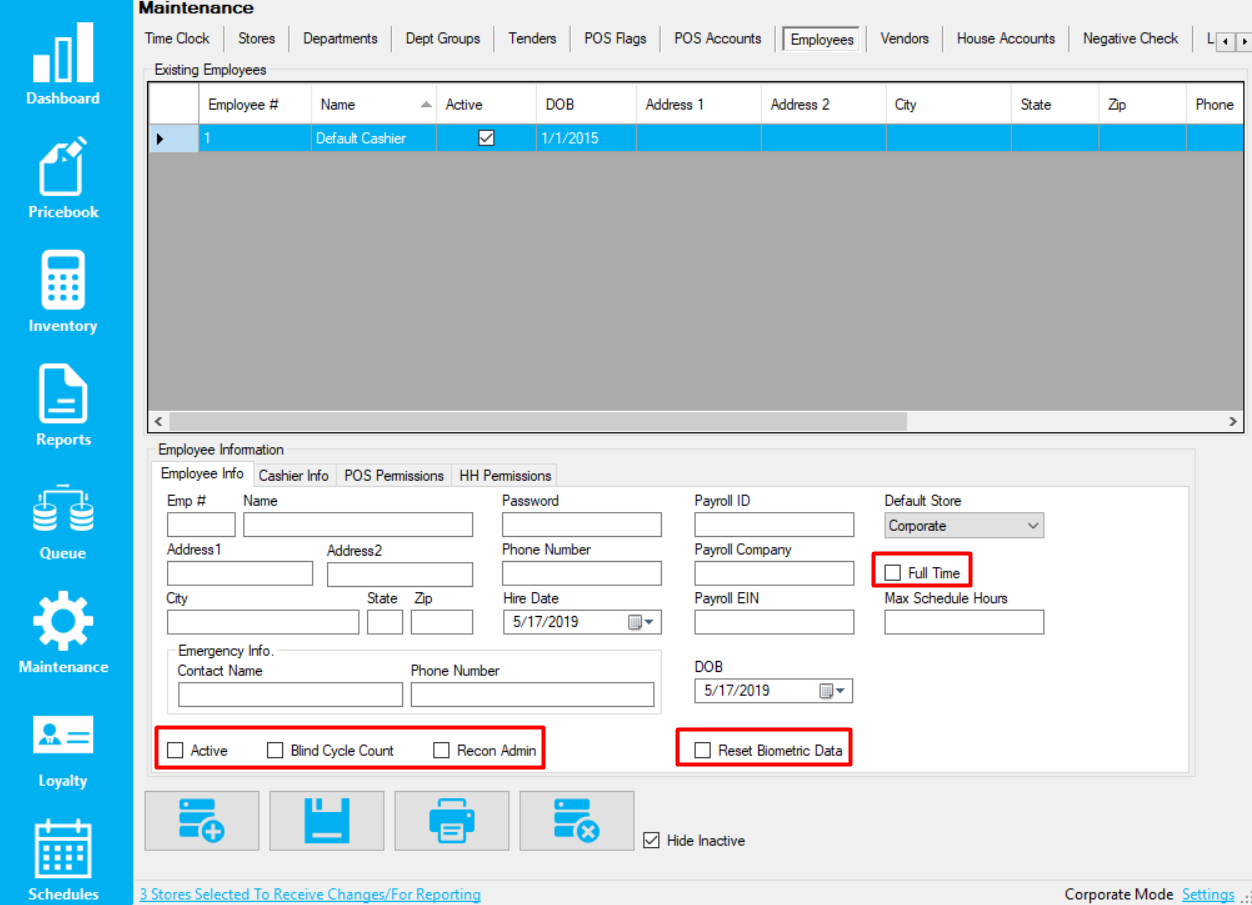
- Active – If the employee is active, they can utilize functions outside the POS, such as time clock and handheld
- Full Time – Marks the employee as a full time employee; unchecked means part time
- Blind Cycle Count – Checked if the employee isn’t supposed to see system on hands or variances during cycle counts
- Recon Admin – Allows the employee to perform administration functions on reconciliations, such as altering or deleting
Cashier Permissions
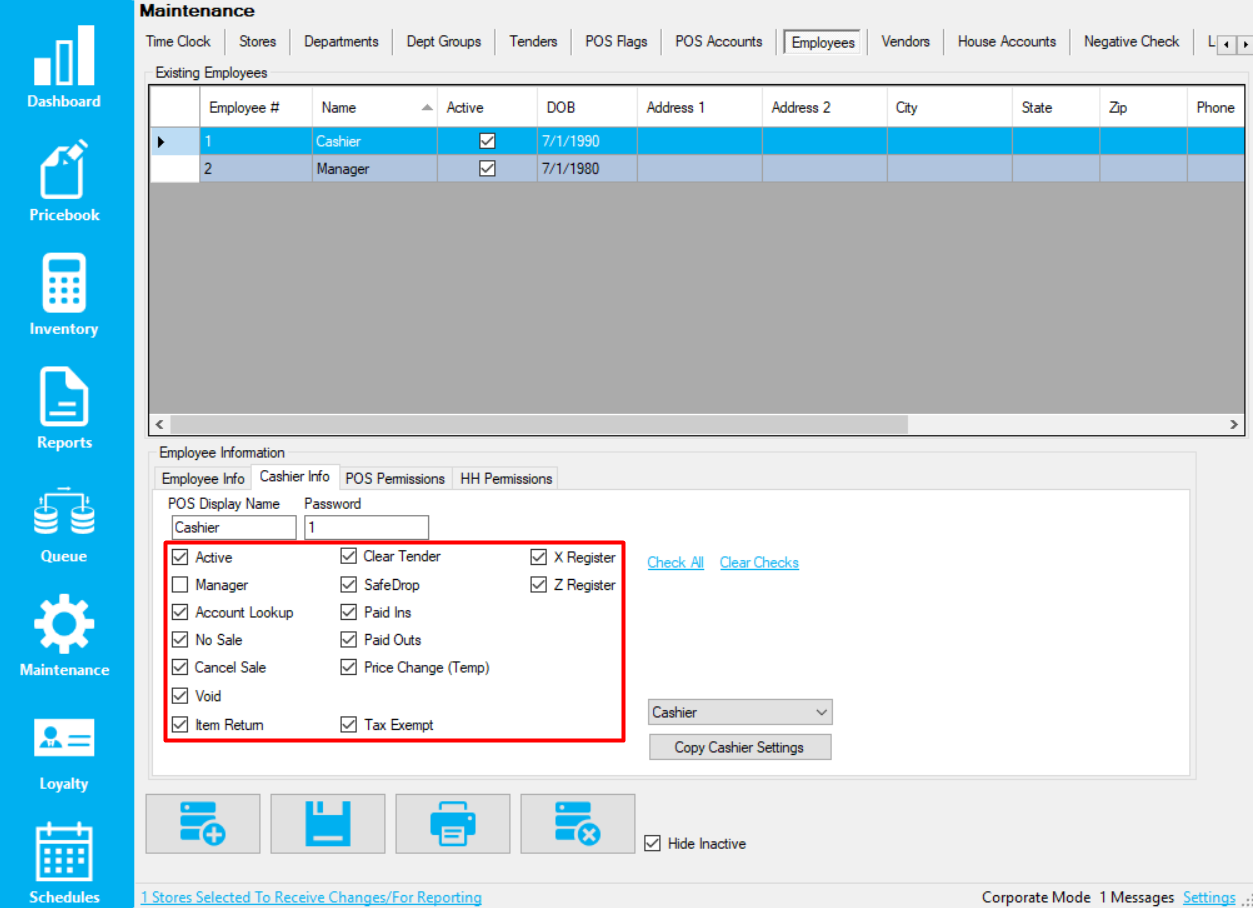
- Active – Gives permission to utilize the POS
- Manager – Gives the manager permission, which can be utilized for manager-only buttons or overrides
- Account Lookup – Gives permission to lookup and add house accounts
- No Sale – Gives permission to perform a “No Sale” transaction, popping the drawer open
- Cancel Sale – Gives permission to perform a “Cancel Sale”, ending an in-progress transaction
- Void – Gives permission to perform a “Void”, allowing the cashier to remove an item on an in-progress transaction
- Item Return – Gives permission to perform a return of an item
- Clear Tender – Gives permission to clear out input tenders from a transaction, effectively resetting the subtotal
- SafeDrop – Gives permission to perform a safe drop
- Paid Ins – Gives permission to perform a pay-in
- Paid Outs – Gives permission to perform a pay-out
- Price Change (Temp) – Gives permission to change an item’s price temporarily for the current transaction
- Tax Exempt – Gives permission to make a transaction tax exempt
- X Register – Gives permission to perform a register X, which prints out sale and drawer totals on the receipt printer for that specific shift
- Z Register – Gives permission to perform a register Z, which closes a shift and allows it to be reconciled
POS Permissions
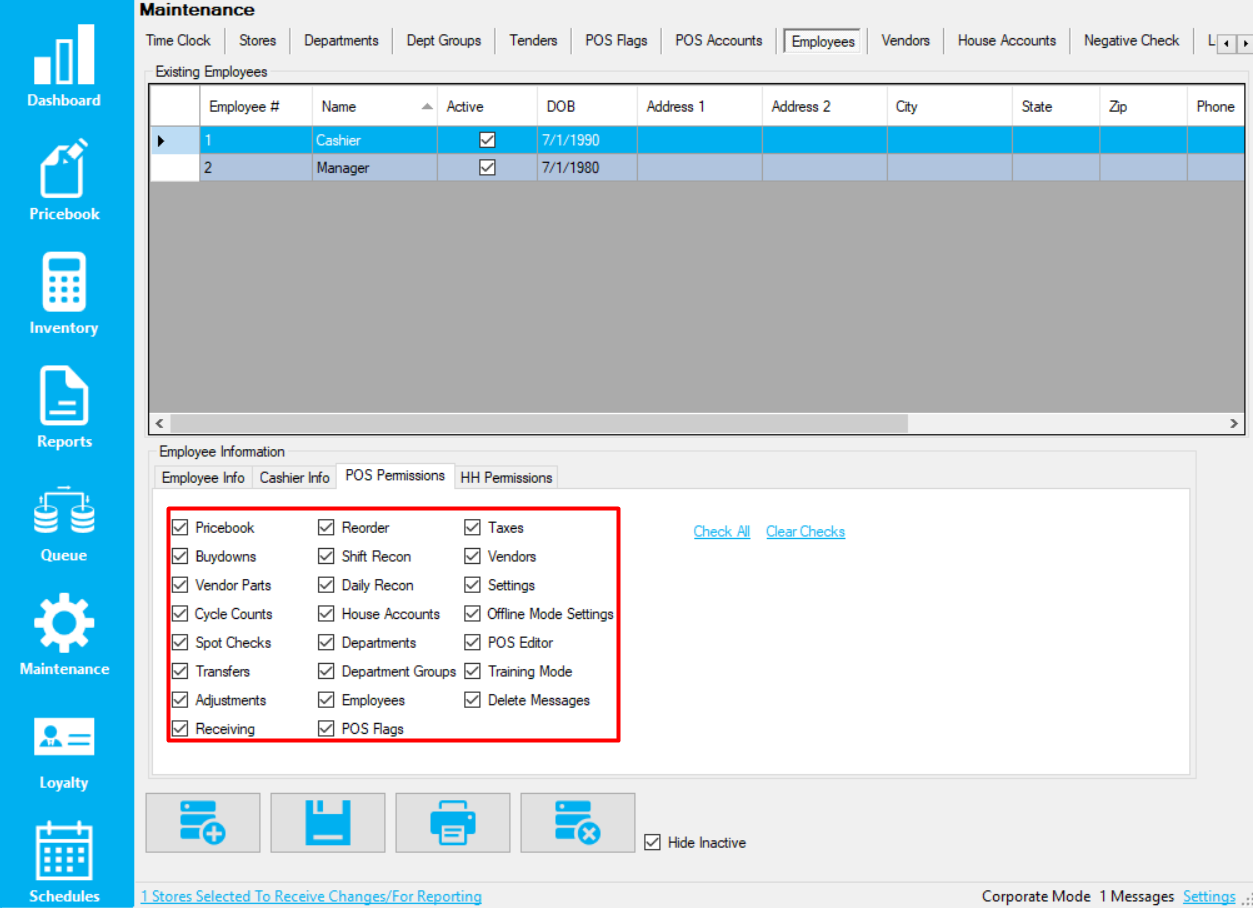
- Pricebook – Gives permission to utilize the pricebook module in POS, allowing any change to take place such as prices and costs
- Buydowns – Gives permission to utilize the buydown module in POS, allowing any change to take place such as altering, adding, and deleting buydowns
- Vendor Parts – Gives permission to utilize the vendor parts module in POS, allowing any change to take place such as adding, altering or deleting vendor parts
- Cycle Counts – Gives permission to utilize the cycle counts module in POS, allowing any change to take place such as reviewing, deleting, or applying counts
- Spot Checks – Gives permission to utilize the spot checks module in POS, allowing any change to take place such as viewing spot checks
- Transfers – Gives permission to utilize the transfers module in POS, allowing any change to take place such as creating, altering, or deleting transfers
- Adjustments – Gives permission to utilize the adjustments module in POS, allowing any change to take place such as adding, altering, or deleting adjustments
- Receiving – Gives permission to utilize the receiving module in POS, allowing any change to take place such as adding, altering, or deleting invoices
- Reorder – Gives permission to utilize the reorder module in POS, allowing any change to take place such as creating, altering, or deleting orders
- Shift Recon – Gives permission to utilize the shift reconciliation module in POS, allowing any change to take place such as creating, altering, or deleting shift reconciliation entries
- Daily Recon – Gives permission to utilize the daily reconciliation module in POS, allowing any change to take place such as creating, altering, or deleting daily reconciliation entries
- House Accounts – Gives permission to utilize the house accounts module in POS, allowing any change to take place such as creating, altering, or deleting house accounts
- Departments – Gives permission to utilize the departments module in POS, allowing any change to take place such as creating, altering, or deleting departments
- Department Groups – Gives permission to utilize the department groups module in POS, allowing any change to take place
- Employees – Gives permission to utilize the employee module in POS, allowing any change to take place such as creating, altering, and deleting employees
- POS Flags – Gives permission to utilize the POS flags module in POS, allowing any change to take place such as creating, altering, and deleting POS flags
- Taxes – Gives permission to utilize the taxes module in POS, allowing any change to take place such as creating, altering, and deleting tax rates and groups
- Vendors – Gives permission to utilize the vendors module in POS, allowing any change to take place such as creating, altering, and deleting vendors
- Settings – Gives permission to utilize the settings module in POS, allowing any change to take place such as altering the POS settings
- Offline Mode Settings – Gives permission to utilize the offline mode settings module in POS, allowing any change to take place such as creating, altering, and deleting offline mode variables
- POS Editor – Gives permission to utilize the POS button editor module in POS, allowing any change to take place such as creating, altering, and deleting both buttons and panels
- Training Mode – Gives permission to utilize the training module in POS, allowing the casher to do sales and transactions in the POS and it not record any of the action
- Delete Messages – Gives the permission to delete messages sent from corporate
HH Permissions
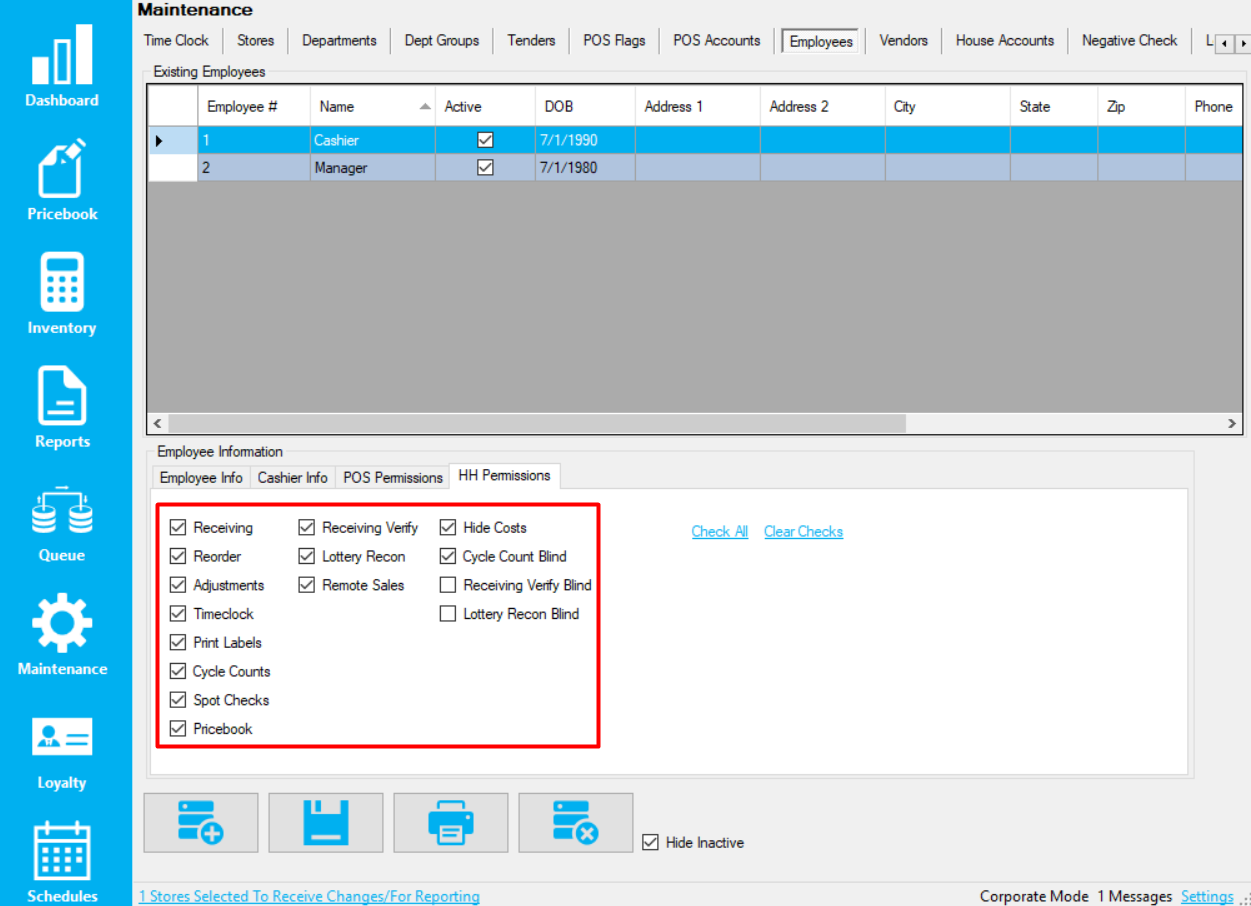
- Receiving – Gives permission to create, edit, and verify invoices on the handheld
- Reorder – Gives permission to scan and create a new order
- Adjustments – Gives permission to create both positive and negative adjustments
- Timeclock – Gives permission to utilize the timeclock within the handheld
- Print Labels – Gives permission to scan and send labels to the label queue
- Cycle Counts – Gives permission to start and scan cycle counts
- Spot Checks – Gives permission to start and scan spot checks
- Pricebook – Gives permission to scan items and view costs, prices, and quantity on hand
- Receiving Verify – Gives permission to verify invoices on the handheld
- Lottery Recon – Gives permission to do a lottery reconciliation on the handheld
- Remote Sales – Gives permission enter remote sales from the handheld
- Hide Costs – Removes costs from pricebook module on handheld
- Cycle Count Blind – Removes the snapshot quantity on hand when doing cycle counts
- Receiving Verify Blind – On invoice verification, removes the expected quantities
- Lottery Recon Blind – On lottery reconciliations, makes them blind
Director Permissions
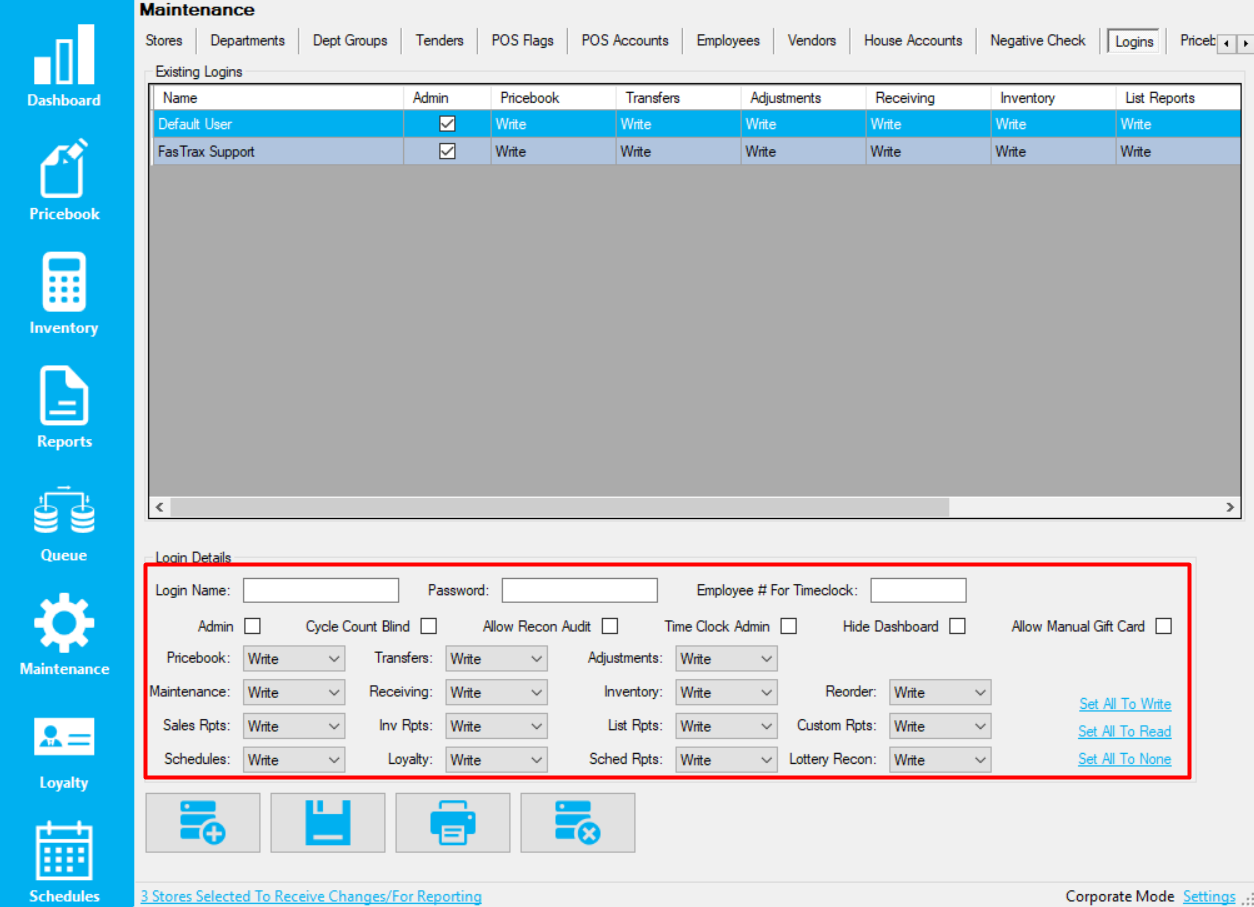
- Pricebook – Gives the user the ability to utilize the pricebook module within Director
- Transfers – Gives the user the ability to utilize transfers within the inventory module of Director
- Adjustments – Gives the user the ability utilize adjustments within the inventory module of Director
- Maintenance – Gives the user the ability to utilize the maintenance module within Director
- Receiving – Gives the user the ability to receive, adjust, delete, and create invoices within the maintenance module of Director
- Inventory – Gives the user the ability to create, edit, and delete cycle counts and definitions
- Reorder – Gives the ability to utilize reorder functionality
- Sales Rpts – Gives the user the ability to run reports on sales data
- Inv Rpts – Gives the user the ability to run reports on inventory data
- List Rpts – Gives the user the ability to run reports based on static data, such as departments, tenders, ect
- Custom Rpts – Gives the user the ability to run reports in the custom reports tab
- Schedules – Gives the user the ability to utilize the employee scheduler module within Director
- Loyalty – Gives the user the ability to utilize the loyalty module within Director
- Sched Rpts – Gives the user the access to view the scheduled reports section of Director
- Lottery Recon – Gives the user the ability to access the lottery reconciliation tab in Director
- Admin – Gives the user the ability to change administrative Director settings
- Cycle Count Blind – Hides snapshot quantity of items on cycle counts within Director
- Allow Recon Audit – Gives the user the ability to audit daily reconciliations
- Hide Dashboard – Hides the dashboard module of Director
- Allow Manual Gift Card – Gives the user the ability to manually edit gift card values
Overview of Importing Zebra Label Templates
Zebra labels can be custom designed using Zebra’s free software called ZebraDesigner*. The labels that are created in ZebraDesigner are easily importable within Director and can be printed from both POS and Director.
Below is an image showing how a label looks in text form and allows the user complete control in creating, editing, and deleting Zebra labels using a combination of ZebraDesigner* and FasTrax Director.
*ZebraDesigner can be downloaded and used for free from Zebra’s website.
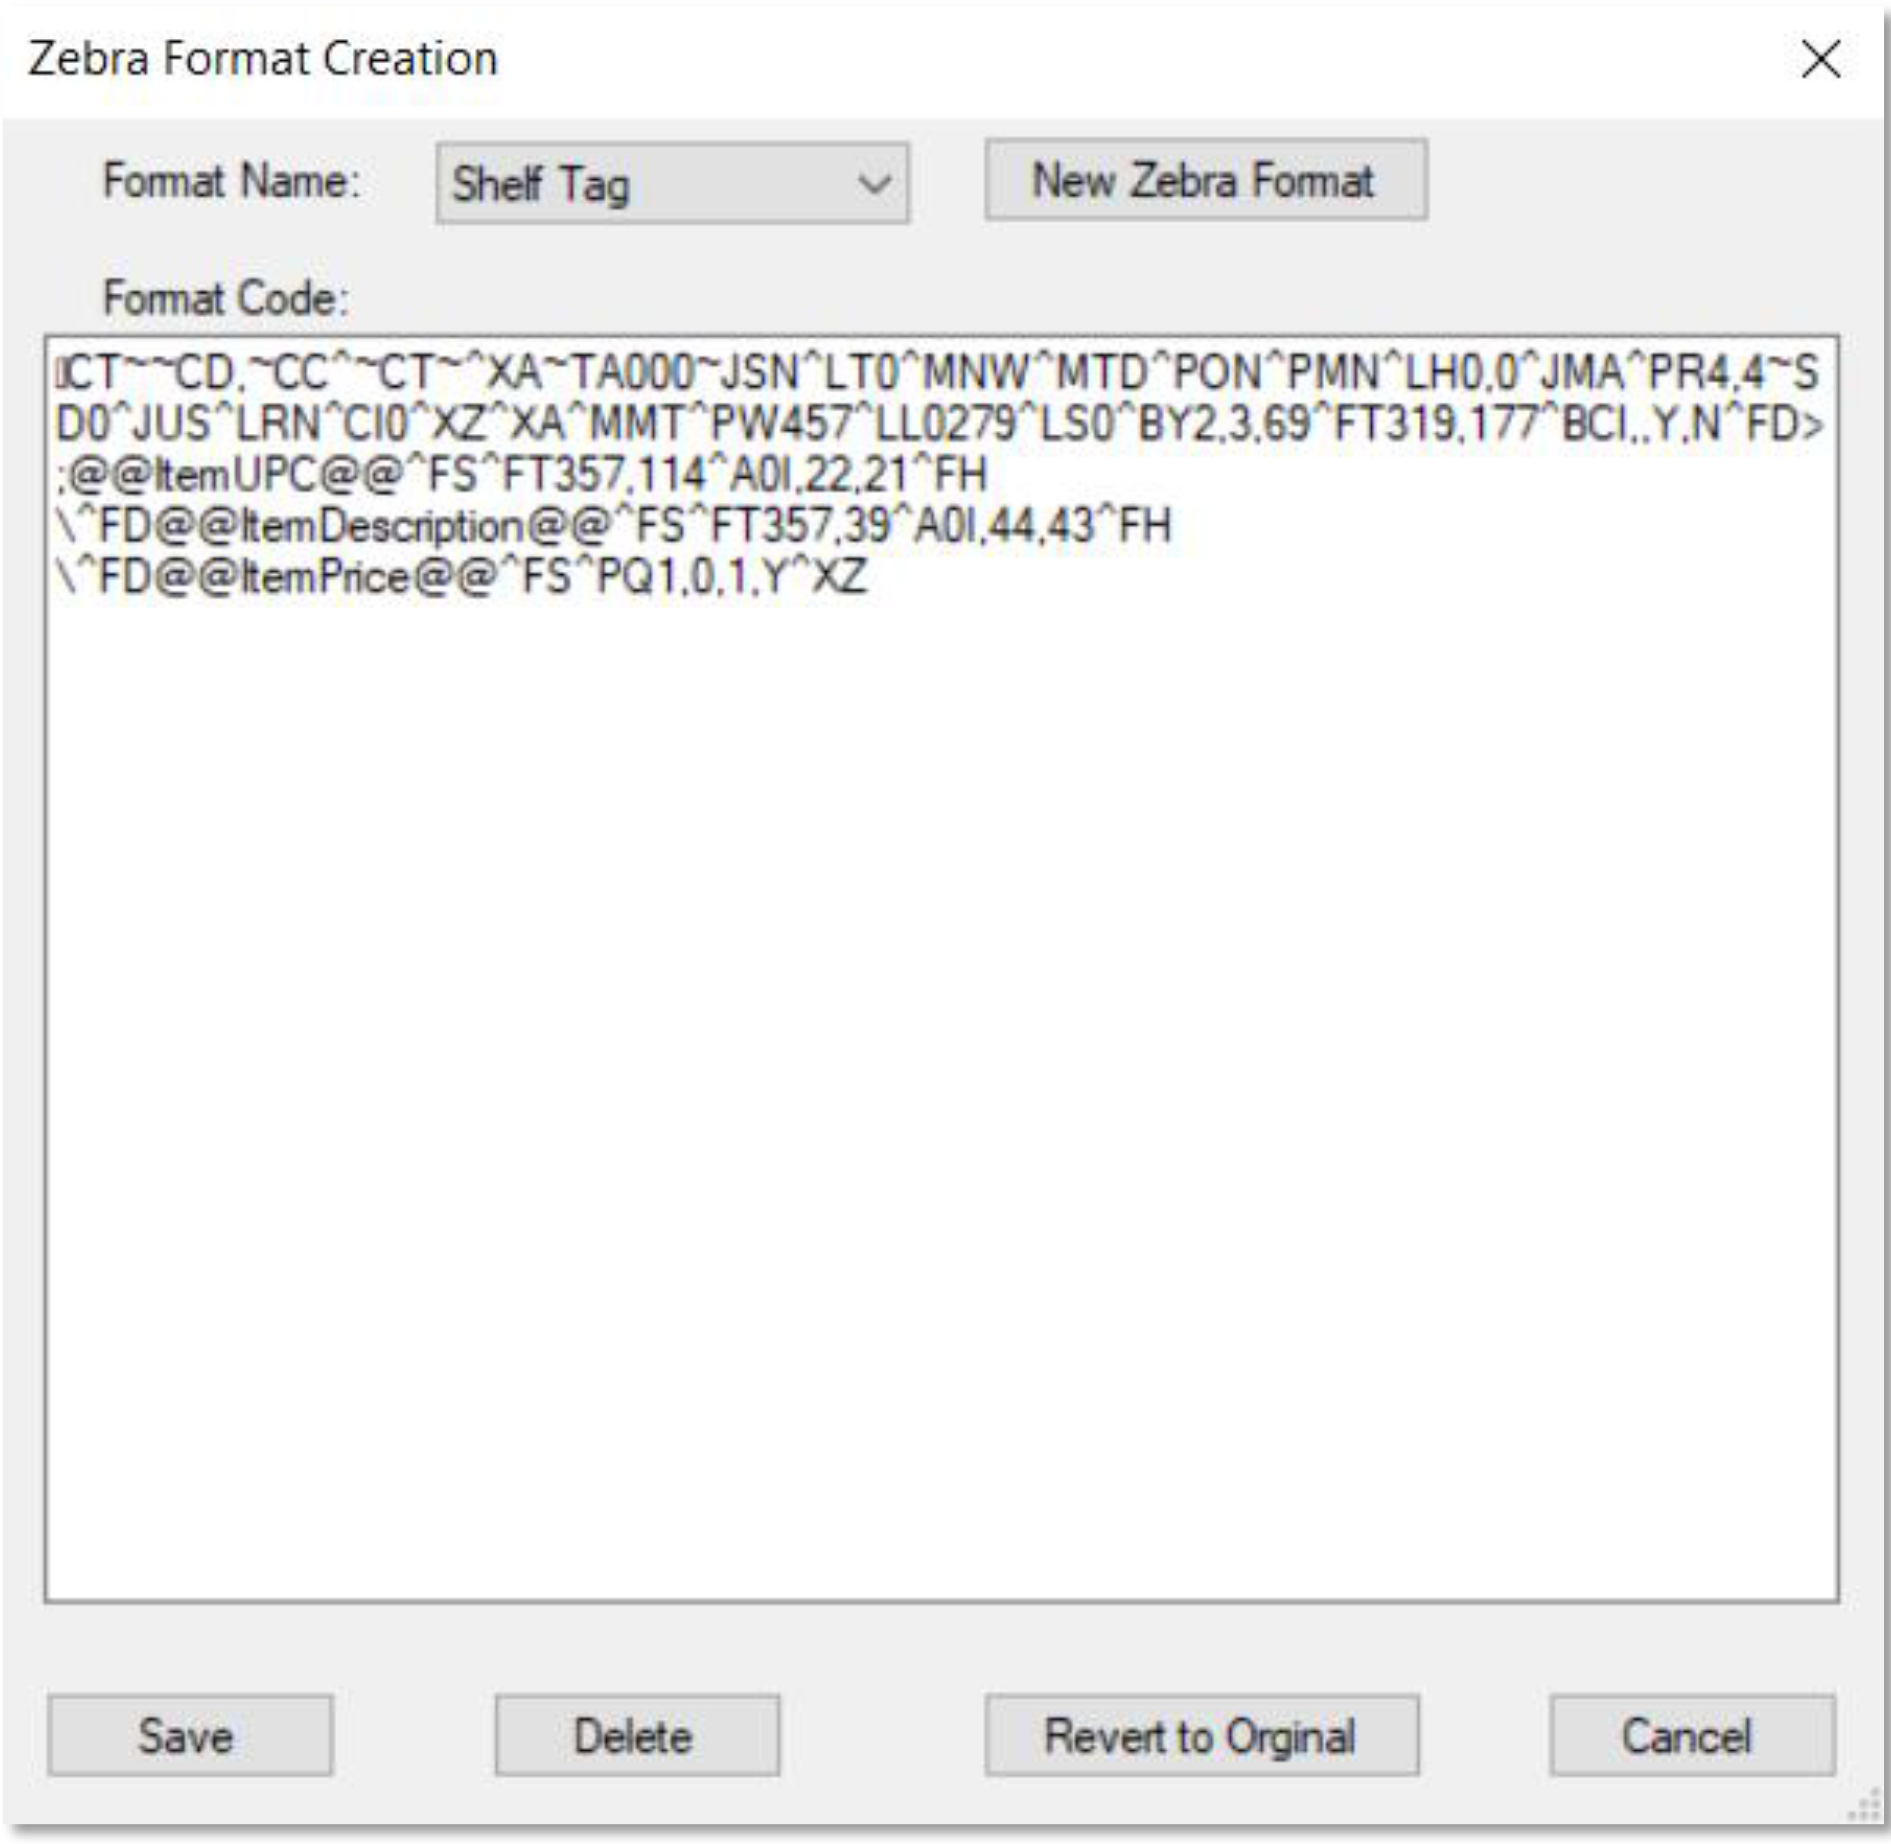
Finalizing a Label in ZebraDesigner
Within the ZebraDesigner software, any size label can be created that is compatible with your Zebra printer. There are only the following requirements:
1. All variables used must be fixed text values. The variables that are available are below:
a. @@ItemUPC@@ = the item’s UPC
b. @@ItemPrice@@ = the item’s price
c. @@ItemDescription@@ = the first part of an item’s description
d. @@ItemDescription2@@ = the second part of an item’s description
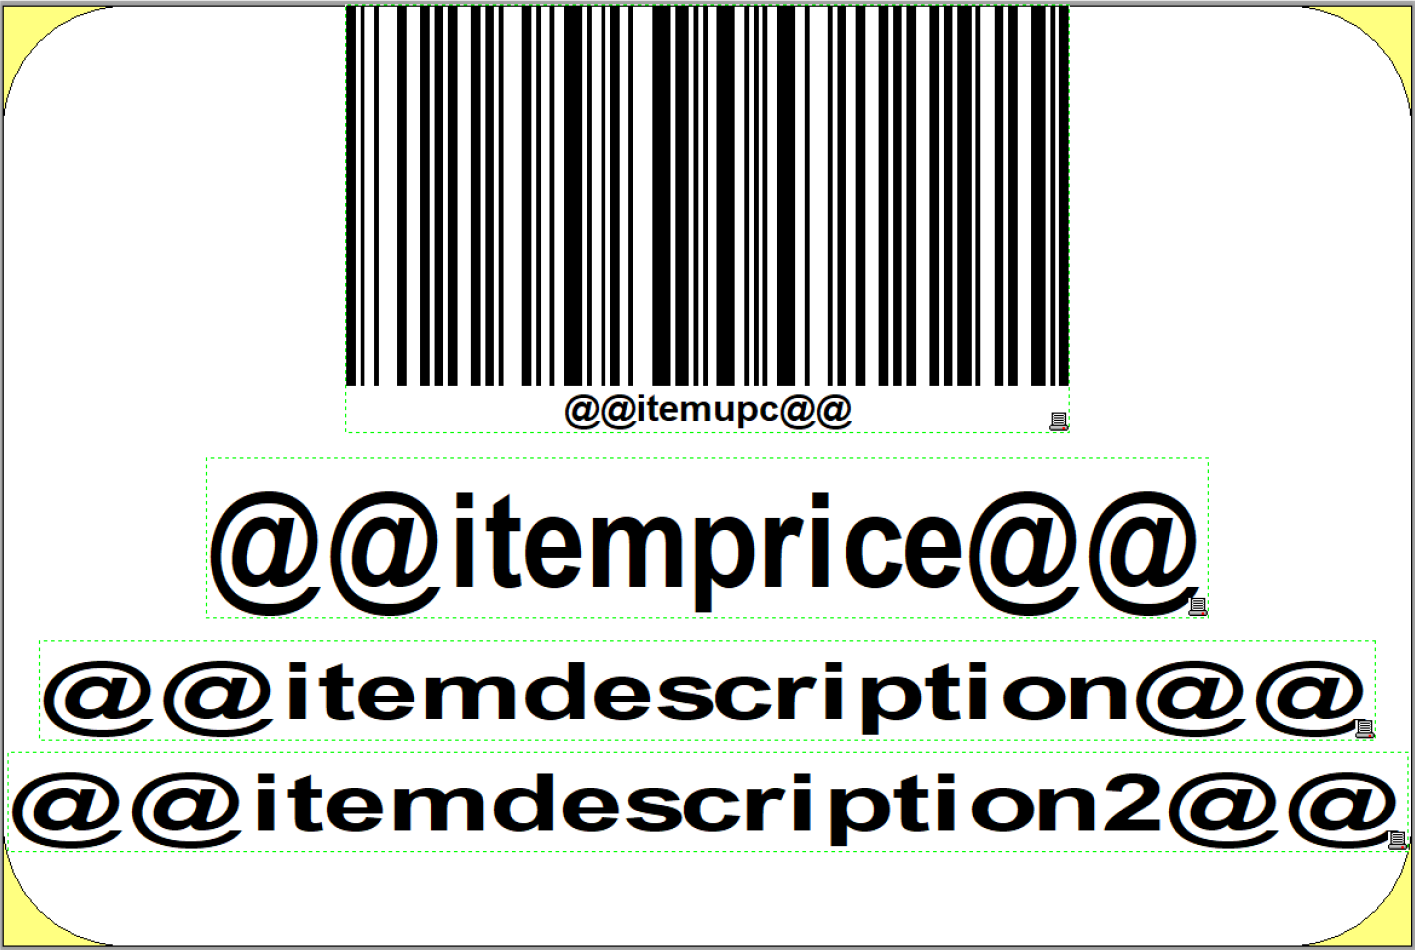
2. After saving the template, print the template as a file. Be sure to remember the location of where this was saved, as it will be needed in the future when opening in notepad

Importing a Label in Director
When importing a template into Director, Director is required to be in Support mode. This requires a user with Admin privileges to enable this setting, which can be found using the bottom Settings hyperlink in Director.

Next, after opening Director and before logging in, click on the FasTrax logo to bring up the menu used to import labels. It will require a password, which by default is FasTrax0! if it has not been changed.
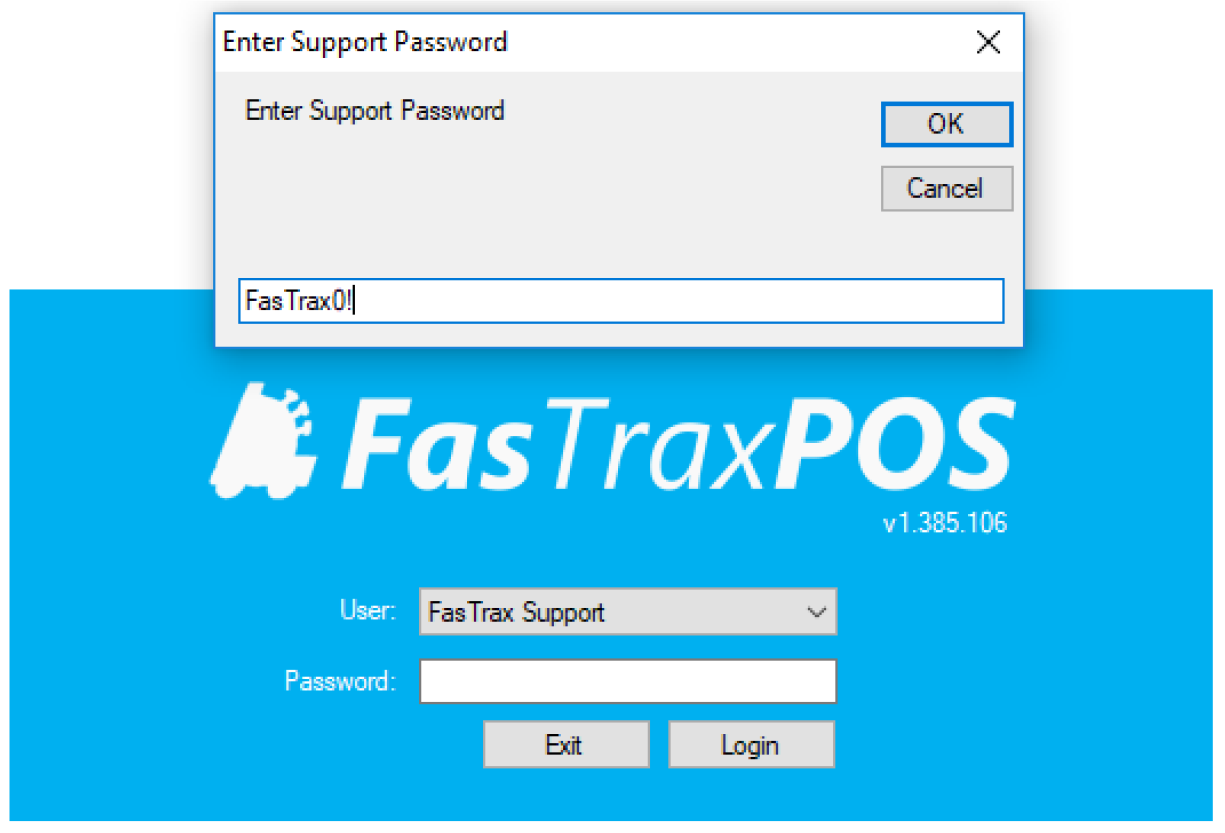
When the utilities window opens, choose the Other tab followed by the Zebra Label Formats button.
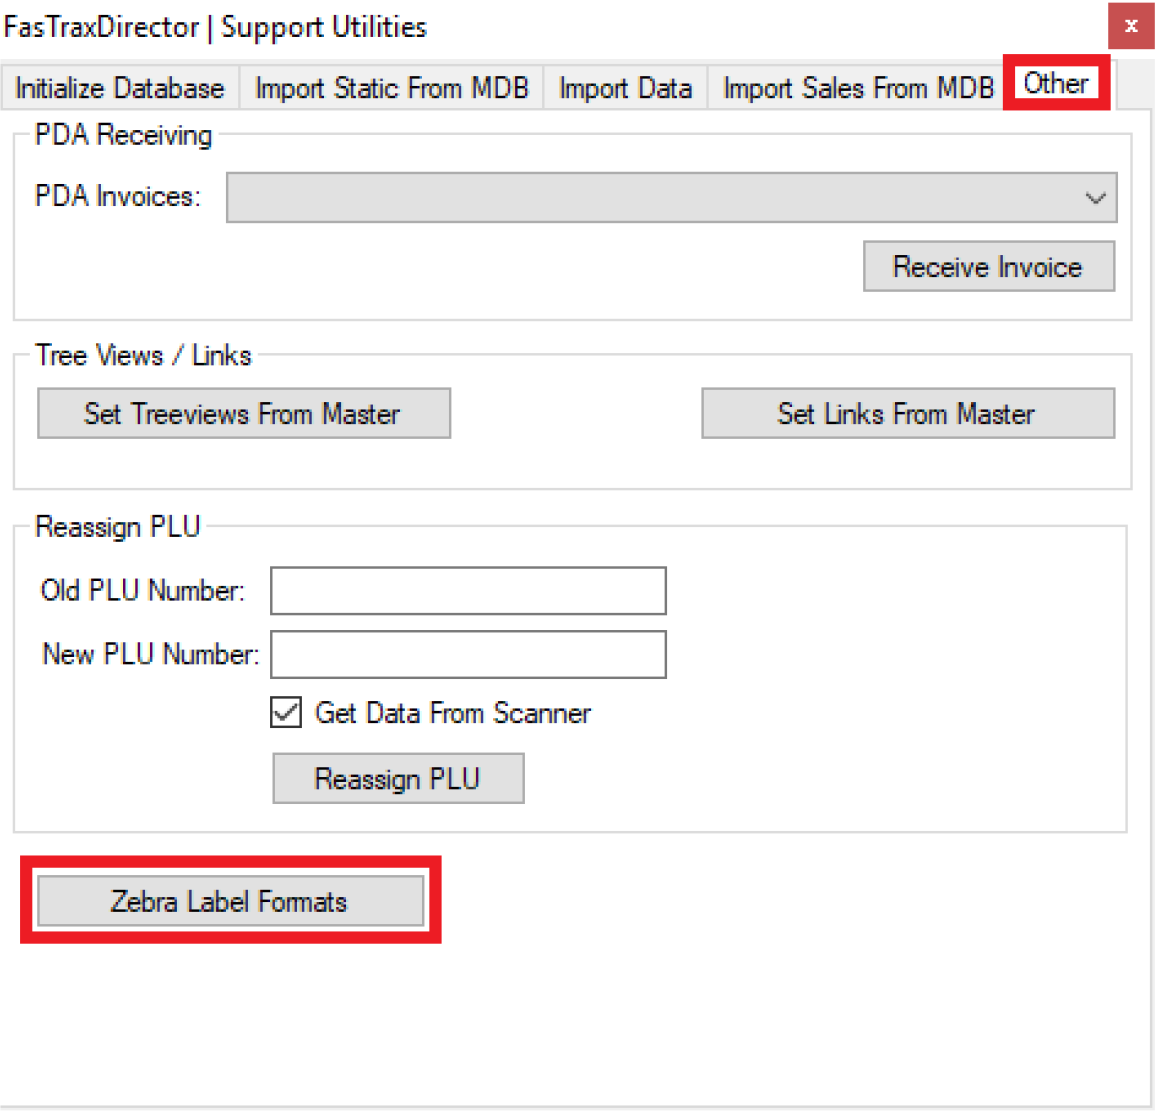
This opens the window below, which allows you to create, delete, and save new label formats.
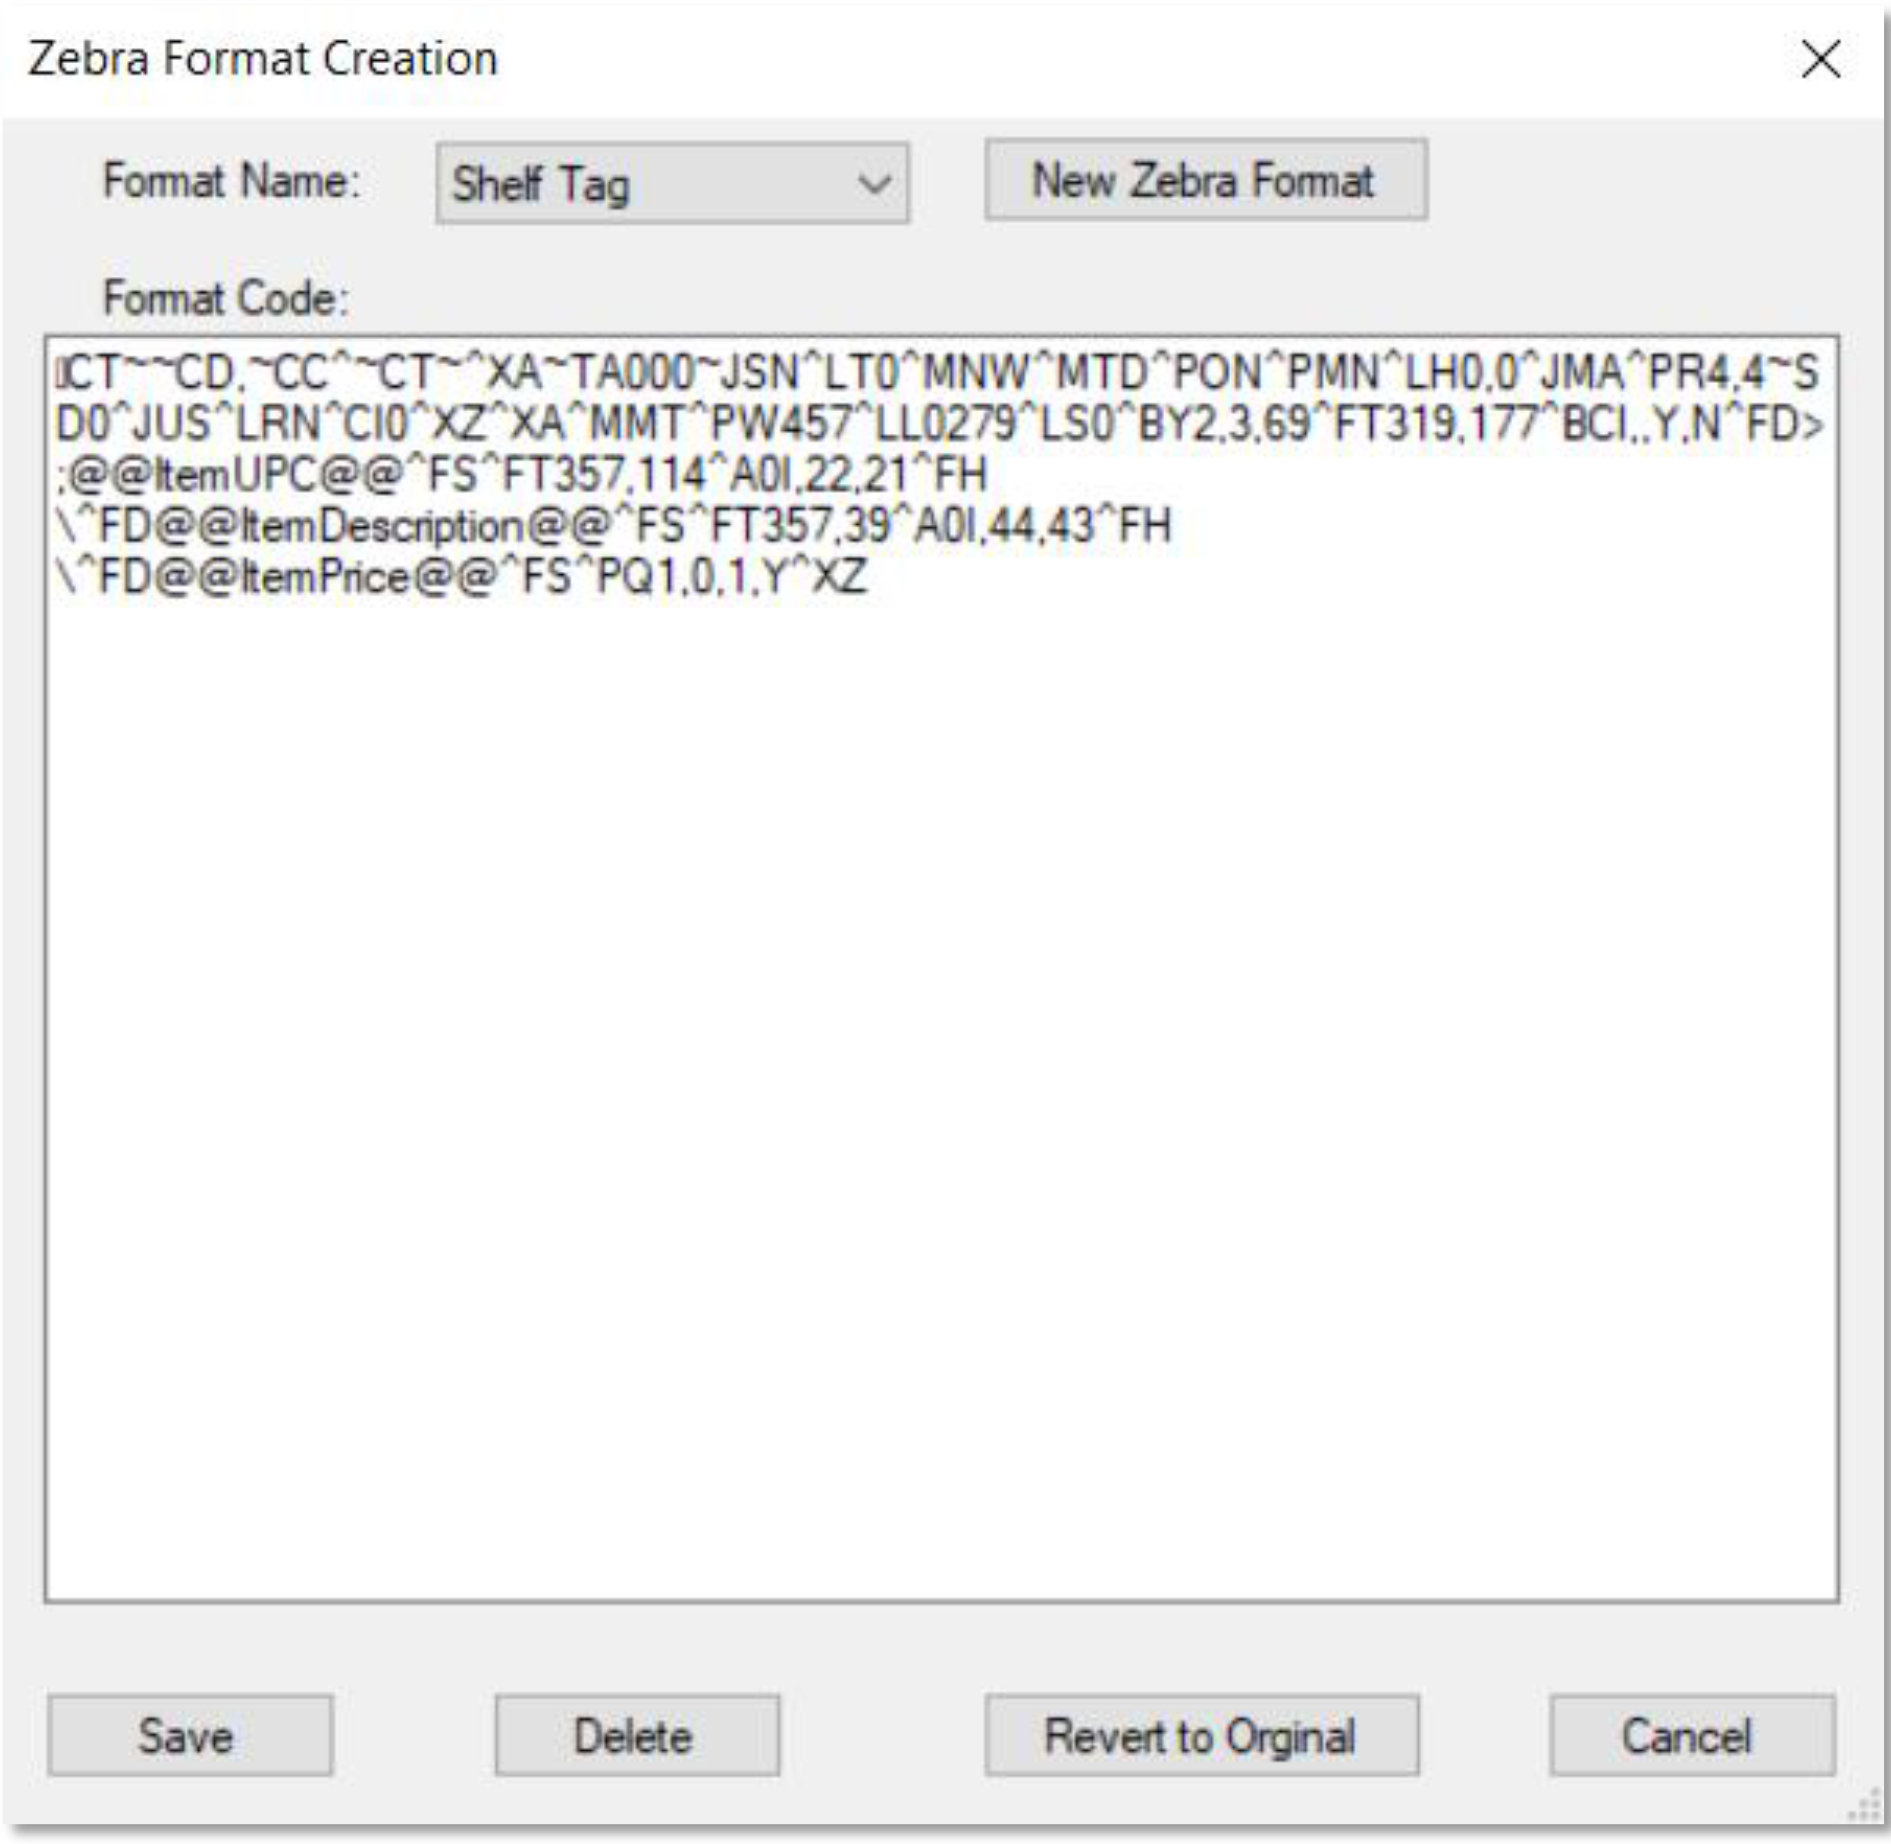
To import the newly created label, choose the new button and give the label a name.
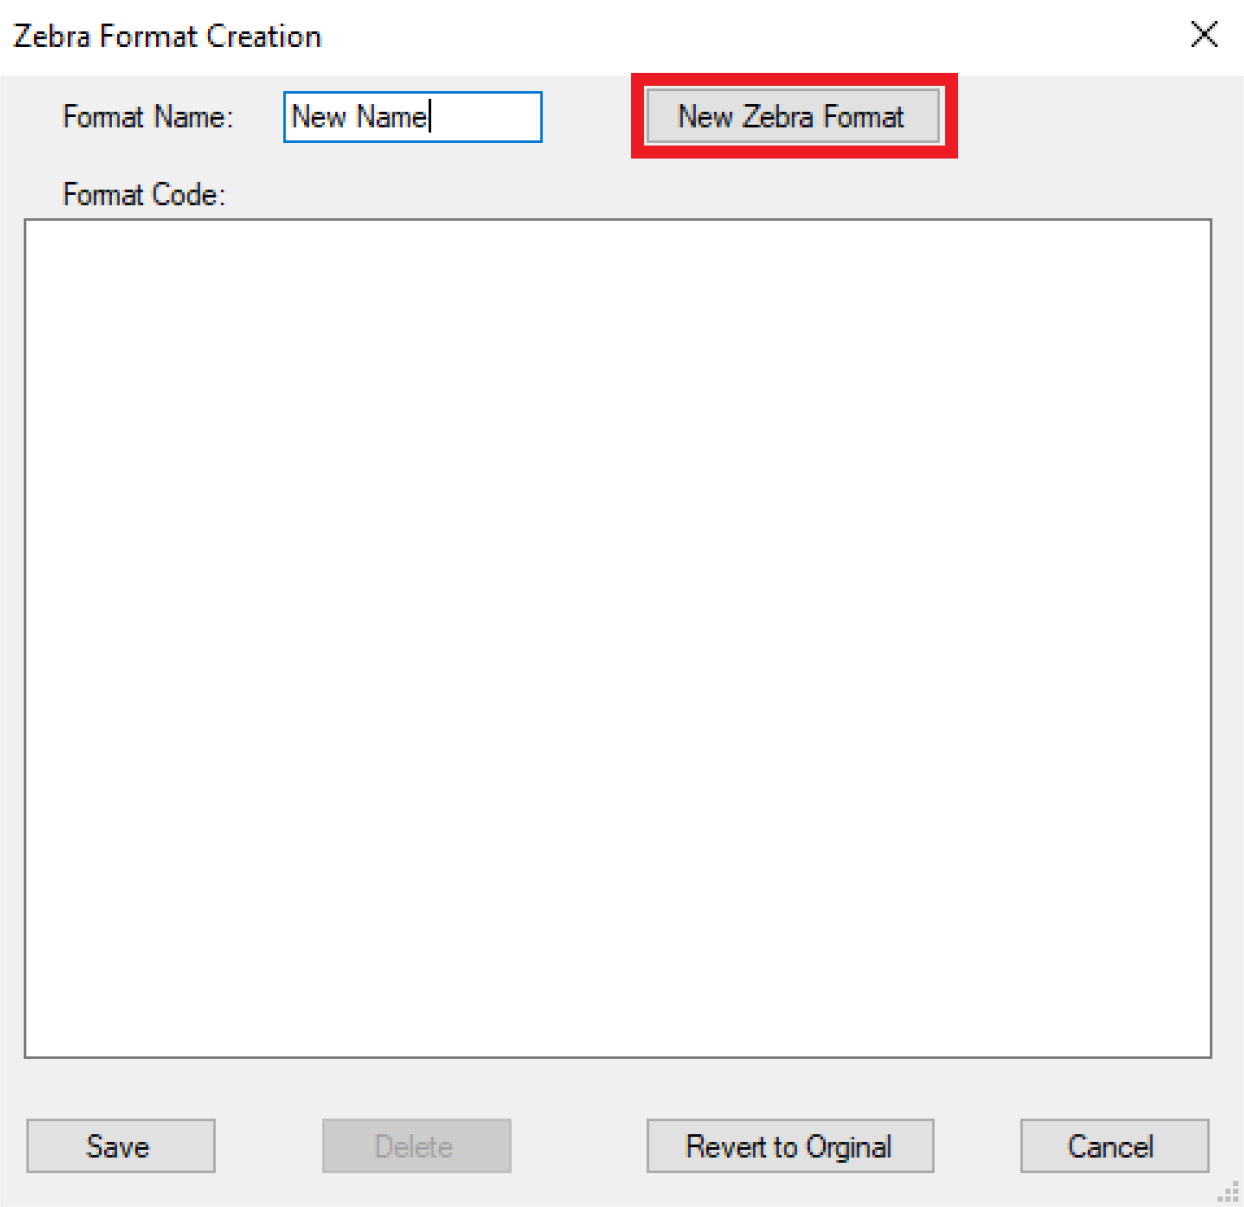
Next, the label itself will have to be opened in notepad. This can be accomplished by navigating where the .prn file was saved (Step 2 in finalizing a Zebra label), right clicking the .prn file, and choosing to open within notepad.
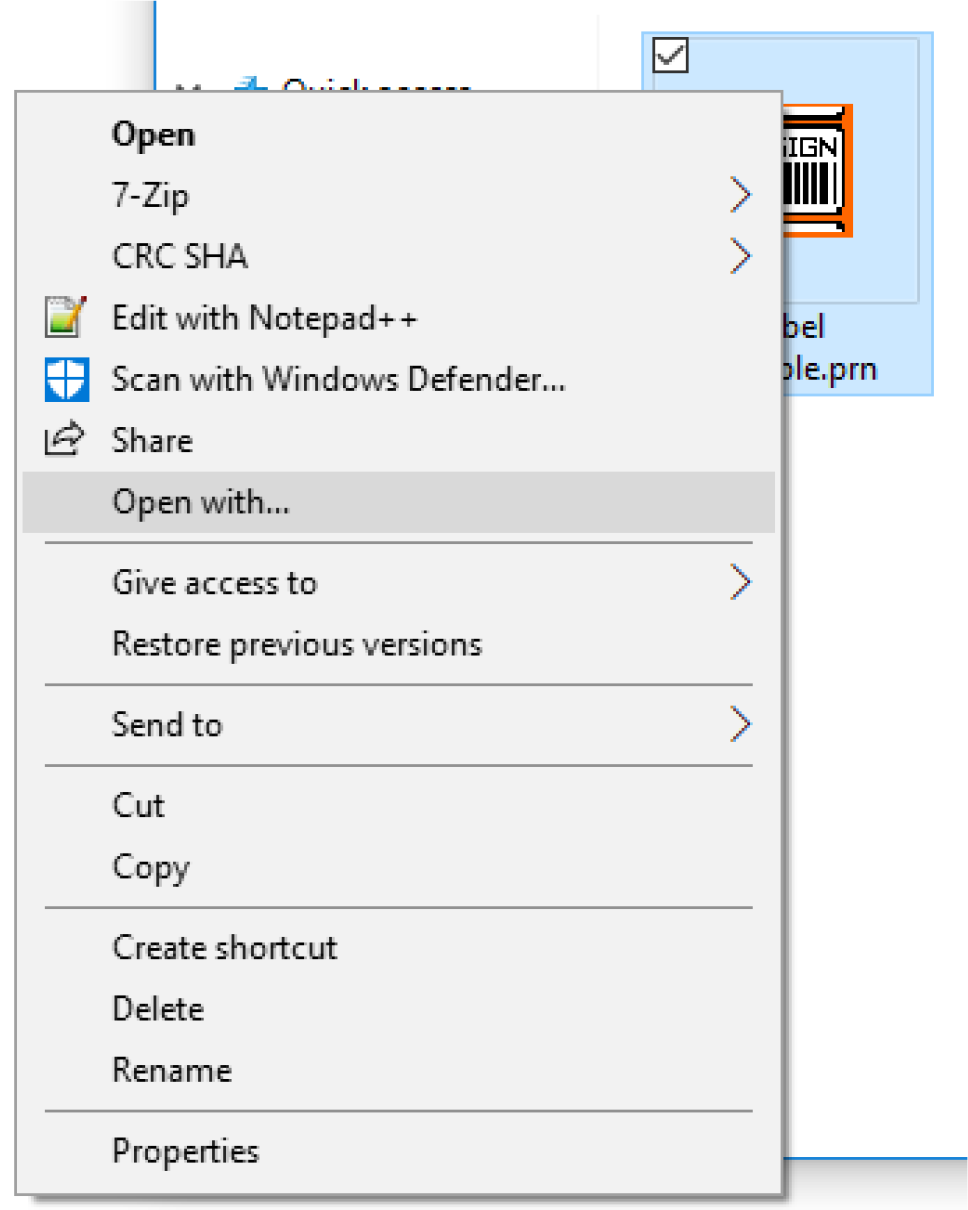

Now that the file is opened in Notepad, copy all the text from the window and paste it into the format code text block within Director.
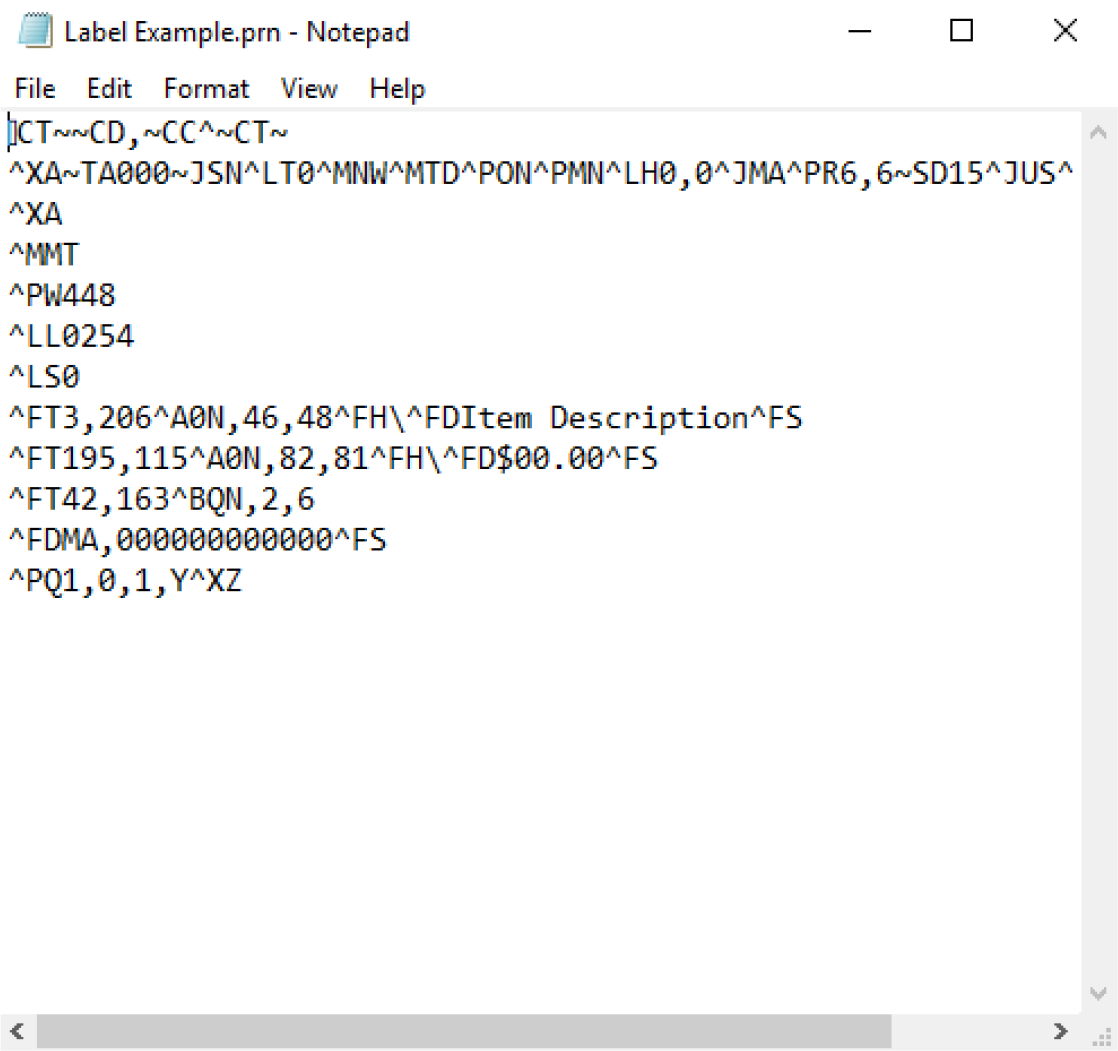
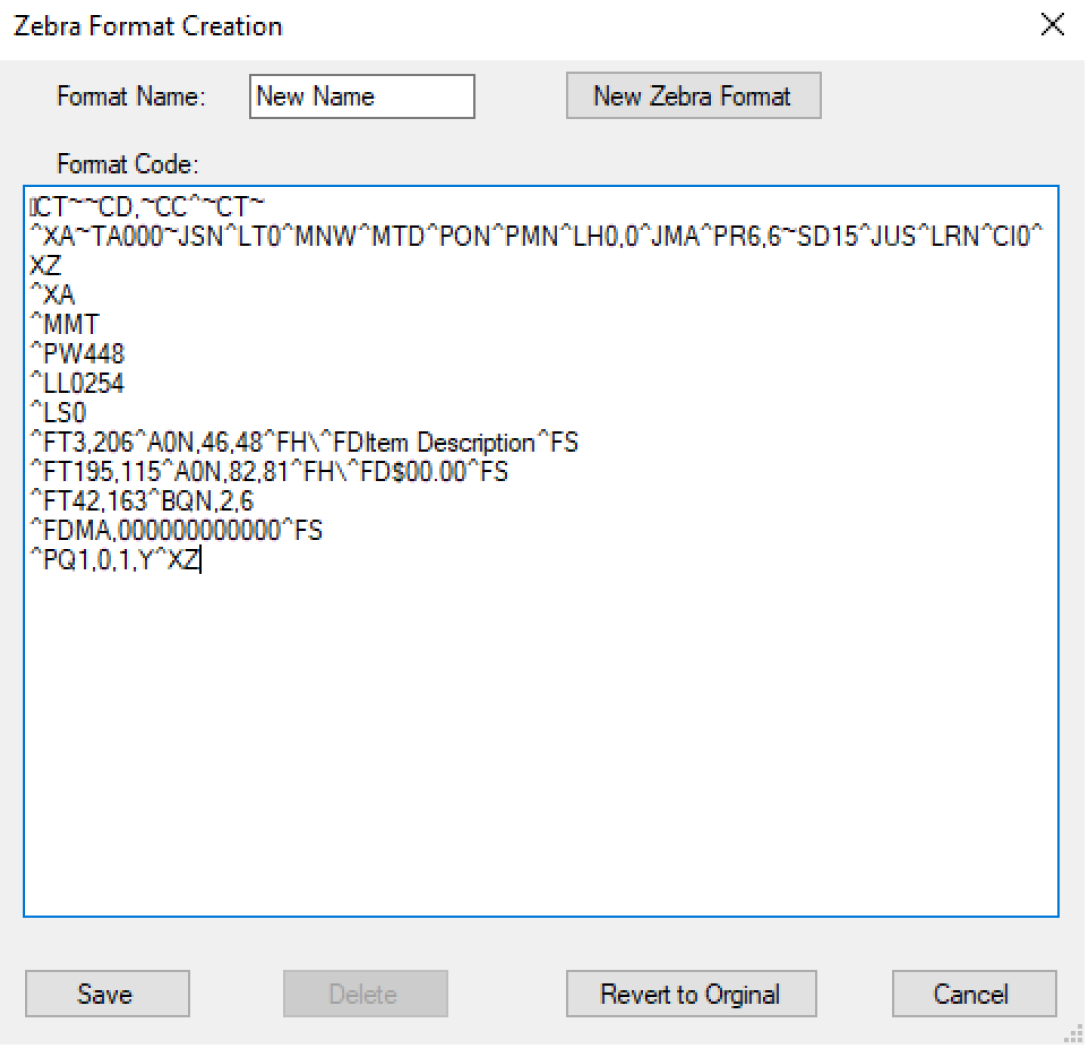
Finally, choose the save button to save the format in the database. Now, it can be used in both Director and POS from anywhere that you could previously print labels.
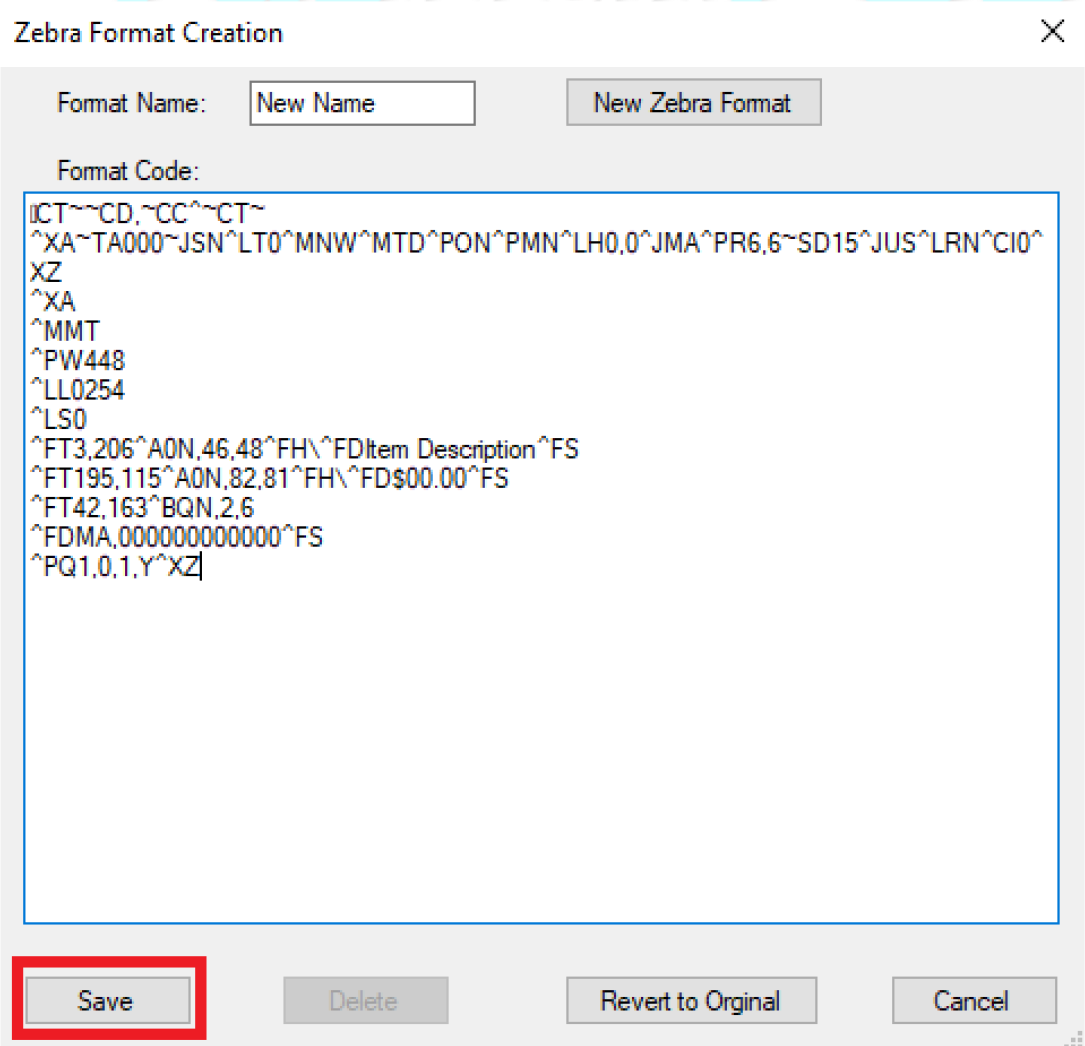
Overview of Importing Dymo Label Templates
Dymo labels can be custom designed using Dymo’s free software called Dymo Label*. The labels that are created in Dymo Label are easily importable within Director and can be printed from both POS and Director.
The Dymo Label software saves custom labels as a .label file, which when placed within a specific folder, is read by both the POS and Director.
*Dymo Label can be downloaded and used for free from Dymo’s website.
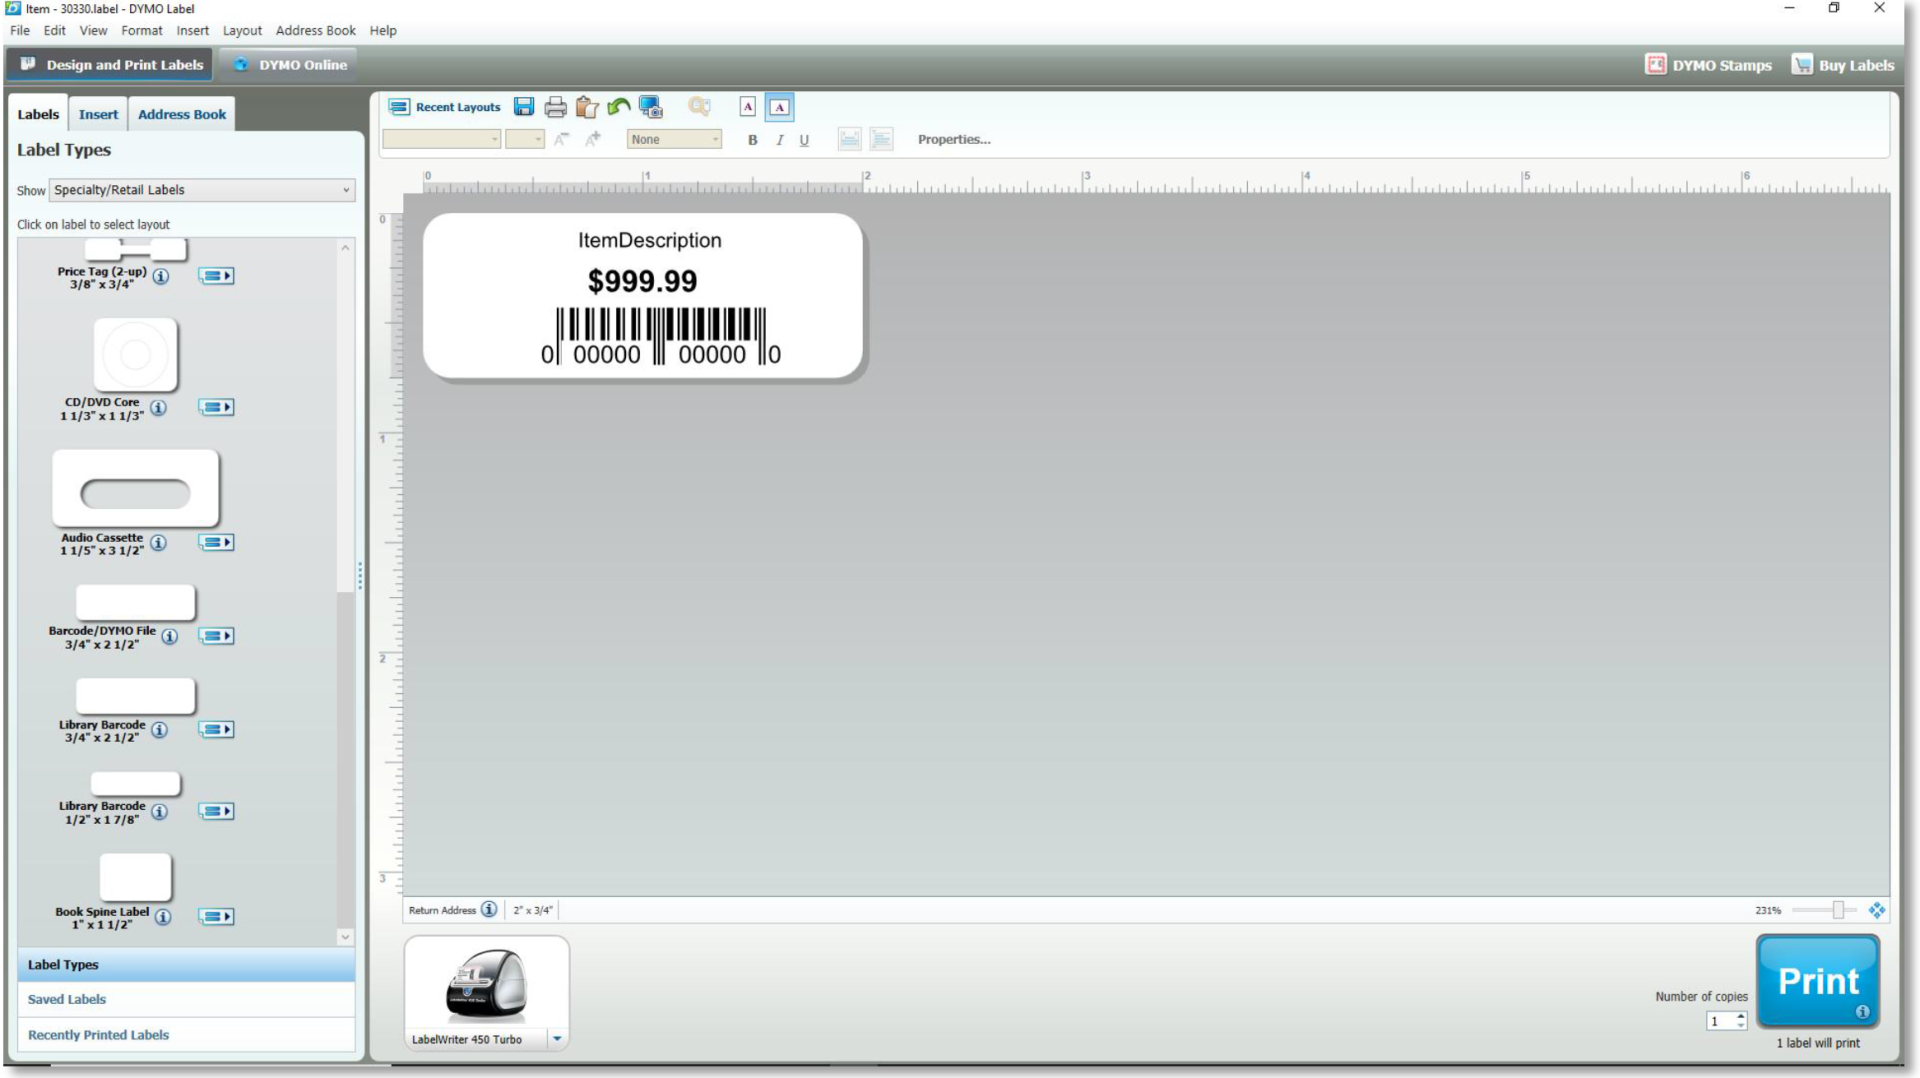
Finalizing a Label in the Dymo Label Software
Within the Dymo Label software, any size label can be created that is compatible with your Dymo printer. There are only the following requirements:
1. All variables used must be variable objects. The variables that are available are below:
a. ItemBarcode = the items UPC
b. ItemPrice = the item’s price
c. ItemDescription = the first part of an item’s description
d. ItemDescription2 = the second part of an item’s description
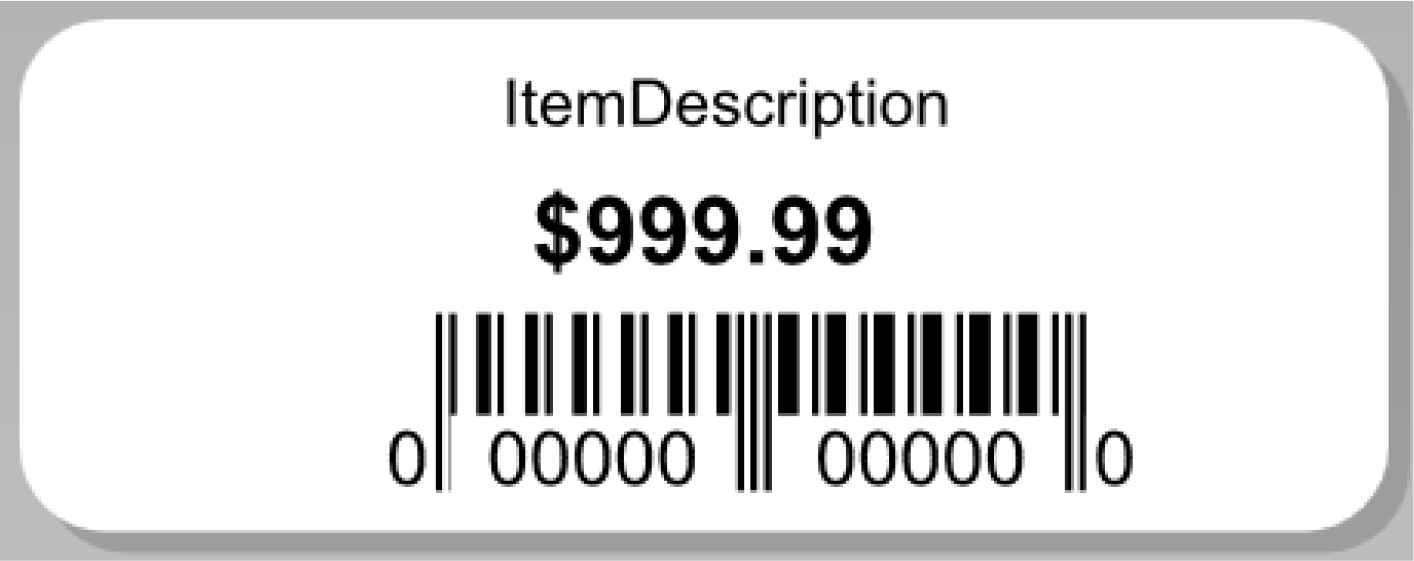
2. When complete, save the label in the C:\Fastrax\DymoLabelTemplates directory.
3. Now the label can be used in both Director and POS from anywhere that you could previously print label.
Overview of Age Verification
Age verification is a powerful feature that helps safeguard against underage sales. When set properly, the point of sale will prevent the sale of items where the customer is not old enough to make the purchase. This is an additional safeguard to employees manually checking the customer’s age.
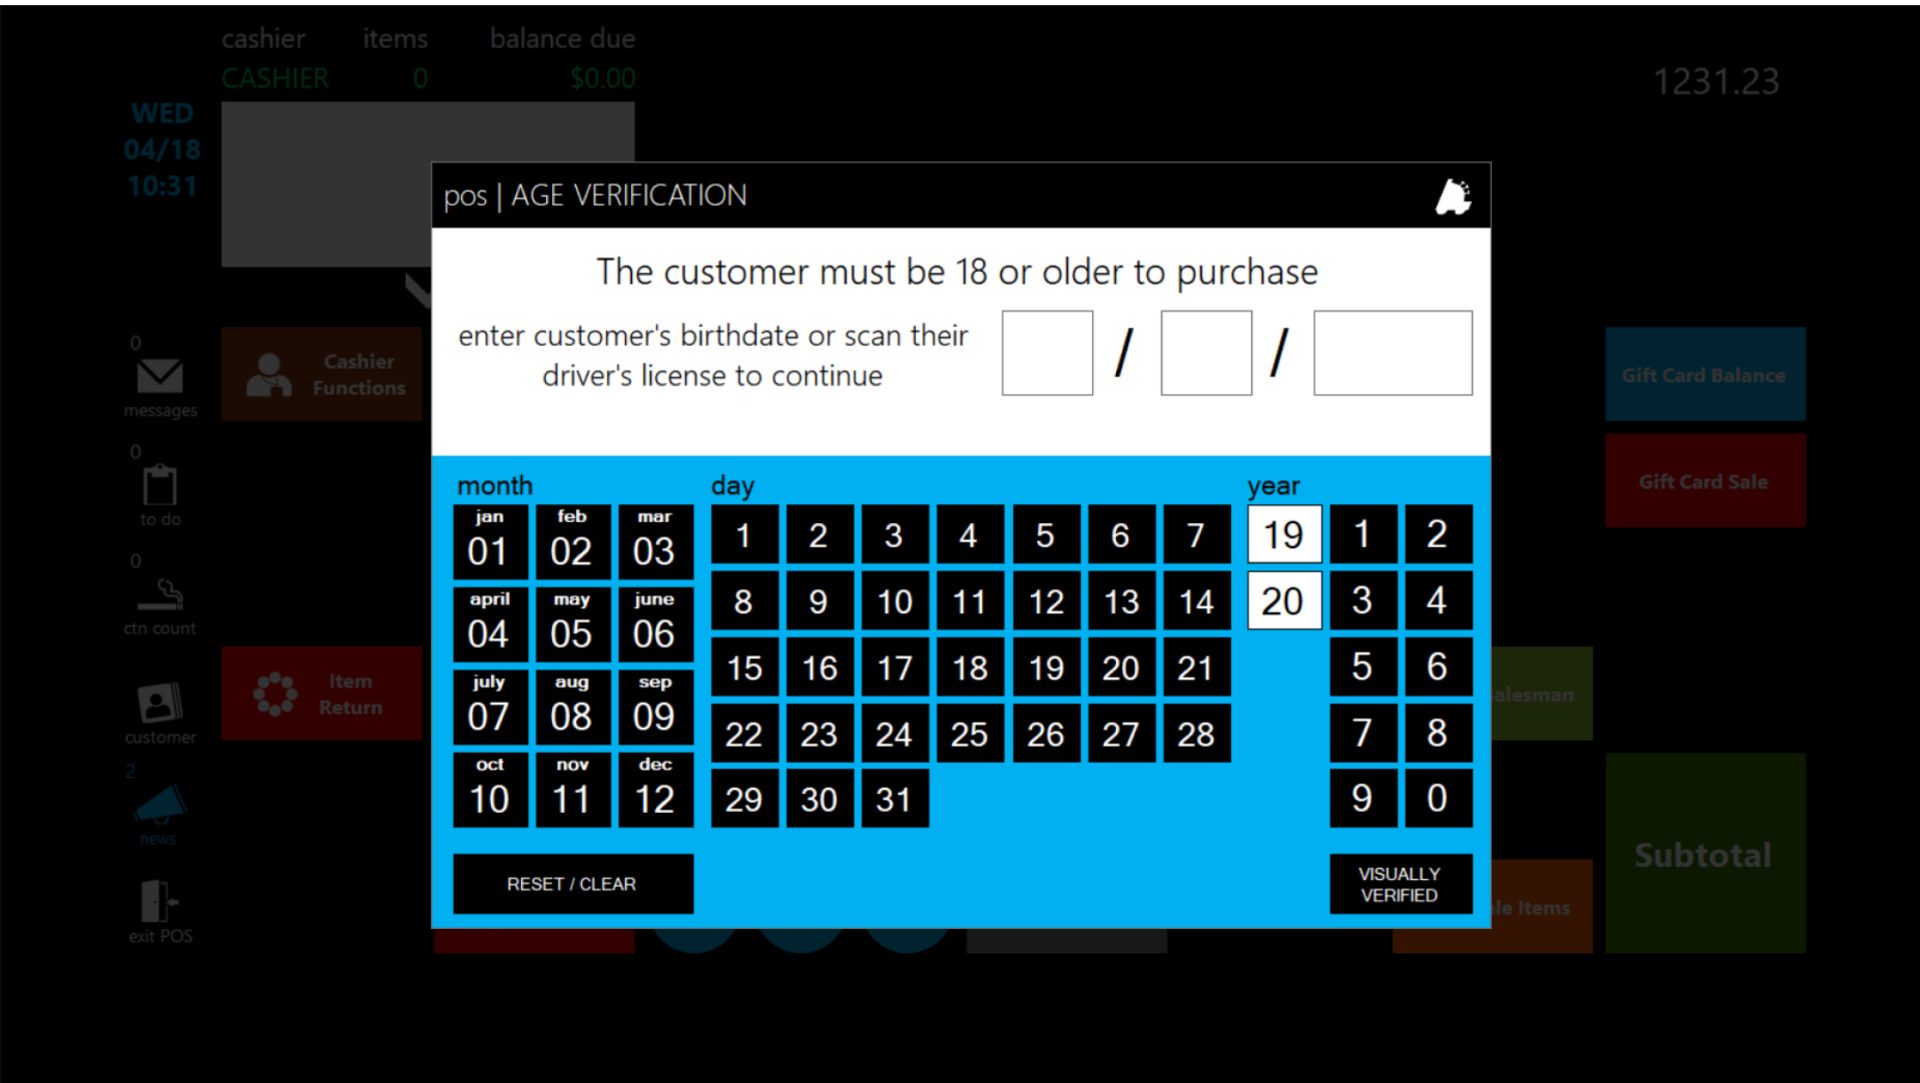
- Now choose the “Departments” tab on the ribbon
- When done, choose the save button after editing the values

- On POS Flags, to enable an age restriction, input an age in the “Age Required” field

- Next, choose the “POS Flags” tab on the ribbon
- From within Director, choose the “Maintenance” button
- On the “Department Details”, set the “POS Flag” with an age restriction on a department that needs to have an age restriction and then choose save.
 Now, when ringing sales up on items within that department, the POS will have a screen like below. This will require the cashier to enter a birthday for the customer or scan the customer’s driver’s license in order to proceed with the sale.
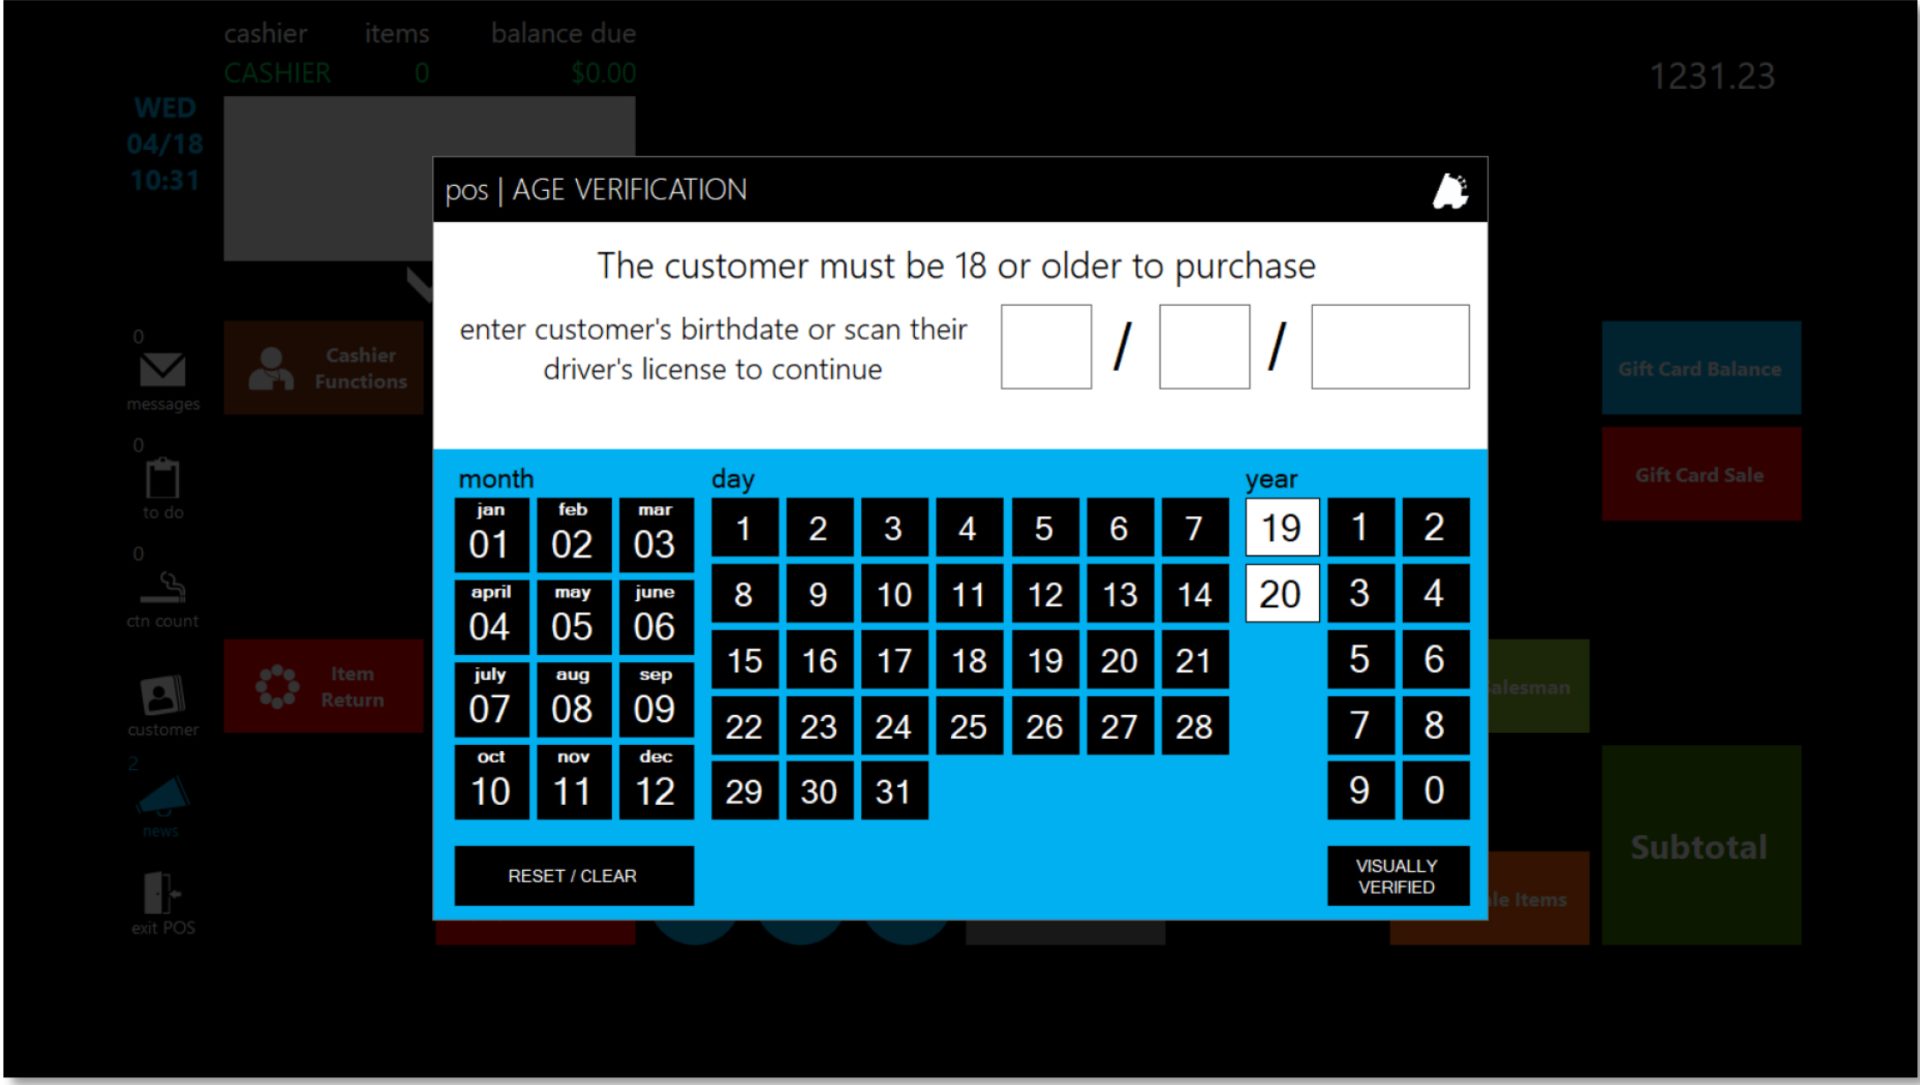
The next page will show settings that can be adjusted within the POS to alter the age verification window.
POS Settings that Alter Age Verification
- After logging into the POS, choose the “Actions” button
- Next, choose the “Settings” button
- Then, choose the next “Settings” button
- From the settings screen, choose the “Register Settings” button

- Allow Visual Age Verify – Adds a visually verified button

on the age verification window
that allows the cashier to bypass
entering a birthdate if the customer
looks well over the age required - Force DL Scan For Age Verify – On the age verification

screen, forces a driver’s
license to be scanned.
Manual age verification
isn’t allowed
- Allow Visual Age Verify – Adds a visually verified button
Overview of Return Forms
By using the option of return forms in both the POS and Director, keeping tabs of specific customer returns is no problem. All returns are recorded with detailed transactional and customer data: name, address, phone, license number, product(s) returned, dollars returned, location returned, and total lifetime returns.
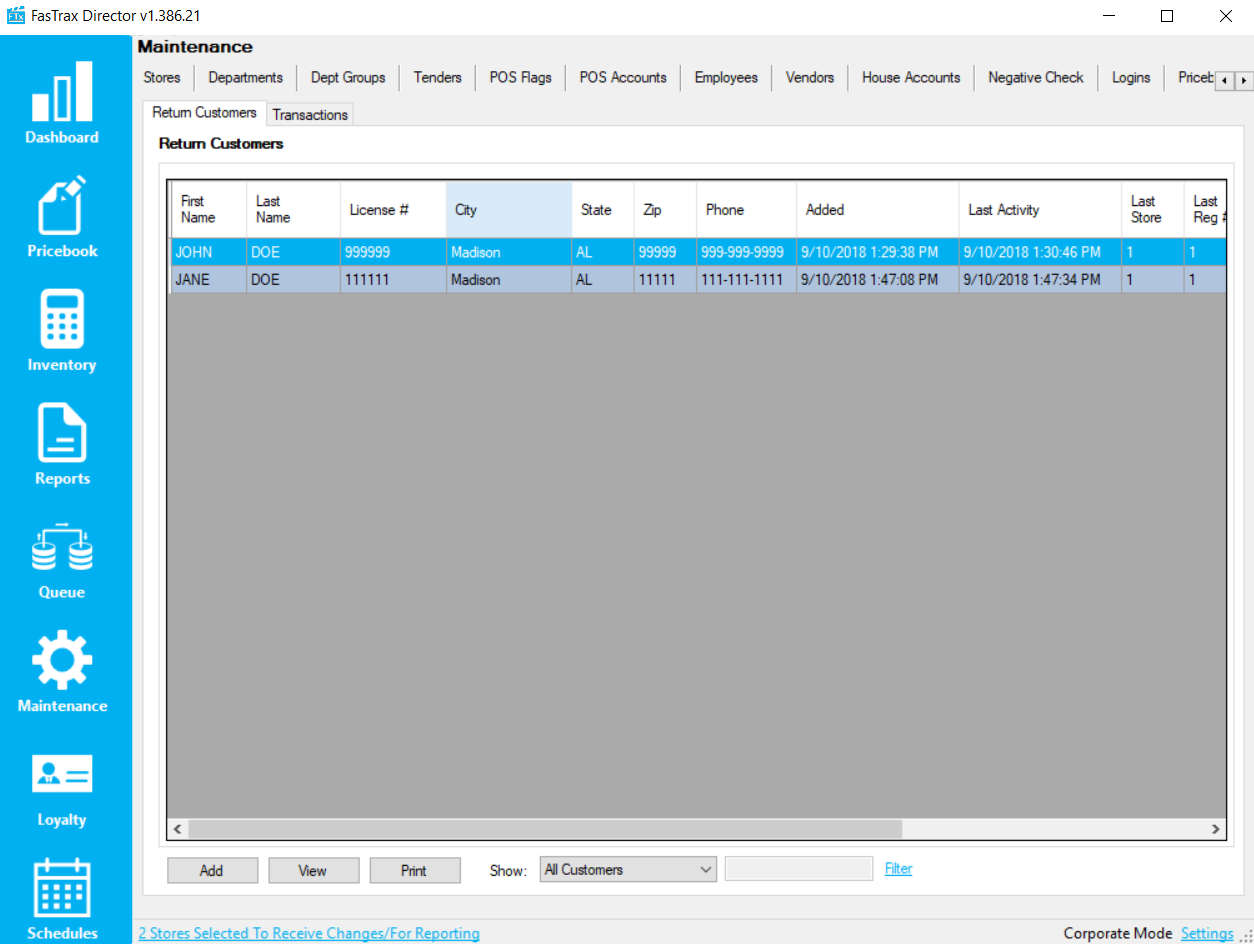
Enabling Return Forms in Director
- From within Director, choose the settings hyperlink in the bottom right corner

- In the settings window, make sure the checkbox is checked to “Enable Return Forms”
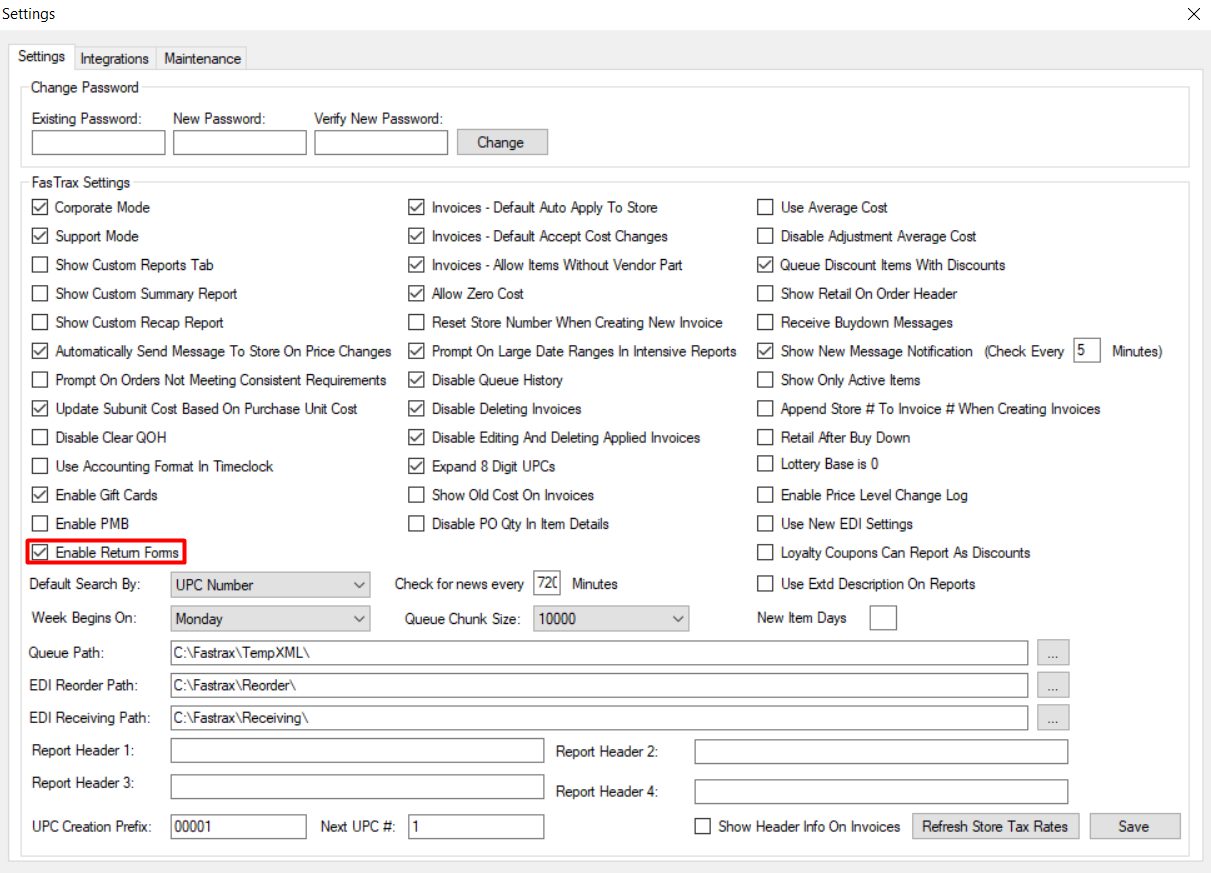
- Choose the “Save” button

Enabling Return Forms in POS
- From within the POS after logging in, choose the “Actions” button

- Then choose the “Settings” button, followed by the second “Settings” button

- Next, choose the “Register Settings” tab

- Choose the checkbox “Use Return Forms”

- Finally, choose the “Save” button

When performing a return in the POS with return forms enabled, you will receive the below screen:
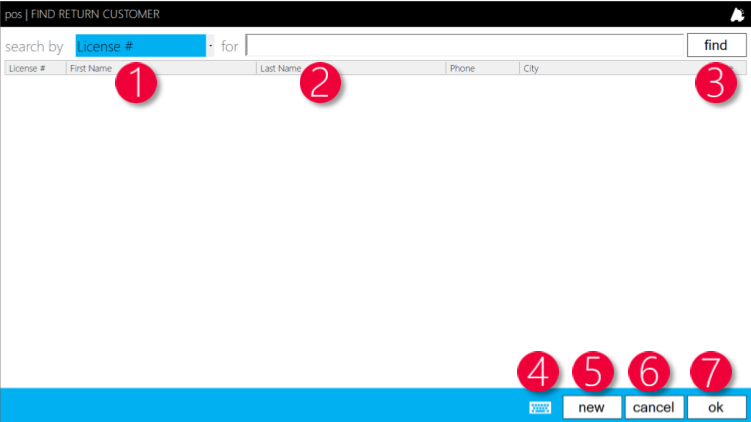
This screen allows you to add a new return customer or find an existing one.
- Search By – This dropdown allows you to search by license #, last name, or phone #
- For – This is a text box where you input the value you want to search
- Find – Press find to search for the value that was input in the “for text box field”
- Keyboard – Brings up a touch friendly virtual keyboard
- New – Allows you to input a new return customer
- Cancel – Cancels the return process
- Ok – After selecting the return customer, press ok to process with the return process
If pressing the “new” button to add a customer, you will be presented with the below screen:
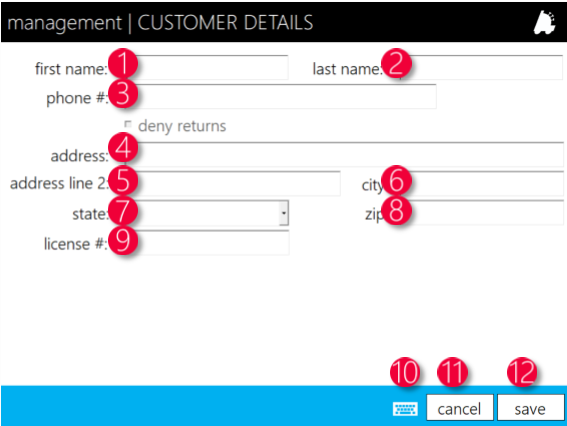
- First Name – The customer’s first name
- Last Name – The customer’s last nam
- Phone # – The customer’s phone numbe
- Address – The customer’s address
- Address Line 2 – The customer’s address for line 2 if required
- City – The customer’s city
- State – The customer’s state
- Zip – The customer’s zip code
- License # – The customer’s driver’s license number
- Keyboard – Brings up a touch friendly virtual keyboard
- Cancel – Cancels out of adding a new customer
- Save – Saves the new customer
After either adding a new return customer or selecting an existing one, you next have the screen which asks for return notes
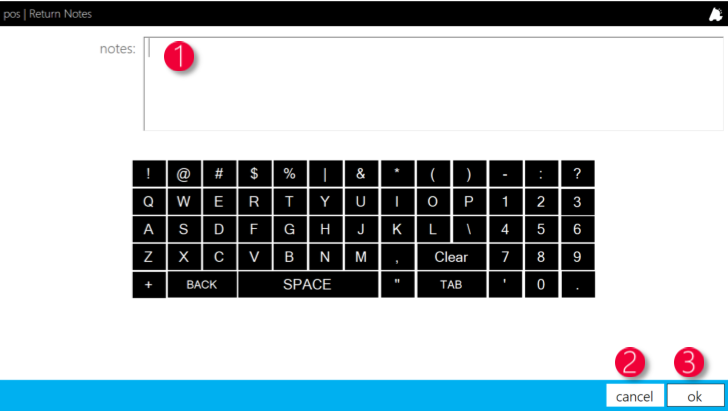
- Notes – Enter in the reason for return
- Cancel – Cancels the return process
- Ok – After entering the reason for return, continues the return process
The next window is part of the standard return process: return against a receipt or manual item return.
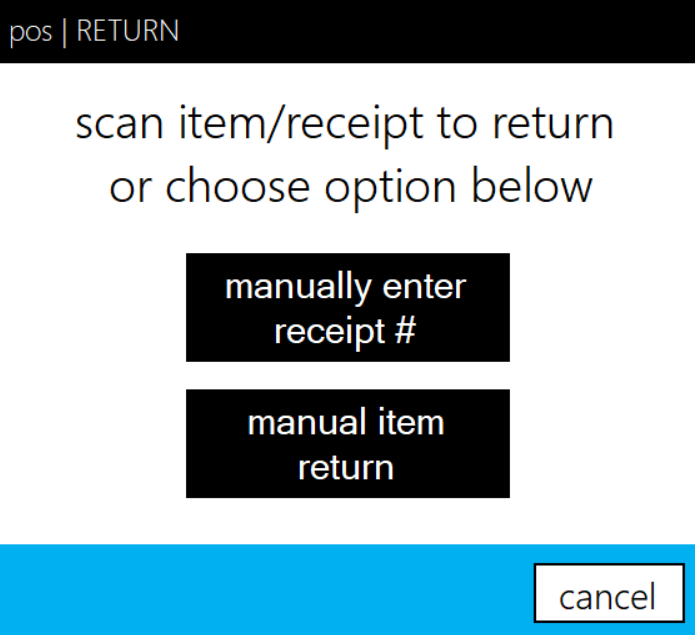
Return Forms in Director
When navigating to the return forms section in Director’s maintenance module, you will be presented with the following screen:
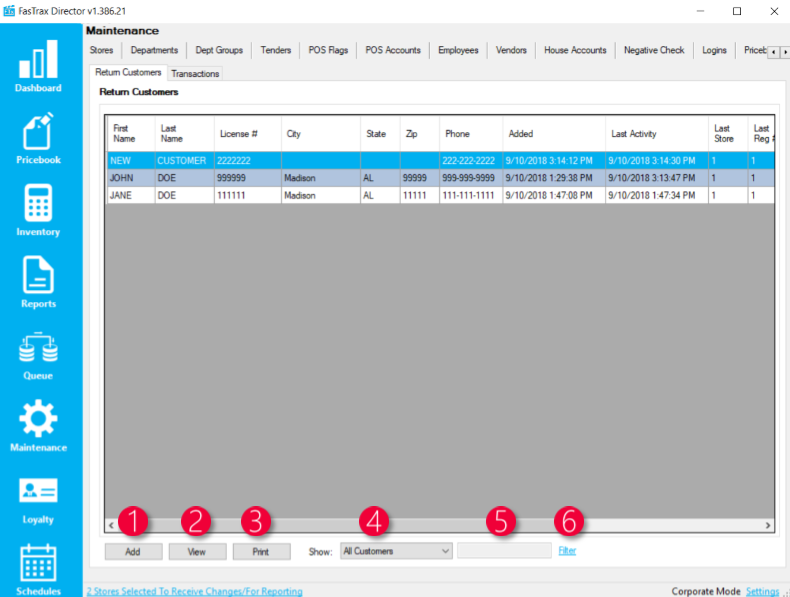
- Add – Allows a new return customer to be added
- View – Opens a new window to view data on a return customer that is selected in the above grid
- Print – Prints a list of all return customers
- Show – A filter with many options to filter specific return customers
- Filter Text Box – Allows text to be input to filter against
- Filter – Filters against the filter text box and show dropdown
When choosing the “Add” button or “View” button, you are presented the below window:
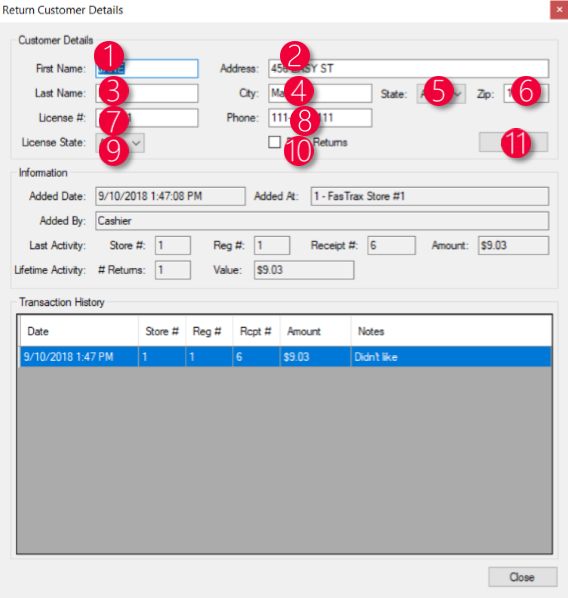
- First Name – The customer’s first name
- Address – The customer’s address
- Last Name – The customer’s last name
- City – The customer’s city
- State – The customer’s state
- Zip – The customer’s zip code
- License # – The customer’s driver’s license
- Phone – The customer’s phone number
- License State – The state of the driver’s license
- Deny Returns – When flagged, returns from the customer are now rejected
- Save – Saves the customer details
When choosing the “Transactions” tab, you will see the below screen. This allows you to see return transactions, customers who made the return, and print out the list.
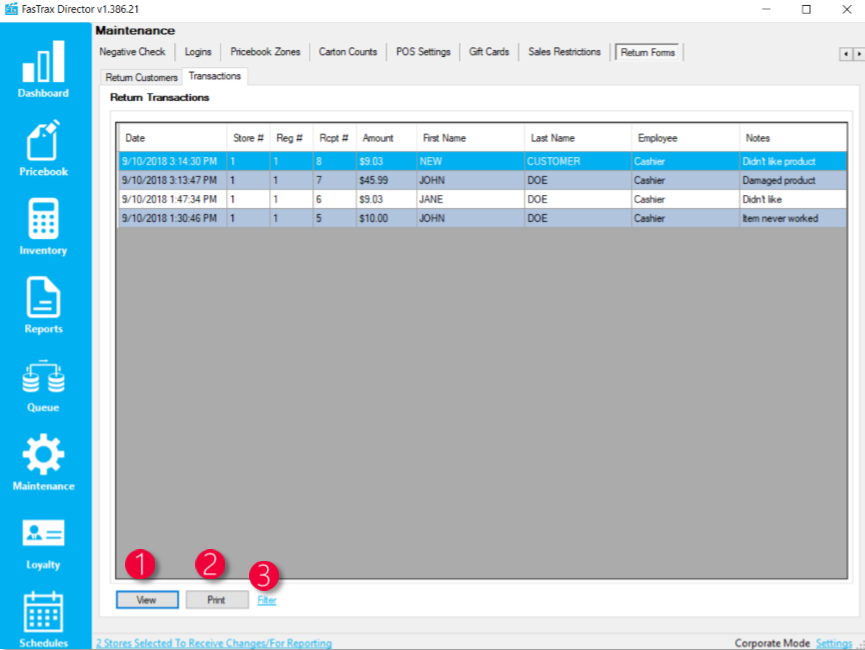
- View – Creates a report for the highlighted row and shows details of the transaction
- Print – Prints the entire grid of transactions
- Filter – Allows you to filter the grid of specific transactions
Overview of Disclaimers
A disclaimer is a simple message that is assigned to print on a receipt for items in the assigned department. This is a simple way to attach return policies, warranty policies, or any line of text that needs to be seen by the customer on a receipt for a particular group of items.
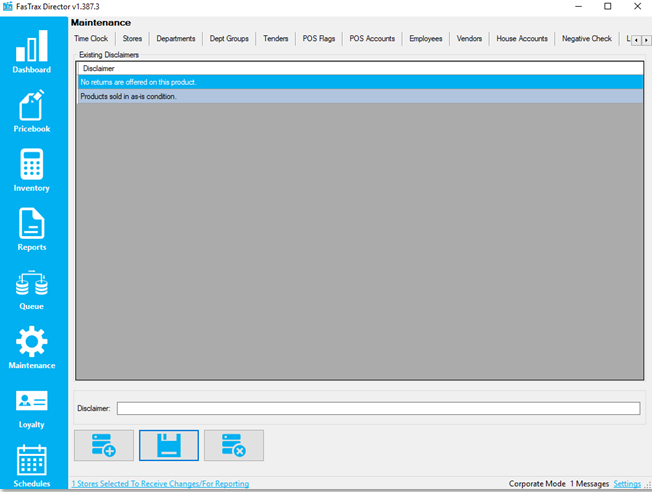
Creating a Disclaimer
- After opening Director and logging in, choose the “Maintenance” module

- Next, choose the “Disclaimers” tab

- Choose the “Add New Record” button

- Enter text in the “Disclaimer” field

Assigning a Disclaimer to a Department
- After opening Director and logging in, choose the “Maintenance” module

- Next, choose the “Departments” tab

- After selecting a department, navigate to the “Disclaimer” dropdown and select one

- Choose the “Save” button

Overview of Inactive Items
Inactive items are items that have been hidden and cannot be utilized in the pricebook in any way. This includes selling, ordering, receiving, and counting.
Utilizing inactive items is a great way to have a clutter free pricebook while keeping all previous imported and discontinued items in a secluded area to where they can be reactivated at any time. The inactive items wizard can automatically scan the pricebook and make suggestions to deactivate items that meet all the criteria of a discontinued or non-carried item.
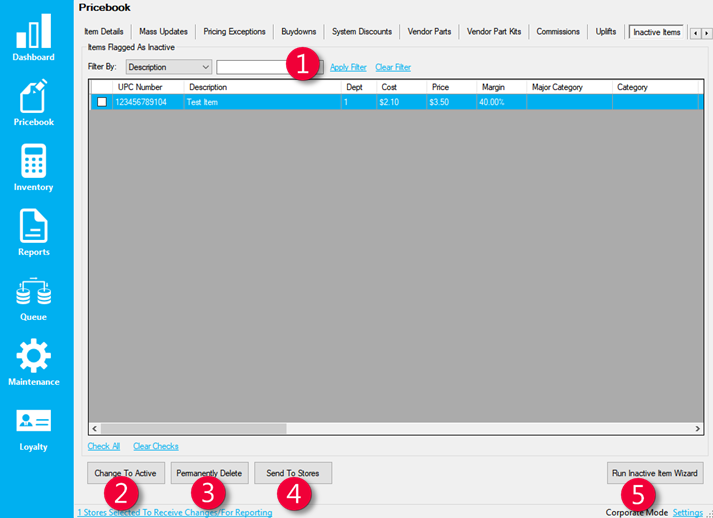
- Item Search Filter – Allows you to search by or UPC through the list of inactive items
- Change To Active – Changes all checked items to active
- Permanently Delete – Permanently deletes all checked items
- Sent To Store – Sends all checked items to the selected store(s)
- Run Inactive Item Wizard – Opens the inactive item wizard to scan items for inactive suggestions
When changing, sending, or deleting items, it only affects the checked items in the grid.
Flagging Items as Inactive
- After logging into Director, choose the Pricebook module

- Within Pricebook, there are two places to flag items as inactive: Item Details and Mass Updates under Addtl Utilities
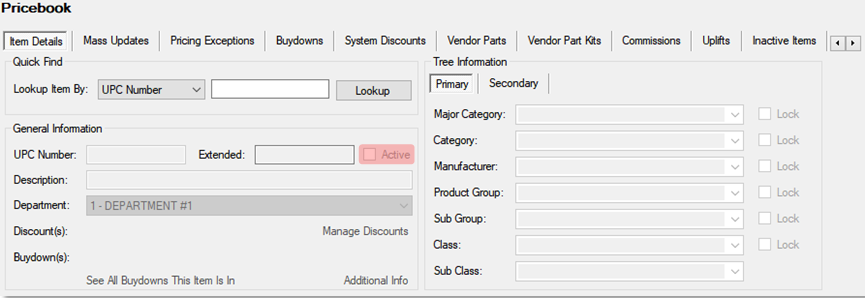

Remember – when flagging items as inactive from within mass updates, it flags everything in the grid. Make sure the filters are set correctly before flagging any items as inactive.
Inactive Item Wizard
- After logging into Director, choose the Pricebook module and then Inactive Items


- Choose the Run Inactive Item Wizard

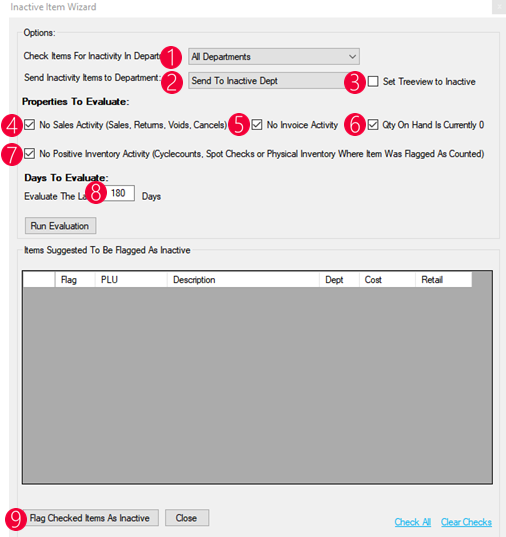
1. Choose the departments to scan
2. Choose department that inactive items will go
3. Sets all tree information to “INACTIVE”
4. Scan to look for sales activity
5. Scan to look for invoice activity
6. Scan to verify QOH is 0
7. Scan to verify items have not been counted
8. Choose how many days are to be evaluated when searching the above properties
9. Flag all checked items in the grid as inactive
The item sale limiter is a very powerful feature that is in place to limit sales of specific item(s) on an individual transaction, allowing users to follow manufacturer guidelines and compliance.
Within Director, the user would build a definition/rule to contain the items that are to be limited. Once saved and the store receives the changes, the point of sale would then not allow items that are assigned to that definition/rule to exceed the sales limit.
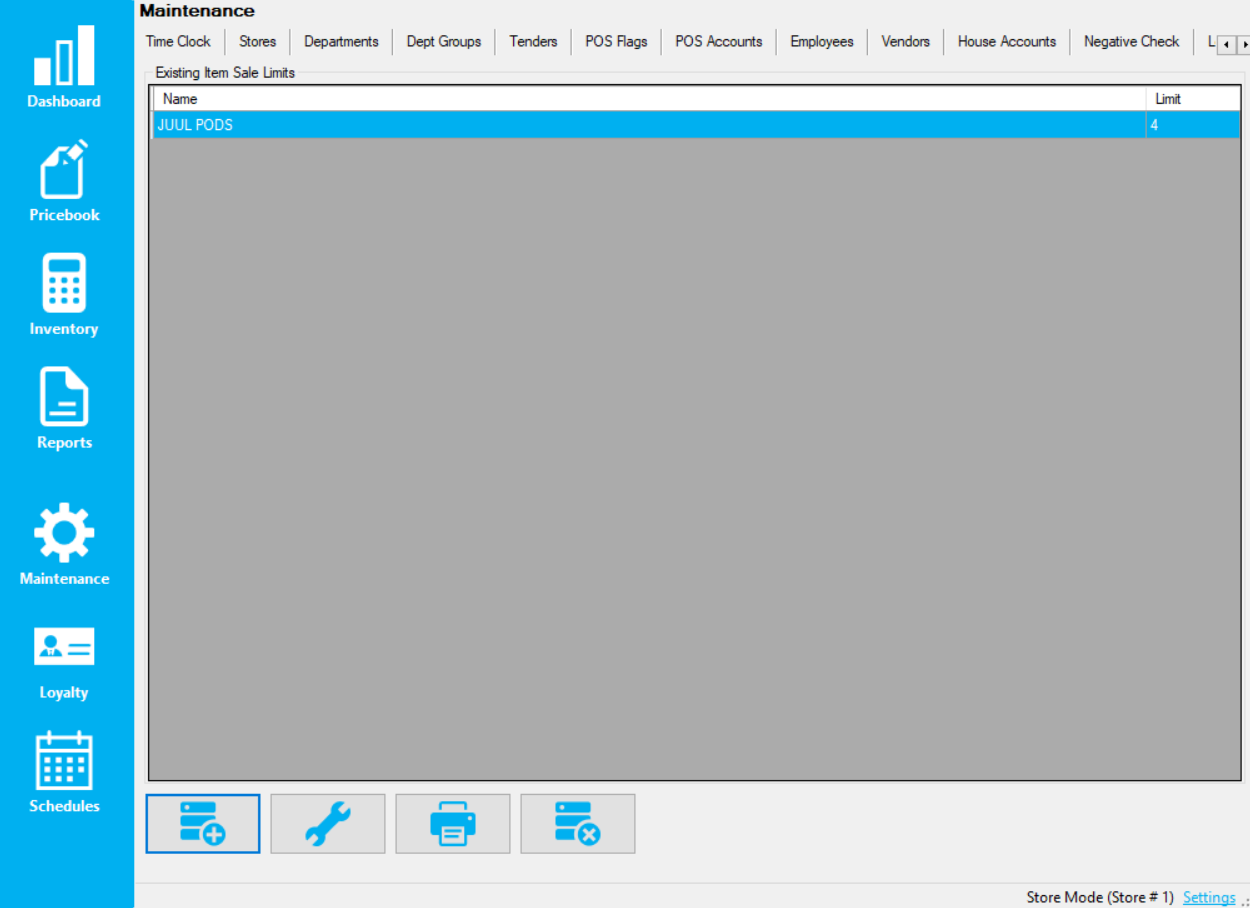
- After opening and logging into Director, choose the Maintenance Module

- Choose the Item Sale Limits tab on the navigation ribbon

This will bring up the below screen:
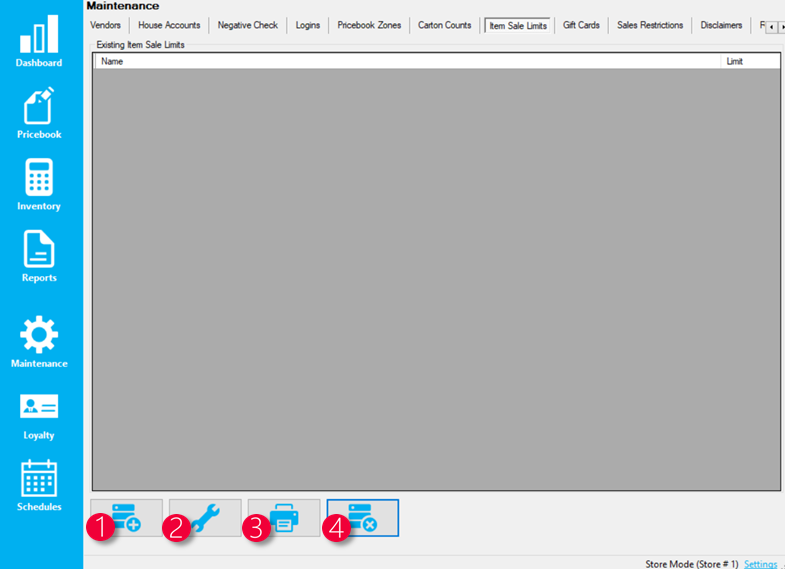
1. Add New Item Sale Limit – This button creates a new item sale limit and brings up a window to edit
2. Edit Item Sale Limit – This button will edit the selected item sale limit row
3. Print Report – This button prints a report of all item sale limits and the items contained within them
4. Delete Selected Item Sale Limit – This button will delete the selected item sale limit - Choose the Add New Item Sale Limit button

This will bring up the below window:
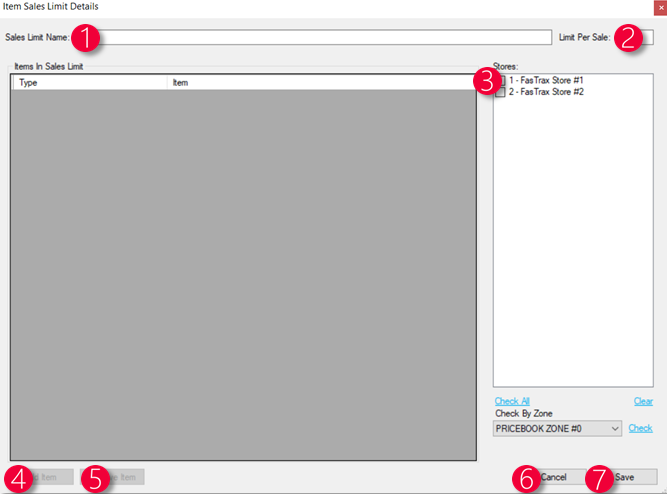
1. Sales Limit Name – The name of the item sales limit
2. Limit Per Sale – The numerical limit allowed of the added items to be sold in a single transaction
3. Stores – The store(s) that will be in the item sales limit
4. Add Item – Brings up the item search window to allow items to be added to the limit
5. Remove Item – This removes a selected item from the Item Sales Limit rule
6. Cancel – This cancels out of the Item Sales Limit Details window, not saving any changes
7. Save – Saves all changes done in the Item Sales Limit Details window - Enter in a Sales Limit Name and Limit Per Sale value

- Assign the store(s) needed and choose Save


- Now that Save has been pressed, the Add Item button can now be used. Press the Add Item button to start adding items to the rule.

- This brings up the Select Items For Sales Limit window, where items can be added individually by UPC or description, or by mass by categorization
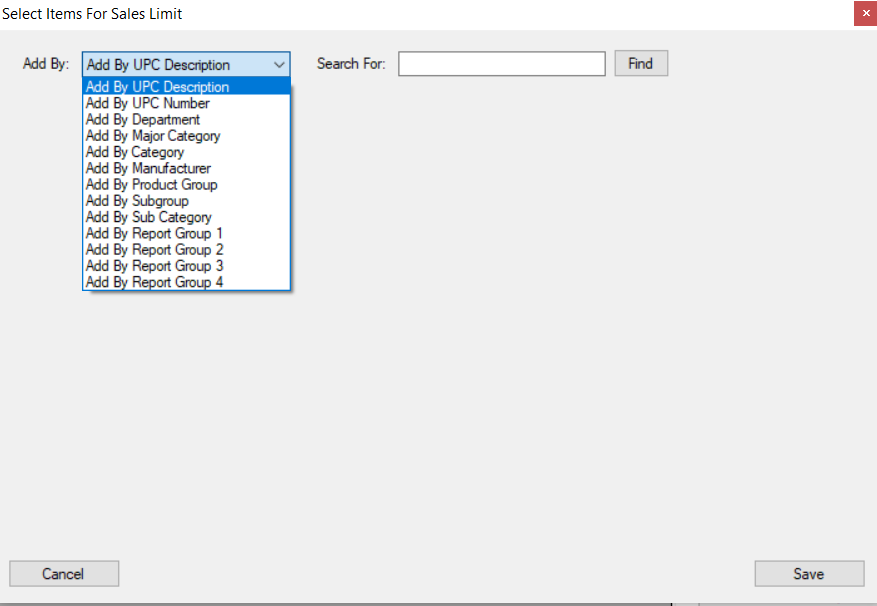
- When does adding item(s), choose the Save button

- To save all changes to the Item Sale Limit, choose the Save on the Item Sales Limit Details window

Now, when selling an item in this rule that is greater than the limit set, the POS will give the below screen:
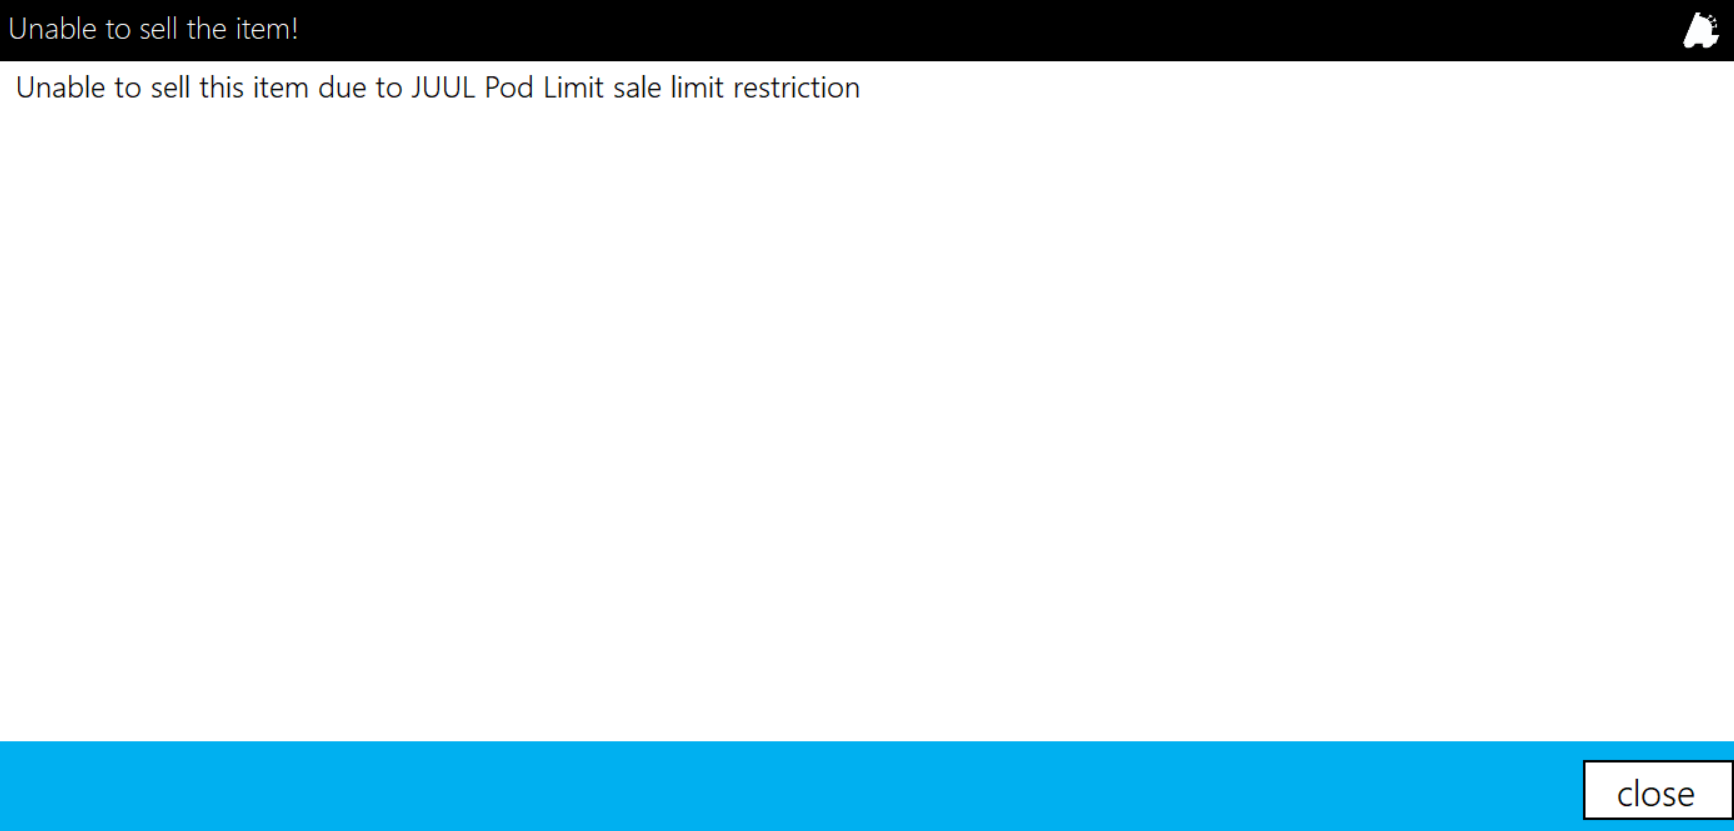
Tenders are forms of payment that are entered into Director they can be utilized in the POS. Tenders are also assigned a reconciliation bucket to be used when doing a shift reconciliation – the act of counting a cash till after a shift is complete.
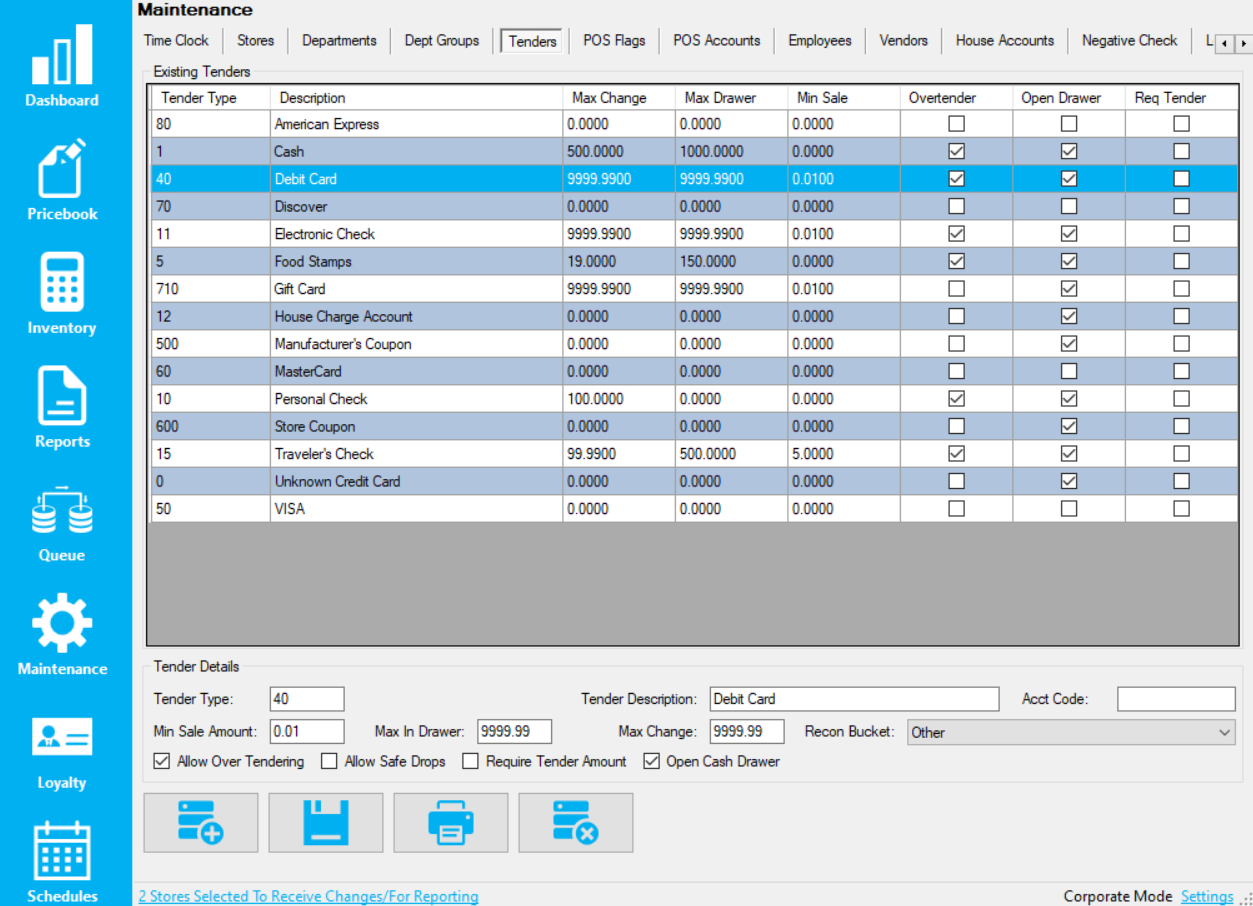
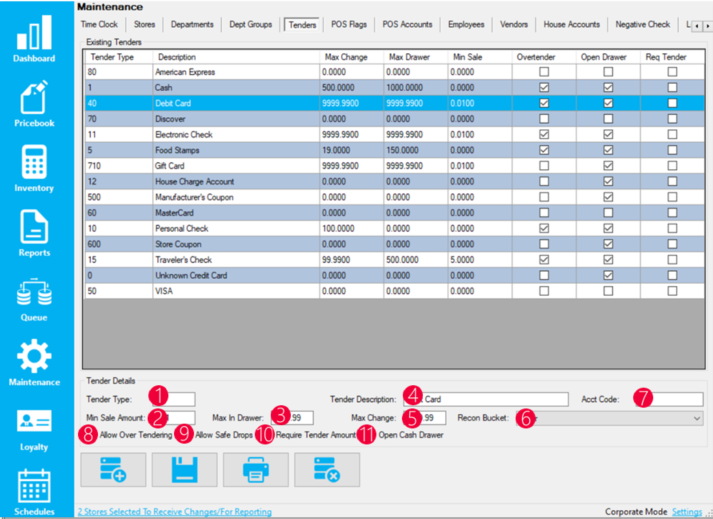
- Tender Type – This is a unique, numerical number that is tied to the specific tender description
- Min Sale Amount – The minimum dollar amount that can be used for the specific tender
- Max In Drawer – The max amount to be allowed in the cash till
- Tender Description – The description of the tender
- Max Change – The max change amount allowed be given in a single transaction
- Recon Bucket – The reconciliation bucket that the tender is assigned to for shift/daily reconciliations
- Acct Code – The accounting code assigned to the tender for accounting exports
- Allow Over Tendering – The ability for the tender to be over tendered in a single transaction
- Allow Safe Drops – The ability for the tender to be removed from the cash till and deposited in the safe via a safe drop button/prompt
- Require Tender Amount – The tendering of a sale will now require specific dollar amounts to be entered before the tender button is used
- Open Cash Drawer – When the tender is used, opens the cash drawer
There are several hardcoded tender ID’s that should not be changed or removed. Following these rules is a necessity. See all of these default values and rules below:
• Tender ID’s between 500 and 599 are always treated as a manufacturer’s coupon
• Tender ID’s between 600 and 699 are always treated as a store coupon
• Tender ID 0 is always Unknown Credit Card
• Tender ID 1 is always Cash
• Tender ID 5 is always Food Stamps
• Tender ID 10 is always Personal Check
• Tender ID 12 is always House Account
• Tender ID 15 is always Traveler’s Check
• Tender ID 40 is always Debit
• Tender ID 50 is always VISA
• Tender ID 60 is always MasterCard
• Tender ID 70 is always Discover
• Tender ID 80 is always American Express
Overview of Lottery Items
In order to properly do a lottery reconciliation, lottery items need to be added to the system and assigned proper values. This guide will show the process of adding a lottery item properly with ticket quantity, game number, and assigning it a bin number.
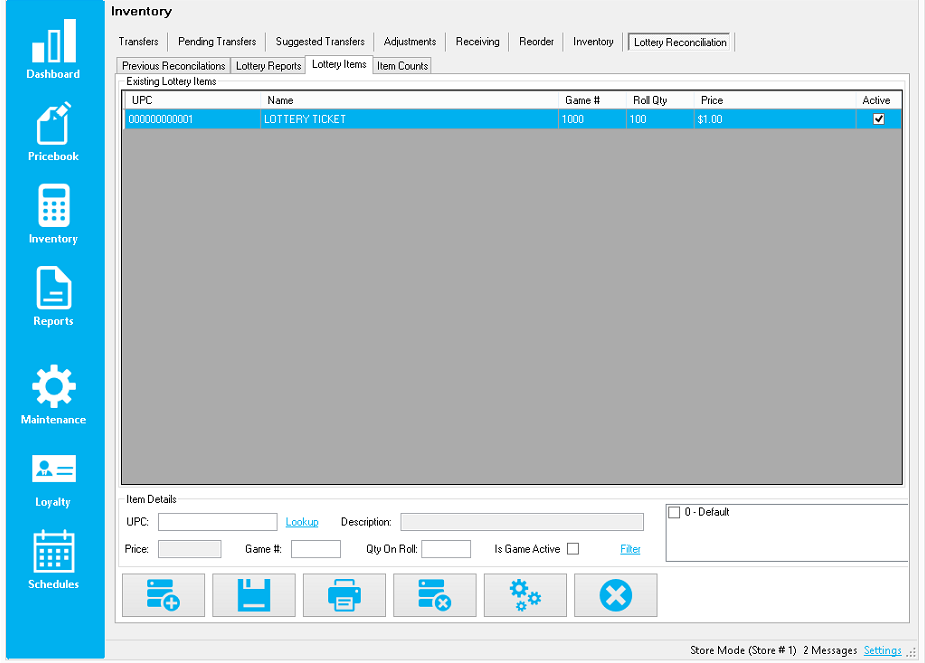
Assigning Lottery Game Details to an Item
- After logging into Director, choose the Inventory Module

- Next, choose the Lottery Reconciliation tab

- Then, choose the Lottery Items tab
 This page shows the below screen
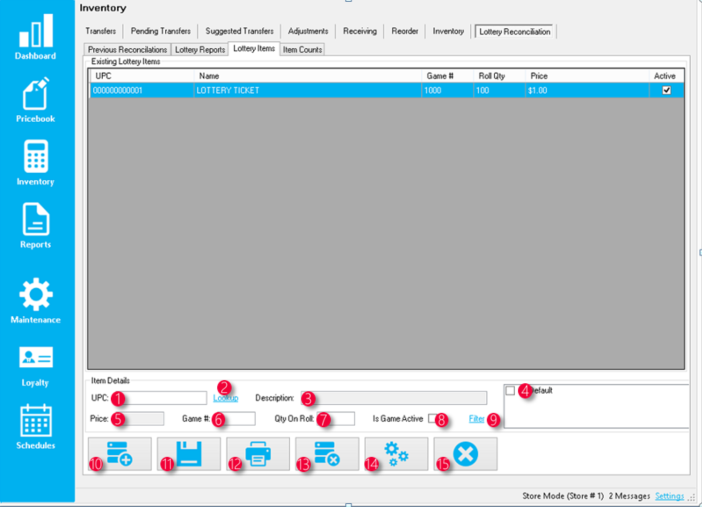
- UPC – Text field that allows you to enter a UPC that already exists in the pricebook followed by pressing the enter key to assign an item to the window
- Lookup – Allows you to lookup an item to add to the window in case you are unable to key in the exact UPC in the previous field
- Description – After looking up an item, the description field will automatically be filled
- Pricebook Zone Selector – When selecting checkboxes, it assigns the selected lottery ticket to that pricebook zone.
- Price – The price of the selected lottery ticket (pulled from the pricebook)
- Game # – The field used to assign the game number to the ticket
- Qty On Roll – The number of tickets on the roll
- Is Game Active – Marks the game as active (can be used / sold) or inactive
- Filter – Allows you to filter the grid based on several categories such as price and game number
- Add New – Press this button to initiate adding a game
- Save – Saves any changes made on the selected row
- Print – Prints all filtered records in the grid
- Delete Game – Deletes the selected game in the grid
- Mass Update Lottery Pricebook Zone – Allows you to mass assign lottery games to pricebook zones
- Deactivate Games – Deactivates the selected game in the grid
- When done, choose the Save button

Remember to first create the lottery item as a normal item in the pricebook, assigning it to the proper department, tree categorization, and vendor part.
This page just simply assigns the game number and number of tickets to the existing UPC in the pricebook.
Assigning Lottery Games to Bins
- After logging into the POS, choose Actions and then Settings


- Then choose Settings and Recon Settings


- Next, choose the Manage Lottery Games button
 The below screen will now show up
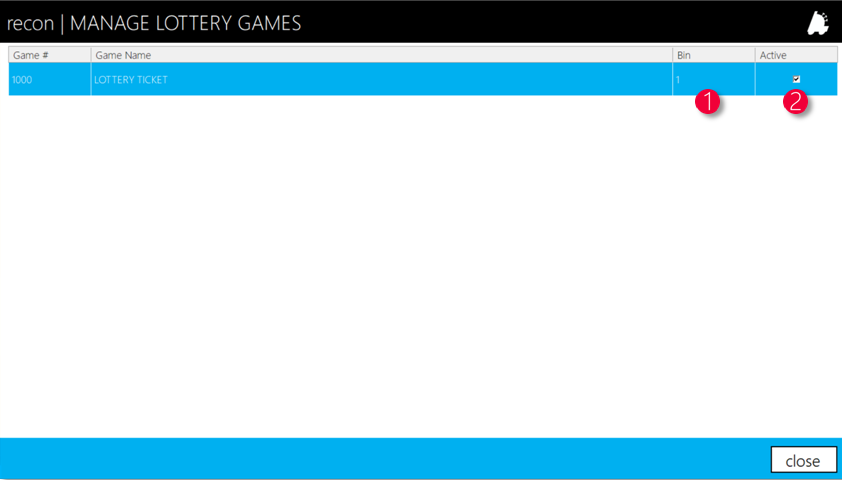
- Bin – this field allows you to specify what bin the game is in
- Active – This field allows you to mark a game as active or not. If inactive, the game will not show up on the lottery reconciliation
Bin numbers are always managed at store level, even if in a corporate environment.
Overview of Lottery Reconciliation
Utilizing the lottery reconciliation feature within the point of sale is a simple and intuitive way of keeping track of lottery ticket sales, book activation, books in the safe, and online lottery sales.
The lottery reconciliation process is enabled within the point of sale and gets added on to the normal shift reconciliation process. There is an option to force it upon each shift reconciliation (meaning lottery games can only be sold on one single register) or at the end of the day, combining multiple shifts (meaning lottery games can be sold on multiple registers).
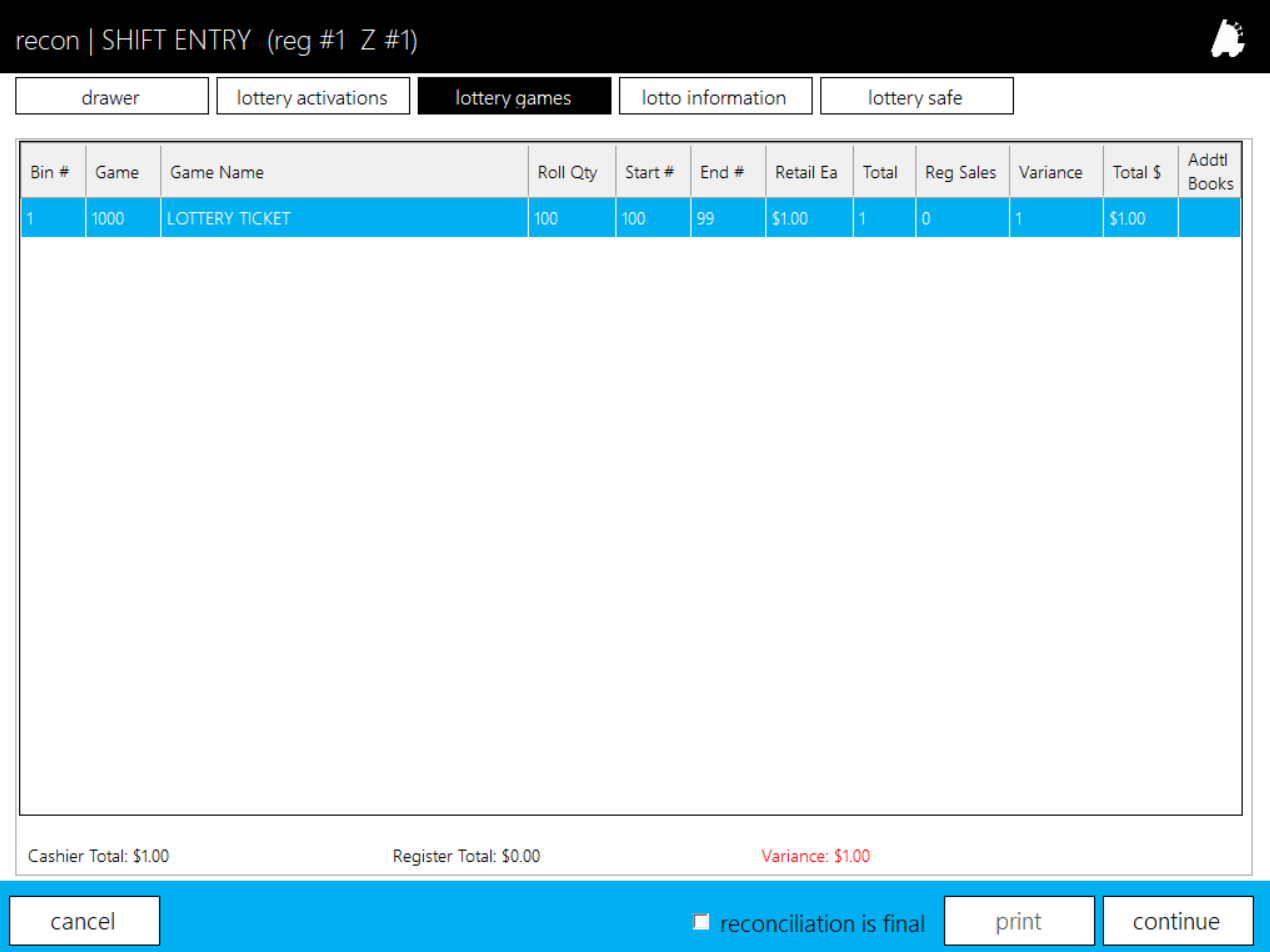
Enabling Lottery Reconciliation
- After opening and logging into the POS, choose actions,
followed by settings


- Next, choose the SETTINGS button, followed by clicking
the RECON SETTINGS tab


The below screen will now show.
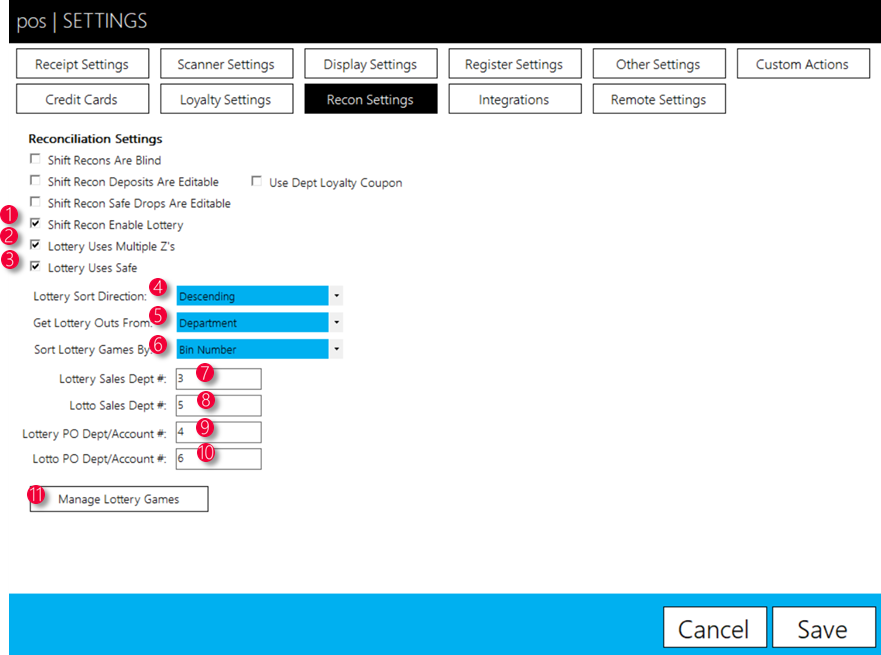
1. Shift Recon Enable Lottery – Enables lottery reconciliation functionality within shift reconciliations
2. Lottery Uses Multiple Z’s – When enabled, allows multiple shifts’ lottery to be reconciled together. When disabled, lottery sales are meant to be run on one single register (even if in a multiple register environment) so that the reconciliation is accurate. If checked, a singular reconciliation encompassing all shifts for the day is meant to be done at the end of a day when sales are finished; multiple registers can be used to sell lottery when this is checked.
3. Lottery Uses Safe – Enables the ability to utilize a safe to keep track of lottery books
4. Lottery Sort Direction – Gives the ability to have the lottery reconciliation sort by ascending ticket numbers or descending ticket numbers.
5. Get Lottery Outs From – Allows you to choose where to get lottery pay outs from a department or payout
6. Sort Lottery Games By – Gives the ability to sort lottery games by bin number or game number on the reconciliation
7. Lottery Sales Dept # – Where to input the lottery sales department number
8. Lotto Sales Dept # – Where to input the online lottery sales department number
9. Lottery PO Dept/Account # – Where to input the lottery payout department number or payout account number (see #5 from above)
10. Lotto PO Dept/Account # – Where to input the online lottery payout department number or payout account number (see #5 from above)
11. Manage Lottery Games – Brings up the window to assign bin numbers to lottery games
3. Make sure that you have chosen to enable “Shift Recon Enable Lottery” at the very least to enable the ability to do a lottery reconciliation.
4. When done, choose the save button

Completing Lottery Activations
Lottery activations are a simple way to add lottery tickets into inventory. During a lottery reconciliation, you can activate a new book of tickets. When the reconciliation is finished, this will show up in Director and can be converted to an invoice, adding the tickets to inventory.
In the POS after reconciling the drawer, you will be presented with the below screen.
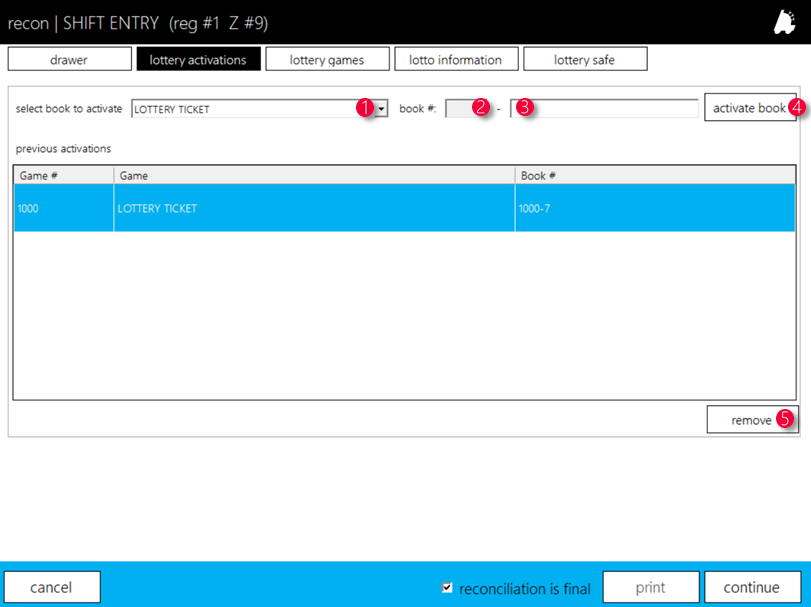
- Select book to activate – This dropdown allows you to choose a lottery book to be activated
- Book # – This field shows the lottery book number
- Activate Book Text Box – Allows you to input the book activation number
- Activate Book – Pressing this activates the book that is selected
- Remove – In the previous activations grid, pressing this will remove the highlighted activation from the recon
Counting Lottery Games
After handling activations, the next part of the process is counting the lottery tickets. You will be presented with the below screen.
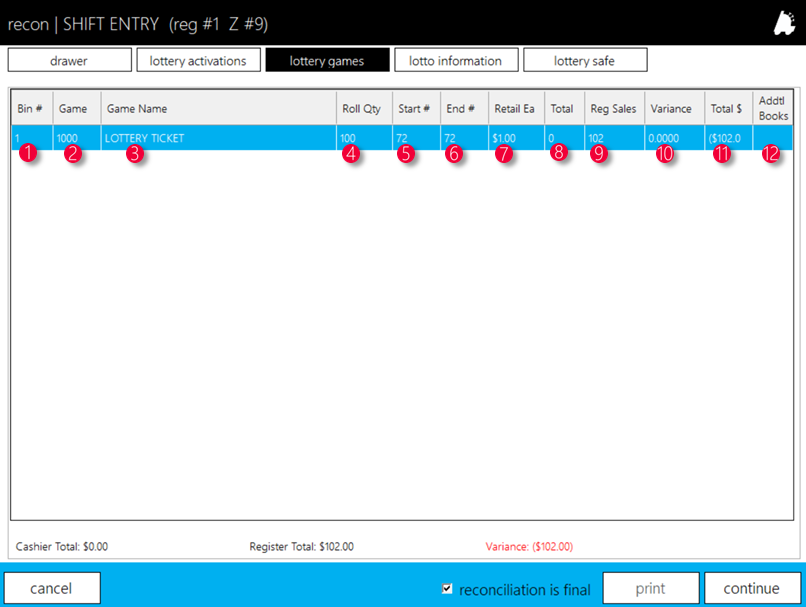
- Bin # – The plastic bin that is holding the ticket
- Game – The lottery game number
- Game Name – The lottery game name
- Roll Qty – The number of tickets on the lottery game roll
- Start # – The starting number of the ticket at the beginning of the shift
- End # – The ending number of the ticket at the end of the shift
- Retail Ea – The retail price of the lottery ticket
- Total – The total number of tickets being input by the cashier as being sold
- Reg Sales – The number of tickets the register sees as sold on the shift
- Variance – the number of tickets that is different from the cashier values when compared to the register values
- Addtl Books – If the number of tickets sold exceed the quantity on the books, it allows you to input the additional books sold
Steps to complete counting the lottery games:
- The starting ticket number will always be the ending ticket number for the previous shift and is by default

- Input the ending number into the End # field for each game

- If more than a book of a specific game was sold, input the value in the Addtl Books field

- When done, choose the continue button

Inputting Online Lottery Values
After completing counting the lottery tickets and choosing continue, the next screen you are presented with is a screen to input online lottery values, as seen below.
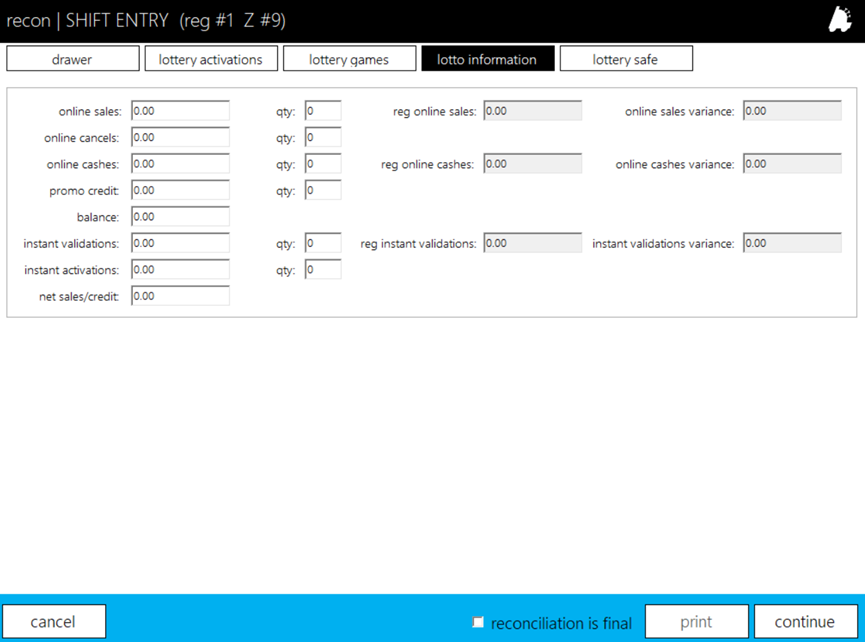
Since online lottery is always done via a lottery terminal, there should be a printout that shows the sales and validations done at the end of the shift. These values should be input in their appropriate sections.
Inputting Lottery Books in the Safe
If the setting is enabled, the system can keep track of lottery books in the safe. If enabled and you choose continue from the lotto information screen, you will get the below screen.
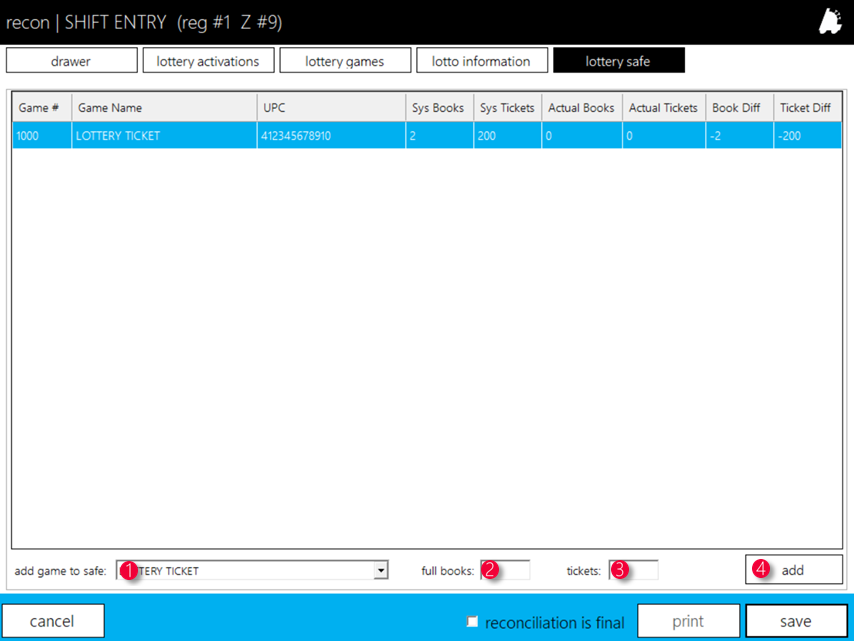
- Add game to safe – This dropdown allows you to choose which game is being added to the safe
- Full books – This is where you place the number of full books going into the safe
- Tickets – This is where you place the ticket quantity going into the safe
- Add – Adds the selected game to the safe after inputting books and tickets
Adding Lottery Ticket Activations to Inventory
After lottery tickets are activated in reconciliation, that activation can be turned into an invoice within Director to be applied to inventory.
- From within Director, choose the Inventory module

- Choose the Lottery Reconciliation tab

This brings up the below screen
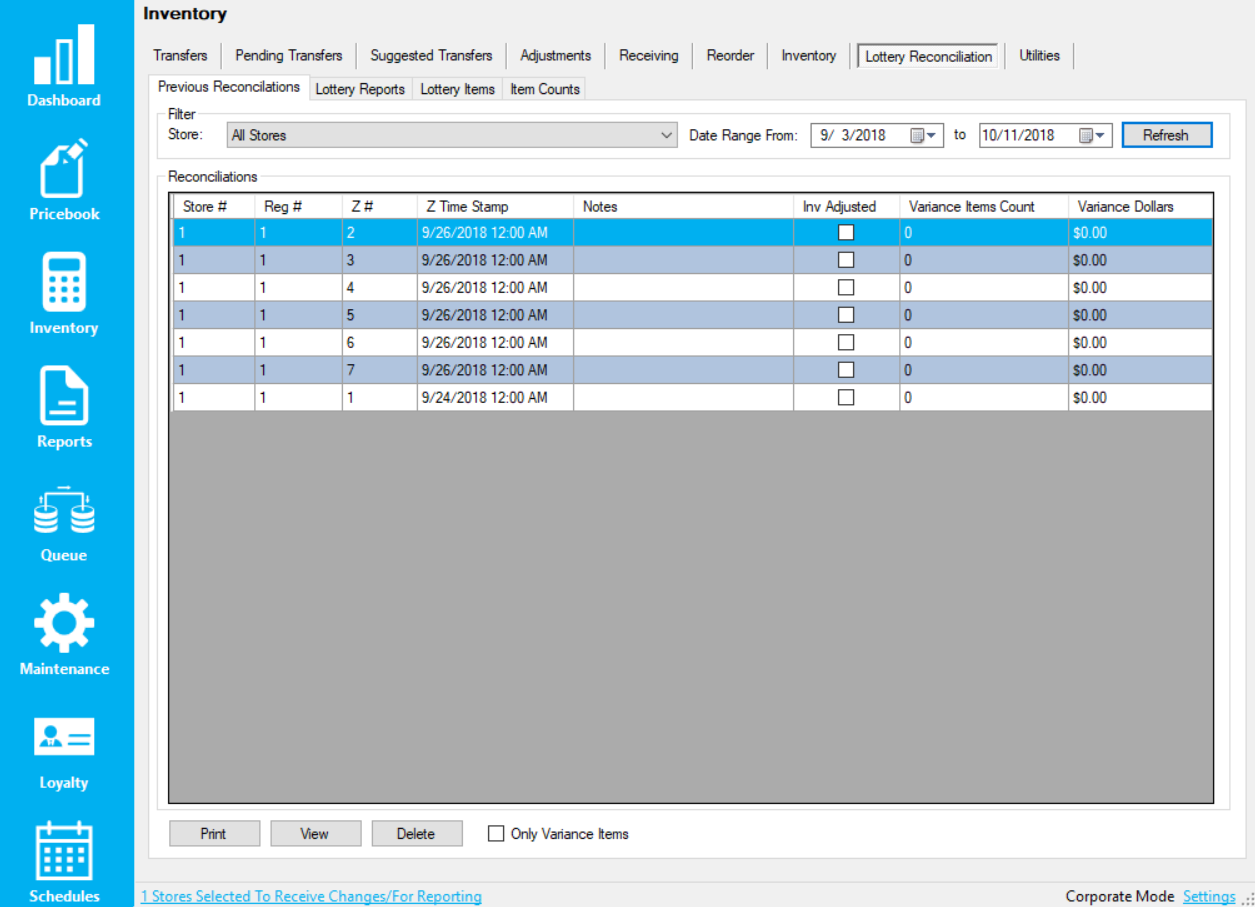
3. Choose any shift reconciliation and choose view

4. In the Activations portion of the screen, choose the lottery vendor from the “Vendor for Invoices” dropdown and choose “Apply Activations”

This will create an invoice that can be applied under “Previous Invoices”. For more information on applying invoices, please refer to the applying invoices document.
How to Receive a Hand Held Invoice
- After entering FasTrax PSM on thehand held, choose “Receiving”.
Note – FasTrax PSM is accessed by pressing the “Start” option on the Hand Held home screen. Choose FasTrax PSM from this drop down. - Choose “Login” after the appropriateEmployee ID and Password areentered.
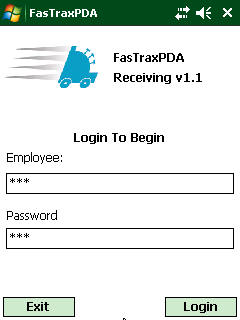
Note – Employee numbers and Passwords are created in the FasTrax Director through the “Maintenance” tab. - This will bring you to the “SelectReceiving Method section”. Thereare 2 selections; Begin A NewInvoice and Resume An UnfinishedInvoice. After selecting the intendedroute of receiving, press the“Continue” button.
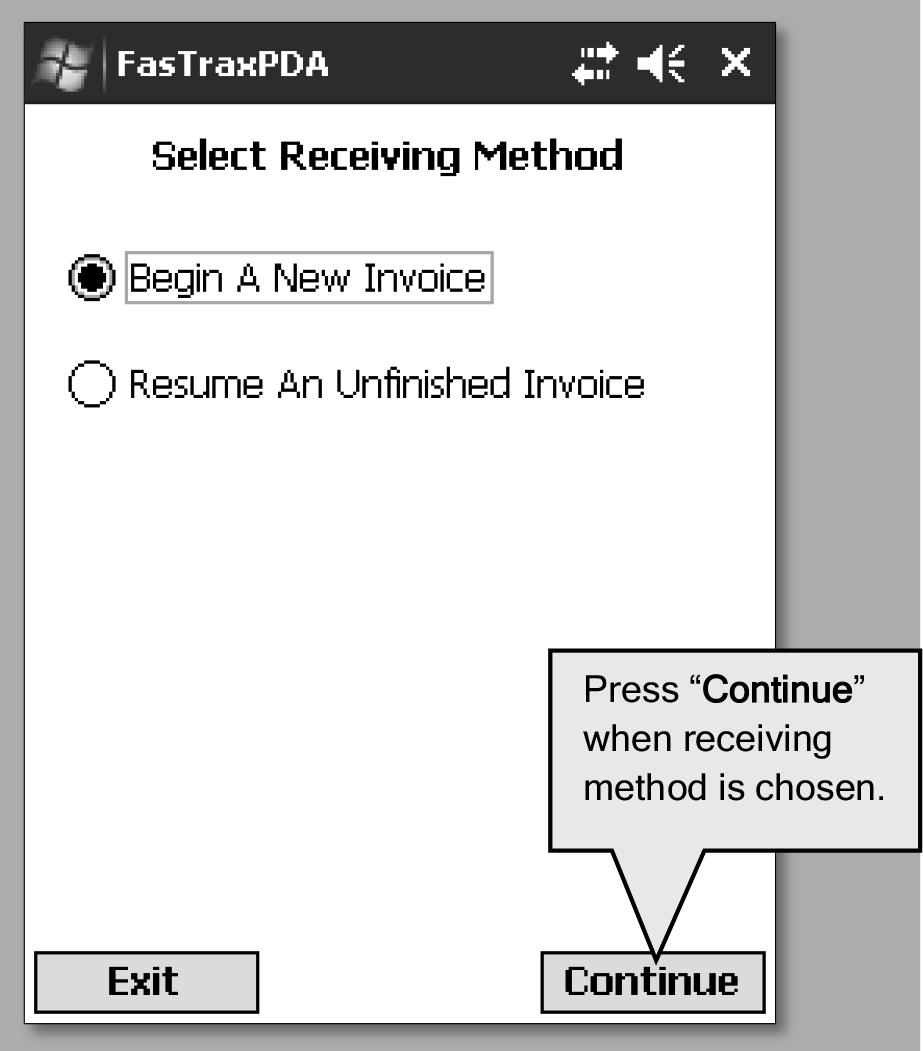
- Begin A New Invoice – Choose this ifthe invoice being received is a NEW invoice.
- Resume An Unfinished Invoice – Choose this if an invoice has beenstarted, but not yet completed.
Note– Resuming an Invoice is explained by clicking here: How to Resume a Hand Held Invoice. Pg 11
- If “Begin A New Invoice” is chosen,pick the vendor for this new invoice.Press the down arrow under“Choose Vendor” for a drop down ofavailable vendors.
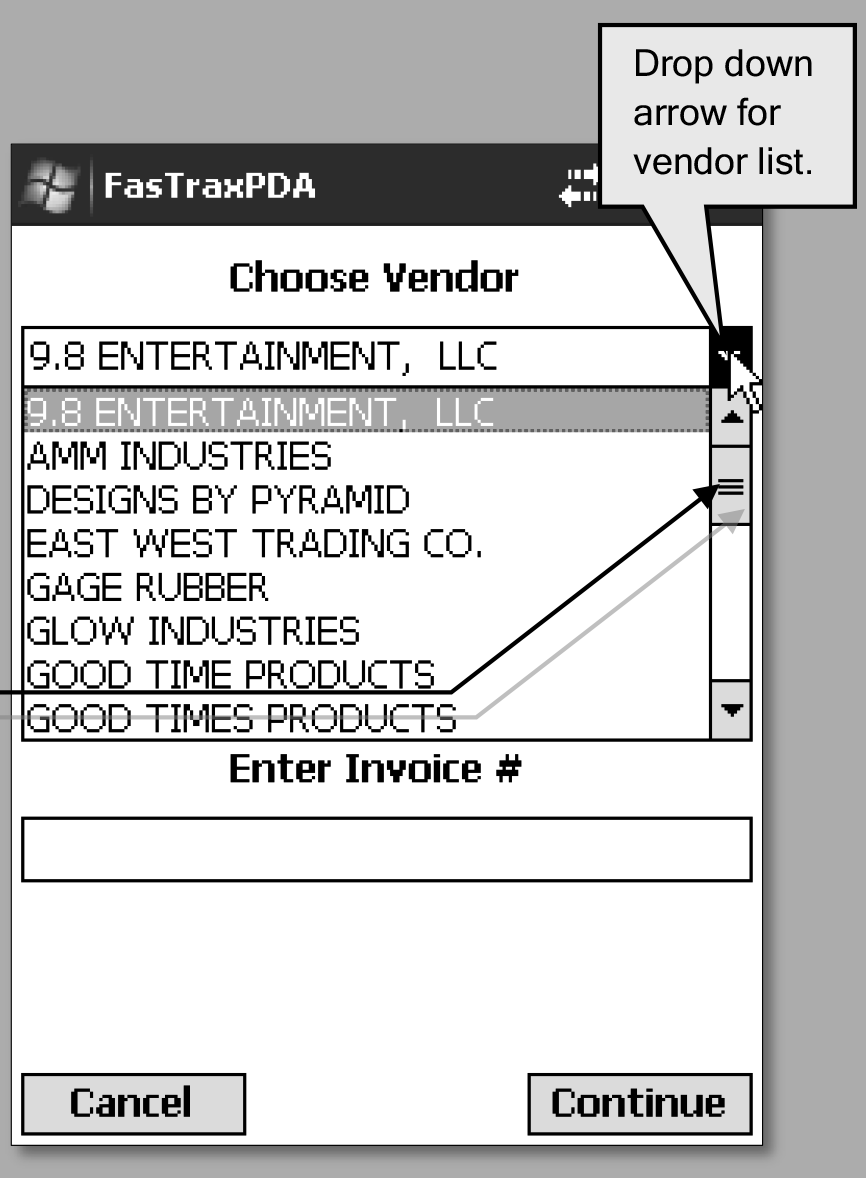
Use the scroll bar to see all available vendors. Once the correct vendor name is found, press the name and the field will become populated by this vendor. - After choosing the correct vendor,enter the invoice number eitherprovided by the vendor or printed onthe invoice. Then press “Continue”.
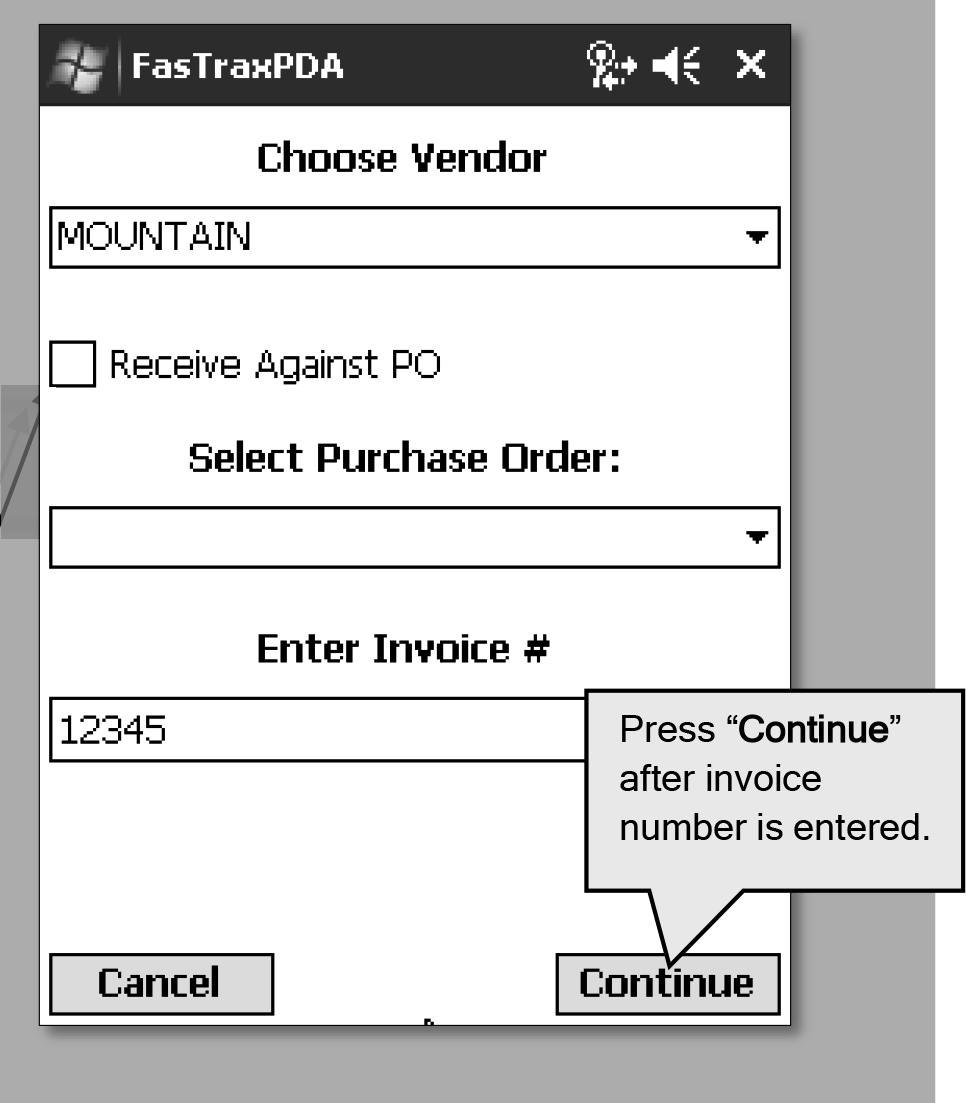
Note – Receiving via PO (purchase order) will be discussed in further detail on Pg ## of this manual. - Next, scan or type in the UPC of thefirst item you are receiving. Once theUPC is entered, press “Continue”.
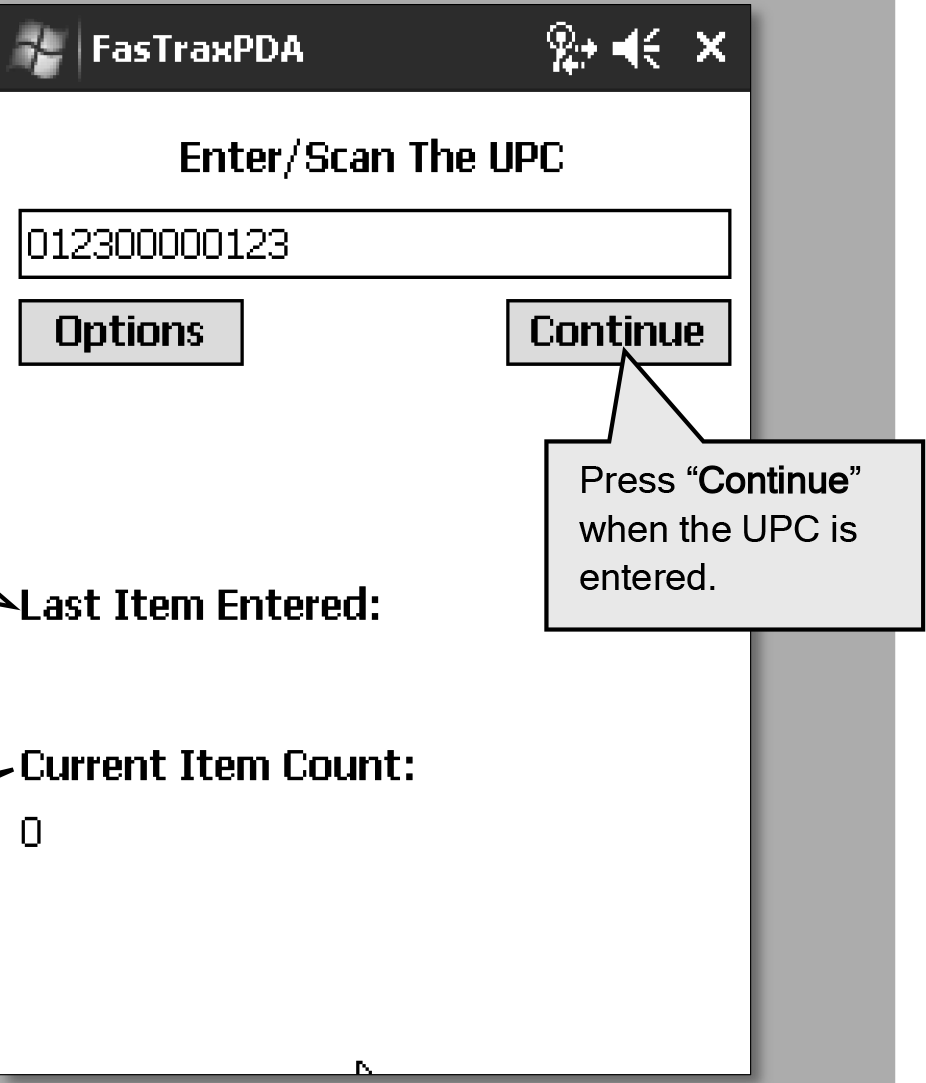
Last Item Entered – This will be blank for the first item scanned. After an item is successfully scanned and entered, the last UPC scanned will show here. This is for reference when working with interruptions while scanning in an invoice.Current Item Count – This displays a running total of entered item counts. This will increase as more items are scanned. - In the “Receive Qty” box, enter thequantity of the UPC you arereceiving. Confirm the cost of theitem is correct per the invoice. Press“Save” once the quantity and cost forthe UPC are correct.
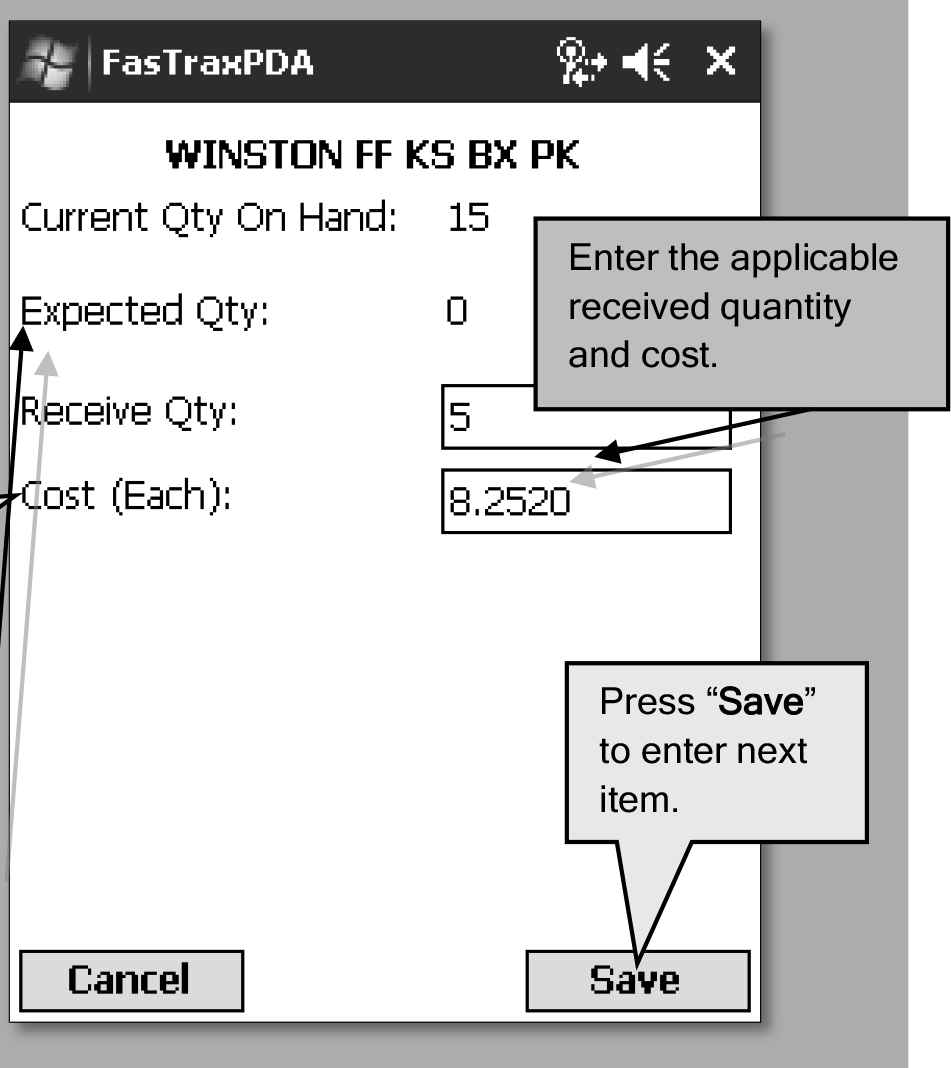
“Cost” signifies how much you pay the vendor for each UPC at the time of receiving. This is usually indicated per line item on the invoice being received. This can be changed by pressing the “Cost” box and entering the cost.
Note – “Expected Qty” is only populated when receiving a PO. When POs are created on the FasTrax Director, an expected quantity is set per item. - After pressing “Save”, you areprompted to enter the next UPC.Steps 6-7 are to be repeated until allitems being received are entered.
Notice you now show a “Last Item Entered”. This will change after each item scanned.
Notice you now show a “Current Item Count”. This number will increase with each quantity entered. - When an invoice has beencompletely scanned, confirm the“Current Item Count” displayed onyour hand held matches that of yourinvoice.
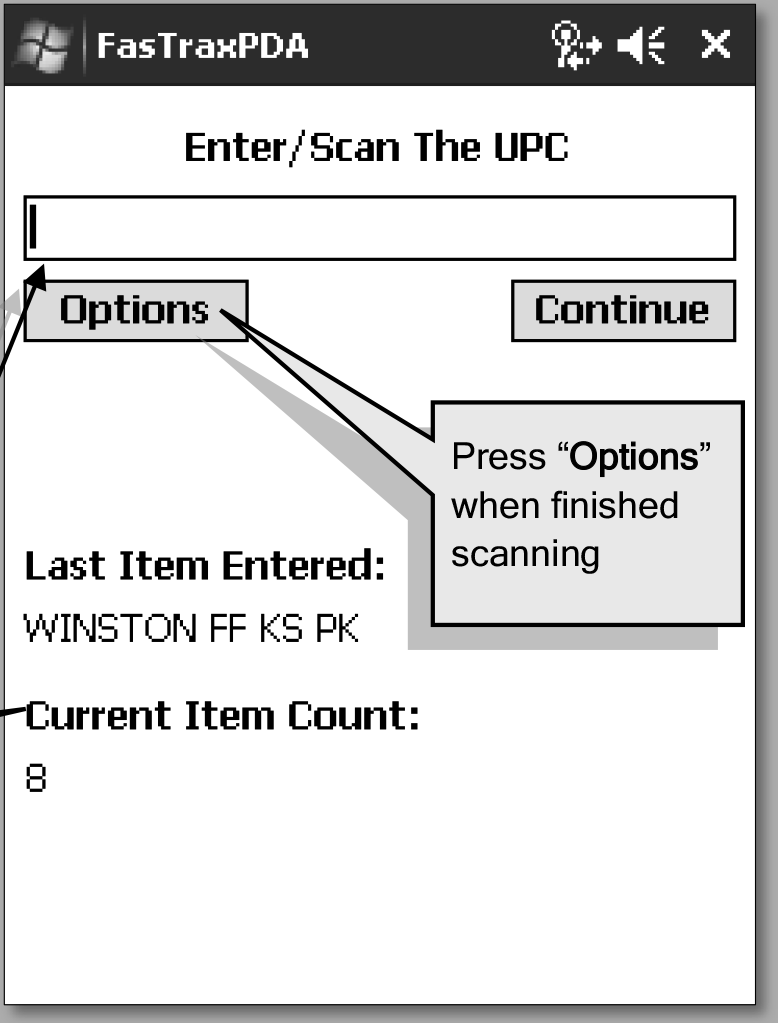
Press the “Options” button when you have completed scanning.
At any time during the scanning process “Options” can be pressed. “Options” is a menu to assist in reviewing, editing, resuming and saving invoices.
Confirm this count matches the quantity total from your invoice! - Press “Save Invoice” toaccept what has been scanned.Saving an invoice accepts andcompletes it. Any necessarychanges are performed in the FasTrax Director.
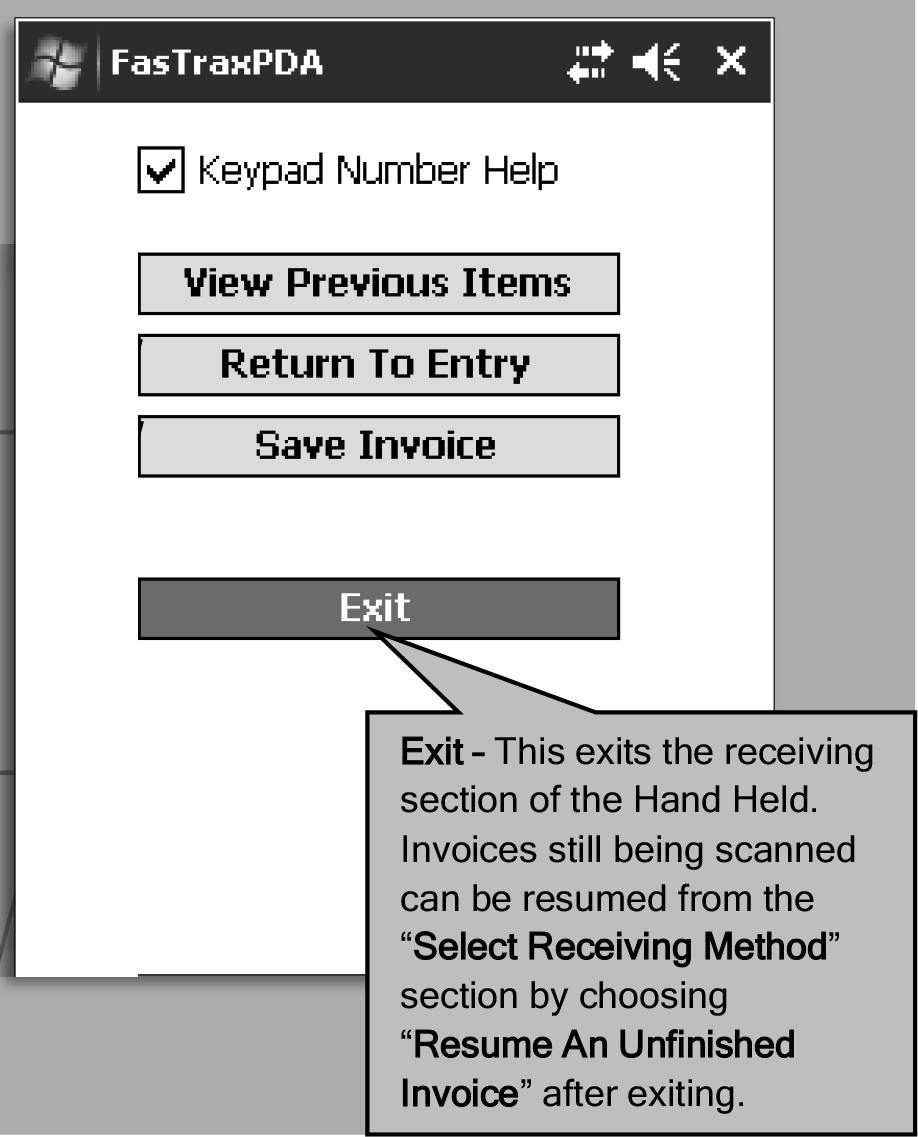
Note – View Previous Items – If accessed during the scanning process, this takes you to a list of items already scanned for a current invoice. This enables you to edit quantities already entered for items. Click Here! Pg 15
Return To Entry – When in “Options”, thisreturns you to your current invoice.
Save Invoice – Press this when an invoice has been completely scanned to accept and queue in the FasTrax Director. Saved invoices cannot be Resumed. Any changes necessary for a saved invoice will be done through the FasTrax Director.
How to Edit Invoices in the FasTrax Director
- After logging in, choose “Inventory” from the optionslocated on the left of the Director.
- Once in “Inventory”, choose the “Receiving” tab fromthe row of options listed at the top of the Director.

- After choosing Receiving, you can search for queued invoices using enteredcriteria in the sections below. By default, all invoices within the 7 day range will bedisplayed. The tools illustrated below are explained to better assist in sorting invoices.
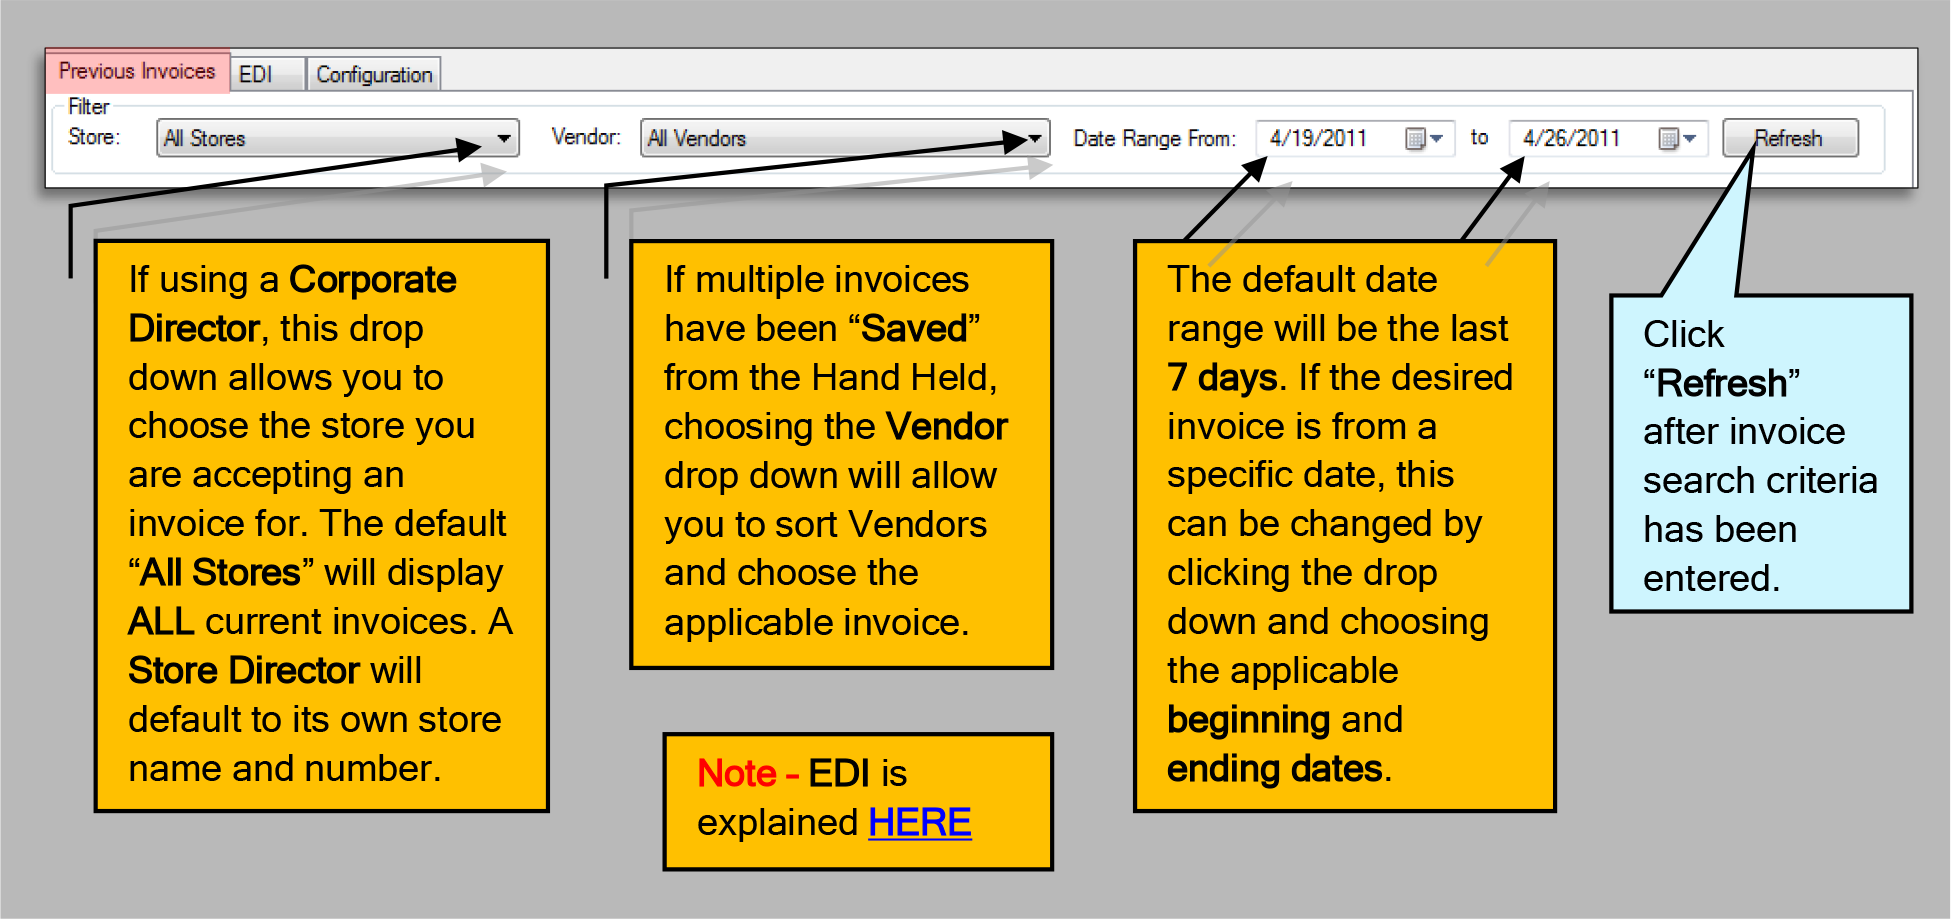
- Depending on the search criteria, any available invoices will be listed as illustratedbelow. From this list, choose the invoice you wish to view and/or edit.
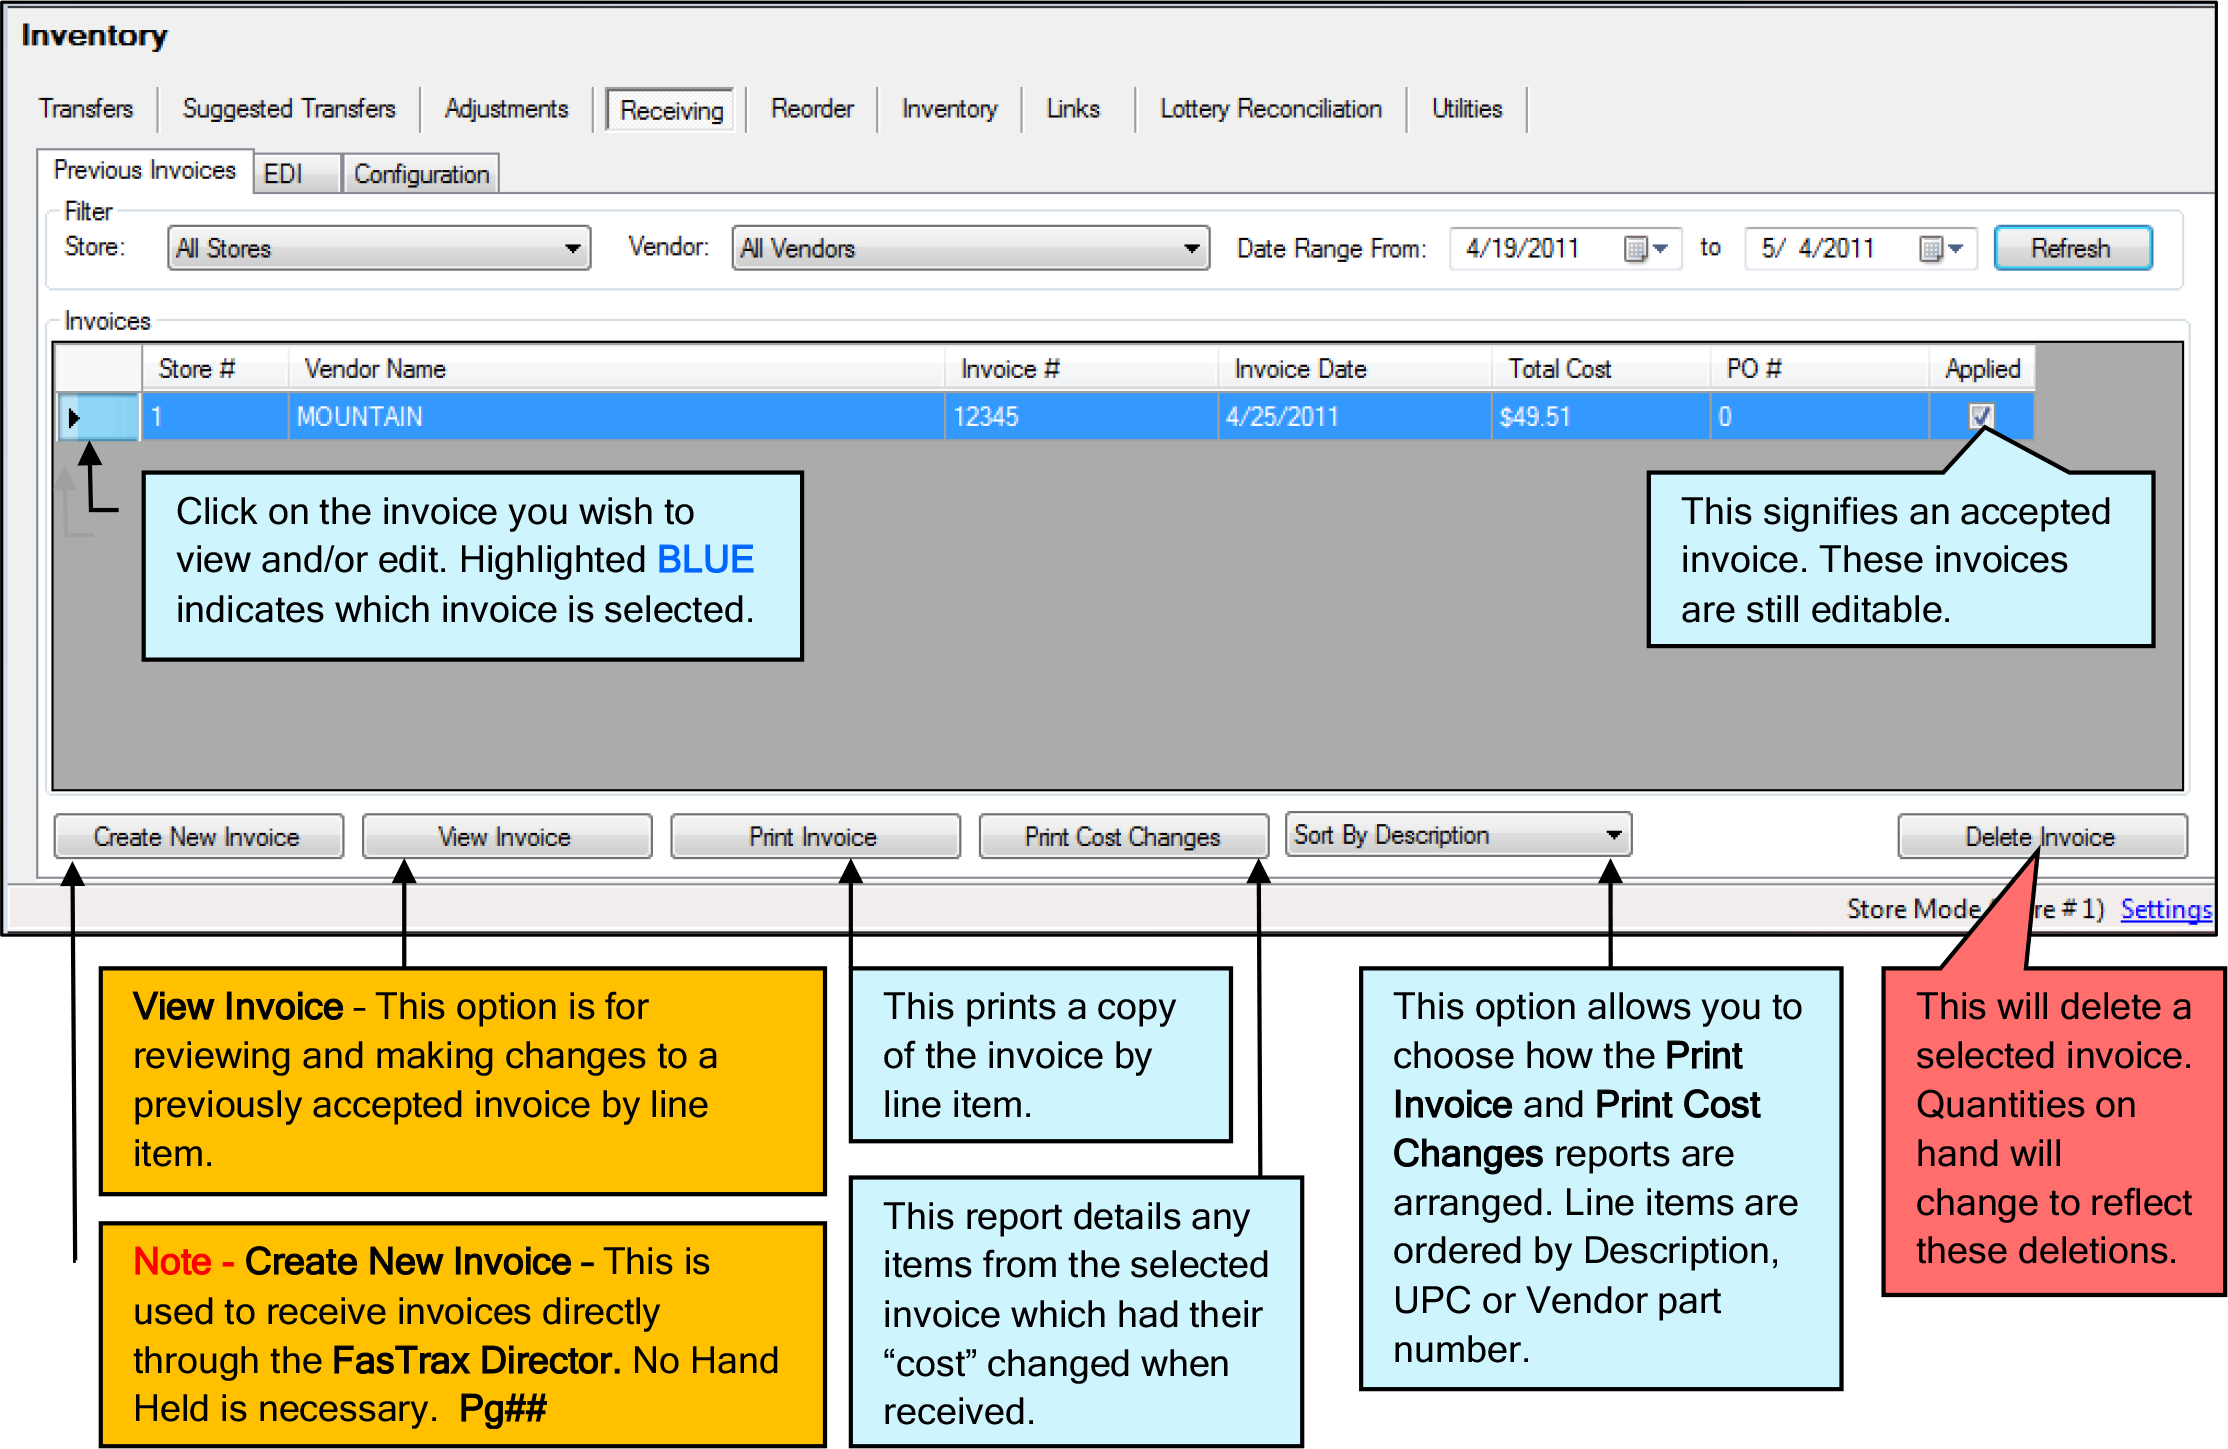
- After highlighting the applicable invoice, click View Invoice. This will open the invoice listed by line item as shown below.
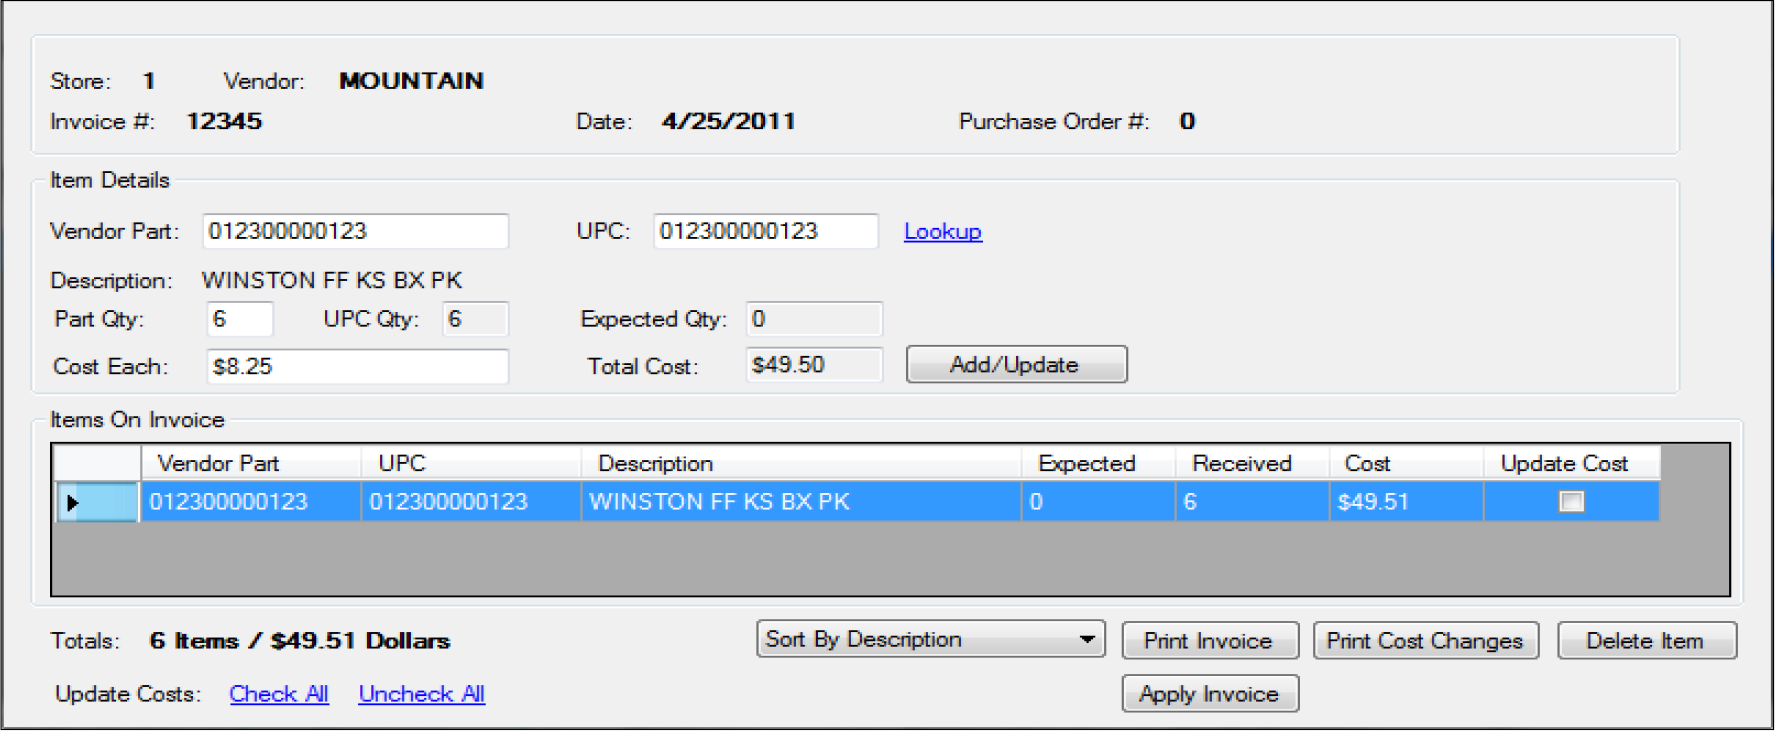
- From here you can edit item quantities and cost. All changes are accepted by clicking Add/Update. All changes are applied to the Pricebook and quantities on hand once Apply Invoice is selected. Other options available are explained below.
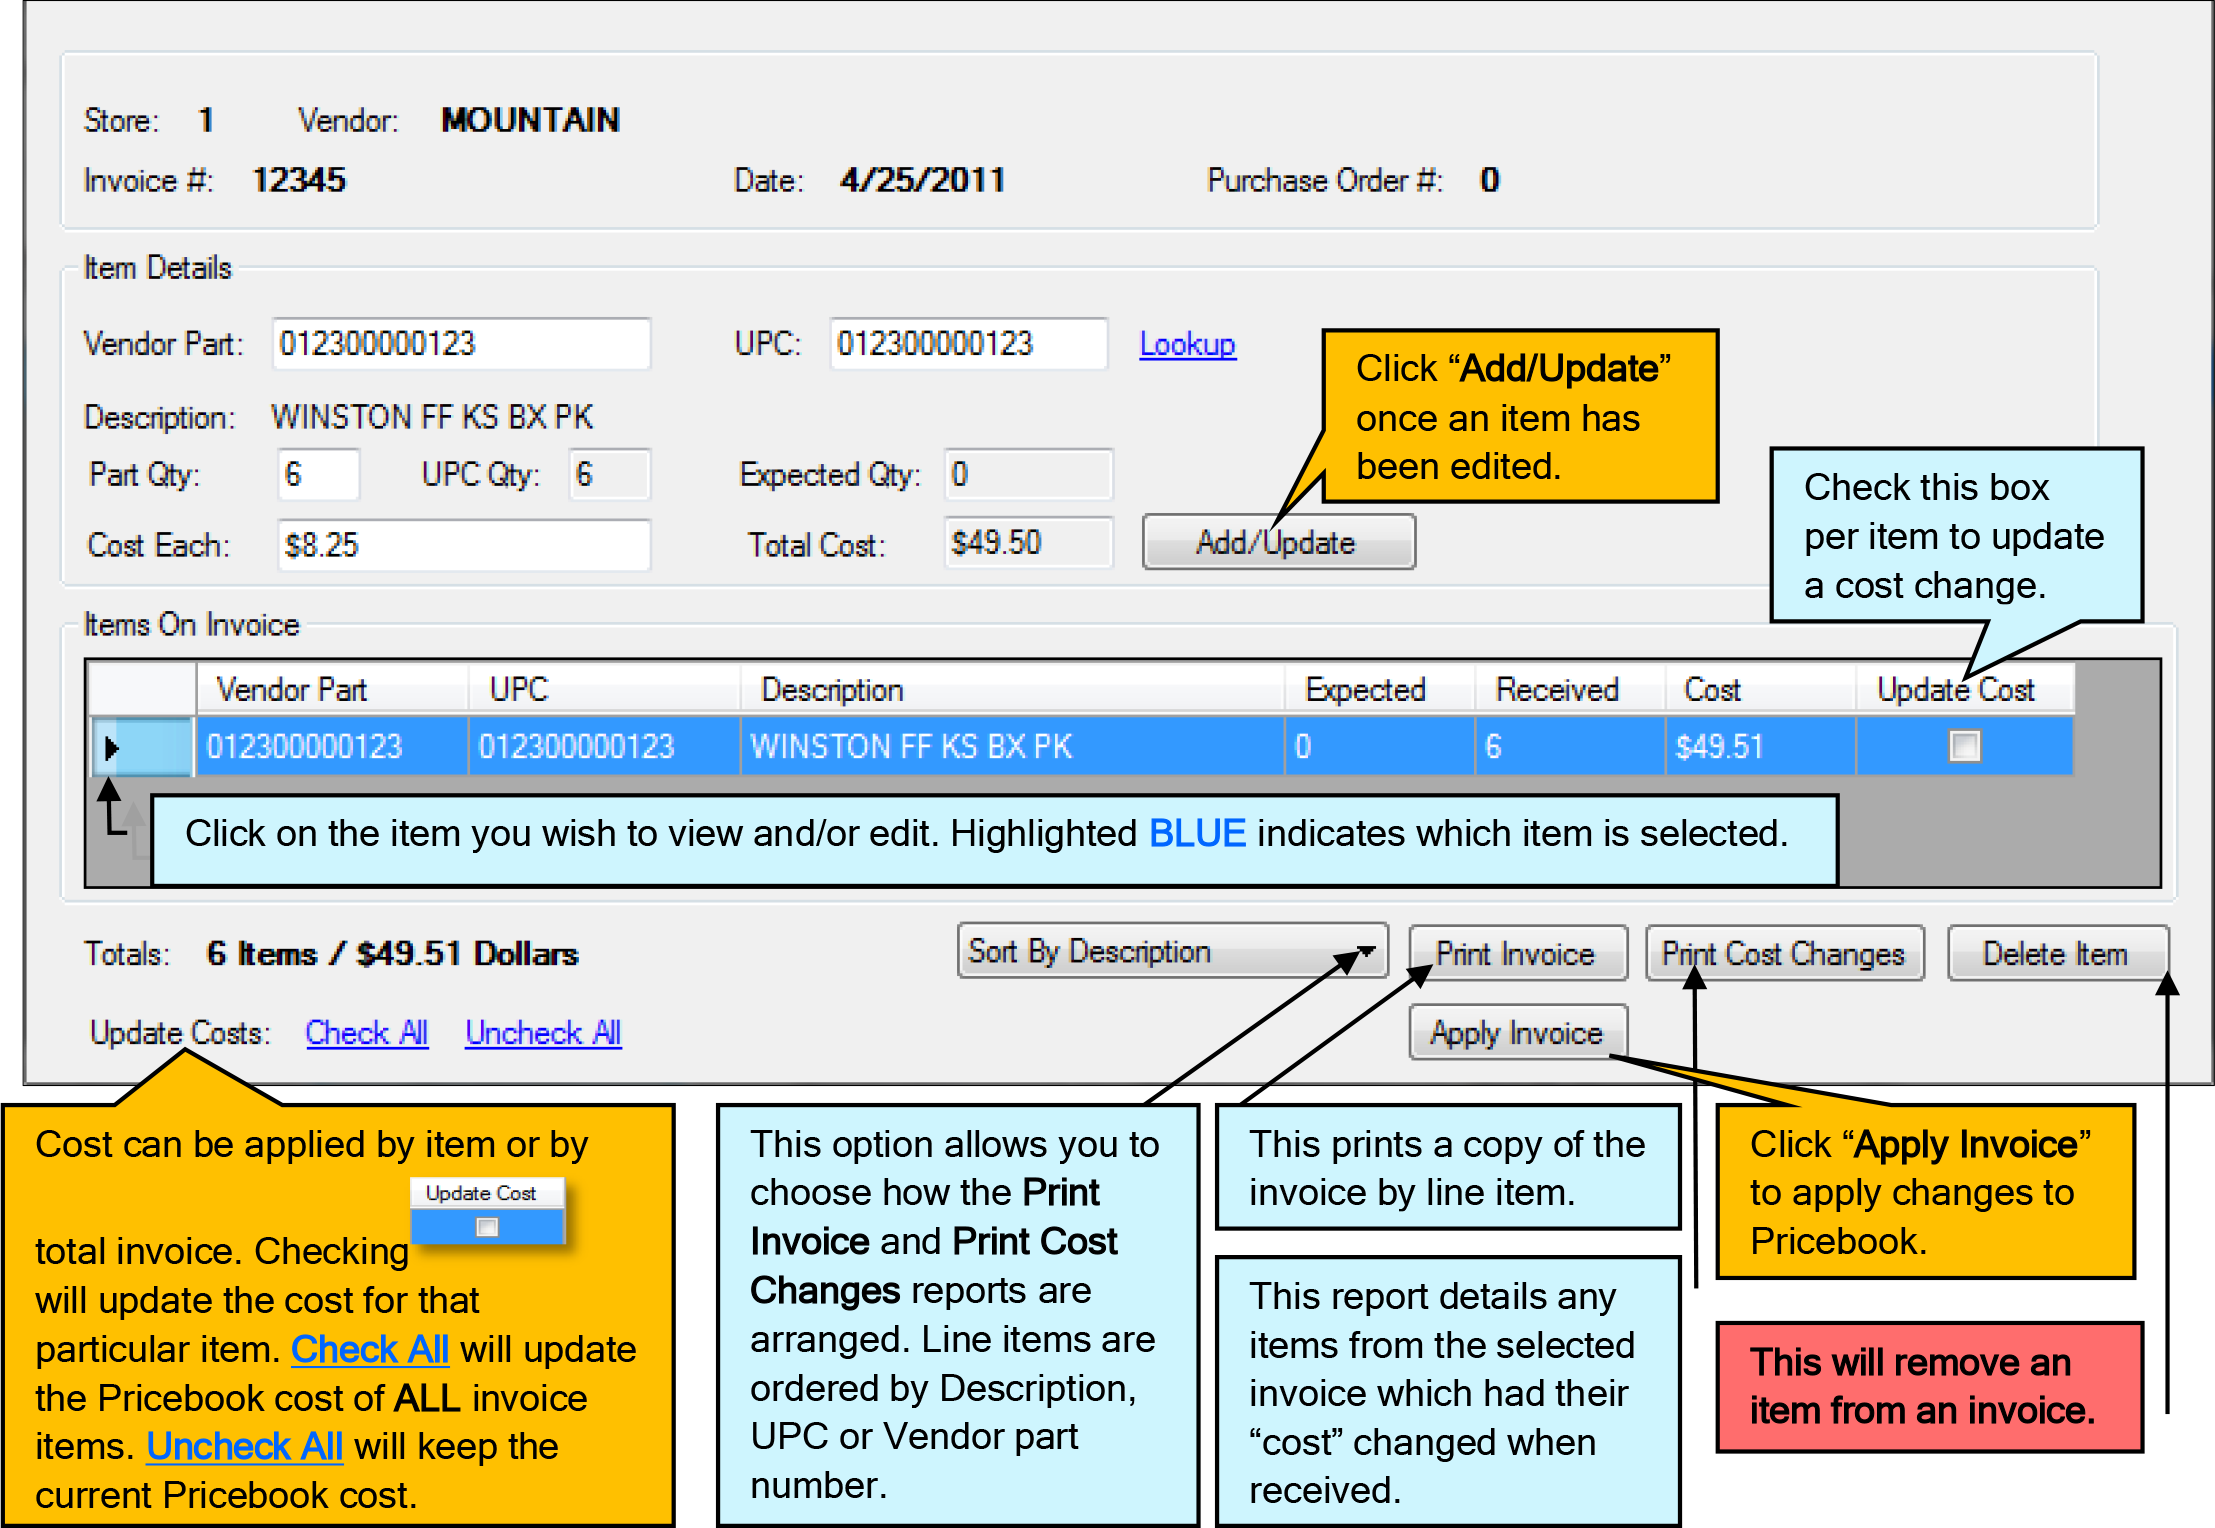
- Once Apply Invoice is selected,you will be notified that adjustmentswill be applied. Choose “Yes” ifready to apply.
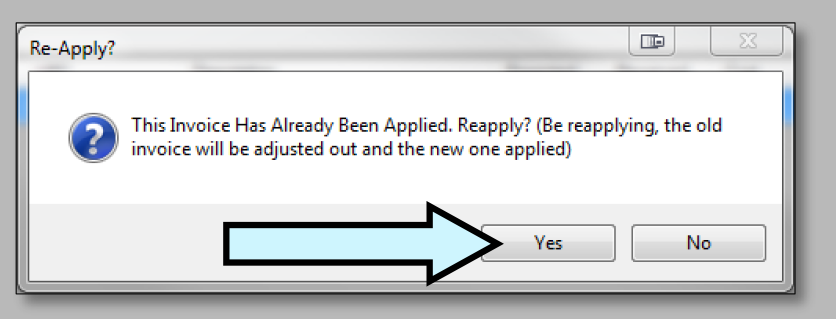
- Choose “Yes” to apply updates tothe Pricebook.
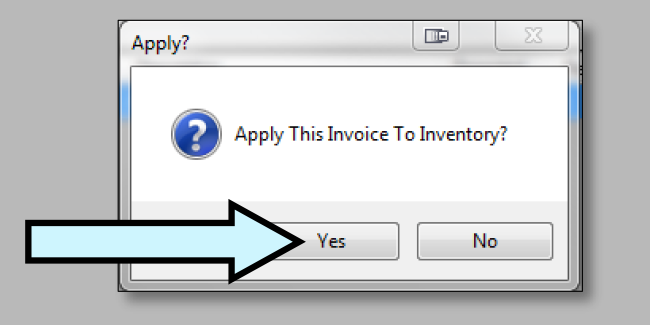
How to Resume a Hand Held Invoice
- After entering FasTrax PSM on thehand held, choose “Receiving”.
Note – FasTrax PSM is accessed by pressing the “Start” option on the Hand Held home screen. Choose FasTrax PSM from this drop down. - Choose “Login” after the appropriateEmployee ID and Password areentered.
Note – Employee numbers and Passwords are created in the FasTrax Director through the “Maintenance” tab.
Click HERE for more assistance. - This will bring you to the “Select Receiving Method” section. Thereare 2 selections; Begin A New Invoice and Resume An Unfinished Invoice. After selecting the intendedroute of receiving, press the“Continue” button.
- Resume An Unfinished Invoice – Choose this if an invoice has beenstarted, but not yet completed.
- Begin A New Invoice – Choose this ifthe invoice being received is a NEW invoice.
Note– Beginning an Invoice is explained by clicking here: How to Receive a hand Held Invoice. Pg 3
- If “Resume An Unfinished Invoice” is chosen, highlight theintended invoice by pressing thebox to the left of the entry. Afterhighlighting the applicableinvoice, press “Resume”.
Click this box to highlight the applicable invoice to resume. - Scan or, using the Hand Heldkeyboard, enter the next item UPCof the resumed invoice. Press“Continue” when the UPC is entered.
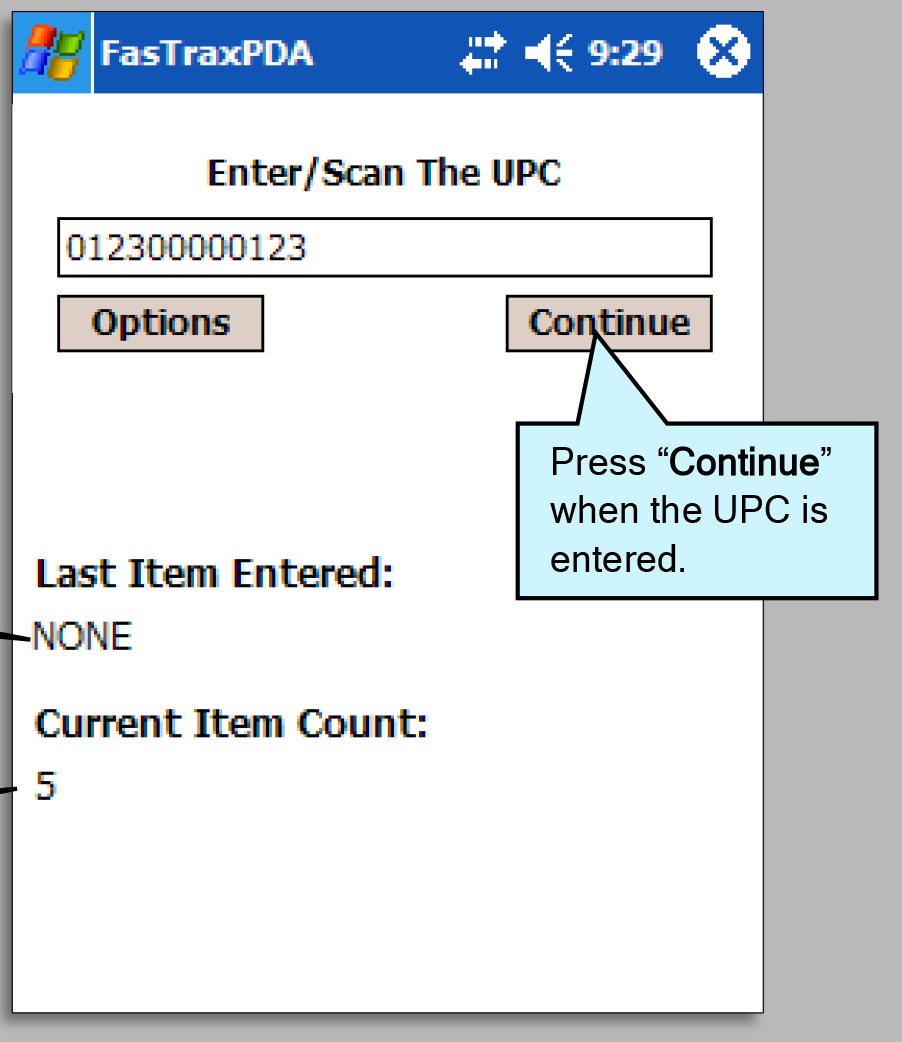
Notice you show a “Last Item Entered”. This will update to show the last item scanned.
Notice you show a “Current Item Count”. This number will increase with each quantity entered. - In the “Receive Qty” box, enter thequantity of the UPC you arereceiving. Confirm the cost of theitem is correct per the invoice. Press“Save” once the quantity and cost forthe UPC are correct.
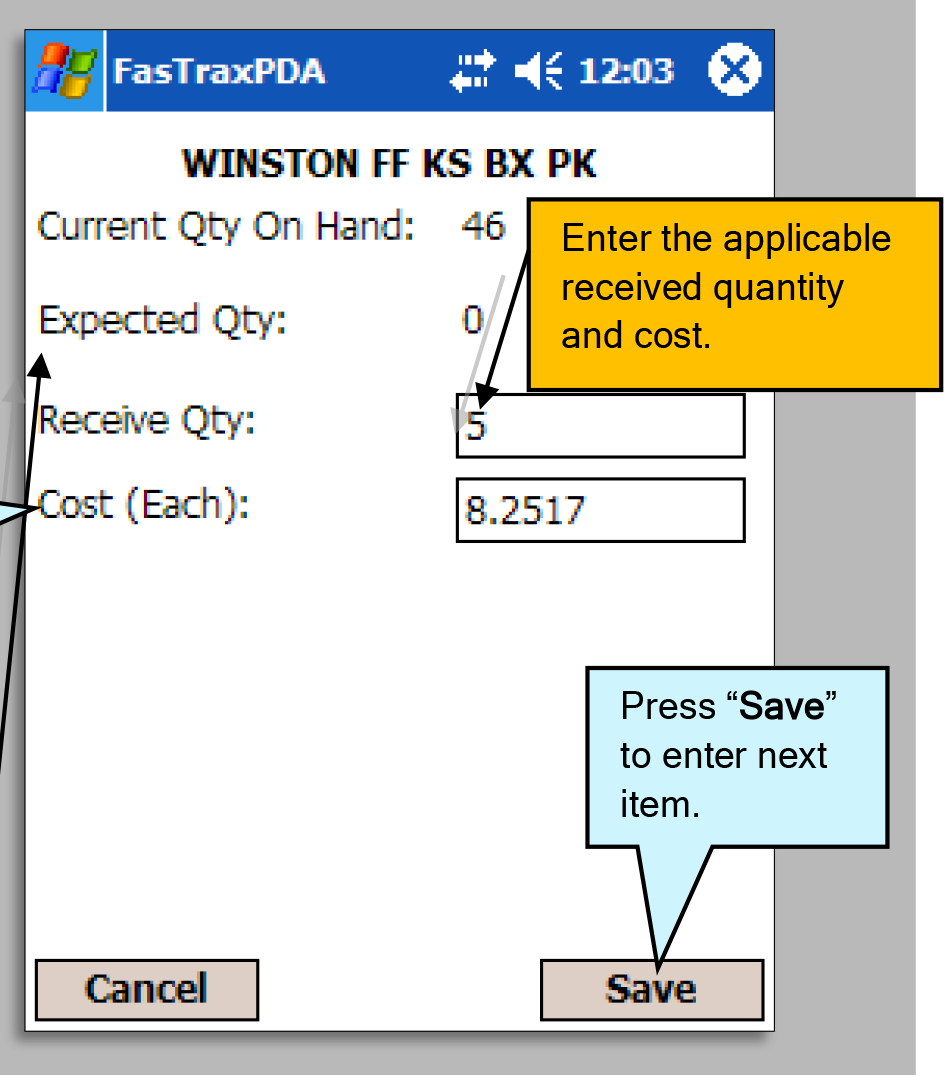
“Cost” signifies how much you pay the vendor for each UPC at the time of receiving. This is usually indicated per line item on the invoice being received. This can be changed by pressing the “Cost” box and entering the cost.
Note – “Expected Qty” is only populated when receiving a PO. When POs are created on the FasTrax Director, an expected quantity is set per item. - After pressing “Save”, you areprompted to enter the next UPC.Steps 5-6 are to be repeated until allitems being received are entered.
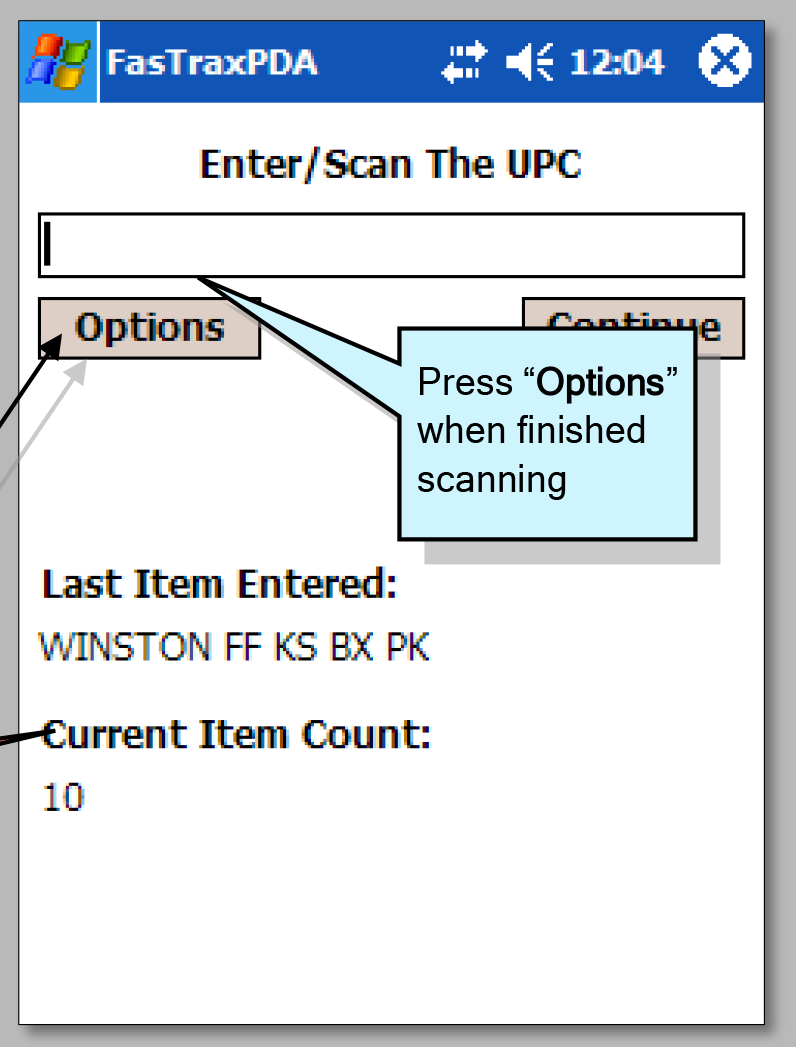
Press the “Options” button when you have completed scanning.
At any time during the scanning process “Options” can be pressed. “Options” is a menu to assist in reviewing, editing, resuming and saving invoices.
Confirm this count matches the quantity total from your invoice! - Press “Save Invoice” to accept whathas been scanned. Saving an invoice accepts and completes it.Any necessary changes areperformed in the FasTrax Director.
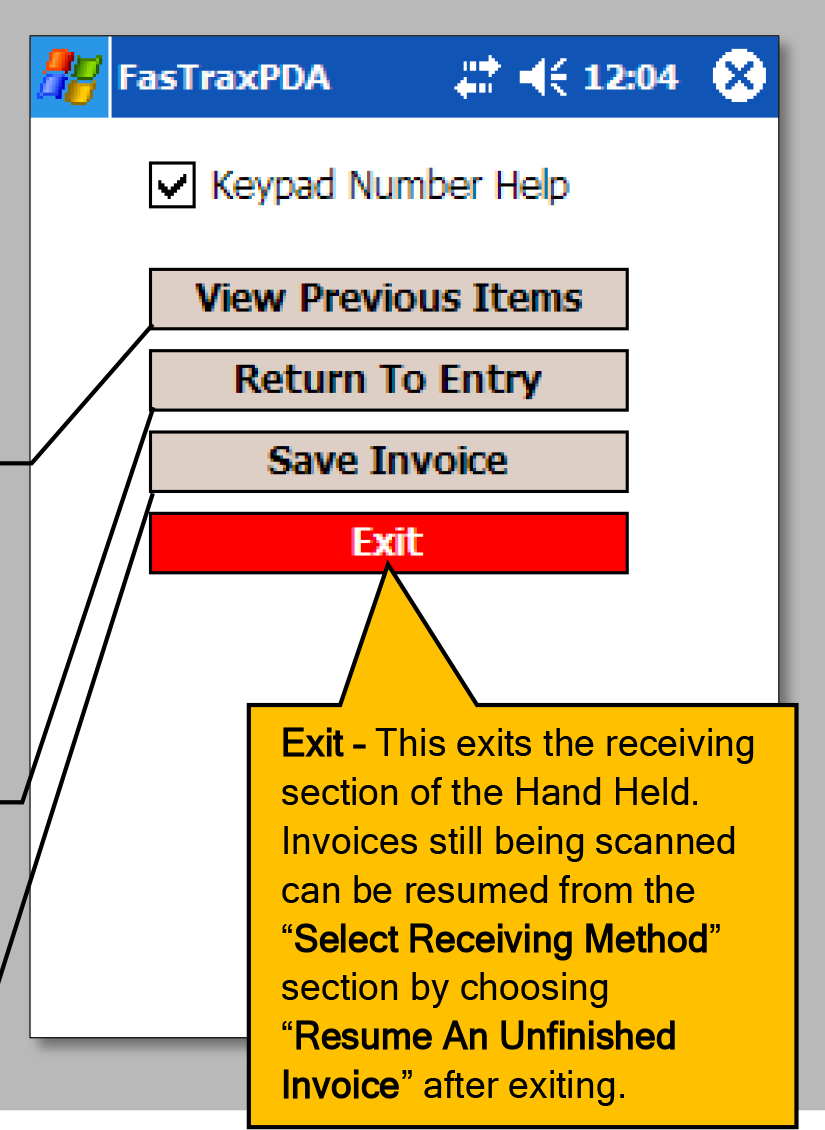
Note – View Previous Items – If accessed during the scanning process, this takes you to a list of items already scanned for a current invoice. This enables you to edit quantities already entered for items. Click Here! Pg 15
Return To Entry – When in “Options”, thisreturns you to your current invoice.
Save Invoice – Press this when an invoice has been completely scanned to accept and queue in the FasTrax Director. Saved invoices cannot be Resumed. Any changes necessary for a saved invoice will be done through the FasTrax Director.
View Previous Items on Hand Held
- During the scanning process:
- Press the “Options” button.
- Choose “View Previous Items” from the options listed.
- View or remove item
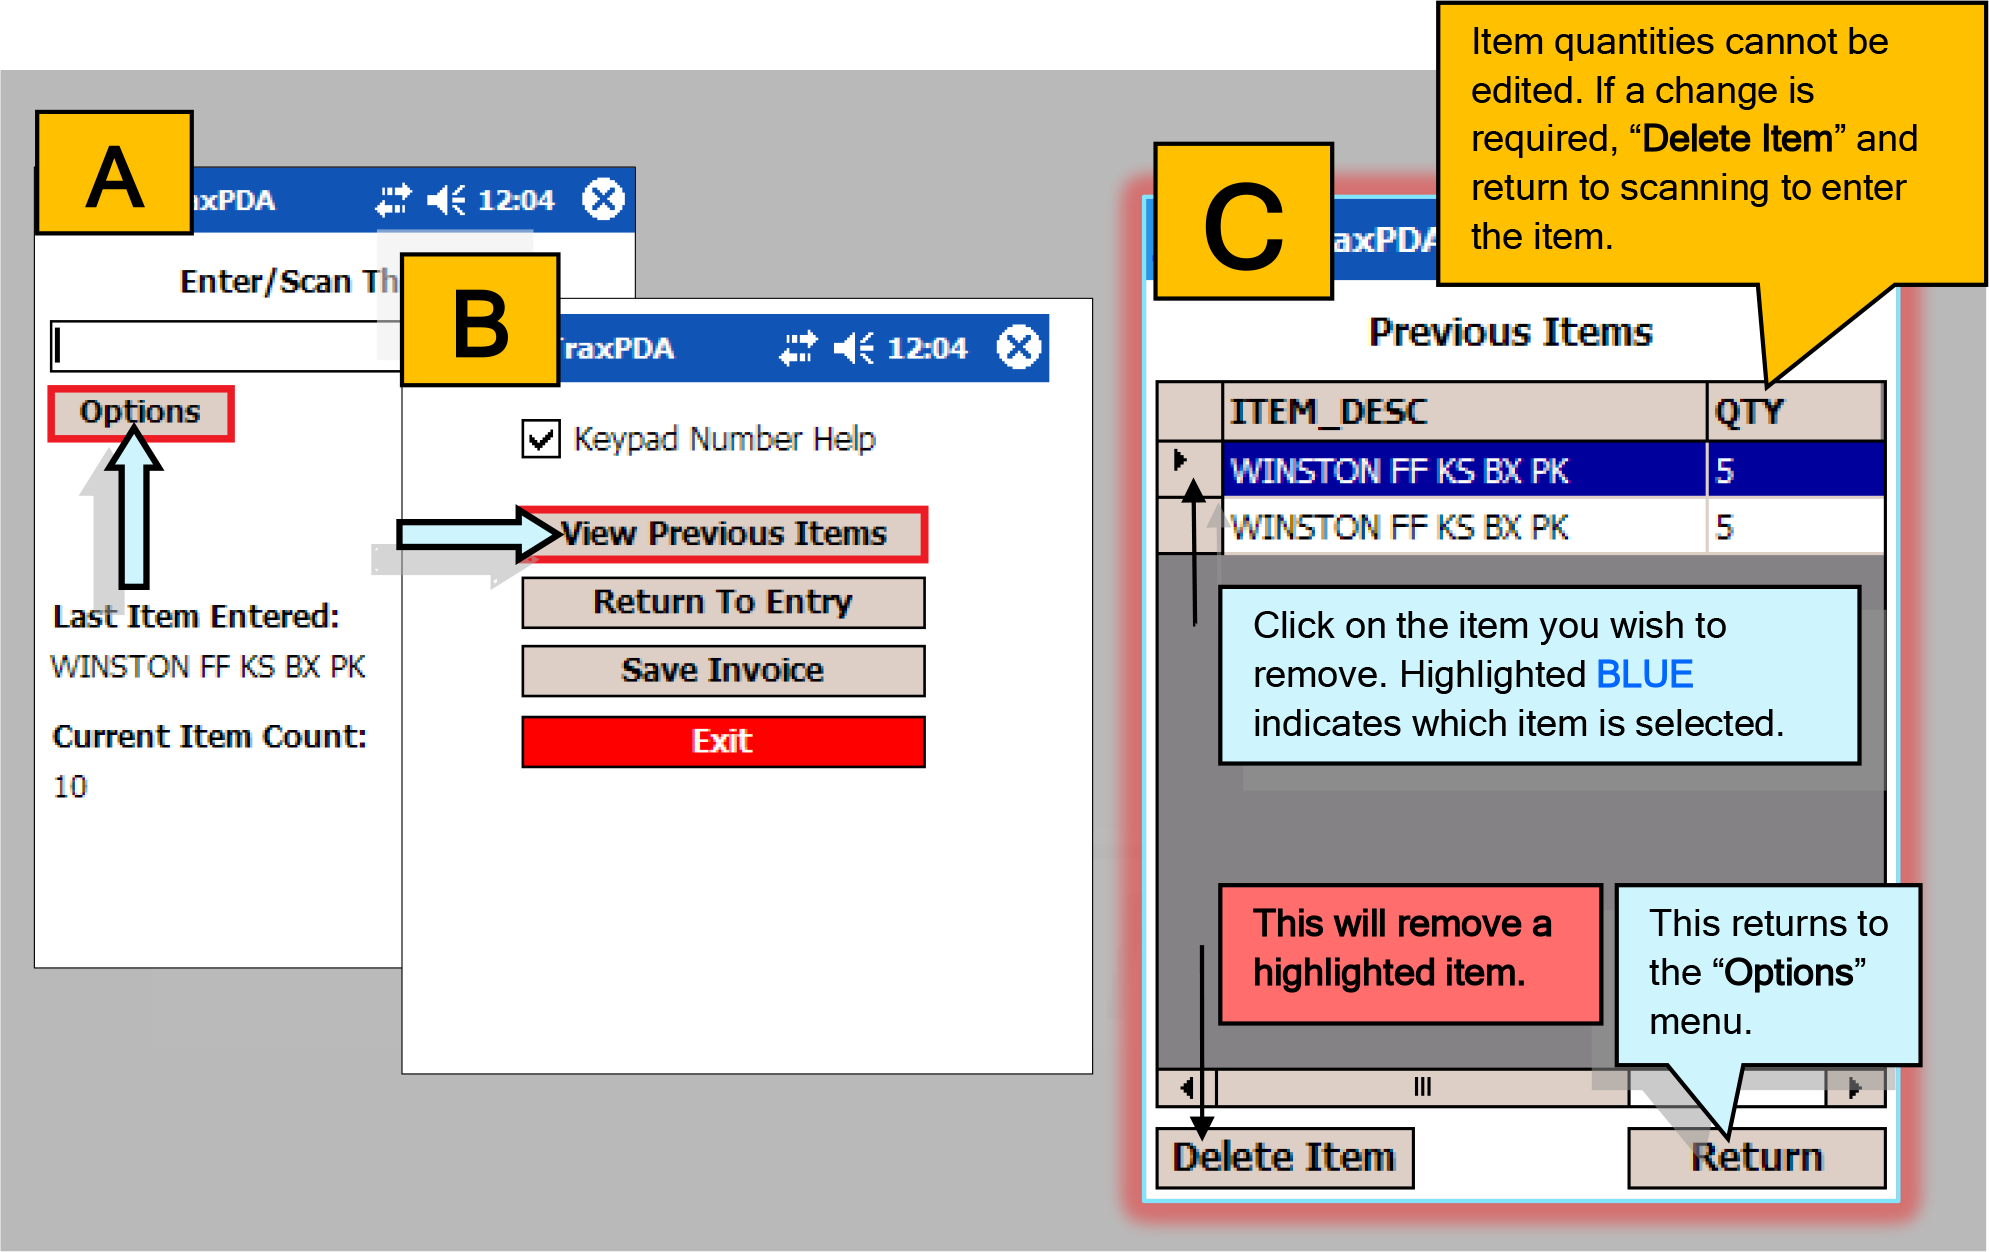
- After you have viewed and/orremoved items previously scanned,press the “Return” button for optionsto “Return to Entry” or “Save Invoice”.
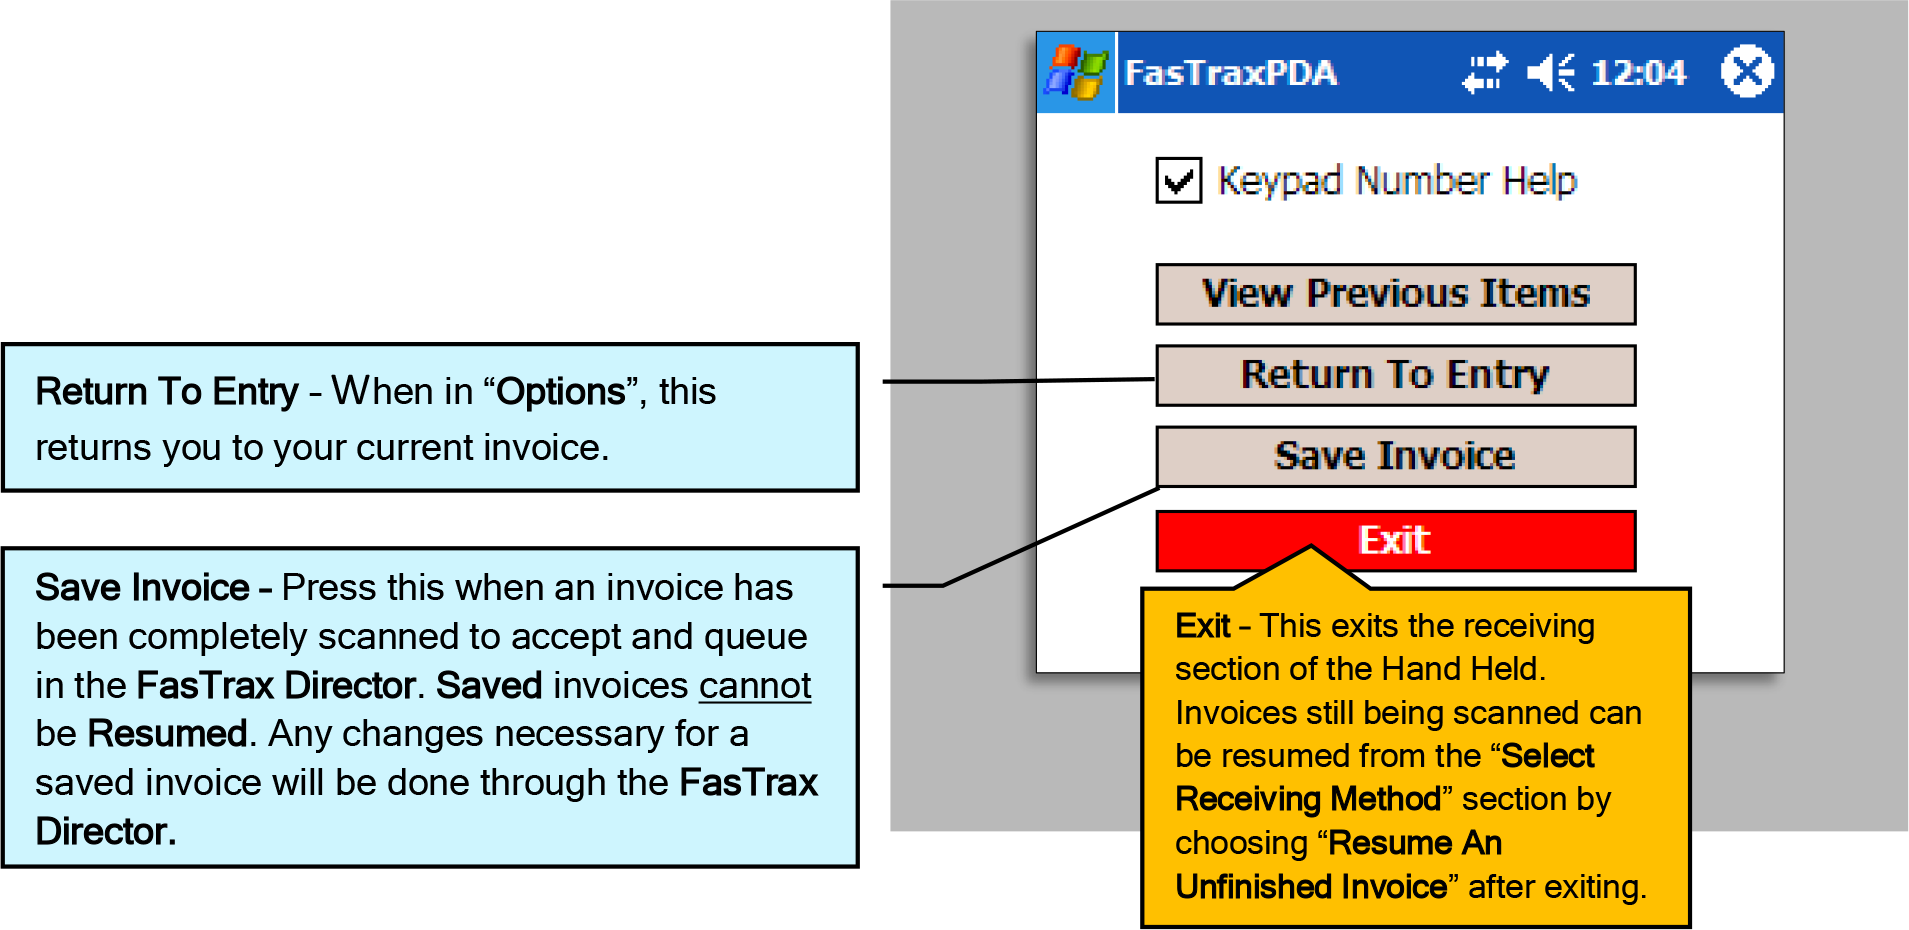
How to Perform a Hand Held Cycle Count
- After entering FasTrax PSM on thehand held, choose “Inventory”.
Note – FasTrax PSM is accessed by pressing the “Start” option on the Hand Held home screen. Choose FasTrax PSM from this drop down.
- Select “Cycle Counts”:
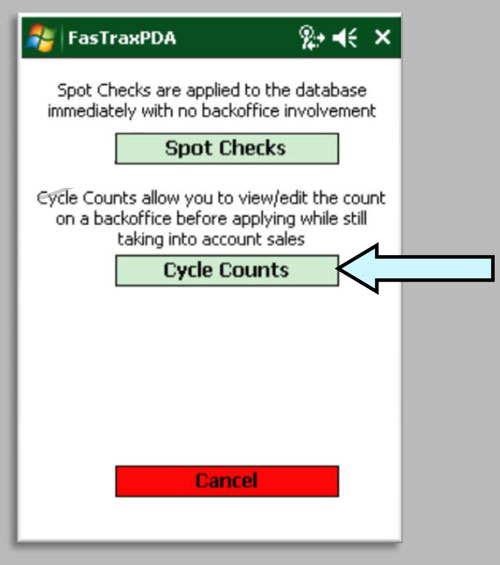
Spot Checks – This is used for quick quantity checks/replacement. This is NOT to be used in lieu of Cycle Counts. This feature does not take in account current sales or invoices. The setup and usage follow the same steps as performing a Cycle Count.
Cancel – This will return you to the main screen of FasTrax PSM.
- Choose “Login” after the appropriateEmployee ID and Password areentered.
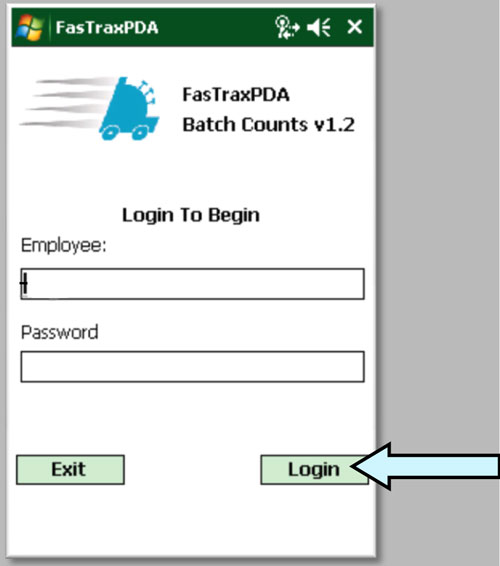
Note – Employee numbers and Passwords are created in the FasTrax Director through the “Maintenance” tab.
- If you are performing a new CycleCount, select the “Begin A NewCount” option.
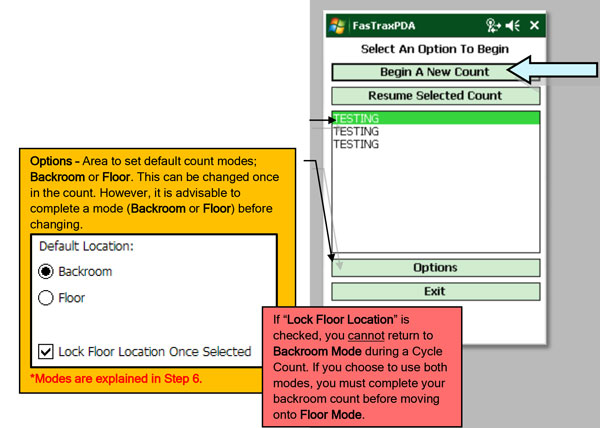
If you are resuming a previous cycle count, select the name of your Cycle Count from the list and select “Resume Selected Count”.
- You have the option of selecting apreexisting definition or you canselect “No Def”. Press “Continue”when a selection is made.
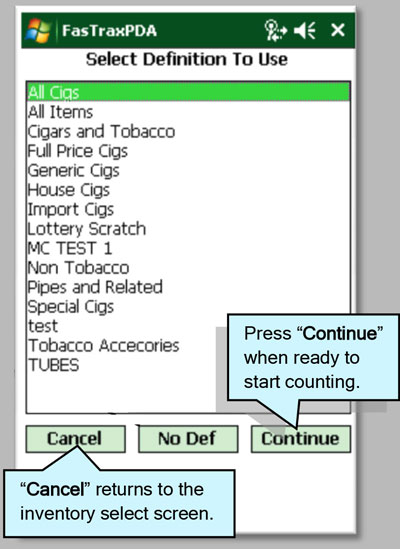
Definitions are a preset list of items from the Pricebook. These are useful for specific, repetitive or employee assigned Cycle Counts. See “How to setup Cycle Count Definitions” for more information. Pg##
If “No Def” is selected, the inventory will not include any Non-counted (not scanned) items from your pricebook. It is advisable to use definitions to keep track of ALL items in your pricebook; not just what is on the shelf.
- You have two modes for scanningitems into a Cycle Count. They are“Backroom Mode” and “Floor Mode”.Press “Continue” when the propermode is selected and the item isscanned.
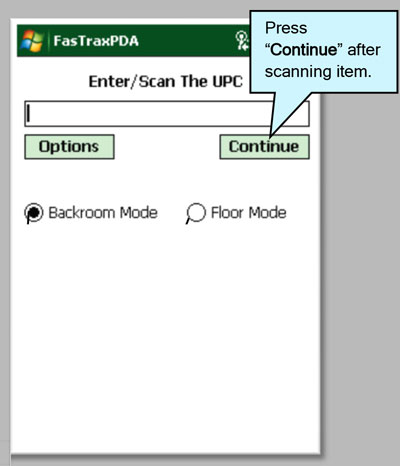
“Options” is a section for handling duplicate item scans. See Step 7 for further explanation.
If you choose Backroom Mode, it is expected that you are counting items in a stock room and that no inventory adjustments such as sales, receiving, transfers, etc. will be made to these items during the count.
If you choose Floor Mode, the system takes a snap shot of the current “On Hand Quantity” of the item at the time of scanning. From that point it tracks any inventory adjustment made during the cycle count.
“Floor Mode” allows the ability to perform a complete store Cycle Count while the store is operating.
- The “Options” button allows you to select whether you will be prompted when an item isscanned more than once during a Cycle Count. Press “Return To Entry” when selectionfor handling duplicates is chosen.
- “Prompt On Duplicates” selected:
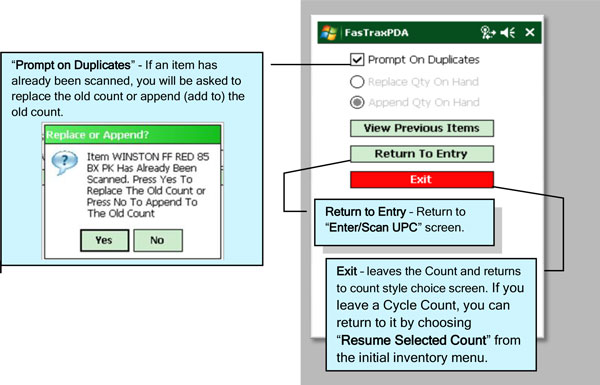
You will not be prompted if you scan an item in Backroom Mode and the same item in Floor Mode. These modes are handled separately during the Cycle Count and added together during reconciliation.
- If “Prompt on Duplicates” is notselected, you have the option toselect “Replace Qty On Hand” or“Append Qty On Hand”
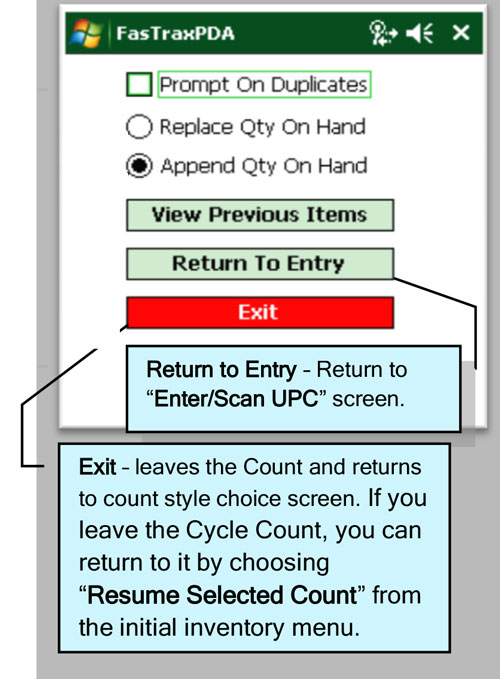
Replace Qty On Hand – Whenever an item is scanned, the quantity entered will become the On Hand Quantity. Multiple scans of an item will not append.
Append Qty On Hand – If an item is scanned multiple times, the entered quantities will automatically append.
- “Prompt On Duplicates” selected:
- To update quantities:
- Scan item or manually enter UPC.
- Enter the quantity you have counted.Select “Save” to go to the next item. Repeat this process until all items are counted.
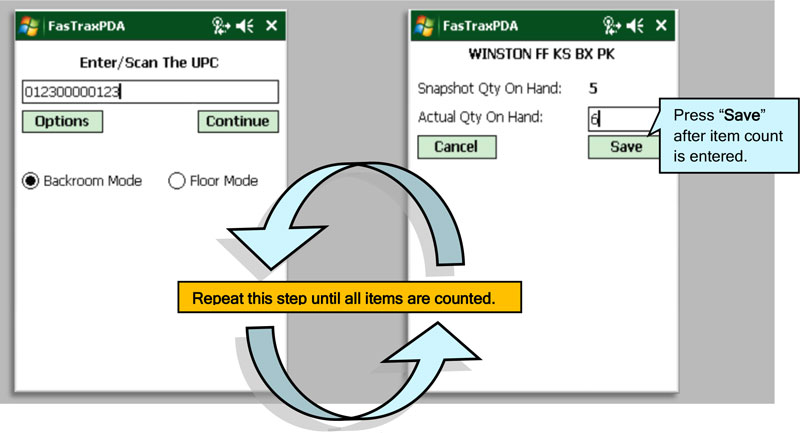
- When the Cycle Count is complete, select “Options” and Select “Exit”.
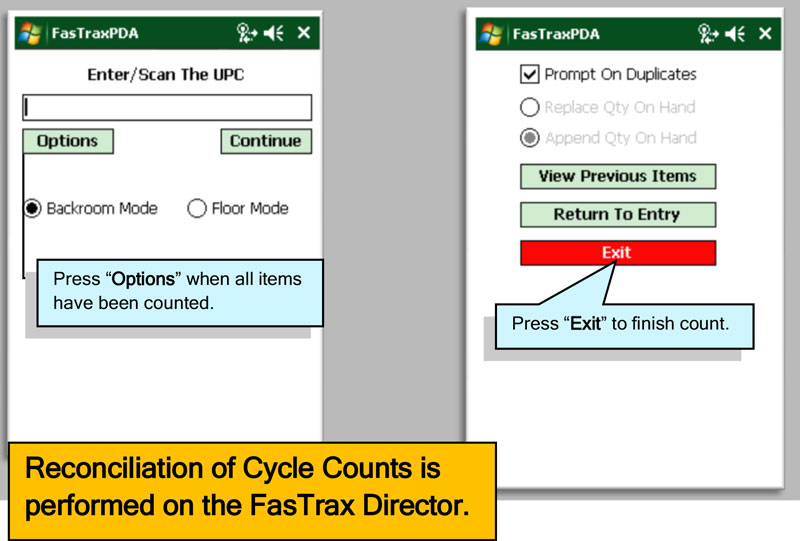
Reconciling Cycle Count in FasTrax Director
- After logging in, choose “Inventory”from the options located on the leftof the Director.
- Once in “Inventory”, choose the “Inventory” tab from the row of options listed at the top of the Director.

- Then select the “Cycle Count Tab”.

- In the “Date Range From” area, enter/select the dates you have performed Cycle Countsand press the “Refresh” button.

- From the displayed list, highlight the intended Cycle Count and select
 at the bottom left. You can correct issues, print reports and reconcile your inventory.
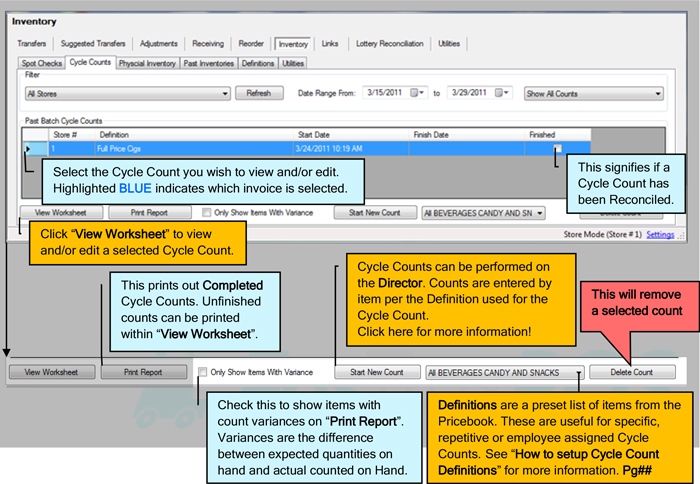
- Once in “View Worksheet”, verify that item counts are correct. The Backroom Count and Floor Count columns will reflect what was entered on the handheld. Corrections can be entered in these columns.
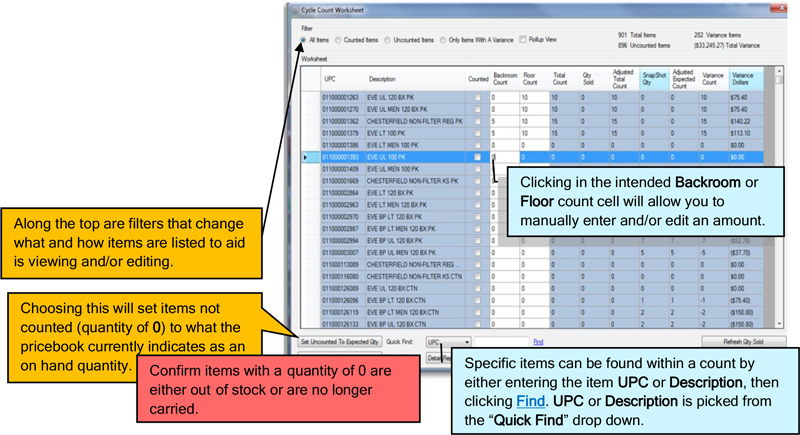
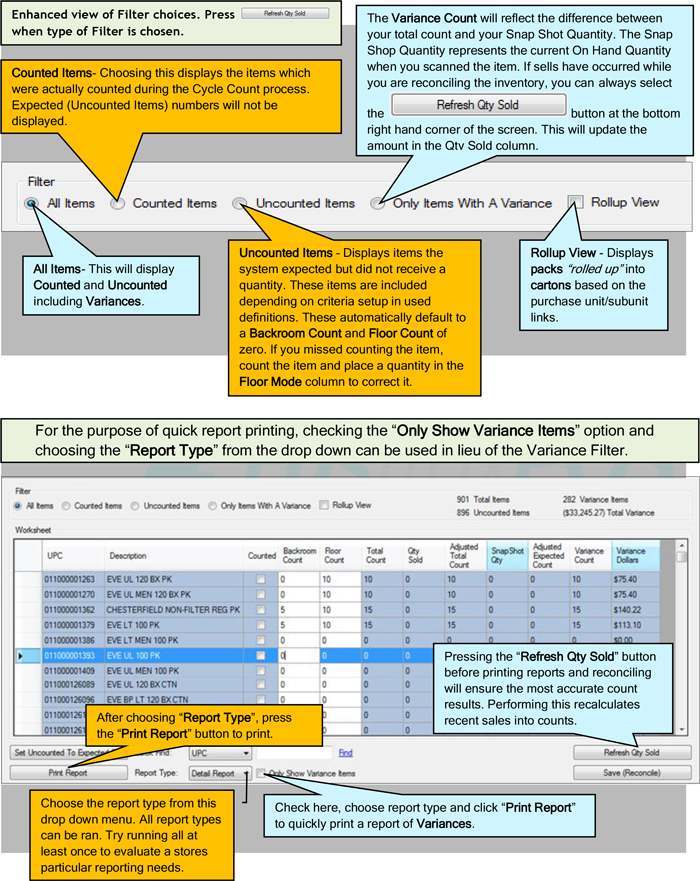
- After confirming and/or editing thecount, press the “Save (Reconcile)”button. This applies the quantities tothe pricebook. Ensure theseamounts are correct before savingthe Cycle Count.
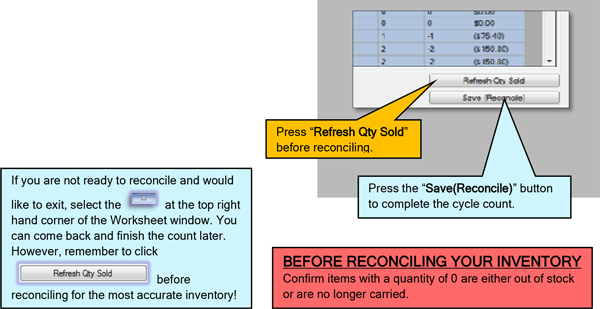
Congratulations! You have completed your inventory!
Reports to Gather a Total Inventory Cost
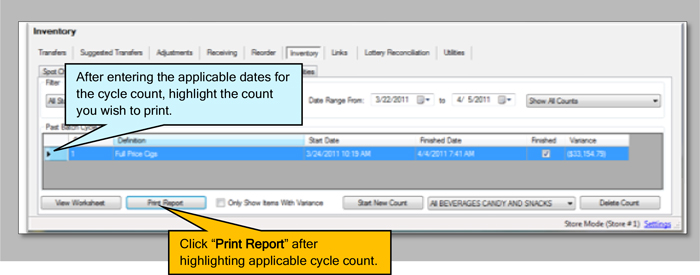
If the completed cycle count was a complete store scan and you require a Total Cost of the inventory, select the desired inventory and “Print Report”.
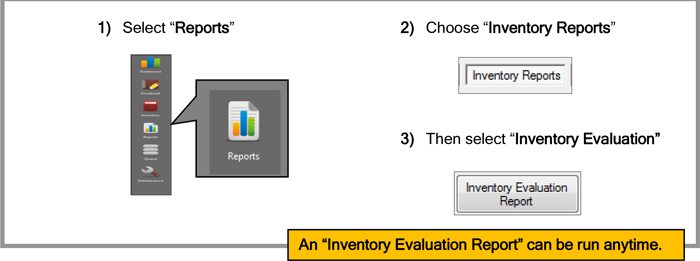
If multiple cycle counts were completed (as multiple definitions), it is not necessary to print each count separately to obtain a total inventory cost. If an “Inventory Evaluation Report” is run immediately after reconciling counts, a singular total inventory cost is printed.
FasTrax Hand Held Checklist
- Honeywell Dolphin 6100 Hand Held
Please allow the Honeywell hand held to charge at least 10 hours before beginning setup and hand held usage - Honeywell Hand Held Charging and Sync Cradle

- WiFi Network Linked with FasTrax POS System
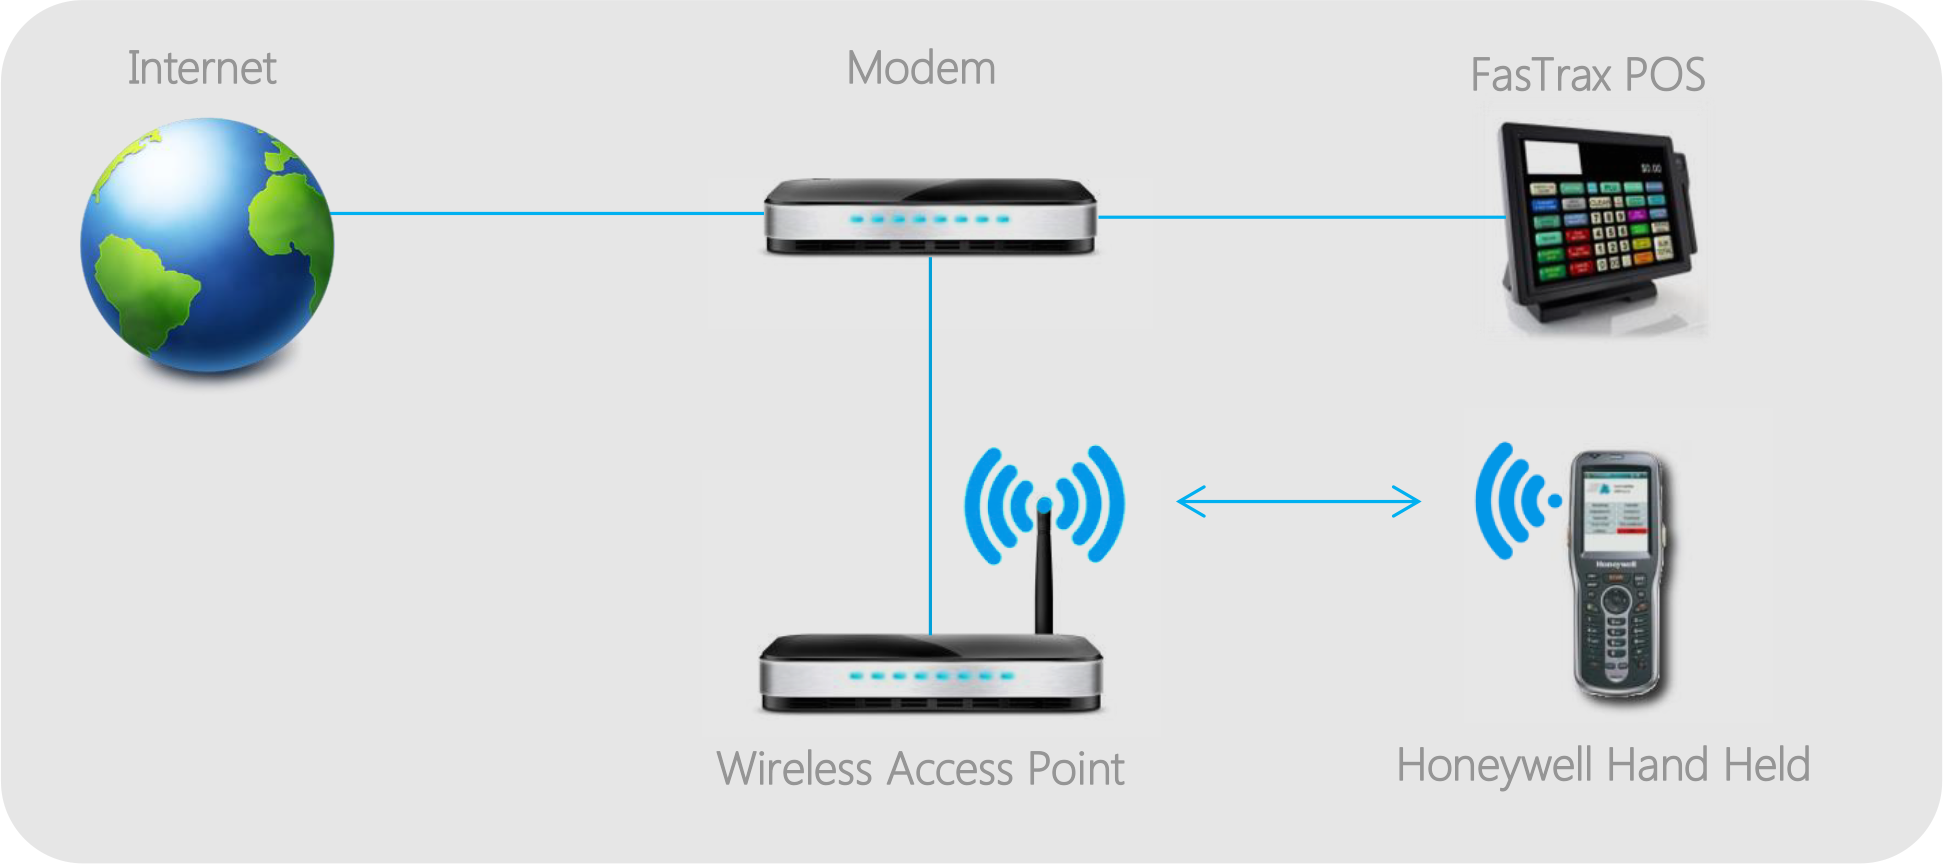
FasTrax Hand Held Software Setup
After plugging the Honeywell Charging/Sync Cradle to a power outlet and your PC, your PC will automatically install the Windows Mobile Device Center once the hand held is placed in the cradle.
Touch Dynamic machines run a version of Windows® that will require you to download the Windows Mobile Device Center directly from Microsoft®. Click here to download this utility.
If you are viewing this in printed format, open your internet browser and navigate to – www.microsoft.com/en-us/download/details.aspx?id=14
Once the install is finished and you accept Microsoft’s terms agreement, Windows Mobile Device Center will open.
- Since this utility is only required to move FasTrax PDA software to your hand held, choose the option to “Connect without setting up your device”.
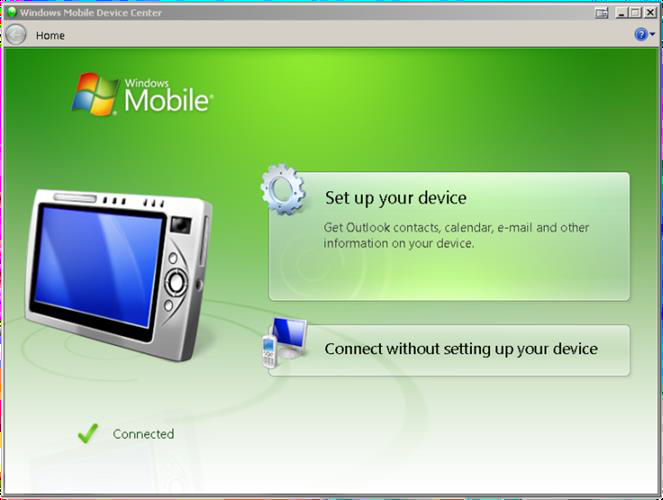
- From the next list of actions, choose “File Management”.
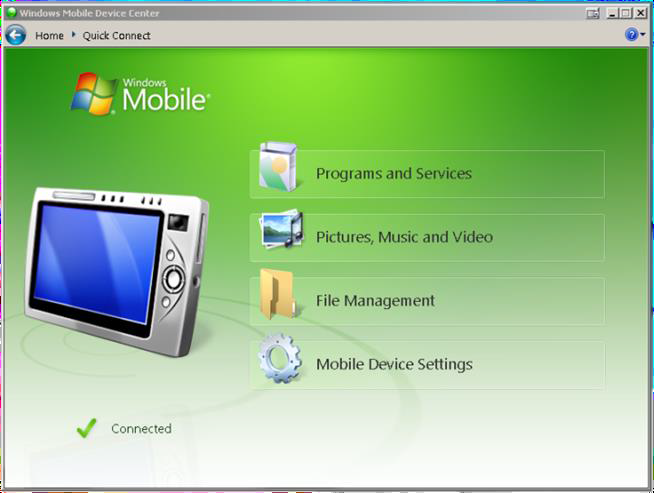
- This will expand to show the “Browse the contents of your device” option. Choose this option.
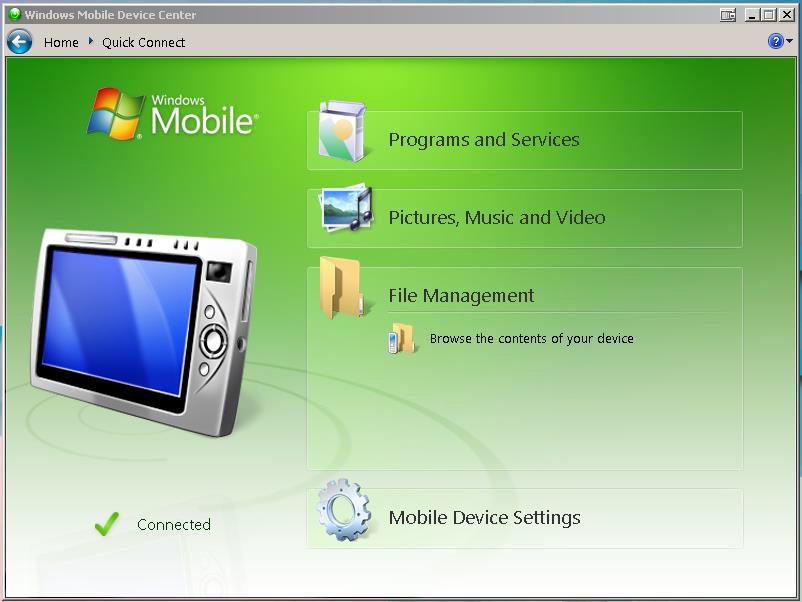
- This will open a file explorer window.
Open the hand held’s displayed directory; designated by “\” for “root”. - Once opened, you will see a number of directories.
Open the “Program Files” directory. - Once in the “Program Files” directory, copy and paste in the FasTraxPDA folder.
Once copied, close this window.
The FasTraxPDA folder can be found in C:\FasTrax\Handheld on your main FasTrax machine.
Once you have closed the Windows File Explorer window, remove the hand held from its charging cradle.
You will need to create FasTrax shortcuts on the desktop of your hand held for quick access.
Remove and prepare to use the hand held stylus which is held in the elastic wrist strap of the device.
- Using the stylus, double-click on the “My Device” icon located on the hand held desktop window.
- From the opened explorer window, double-click on the “Program Files” folder.
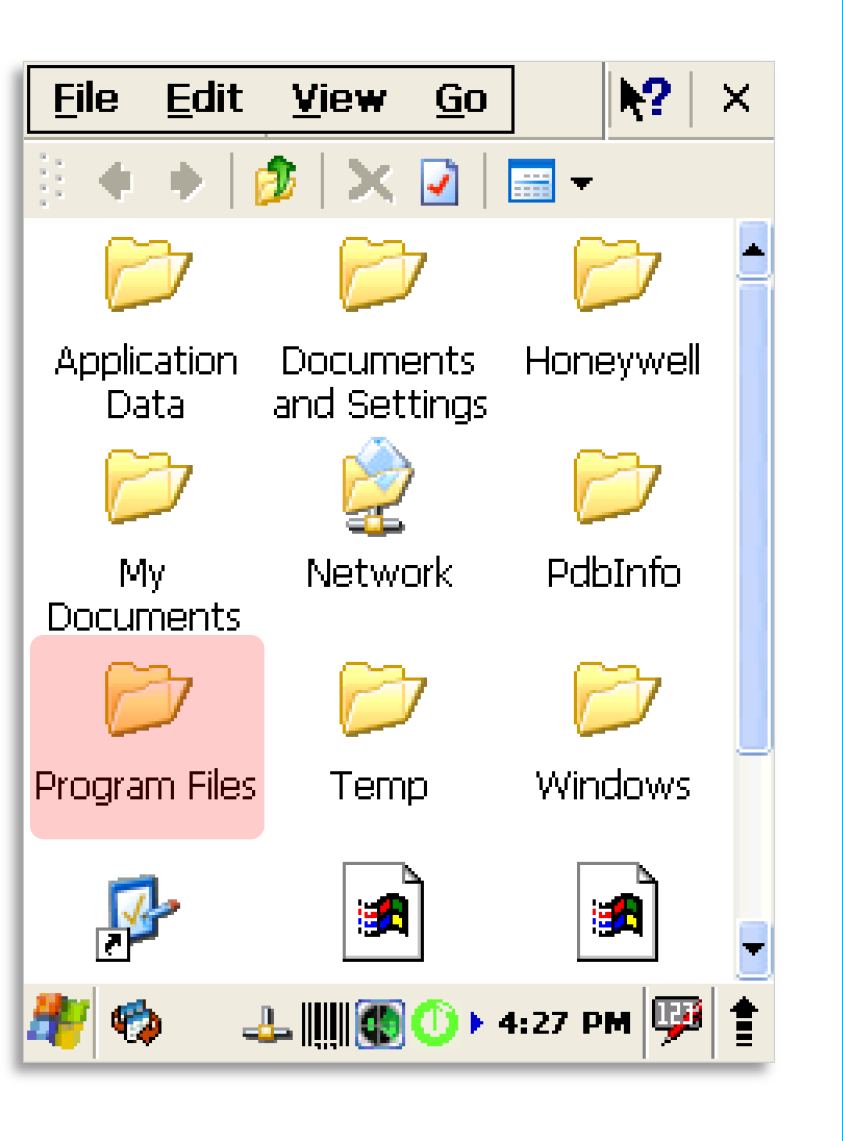
- From the new window, double-click on the “FasTraxPDA” folder.
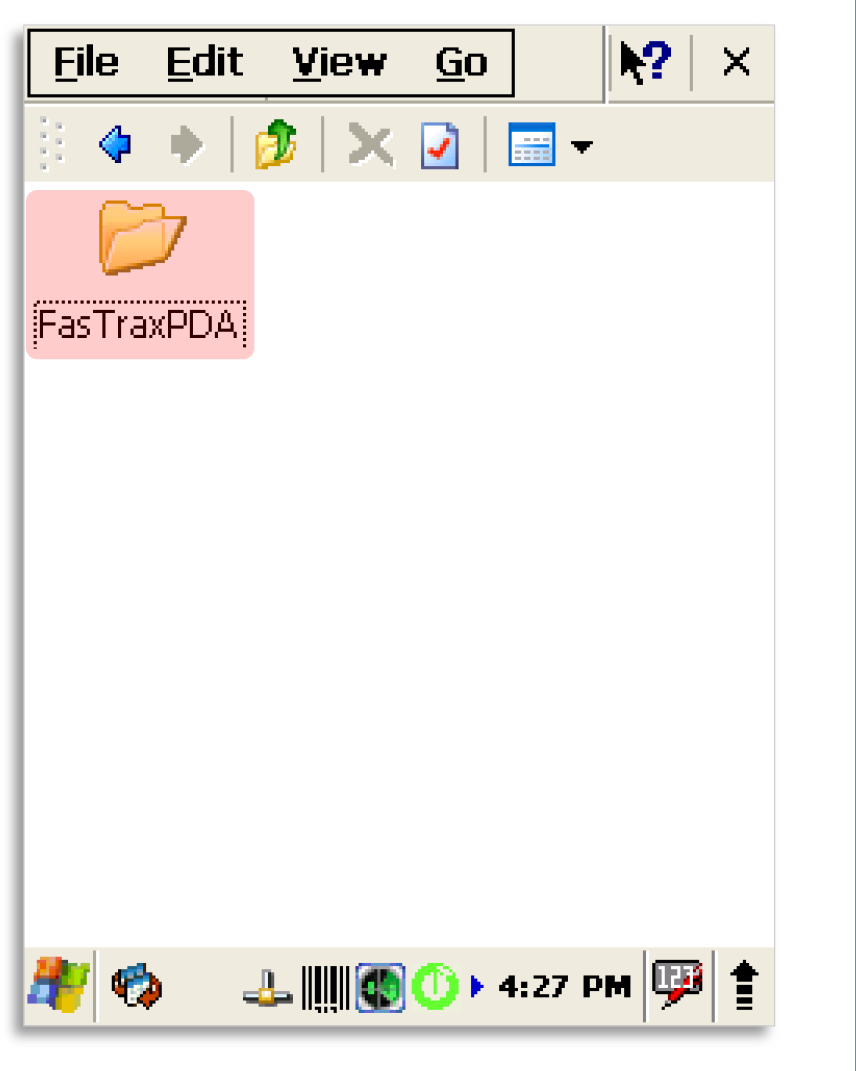
The FasTraxPDA folder is the same folder you installed on the hand held in the previous steps. - Once you have opened the “FasTraxPDA” folder, find the “FasTraxConfigure” and “FasTraxPSM” files.
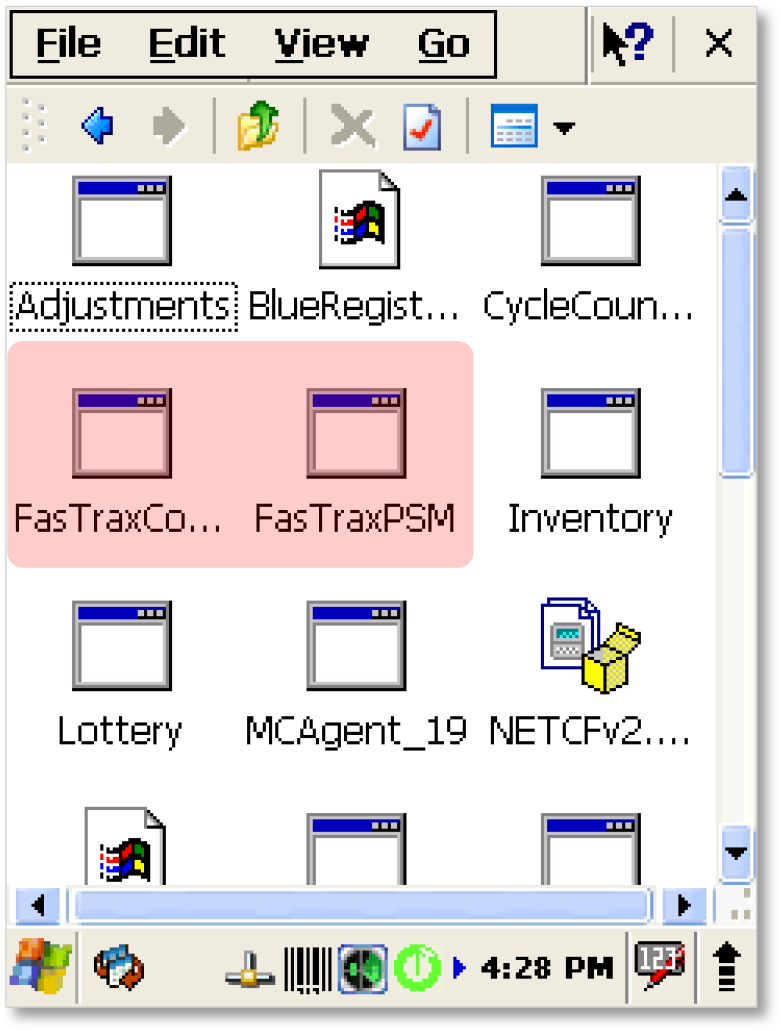
Choosing to filter the view by “Details” may assist in locating these files.
This filter can be found under the icon on the top right of the action banner.
- Using the stylus, touch “FasTraxPSM” to highlight.
- After choosing ”FasTraxPSM”, touch “File”.
- Choose “Send To”
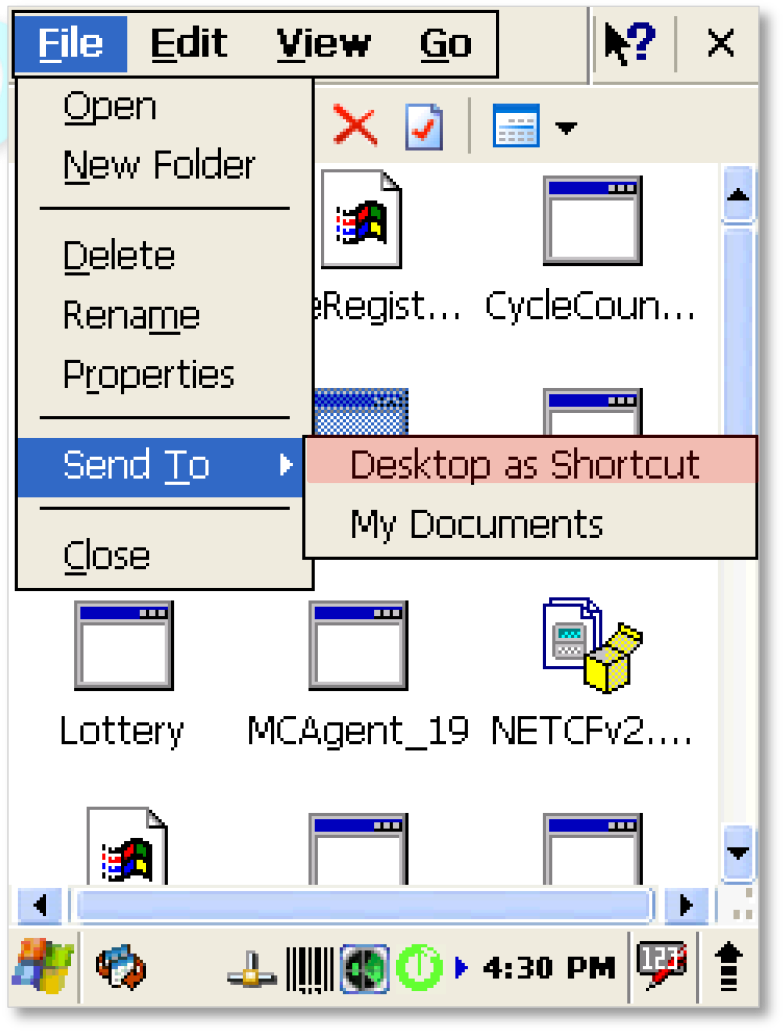
- Choose “Desktop as Shortcut”
This will create a shortcut on the hand held desktop for quick access to the “FasTraxPSM” utility. - Repeat the previous steps to create a desktop shortcut for the “FasTrax Configure” file.
- Use the “X”, located in the top right corner, to close all open windows.
This will resolve to the hand held desktop where your newly added shortcuts are located.
- From the hand held desktop, double-click the “FasTrax Configure” shortcut
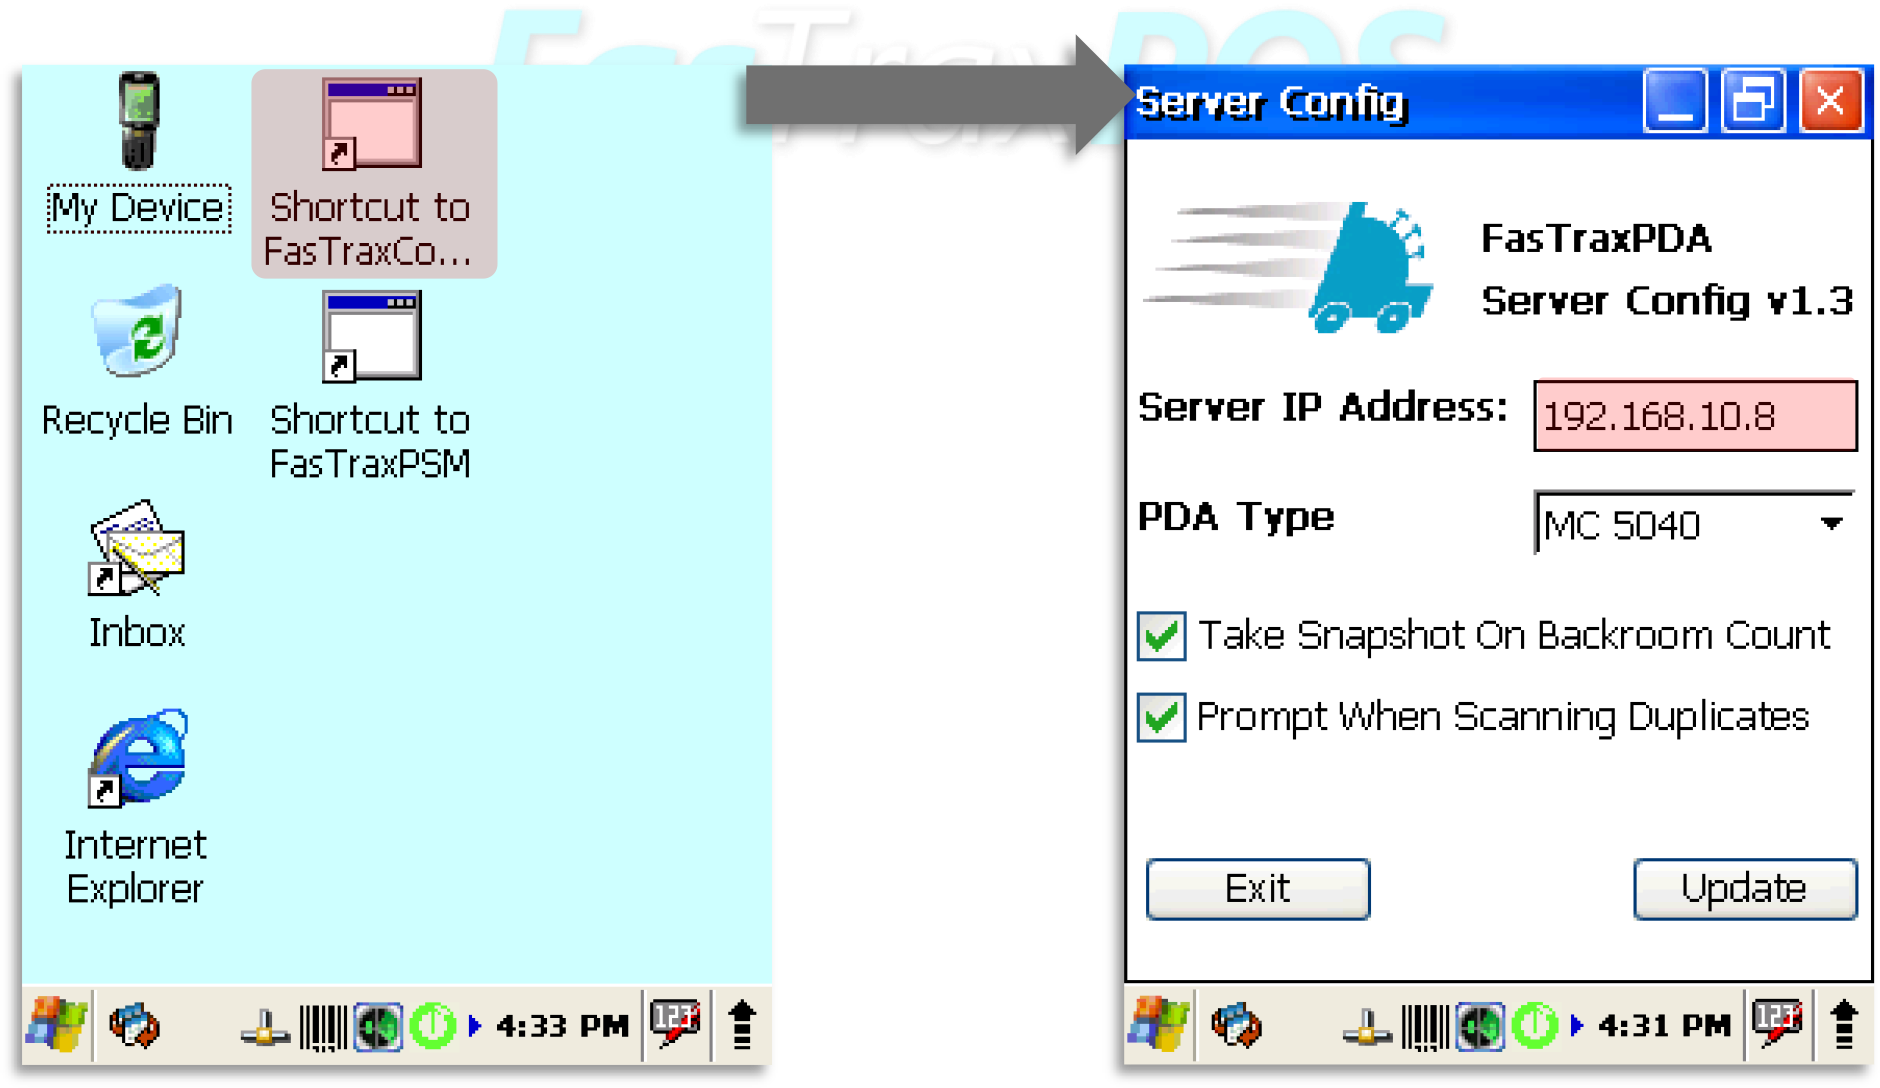
- In the “Server Config” window, enter the Local IP of the Primary FasTrax Database machine.
This is usually Register 1 at your location. Choose “update” when complete.
FasTrax Hand Held ScanWedge Configuration
ScanWedge is the utility that enables the barcode reading functionality of your hand held.
- From the desktop of your hand held double-click the “My Device” icon.
- Double-click to open the “Program Files” folder.
- Double-click to open the “Power Tools” folder.
- Scroll down to find “ScanWedge”.
Using the stylus, press on the “ScanWedge” icon until a window opens giving you the option to “Copy” – choose “Copy”.
After successfully copying “ScanWedge”, close any open windows to return to the hand held desktop. - From the hand held desktop, double-click the “My Device” icon.
Long press on an empty spot of the desktop and choose “Paste Shortcut” to create a “Scan Wedge” shortcut.
In the “Power Tools” directory, there is an icon titled “Reboot”, paste a desktop shortcut for this function as well. - Double-click to open the “Windows” folder.
- Double-click to open the “Startup” folder.
- Using the stylus, press on a blank portion of this window until a window opens giving you the option to “Paste Shortcut” – choose “Paste Shortcut”.
After successfully copying “ScanWedge”, double-click to start the ScanWedge utility.
A barcode icon will appear on your taskbar to indicate ScanWedge is running. - From the hand held desktop, using your stylus, touch the ScanWedge icon.
This will open a window with the option for “Settings” – choose “Settings”. - In the top section of the “Settings” window, scroll down and choose “Symbologies”.
- Scroll down the Key section of the “Settings” window and double-click on “UPC-A”.
- Ensure the first digit listed is a value of “1”.
If this is a value other than “1”, using your stylus, simply touch after the number, press the “BKSP” button on your hand held keyboard and enter the new value.
If no change is necessary, simply choose “Cancel” to return to the previous screen.
If a value is changed, press the “X” button located in the top right hand corner of the window to apply the change. - Repeat steps 10-13 of this section for “UPC-E0” & “UPC-E1”.
- Once these settings are confirmed, choose the “X” located in the top right hand corner of the ScanWedge section.
You will be prompted to “Save Changes”. If you have confirmed your changes, choose “Yes”
If no changes were made, simply choose “No” to ensure no changes are applied.
Enabling FasTrax Hand Held Wireless LAN
The wireless LAN enables the wireless functionality of your hand held.
- From the hand held desktop, using your stylus, choose the Arrow
icon located in the bottom right corner of the screen. - This will open a smaller window with an option to “Turn Wireless
LAN” to be either “On” or “Off”.
You will want wireless LAN to be On.
If wirless LAN is already turned on, simply use your stylus to touch another section of the screen to close the window.
Turn Wireless LAN On = Wireless is currently off
Turn Wireless LAN Off = Wireless is currently on
FasTrax Hand Held Wireless Profiles
The wireless Profiles are used to identify the specific wireless network your hand held will connect to.
These are edited and assigned via the WLAN SWC utility.
For more detailed information about wireless setup and the WLAN SWC, the Honeywell Document is available here
- From the hand held desktop, choose Windows Icon located in the bottom left corner of the screen.
- From the new window, choose “Programs”
- Choose “WLAN SWC” from the list of programs.
- This will open to the “Status” tab of the WLAN SWC utility.
The example pictured shows a Status tab displaying the details of an existing WiFi connection. - Choose the “Config” tab.
Indicates a connected wireless network - If your wireless network is not listed, choose the “Scan” button for the hand held to search for available networks.
- Once your network is listed, choose/highlight it and choose the “Activate” button.
By choosing “New”, you can setup multiple Profiles if a singular hand held is to be used for multiple stores.
After the Profiles are set, once a hand held enters a store, return to this section, highlight the applicable profile and choose “Activate”.
Indicates a connected wireless network - Depending on your specific wireless setup, you may need highlight your network then choose the “Modify” button.
Within the “Modify” section, you can input your specific wireless network settings to enable hand held connectivity.
This section does require that you know or have access to your existing wireless access point’s settings.
For more details on this section, please visit:
www.honeywellaidc.com/CatalogDocumetns/WLANSupp-UG.pdf
FasTrax Hand Held Remote Support Software
For Support to assist you with hand held issues, they may be required to access and remote directly into your device.
There is an included software client that must be installed to enable this functionality.
- From the hand held desktop, double-click the “My Device” icon.
- Double-click to open the “Program Files” folder.
- Double-click to open the “FasTraxPDA” folder.
- Scroll to find the file named “MCAgent_19”.
Using your stylus, double-click the “MCAgent_19” file.
- After installation is complete, you will see an icon on the taskbar for Soti/MoBi Control.

- Using your stylus, touch this icon.
From the new window, choose “Configure”. - This will open the “Config MobiControl” window.
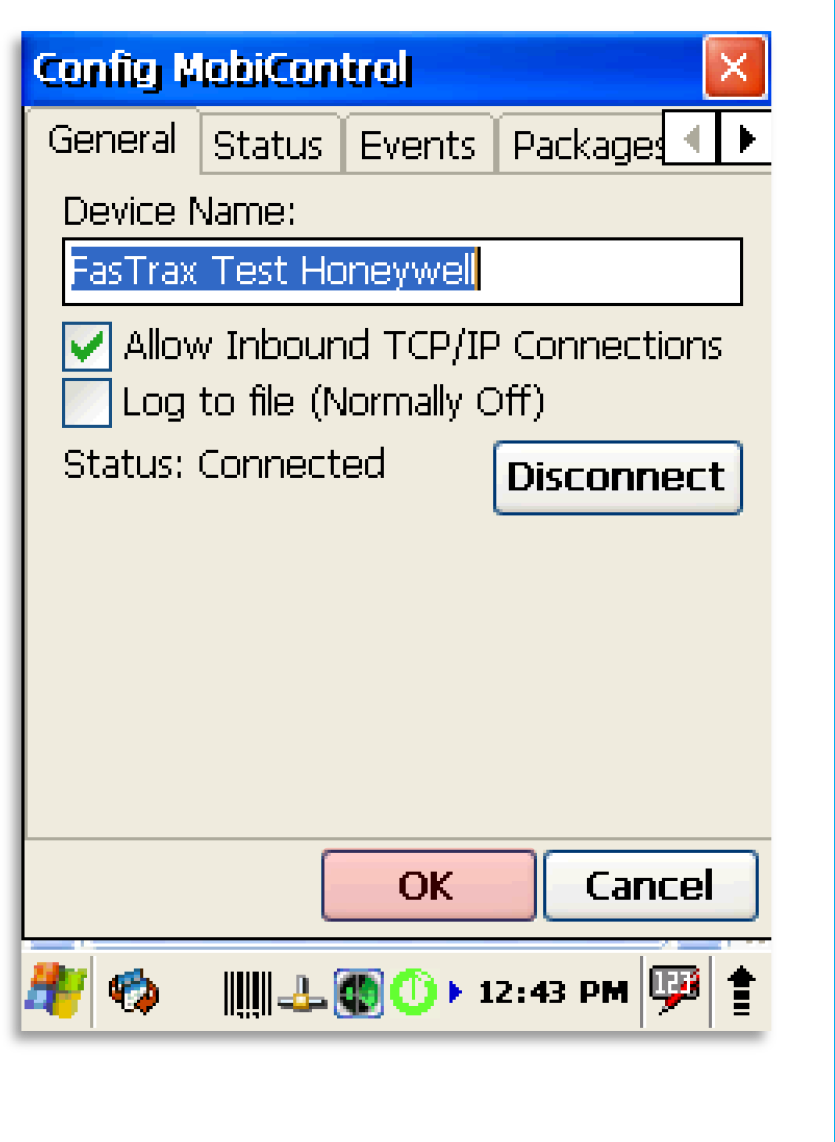
Enter the applicable Device Name for this hand held.
Press “OK” when complete.
Please include a business name when naming devices.
e.g. – Smoker’s Choice HH1
FAQ
Q – Where can I find the Local IP of my main FasTrax machine?
A – This is found by performing “ipconfig” in the command prompt window of the main (DB) machine
- In the search/run window, enter “cmd” then press the enter button
- The black, command window will open
- Type “ipconfig” and press the enter button
- The local IP will be displayed with the Default Gateway and DNS.
Q – Receiving an “unable to connect to server/host” error.
A – Confirm HH is connected to wireless network.
Q2 – I have confirmed my HH is connected to my wireless network, but I am still receiving “Unable to Connect to server/host” messages:
A – Confirm the “FireWall” on the main DB machine is not turned on
- If FireWalls are enabled intentionally, ensure exceptions are properly set
Q3 – I have confirmed my HH is connected to my wireless network, but I am still receiving “Unable to Connect to server/host” messages.
A – In “FasTrax Configure” check and change the server/host URL to be the correct local IP for the main machine of the store.
After establishing the correct Local IP, open the “FasTrax Configure” utility on the HH. This should be on the HH Desktop or can be found the “FasTrax” folder using the HH File Explorer. Enter the correct Local IP in the section titled “Server IP Address“. Choose “Update” and close the Window if applicable.
FasTrax Hand Held Checklist
- Unitech HT682 Handheld
Please allow the Unitech hand held to charge at least 10 hours before beginning setup and hand held usage - Unitech Hand Held Charging and Sync Cradle

- WiFi Network Linked with FasTrax POS System
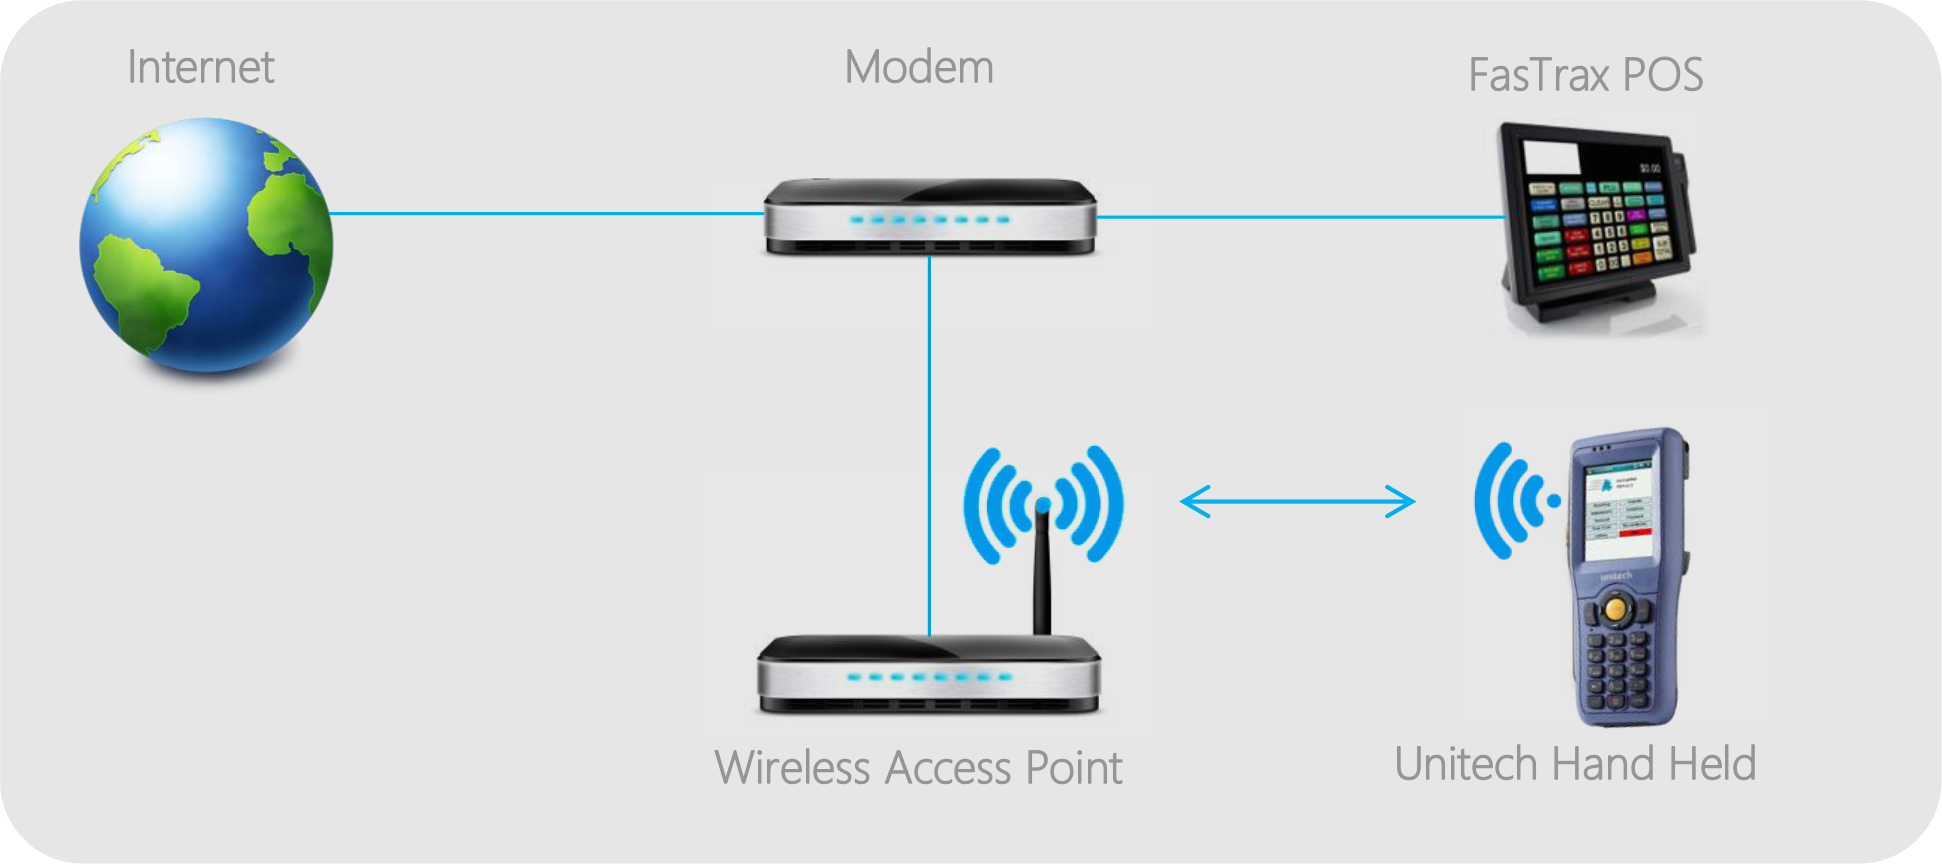
FasTrax Hand Held Software Setup
After plugging the Unitech Charging/Sync Cradle to a power outlet and your PC, your PC will automatically install the Windows Mobile Device Center once the hand held is placed in the cradle.
Touch Dynamic machines run a version of Windows® that will require you to download the Windows Mobile Device Center directly from Microsoft®. Click here to download this utility.
If you are viewing this in printed format, open your internet browser and navigate to –
www.microsoft.com/en-us/download/details.aspx?id=14
Once the install is finished and you accept Microsoft’s terms agreement, Windows Mobile Device Center will open.
- Since this utility is only required to move FasTrax PDA software to your hand held, choose the option to “Connect without setting up your device”.
- From the next list of actions, choose “File Management”.
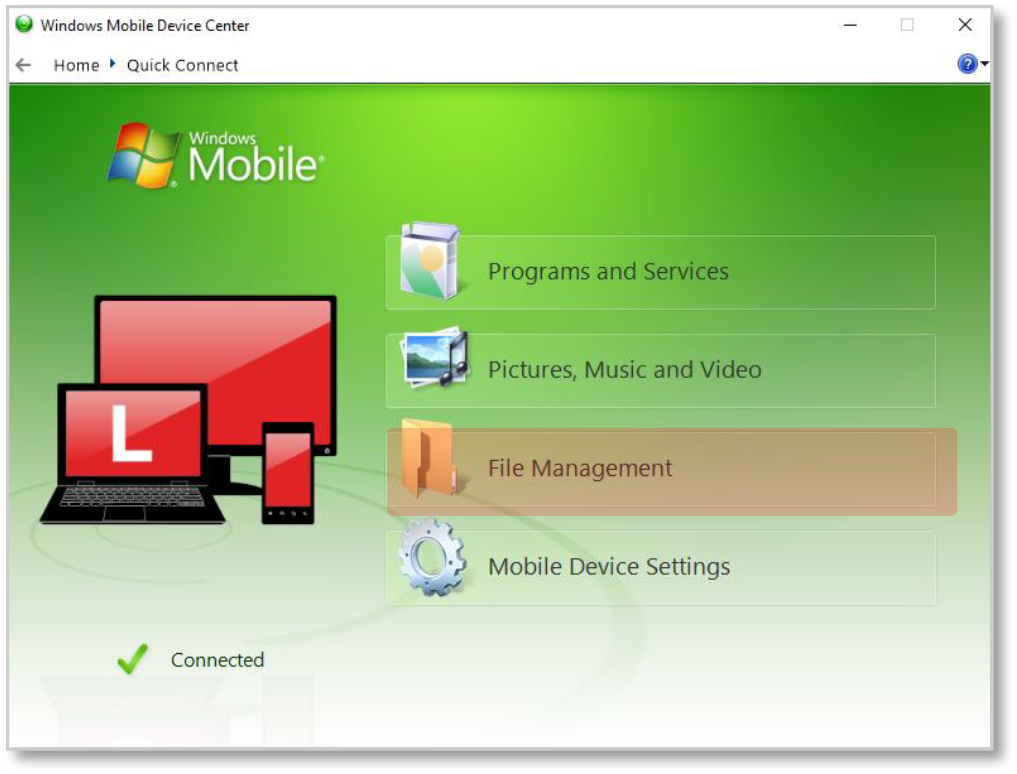
- This will expand to show the “Browse the contents of your device” option.
Choose this option.
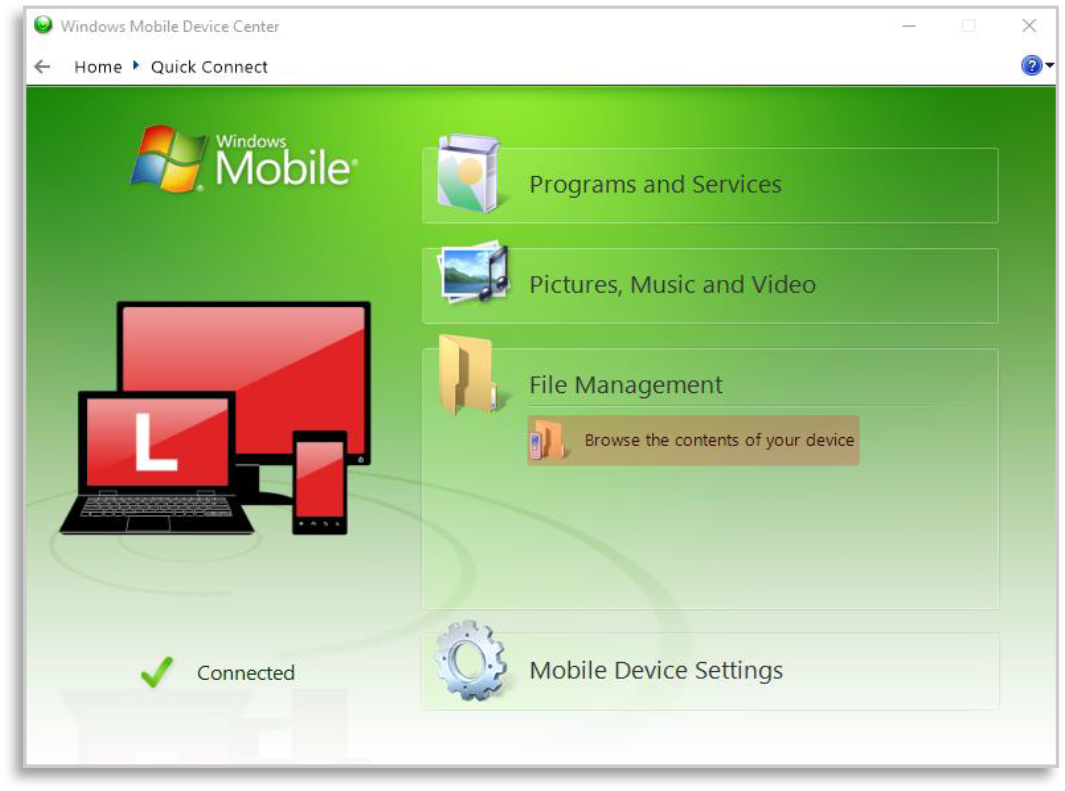
- This will open a file explorer window.
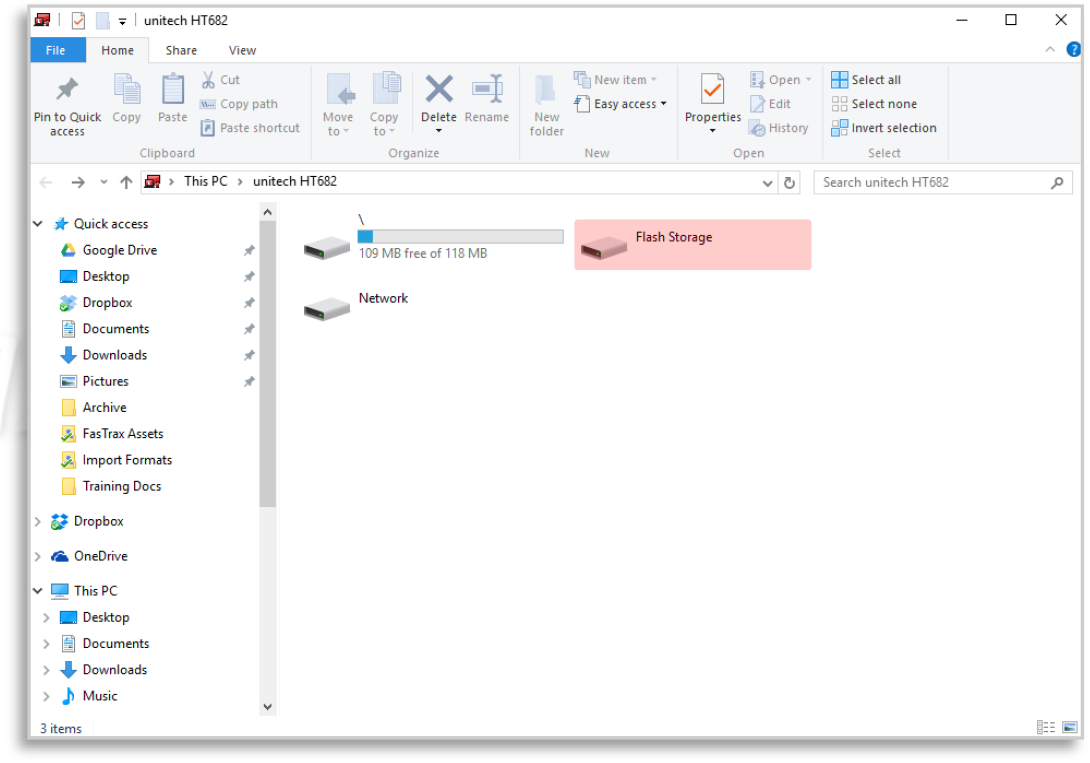
Open the hand held’s Flash Storage directory. - Once in the Flash Storage, copy and paste in the entire contents of the Unitech Installer Files folder.
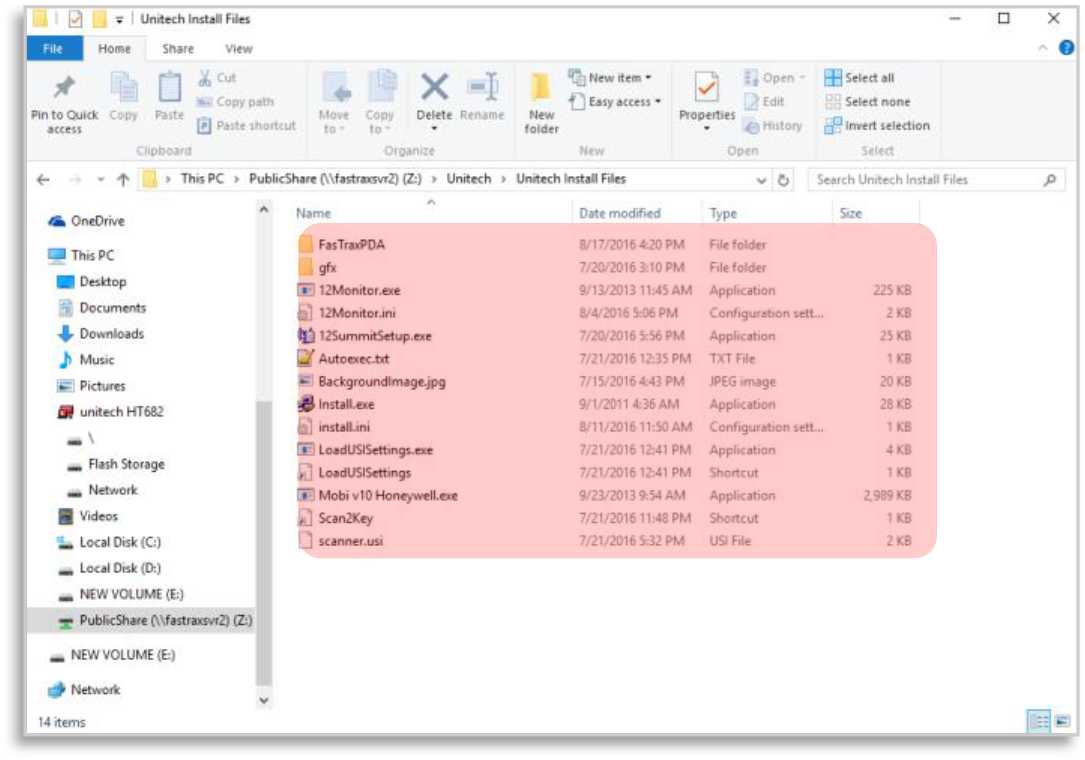
Once copied, close this window. - Navigate to the FasTraxPDA folder on the Flash Storage.
Run the Register program in that folder.
- This will give a Registration Code and prompt for a matching License Key.
Enter the License Key and tap Register.
If you do not have a License Key, contact FasTrax Support for assistance. - Tap OK on the License File Saved box
- Close all windows so that the Desktop is visible again.
Navigate to My Device by double-clicking the icon on the desktop. - Locate the FTLicense file.
Tap and hold on the file until a menu appears, and tap Copy. - Navigate to the Flash Storage, and double-tap on the FasTraxPDA folder.
- Tap and hold on the white background and select Paste.
- Close this window and open the Start Menu by tapping the Windows logo in the bottom left of the screen.
Open the Boot Mode utility by tapping Programs, then Utilities, then Boot Mode. - Tap Cold Boot to reboot the device.
The device will reboot and display a message saying the scanner port is occupied; click OK, then click OK again when asked to reboot the device.
Configuring Wireless LAN
- After performing step 14 above, the device will boot to the FasTraxPOS screen shown.
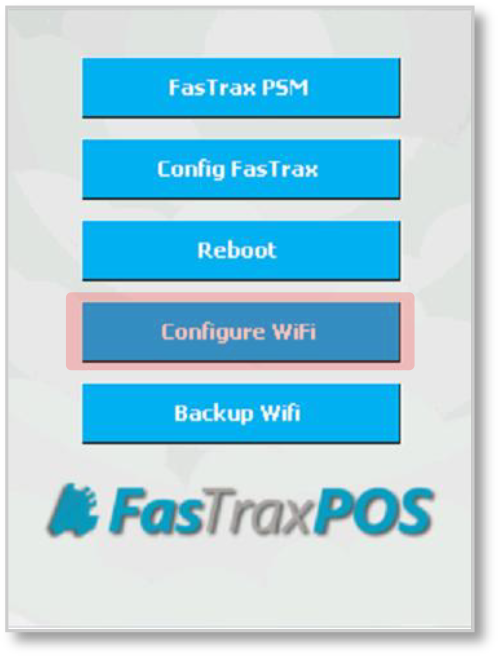
Tap Configure Wifi to open the Summit Client Utility. - Navigate to the Profile tab, and tap Scan to look for wireless LANs.
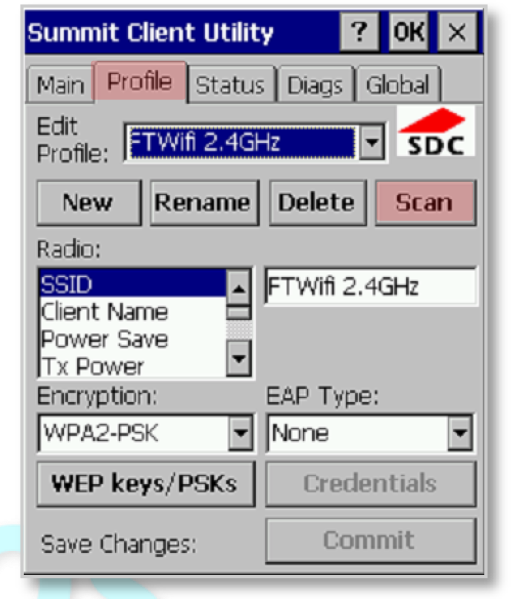
- Select the wireless LAN you wish to connect to, and tap Configure.
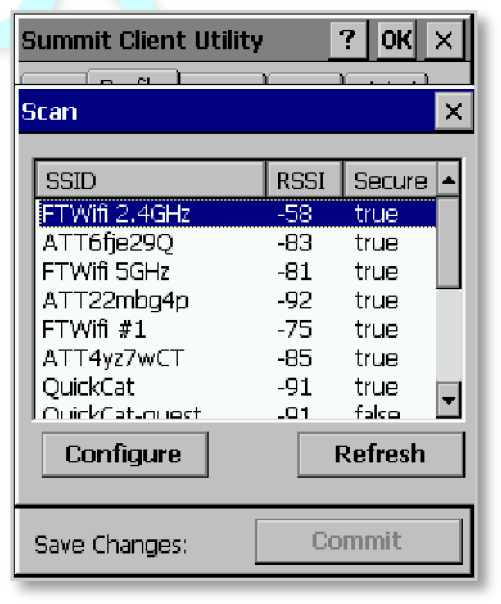
Tap Yes when asked to “Create a new profile”. - Next you will need to enter the passphrase for the wireless network.
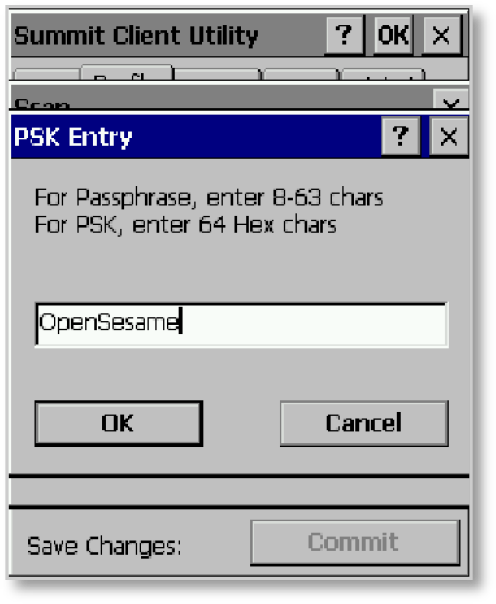
Tap OK when finished. - Tap the Commit button to save the wireless profile.
Make a note of the Profile Name listed in the Edit Profile box.
- Navigate back to the Main tab to select your new profile.
Tap the arrow next to the Active Profile box, and select your profile using the Profile Name from the previous step. - Finally, Check the Status tab in order to verify you’re connected.
You’ve successfully connected when you see an IP.
Backing up Wifi Settings (Recommended)
- Once you have finished setting up your Wireless LAN, FasTrax recommends creating a backup of your Wifi settings on the Flash Storage of the device.
Start by tapping Backup Wifi on the Main Screen. - This will show you a few brief walkthrough of the backup process. Tap Next Page twice , then tap Exit Help.
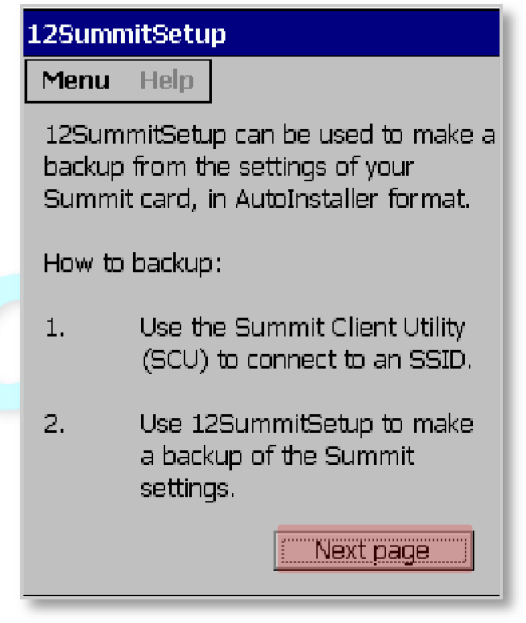
- Verify that the REG file name and location field reads exactly as shown
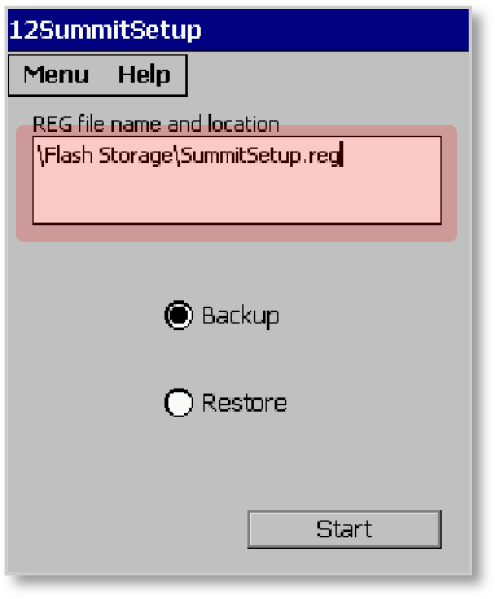
Tap Start. You will see a message flash on the screen briefly, then you’ll be returned to the Main Screen.
Connecting to the FasTrax System
- Starting from the Main Screen, tap Config FasTrax.
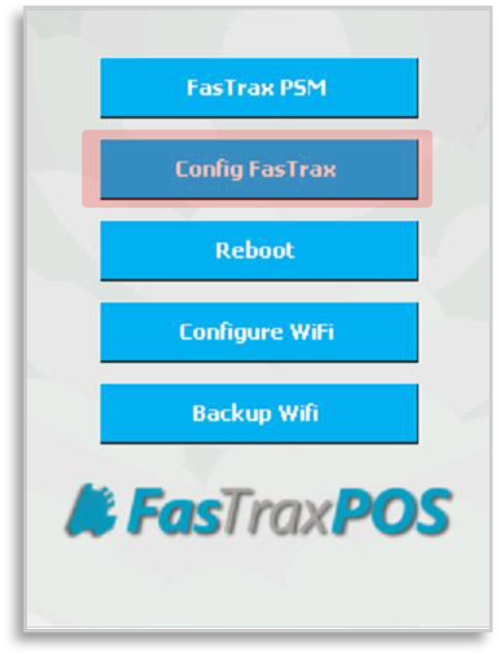
- This will open the Server Config Screen. Enter the IP address of the main register in the Server IP Address box.
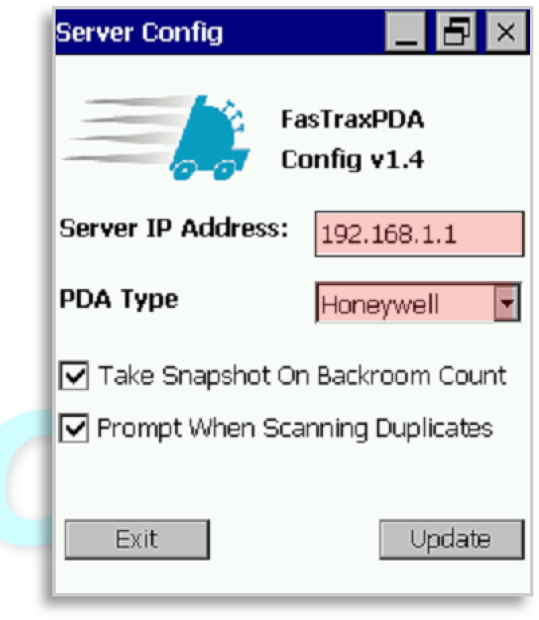
Select your PDA Type as Honeywell as shown. - Tap Update, and you’ll see a message box saying that the settings are updated.
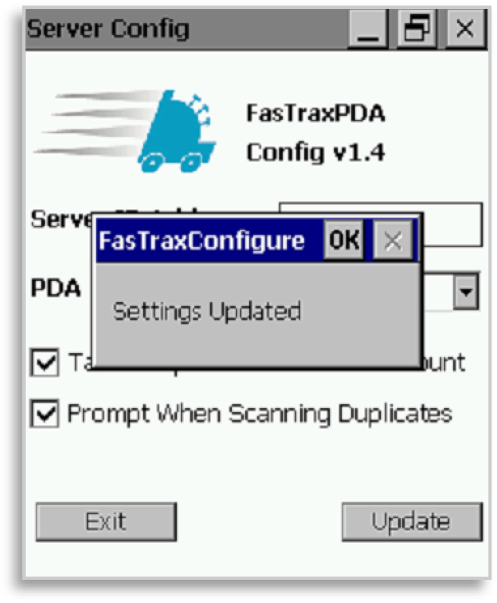
Tap OK, then tap Exit to return to the main screen.
FAQ
Q – Where can I find the Local IP of my main FasTrax machine?
A – This is found by performing “ipconfig” in the command prompt window of the main (DB) machine
- In the search/run window, enter “cmd” then press the enter button
- The black, command window will open
- Type “ipconfig” and press the enter button
- The local IP will be displayed with the Default Gateway and DNS.
Q – Receiving an “unable to connect to server/host” error.
A – Confirm HH is connected to wireless network.
Q2 – I have confirmed my HH is connected to my wireless network, but I am still receiving “Unable to Connect to server/host” messages:
A – Confirm the “FireWall” on the main DB machine is not turned on
- If FireWalls are enabled intentionally, ensure exceptions are properly set
Q3 – I have confirmed my HH is connected to my wireless network, but I am still receiving “Unable to Connect to server/host” messages.
A – In “FasTrax Configure” check and change the server/host URL to be the correct local IP for the main machine of the store.
After establishing the correct Local IP, open the “FasTrax Configure” utility on the HH. This should be on the HH Desktop or can be found the “FasTrax” folder using the HH File Explorer. Enter the correct Local IP in the section titled “Server IP Address“. Choose “Update” and close the Window if applicable.
Honeywell Fusion 3780 OPOS Setup
With the Honeywell Fusion barcode scanner plugged into the machine-
- Navigate to c:/fastrax/installerfiles and unzip/extract the two files named –
- Honeywell HSM USB Serial Driver ver 3.4.8.zip
- Honeywell MetrOPOS Driver.zip
OR
- Navigate to https://www.honeywellaidc.com/en-US/Pages/Product.aspx?category=hand-held-barcode-scanner&cat=HSM&pid=3780 and click the “Software” tab.
Download the MetrOPOS Driver and the HSM USB Serial Driver as referenced in step 1. - Unzip/extract the “Honeywell HSM USB Serial Driver ver 3.4.8.zip” from its where it was downloaded.
- Open the file folder that was extracted from the “Honeywell HSM USB Serial Driver ver 3.4.8.zip“, then
- double click the setup bat file
- scan barcode 1 on page 2 of this document with the scanner
- On your keyboard, press the Windows Key and the “r” button at the same time to bring up the “Run” menu.
Type “mmc devmgmt.msc” then press the “enter” key to bring up the device manager. - Expand the “Ports” drop down and make sure the “Honeywell Biodirectional Device” is present with a COM port.
- Starting with barcode 2, scan the barcodes on page 2 in order from top to bottom.
- Repeat step 4 & 5 to verify that “Honeywell Unidirectional Device” is under “Ports”.
- Run the “MetrOPOS Driver” setup file in the location it was downloaded, using the default settings
- From the desktop, double click the “MetrOPOS Administrator”
- Click “New Profile” and use the following settings.
- Click “Save” and then “OK” on the following (two) prompts.
- The scanner is now programmed to OPOS mode and should have the option to be claimed from within theFasTraxPOS settings!
SETUP BARCODES
FasTrax Hand Held Checklist
- Honeywell Dolphin 6100 Hand Held

Please allow the Honeywell hand held to charge at least 10 hours before beginning setup and hand held usage - Honeywell Hand Held Charging and Sync Cradle

- WiFi Network Linked with FasTrax POS System

FasTrax Hand Held Software Setup
After plugging the Honeywell Charging/Sync Cradle to a power outlet and your PC, your PC will automatically install the Windows Mobile Device Center once the hand held is placed in the cradle.
Touch Dynamic machines run a version of Windows® that will require you to download the Windows Mobile Device Center directly from Microsoft®. Click here to download this utility.
If you are viewing this in printed format, open your internet browser and navigate to – www.microsoft.com/en-us/download/details.aspx?id=14
Once the install is finished and you accept Microsoft’s terms agreement, Windows Mobile Device Center will open.
- Since this utility is only required to move FasTrax PDA software to your hand held, choose the option to “Connect without setting up your device”.

- From the next list of actions, choose “File Management”.

- This will expand to show the “Browse the contents of your device” option. Choose this option.

- This will open a file explorer window.

Open the hand held’s displayed directory; designated by “\” for “root”. - Once opened, you will see a number of directories.

Open the “Program Files” directory. - Once in the “Program Files” directory, copy and paste in the FasTraxPDA folder.

Once copied, close this window.
The FasTraxPDA folder can be found in C:\FasTrax\Handheld on your main FasTrax machine.
Once you have closed the Windows File Explorer window, remove the hand held from its charging cradle.
You will need to create FasTrax shortcuts on the desktop of your hand held for quick access.
Remove and prepare to use the hand held stylus which is held in the elastic wrist strap of the device.
- Using the stylus, double-click on the “My Device” icon located on the hand held desktop window.

- From the opened explorer window, double-click on the “Program Files” folder.

- From the new window, double-click on the “FasTraxPDA” folder.

The FasTraxPDA folder is the same folder you installed on the hand held in the previous steps. - Once you have opened the “FasTraxPDA” folder, find the “FasTraxConfigure” and “FasTraxPSM” files.

Choosing to filter the view by “Details” may assist in locating these files.
This filter can be found under the icon on the top right of the action banner.
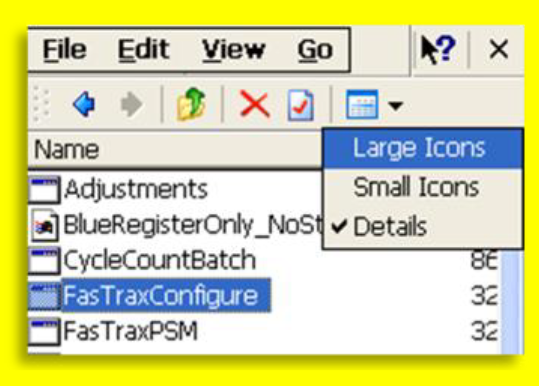
- Using the stylus, touch “FasTraxPSM” to highlight.
- After choosing ”FasTraxPSM”, touch “File”.
- Choose “Send To”

- Choose “Desktop as Shortcut”
This will create a shortcut on the hand held desktop for quick access to the “FasTraxPSM” utility. - Repeat the previous steps to create a desktop shortcut for the “FasTrax Configure” file.
- Use the “X”, located in the top right corner, to close all open windows.
This will resolve to the hand held desktop where your newly added shortcuts are located.

- From the hand held desktop, double-click the “FasTrax Configure” shortcut

- In the “Server Config” window, enter the Local IP of the Primary FasTrax Database machine.
This is usually Register 1 at your location. Choose “update” when complete.
FasTrax Hand Held ScanWedge Configuration
ScanWedge is the utility that enables the barcode reading functionality of your hand held.
- From the desktop of your hand held double-click the “My Device” icon.

- Double-click to open the “Program Files” folder.

- Double-click to open the “Power Tools” folder.

- Scroll down to find “ScanWedge”.

Using the stylus, press on the “ScanWedge” icon until a window opens giving you the option to “Copy” – choose “Copy”.
After successfully copying “ScanWedge”, close any open windows to return to the hand held desktop. - From the hand held desktop, double-click the “My Device” icon.

Long press on an empty spot of the desktop and choose “Paste Shortcut” to create a “Scan Wedge” shortcut.
In the “Power Tools” directory, there is an icon titled “Reboot”, paste a desktop shortcut for this function as well. - Double-click to open the “Windows” folder.

- Double-click to open the “Startup” folder.

- Using the stylus, press on a blank portion of this window until a window opens giving you the option to “Paste Shortcut” – choose “Paste Shortcut”.

After successfully copying “ScanWedge”, double-click to start the ScanWedge utility.
A barcode icon will appear on your taskbar to indicate ScanWedge is running. - From the hand held desktop, using your stylus, touch the ScanWedge icon.

This will open a window with the option for “Settings” – choose “Settings”. - In the top section of the “Settings” window, scroll down and choose “Symbologies”.

- Scroll down the Key section of the “Settings” window and double-click on “UPC-A”.
- Ensure the first digit listed is a value of “1”.

If this is a value other than “1”, using your stylus, simply touch after the number, press the “BKSP” button on your hand held keyboard and enter the new value.
If no change is necessary, simply choose “Cancel” to return to the previous screen.
If a value is changed, press the “X” button located in the top right hand corner of the window to apply the change. - Repeat steps 10-13 of this section for “UPC-E0” & “UPC-E1”.
- Once these settings are confirmed, choose the “X” located in the top right hand corner of the ScanWedge section.
You will be prompted to “Save Changes”. If you have confirmed your changes, choose “Yes”

If no changes were made, simply choose “No” to ensure no changes are applied.
Enabling FasTrax Hand Held Wireless LAN
The wireless LAN enables the wireless functionality of your hand held.
- From the hand held desktop, using your stylus, choose the Arrow
icon located in the bottom right corner of the screen. - This will open a smaller window with an option to “Turn Wireless
LAN” to be either “On” or “Off”.
You will want wireless LAN to be On.
If wirless LAN is already turned on, simply use your stylus to touch another section of the screen to close the window.
Turn Wireless LAN On = Wireless is currently off
Turn Wireless LAN Off = Wireless is currently on

FasTrax Hand Held Wireless Profiles
The wireless Profiles are used to identify the specific wireless network your hand held will connect to.
These are edited and assigned via the WLAN SWC utility.
For more detailed information about wireless setup and the WLAN SWC, the Honeywell Document is available here
- From the hand held desktop, choose Windows Icon located in the bottom left corner of the screen.
- From the new window, choose “Programs”
- Choose “WLAN SWC” from the list of programs.

- This will open to the “Status” tab of the WLAN SWC utility.

The example pictured shows a Status tab displaying the details of an existing WiFi connection. - Choose the “Config” tab.

Indicates a connected wireless network - If your wireless network is not listed, choose the “Scan” button for the hand held to search for available networks.
- Once your network is listed, choose/highlight it and choose the “Activate” button.
By choosing “New”, you can setup multiple Profiles if a singular hand held is to be used for multiple stores.
After the Profiles are set, once a hand held enters a store, return to this section, highlight the applicable profile and choose “Activate”.
Indicates a connected wireless network - Depending on your specific wireless setup, you may need highlight your network then choose the “Modify” button.
Within the “Modify” section, you can input your specific wireless network settings to enable hand held connectivity.
This section does require that you know or have access to your existing wireless access point’s settings.

For more details on this section, please visit:
www.honeywellaidc.com/CatalogDocumetns/WLANSupp-UG.pdf
FasTrax Hand Held Remote Support Software
For Support to assist you with hand held issues, they may be required to access and remote directly into your device.
There is an included software client that must be installed to enable this functionality.
- From the hand held desktop, double-click the “My Device” icon.

- Double-click to open the “Program Files” folder.

- Double-click to open the “FasTraxPDA” folder.

- Scroll to find the file named “MCAgent_19”.
Using your stylus, double-click the “MCAgent_19” file.

- After installation is complete, you will see an icon on the taskbar for Soti/MoBi Control.

- Using your stylus, touch this icon.

From the new window, choose “Configure”. - This will open the “Config MobiControl” window.

Enter the applicable Device Name for this hand held.
Press “OK” when complete.
Please include a business name when naming devices.
e.g. – Smoker’s Choice HH1
FAQ
Q – Where can I find the Local IP of my main FasTrax machine?
A – This is found by performing “ipconfig” in the command prompt window of the main (DB) machine
- In the search/run window, enter “cmd” then press the enter button
- The black, command window will open
- Type “ipconfig” and press the enter button
- The local IP will be displayed with the Default Gateway and DNS.
Q – Receiving an “unable to connect to server/host” error.
A – Confirm HH is connected to wireless network.
Q2 – I have confirmed my HH is connected to my wireless network, but I am still receiving “Unable to Connect to server/host” messages:
A – Confirm the “FireWall” on the main DB machine is not turned on
- If FireWalls are enabled intentionally, ensure exceptions are properly set
Q3 – I have confirmed my HH is connected to my wireless network, but I am still receiving “Unable to Connect to server/host” messages.
A – In “FasTrax Configure” check and change the server/host URL to be the correct local IP for the main machine of the store.
After establishing the correct Local IP, open the “FasTrax Configure” utility on the HH. This should be on the HH Desktop or can be found the “FasTrax” folder using the HH File Explorer. Enter the correct Local IP in the section titled “Server IP Address“. Choose “Update” and close the Window if applicable.
FasTrax Hand Held Checklist
- Unitech HT682 Handheld
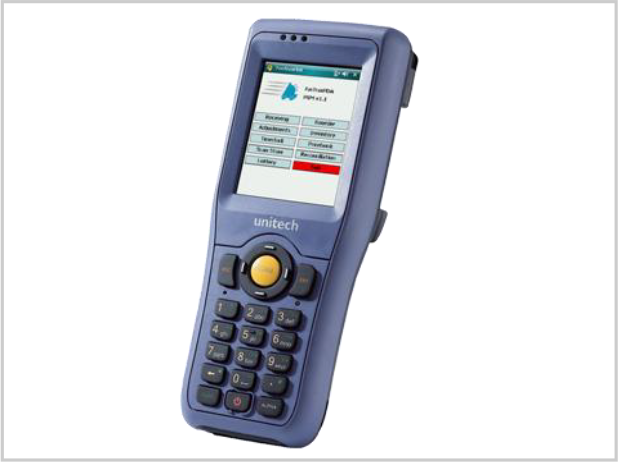
Please allow the Unitech hand held to charge at least 10 hours before beginning setup and hand held usage - Unitech Hand Held Charging and Sync Cradle

- WiFi Network Linked with FasTrax POS System
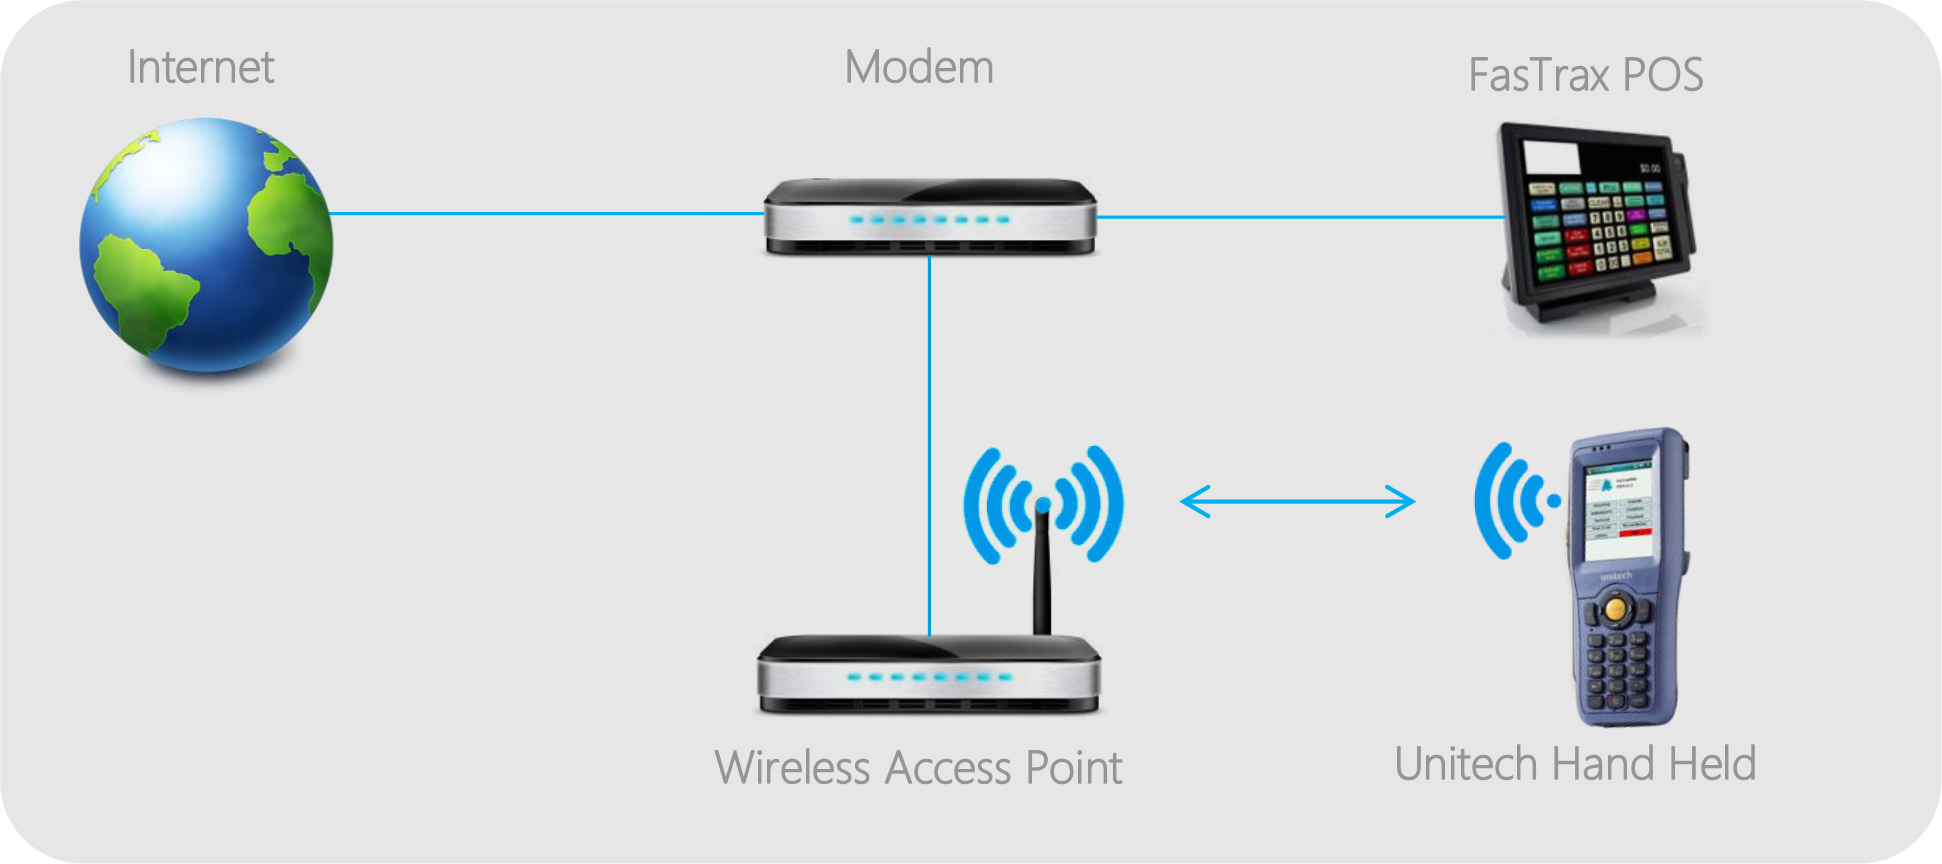
FasTrax Hand Held Software Setup
After plugging the Unitech Charging/Sync Cradle to a power outlet and your PC, your PC will automatically install the Windows Mobile Device Center once the hand held is placed in the cradle.
Touch Dynamic machines run a version of Windows® that will require you to download the Windows Mobile Device Center directly from Microsoft®. Click here to download this utility.
If you are viewing this in printed format, open your internet browser and navigate to –
www.microsoft.com/en-us/download/details.aspx?id=14
Once the install is finished and you accept Microsoft’s terms agreement, Windows Mobile Device Center will open.
- Since this utility is only required to move FasTrax PDA software to your hand held, choose the option to “Connect without setting up your device”.
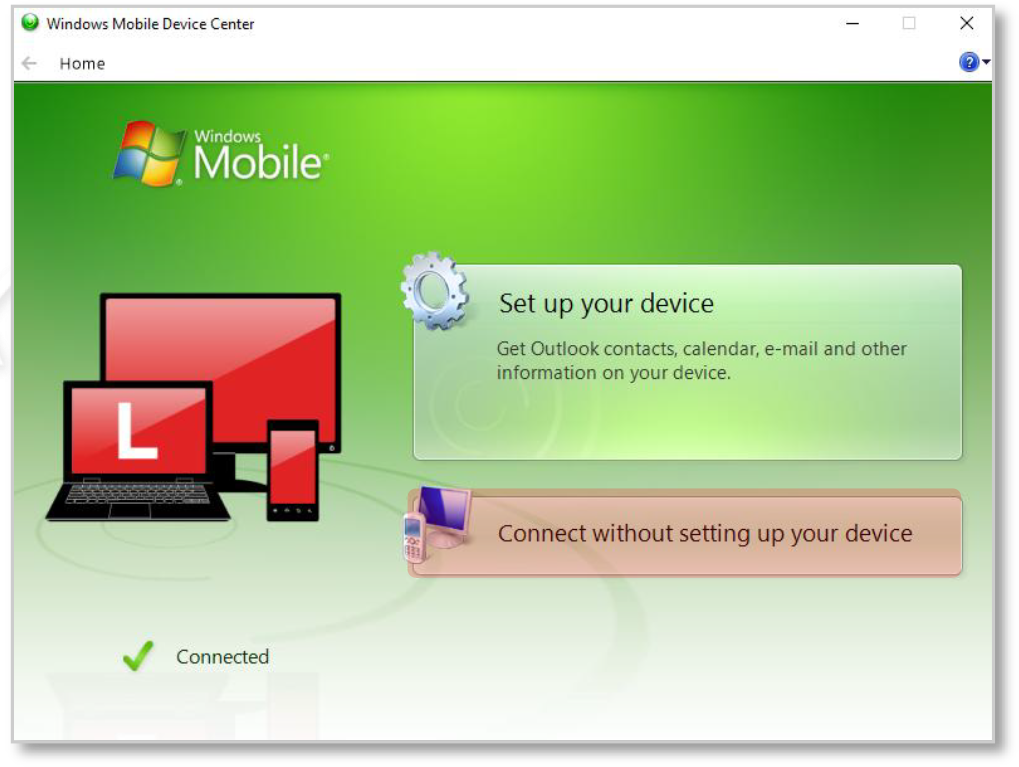
- From the next list of actions, choose “File Management”.
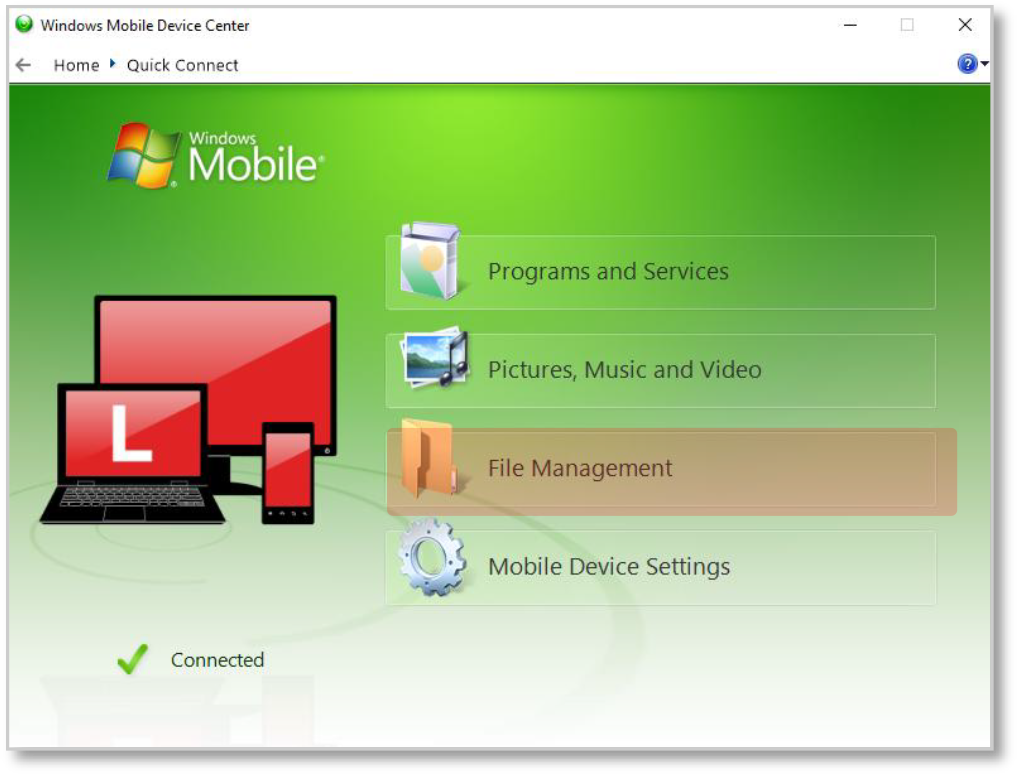
- This will expand to show the “Browse the contents of your device” option.
Choose this option.
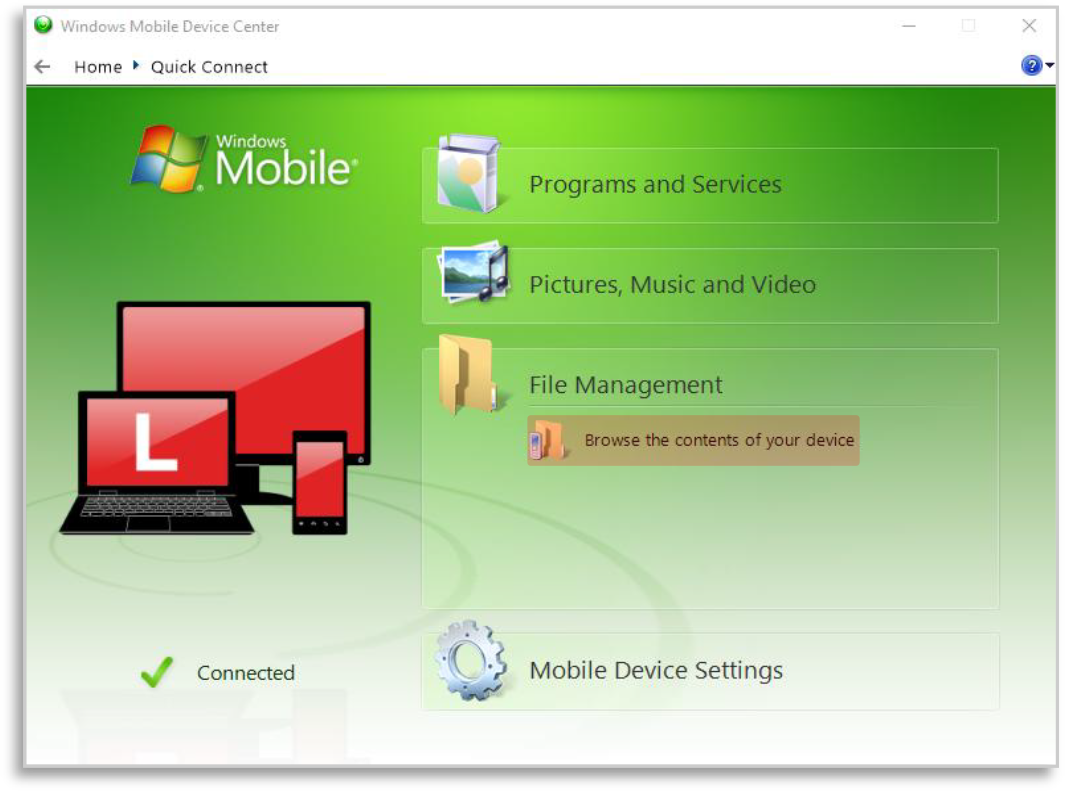
- This will open a file explorer window.
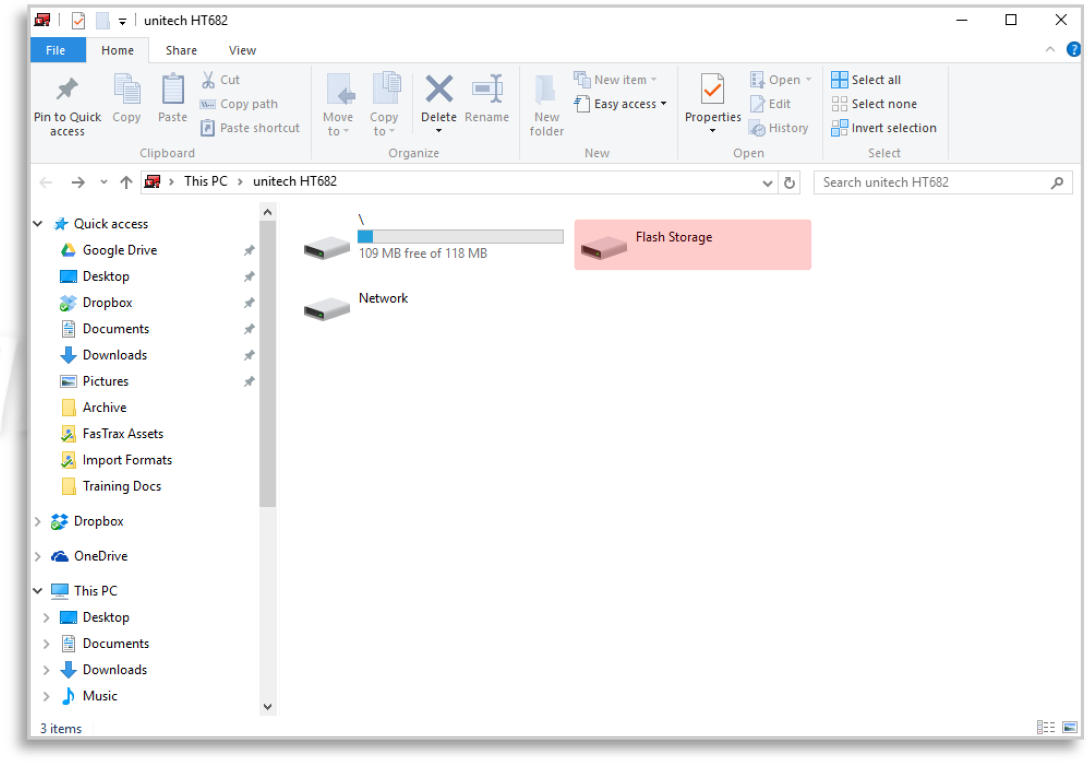
Open the hand held’s Flash Storage directory. - Once in the Flash Storage, copy and paste in the entire contents of the Unitech Installer Files folder.
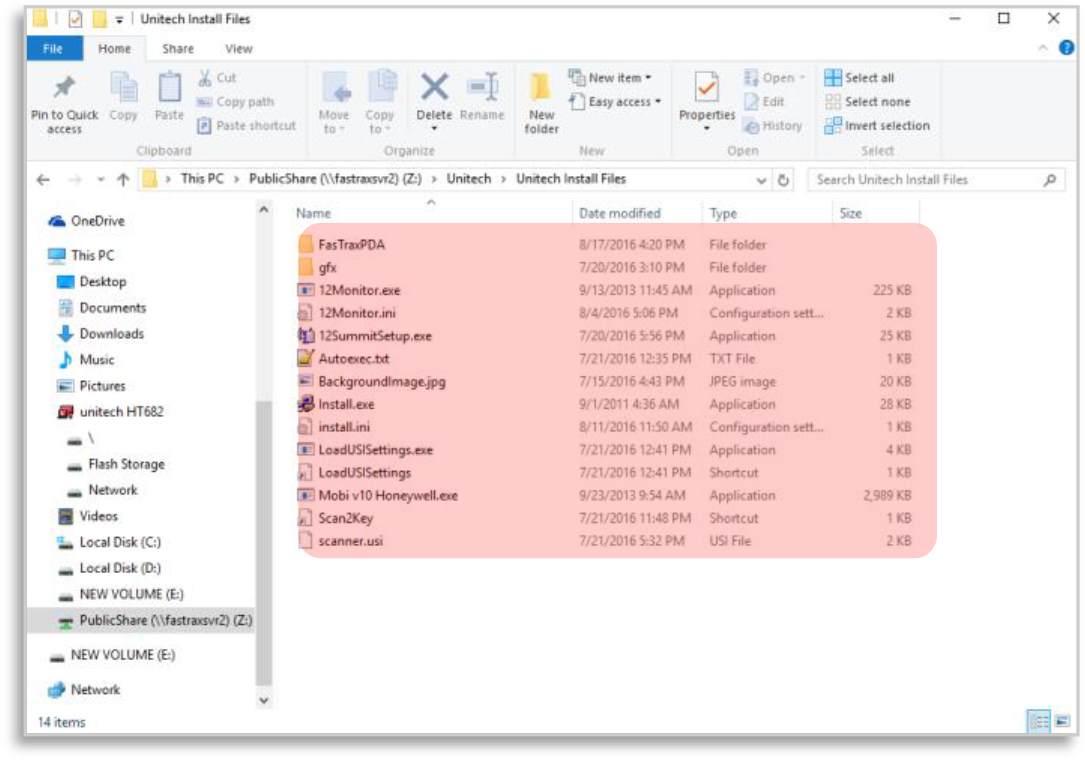
Once copied, close this window. - Navigate to the FasTraxPDA folder on the Flash Storage.
Run the Register program in that folder.
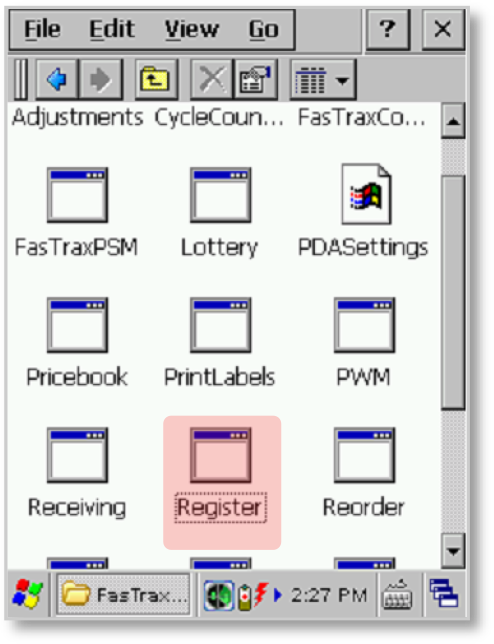
- This will give a Registration Code and prompt for a matching License Key.
Enter the License Key and tap Register.
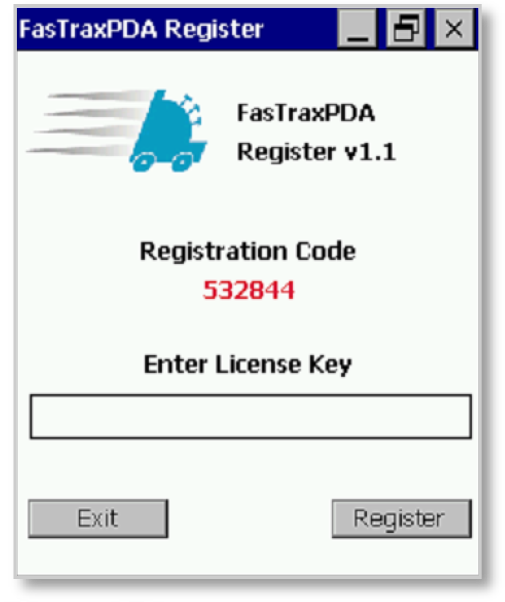
If you do not have a License Key, contact FasTrax Support for assistance. - Tap OK on the License File Saved box
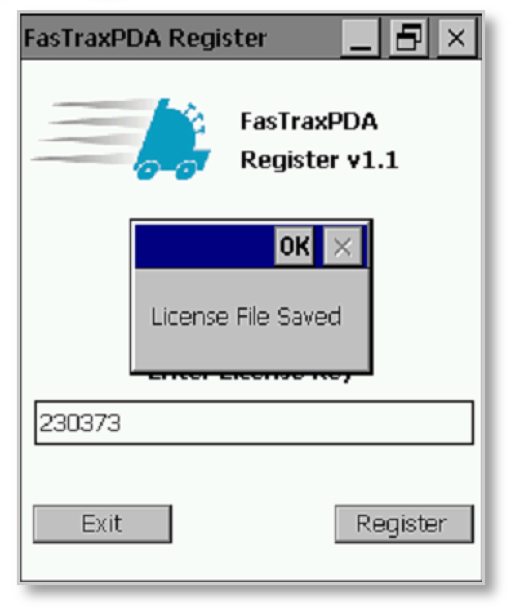
- Close all windows so that the Desktop is visible again.
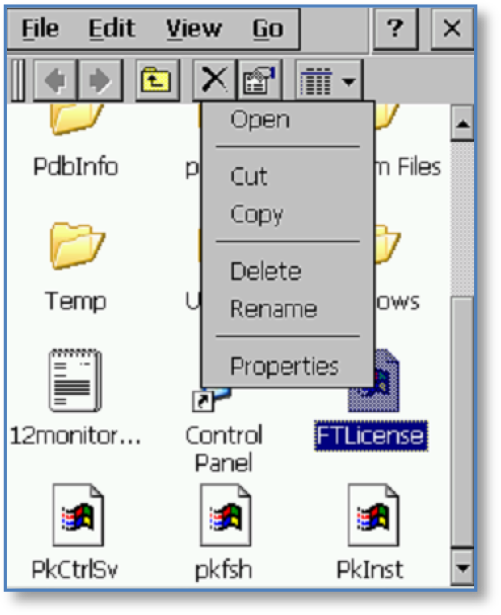
Navigate to My Device by double-clicking the icon on the desktop. - Locate the FTLicense file.
Tap and hold on the file until a menu appears, and tap Copy. - Navigate to the Flash Storage, and double-tap on the FasTraxPDA folder.
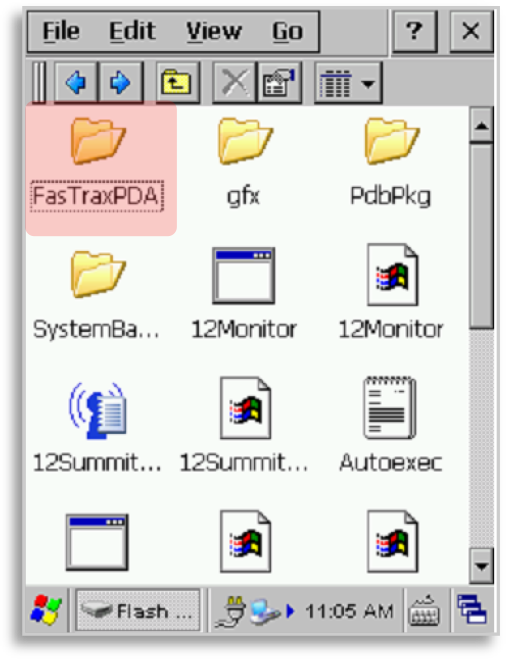
- Tap and hold on the white background and select Paste.
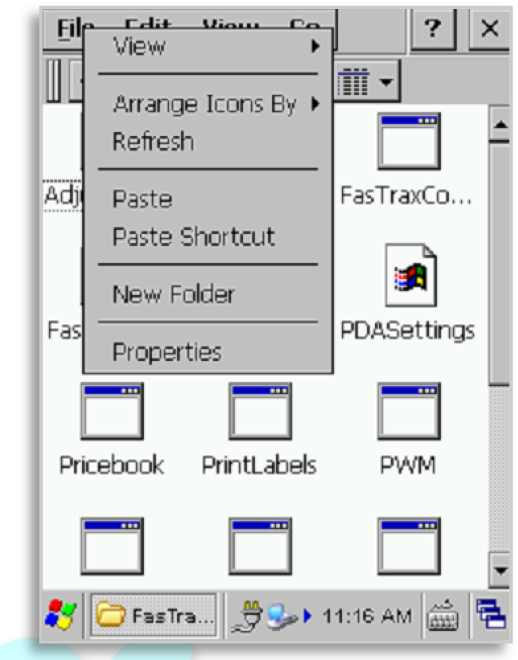
- Close this window and open the Start Menu by tapping the Windows logo in the bottom left of the screen.
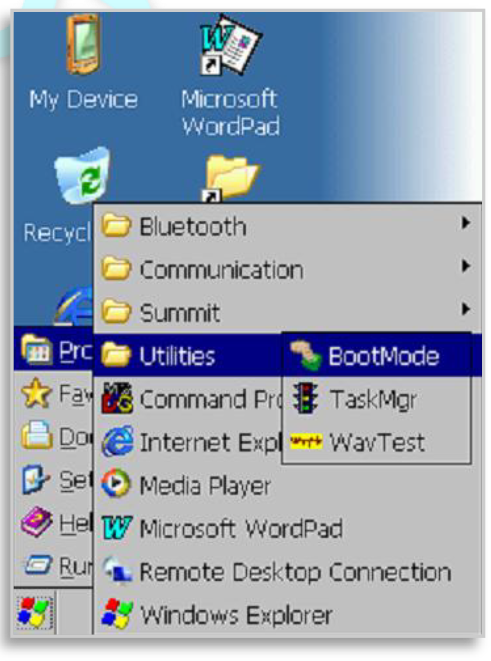
Open the Boot Mode utility by tapping Programs, then Utilities, then Boot Mode. - Tap Cold Boot to reboot the device.
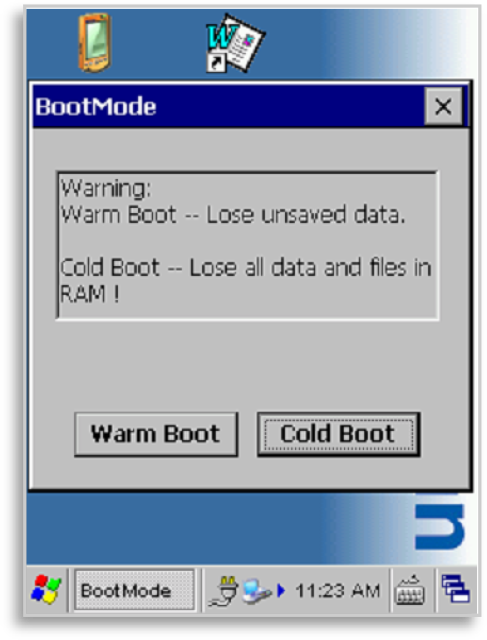
The device will reboot and display a message saying the scanner port is occupied; click OK, then click OK again when asked to reboot the device.
Configuring Wireless LAN
- After performing step 14 above, the device will boot to the FasTraxPOS screen shown.
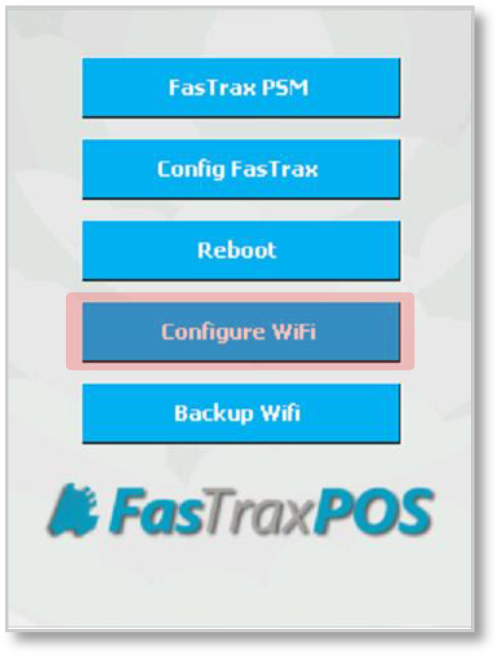
Tap Configure Wifi to open the Summit Client Utility. - Navigate to the Profile tab, and tap Scan to look for wireless LANs.
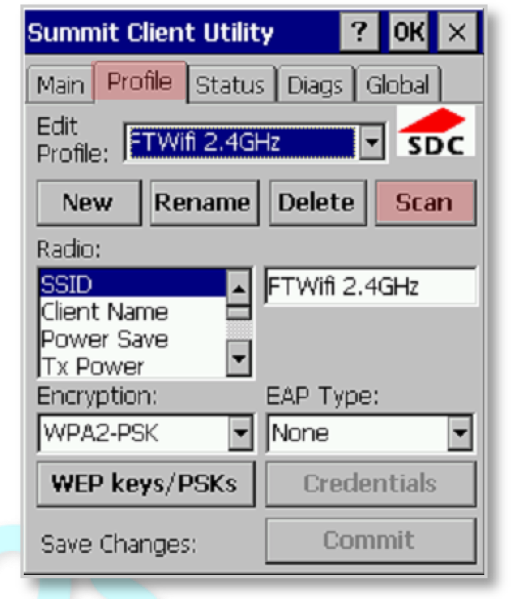
- Select the wireless LAN you wish to connect to, and tap Configure.
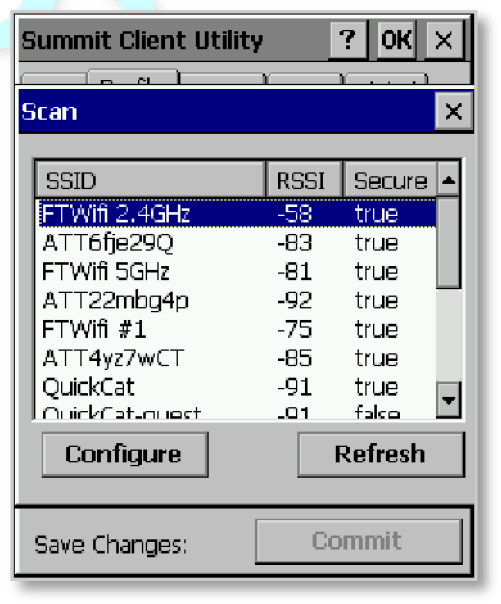
Tap Yes when asked to “Create a new profile”. - Next you will need to enter the passphrase for the wireless network.
Tap OK when finished. - Tap the Commit button to save the wireless profile.
Make a note of the Profile Name listed in the Edit Profile box.
- Navigate back to the Main tab to select your new profile.
Tap the arrow next to the Active Profile box, and select your profile using the Profile Name from the previous step. - Finally, Check the Status tab in order to verify you’re connected.
You’ve successfully connected when you see an IP.
Backing up Wifi Settings (Recommended)
- Once you have finished setting up your Wireless LAN, FasTrax recommends creating a backup of your Wifi settings on the Flash Storage of the device.
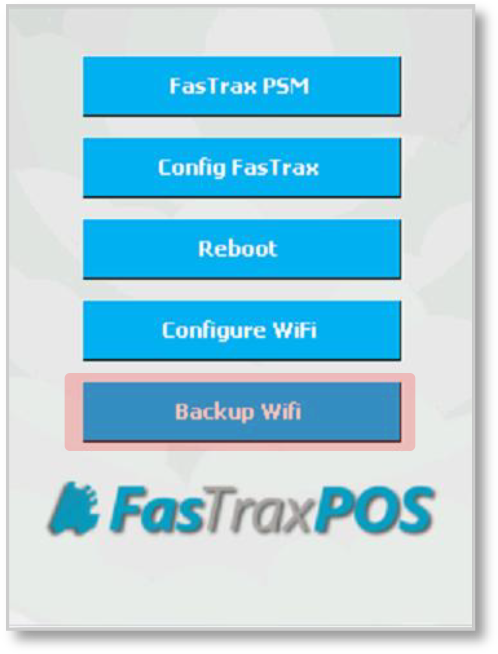
Start by tapping Backup Wifi on the Main Screen. - This will show you a few brief walkthrough of the backup process. Tap Next Page twice , then tap Exit Help.
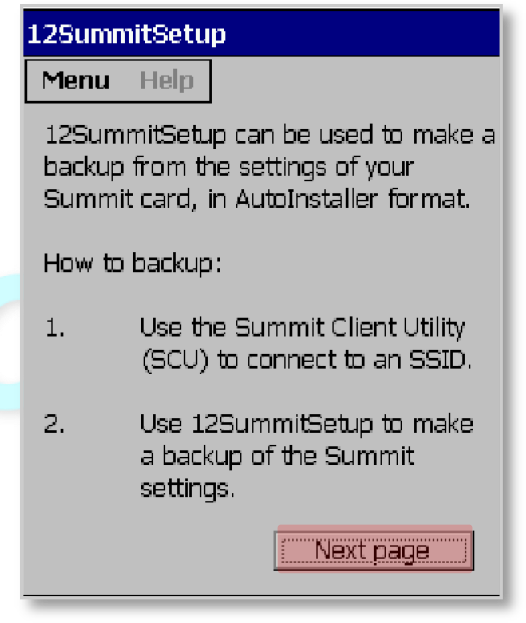
- Verify that the REG file name and location field reads exactly as shown
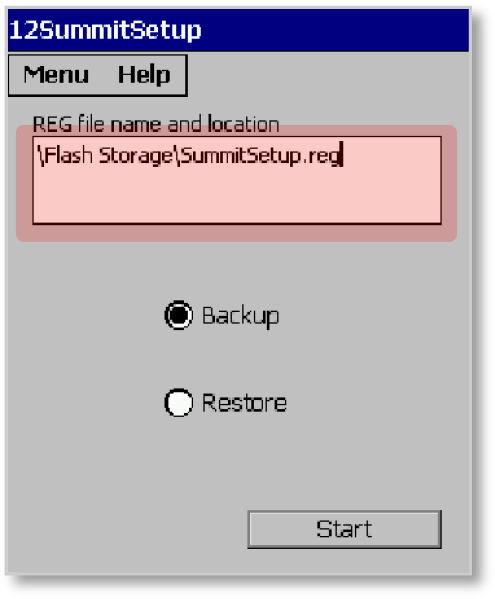
Tap Start. You will see a message flash on the screen briefly, then you’ll be returned to the Main Screen.
Connecting to the FasTrax System
- Starting from the Main Screen, tap Config FasTrax.
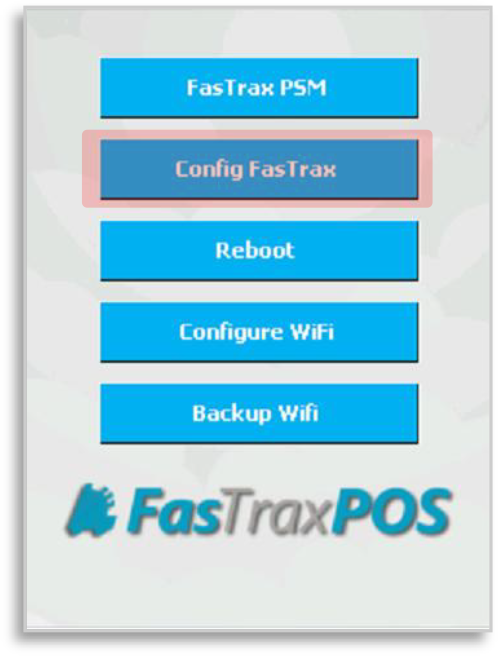
- This will open the Server Config Screen. Enter the IP address of the main register in the Server IP Address box.
Select your PDA Type as Honeywell as shown. - Tap Update, and you’ll see a message box saying that the settings are updated.
Tap OK, then tap Exit to return to the main screen.
FAQ
Q – Where can I find the Local IP of my main FasTrax machine?
A – This is found by performing “ipconfig” in the command prompt window of the main (DB) machine
- In the search/run window, enter “cmd” then press the enter button
- The black, command window will open
- Type “ipconfig” and press the enter button
- The local IP will be displayed with the Default Gateway and DNS.
Q – Receiving an “unable to connect to server/host” error.
A – Confirm HH is connected to wireless network.
Q2 – I have confirmed my HH is connected to my wireless network, but I am still receiving “Unable to Connect to server/host” messages:
A – Confirm the “FireWall” on the main DB machine is not turned on
- If FireWalls are enabled intentionally, ensure exceptions are properly set
Q3 – I have confirmed my HH is connected to my wireless network, but I am still receiving “Unable to Connect to server/host” messages.
A – In “FasTrax Configure” check and change the server/host URL to be the correct local IP for the main machine of the store.
After establishing the correct Local IP, open the “FasTrax Configure” utility on the HH. This should be on the HH Desktop or can be found the “FasTrax” folder using the HH File Explorer. Enter the correct Local IP in the section titled “Server IP Address“. Choose “Update” and close the Window if applicable.
Enable Biometric Scanner
- From within the POS, choose Actions – Settings – Settings – Other Settings
- Make sure the logged in user has adequate permission levels for adjusting settings.
- Check the checkbox for “Use Biometric Reader”.
- From the dropdown, choose the type of biometric reader that is to be utilized.
- “Touchpoint” is for the HP RP9. “Digital Persona” is for other machines.
- Choose the “Save” button
- The POS will now be closed and ready to be used with the biometric scanner
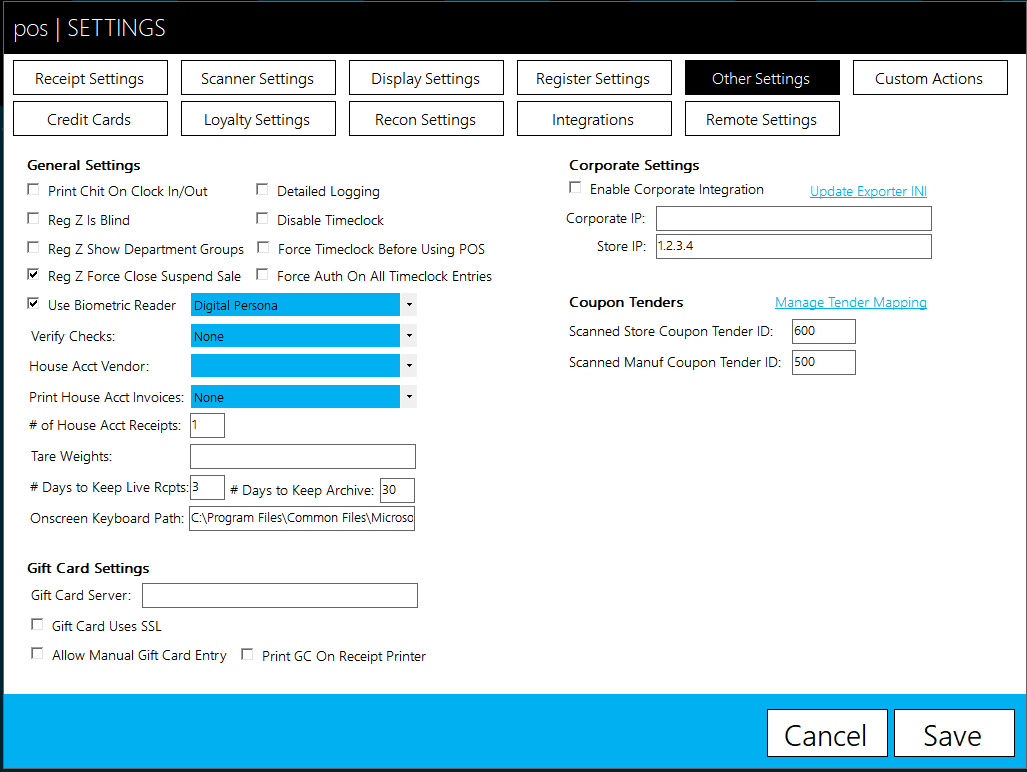
Print Registration
After enabling the biometric scanner, when opening the POS for the first time and logging in using an employee number, you will be prompted to register your fingerprints.
- Open the POS and choose “use keypad”.
- Choose “Login”
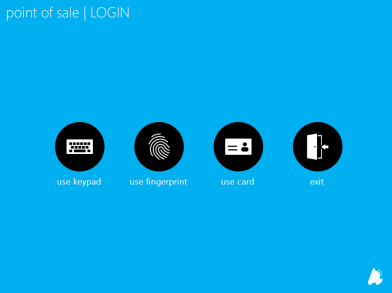
- You will then be prompted to register your print.
- Choose “Yes”
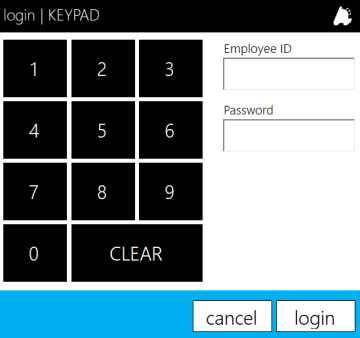
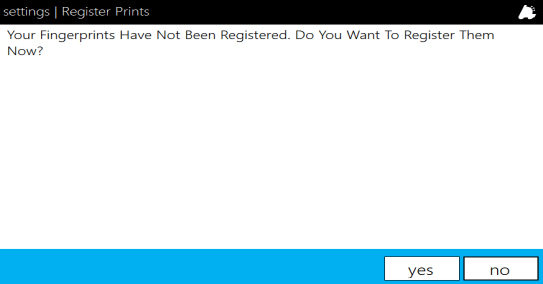
- Choose the applicable digit this employee will use.
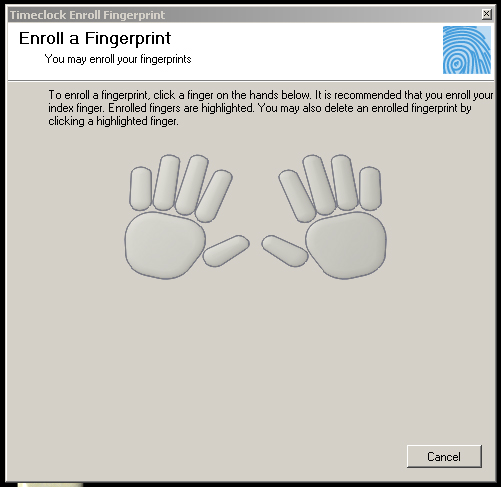
- After choosing the applicable digit, you will be prompted to scan the digit 4 times.
- This requires the employee to place, lift and place the same digit 4 times.
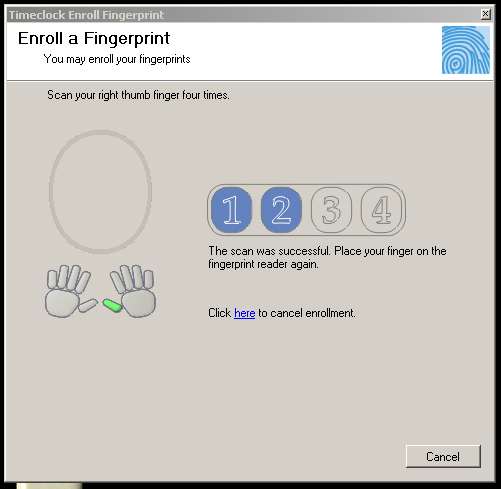
- After successfully scanning 4 times, you will be notified that the
fingerprint has been added to the database. - Choose “OK”
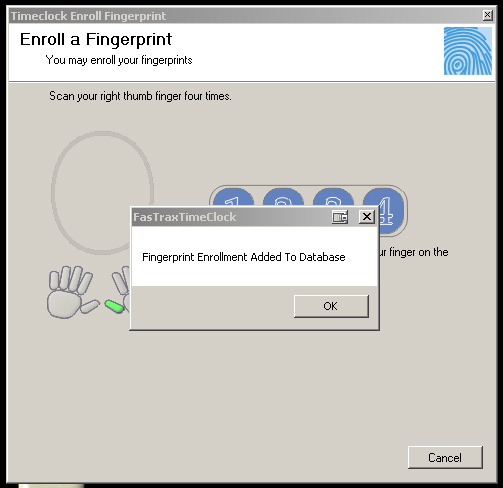
If employees choose to “Cancel” the fingerprint scan utility and instead manually enter their cashier number and password for clock in/out, the Timeclock Report available via FasTrax Director will show as a “Manual” entry.
Biometric POS Login
After prints have been registered via the Timeclock configuration, the biometric readers can also be used to log into the POS.
- From the log in screen of the POS, choose the applicable “use fingerprint” button
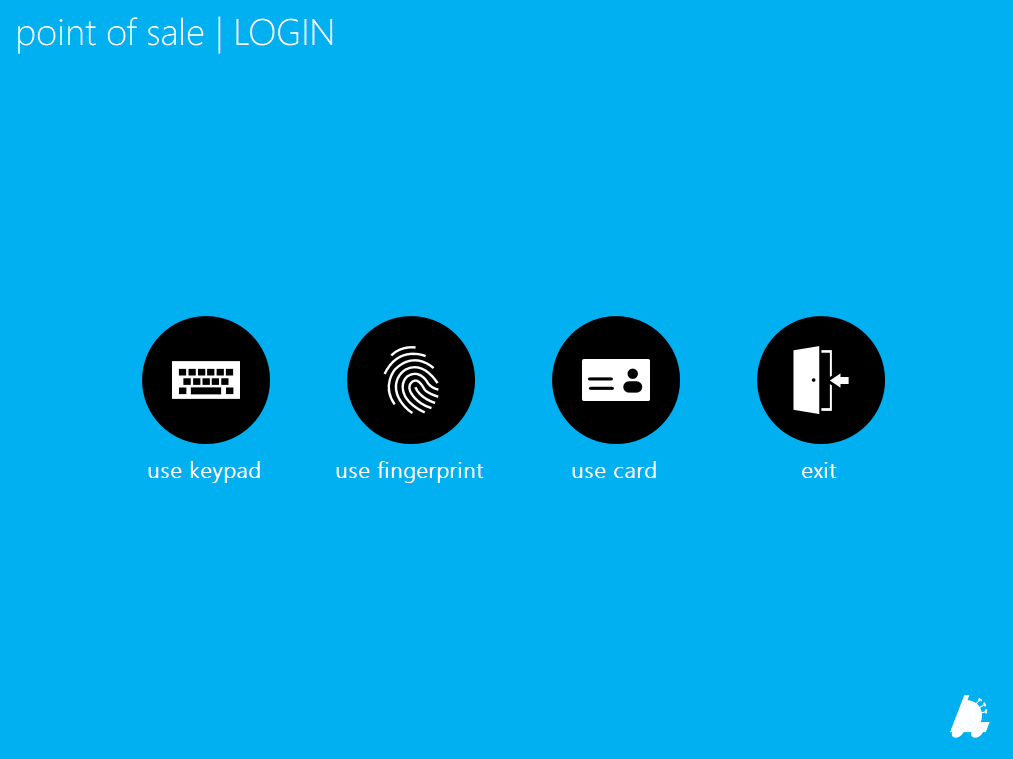
- This will open the Fastrax FingerPrint Reader entry window.
- Scan the same registered digit.
- POS will successfully log in.
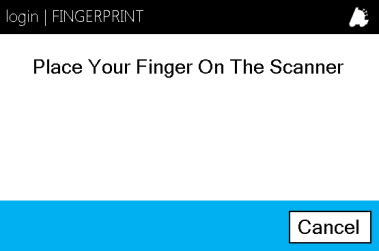
Resetting Employee Biometric Data
Employee Biometric data can be reset via the FasTrax Director.
If a Corporate setup is being utilized, the employee reset should be performed here, saved and sent to stores via the FasTrax Queue.
- Open and log into Fastrax Director.

- Choose the Maintenance module.

- Choose the “Employee” tab.

- Highlight the applicable employee from the employee list.
- Check to “Reset Biometric Data”.
- Choose “Save”.
If this is performed from Corporate, choose the Queue module and send new employee records.
HP RP9 Windows Installation Overview
This documents purpose is to give the steps needed to install Windows using HP’s recovery media flash drive. This is generally used after a HP RP9 G1 is repaired and the hard drive or SSD has been replaced, leaving no operating system on the computer.
This guide will show the process of creating a recovery flash drive, as well as installing Windows itself.
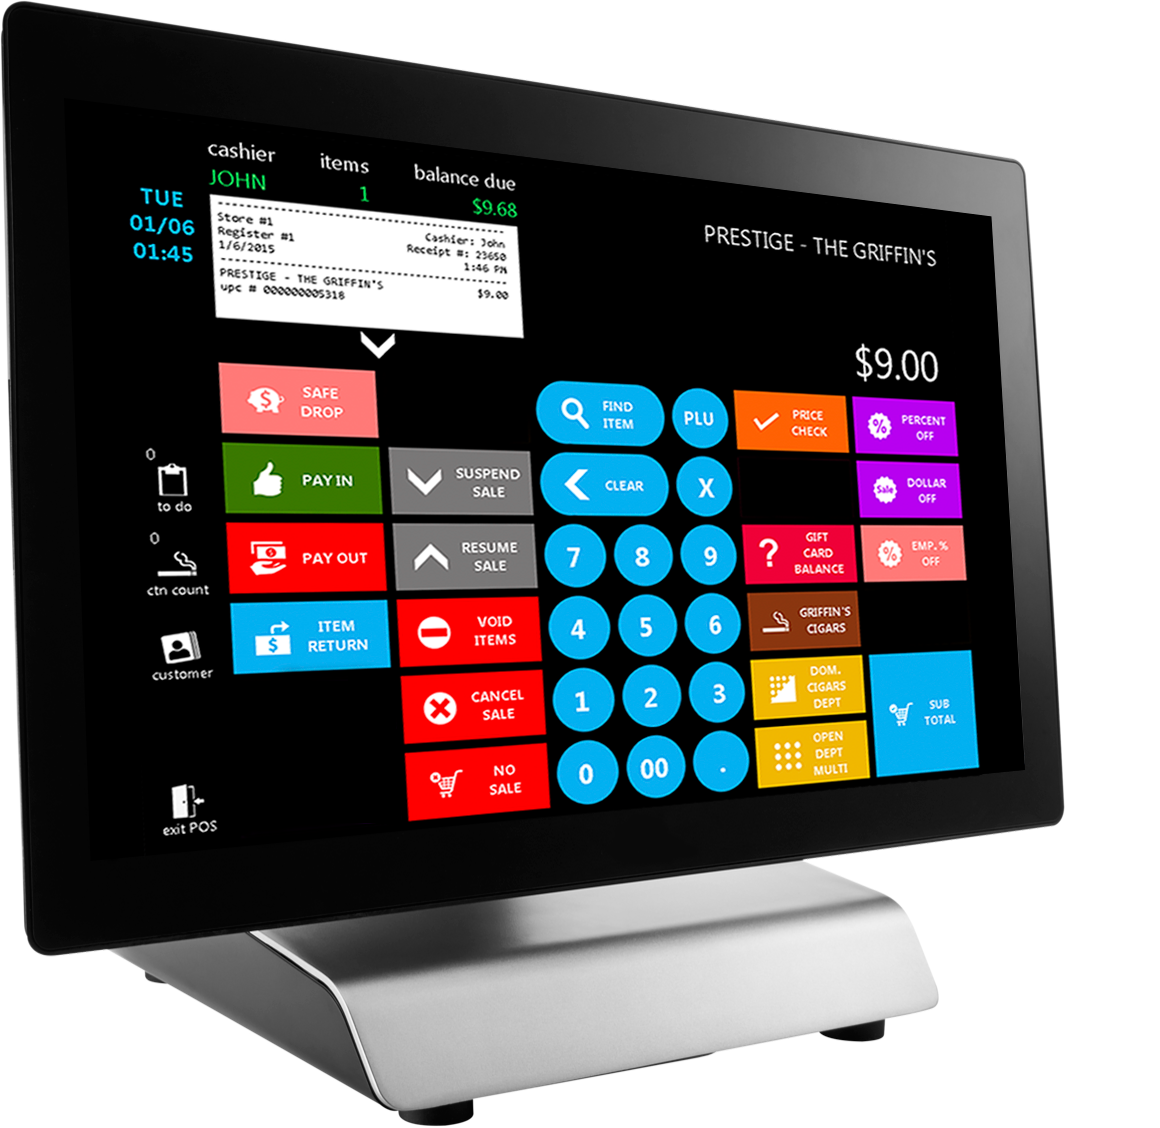
Creating Recovery Media
In case you need to create the recovery media, follow the below steps to download and create the recovery drive. You will need a >16GB USB flash drive and a working machine with an internet connection.
- On a different computer, navigate to the following website: https://support.hp.com/us-en/drivers/selfservice/hp-rp9-g1-retail-system/8737474
- Scroll down and click to expand the area under “Software-Restore CD” and choose “Download”
- Choose “Run” on the download confirmation prompt

- Choose “Yes” on the Windows UAC prompt
- Choose “Next” on the InstallShield Wizard
- Choose “I Accept” and “Next” on the License Agreement
- Choose “Next” on the location to save files prompt
- Choose “Next” on the HP Cloud Recovery window
- Check the checkbox for entering the serial number and then enter the serial number of the unit, followed by choosing the HP RP9 G1 Retail System from the model name dropdown and Microsoft Windows 10 64-bit Professional from the Operating System dropdown, followed by choosing “Next”
- On the download page, for the Recovery Options dropdown, choose “Operating System & Drivers”, for the Region dropdown, choose “Americas”, and for the Download Server dropdown, choose “Americas”, followed by choosing “Next”
- Next, choose the flash drive plugged into the machine from the dropdown and choose “Next”
**This will erase all contents on the flash drive**
- Wait for the utility to download all required software and image the flash drive. It will let you know when it is complete.
Installing Windows on the Machine
- With the recovery flash drive provided or created in the previous steps, plug it into one of the USB ports on the RP9. Make sure the machine is powered off.

- Power the machine on and wait for the below screen. Choose “Next”

- The Windows Edition screen will show up next. Choose “Next”

- Check the checkbox to accept the license agreement and then choose “Next”

- On the where to install Windows screen, choose “Next”

- Windows will install and the next intractable screen is the below screen, where you choose your language

- After choosing your language, choose “Next” to choose the keyboard layout.

- After choosing your keyboard layout, choose “Next”. You can choose a second keyboard layout if needed, otherwise choose “Skip”

- The next screen needs a network connection. Choose your network connection and then choose “Next”

- Windows will check for updates. Next, choose “Set up for personal use” and choose “Next”

- Next will prompt for an account. Choose the “Offline account” option in the bottom left corner of the screen.

- You will be prompted to use a Microsoft account. Choose “No”

- Enter an account name and choose “Next”

- Enter a password and choose “Next”

- You’ll next have a prompt to utilize Cortana. Choose yes or no.

- The next screen will ask privacy settings. Make a choice and when done, choose “Accept” to complete the installation.

Overview of Database Maintenance
After a period of time and depending on your chain size and store traffic, SQL databases can grow to a size which starts to affect computer/system performance.
For this, FasTraxPOS has built in maintenance tools to assist you in trimming down antiquated data.
Trimming this data frees up space as well as reduces the possibility of database errors while increasing efficiency.
Q: What does this maintenance do?
A: Several options are available to trim the size of the database and optimize all FasTrax software, specifically the POS, to increase speed and efficiency.
This also makes the database less prone to errors from maxed networking or computer resources.
Q: What does this exactly do to the database?
A: This will permanently delete data based on a date of your choosing going backwards. After completion, it will re-index (defragment) the database and shrink the DB size; freeing space on the computer!
Q: How often should I perform this maintenance?
A: We suggest at least once every 6 months. These can certainly be ran monthly or weekly if you choose.
Also, ensure no other POS/registers are being operated while this is performed, as it can be an intensive process.
A suggested time frame is after hours.
Q: On which machine(s) should this be performed?
A: This should only be performed on the machine that houses your database. This is usually register 1/main register.
Q: How much data should I leave in the database?
A: We suggest no more than a year of sales data to ensure a comfortable DB size.
Q: How do you get to the database maintenance tool?
A: Simply open Director, click the “Settings” hyperlink in the bottom right corner of the window, and select the “Maintenance” tab.
Q: Is this something FasTraxPOS Technical Support can assist me with?
A: Absolutely!
In fact, we would prefer you contact us the first time you attempt to ensure your understanding.
Q: What order should this be performed?
A: Follow the steps below for the absolute best results.
Database Maintenance Guide
- After logging into FasTrax Director, choose the“Settings” hyperlink located in the bottom-right of the window.

- This will open the “Settings” interface window.
Choose the “Maintenance” tab located at thetop of the window.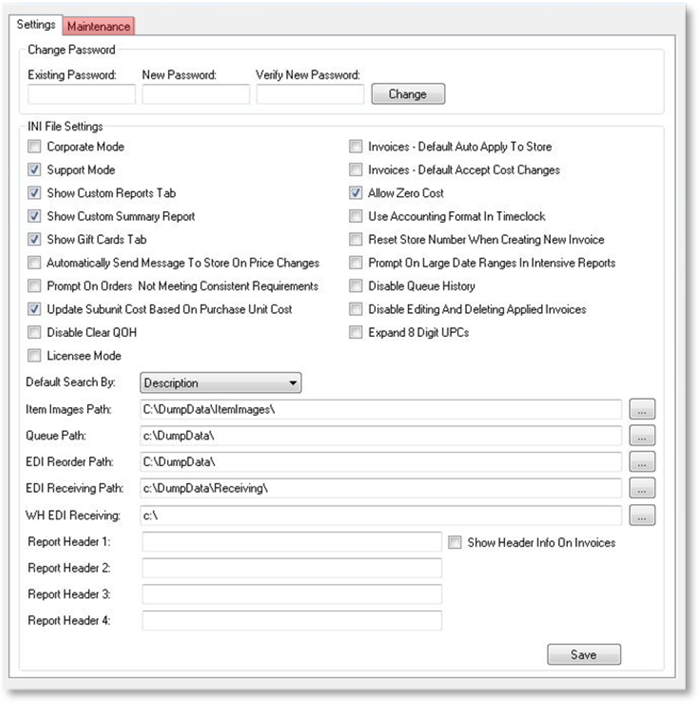
- This will switch to the “Maintenance” interface.
Notice, by default the “Clear Sent QueueRecords” and “Clear Temporary Report Tables”options are check.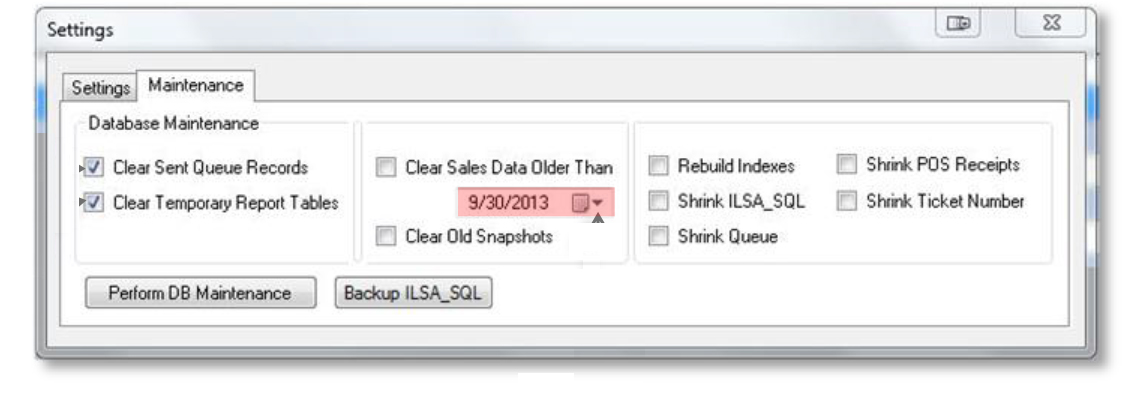
The default date is set to 1 year previous ofthe current date.
Please ensure before performing “Clear Sales Data” that the intended date is correct.
Backup ILSA_SQL Database
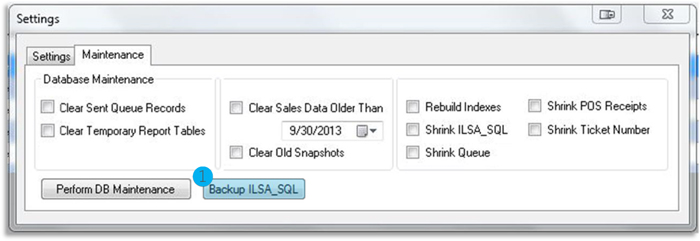
- Before performing any of the following steps for database maintenance, always create a backup of your existing database first.
Performing a database backup is as simple as choosing the “Backup ILSA_SQL” button. This may take a few moments, but you will be notified when completed.
Database Maintenance Steps
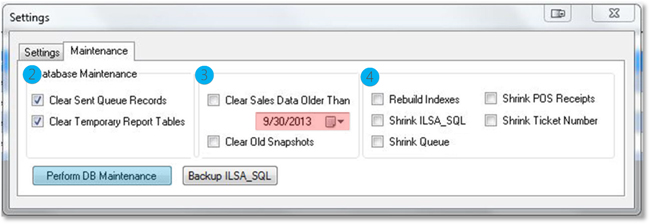
- Check only –Clear Sent Queue Records – not available in store mode
Clear Temporary Report TablesChoose the “Perform DB Maintenance” button.
This can take a few moments – you will be notified when the process is complete.
This step can be performed regularly without having to run step 3.
- Check only –Clear Sales Data Older Than
Select the date you wish to clear data from
Clear Old SnapshotsChoose the “Perform DB Maintenance” button
For your protection, this step requires a password supplied by FasTraxPOS Technical Support
- Check only –Rebuild Indexes
Shrink ILSA_SQL
Shrink Queue – not available in store mode
Shrink POS Receipts – not available in corporate mode
Shrink Ticket Number – not available in corporate modeChoose the “Perform DB Maintenance” button.
This can take a few moments – you will be notified when the process is complete.
Maintenance is now complete!
You may now resume normal business operations.
You may notice options not available. Some of the above options are only available depending on your database type – corporate or store.
Please remember, maintenance plans need to be executed during non-store hours. Depending on regularity and database size, the time needed to complete could be extensive.
FAQ
Q – Is there a limit to how many backups I can create?
A – No, database backups can be created as often as you want, just be aware they do not overwrite each other which could result in large amounts of storage being utilized unless backups are managed.
Q – What should I do if/when performing any of these steps my machine doesn’t restore to normal?
A – Be patient. Some of these steps, depending on the amount of data you are cleansing, could take a few moments to complete. Check the log section for feedback on status. If the log is not indicating a completion, please allow the maintenance to continue. If a completion is signified, but you are unable to interact with your system, please contact FasTraxPOS Technical Support for assistance.
Q – Can I perform this on both my corporate and store(s) databases?
A – Yes, keep in mind that when you perform this at a store, it is only that specific store’s data being trimmed. When you perform this on a corporate database, all stores information is being affected. Some options are only available depending on your database type. Always remember to perform backups before deleting data.
Q – What should I do if I made a backup and noticed that I deleted the wrong information?
A – Contact FasTraxPOS Technical Support. If you made a backup, they can assist with restoring this and setting you back to a state prior to data changes.
Q – What should I do if I did not make a backup and noticed that I deleted the wrong information?
A – Contact FasTraxPOS Technical Support.Your data is redundant, there is a possibility technical support can utilize data from corporate to rebuild your DB.
Overview of POS Offline Mode
Network interruption or hardware failure is always a possibility with your store(s) operation and infrastructure.
Unforeseen disconnects and down time can cause possible operation interruptions, data loss, and/or lost sales.
For this, FasTraxPOS has built tools to assist you in syncing databases and operations.
Syncing your register’s databases ensures continued operation in periods of possible network connectivity interruption.
Q: What does Offline Mode do?
A: Offline mode synchronizes the SQL database of your main register with that of supporting registers.
This allows for continued operations of registers if network connectivity is interrupted.
Q: What does this exactly do to the database?
A: This creates a copied database of required static data for store/register operations.
Q: How often should this be performed?
A: Syncing can be performed manually at anytime; however, we suggest setting a scheduled task to automatically run daily.
Q: On which machine(s) should this be performed?
A: On all secondary/supporting registers – Not the main register
If you have questions about applicable machines, please contact FasTrax support.
Q: How do you get to POS Offline Mode setup?
A: Simply log into the applicable secondary POS, choose the “actions” module, and select the “settings” option.
Q: Is this something FasTraxPOS Technical Support can assist me with?
A: Absolutely!
In fact, we would prefer you contact us the first time you attempt to ensure your understanding.
Q: What order should this be performed?
A: Follow the steps below for the absolute best results.
POS Offline Mode
- After logging into FasTrax POS, choose the“actions” module, then the “settings” option.
- This will open the “Settings” options window.
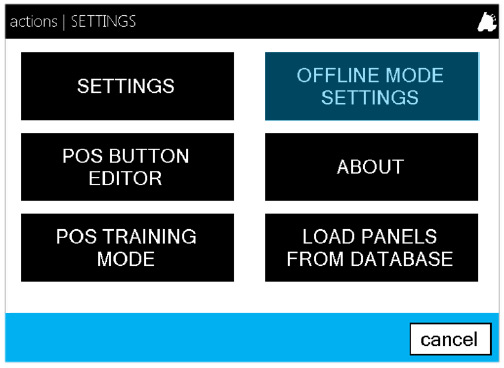
Choose the “OFFLINE MODE SETTINGS”button located at the top-right of the window. - This will open the “OFFLINE MODE SETTINGS”interface.
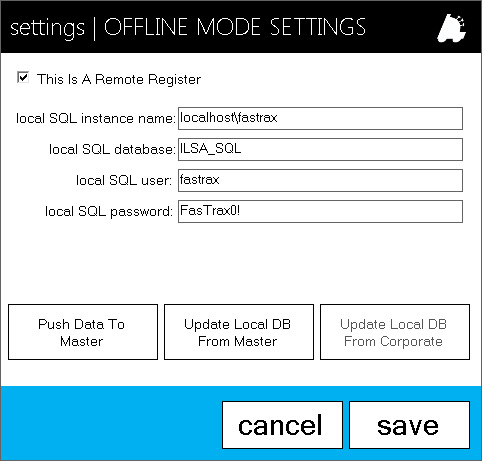
Enter data as shown in the picture to the right.
If remote POS already has a previous installation of SQL, alternate information may be required. Contact support for assistance.Push Data To Master – used to send data from the remote register to the main database if not utilizing automatic POSDataSync utility.
Update Local DB From Master – used to update remote register’s database from database if not utilizing automatic POSDataSync utility.
POS Offline Mode | DataSync Setup
To set up automatic database updating for offline mode, please follow the steps illustrated below.
Begin by opening your “Control Panel” from the Windows button on your desktop.
From the “Control Panel” choose the “Administrative Tools” option.
Double-click “Task Scheduler”
Choose “Create Task”
From the “General” tab, enter the information illustrated.
Once entered, choose the “Change User or Group…” button.
Choose “Advanced”
Choose “SYSTEM” then “OK”.
Choose “OK”.
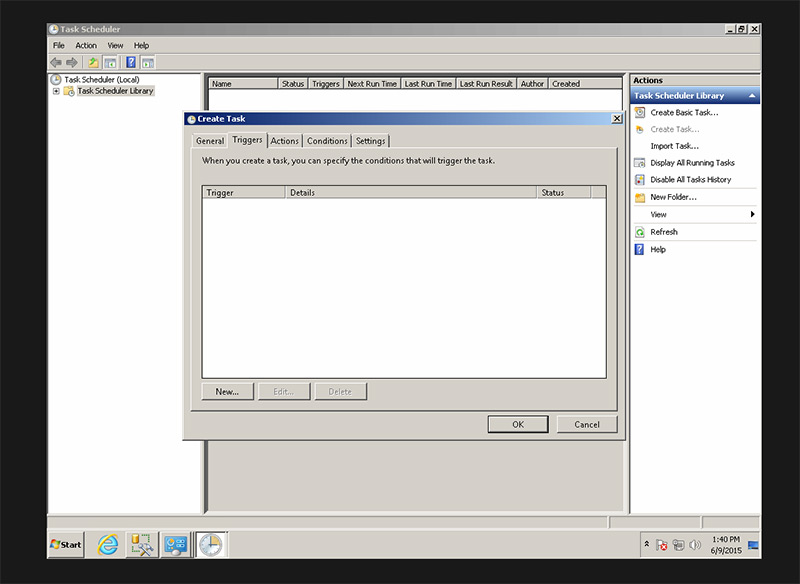
Choose “Triggers” then “New…”
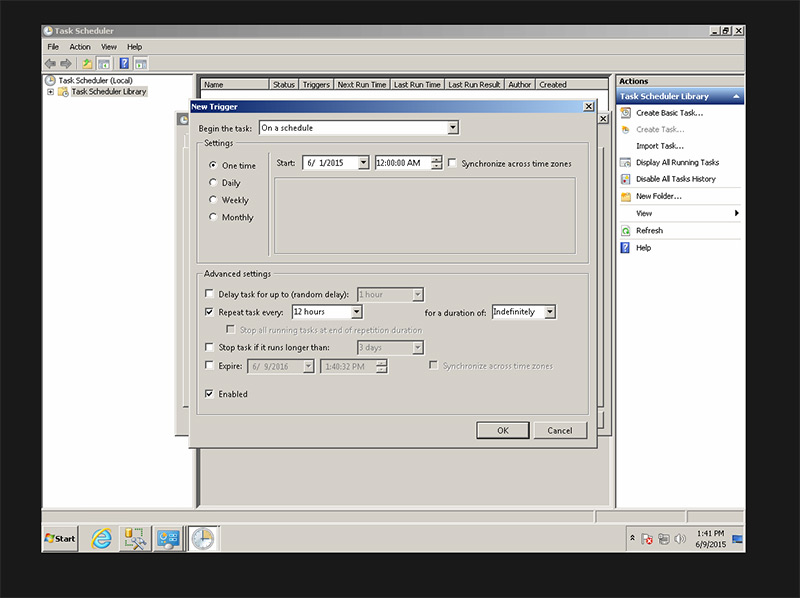
From the “New Trigger” screen, enter information as illustrated.
Use your current date for your “Start” date.
Choose “OK” when complete.
Choose “Actions” then “New…”
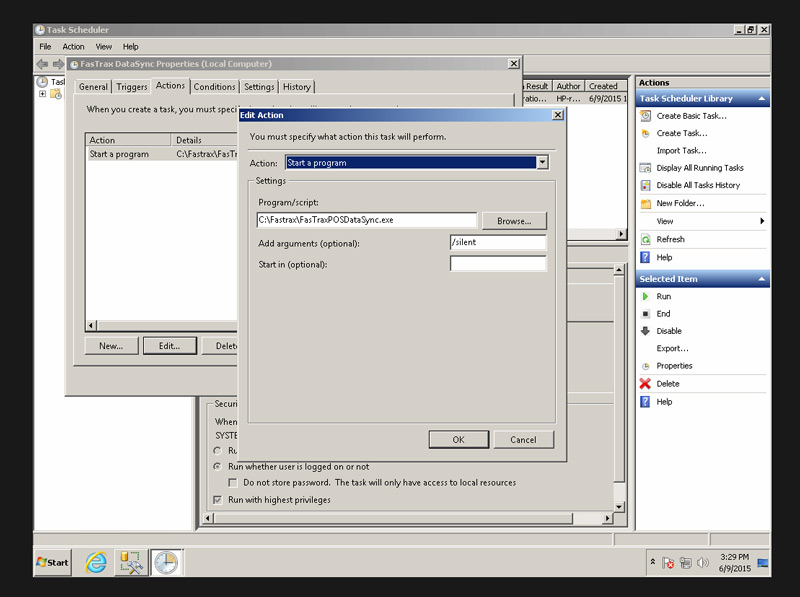
From the “Edit Action” screen, enter information as illustrated.
Choose “OK” when complete.

